Home>Gardening News and Trends>Latest News>How To Can Vegetables

Latest News
How To Can Vegetables
Modified: January 22, 2024
Get the Latest News on How to Can Vegetables and Preserve Their Freshness. Discover Easy Steps and Helpful Tips to Safely Store Your Harvest.
(Many of the links in this article redirect to a specific reviewed product. Your purchase of these products through affiliate links helps to generate commission for Chicagolandgardening.com, at no extra cost. Learn more)
Table of Contents
Introduction
Welcome to the world of canning vegetables! Canning has been a popular method of preserving food for centuries, ensuring that we have access to fresh and nutritious vegetables all year round. Whether you have a bountiful backyard garden or simply want to take advantage of seasonal produce, learning how to can vegetables is a valuable skill that allows you to enjoy the flavors of summer even during the colder months.
Not only does canning help to reduce waste by preserving excess harvests, but it also helps to retain the nutritional value of vegetables. When vegetables are canned properly, they maintain their vitamins, minerals, and fiber, providing a healthy and convenient option for your meals. Plus, homemade canned vegetables offer a world of flavor that surpasses store-bought options.
In this comprehensive guide, we will explore everything you need to know about canning vegetables. From the benefits of canning to the steps involved in the process, we will walk you through each stage to ensure your success in preserving your harvest or store-bought vegetables. So, let’s dive in and discover the wonderful world of canning vegetables!
Benefits of Canning Vegetables
Canning vegetables offers numerous benefits, making it a worthwhile endeavor for anyone looking to preserve their harvest or stock up on nutritious options. Let’s explore some of the key advantages of canning vegetables:
- Long Shelf Life: Canning vegetables allows you to extend their shelf life significantly. Properly canned vegetables can last for months or even years, ensuring that you have access to fresh produce even when it’s out of season.
- Preserves Nutritional Value: When vegetables are cooked and canned at the peak of their freshness, they retain much of their nutritional value. Vitamins, minerals, and fiber are preserved, providing you with a healthy and convenient option for meals.
- Budget-Friendly: Canning vegetables can be a cost-effective way to stock up on produce. Whether you grow your own vegetables or take advantage of sales at the local market, canning allows you to save money compared to purchasing canned vegetables from the store.
- Control and Customization: By canning vegetables at home, you have full control over the ingredients and additives. You can customize the flavors and seasoning to suit your preferences, ensuring that every jar is tailored to your liking.
- Sustainable Practice: Canning is an eco-friendly practice that helps reduce food waste. It allows you to make use of excess harvests or surplus produce, preventing them from going to waste and contributing to a more sustainable food system.
- Convenience and Accessibility: Having a stock of canned vegetables in your pantry provides quick, easy, and accessible meal options. They can be easily incorporated into soups, stews, casseroles, or served as side dishes, saving you time and effort in meal preparation.
By taking advantage of these benefits, you can enjoy the satisfaction of having a well-stocked pantry filled with flavorful and nutritious vegetables throughout the year. So, let’s move on to the next section and learn about choosing the right vegetables for canning.
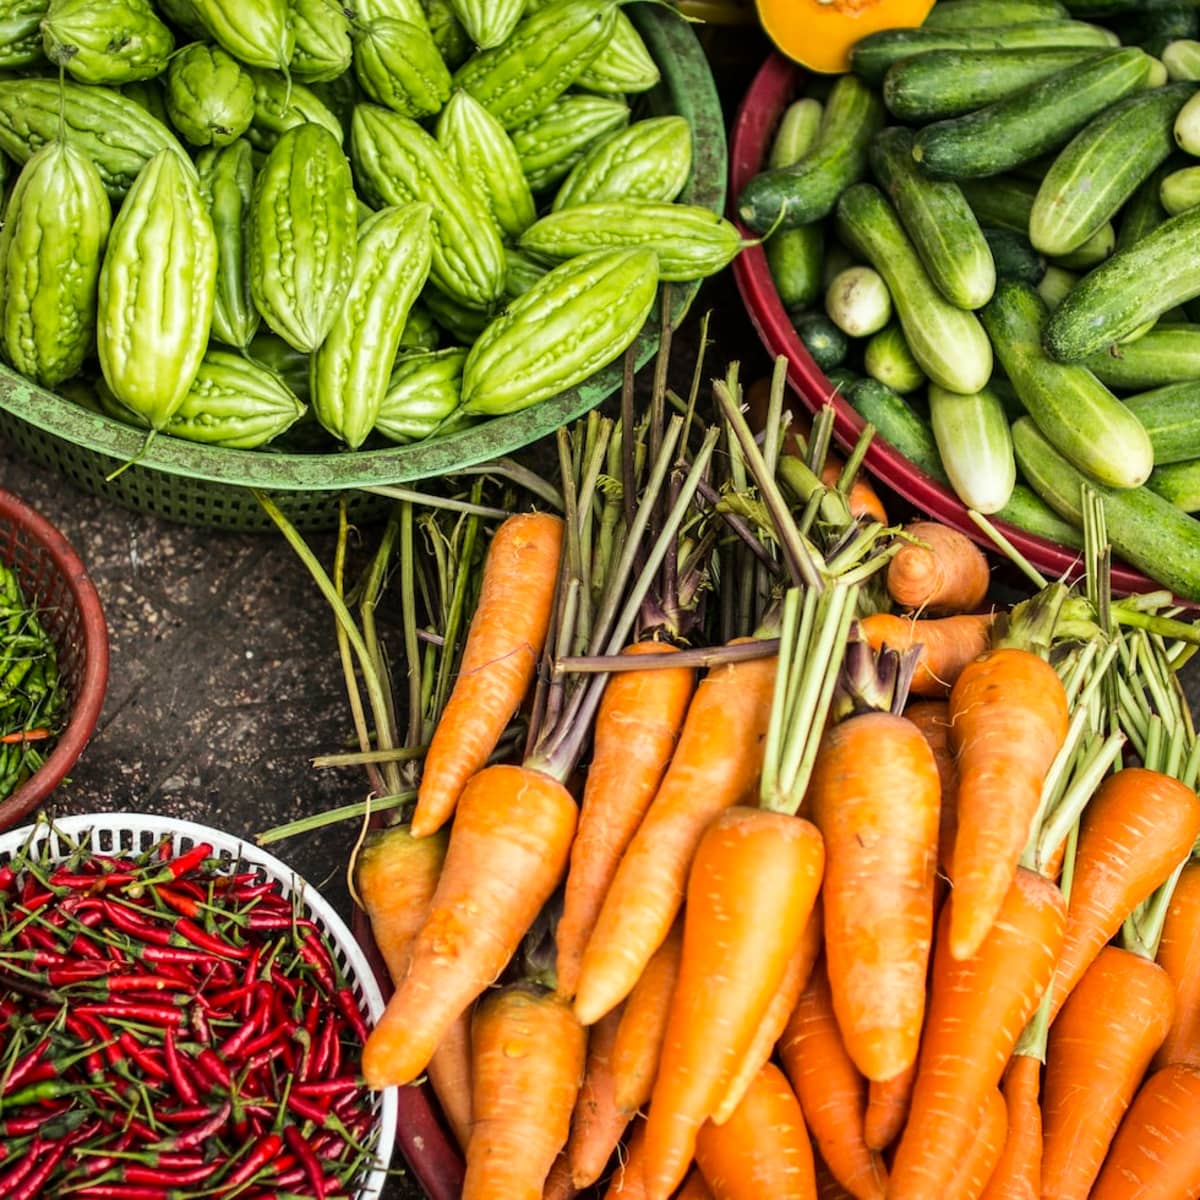
Choosing the Right Vegetables for Canning
Properly selecting the vegetables for canning is crucial to ensure the best quality and taste of your preserved produce. Here are some key factors to consider when choosing vegetables for canning:
- Freshness and Quality: Select vegetables that are fresh, firm, and of good quality. Avoid using overripe or bruised vegetables, as they may not hold up well during the canning process and can affect the taste and texture of the final product.
- Texture and Density: Some vegetables, like tomatoes and peppers, have a high water content, while others, like beans and corn, have a denser texture. Consider the texture and density of the vegetables as it can impact the canning method and processing time required.
- Size and Uniformity: Choose vegetables that are uniform in size to ensure even cooking and processing. This allows for consistent texture and flavor throughout the jars. If possible, select smaller or medium-sized vegetables, as they tend to can more evenly than larger ones.
- Acidity: The acidity level of vegetables is crucial when it comes to canning. Low-acid vegetables, such as green beans and corn, require a pressure canner to ensure safe preservation due to the risk of botulism. High-acid vegetables, like tomatoes and pickles, can be safely canned using a boiling water bath method.
- Flavor and Preference: Consider the flavor profile of the vegetables and your personal preferences. Choose vegetables that are naturally flavorful and suit your taste. If desired, you can also experiment with different varieties and combinations to create unique and tasty canned vegetable options.
It is important to note that not all vegetables are suitable for canning. Certain vegetables, such as lettuce, cucumbers, and radishes, have high water content and do not hold up well in the canning process. These vegetables are better suited for pickling or other methods of preservation.
By carefully selecting the right vegetables for canning, you can ensure the best quality and flavor of your preserved produce. Now that you know how to choose the right vegetables, let’s move on to the next section and learn about preparing them for canning.
Preparing Vegetables for Canning
Properly preparing vegetables before canning is crucial to ensure the safety and quality of the final product. Follow these steps to prepare your vegetables for canning:
- Washing: Start by thoroughly washing the vegetables in cold water to remove any dirt, debris, or pesticides. Gently scrub the vegetables with a brush or your hands, making sure to clean all visible surfaces.
- Peeling and Trimming: For certain vegetables, such as carrots or potatoes, you may need to peel them before canning. Remove the outer skin or any blemishes using a vegetable peeler or paring knife. Trim off any stems, leaves, or tough ends that are not suitable for consumption.
- Cutting and Slicing: Depending on your preference and the canning recipe, you may need to cut or slice the vegetables into specific sizes or shapes. Follow the recipe instructions to ensure uniformity and proper cooking or processing.
- Blanching: Blanching involves briefly cooking the vegetables in boiling water or steam and then rapidly cooling them in ice water. Blanching helps to preserve the color, texture, and nutritional value of the vegetables while also eliminating bacteria and enzymes that could cause spoilage. Follow the recommended blanching times for each vegetable type.
- Draining and Drying: After blanching, drain the vegetables using a colander or strainer to remove excess water. It is essential to dry the vegetables thoroughly to minimize the risk of microbial growth during canning. Pat them dry with a clean kitchen towel or paper towels.
- Packing: Pack the prepared vegetables tightly into clean, sterilized canning jars, leaving the recommended headspace as per the recipe or canning guidelines. Headspace refers to the space between the top of the food and the rim of the jar.
- Hot Pack vs. Raw Pack: Some vegetables benefit from being hot packed, where they are partially or fully cooked before packing into the jars. This method can help improve flavor, texture, and reduce air bubbles. However, other vegetables can be raw packed directly into the jars without pre-cooking. Follow the specific recipe instructions for each vegetable.
- Adding Liquid and Seasonings: Depending on the canning recipe, you may need to add liquid, such as water, vegetable broth, or brine, to the jars to cover the vegetables. Additionally, you can add seasonings, such as salt, herbs, or spices, to enhance the flavor. Refer to the recipe for the recommended quantities.
By carefully preparing your vegetables for canning, you ensure that they are clean, safe, and ready for preservation. Now that your vegetables are prepared, let’s move on to the different methods for canning vegetables.
Methods for Canning Vegetables
There are two main methods for canning vegetables: the boiling water bath method and the pressure canning method. The method you choose will depend on the acidity level of the vegetables you are canning. Let’s explore these methods in more detail:
- Boiling Water Bath Method: This method is suitable for high-acid vegetables, such as tomatoes, pickles, and acidic fruits. Here’s how to use the boiling water bath method:
- Fill a large pot with enough water to cover the filled jars with at least 1-2 inches of water.
- Place a canning rack or a heat-resistant trivet at the bottom of the pot to elevate the jars and prevent direct contact with the hot surface.
- Place the filled jars onto the rack, ensuring they are submerged in the water. Add more water if needed.
- Bring the water to a boil and start the processing time based on the recipe or canning guidelines.
- Once the processing time is complete, carefully remove the jars from the pot and place them on a towel-lined surface to cool.
- Pressure Canning Method: This method is required for low-acid vegetables, such as green beans, corn, and root vegetables. The high heat and pressure in the pressure canner are necessary to destroy bacteria, including the potentially harmful Clostridium botulinum. Follow these steps to use the pressure canning method:
- Add the recommended amount of water to the pressure canner according to the manufacturer’s instructions.
- Place the filled jars on the canning rack inside the canner, ensuring there is enough space between them for the steam to circulate.
- Lock the lid securely and follow the canner’s instructions for venting and pressurizing.
- Once the canner reaches the desired pressure, start the processing time specified in the recipe.
- After the processing time, turn off the heat and wait for the pressure to naturally release before opening the canner lid.
- Carefully remove the jars from the canner and place them on a towel-lined surface to cool.
It is crucial to follow the recommended processing times and pressures for each vegetable type and canning method to ensure safe preservation. Refer to reliable canning resources or recipe guidelines for specific instructions and adjustments.
Now that you are familiar with the methods for canning vegetables, let’s move on to the next section and explore a step-by-step guide to canning vegetables.
Step-by-Step Guide to Canning Vegetables
Now that you have chosen your vegetables, prepared them, and selected the appropriate canning method, it’s time to dive into the step-by-step process of canning vegetables. Follow these guidelines to ensure a successful and safe canning experience:
- Gather Your Equipment: Before you begin, make sure you have all the necessary equipment and supplies. This includes canning jars, lids, bands, a canning pot, a canning rack or trivet, a pressure canner (if required), a jar lifter, a funnel, a bubble remover, a lid lifter, a clean kitchen towel, and a timer.
- Sterilize the Jars: To ensure the cleanliness and safety of your canned vegetables, sterilize the jars and lids by placing them in a large pot of boiling water for 10 minutes. Remove them using a jar lifter and let them air dry on a clean kitchen towel.
- Prepare the Canning Pot: If using the boiling water bath method, fill a large pot with enough water to cover the filled jars with at least 1-2 inches of water. Place the canning rack or trivet at the bottom of the pot and bring the water to a simmer.
- Fill the Jars: Using a sterilized funnel, carefully pack the prepared vegetables into the jars, leaving the recommended headspace as per the recipe or canning guidelines. Remove any air bubbles using a bubble remover or a non-metallic utensil. Wipe the jar rims clean with a damp cloth.
- Apply the Lids and Bands: Place the sterilized lids on top of the jars, ensuring they are centered. Screw the bands on until they are fingertip tight, ensuring that there is still some room for air to escape during processing.
- Process the Jars: If using the boiling water bath method, carefully place the filled jars onto the canning rack inside the pot of simmering water. Ensure that the jars are fully submerged in the water. Process the jars according to the recommended processing time for the specific vegetable and altitude.
- Remove and Cool the Jars: After the processing time is complete, use a jar lifter to carefully remove the hot jars from the pot. Place them on a towel-lined surface, leaving space between jars to allow for air circulation. Let the jars cool undisturbed for 12-24 hours.
- Check the Seals: Once the jars have cooled, check the seals by pressing down on the center of each lid. If the lid does not flex or make a popping sound, the jars are properly sealed. Any unsealed jars should be refrigerated and consumed within a few days.
- Store the Jars: Store the properly sealed jars in a cool, dark, and dry place, such as a pantry or cellar. Label each jar with the contents and the date of canning. Canned vegetables can typically be stored for up to a year but are best consumed within the first 6-8 months for optimal quality.
Remember to consult reliable canning resources or recipe guidelines specific to the vegetables you are canning for accurate processing times, pressures, and any additional steps.
Now that you have successfully canned your vegetables, you can enjoy the fruits of your labor throughout the year. However, it is important to keep in mind some essential storage and safety tips, which we will discuss in the following sections.
Storing Canned Vegetables
Proper storage is key to maintaining the quality and safety of your canned vegetables. Follow these tips to ensure that your canned goods remain in optimal condition:
- Cool and Dry Environment: Store your canned vegetables in a cool, dark, and dry place, such as a pantry or cellar. Avoid areas that are exposed to direct sunlight or high humidity, as these can degrade the quality of the food.
- Temperature: Aim for a consistent storage temperature between 50-70°F (10-21°C). Fluctuations in temperature can lead to spoilage or loss of flavor in canned goods.
- Organize and Rotate: Keep your pantry organized with the oldest canned vegetables at the front and the newest at the back. This practice ensures that you use the oldest jars first and maintain a fresh supply.
- Inspect for Spoilage: Regularly check your stored jars for any signs of spoilage, such as bulging lids, leakage, off odors, or mold growth. Discard any compromised or spoiled jars immediately.
- Labeling: Properly label each jar with the contents and the date of canning. This helps you keep track of the age of your canned vegetables and ensures that you use them before their quality deteriorates.
- Proper Handling: When using your canned vegetables, handle the jars with care and avoid dropping them or exposing them to extreme temperatures. Rough handling can cause breakage or compromise the seal of the jars.
- Consume within a Reasonable Time: While properly canned vegetables can theoretically last for several years, it is recommended to consume them within 1-2 years for optimal quality and flavor.
Following these storage guidelines will help you get the most out of your canned vegetables. Remember, if you notice any signs of spoilage, it is better to be safe than sorry and discard the affected jars.
Now that you are familiar with storing your canned vegetables, let’s move on to some important safety tips you should keep in mind during the canning process.
Safety Tips for Canning Vegetables
Ensuring the safety of your canned vegetables is of utmost importance. Follow these essential safety tips to prevent foodborne illnesses and maintain the quality of your preserved vegetables:
- Use Reliable Recipes: Always use tested and reputable canning recipes from trusted sources, such as the USDA or reputable canning guides. These recipes have been scientifically developed to ensure safe processing times and ingredient proportions.
- Follow Proper Canning Techniques: Adhere to the recommended canning methods, processing times, and pressures specified in the recipe or canning guidelines. Proper processing is crucial to destroy bacteria and ensure the safety of the preserved vegetables.
- Use Safe Canning Equipment: Ensure that your canning equipment, including jars, lids, bands, and canners, is in good condition and free from any defects or cracks. Avoid using rusty or damaged equipment, as it can compromise the seal of the jars.
- Practice Good Hygiene: Wash your hands thoroughly with soap and warm water before handling any food or canning equipment. Keep your work area clean, and sanitize all utensils, cutting boards, and surfaces that come into contact with the vegetables.
- Pressure Canning for Low-Acid Vegetables: If canning low-acid vegetables, such as beans or corn, always use a pressure canner to ensure proper heat penetration and eliminate the risk of botulism. Water bath canning is not suitable for these types of vegetables.
- Do Not Alter Recipes: Do not alter or modify canning recipes by changing ingredient proportions or processing methods. Alterations can affect the acidity, shelf life, and safety of the canned vegetables.
- Allow Adequate Processing Time: Do not cut short the recommended processing time for canning. The designated time is necessary to destroy bacteria, enzymes, and other microorganisms that can cause spoilage and illness.
- Properly Cool and Store: Allow the jars to cool undisturbed after processing to ensure proper sealing. Store the jars in a cool, dry place as mentioned in the previous section on storing canned vegetables.
- Discard Spoiled Jars: If you notice any signs of spoilage, such as bulging lids, unusual odors, or mold growth, do not consume the contents. Discard the jars immediately to prevent foodborne illness.
- Stay Informed: Stay updated with current canning guidelines, safety recommendations, and recalls by referring to reputable sources, such as government food safety websites or local extension offices.
By following these safety tips, you can ensure that your canned vegetables are both safe and enjoyable to consume. Now that you are equipped with the necessary knowledge, let’s move on to addressing some frequently asked questions about canning vegetables.
Frequently Asked Questions (FAQs)
Here are answers to some frequently asked questions about canning vegetables:
- Can I reuse lids for canning?
No, it is not recommended to reuse canning lids. The sealing compound on the lids may not form a proper seal after the initial use, which can lead to spoilage or contamination. It is best to use new lids for each canning session. - Do I need to sterilize the jars if using a pressure canner?
If you are using a pressure canner for processing, you do not need to sterilize the jars beforehand. The high heat and pressure in the canner will effectively sterilize the contents and jars during the processing time. - What’s the difference between hot pack and raw pack?
Hot pack refers to pre-cooking the vegetables before packing them into the jars, while raw pack involves packing the raw vegetables directly into the jars. Hot pack may improve the flavor and texture of certain vegetables, but both methods are safe for canning. - Can I add extra seasoning to my canned vegetables?
Yes, you can add extra seasonings to your canned vegetables. However, it is important to follow tested recipes for canning to ensure safe processing. If you want to experiment with different seasonings, make sure they are safe for canning and do not alter the acidity level of the vegetables. - Why did my canned vegetables spoil?
Canned vegetables can spoil due to improper processing, inadequate sterilization, insufficient acidity level, or a compromised seal. It is important to follow proper canning techniques, use reliable recipes, and store the jars in suitable conditions to prevent spoilage. - Can I store canned vegetables in the refrigerator?
Canned vegetables do not need to be stored in the refrigerator if they are properly canned and sealed. They can be stored in a cool, dry pantry or cellar. However, once opened, any leftover vegetables should be refrigerated and consumed within a few days. - Can I use plastic containers for canning vegetables?
Plastic containers are not suitable for canning vegetables as they are not designed to withstand the high temperatures and pressures involved in canning. It is best to use glass canning jars specifically designed for canning purposes.
If you have any additional questions or concerns about canning vegetables, it is recommended to consult reliable canning resources or reach out to your local extension office for guidance and assistance.
Now that you have a comprehensive understanding of canning vegetables, you are ready to embark on this rewarding and flavorful journey. So, roll up your sleeves, gather your fresh vegetables, and start preserving your harvest or store-bought produce through the fantastic art of canning!
Conclusion
Canning vegetables is a wonderful way to preserve the flavors and nutrients of your harvest or store-bought produce. By following proper canning techniques, you can enjoy the taste of summer even during the colder months. Throughout this guide, we have explored the benefits of canning vegetables, how to choose the right vegetables, preparing them for canning, different canning methods, a step-by-step guide, storage tips, safety precautions, and common FAQs.
From extending the shelf life of your vegetables to having full control over the ingredients and customization, canning vegetables offers numerous advantages. It is essential to select fresh and high-quality vegetables, properly prepare them, and follow recommended canning methods to ensure the safety and longevity of your preserved vegetables.
Remember to consult reputable canning resources, such as the USDA, for canning guidelines and tested recipes. Safety is paramount when it comes to canning, so follow proper processing times, sterilize equipment, and store the jars in suitable conditions. Regularly inspect your canned vegetables for signs of spoilage and discard any compromised jars.
By incorporating the knowledge and tips shared in this guide, you can confidently and successfully can your own vegetables. So, embrace the art of canning, savor the flavors of fresh produce throughout the year, and enjoy the satisfaction of knowing that you have created a pantry stocked with delicious and nutritious canned vegetables.