Home>Gardening Techniques>DIY Projects>How To Arrange Dried Flowers
DIY Projects
How To Arrange Dried Flowers
Modified: January 22, 2024
Learn how to arrange dried flowers with DIY projects. Get creative ideas and tips to create stunning floral arrangements.
(Many of the links in this article redirect to a specific reviewed product. Your purchase of these products through affiliate links helps to generate commission for Chicagolandgardening.com, at no extra cost. Learn more)
Table of Contents
Introduction
Dried flowers have become increasingly popular in home decor and crafting projects. Unlike fresh flowers, dried flowers can last for months or even years when properly cared for. They add a touch of natural beauty and rustic charm to any space, making them a great choice for DIY enthusiasts.
If you’re interested in learning how to arrange dried flowers, you’ve come to the right place. In this article, we’ll guide you through the step-by-step process of creating stunning arrangements that will brighten up your home or make unique gifts for your loved ones.
Arranging dried flowers not only allows you to showcase your creativity, but it also provides an opportunity to preserve the beauty of flowers long after they have bloomed. Whether you’ve recently harvested flowers from your garden or purchased them from a store, knowing how to arrange them will help you create elegant and visually appealing displays.
One of the reasons why dried flowers have become so popular is their versatility. They can be used to create bouquets, wreaths, centerpieces, or even incorporated into other craft projects. You can mix and match different types and colors of dried flowers to suit your personal style and the overall aesthetic of your space.
By following the steps we’ll outline, you’ll be able to create arrangements that not only showcase the beauty of these preserved blooms but also last for a long time. So, let’s get started on your journey into the world of arranging dried flowers!
Step 1: Selecting the Right Dried Flowers
The first step in arranging dried flowers is selecting the right blooms for your arrangement. When it comes to choosing dried flowers, there are a few factors to consider to ensure a visually appealing and cohesive result.
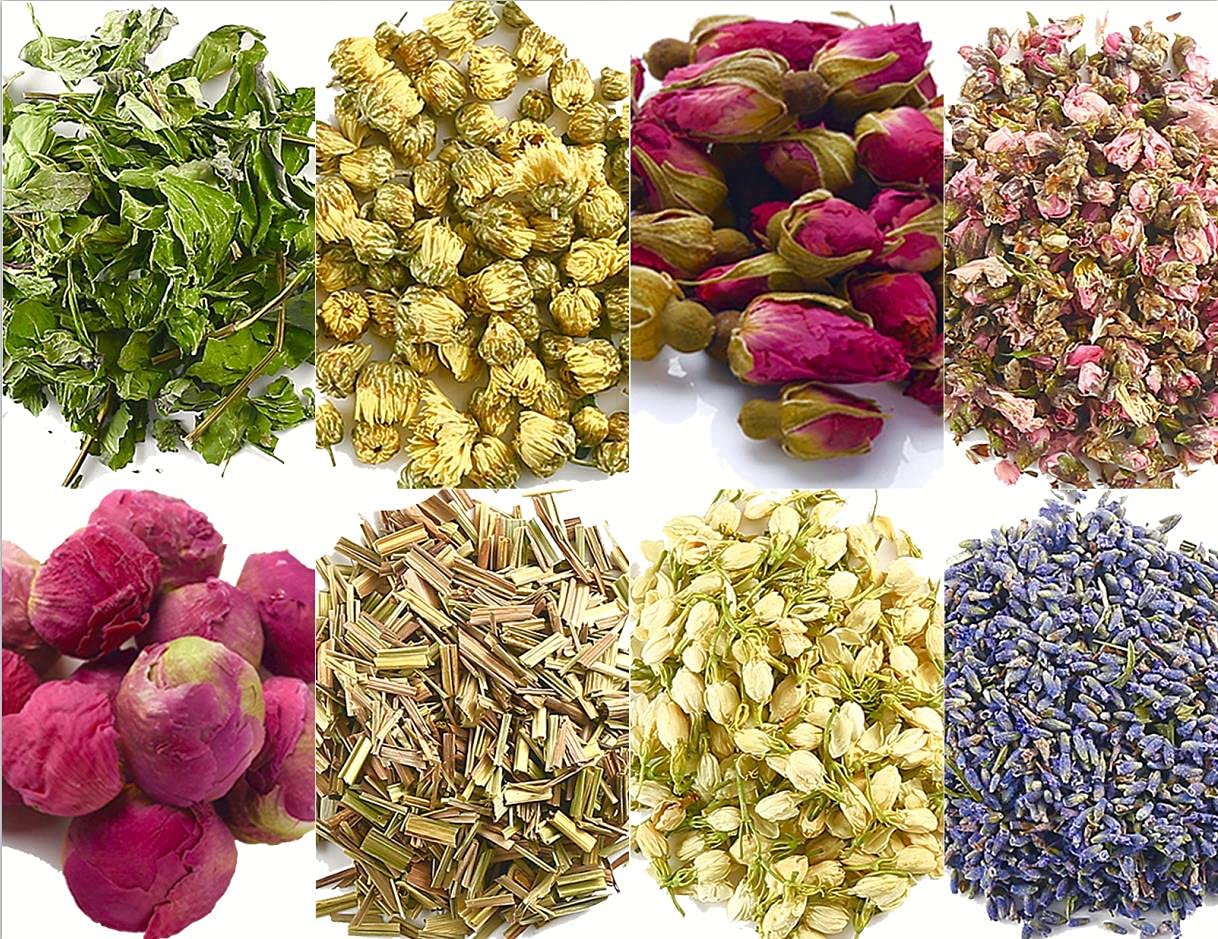
Firstly, consider the color scheme you want to achieve. Dried flowers come in a wide range of colors, from vibrant and bold to soft and muted hues. Think about the overall theme or mood you want to create and select flowers that align with your vision. For example, if you’re going for a romantic and delicate feel, opt for pastel-colored flowers like dried lavender or rose petals. If you prefer a more vibrant and eclectic look, consider using dried sunflowers or vibrant dried larkspur.
Next, think about the flower shapes and sizes. Different dried flowers have unique shapes and textures that can add visual interest to your arrangement. Some flowers, like dried hydrangeas, have large, full blooms, while others, like dried baby’s breath, have smaller and delicate sprigs. By incorporating a mix of different flower shapes and sizes, you can create a visually dynamic and balanced arrangement.
Consider the overall style or theme of your space when selecting dried flowers. If you have a rustic or farmhouse-style decor, using dried wheat stalks or dried cotton stems can complement the aesthetic. If your space has a more modern and minimalist vibe, opting for dried pampas grass or dried eucalyptus can add a touch of simplicity and elegance.
Lastly, consider the availability and durability of the dried flowers. Some flowers dry better than others, retaining their color and shape even after the drying process. Roses, lavender, and strawflowers are examples of flowers that dry well. If you’re harvesting flowers from your garden, make sure to harvest them at the right time – usually just before they fully open. If you’re purchasing dried flowers, ensure they are from a reputable source to ensure their quality and longevity.
By taking into account the color scheme, shapes, sizes, style, and availability of the dried flowers, you can select the perfect blooms for your arrangement. This thoughtful selection process will set the foundation for a visually stunning and cohesive finished product.
Step 2: Preparing the Dried Flowers
Once you have selected the right dried flowers for your arrangement, it’s important to properly prepare them before beginning the arranging process. This step ensures that your flowers are clean, free from debris, and ready to be arranged beautifully.
Start by gently dusting off any dirt or particles that may have accumulated on the dried flowers. You can use a soft brush or a hairdryer on a low, cool setting to carefully remove any loose debris. Be gentle to avoid damaging the delicate petals or stems.
If you notice any wilted or damaged petals or stems, trim them off using a pair of clean and sharp scissors. This will help maintain the overall appearance of your arrangement and ensure that only the best-looking flowers are used.
Some dried flowers have stems that may be too long for your desired arrangement. In this case, you can trim them to the desired length using your scissors. Find the spot where you want to make the cut, and make a clean and straight cut at a 45-degree angle. This will help the flowers better absorb water if you choose to rehydrate them.
Rehydrating your dried flowers is optional but can be beneficial if you want to revive their natural shape and pliability. To do this, you can gently mist the flowers with water using a spray bottle or place them in a container of tepid water for a short period of time. Be cautious not to oversaturate them, as this can cause damage or discoloration. Once rehydrated, allow the flowers to air dry before incorporating them into your arrangement.
It’s worth mentioning that not all dried flowers can or need to be rehydrated. Some varieties, such as preserved roses or dried grasses, do not require any additional hydration. Always refer to specific care instructions for the type of dried flowers you are working with to ensure you handle them properly.
By taking the time to prepare your dried flowers, you are ensuring that they are in the best condition for arranging. This step sets the foundation for a beautiful and long-lasting arrangement that will bring joy and beauty to any space.
Step 3: Choosing a Vase or Container
Choosing the right vase or container for your dried flower arrangement is an important step in the process. The vase or container you choose should not only complement the style and theme of your space but also provide proper support and stability for your dried flowers.
Consider the size and shape of the dried flowers you will be arranging. If you have long-stemmed flowers, such as dried branches or sunflowers, a tall and cylindrical vase would be a good choice. This will give the arrangement the necessary height and provide stability to the taller stems. For shorter and more delicate dried flowers, a smaller and more compact vase or container would work best.
Think about the overall aesthetic you want to achieve. If you prefer a more rustic and natural look, consider using a vintage pitcher, a mason jar, or even a wooden box. These types of containers will add to the charm and character of your arrangement. On the other hand, if you want to create a sleek and modern look, opt for a glass or ceramic vase with clean lines and a contemporary design.
Take into account the color and texture of the vase or container. Choose a color that complements the colors of your dried flowers and enhances their visual appeal. Additionally, consider the texture of the vase – a patterned or textured container can add extra visual interest and create a unique focal point for your arrangement.
Ensure that the vase or container you choose is appropriately sized for your arrangement. The opening should be wide enough to accommodate the number of flowers you have selected, while also providing enough space for arranging them in a visually appealing way. A vase that is too small or too large in proportion to your dried flowers can throw off the balance and overall aesthetic of the arrangement.
Lastly, consider the functionality of the vase or container. If you plan to display the arrangement in an area where it may be bumped or moved frequently, consider using a heavy or sturdy container that will provide stability. If you want the flexibility to easily change the location of the arrangement or switch out the flowers, choose a vase with a removable or adjustable floral frog or with a wide mouth that allows for easy insertion and removal of stems.
By carefully selecting a vase or container that complements your dried flowers in terms of size, shape, style, color, and functionality, you will enhance the overall visual impact of your arrangement and create a focal point that seamlessly integrates into your space.
Step 4: Arranging the Dried Flowers
Now that you have your dried flowers and chosen a suitable vase or container, it’s time to start arranging them. The arrangement process allows you to unleash your creativity and create a visually stunning display that showcases the beauty of your dried flowers.
Begin by trimming the stems of your dried flowers as needed. If you haven’t already done so during the preparation stage, use clean and sharp scissors to trim the stems at a 45-degree angle. This will ensure that the flowers can easily absorb water if they have been rehydrated or to simply maintain their shape.
Start by placing the tallest and most visually impactful flowers in the center of the vase. These will serve as the focal point of your arrangement. Position them at varying heights to add dimension and visual interest. If you have symmetrical flowers, such as dried branches or long-stemmed roses, you can place them in pairs on either side of the central flower.
Next, add in the medium-sized flowers around the taller focal flowers. These can be arranged in a circular or cascading pattern around the center. Adjust the heights and angles of the stems to create depth and movement within the arrangement.
Fill in any gaps or empty spaces with smaller dried flowers, such as sprigs of baby’s breath or statice flowers. These delicate blooms can add texture and fill out the arrangement. Insert them strategically throughout, ensuring they are evenly distributed and not overcrowding any specific area.
As you arrange the flowers, step back occasionally to assess the arrangement from different angles. This will help you identify any imbalances or empty spots that need to be addressed. You can also make adjustments as needed to achieve the desired look.
Remember to consider the overall shape and form of your arrangement. Aim for a visually pleasing balance of height, width, and depth. For example, if your vase is tall and narrow, you may want to create a more vertical and compact arrangement. If your vase is wide and shallow, a wider and more horizontal arrangement would work well.
Once you are satisfied with the arrangement of the dried flowers, take a moment to inspect the overall look. Make any final adjustments to ensure that all flowers are secure and positioned exactly as you desire.
The process of arranging dried flowers is a delightful and creative journey. Don’t be afraid to experiment, try different combinations of flowers, and let your artistic instincts guide you. Remember, there’s no right or wrong way to arrange dried flowers, so trust your instincts and have fun with the process!
Step 5: Adding Decorative Elements
To elevate the visual appeal and add a personal touch to your dried flower arrangement, consider incorporating decorative elements that complement the style and theme of the arrangement and the surrounding space. These elements can enhance the overall aesthetic and create a more unique and captivating display.
One option is to add foliage or greenery to the arrangement. Dried eucalyptus, preserved ferns, or dried moss can provide a lush and natural backdrop for the dried flowers. You can tuck these additions around the base of the flowers or weave them throughout the arrangement to create depth and texture.
Consider adding texture and visual interest by incorporating dried grasses, branches, or seed pods. These elements can add a touch of wildness and rustic charm to your arrangement. Experiment with different lengths and angles to create a dynamic and organic look.
If you want to introduce a pop of color or additional visual interest, consider incorporating dried fruits, berries, or seed heads. These elements can add depth, texture, and a hint of nature’s bounty to your arrangement. For example, dried oranges or apple slices can bring a vibrant and warm touch to an autumn-themed arrangement.
Another option is to include decorative accessories such as ribbons, twine, or lace. These can be wrapped around the neck of the vase or tied in a bow around the stems of the arrangement. Ribbons in complementary colors or patterns can add a festive or whimsical touch, while natural twine or lace can enhance the rustic and vintage vibe.
Don’t forget about the vase or container itself – it can be a decorative element in its own right. Consider adding rocks, pebbles, or colored glass beads to the bottom of a transparent vase to create visual interest and support the dried flowers. You can also adorn the vase with decorative stickers, paint, or embellishments that match the overall style of the arrangement.
When adding decorative elements, be mindful not to overcrowd or overpower the dried flowers. The goal is to enhance the arrangement, not overshadow it. Place the additional elements strategically, ensuring they do not distract from the beauty of the dried flowers and maintaining a harmonious balance.
Adding decorative elements to your dried flower arrangement allows you to infuse your personality and creativity into the display. By incorporating complementary foliage, textures, colors, and accessories, you can create a unique and visually captivating arrangement that truly stands out.
Step 6: Displaying and Caring for Dried Flower Arrangements
Now that you have arranged your dried flowers and added decorative elements, it’s time to display and care for your beautiful creation. Properly displaying and maintaining your dried flower arrangement will ensure its longevity and continued visual appeal.
Choose the right location to showcase your dried flower arrangement. Consider the lighting conditions, temperature, and humidity of the area. Avoid placing the arrangement in direct sunlight, as it can cause the colors to fade over time. Similarly, avoid areas with high humidity or excessive moisture, as it can cause the dried flowers to deteriorate or develop mold.
Dust your dried flower arrangement regularly to keep it looking fresh and vibrant. You can use a soft brush or a hairdryer on a low, cool setting to gently remove any dust or debris that may accumulate on the petals and stems. Be careful not to apply too much pressure or force, as it can damage the delicate dried flowers.
Avoid exposing your dried flower arrangement to excessive heat or drafts, as it can cause the flowers to become brittle and lose their shape. Keep them away from heating vents, radiators, or any source of direct heat. Additionally, ensure that there is proper airflow around the arrangement to prevent moisture buildup.
If you notice any signs of mold or mildew on the dried flowers or foliage, remove them immediately. This will help prevent the spread of mold to the rest of the arrangement. If the problem persists, consider reevaluating the location and conditions in which you are displaying the arrangement.
Although dried flowers do not require water, you can spritz them with a light mist of water occasionally to refresh them and maintain their shape. Be careful not to oversaturate the flowers, as it can cause them to become limp or discolored.
Finally, consider the lifespan of your dried flower arrangement. Over time, the colors may fade, and the flowers may become more fragile. If you notice significant deterioration, it may be time to retire the arrangement or repurpose the dried flowers in a different craft project.
By taking proper care of your dried flower arrangement, you can enjoy its beauty and charm for an extended period. Regular dusting, careful placement, and avoiding excessive heat or humidity will help preserve the quality and visual appeal of the arrangement for months or even years to come.
Conclusion
Congratulations! You have successfully learned how to arrange dried flowers. Armed with the knowledge of selecting the right flowers, preparing them, choosing the perfect vase, arranging them creatively, adding decorative elements, and displaying and caring for your arrangement, you are now equipped to create stunning dried flower displays for your home or as heartfelt gifts.
Arranging dried flowers is a creative and rewarding DIY project that allows you to enjoy the beauty of nature long after the flowers have bloomed. By following the steps outlined in this guide, you can create visually captivating and long-lasting arrangements that bring joy and a touch of nature to any space.
Remember, the key to a successful dried flower arrangement is to let your creativity shine. Experiment with different types of flowers, color combinations, and decorative elements to create arrangements that reflect your personal style and complement your home decor.
As you embark on your dried flower arranging journey, continue to explore new techniques and possibilities. Consider incorporating different textures, experimenting with unique color schemes, or even drying your own flowers from your garden. The possibilities are endless, and the more you practice and explore, the more confident and skilled you will become.
So, let your imagination bloom and start arranging those beautiful dried flowers. Bring the beauty of nature indoors and enjoy the charm and longevity of these preserved blooms. Happy arranging!