Home>Gardening Tips and Tricks>Eco-Friendly Gardening>What Permaculture Vegetables Can I Grow In Minnesota


Eco-Friendly Gardening
What Permaculture Vegetables Can I Grow In Minnesota
Published: February 16, 2024
Discover eco-friendly gardening in Minnesota with a wide variety of permaculture vegetables that thrive in this climate. Start your sustainable garden today!
(Many of the links in this article redirect to a specific reviewed product. Your purchase of these products through affiliate links helps to generate commission for Chicagolandgardening.com, at no extra cost. Learn more)
Table of Contents
Introduction
Welcome to the world of eco-friendly gardening! If you are passionate about sustainability and want to make a positive impact on the environment, then eco-friendly gardening is the perfect choice for you. By adopting eco-friendly gardening practices, you can create a beautiful and thriving garden while minimizing your carbon footprint.
One of the key principles of eco-friendly gardening is permaculture, which focuses on designing and maintaining sustainable ecosystems. Permaculture gardening promotes the use of natural resources, organic practices, and biodiversity to create a self-sustaining and resilient garden. Whether you have a small backyard or a large plot of land, permaculture principles can be applied to grow a wide range of vegetables, fruits, and herbs while preserving the natural balance of your garden.
In this article, we will explore the world of permaculture vegetables and discover which ones are most suitable for the unique climate of Minnesota. Minnesota’s climate can be challenging, with cold winters and relatively short growing seasons. However, with careful planning and the right selection of vegetables, you can create a productive and eco-friendly garden that thrives in these conditions.
By choosing permaculture vegetables for your garden, you will not only enjoy a bountiful harvest but also contribute to the sustainability of your local ecosystem. Permaculture gardening focuses on building healthy soil, conserving water, attracting beneficial insects, and reducing waste. These practices not only benefit your garden but also have a positive impact on the larger environment.
Whether you are an experienced gardener looking to transition to eco-friendly practices or a beginner exploring the world of permaculture, this article will serve as a guide to help you navigate the process of growing permaculture vegetables in Minnesota. Let’s dive in and discover the incredible variety of vegetables that can thrive in your eco-friendly garden!
Growing Permaculture Vegetables in Minnesota
Growing permaculture vegetables in Minnesota requires careful consideration of the unique climate and growing conditions of the region. With cold winters and a relatively short growing season, it is essential to choose vegetables that can tolerate these conditions and thrive in your eco-friendly garden.
One of the key aspects of successful permaculture gardening in Minnesota is selecting cold-hardy vegetables. These are vegetables that are capable of withstanding frost and cooler temperatures. It is also important to choose varieties with a shorter maturity period, as this allows them to complete their life cycle before the cold weather sets in.
Before planting, it is advisable to prepare your soil using organic practices. Adding compost and other organic matter will help improve soil fertility and enhance its water-holding capacity. Healthy soil is essential for the growth and productivity of permaculture vegetables.
Another crucial factor to consider is the layout and design of your garden. Permaculture principles emphasize creating diverse ecosystems, so plan your garden to include companion planting and intercropping. This will promote natural pest control, enhance soil fertility, and optimize space utilization.
Water conservation is also an integral part of eco-friendly gardening in Minnesota. Mulching your vegetable beds with organic materials such as straw or wood chips can help retain moisture and suppress weed growth. Additionally, consider installing rainwater harvesting systems to collect and store water for irrigation purposes.
Finally, it is important to practice regular maintenance and observation in your permaculture garden. This includes monitoring for pests and diseases, preventing weed growth, and providing support to climbing vegetables when needed. Regular harvesting and utilization of vegetables will not only provide you with fresh produce but also encourage continuous growth throughout the season.
Growing permaculture vegetables in Minnesota requires patience, planning, and a deep understanding of the local climate. However, with the right selection of vegetables and the application of permaculture principles, you can create a thriving and sustainable garden that provides you with abundant harvests year after year.
Permaculture Vegetables Suitable for Minnesota Climate
When it comes to choosing permaculture vegetables that are suitable for the unique climate of Minnesota, it is important to select cold-hardy varieties that can thrive in colder temperatures and shorter growing seasons. Here are some permaculture vegetables that are well-suited for Minnesota’s climate:
1. Potatoes: Potatoes are a versatile and hardy vegetable that can tolerate cooler temperatures. They can be planted in early spring and harvested in late summer or early fall.
2. Kale: Kale is a nutrient-dense leafy green that can withstand frost and even improve in flavor after exposure to cold temperatures. It can be grown almost year-round in Minnesota.
3. Swiss Chard: Swiss chard is another cold-tolerant leafy green that can be grown throughout the growing season in Minnesota. It is highly nutritious and adds a pop of color to your garden.
4. Carrots: Carrots are root vegetables that can be planted in the early spring and harvested in late summer or fall. Choose smaller varieties that mature quickly to ensure a successful harvest in Minnesota’s shorter growing season.
5. Radishes: Radishes are quick-growing vegetables that can be planted in early spring or late summer for a fall harvest. They add a crunchy texture and a peppery flavor to salads and other dishes.
6. Peas: Peas are cool-weather crops that thrive in the spring and fall. They can be grown on trellises to save space and maximize yields.
7. Green Beans: Green beans are warm-weather vegetables that can be grown in Minnesota’s short summer season. Choose bush varieties for ease of maintenance.
8. Cabbage: Cabbage is a cold-tolerant vegetable that can be planted in early spring or late summer. It is a versatile vegetable that can be used in salads, coleslaw, stir-fries, and more.
9. Onions: Onions can be planted in early spring and harvested in late summer or fall. They are a staple ingredient in many recipes and can be stored for long periods.
10. Garlic: Garlic is a cold-hardy bulb that can be planted in the fall for a summer harvest. It adds flavor to a variety of dishes and has numerous health benefits.
11. Zucchini: Zucchini is a warm-weather vegetable that requires a longer growing season. Start seeds indoors and transplant after the last frost for a successful harvest.
12. Lettuce: Lettuce is a cool-weather crop that can be grown in the spring and fall. Choose leafy varieties for continuous harvest throughout the season.
These permaculture vegetables are just a starting point for creating a diverse and resilient garden in Minnesota. Experiment with different varieties and try companion planting to optimize your garden’s productivity and sustainability. By selecting vegetables that are well-suited to Minnesota’s climate, you can enjoy a productive and eco-friendly garden throughout the growing season.
Potatoes
Potatoes are a staple crop that can be successfully grown in the Minnesota climate. They are versatile, easy to cultivate, and provide a bountiful harvest. Potatoes can be grown in both traditional garden beds and containers, making them suitable for gardens of all sizes.
When selecting potato varieties for Minnesota, it’s important to choose early-maturing varieties that can reach maturity before the first frost. Some popular varieties include Yukon Gold, Russet, Red Pontiac, and Fingerling potatoes. These varieties are known for their flavor, texture, and ability to withstand cooler temperatures.
Potatoes should be planted in early spring, once the soil temperature reaches around 45 degrees Fahrenheit. They prefer loose, well-draining soil enriched with compost or organic matter. To plant potatoes, dig a trench about six inches deep and place the seed potatoes with the eyes facing up. Cover the potatoes with a few inches of soil and gradually fill in the trench as the plants grow. This practice, known as hilling, helps to prevent the potatoes from being exposed to light, which can cause them to turn green and become inedible.
Keep the potato plants consistently watered throughout the growing season, aiming to keep the soil consistently moist but not waterlogged. Mulching around the base of the plants helps to retain moisture and suppress weed growth.
As the potato plants grow, they may require support to prevent them from falling over and breaking. Use stakes or cages to gently support the plants and encourage upright growth. Regularly check for pests such as Colorado potato beetles and aphids, and take appropriate action to control them using organic methods if necessary.
Harvesting potatoes is an exciting moment in the gardening journey. Mature potatoes are typically ready for harvest when the leaves turn yellow and wither, usually around 2 to 3 months after planting. Using a garden fork or shovel, carefully loosen the soil around the plants and gently lift the potatoes from the ground, being cautious not to damage them.
After harvesting, allow the potatoes to dry and cure for a couple of weeks in a cool, dry, and dark place. This process toughens the skin and allows the potatoes to store well. Store your harvested potatoes in a cool, dark, and well-ventilated area to prevent them from sprouting or rotting.
Potatoes are a versatile vegetable that can be enjoyed in various dishes, from mashed potatoes and baked potatoes to roasted potatoes and potato salads. Growing your own potatoes ensures that you have a fresh supply of this nutritious and delicious vegetable right at your fingertips.
Kale
Kale is a nutritional powerhouse that thrives in the cooler temperatures of the Minnesota climate. It is a leafy green vegetable that is packed with vitamins, minerals, and antioxidants, making it a valuable addition to any permaculture garden. From its vibrant leaves to its incredible health benefits, kale is a versatile and resilient vegetable.
When it comes to growing kale in Minnesota, there are a few important considerations to keep in mind. Kale is a cool-season crop that prefers temperatures between 60 and 70 degrees Fahrenheit. It can tolerate light frost, making it an excellent choice for early spring and late fall plantings. However, it is best to avoid planting kale during the hottest months of summer, as prolonged heat can cause the leaves to become bitter and tough.
Start your kale seeds indoors about 6 to 8 weeks before the last expected frost date. Once the seedlings have grown a couple of inches tall, they can be transplanted into your garden or outdoor containers. Kale prefers well-draining soil that is rich in organic matter. Amend your soil with compost or well-rotted manure before planting to provide the necessary nutrients.
When it comes to planting kale in your garden, give the plants enough space to spread out. Each kale plant should have about 12 to 18 inches of spacing between them to ensure adequate air circulation. This helps to prevent diseases and pests from taking hold.
To care for your kale plants, it is important to provide them with consistent moisture. Water deeply but infrequently, aiming to keep the soil evenly moist. Mulching around the base of the plants can help to retain moisture, keep weeds at bay, and regulate soil temperatures.
Kale is relatively low maintenance when it comes to pests and diseases. However, keep an eye out for common pests such as aphids, cabbage worms, and slugs. Regularly inspect your plants and take appropriate measures, such as handpicking pests or using organic pest control methods, to keep your kale healthy and pest-free.
Harvesting kale is a continuous process. Start harvesting the outer leaves of the plant when they reach a suitable size, usually around 8 to 10 inches in length. Harvesting the outer leaves allows the younger leaves to continue growing. When harvesting, be sure to use a sharp knife or scissors to avoid damaging the plant.
Kale can be used in a variety of dishes, from salads and smoothies to stir-fries and soups. The leaves can be eaten raw or cooked, and they provide a hearty texture and a rich flavor. The versatility and nutritional benefits of kale make it a fantastic choice for your permaculture garden in Minnesota.
Swiss Chard
Swiss chard is a vibrant and nutritious leafy green that thrives in the Minnesota climate. With its colorful stems and large, glossy leaves, it adds both visual appeal and culinary versatility to your permaculture garden. Swiss chard, also known as silverbeet or rainbow chard, is packed with vitamins, minerals, and antioxidants, making it a fantastic addition to any healthy diet.
Swiss chard is a cool-season crop that can tolerate a wide range of temperatures. It can be planted early in the spring as soon as the soil is workable, making it one of the first greens you can enjoy from your garden. It can also be planted later in the summer for a fall harvest, as it withstands light frosts.
Before planting, prepare your garden bed by incorporating compost or well-rotted manure to improve soil fertility and moisture retention. Swiss chard prefers well-draining soil with a slightly acidic pH level. Space the plants around 12 to 18 inches apart to give them room to grow and ensure good air circulation around the leaves.
Swiss chard requires consistent moisture throughout the growing season. Water deeply, providing the plants with about 1 to 1.5 inches of water per week. Mulching around the base of the plants is beneficial, as it helps to retain moisture, suppress weed growth, and regulate soil temperature.
One of the advantages of growing Swiss chard is its resistance to pests and diseases. However, keep an eye out for common garden pests such as aphids and leaf miners. Regularly inspect your plants and take appropriate measures, such as applying organic insecticides or practicing companion planting, to keep them healthy and protected.
Harvesting Swiss chard is a highly rewarding process. You can start harvesting the outer leaves when they reach about 6 to 8 inches in length. Use a sharp knife or scissors to cut the outer leaves at the base, being careful not to damage the plant while harvesting. By harvesting the outer leaves, the inner leaves have a chance to continue growing, providing you with a continuous harvest throughout the season.
Swiss chard is a versatile vegetable that can be prepared in a variety of ways. You can enjoy it raw in salads, sautéed as a side dish, or added to stir-fries and soups. The stems are edible as well and can be cooked separately or incorporated into your culinary creations. Its vibrant colors and earthy flavor make it a popular choice among home cooks and chefs alike.
With its adaptability and stunning appearance, Swiss chard is a perfect addition to your permaculture garden in Minnesota. Adding this nutrient-dense leafy green to your garden not only provides you with fresh and delicious produce but also contributes to the overall beauty and sustainability of your eco-friendly garden.
Carrots
Carrots are a versatile and nutritious root vegetable that can thrive in the climate of Minnesota. Known for their vibrant colors and sweet flavor, carrots are a popular choice for home gardeners. With a little planning and care, you can enjoy a bountiful harvest of crunchy and delicious carrots from your permaculture garden.
When it comes to growing carrots in Minnesota, it is important to select varieties that are suitable for the region’s short growing season. Look for early-maturing varieties such as Nantes or Danvers that can reach maturity within 60 to 80 days. These varieties are more adapted to the cooler temperatures and shorter frost-free periods of Minnesota.
Carrots prefer loose, well-draining soil, so it is essential to prepare your garden bed properly. Remove stones, debris, and clumps of soil to create a fine texture. Adding compost or well-rotted manure to the soil helps to improve its fertility and provide the necessary nutrients for healthy carrot growth.
Carrot seeds are tiny, so it is important to thin them out after germination to ensure adequate spacing. Sow the seeds sparingly, about half an inch to an inch apart, and thin them to a spacing of about one to three inches between plants. Proper spacing allows each carrot to develop properly without competing for essential nutrients and space.
Consistent moisture is crucial for carrot growth and quality. Keep the soil evenly moist throughout the growing season to prevent the carrots from becoming tough or splitting. Be mindful not to overwater, as overly wet conditions can lead to rot and disease.
Weeding is another important aspect of caring for carrot plants. Keep the garden bed free of weeds, as they can compete with carrots for nutrients and water. Regularly inspect your garden and remove any weeds by hand or use shallow cultivation tools to disturb the soil surface without damaging the carrot roots.
Pest control for carrots is relatively minimal, as they are less prone to pests compared to other vegetables. However, keep an eye out for common garden pests such as carrot rust fly or aphids. Consider using row covers to protect young seedlings from pests or employ organic pest control methods when necessary.
Harvesting carrots is an exciting moment in the gardening process. The optimum harvest size for most carrots is around 1/2 to 3/4 inch in diameter, although you can harvest them at different stages depending on your preference. Gently loosen the soil around the carrot and pull it up, taking care not to damage the delicate roots. Carrots can be stored in a cool and dry place to preserve their freshness.
Carrots are versatile in the kitchen and can be enjoyed raw or cooked. From salads and snacks to soups and stir-fries, carrots add a delightful crunch and natural sweetness to various dishes. Growing your own carrots allows you to experience their incredible flavor and nutritional value right from your permaculture garden.
Radishes
Radishes are quick-growing and cold-hardy vegetables that are perfect for the Minnesota climate. With their crunchy texture and peppery flavor, radishes are a popular choice for both beginner and experienced gardeners. These vibrant root vegetables can be grown easily in your permaculture garden, providing a colorful and delicious addition to your meals.
Radishes are fast-growing crops that can be ready for harvest in as little as 3 to 4 weeks from sowing. This makes them an excellent choice for gardeners looking for a quick yield. They thrive in cool temperatures, making them ideal for early spring and fall plantings in Minnesota.
The first step in growing radishes is to prepare the soil. Radishes prefer loose, well-draining soil enriched with organic matter. Clear the planting area of any debris, rocks, or large clumps of soil to create a fine texture. Incorporating compost or well-rotted manure will provide the necessary nutrients for healthy radish growth.
Radish seeds should be sown directly into the garden bed. Make shallow rows about half an inch deep and space the seeds about one inch apart. Cover the seeds with a thin layer of soil, firm it gently, and water the area well. Thin the seedlings as they grow, leaving about 2 to 3 inches of space between plants, depending on the variety.
Consistent moisture is crucial for radish development. Water the plants regularly to keep the soil evenly moist, especially during dry periods. Avoid overwatering or allowing the soil to become waterlogged, as this can lead to rotting of the roots.
Weed control is important to ensure the healthy growth of radishes. Keep the garden bed free of weeds, as they can compete with radishes for nutrients and water. Regularly inspect your garden and remove any weeds by hand or use shallow cultivation tools to disturb the soil surface without causing damage to the radish roots.
While radishes are generally pest-resistant, keep an eye out for potential pests such as flea beetles or aphids. If necessary, apply organic pest control methods or use row covers to protect the young seedlings. Proper air circulation and maintaining a clean garden environment will also help prevent pest infestations.
Radishes are usually ready for harvest in 3 to 4 weeks, depending on the variety. They should be firm and crisp when pulled from the ground. To harvest radishes, gently loosen the soil around the base of the plants and pull them up. Remove the leaves, wash the radishes, and store them in the refrigerator to maintain their freshness.
Radishes are a versatile vegetable that can be enjoyed in various ways. They can be eaten raw, sliced into salads, or pickled for a tangy and crunchy snack. The peppery flavor of radishes adds a refreshing and zesty kick to dishes. Growing your own radishes allows you to experience their vibrant taste and enjoy their nutritional benefits straight from your permaculture garden.
Peas
Peas are delicious and nutritious cool-season vegetables that thrive in the Minnesota climate. These versatile legumes are a favorite in many home gardens, providing both fresh peas and edible pea pods. With their delicate sweetness and tender texture, peas are a delightful addition to your permaculture garden.
Peas prefer cooler temperatures and can tolerate light frosts, making them an excellent choice for early spring and fall plantings in Minnesota. To get a head start on the growing season, you can start pea seeds indoors 4-6 weeks before the last expected frost date. Alternatively, direct sow pea seeds into the garden bed once the soil has thawed and temperatures reach around 45-50 degrees Fahrenheit.
Prepare the soil before planting by incorporating compost or well-rotted manure to enhance its fertility and drainage. Peas prefer well-draining soil with a slightly acidic pH level. Create furrows or trenches, about two inches deep and six inches apart, for planting the pea seeds.
When sowing pea seeds, place them about one inch deep and three inches apart within the furrow. Cover the seeds with soil and gently firm the soil over them. As the peas grow, provide support for the plants by installing trellises, stakes, or mesh netting for them to climb. This will optimize space usage and prevent plants from sprawling on the ground.
Peas require consistent moisture to ensure good growth and development. Water the plants evenly to keep the soil evenly moist, especially during dry spells. Mulching around the base of the plants helps to retain moisture, suppress weed growth, and regulate soil temperature.
Regular weeding is important to maintain the health and productivity of your pea plants. Remove any weeds that compete with the peas for nutrients and water. Be cautious when weeding to avoid disturbing the shallow root systems of the pea plants.
Pests that commonly affect peas include aphids, pea weevils, and powdery mildew. Inspect your plants regularly and take appropriate measures to manage any infestations. Creating a diverse garden ecosystem through companion planting can help deter pests and enhance natural pest control.
Harvesting peas at the right time is essential for enjoying their peak flavor and tenderness. Snap peas, the type of peas where the entire pod is edible, are usually ready to harvest when the pods are plump and crisp, but before the individual peas inside become too large. Shell peas, where only the inner peas are eaten, are ready when the pods are plump and well-filled. Use a gentle twisting motion to harvest the pods, taking care not to damage the plants.
Peas are delightful when enjoyed fresh from the garden. They can be eaten raw, steamed, sautéed, or added to a variety of dishes, including salads, stir-fries, soups, and pasta dishes. The sweetness and crunch of homegrown peas make them a true garden-to-table treat.
Green Beans
Green beans, also known as snap beans or string beans, are versatile and productive vegetables that thrive in the Minnesota climate. These delicious legumes are a popular choice for home gardeners due to their ease of growth, high yield, and culinary versatility. Whether you prefer them fresh, steamed, sautéed, or in stir-fries, green beans are a delightful addition to any permaculture garden.
Green beans are warm-weather crops that require a longer growing season. It is best to wait until after the danger of frost has passed and the soil temperature has reached at least 60 degrees Fahrenheit before planting green beans directly into the garden. They prefer loose, well-draining soil enriched with organic matter.
There are two main types of green beans: bush beans and pole beans. Bush beans are compact plants that do not require support, making them a great option for smaller gardens or containers. Pole beans, on the other hand, are climbing plants that require trellises, stakes, or other forms of support to grow vertically.
When planting green beans, space the seeds or seedlings according to the variety’s specific instructions. Typically, bush beans should be spaced about 3 to 4 inches apart, and pole beans should be spaced 6 to 8 inches apart along the trellis or support structure. Plant the seeds about an inch deep in well-prepared soil and gently firm the soil over them.
Green beans require regular moisture to ensure healthy growth and prevent the development of tough or stringy beans. Water the plants deeply and consistently, aiming to keep the soil evenly moist. Applying mulch around the base of the plants can help to retain moisture and suppress weed growth.
Regular weeding is important to maintain the health and productivity of your green bean plants. Remove any weeds that compete for nutrients, water, and sunlight. Be cautious when weeding to avoid disturbing the roots of the plants.
Green beans are relatively resistant to pests and diseases. However, common pests such as aphids, bean beetles, and spider mites can occasionally be problematic. Regularly inspect your plants for any signs of damage or infestation, and take appropriate measures to control pests using organic methods when necessary.
Harvesting green beans is a rewarding experience. The best time to harvest varies depending on the variety, but it typically occurs when the beans are young, tender, and firm. Harvest the beans by gently pinching or snapping them off the plant. Regular harvesting encourages continued production, so be sure to check the plants regularly once they start bearing beans.
Green beans can be enjoyed in various ways, from being eaten fresh off the vine to being cooked in a variety of dishes. They can be steamed, sautéed, stir-fried, added to salads, or incorporated into casseroles. The crisp texture and delightful flavor of homegrown green beans make them a versatile and tasty addition to your meals.
Cabbage
Cabbage is a cold-hardy and versatile vegetable that thrives in the Minnesota climate. Known for its dense, tightly packed leaves and mild flavor, cabbage is a popular choice for coleslaw, salads, stir-fries, and other delicious dishes. Growing cabbage in your permaculture garden allows you to enjoy this nutritious and versatile vegetable right at home.
When it comes to growing cabbage in Minnesota, it is important to select varieties that are suitable for the region’s shorter growing season. Look for early-maturing cabbage varieties that can reach maturity within 60 to 80 days. Some popular options include Early Jersey Wakefield, Copenhagen Market, and Golden Acre.
To prepare for planting, ensure that your garden bed has well-draining soil with plenty of organic matter. Cabbage prefers a slightly acidic soil pH level of around 6.5. Adding compost or well-rotted manure to the soil helps improve its fertility and provides the necessary nutrients for healthy cabbage growth.
Start cabbage seeds indoors about 6 to 8 weeks before the last expected frost date. Once the seedlings have developed a few sets of leaves, move them to the garden. Space the plants about 12 to 18 inches apart, allowing enough room for the heads to form and enough air circulation to prevent diseases.
Consistent moisture is important for cabbage growth and head formation. Water the plants deeply, aiming to keep the soil consistently moist. Mulching around the base of the plants helps retain moisture, suppress weed growth, and regulate soil temperature.
Weed control is essential to ensure the optimal growth and development of cabbage plants. Remove any weeds that compete for nutrients, water, and sunlight. Regularly inspect your garden and remove weeds by hand or use shallow cultivation tools to disturb the soil surface without causing damage to the shallow roots of the cabbage plants.
Cabbage is relatively resistant to pests but can occasionally be affected by common garden pests such as cabbage worms or aphids. Inspect your plants regularly and take appropriate measures to manage any infestations. Using row covers to protect the young plants from pests or employing organic pest control methods can help keep your cabbage plants healthy.
As cabbage heads mature, they become firm and reach their peak size. Harvest cabbage heads by cutting them at the base with a sharp knife. It is advisable to harvest them when they are fully mature but before they start splitting or showing signs of rot.
Cabbage is a versatile vegetable that can be enjoyed in various culinary creations. It can be used raw in salads, cooked in stir-fries or soups, or fermented to make sauerkraut. The mild, yet distinctive flavor of cabbage makes it an excellent ingredient for adding crunch and texture to your favorite dishes.
By growing cabbage in your permaculture garden, you can have a fresh supply of this nutritious vegetable at your fingertips. Enjoy the satisfaction of eating homegrown cabbage while reaping its numerous health benefits.
Onions
Onions are a versatile and flavorful vegetable that thrives in the Minnesota climate. Whether you prefer them raw in salads, sautéed in stir-fries, or caramelized for a delicious topping, growing onions in your permaculture garden is a rewarding experience. Onions are a staple ingredient in many culinary dishes and can be easily grown in various types of gardens.
When it comes to growing onions in Minnesota, it is important to select varieties that are adapted to short growing seasons and cooler temperatures. Look for onion varieties that are suitable for northern regions, such as Yellow Sweet Spanish, Redwing, or Walla Walla. These varieties have been specifically bred to thrive in similar climates.
Onions can be grown from seeds, sets (small bulbs), or transplants. Seeds require more time and care to grow, but they offer a wider selection of varieties. Sets and transplants provide a head start and are easier to work with, particularly for beginners.
Prepare your garden bed by removing any weeds and working in compost or well-rotted manure to improve soil fertility and drainage. Onions prefer well-draining soil with a slightly acidic pH level. Create furrows or shallow trenches for planting your onion sets or transplants.
Plant the sets or transplants about one inch deep and three to four inches apart within the furrows. If you are growing from seeds, follow the packet instructions for spacing and depth. Space the rows about 12 to 18 inches apart to allow for good air circulation and growth.
Onions require consistent moisture, especially during dry spells, to prevent the bulbs from becoming stressed or cracking. Water the plants regularly, aiming to keep the soil consistently moist but not waterlogged. Mulching around the base of the plants can help retain moisture and suppress weed growth.
Weed control is essential to ensure optimal onion growth and development. Remove any weeds that compete with the onions for nutrients, water, and sunlight. Be cautious when weeding to avoid damaging the onion bulbs or their shallow roots.
Onions are relatively low-maintenance when it comes to pests and diseases. However, common pests such as onion maggots or thrips can occasionally be problematic. Regularly inspect your plants and take appropriate measures, such as applying organic pest control methods, to manage any infestations.
Harvesting onions is an exciting moment in the gardening journey. Onions can be harvested once the tops start to fall over and turn yellow or brown. Gently loosen the soil around the bulbs and lift them from the ground. Allow the harvested onions to dry for a few weeks in a warm and well-ventilated area before storing them in a cool, dark place.
Onions can be used in a wide variety of dishes, adding depth and flavor to soups, stews, sautés, and more. They can also be enjoyed raw in salads or as a topping for sandwiches and burgers. Growing your own onions ensures a fresh supply of this versatile vegetable and allows you to savor their distinct taste in your favorite recipes.
Garlic
Garlic is a pungent and flavorful herb that thrives in the Minnesota climate, making it a wonderful addition to your permaculture garden. Known for its culinary and medicinal properties, garlic is a versatile and easy-to-grow herb that adds a distinct flavor to a wide range of dishes. By growing garlic in your garden, you can enjoy the rich, aromatic taste of homegrown cloves.
When it comes to growing garlic in Minnesota, the best time to plant cloves is in the fall, usually around mid to late October. Garlic needs a period of cold weather to develop into full-sized bulbs. Choose hardneck varieties such as Rocambole or Porcelain, as they are more suited for colder climates.
To plant garlic, prepare your garden bed by loosening the soil and adding compost or well-rotted manure to improve its fertility and drainage. Separate the garlic bulb into individual cloves, carefully making sure to keep the papery skin intact. Plant each clove with the pointed end facing up, about two inches deep and six inches apart, in rows that are spaced 12 to 18 inches apart.
Water the garlic immediately after planting, ensuring that the soil is moist but not waterlogged. Garlic requires consistent moisture during its growing season to develop plump bulbs. Keep the soil evenly moist, but reduce watering as the harvest date approaches to prevent excessive moisture that can lead to diseases or rot.
Garlic plants are relatively low-maintenance, but weed control is essential to allow the bulbs to develop properly. Remove any weeds that compete with the garlic for nutrients, water, and sunlight. Be cautious when weeding to avoid damaging the shallow roots of the garlic plants.
Garlic is generally resistant to pests and diseases, but keep an eye out for common garden pests such as aphids or garlic bulb mites. Inspect your plants regularly and take appropriate measures to manage any pest infestations. Using row covers can help protect young plants from pests and provide added warmth during colder months.
Harvesting garlic is an exciting event in your garden. Garlic is usually ready for harvest when the lower leaves have turned brown, usually in late spring or early summer. Carefully dig up the bulbs using a garden fork or trowel, being careful not to damage them. Allow the harvested garlic bulbs to dry in a warm and well-ventilated area for a few weeks before storing.
Once cured, store your garlic bulbs in a cool and dark place with good ventilation. Properly stored garlic can last for several months, providing you with a supply of flavorful cloves throughout the year.
Garlic is a versatile ingredient used in many culinary creations. It can be used in sauces, marinades, dressings, stir-fries, or roasted with vegetables. Its distinct flavor and aroma add depth and complexity to dishes, while its numerous health benefits make it a valuable addition to your permaculture garden in Minnesota.
Zucchini
Zucchini, also known as summer squash, is a versatile and prolific vegetable that thrives in the Minnesota climate. With its mild flavor and tender texture, zucchini is a popular choice for gardeners looking to add variety to their permaculture garden. Whether you enjoy it grilled, sautéed, baked, or even in bread, zucchini is a delightful addition to any culinary repertoire.
When it comes to growing zucchini in Minnesota, choose varieties that are well-suited for the region’s shorter growing season. Look for compact or bush varieties such as ‘Astia’ or ‘Raven’ that are ideal for smaller gardens or containers. These varieties tend to have a shorter maturation period, allowing you to enjoy fresh zucchini sooner.
To grow zucchini, prepare your garden bed by ensuring it has well-draining soil enriched with compost or well-rotted manure. Zucchini prefers a slightly acidic soil pH level. Space the plants about 2 to 3 feet apart to allow for good air circulation and growth.
Sow zucchini seeds directly into the garden once all danger of frost has passed and the soil temperature has reached around 60 degrees Fahrenheit. Plant the seeds about one inch deep and cover them with soil. Water the seeds immediately after planting and keep the soil consistently moist to aid germination.
Zucchini plants require regular moisture to encourage healthy growth and productivity. Water the plants deeply, ensuring the soil is evenly moist but not waterlogged. Mulching around the base of the plants can help retain moisture and suppress weed growth.
Weed control is essential to ensure optimal growth and development of zucchini plants. Keep the garden bed free of weeds by regularly removing them by hand or using shallow cultivation tools. Be cautious when weeding to avoid damaging the shallow roots of the zucchini plants.
Zucchini plants are generally low-maintenance and relatively resistant to pests and diseases. However, keep an eye out for common pests such as cucumber beetles or squash bugs. Monitor your plants regularly and take appropriate measures, such as handpicking pests or using organic pest control methods if necessary.
Harvesting zucchini is an exciting part of the gardening process. Zucchini can be harvested when it reaches a length of about 6 to 10 inches and has a firm texture. Use a sharp knife or scissors to cut the zucchini from the plant, being careful not to damage the vine or nearby foliage.
Zucchini can be used in a variety of dishes, adding a mild and slightly sweet flavor. It can be sautéed with other vegetables, grilled as a side dish, baked into bread or muffins, or spiralized into noodles. The versatility of zucchini makes it a favorite among home cooks and a delightful addition to your permaculture garden.
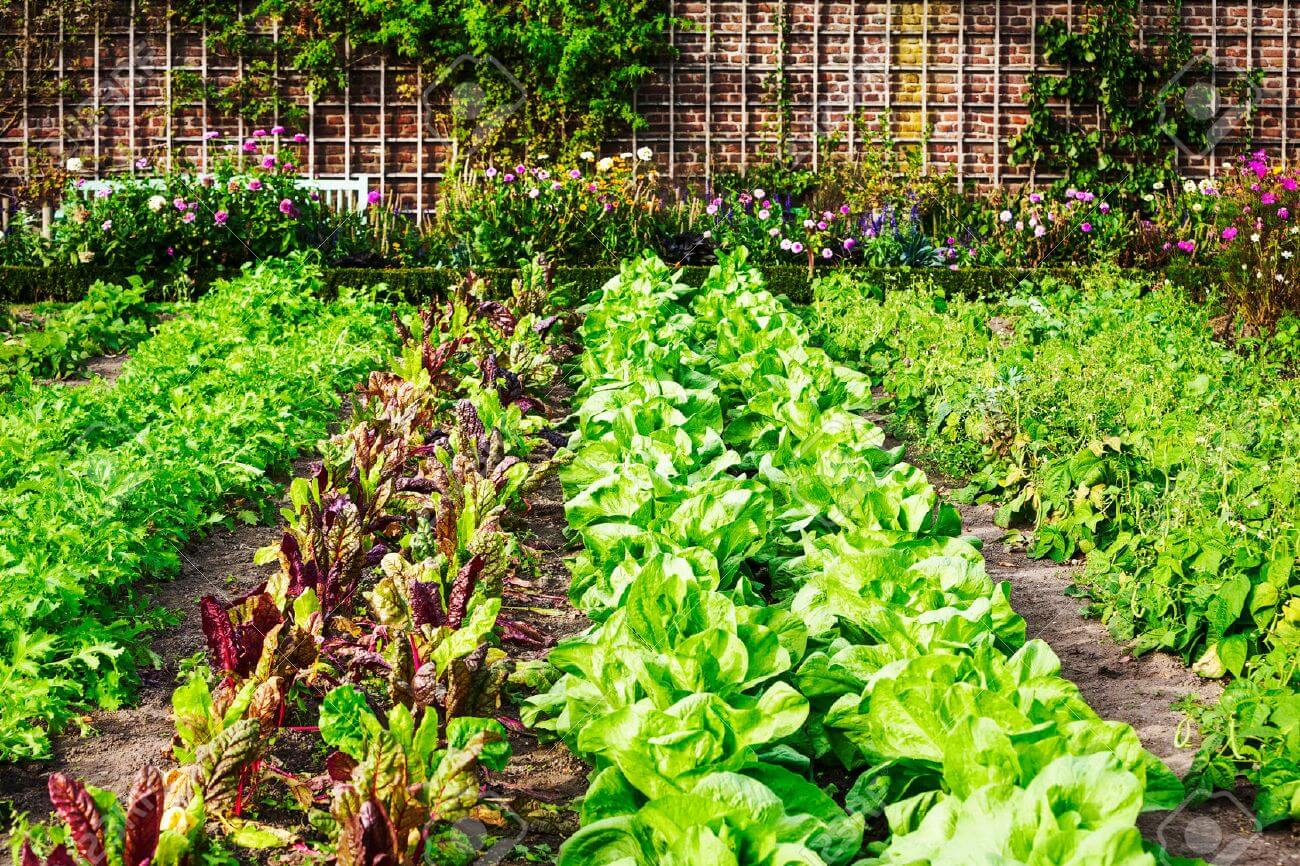
Lettuce
Lettuce is a cool-season crop that thrives in the Minnesota climate, making it a perfect addition to your permaculture garden. Its crisp texture and refreshing taste make lettuce a versatile and essential ingredient in salads, sandwiches, and wraps. Whether you prefer the vibrant colors of leaf lettuce or the tight heads of romaine lettuce, growing your own lettuce ensures a fresh and abundant supply right at your fingertips.
When it comes to growing lettuce in Minnesota, timing is crucial. Lettuce prefers cooler temperatures and can tolerate light frosts. It is best to sow lettuce seeds in early spring as soon as the soil can be worked, or in late summer for a fall harvest.
Prepare your garden bed by loosening the soil and removing any weeds or debris. Lettuce prefers well-draining soil with plenty of organic matter. Incorporate compost or well-rotted manure into the soil before planting to enhance fertility and water retention.
Lettuce seeds are tiny and should be sown thinly in rows or broadcast over a prepared bed. Cover the seeds lightly with soil or compost and water gently to ensure good seed-to-soil contact. Keep the soil moist throughout the germination period.
Thin the lettuce seedlings to a spacing of about 6 to 12 inches, depending on the lettuce variety. This provides enough room for the plants to develop leaves without overcrowding. Thinning helps prevent competition for light, nutrients, and water.
Lettuce requires consistent moisture for optimal growth and to prevent the leaves from becoming wilted or bitter. Water regularly, aiming to keep the soil evenly moist but not waterlogged. Applying mulch around the base of the plants can help retain moisture and suppress weed growth.
Weed control is important to allow the lettuce plants to thrive without competition. Remove any weeds that compete for nutrients, water, and sunlight. Be careful when weeding to avoid disturbing the shallow roots of the lettuce plants.
Lettuce is relatively low maintenance and generally not prone to pests and diseases. However, keep an eye out for slugs, snails, or aphids. Monitor your plants regularly and take appropriate measures to manage any pest infestations using organic methods.
Harvesting lettuce can be done when the leaves are at the desired size and shape. Depending on the variety, you can harvest individual leaves or cut the entire head at the base. Harvesting outer leaves encourages continuous growth, extending your harvest period.
Lettuce is best enjoyed fresh. Rinse the leaves thoroughly in cool water before using them in salads or other dishes. The crisp texture and vibrant flavor of homegrown lettuce will elevate your culinary creations.
With its easy cultivation and versatility, lettuce is a must-have in your permaculture garden. Growing your own lettuce ensures a fresh and constant supply of this nutritious and delicious leafy green, enriching both your garden and your meals.
Conclusion
Congratulations! You now have a comprehensive understanding of growing a variety of permaculture vegetables in the unique climate of Minnesota. By adopting eco-friendly gardening practices and selecting suitable vegetables, you can create a thriving and sustainable garden that provides you with an abundant harvest.
Remember to consider the specific requirements of each vegetable, such as planting times, soil conditions, and spacing. Incorporate permaculture principles into your gardening practices, such as companion planting, water conservation, and organic pest control, to create a balanced and resilient ecosystem in your garden.
From potatoes to zucchini, each vegetable brings its own unique flavors and nutritional benefits to your table. By growing your own permaculture vegetables, you can enjoy the freshness and flavor that comes from harvesting them at their peak. There is nothing quite like the satisfaction of biting into a homegrown carrot or enjoying a salad with lettuce picked just moments ago.
Remember to experiment with different varieties, companion plantings, and crop rotations to optimize the productivity and sustainability of your garden. Diversifying your plantings will not only enhance the health of your garden but also attract beneficial insects and promote natural pest control.
As you embark on your journey to eco-friendly gardening, continue to learn and refine your techniques. Take note of what works well in your garden and be adaptable to the ever-changing conditions. Gardening is a continuous learning process that allows us to deepen our connection with the natural world and create a positive impact on the environment.
Now it’s time to roll up your sleeves and start planting your permaculture garden in Minnesota. Embrace the joy of bringing life to your garden, nurturing your plants, and reaping the rewards of your hard work. Enjoy the process and the many fresh, delicious, and nutritious vegetables that will grace your table for years to come.
