Home>Garden Design>Landscape Design>How Much Rocks Do I Need For Landscaping
Landscape Design
How Much Rocks Do I Need For Landscaping
Modified: January 22, 2024
Looking for landscape design tips? Find out how much rocks you need for your landscaping project and create the perfect outdoor space.
(Many of the links in this article redirect to a specific reviewed product. Your purchase of these products through affiliate links helps to generate commission for Chicagolandgardening.com, at no extra cost. Learn more)
Table of Contents
Introduction
Welcome to the world of landscape design, where creativity meets nature to transform outdoor spaces into stunning works of art. Whether you’re revamping your backyard, creating an inviting front entrance, or designing a beautiful garden, the right use of rocks can elevate your landscaping to a whole new level.
Rocks play a crucial role in landscape design, not only for their aesthetic appeal but also for their functional benefits. They can be used to define borders, create pathways, build retaining walls, or add texture and depth to garden beds. However, before you embark on your landscaping project, it’s important to determine how much rocks you’ll need to bring your vision to life.
Calculating the amount of rocks needed can be a daunting task, but fear not! In this article, we’ll guide you through the process of estimating the quantity of rocks required for your landscaping project. By considering factors such as the area to be covered, the desired thickness of rocks, and the type of rocks you’re using, you’ll be able to make an accurate assessment.
Not only will we explore the practical aspects of determining the amount of rocks needed, but we’ll also delve into the different types of rocks commonly used in landscaping. From timeless and elegant natural stones to vibrant and colorful gravel, we’ll help you select the perfect rocks that reflect your personal style and complement your overall design.
Once you’ve determined the quantity and type of rocks, you’ll need to consider where to purchase them. We’ll discuss the various options available, whether it’s visiting local stone yards, sourcing from online suppliers, or utilizing the services of a professional landscaping company.
Finally, we’ll touch on the logistics of rock delivery and installation. This step can be challenging, especially when dealing with heavy and bulky materials. We’ll provide some tips and considerations to ensure a smooth and efficient process, allowing you to marvel at your newly transformed landscape in no time.
So, let’s roll up our sleeves, dive into the world of landscape design, and explore how to determine the perfect amount of rocks needed for your next project.
Factors to Consider
Before calculating the amount of rocks needed for your landscaping project, there are several factors you need to take into consideration. These factors will help you make accurate estimations and ensure a successful and cost-effective outcome.
1. Area to be Covered: The first and most crucial factor is determining the total area that requires rock coverage. Measure the length and width of the space and multiply the two measurements to calculate the square footage. Keep in mind any irregular or curved areas that may require additional calculations.
2. Desired Thickness of Rocks: Ponder over the thickness of rocks you want to lay in your landscaping. Thinner rocks will require more quantity to cover the same area compared to thicker rocks. Decide on a suitable thickness based on your aesthetic preferences and functional requirements.
3. Type of Rocks: Different types of rocks have varying sizes and densities, which can impact the amount needed. Consider whether you plan to use larger boulders, gravel, or small pebbles in your design. Each type will require different calculations to determine the quantity accurately.
4. Sloping Terrain or Elevation Changes: If your landscape has slopes or elevation changes, it’s important to factor them in. Depending on the steepness and design of the area, additional rocks may be needed for stability and erosion control.
5. Functionality Requirements: Determine the purpose of the rocks in your landscaping. Are you using them for decorative purposes, to create pathways, or for structural support? Understanding the intended function will help you determine the quantity needed for each specific area.
6. Local Climate and Weather Conditions: Consider the local climate and weather patterns when calculating the quantity of rocks needed. If you live in an area with heavy rainfall, for example, you may need more rocks to prevent erosion or create effective drainage systems.
By taking these factors into account, you can make informed decisions and estimate the right amount of rocks for your landscaping project. Now that we have a better understanding of the factors at play, let’s move on to the next step: calculating the exact quantity of rocks required for your specific design.
Calculating the Area
Accurately calculating the area to be covered with rocks is essential for determining the quantity needed for your landscaping project. By following a few simple steps, you can ensure precise measurements and avoid any unnecessary expenses or shortages.
Step 1: Measure the Length and Width: Using a tape measure or measuring wheel, measure the length and width of the area where you plan to lay the rocks. If the area is irregular in shape, break it down into smaller sections and measure each one separately.
Step 2: Convert Measurements: Convert the measurements to the same unit of measure, such as feet or meters. This step is important to ensure consistency in your calculations.
Step 3: Multiply Length and Width: Multiply the length and width measurements together to calculate the total square footage of the area. For example, if you have a length of 20 feet and a width of 10 feet, the total square footage would be 200 square feet (20 x 10 = 200).
Step 4: Consider Irregular Areas: If you have irregular areas, such as curved beds or triangular sections, break them down into smaller shapes. Calculate the square footage for each shape separately and add them together to get the total square footage for the entire area.
Step 5: Account for Overlap: Account for any overlapping areas or spaces where rocks won’t be laid, such as walkways or other landscaping features. Subtract the square footage of these areas from the total square footage calculated in the previous steps.
By following these steps, you can accurately calculate the total area to be covered with rocks. This information will serve as the foundation for estimating the quantity of rocks you’ll need for your landscaping project.
Now that we have the area calculated, let’s move on to the next step: determining the desired thickness of rocks for your design.
Determining the Thickness of Rocks
When it comes to landscaping with rocks, the thickness of the rocks plays a significant role in determining the quantity needed. The thickness you choose will depend on several factors, including your design preferences and the functional requirements of the rocks.
Aesthetic Considerations: The desired look and feel of your landscape design will impact the thickness of rocks you choose. For a more natural and organic appearance, you may opt for varying thicknesses to create texture and depth. Alternatively, if you prefer a sleek and contemporary look, you may choose a consistent thickness throughout the entire project.
Functional Requirements: The function of the rocks in your design will also influence the thickness. If you’re using rocks for pathways or stepping stones, a thinner thickness may be appropriate to ensure a comfortable walking surface. However, if the rocks are intended for structural purposes, such as retaining walls or erosion control, a thicker thickness may be necessary for stability and durability.
Practical Considerations: The practical aspects of sourcing and handling the rocks should also be taken into account. Thicker rocks may be heavier and more challenging to maneuver, while thinner rocks may be easier to work with. Consider your ability to handle and transport the rocks when deciding on the thickness.
Once you’ve determined the desired thickness, you can apply it to your calculated area to estimate the volume of rocks needed. Simply multiply the thickness by the square footage to obtain the volume in cubic units. If your measurements are in feet, the volume will be in cubic feet. If your measurements are in meters, the volume will be in cubic meters.
Keep in mind that it’s always a good idea to add a little extra to account for any discrepancies, irregularities, or future adjustments. It’s better to have a bit more than necessary than to run short during your project.
Now that we have a clearer understanding of the thickness and volume considerations, let’s explore the different types of rocks commonly used in landscaping.
Types of Rocks for Landscaping
When it comes to landscaping, the type of rocks you choose can make a significant impact on the overall aesthetic and ambiance of your outdoor space. There is a wide variety of rocks available, each with its own unique color, texture, and characteristics. Let’s explore some popular options:
- Natural Stones: Natural stones, such as granite, limestone, or sandstone, are timeless choices for landscaping. They come in various shapes and sizes, providing a natural and authentic look. These rocks offer durability and can withstand the test of time, making them ideal for pathways, retaining walls, or garden borders.
- Gravel: Gravel is a versatile option that comes in different sizes and colors. It can be used in many ways, including as a ground cover for garden beds, driveways, or pathways. Smaller gravel creates a more uniform and compact look, while larger gravel adds texture and visual interest. Popular types of gravel include pea gravel, river rock, and crushed stone.
- Pebbles: Pebbles are small, smooth stones that add a decorative touch to your landscape. They come in various colors and sizes, providing a vibrant and eye-catching appearance. Pebbles can be used for creating unique patterns in garden beds, filling up gaps in pathways, or lining water features like ponds or fountains.
- Cobblestones: Cobblestones are rounded stones that offer a rustic and charming appeal. They are commonly used for creating traditional-style pathways or driveways, adding character and elegance to your landscape design. Cobblestones can also be used to build low garden walls or create accents in specific areas.
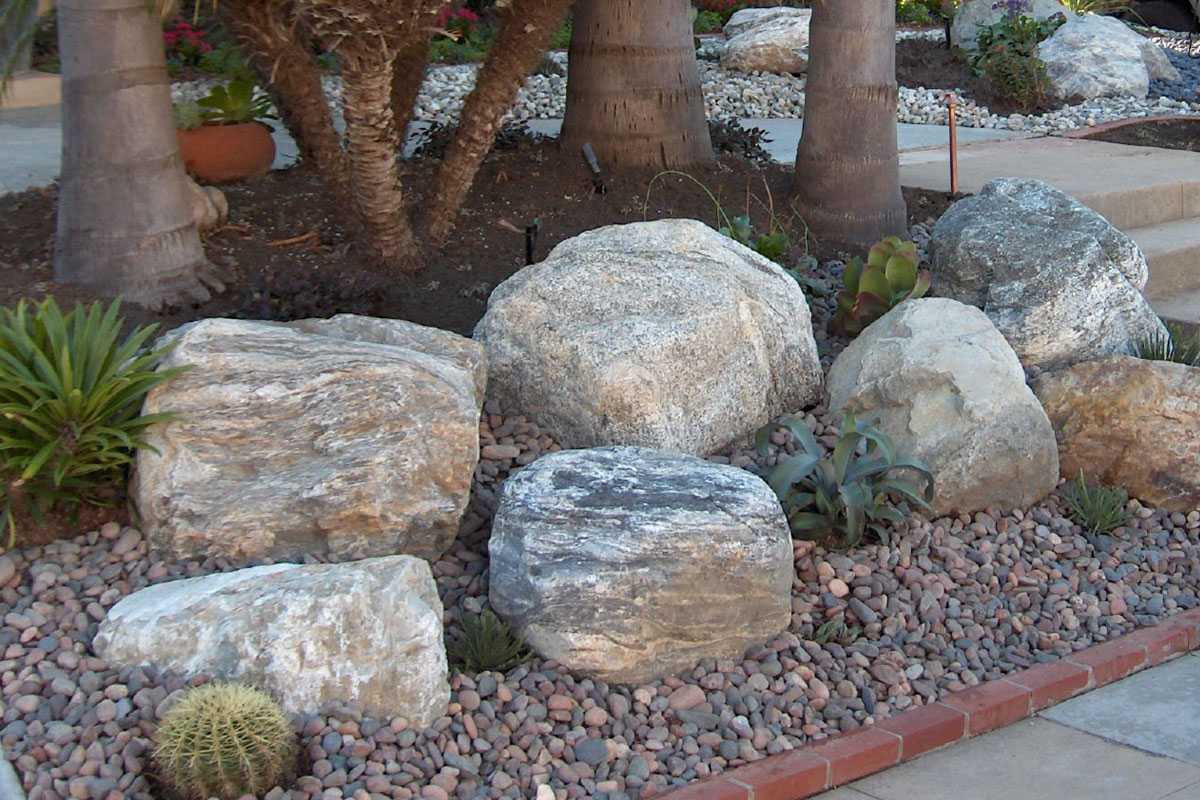
- Boulders: Boulders are large rocks that make a bold statement in your landscape. They can be used as focal points or as natural elements in garden designs. Boulders come in various shapes and colors, and their size and weight can provide stability and structural support in landscaping projects.
When selecting the right type of rocks, consider the overall aesthetic you want to achieve, the functionality you need, and how the rocks will complement the surrounding elements of your landscape. Mixing and matching different types and sizes of rocks can create visual interest and elevate the overall design.
Now that we’ve explored the different types of rocks available for landscaping, let’s move on to the next step: estimating the amount of rocks needed for your project.
Estimating the Amount of Rocks Needed
Estimating the amount of rocks needed for your landscaping project is a crucial step in ensuring that you purchase the right quantity and avoid any unexpected shortages or excess. While it may seem challenging, following a systematic approach can help you make accurate calculations.
1. Convert Measurements: Make sure all measurements are in the same unit of measure, such as feet or meters, for consistency. If necessary, convert measurements to the desired unit before proceeding with calculations.
2. Calculate Volume: Multiply the square footage of the area by the desired thickness of the rocks. This will give you the volume required in cubic units (i.e., cubic feet or cubic meters).
3. Adjust for Density: Different types of rocks have varying densities, which can affect the volume-to-weight ratio. Consult with your supplier or research the average weight per cubic unit for the specific type of rocks you’re using. Multiply the volume by the weight per cubic unit to estimate the total weight of rocks needed.
4. Account for Irregular Shapes: If your landscape design includes irregularly shaped areas, calculate the volume separately for each shape and add them together to get the total volume.
5. Consider Extra Coverage: It’s always advisable to factor in a little extra coverage to account for any discrepancies, irregularities, or future adjustments. A general rule of thumb is to add around 10% to 20% to your calculated quantity. This additional amount will provide a cushion and minimize the risk of running out of rocks during the project.
Remember, these estimations are just a starting point and may vary based on the specific characteristics of your landscape and design preferences. It’s always a good idea to consult with a landscaping professional or supplier who can provide expert guidance and assist you in making accurate calculations based on your unique project requirements.
Now that we have estimated the amount of rocks needed, let’s explore the next step: purchasing the rocks for your landscaping project.
Purchasing Rocks
Now that you have determined the amount of rocks needed for your landscaping project, it’s time to explore your options for purchasing them. There are several avenues you can take to acquire the rocks that fit your design and budget requirements.
Local Stone Yards: Visiting local stone yards or garden centers can provide you with a hands-on experience to see and feel the different types of rocks available. You can talk to knowledgeable staff who can help you select the right rocks for your project and provide guidance on quantities and pricing.
Online Suppliers: The internet offers a wide range of online suppliers who specialize in landscaping rocks. You can browse through their catalogs, view images, read descriptions, and compare prices. It’s important to read reviews, check the credibility of the supplier, and inquire about shipping options and costs before making a purchase.
Landscaping Companies: If you’re working with a professional landscaping company for your project, they may have relationships with rock suppliers. They can handle the procurement for you, ensuring that the right type and quantity of rocks are delivered to your site. This option can save you time and effort while leveraging their expertise in sourcing quality materials.
When making your purchase, consider factors such as quality, durability, and cost. Opt for rocks that are sourced sustainably and are suitable for the specific purpose and climate of your landscape. Some suppliers may offer bulk discounts, so be sure to inquire about pricing for larger quantities.
Additionally, ask about any warranties or guarantees provided by the supplier, especially if you’re investing in high-end or specialized rocks that require long-term durability.
Once you have made your purchase, it’s time to plan for the delivery and installation of the rocks. Let’s explore this final step in the landscaping process.
Delivery and Installation
After purchasing the rocks for your landscaping project, you’ll need to consider the logistics of delivery and installation. This step is crucial to ensure the smooth and efficient execution of your design plan. Here are some important factors to keep in mind:
Delivery Restrictions: Before placing your order, check for any delivery restrictions in your area. Ensure that the supplier can access your property and deliver the rocks to the desired location. Communicate any specific requirements or challenges, such as narrow driveways or limited access points, to the supplier.
Timing: Coordinate the delivery of the rocks with the progress of your project. Ensure that you have completed any necessary groundwork or preparation before the rocks arrive. This will minimize the storage time of the rocks and reduce any potential damage or inconvenience.
Unloading and Placement: Determine where you would like the rocks to be unloaded on your property. Provide clear instructions to the delivery personnel to ensure that the rocks are placed in the desired location. Consider the weight and size of the rocks and ensure there is adequate manpower and equipment to handle the unloading process safely and efficiently.
Installation Techniques: Depending on the purpose of the rocks in your design, there may be specific installation techniques to follow. For example, if you’re laying gravel or pebbles for a pathway, you may need to prepare the base with a landscaping fabric or gravel stabilizer. Research and follow recommended installation guidelines to ensure long-lasting and effective results.
Maintenance and Care: Proper maintenance and care are essential to preserve the beauty and functionality of your rock landscaping. This may include regular cleaning, weed control, and addressing any issues related to erosion or settling. Consult with your landscaping professional or research best practices for maintaining rocks in your specific design.
Remember, if you feel overwhelmed or unsure about handling the delivery and installation process, it’s always a good idea to seek the assistance of professional landscapers who have experience in working with rocks. They can ensure a seamless and professional installation, giving you peace of mind and a beautiful finished result.
With the delivery and installation complete, step back and admire your newly transformed landscape, enhanced by the strategic placement of rocks that add beauty and functionality. Your well-planned and executed landscaping project is sure to bring you enjoyment for years to come.
Conclusion
Designing and implementing a landscape that incorporates rocks can truly transform your outdoor space into a beautiful sanctuary. By considering factors such as the area to be covered, the desired thickness of rocks, and the type of rocks that best suit your design aesthetic, you can accurately estimate the quantity needed and make informed purchasing decisions. Whether you choose natural stones, gravel, pebbles, cobblestones, or boulders, each type of rock brings its own unique charm and functionality to your landscape design.
Calculating the area, determining the thickness of rocks, and estimating the required quantity are crucial steps in the planning process. By following these steps, you can avoid unnecessary expenses and ensure that you have enough rocks to complete your project successfully.
When purchasing rocks, explore local stone yards, online suppliers, or consult with professional landscaping companies to find the best options for quality, price, and convenience. Additionally, consider delivery logistics and plan for the smooth unloading and installation of the rocks, keeping in mind any specific requirements or techniques needed for proper placement.
Lastly, remember the importance of maintenance and care to preserve the beauty and functionality of your rock landscaping. Regular upkeep will ensure that your design remains vibrant and visually appealing for years to come.
Now that you’re armed with the knowledge of how to calculate, select, purchase, and install rocks for your landscaping project, it’s time to let your creativity flow. Embrace the natural beauty of rocks and let them be the foundation of your stunning outdoor oasis.