Home>Garden Design>Landscape Design>How To Do River Rock Landscaping
Landscape Design
How To Do River Rock Landscaping
Modified: January 22, 2024
Learn how to do river rock landscaping with our expert landscape design tips and tricks. Transform your outdoor space into a beautiful oasis with our step-by-step instructions and creative ideas.
(Many of the links in this article redirect to a specific reviewed product. Your purchase of these products through affiliate links helps to generate commission for Chicagolandgardening.com, at no extra cost. Learn more)
Table of Contents
Introduction
Welcome to the world of river rock landscaping! If you’re looking to transform your outdoor space into a beautiful and low-maintenance oasis, river rock can be the perfect solution. With its natural beauty, versatility, and durability, river rock has become a popular choice for landscape design.
River rock, also known as river pebbles, is a type of natural stone that is typically smooth and rounded. It is often found in riverbeds and can range in size from small pebbles to larger rocks. One of the key advantages of using river rock in landscaping is its ability to withstand harsh weather conditions and erosion, making it a long-lasting option for outdoor spaces.
Not only does river rock add visual appeal to your landscape, but it also offers several practical benefits. It acts as a natural weed barrier, reducing the need for constant weeding and maintenance. Additionally, river rock is excellent for drainage, preventing water from pooling in your yard and causing damage to your plants and structures.
In this article, we will guide you through the process of creating a stunning river rock landscape. We’ll cover everything from choosing the right river rocks to incorporating plants, pathways, and other features. Whether you’re a seasoned gardener or a beginner, we’re here to provide you with the knowledge and inspiration you need to transform your outdoor space.
So grab your gardening gloves and let’s dive into the world of river rock landscaping!
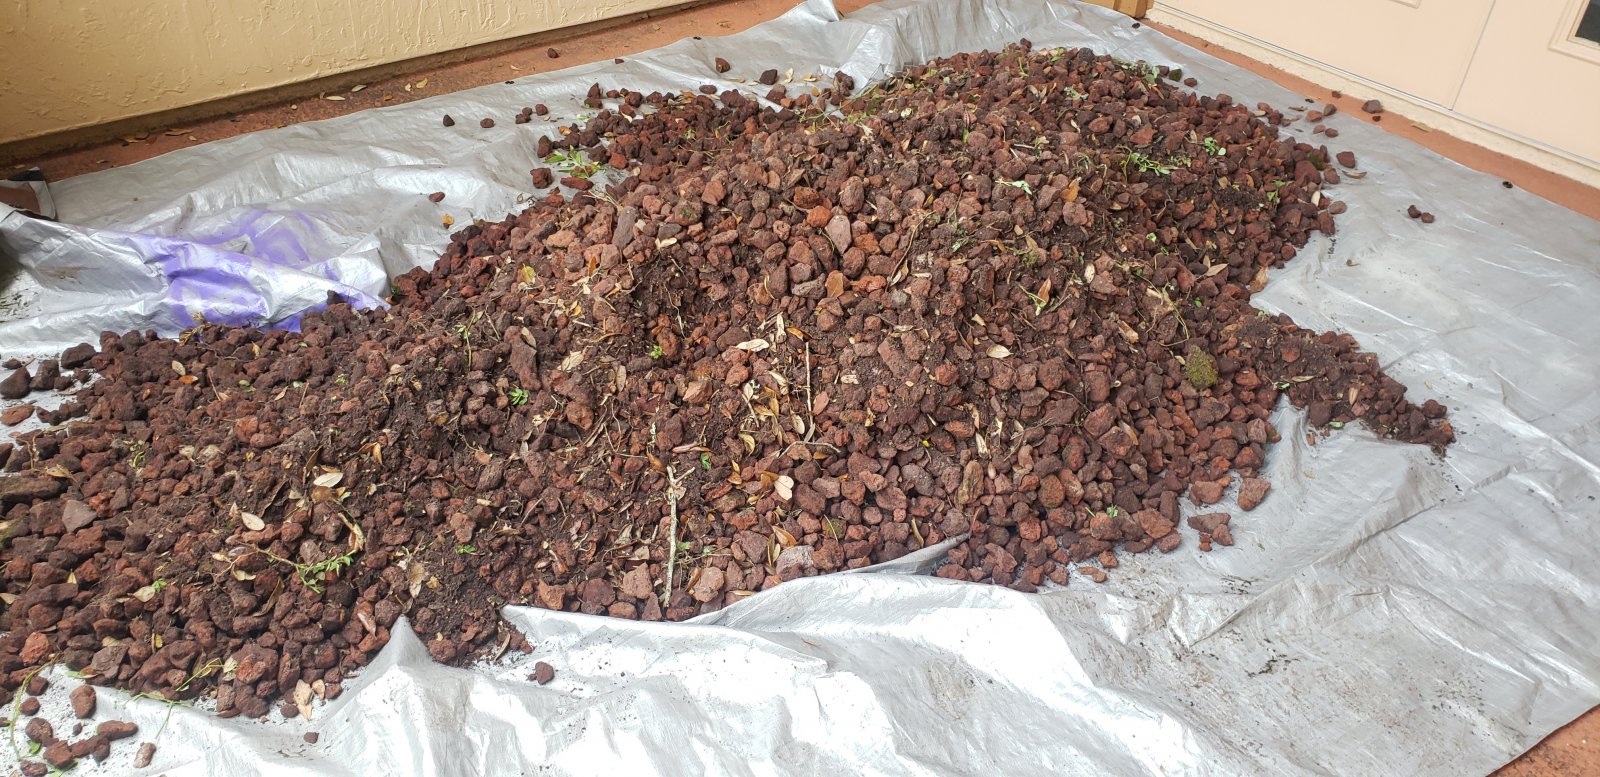
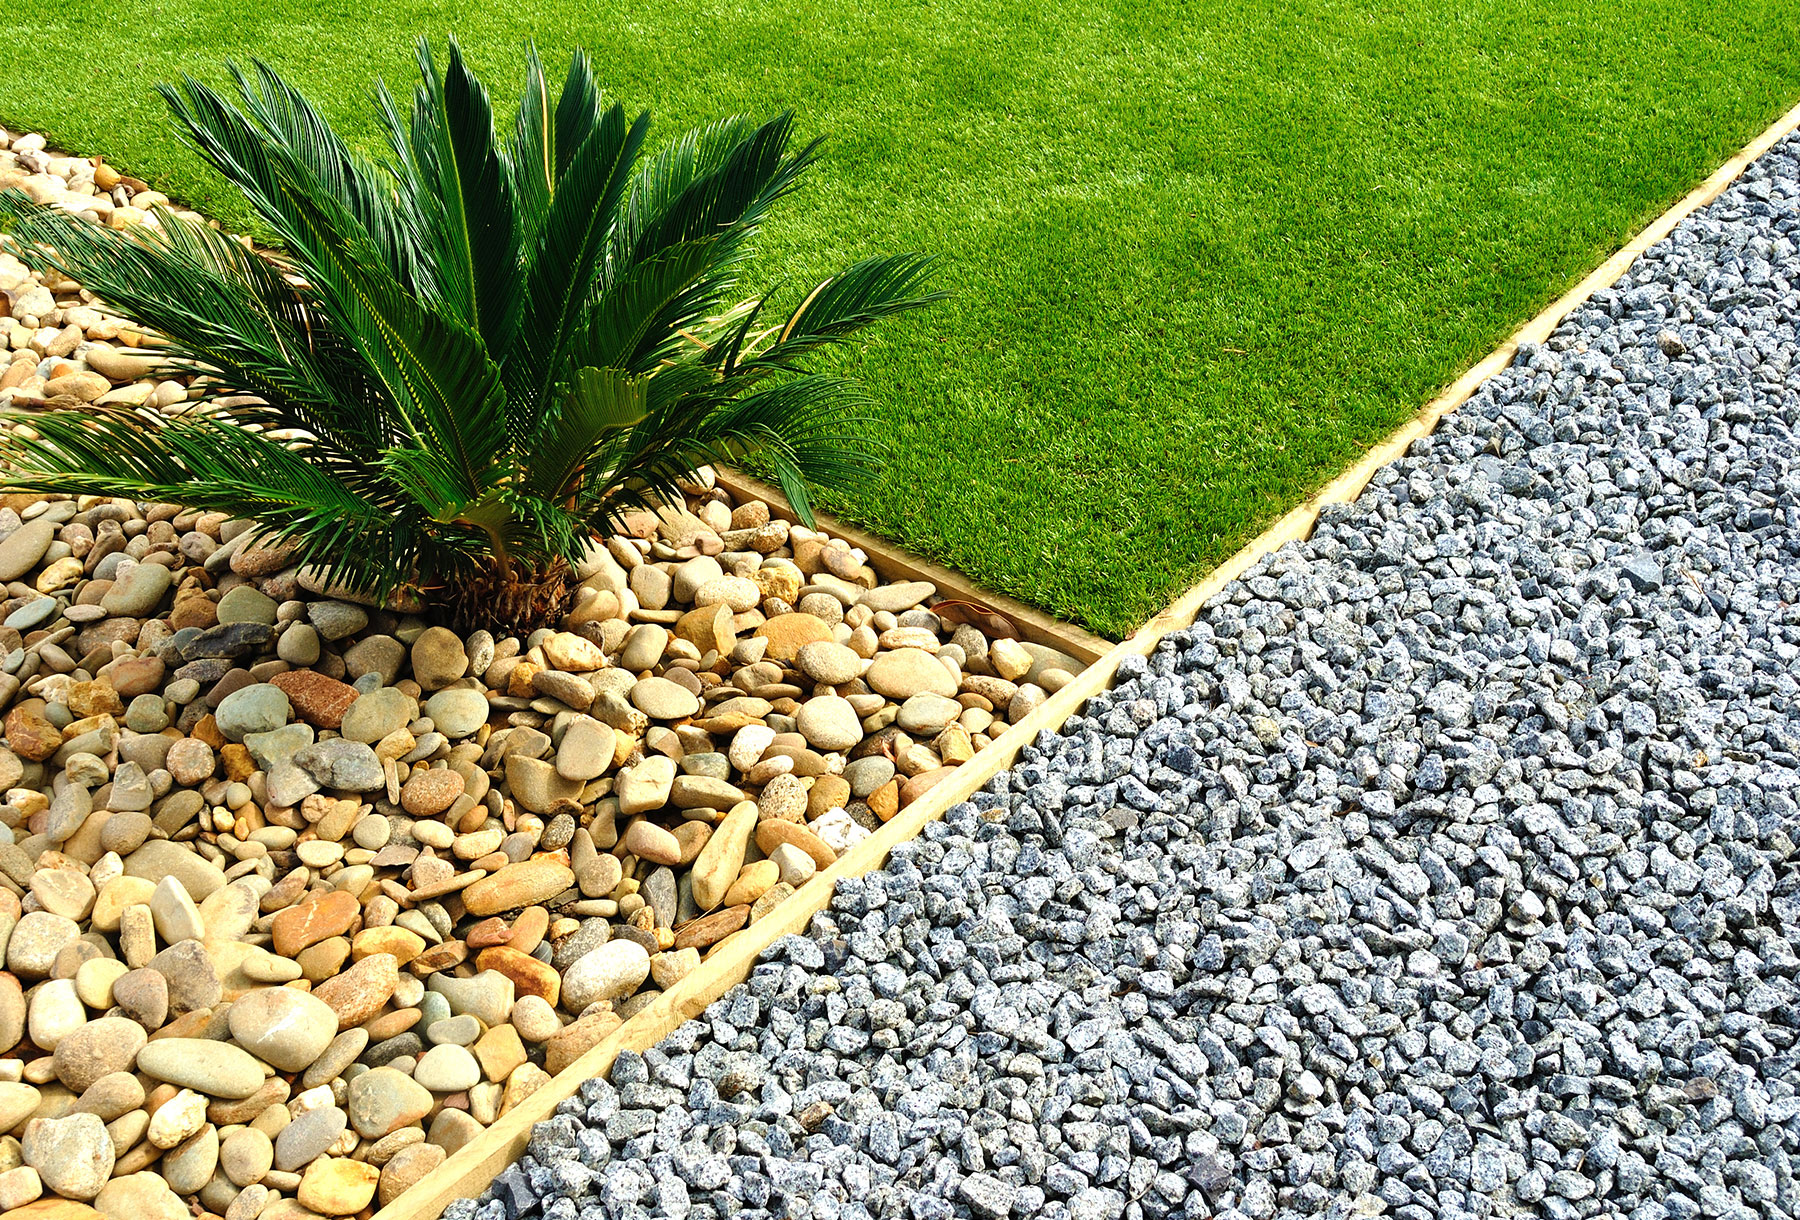
Choosing the Right River Rocks
When it comes to river rock landscaping, selecting the right type and size of river rocks is crucial. The choice you make will greatly impact the overall aesthetic of your landscape. Here are some factors to consider when choosing your river rocks:
- Size: River rocks come in a variety of sizes, ranging from small pebbles to larger stones. The size you choose will depend on the scale of your landscape and the specific design you have in mind. Smaller river rocks work well for pathways and ground cover, while larger rocks can be used as focal points or in dry creek beds.
- Color: River rocks come in an array of colors, including shades of gray, brown, tan, and even red. Consider the color palette of your existing landscape and the style you want to achieve. Lighter-colored rocks can create a bright and airy feel, while darker tones can add depth and drama.
- Texture: River rocks can have varying textures, from smooth and polished to rough and jagged. Think about the overall look and feel you want to achieve in your landscape. Smooth rocks can lend a more contemporary and streamlined appearance, while rougher rocks can create a rustic and natural aesthetic.
- Compatibility: Consider the existing elements in your landscape and choose river rocks that complement them. Take into account the color and style of your house, existing plants, and other structures. The goal is to create a cohesive and harmonious design that blends seamlessly with its surroundings.
- Quantity: Determine how much river rock you will need for your landscape. Measure the area you plan to cover and calculate the volume of rocks required. It’s better to have slightly more than you need, as it’s easier to remove excess rocks than to add more later.
Once you have a clear vision of the type of river rocks you want, visit a local landscaping supplier or stone yard to see the rocks in person. This will allow you to assess their quality, color variations, and size options. Don’t be afraid to ask for assistance from knowledgeable staff who can help you make the right choice for your specific project.
Remember, selecting the right river rocks is the foundation of your landscape design. Take your time, explore different options, and choose rocks that not only enhance the appearance of your outdoor space but also fit your personal style and preferences.
Planning Your River Rock Landscape
Before you start transforming your outdoor space with river rock, it’s essential to have a well-thought-out plan in place. Proper planning will ensure that your landscape design meets your goals and maximizes the potential of your yard. Here are some steps to consider when planning your river rock landscape:
- Assess Your Space: Take a good look at your yard and evaluate the available space. Consider the size, shape, and topography of your landscape. Look for any existing features that you want to highlight or work around, such as trees, focal points, or structures.
- Define Your Goals: Determine what you want to achieve with your river rock landscaping. Are you looking to create a low-maintenance garden, a decorative pathway, or a visually appealing dry creek bed? Identifying your goals will help inform the design choices you make throughout the process.
- Create a Design Blueprint: Sketch out a rough blueprint of your desired landscape design. This can be a simple hand-drawn plan or a digital representation using landscaping software. Consider the placement of river rocks, plants, pathways, and other elements to achieve the desired overall look.
- Consider the Practicalities: Evaluate the practical aspects of your design, such as accessibility, drainage, and maintenance. Ensure that pathways and stepping stones are placed in convenient locations, and incorporate proper drainage systems to prevent water accumulation. Also, consider the long-term maintenance requirements of the chosen plants and rocks.
- Seek Inspiration: Gather inspiration from magazines, books, online sources, or even neighboring landscapes. Look for designs and styles that resonate with you and adapt them to suit your own unique space and preferences.
- Set a Budget: Determine how much you’re willing to invest in your river rock landscape. This will help you make informed decisions about the scale of your project, the choice of materials, and any additional features or accessories you may want to include.
Remember, planning is an essential step in any successful landscaping project. Taking the time to plan your river rock landscape will save you time, effort, and potential headaches down the line. It will also ensure that the final result is a cohesive and visually appealing outdoor space that enhances the beauty of your home.
Preparing the Area
Before you begin installing river rocks in your landscape, it’s crucial to properly prepare the area. This will ensure a stable and long-lasting foundation for your river rock design. Here are the key steps to follow when preparing the area:
- Clean the Area: Start by clearing the area of any debris, rocks, weeds, or vegetation. Remove any existing plants or grass that you plan to replace with river rocks. This will provide a clean canvas for your new landscape design.
- Grade the Area: Evaluate the slope and levelness of the ground in the designated area. If necessary, use a shovel or rake to alter the grade and create a smooth and even surface. This will help with proper drainage and prevent water pooling in certain areas.
- Remove Roots and Weeds: Take the time to dig out any large roots or underground obstacles that may interfere with the installation process. Additionally, thoroughly eliminate any weeds or unwanted vegetation to prevent their growth underneath the river rocks.
- Amend the Soil: Assess the quality of the soil in the area where you’ll be placing the river rocks. If the soil is compacted or lacks nutrients, consider incorporating organic matter or compost to improve its texture and fertility. This will create a healthier environment for any plants or flowers you plan on incorporating into your design.
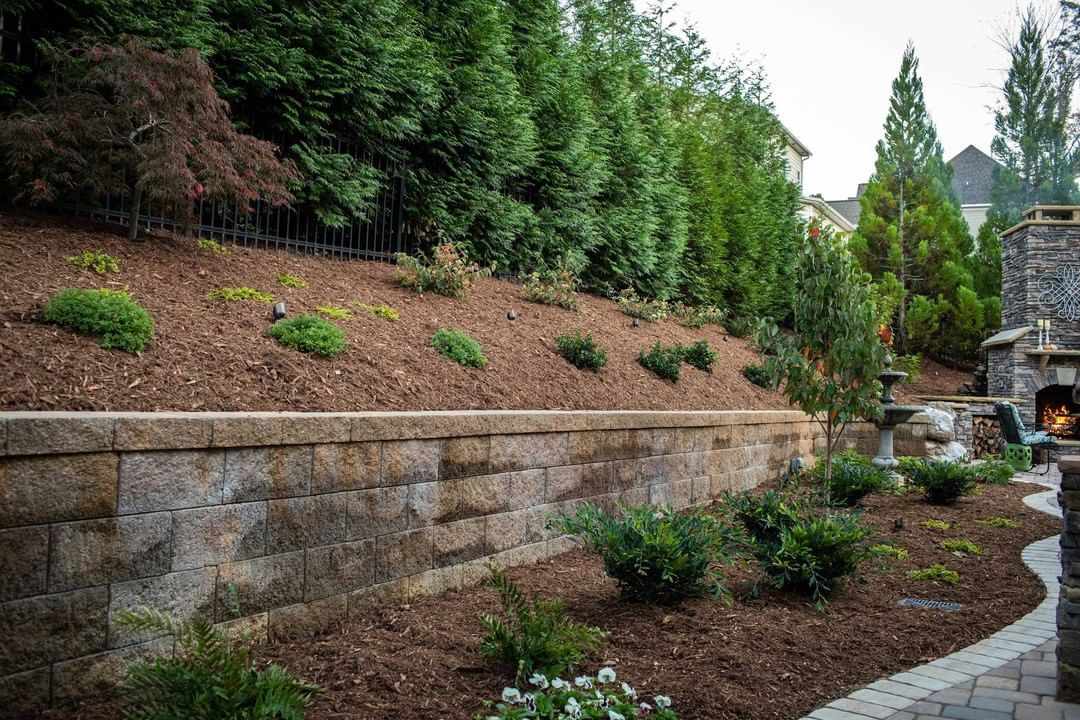
- Install Edging: Consider installing edging or borders around the perimeter of the designated area. This will help contain the river rocks and prevent them from spilling onto adjacent surfaces, such as pathways or flower beds. Edging materials can range from metal and plastic to natural stone or brick, depending on your preferred style.
By properly preparing the area, you lay the groundwork for a successful river rock landscape. Paying attention to these details will result in a more aesthetically pleasing design and ensure the longevity of your project. So, take your time in this phase and make the necessary preparations before moving on to the next steps of installation.
Installing Weed Barrier
One of the major advantages of using river rocks in your landscape is their ability to act as a natural weed barrier. However, to enhance this weed-repelling effect and minimize maintenance in the long run, it’s recommended to install a weed barrier before placing the river rocks. Here’s how to do it:
- Clear the Area: Ensure that the designated area is free from any debris, plants, or weeds. This will provide a clean surface for the weed barrier installation.
- Measure and Cut: Measure the dimensions of the area, allowing for some overlap around the edges. Cut the weed barrier fabric to fit the space, using sharp scissors or a utility knife.
- Lay the Barrier: Unroll the weed barrier fabric over the prepared area. Smooth it out to remove any wrinkles or folds. Ensure that it covers the entire surface and extends slightly beyond the perimeter of the desired river rock area.
- Secure the Barrier: Use landscape fabric pins or staples to secure the weed barrier in place. Space the pins or staples at regular intervals along the edges and throughout the fabric to prevent shifting or movement.
- Overlap and Seam: If necessary, overlap multiple pieces of weed barrier fabric by several inches to ensure complete coverage. Secure the overlapping sections together using landscape fabric pins or staples.
- Cut Openings: Use a utility knife or scissors to cut out openings in the weed barrier for any existing plants, trees, or other features that you want to keep in the designated area. Trim the fabric around these openings to fit snugly.
Installing a weed barrier beneath your river rocks will help prevent weed growth, which could otherwise compete with your plants and create unwanted maintenance. It acts as a protective layer, allowing water to drain through while restricting weed growth from beneath. This not only keeps your landscape looking tidy but also reduces the time and effort spent on weed control.
Remember, the effectiveness of the weed barrier depends on its proper installation and maintenance. Inspect the area periodically and remove any weeds or debris that may accumulate on the surface of the fabric. By taking these preventative measures, you’ll ensure the long-term success of your river rock landscape.
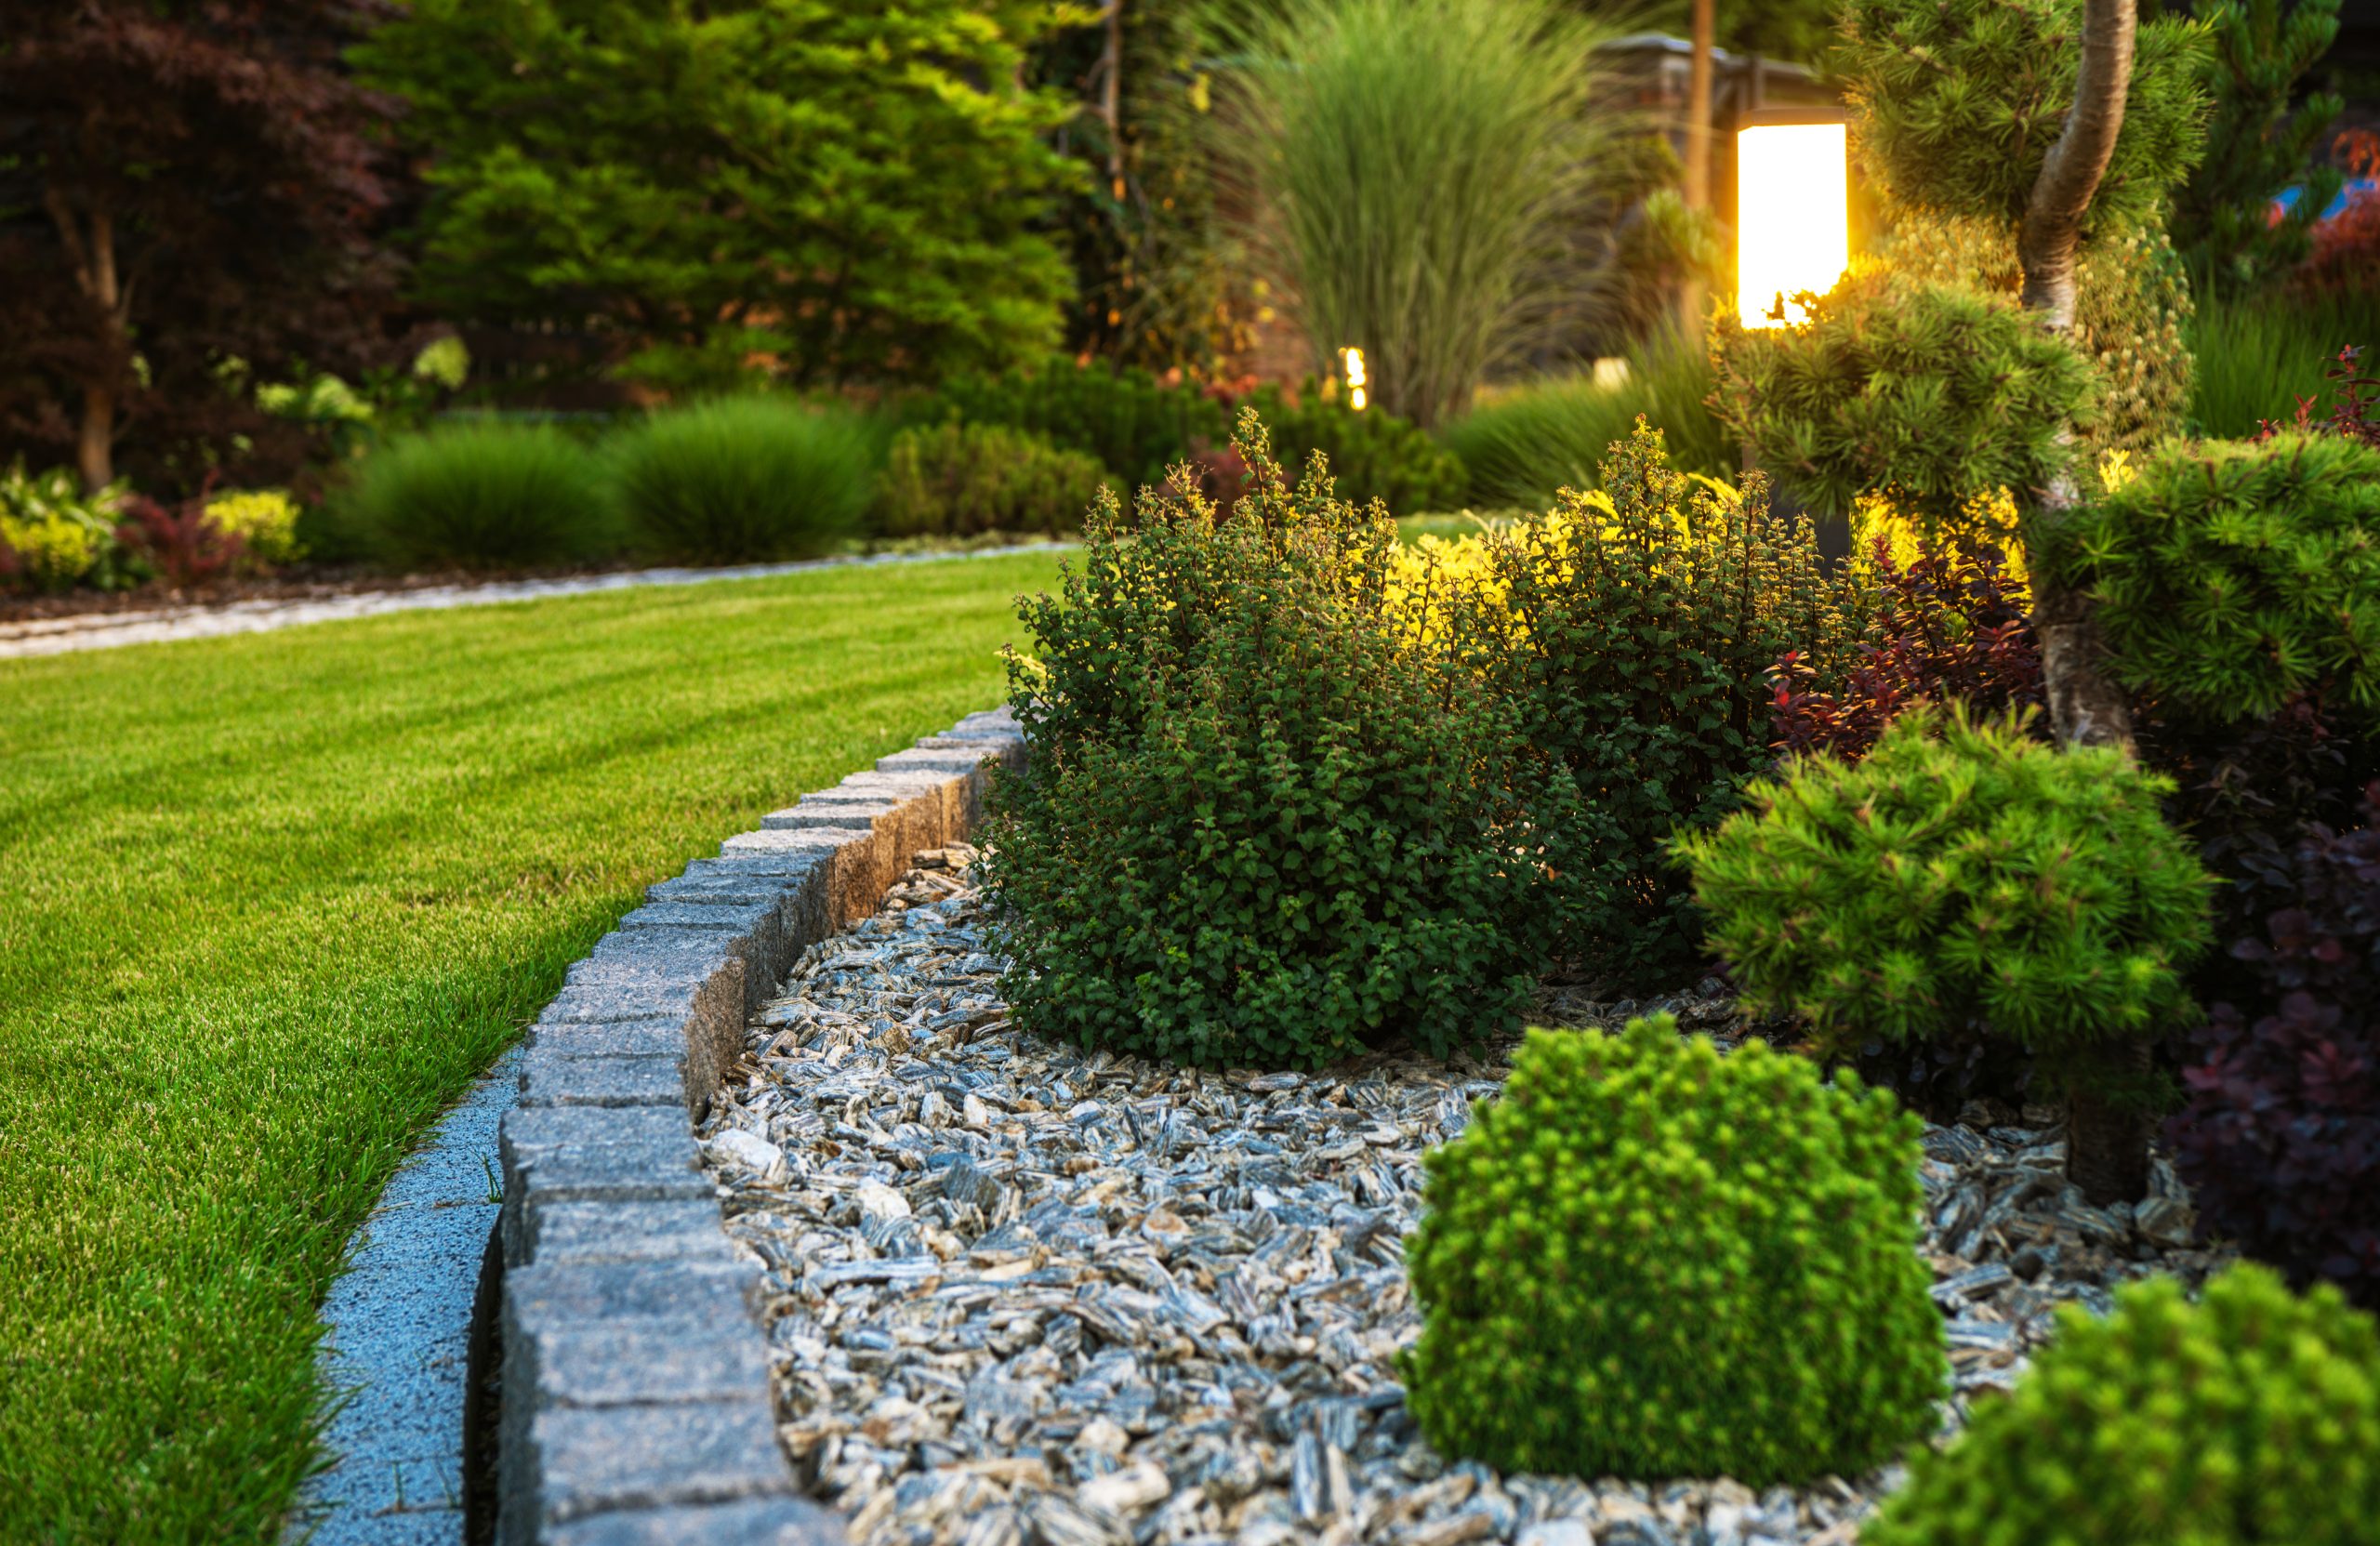
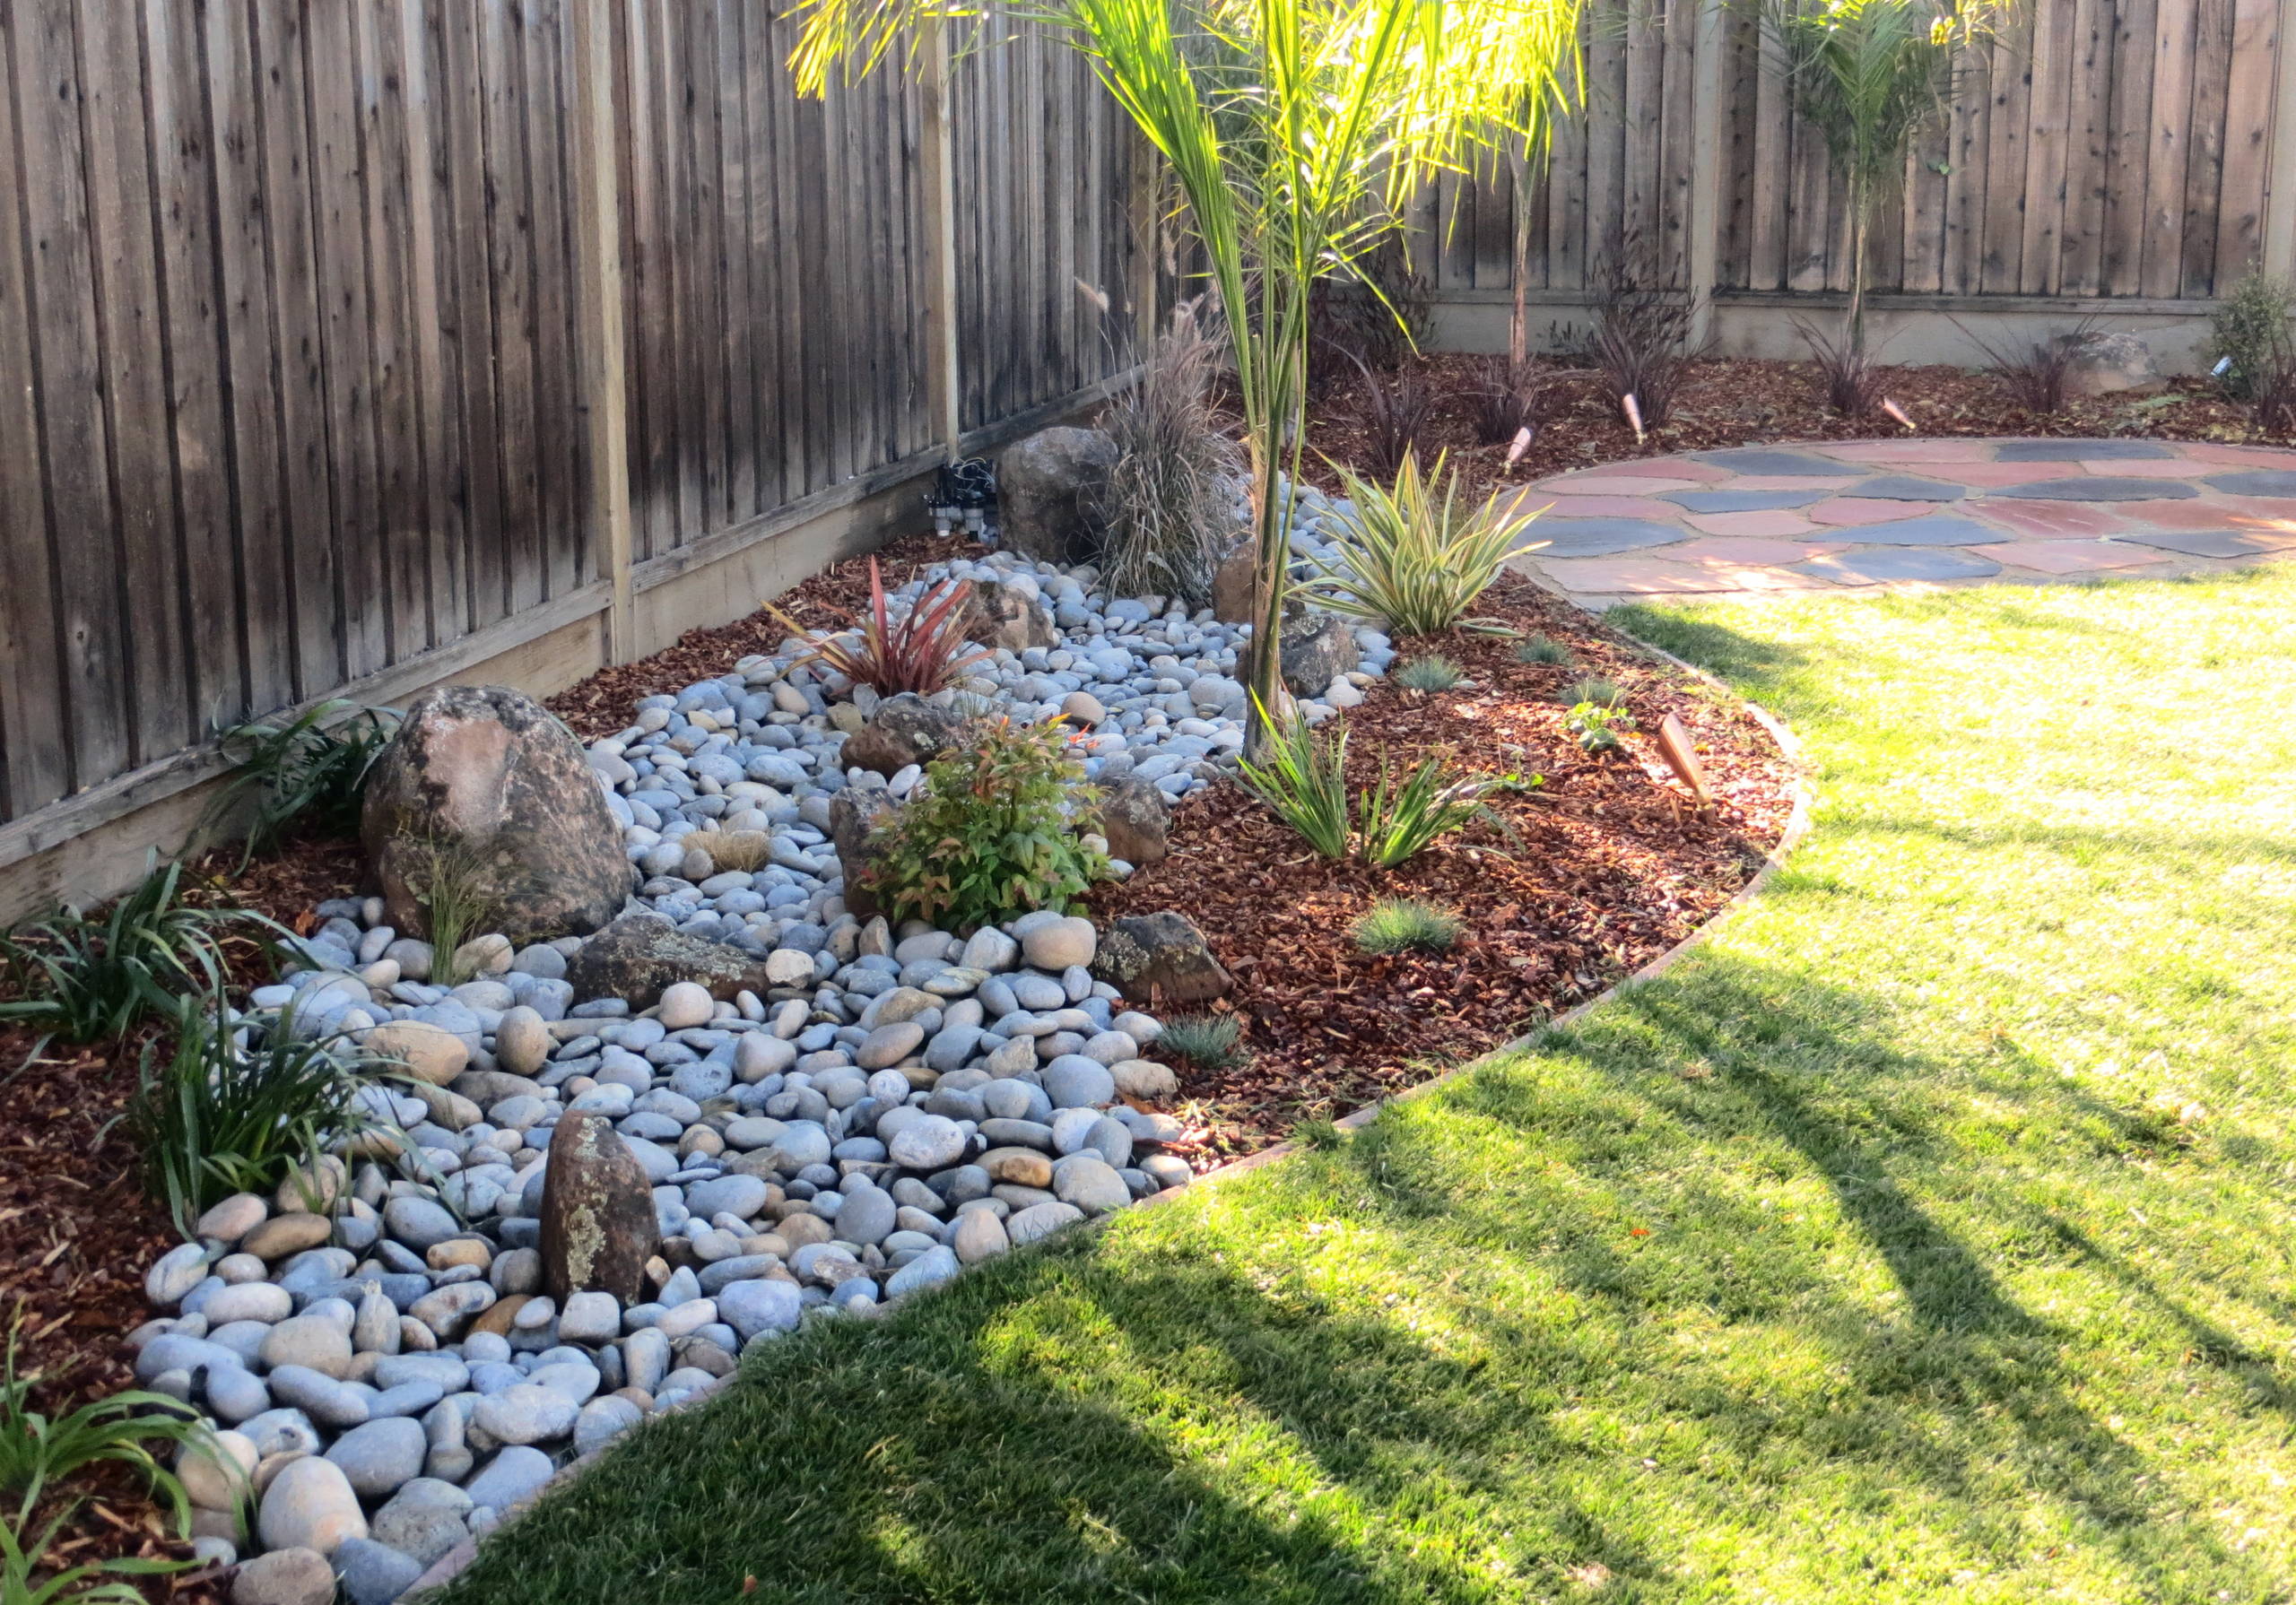
Placing the River Rocks
Now comes the exciting part – it’s time to start placing the river rocks in your landscape! The way you arrange the rocks can greatly impact the overall visual appeal of your design. Here are the steps to follow for a successful installation:
- Distribute the Rocks: Begin by distributing the river rocks evenly throughout the designated area. Place them in small piles or use a wheelbarrow or bucket to transport them to different sections of the landscape.
- Vary the Sizes: As you start placing the rocks, aim for a natural and organic look by varying the sizes and shapes. Mix larger rocks with smaller pebbles to add dimension and visual interest. Avoid creating patterns or symmetrical arrangements, as this may make the landscape appear artificial.
- Layer the Rocks: Consider creating depth and texture by layering the river rocks. Place larger rocks at the bottom or towards the back of the landscape, gradually transitioning to smaller ones towards the front. This mimics the natural formation of rocks in riverbeds and adds a sense of depth to your design.
- Fill in the Gaps: As you place the river rocks, be mindful of any gaps or areas where the weed barrier is visible. Fill these gaps with additional rocks or pebbles to ensure complete coverage. This will create a more cohesive and polished appearance.
- Step Back and Assess: Throughout the process, step back and take a few moments to assess your placement. Walk around the landscape and examine the overall look and feel, making any necessary adjustments. This will help you achieve a balanced and visually pleasing arrangement.
- Secure Loose Rocks: If desired, you can secure any loose or unstable rocks with landscape adhesive or mortar. This is particularly important for larger rocks that may pose a safety risk or could be moved easily by extreme weather conditions.
Take your time when placing the river rocks, as this will be the foundation of your landscape design. Pay attention to the placement, size variation, and overall balance of the rocks to create a visually appealing and natural-looking environment. Don’t be afraid to experiment and rearrange the rocks until you achieve the desired aesthetic.
Remember, river rock landscaping is all about creating a sense of harmony and balance with nature. Let the rocks guide you, and allow your creativity to flow as you arrange and place them in your landscape.
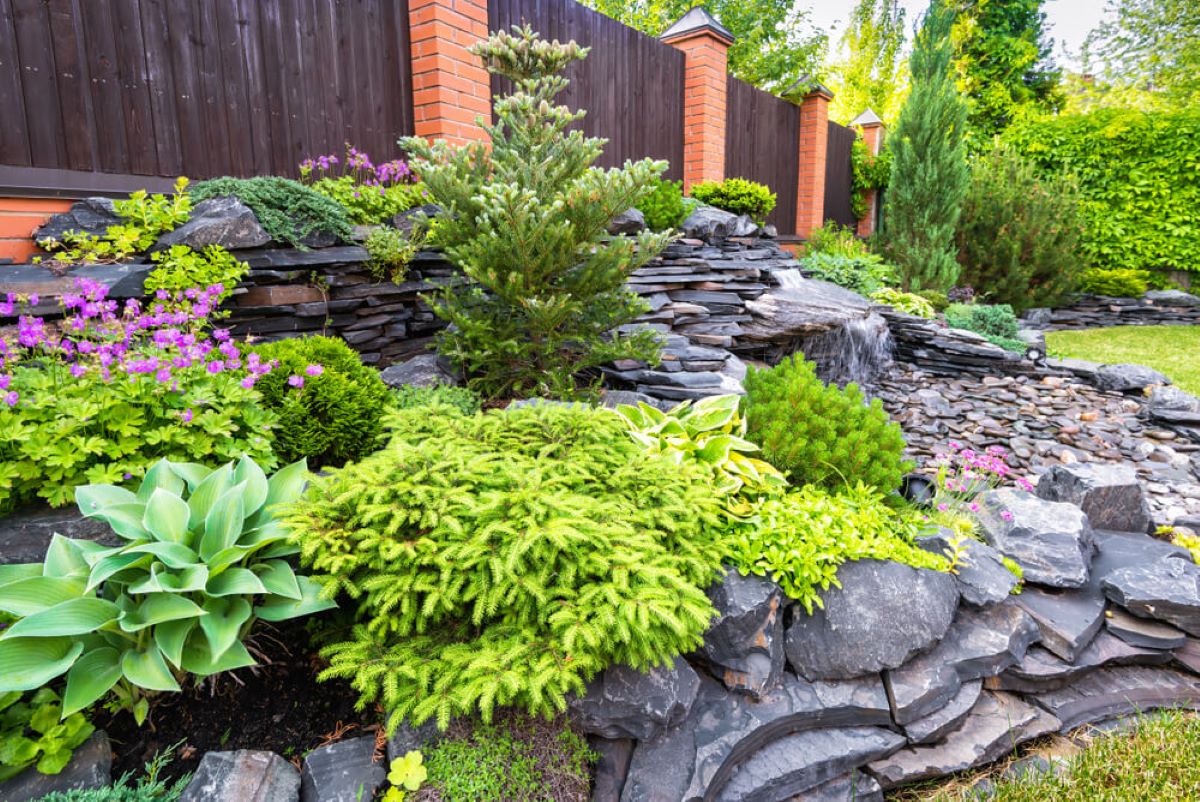
Creating a Dry Creek Bed
A dry creek bed is a stunning and practical feature that can add depth and interest to your river rock landscape. It mimics the look of a natural streambed and can help with drainage, preventing water from pooling in your yard. Here are the steps to follow when creating a dry creek bed:
- Choose the Location: Select a location within your landscape where water tends to accumulate or flow during heavy rain. This is where your dry creek bed will serve its purpose of directing water away from areas prone to flooding.
- Outline the Shape: Use a hose or spray paint to outline the desired path of the dry creek bed. Consider the natural flow of water and mimic the meandering curves and bends that you would find in a natural stream.
- Excavate the Area: Start digging along the outlined shape of the dry creek bed. Dig down to a depth of about 6-8 inches, removing the soil to create the channel for the creek bed. If needed, use a level to ensure a slight slope for proper water drainage.
- Add Landscape Fabric: Lay down landscape fabric along the bottom and sides of the excavated area. This will act as a weed barrier and prevent soil from mixing with the river rocks.
- Place River Rocks: Start placing river rocks along the excavated area, ensuring that they cover the landscape fabric and fill the channel. Vary the sizes and shapes, arranging them in a way that appears natural and mimics the look of a dry creek bed.
- Create Edges: Use larger rocks or stones to create the edges of the dry creek bed, giving it a defined border. This will help contain the river rocks and give a more polished look to your landscape.
- Enhance with Plants: Consider adding plants, such as ornamental grasses or drought-tolerant flowers, around the edges of the dry creek bed. This will soften the appearance and blend it seamlessly with the rest of your landscape design.
- Add Decorative Elements: To further enhance the aesthetic appeal of the dry creek bed, you can incorporate decorative elements such as driftwood, boulders, or river stones. These additions can add texture and interest to the overall design.
- Direct Water Flow: During heavy rain or watering, observe the direction of water flow in your landscape. Make adjustments to the dry creek bed if needed to effectively direct water away from areas prone to pooling or flooding.
Creating a dry creek bed adds both functionality and visual appeal to your river rock landscape. Not only does it effectively manage water drainage, but it also creates a unique and natural element that adds interest and charm to your outdoor space.
Remember to regularly inspect and maintain your dry creek bed. Remove any debris or leaves that may accumulate to ensure that the water can flow freely through the channel. By properly caring for your dry creek bed, you can enjoy its beauty and practical benefits for years to come.
Adding Plants and Foliage
Adding plants and foliage to your river rock landscape is a great way to enhance its visual appeal and create a harmonious blend of natural elements. Plants provide texture, color, and a sense of softness that beautifully complements the ruggedness of the river rocks. Here’s how to incorporate plants and foliage into your landscape design:
- Choose Appropriate Plants: Select plants that thrive in your climate and are well-suited for the specific conditions of your landscape. Consider factors such as sun exposure, soil type, and water requirements. Opt for low-maintenance plants that can withstand dry conditions, as they will complement the low-maintenance nature of river rock landscaping.
- Consider Size and Scale: Take into account the mature size and growth habit of the plants you choose. Ensure they are proportionate to the surrounding river rocks and other features in your landscape. Taller plants can be placed towards the back, while shorter ones can be positioned near the front to create depth and visual interest.
- Add Diversity: Incorporate a variety of plant types to create a visually appealing and dynamic landscape. Combine flowering plants with foliage plants to add pops of color and create a year-round interest. Consider a mix of evergreen plants and perennials to ensure your landscape looks vibrant and attractive throughout the seasons.
- Create Planting Beds: Prepare planting beds around the river rocks where you want to add plants. Clear the area of any weeds, rocks, or debris, and amend the soil with compost or organic matter to provide nutrients for the plants.
- Plant Carefully: Dig holes slightly larger than the root balls of your plants and gently place them in, ensuring they are planted at the same depth as they were in their nursery containers. Backfill the soil around the roots, firming it gently to ensure good contact with the roots.
- Establish Watering Routine: Water the newly planted plants thoroughly after planting to help them settle in their new environment. Monitor the moisture levels of the soil regularly and adjust your watering routine accordingly. Remember to water deeply but infrequently to encourage healthy root growth.
- Mulch the Planting Beds: Apply a layer of mulch around the plants in the planting beds. Mulch helps conserve moisture, suppress weed growth, and create a cohesive and polished look to your landscape. Use organic mulch such as wood chips or shredded bark.
- Prune and Maintain: Regularly prune your plants to maintain their shape and remove any dead or damaged parts. Additionally, periodically check for pests or diseases and take appropriate action to keep your plants healthy.
Adding plants and foliage to your river rock landscape brings life and vibrancy to the design. The combination of rocks and plants creates a visually pleasing contrast and adds depth to your outdoor space. With careful selection and nurturing, your plants will thrive and further enhance the beauty of your river rock landscape.
Remember to choose plants that are well-suited for your specific climate and landscape conditions and to regularly maintain and care for them for optimal growth and health.
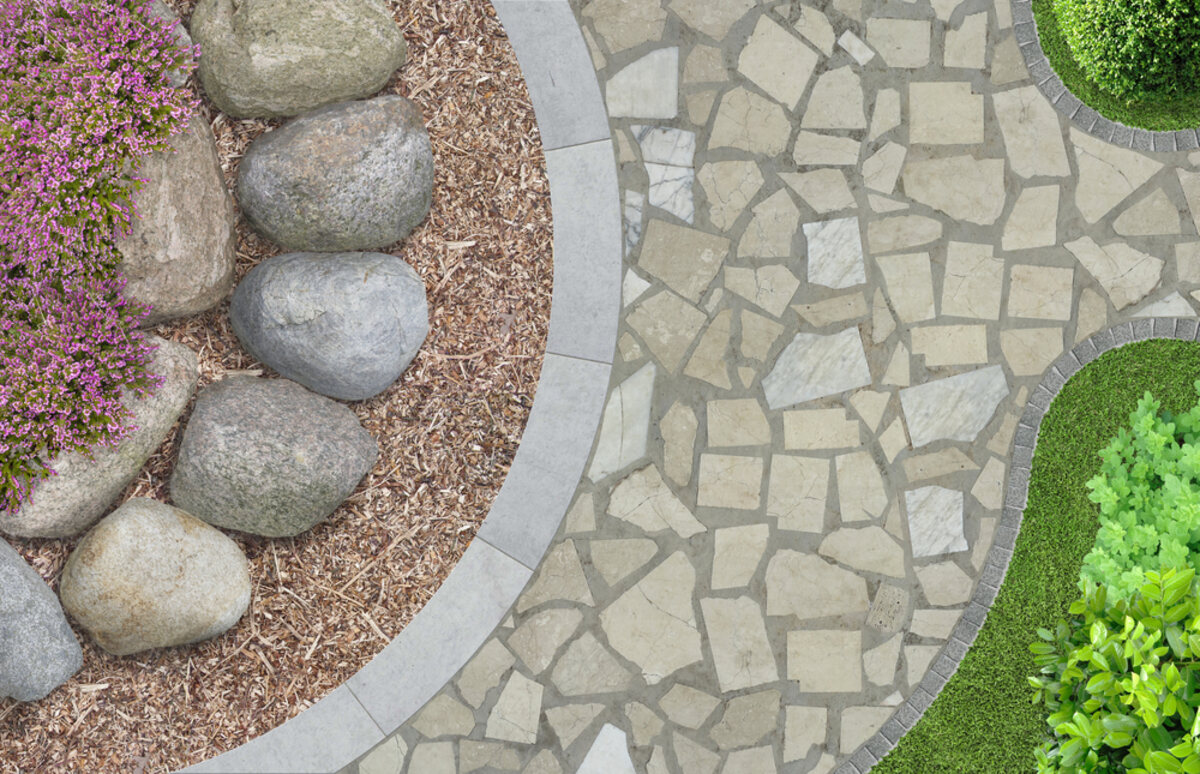
Incorporating Pathways or Stepping Stones
A well-designed pathway or strategically placed stepping stones can enhance the functionality and aesthetics of your river rock landscape. They provide a practical and visually appealing way to navigate through your outdoor space while adding structure and visual interest. Here’s how to incorporate pathways or stepping stones in your landscape design:
- Choose a Suitable Material: Consider the material options for your pathways or stepping stones. Common choices include natural stone, concrete pavers, brick, or even wood. Select a material that complements the style and overall theme of your river rock landscape.
- Plan the Placement: Determine the desired locations for the pathways or stepping stones. Take into account the flow of foot traffic and connect areas that require frequent access, such as the entrance to your garden or the patio area.
- Measure and Mark the Path: Measure and mark the desired pathway or stepping stone locations using stakes and twine. This will provide a visual guide for the installation process and ensure accuracy.
- Prepare the Area: Clear the pathway or stepping stone area of any vegetation or debris. Level the ground and ensure a firm and stable base for the chosen material. This may require digging and removing soil or using a base material such as gravel or sand for stability.
- Install the Pathway or Stepping Stones: Lay the pathway material or place the stepping stones according to your marked layout. Ensure they are level and properly spaced, allowing for comfortable and safe walking. If using materials such as concrete pavers or bricks, consider interlocking them for added stability.
- Fill the Gaps: If using natural stone or irregularly shaped stepping stones, fill the gaps between them with river rock or fine gravel. This will provide a finished look and prevent weeds or vegetation from growing between the stones.
- Add Lighting: Consider incorporating pathway lighting to enhance safety and highlight the beauty of your pathways or stepping stones. Solar-powered lights or low-voltage lighting can be installed along the edges or integrated into the pathway material to create a warm and inviting atmosphere.
- Blend with Landscaping: Soften the appearance of the pathways or stepping stones by incorporating plants or ground cover along the edges. This will help them blend seamlessly with your river rock landscape and create a more natural and cohesive look.
Incorporating pathways or stepping stones in your river rock landscape not only adds functionality but also creates visual interest and directs the flow of your outdoor space. With careful planning and installation, these features can become focal points or provide a seamless connection between different elements of your landscape.
Remember to choose materials that are suitable for the purpose and style of your landscape, and ensure proper installation and maintenance to keep your pathways or stepping stones in optimal condition.
Maintaining Your River Rock Landscape
Maintaining your river rock landscape is essential to keep it looking beautiful and to ensure its longevity. With proper care and regular maintenance, you can preserve the integrity of the design and minimize the need for major repairs or renovations. Here are some maintenance tips to help you keep your river rock landscape in optimal condition:
- Regularly Remove Debris: Keep your river rock landscape free from debris such as fallen leaves, twigs, or branches. Use a rake or leaf blower to remove accumulated debris as needed. This will prevent organic matter from decomposing on the surface of the river rocks and keep the landscape looking clean and tidy.
- Address Weed Growth: Although river rocks act as a natural weed barrier, occasional weed growth may still occur. Regularly inspect the landscape for any weeds or unwanted vegetation and promptly remove them. You can pull them by hand or use a weeding tool to make the task easier.
- Monitor and Adjust Drainage: Ensure that water is properly draining through the river rocks and away from your landscape. Periodically check for any obstructions or areas where water may be pooling. Adjust the river rocks or make necessary alterations to the landscape to improve drainage as needed.
- Inspect and Secure Loose Rocks: Over time, some river rocks may become loose or displaced. Regularly inspect the landscape and secure any loose rocks using landscape adhesive or mortar. This will prevent tripping hazards and ensure the stability of your river rock design.
- Prune Surrounding Plants: Trim and prune any plants or foliage around your river rock landscape. This includes trimming back overhanging branches or foliage that may be encroaching on the river rock area. Pruning will help maintain the shape and size of plants, preventing them from overtaking the landscape.
- Replenish River Rocks: Over time, some river rocks may shift, sink, or become dislodged. Periodically check your landscape and add more river rocks to fill in any gaps or areas that appear thin. This will ensure an even and consistent look throughout the landscape.
- Check for Erosion: Keep an eye out for any signs of erosion in your river rock landscape. Heavy rain or excessive water flow may cause erosion on the slopes or edges. If you notice erosion, take action to reinforce and stabilize the affected areas to prevent further damage.
- Seal the River Rocks (Optional): Consider sealing the river rocks to enhance their durability and appearance. This optional step can help protect the rocks from weathering and prevent fading or discoloration. Use a stone sealer appropriate for the type of river rocks you have and follow the manufacturer’s instructions.
By following these maintenance practices, you can keep your river rock landscape in top shape for years to come. Regular upkeep will help preserve its beauty and functionality, ensuring that you can continue to enjoy its natural charm and low-maintenance appeal.
Remember to adapt your maintenance routine to the specific needs of your landscape and consult with professionals if you encounter any significant issues or concerns.
Conclusion
Congratulations! You are now equipped with the knowledge and guidance to create a stunning river rock landscape. By following the steps outlined in this article, you can transform your outdoor space into a beautiful and low-maintenance oasis.
From choosing the right river rocks and planning your design to incorporating plants, pathways, and other features, each step plays a crucial role in achieving a cohesive and visually appealing landscape. Remember to prioritize functionality and aesthetics as you create a balance between the ruggedness of the river rocks and the softness of plants and foliage.
Maintaining your river rock landscape is also key to its long-term success. Regularly removing debris, addressing weed growth, monitoring drainage, and ensuring the stability of the rocks will help preserve the integrity of your design and minimize the need for major repairs.
As you embark on this journey of landscaping with river rocks, let your creativity shine and adapt the ideas to suit your personal style and preferences. Embrace the opportunity to create a unique and inviting outdoor space that allows you to connect with nature and enjoy the beauty of your surroundings.
So, grab your tools and get started on your river rock landscape today. Whether you’re sprucing up a small garden or revamping a sprawling yard, the possibilities are endless. Enjoy the process, and may your river rock landscape bring you years of beauty, tranquility, and joy.