Home>Gardening Tips and Tricks>Problem Solving>How To Get Weeds Out Of Rock Landscaping
Problem Solving
How To Get Weeds Out Of Rock Landscaping
Modified: January 22, 2024
Learn effective techniques for problem solving and getting rid of weeds in your rock landscaping. Transform your outdoor space with these expert tips.
(Many of the links in this article redirect to a specific reviewed product. Your purchase of these products through affiliate links helps to generate commission for Chicagolandgardening.com, at no extra cost. Learn more)
Table of Contents
- Introduction
- Understanding the Challenge of Weeds in Rock Landscaping
- Benefits of Maintaining Weed-Free Rock Landscaping
- Preparing for Weed Removal
- Tools and Materials Needed
- Effective Strategies for Getting Rid of Weeds
- Method 1: Hand Pulling
- Method 2: Using a Weed Torch
- Method 3: Applying Organic Weed Control Solutions
- Method 4: Installing Landscape Fabric
- Method 5: Utilizing Natural Weed Barriers
- Post-Weed Removal Maintenance Tips
- Conclusion
Introduction
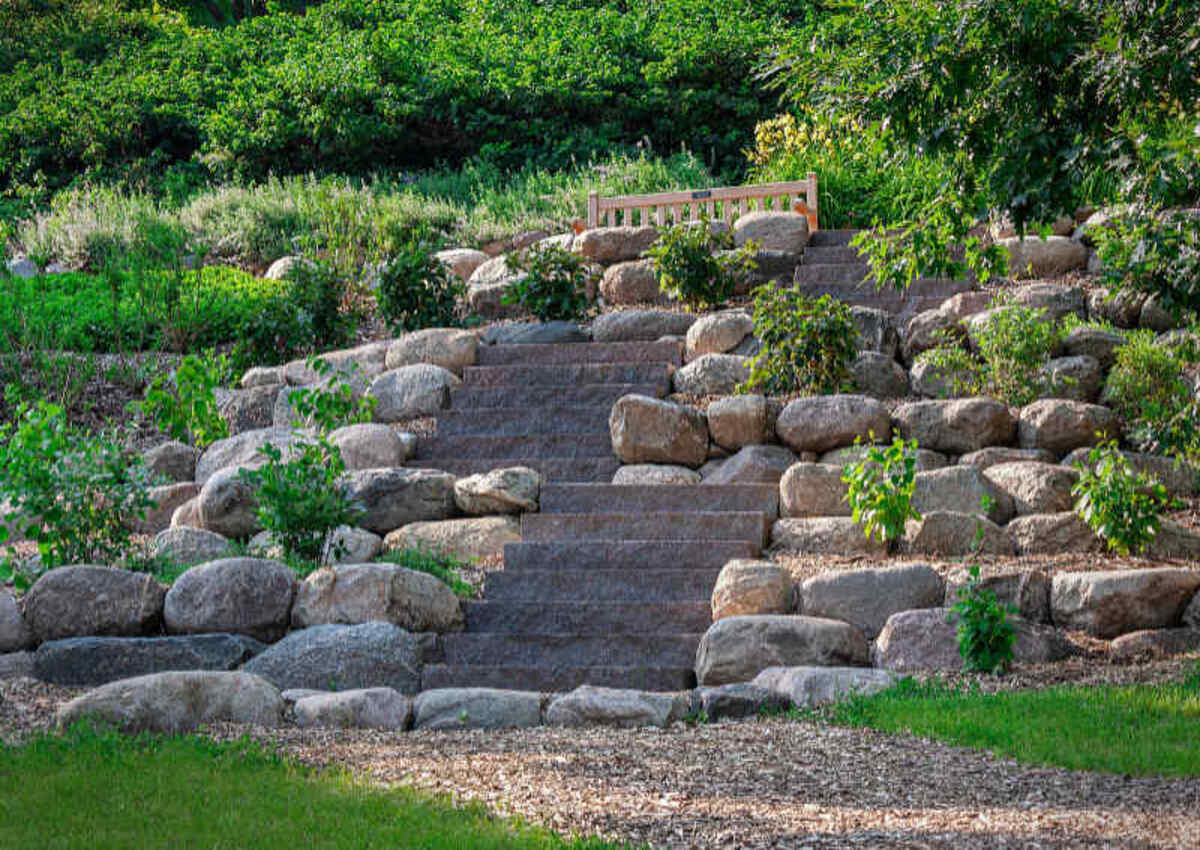
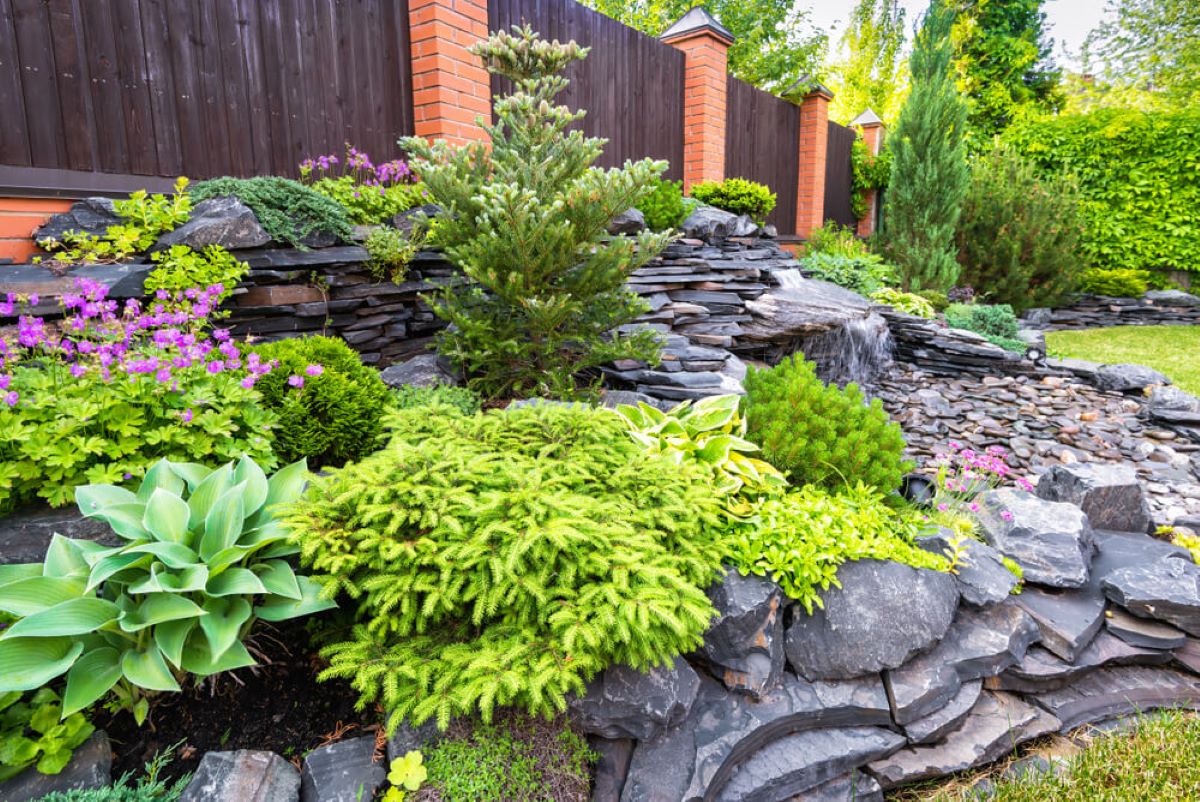
Welcome to the world of rock landscaping! Creating a stunning rock garden or incorporating decorative rocks into your outdoor space can be both visually appealing and low-maintenance. However, one common challenge that many homeowners face with rock landscaping is the invasion of weeds.
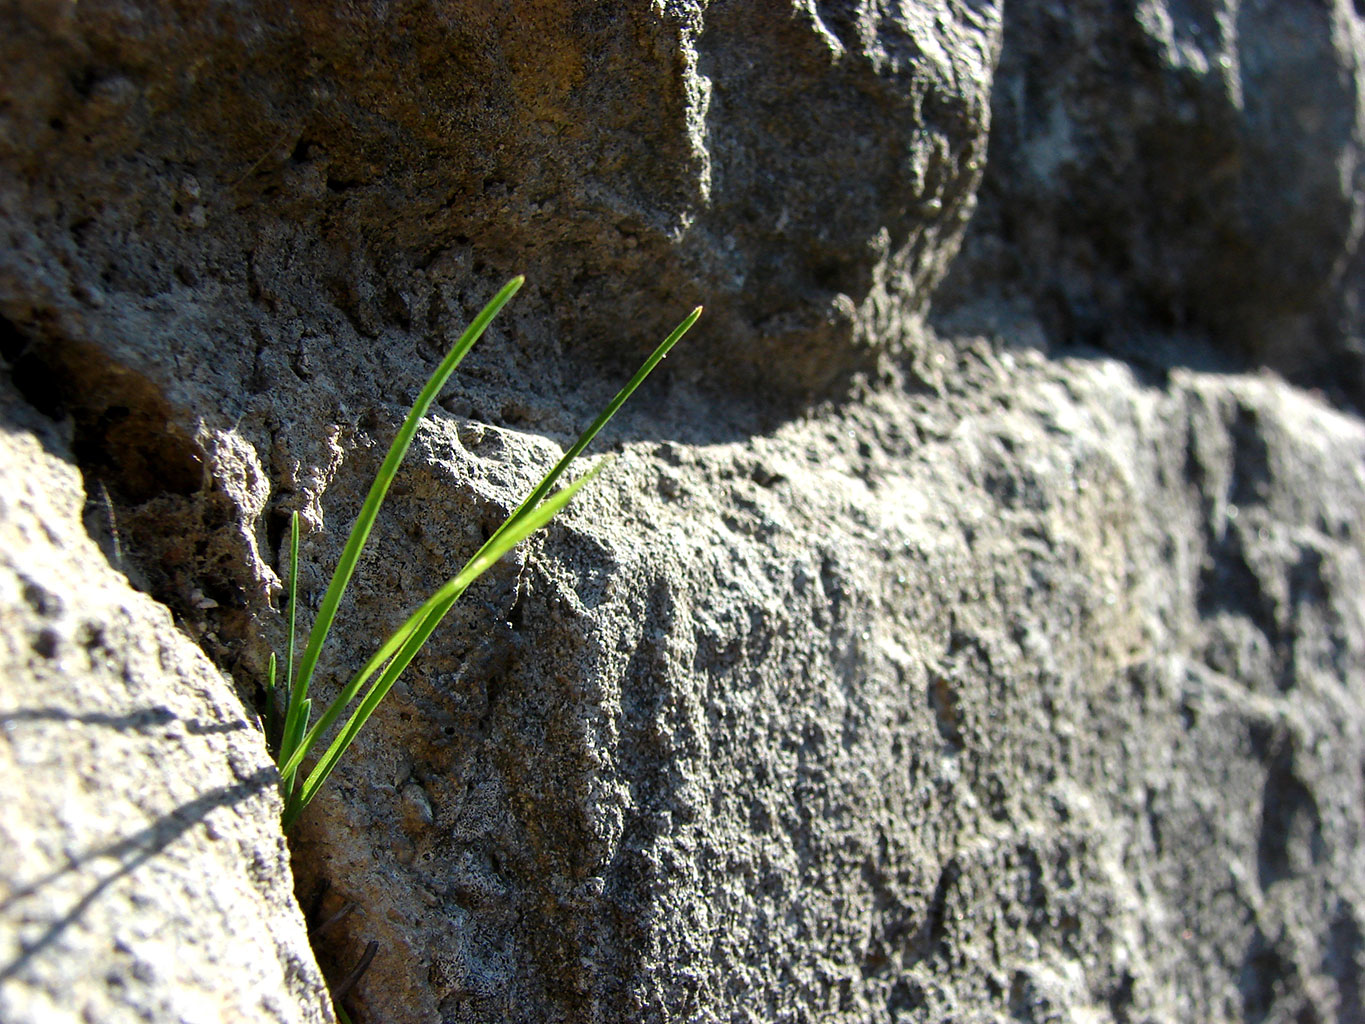
Weeds have an uncanny ability to find their way into any crack or crevice, and rock landscaping is no exception. These unwelcome intruders not only ruin the aesthetic appeal of your rock garden, but they also compete with your desirable plants for resources like sunlight, water, and nutrients.
But fear not! In this comprehensive guide, we will delve into the world of weed control in rock landscaping, equipping you with the knowledge and strategies to reclaim your rock garden from these persistent intruders.
Whether you’re a veteran rock gardener or just starting out, understanding the challenges and benefits of maintaining a weed-free rock landscape is crucial. We’ll explore the reasons behind the weed problem, as well as the advantages of keeping your rock garden free from these relentless invaders.
Additionally, we’ll provide you with step-by-step instructions on how to prepare for the weed removal process, the tools and materials you’ll need, and five effective methods for getting rid of weeds in rock landscaping.
Even after successfully eliminating the weeds, it’s important to implement post-weed removal maintenance practices to ensure your rock garden remains pristine and weed-free. We’ll provide you with tips and reminders for ongoing care.
So, whether you’re planning a weekend DIY project or seeking ways to maintain your existing rock landscaping, read on to discover the best strategies for getting rid of weeds in rock gardens and rock landscaping.
Understanding the Challenge of Weeds in Rock Landscaping
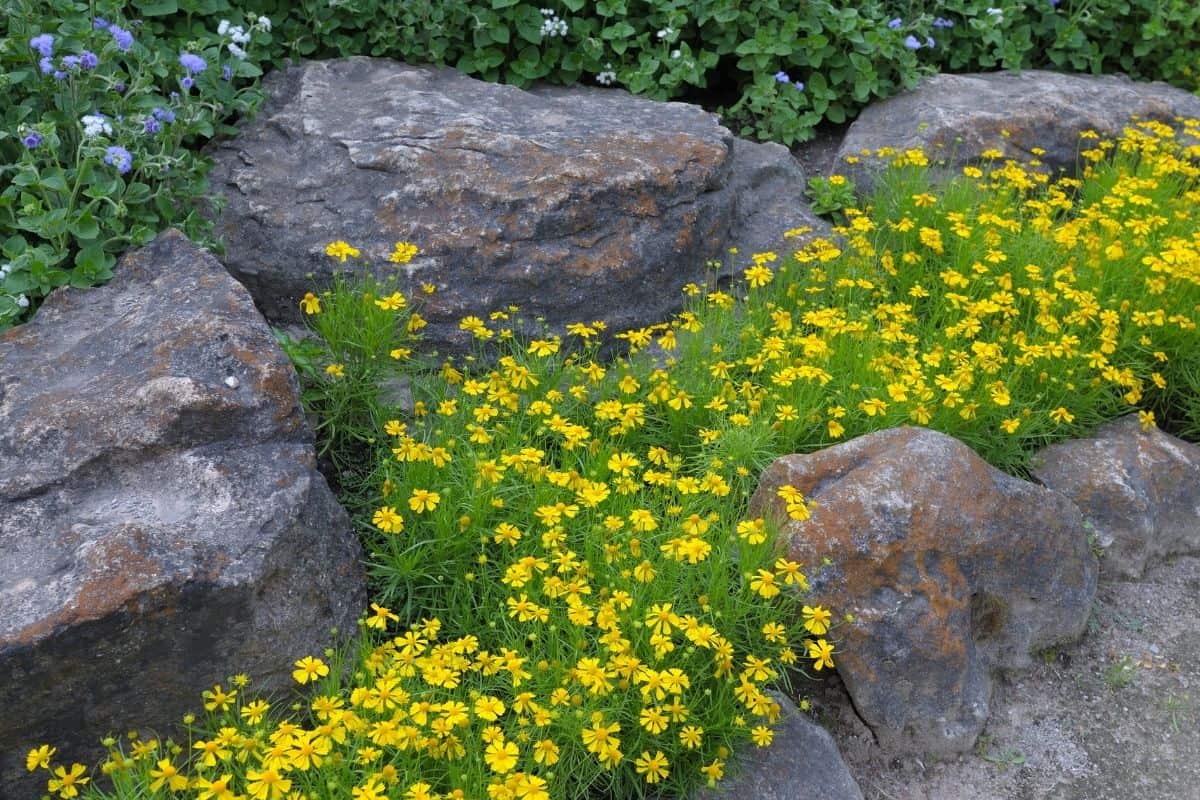
Rock landscaping offers a unique and visually striking way to enhance the beauty of your outdoor space. With its rugged texture and natural appeal, it creates a serene and soothing environment. However, the presence of weeds can quickly tarnish the pristine appearance of your rock garden. Understanding the challenge of weeds in rock landscaping is the first step in effectively combating them.
Weeds in rock landscaping pose several challenges. Firstly, their ability to adapt and thrive in various conditions makes them highly resilient. They can grow in the tiniest cracks, crevices, and gaps between rocks, where other plants struggle to survive.
Furthermore, weeds have a rapid growth rate and produce an abundance of seeds that can be easily dispersed by wind, birds, or even human activity. This means that even a single weed can quickly multiply and spread throughout your rock garden, making the task of weed control even more daunting.
Another challenge is that removing weeds from rock landscaping can be physically demanding. Rocks, pebbles, and gravel are not as forgiving as soil when it comes to accessing and uprooting weeds. The limited space and uneven terrain between rocks often require delicate maneuvering and careful attention to avoid damaging the surrounding plants or rock structures.
Moreover, the presence of weeds in rock landscaping not only detracts from the visual appeal but also competes with desirable plants for essential resources. Weeds can outcompete your chosen plants for sunlight, water, and nutrients, which can lead to stunted growth and even the demise of your carefully curated garden.
Without proper weed control measures, the beauty and serenity of your rock landscaping can gradually be overshadowed by an army of invasive plants. It’s crucial to tackle the weed problem swiftly and effectively to maintain the integrity and aesthetic appeal of your rock garden.
Now that we’ve explored the challenges that weeds pose in rock landscaping, let’s move on to the benefits of maintaining a weed-free rock garden.
Benefits of Maintaining Weed-Free Rock Landscaping
Maintaining a weed-free rock garden offers numerous benefits that go beyond the aesthetic appeal. A weed-free rock landscaping not only enhances the visual beauty of your outdoor space but also provides a host of advantages that contribute to the overall health and longevity of your garden.
One of the primary benefits of maintaining a weed-free rock garden is the preservation of the intended landscape design. A well-planned rock garden is a carefully curated display of rocks, pebbles, and selected plants. Weeds disrupt this design and can overshadow the intended focal points, textures, and color schemes. By eliminating weeds, you can showcase the true beauty of your rock landscaping and highlight the unique features that make it special.
Furthermore, a weed-free rock garden helps to reduce the competition between unwanted intruders and the cultivated plants in your landscape. Weeds are notorious for their aggressive growth, and if left unchecked, they can outcompete your desired plants for essential resources like sunlight, nutrients, and water. By eliminating weeds, you create a more favorable environment for the plants you have intentionally chosen, allowing them to thrive and flourish.
Aesthetics aside, maintaining a weed-free rock garden also contributes to the overall health and longevity of your landscape. Weeds are not just unsightly; they can harbor diseases, pests, and invasive species. By removing weeds, you reduce the potential risks and prevent the spread of pests or diseases that could harm your carefully cultivated plants.
In addition, a weed-free rock garden requires less maintenance in the long run. Weeds are notorious for their fast growth and ability to spread rapidly. By regularly removing weeds and preventing their reestablishment, you can save time and effort in the future. This means fewer hours spent pulling weeds and more time enjoying your beautiful rock landscaping.
Furthermore, a well-maintained rock garden creates a more inviting and enjoyable space for outdoor activities. Whether you use your rock garden for family gatherings, social events, or personal relaxation, a weed-free environment ensures that you can fully appreciate and utilize your outdoor space without the distraction and inconvenience of unsightly weeds.
Finally, a weed-free rock garden can also increase the value of your property. Curb appeal plays a significant role in property valuation and potential buyers are often drawn to landscapes that are well-maintained and aesthetically pleasing. A weed-free rock garden can be a selling point that sets your property apart and enhances its overall desirability.
Now that we understand the benefits of maintaining a weed-free rock garden, let’s explore the steps to prepare for weed removal in your rock landscaping.
Preparing for Weed Removal
Before diving into the process of weed removal in your rock landscaping, it’s important to take some preparatory steps to ensure a smooth and effective weed eradication process. Proper preparation can save you time, effort, and potential damage to your rock structures and desirable plants.
The first step in preparing for weed removal is to assess the size and scope of the weed problem in your rock garden. Take a stroll through your landscaping and carefully observe the areas that are infested with weeds. Note the types of weeds present, their density, and their locations. This assessment will help you determine the best approach and the tools you’ll need for weed removal.
Next, consider the weather and timing for weed removal. It’s ideal to tackle the weeds when the soil is slightly moist, making it easier to pull them out by the root. Avoid weed removal during periods of heavy rain or when the soil is excessively wet, as this can result in muddy conditions and potential damage to the surrounding rocks and plants.
Before you begin the weed removal process, ensure that you have the necessary tools and materials on hand. Some common tools for weed removal in rock landscaping include:
– Garden gloves to protect your hands from thorns, prickles, or sharp rocks.
– Hand weeding tools such as a weeding trowel or hand fork for precision weeding.
– A hoe or cultivator for larger areas.
– Pruning shears or scissors for trimming and removing overgrown vegetation.
– A bucket or bag to collect the weeds and debris.
– A water sprayer or hose for cleaning the rocks after weed removal.
In addition to the tools, consider using knee pads or a gardening mat to protect your knees and provide comfort during the weed removal process.
Lastly, it’s important to mentally prepare yourself for the task at hand. Weed removal can be physically demanding, especially in the tight spaces between rocks. Take breaks when needed, stay hydrated, and pace yourself to avoid exhaustion or strain.
By adequately assessing the weed problem, considering the weather conditions, gathering the necessary tools, and preparing yourself physically and mentally, you’ll be ready to tackle the challenge of weed removal in your rock landscaping. In the next section, we’ll explore effective strategies for getting rid of weeds and restoring the beauty of your rock garden.
Tools and Materials Needed
Having the right tools and materials is essential for effective weed removal in rock landscaping. With the proper equipment at your disposal, you’ll be well-equipped to tackle the weeds and restore the beauty of your rock garden. Here are some essential tools and materials you’ll need for the job:
- Garden Gloves: Protect your hands from thorns, prickles, and sharp rocks by wearing a sturdy pair of garden gloves. This will not only keep your hands safe but also provide better grip and control when pulling weeds.
- Weeding Tools: Invest in a quality set of weeding tools such as a weeding trowel or hand fork. These tools are designed to target weeds at their roots, making it easier to remove them completely. Opt for tools with sharp, pointed tips for precision weeding in between rocks.
- Hoe or Cultivator: For larger areas infested with weeds, a hoe or cultivator can be a valuable tool. These long-handled tools allow you to cover more ground and efficiently uproot weeds in open spaces of your rock landscaping.
- Pruning Shears or Scissors: Overgrown vegetation and tangled weeds may require trimming or cutting. Pruning shears or scissors will come in handy for snipping away excess plant material and clearing the way for weed removal.
- Bucket or Bag: You’ll need a container to collect the weeds and debris as you remove them. A bucket or bag with handles is ideal for easy transport and disposal of the collected weeds.
- Water Sprayer or Hose: After weed removal, it’s important to clean the rocks and remove any residual debris. A water sprayer or hose will help you rinse off any remaining dirt and ensure a tidy and presentable rock garden.
- Knee Pads or Gardening Mat: Protect your knees from discomfort and potential injuries by using knee pads or a gardening mat. These accessories provide cushioning and support, making the weed removal process more comfortable and preventing strain on your joints.
Having these tools and materials readily available will simplify the weed removal process and allow you to work efficiently and effectively. Before starting, ensure that you have all the necessary items on hand to avoid interruptions or delays. Now that we’re equipped with the right tools, let’s explore effective strategies for getting rid of weeds in rock landscaping.
Effective Strategies for Getting Rid of Weeds
When it comes to eliminating weeds in rock landscaping, employing the right strategies is key to success. Here are five effective methods that will help you get rid of those stubborn weeds and restore the beauty of your rock garden:
Method 1: Hand Pulling
Hand pulling is the most straightforward and cost-effective method of weed removal. Simply put on your garden gloves, get down on your knees, and carefully uproot the weeds by hand. For better leverage, use a weeding tool such as a trowel or hand fork. Make sure to grasp the weed as close to the base as possible and gently pull it upward, taking care not to disturb the surrounding rocks or desirable plants.
Method 2: Using a Weed Torch
A weed torch, also known as a flame weeder or weed burner, is a handy tool for controlling weeds in rock landscaping. This method involves using intense heat to scorch and kill the weeds, making them easier to remove. Exercise caution when using a weed torch to avoid accidental fires or damage to nearby plants. It’s best suited for weeds in open areas where there’s minimal risk of burning desirable vegetation.
Method 3: Applying Organic Weed Control Solutions
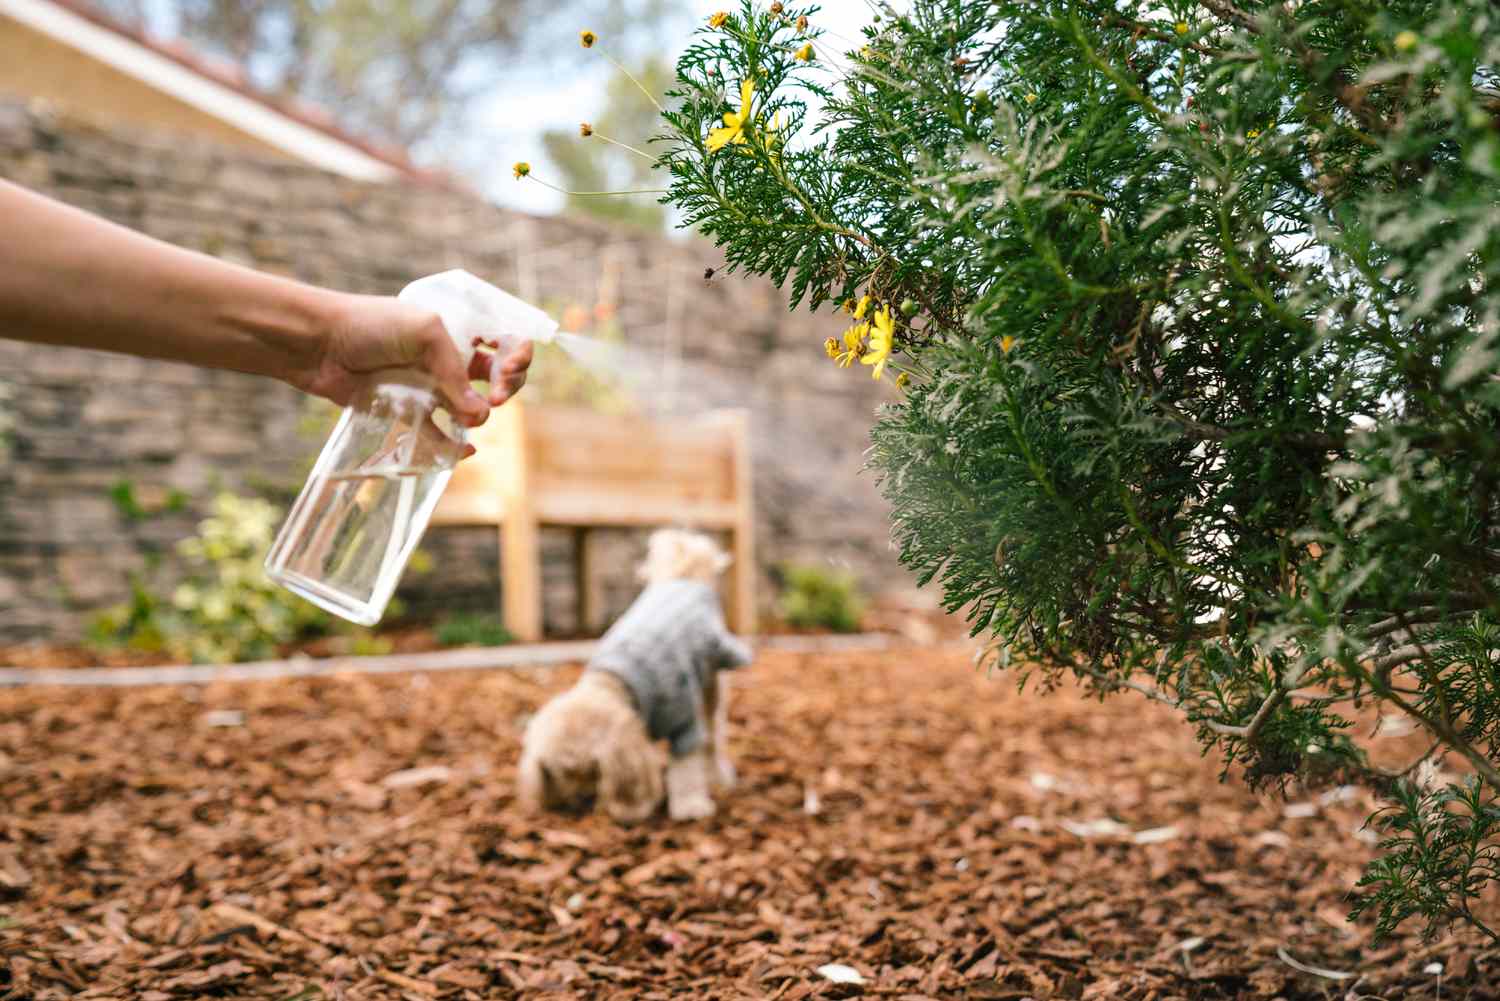
If you prefer a more eco-friendly approach, consider using organic weed control solutions. These solutions are typically made from natural ingredients such as vinegar, salt, or citrus oil. Apply the organic weed control solution directly on the weeds, ensuring that you target the foliage and root system. Take care to avoid spraying on desired plants, as some organic weed control solutions can also harm non-targeted vegetation.
Method 4: Installing Landscape Fabric
Landscape fabric is a material that acts as a physical barrier, preventing weed growth in your rock garden. It’s typically made of woven or non-woven synthetic material. Before laying the fabric, remove existing weeds and ensure the ground is level. Cut the landscape fabric to fit the desired area and secure it with landscape staples. This method is effective in suppressing weed growth, but regular inspection and maintenance are still necessary to prevent weeds from germinating on top of the fabric.
Method 5: Utilizing Natural Weed Barriers
Another effective strategy for weed control in rock landscaping is to utilize natural barriers. This involves placing materials like cardboard, newspaper, or mulch around desirable plants or in weed-prone areas. These materials act as a physical barrier, preventing light from reaching the weed seeds and inhibiting their germination. Layer the natural barrier material to a depth of at least 2-3 inches, overlapping the edges to prevent weeds from poking through.
Remember, it’s best to combine multiple strategies for optimal weed control. For instance, hand pulling weeds and applying organic weed control solutions can be used in tandem to maximize effectiveness. Additionally, ongoing vigilance and regular maintenance are crucial to prevent weeds from reestablishing themselves in your rock garden.
Now that you have learned effective strategies for getting rid of weeds in rock landscaping, let’s move on to post-weed removal maintenance tips to ensure the long-term health and beauty of your rock garden.
Method 1: Hand Pulling
Hand pulling is a simple yet effective method for removing weeds in rock landscaping. It requires minimal tools and allows for precise weed removal, making it an ideal strategy for small or hard-to-reach areas.
To start, put on your garden gloves to protect your hands from thorns, prickles, or sharp rocks. Take a close look at the weeds in your rock garden and identify their base or root system. It’s important to grasp the weed as close to the base as possible to ensure complete removal.
Using a weeding tool such as a weeding trowel or hand fork can provide better leverage and help loosen the weed from the soil. Insert the tool into the ground near the base of the weed, angling it to penetrate as deeply as possible. Gently pry or dig around the root system, loosening the weed from the soil.
Once the weed is loosened, firmly grasp it with your gloved hand and pull it upward, applying steady pressure. Take care not to jerk or yank the weed, as this can detach the foliage from the root system and allow regrowth. Slow and consistent pulling, with a slight twisting motion if needed, will help ensure that the entire weed, including the root, is removed.
As you work through the rock garden, it’s important to be mindful of the surrounding rocks and desirable plants. Take caution not to disturb or displace any rocks, and avoid accidentally damaging nearby plants while pulling weeds.
For larger or more stubborn weeds, you may encounter resistance in removing them by hand. In such cases, using a weeding tool to loosen the soil around the root system can help facilitate weed removal. Be patient and persistent, making sure to extract as much of the root system as possible to prevent regrowth.
While hand pulling can be time-consuming, it offers several advantages. It’s an economical method that doesn’t require the use of chemicals or sophisticated equipment. Hand pulling also allows you to have direct control over the weed removal process, ensuring a thorough and precise approach.
Remember to dispose of the collected weeds and debris in a compost pile or municipal green waste bin rather than simply discarding them in your garden or yard. This will prevent reseeding and the potential spread of weeds.
Utilizing hand pulling as part of your weed removal strategy in rock landscaping can be an effective way to restore the beauty of your garden. However, for larger areas or more extensive weed problems, you may need to incorporate additional methods such as using a weed torch or applying organic weed control solutions.
Now that you’ve mastered the art of hand pulling weeds, let’s move on to exploring the second method: using a weed torch.
Method 2: Using a Weed Torch
If you’re looking for a fast and efficient way to eliminate weeds in your rock landscaping, using a weed torch can be an effective method. A weed torch, also known as a flame weeder or weed burner, utilizes intense heat to scorch and kill off the unwanted plants, making them easier to remove.
Before using a weed torch, it’s important to consider a few factors for safety and effectiveness. Firstly, ensure that the area surrounding the weeds is clear of any flammable materials such as dry leaves, mulch, or debris that could potentially ignite. Safety is paramount, so make sure you have a fire extinguisher or a water source nearby as a precautionary measure.
To use a weed torch, simply ignite the flame according to the manufacturer’s instructions. Hold the flame close to the weeds, focusing the heat on the foliage and base of the plants. The intense heat will cause the plant cells to burst, effectively killing the weed.
When using a weed torch, it’s important to exercise caution and avoid prolonged exposure to the flame. Move the torch quickly and evenly across the weed, ensuring that the heat is evenly distributed and not concentrated in one spot for too long. This will minimize the risk of damaging surrounding rocks or desirable plants.
It’s important to note that a weed torch is most effective on small, young weeds or weed seedlings. For larger, more established weeds with extensive root systems, the torch may only kill the foliage, requiring additional methods for complete eradication.
After applying the weed torch, wait a few days for the weeds to dry up and wither. At this point, they can be easily pulled out by hand or removed using a weeding tool. Be sure to dispose of the dead weeds properly to prevent reseeding or accidental transfer of seeds to other areas of your landscape.
Using a weed torch can be a time-saving method for weed removal in rock landscaping, especially in larger areas where hand pulling is impractical or labor-intensive. However, it’s important to use this method judiciously and follow safety precautions to avoid any accidents or damage to your landscape.
While the weed torch is a powerful tool, it may not be suitable for use near flammable structures or in extremely dry conditions. In such cases, consider alternative methods such as hand pulling, organic weed control solutions, or installing landscape fabric to effectively manage the weed problem in your rock garden.
Now that you’re familiar with using a weed torch, let’s explore the third method: applying organic weed control solutions for safe and effective weed removal.
Method 3: Applying Organic Weed Control Solutions
If you prefer a more eco-friendly approach to weed removal in your rock landscaping, utilizing organic weed control solutions can be an effective method. These solutions are made from natural ingredients and can help inhibit weed growth while minimizing harm to the environment and surrounding plants.
There are several organic weed control solutions that you can use to eliminate weeds in your rock garden. Here are a few examples:
Vinegar:
Vinegar, particularly white vinegar with a higher concentration of acetic acid, can be an effective organic weed killer. Fill a spray bottle with vinegar, making sure not to dilute it with water. Directly spray the vinegar onto the foliage and base of the weeds, focusing on the unwanted plants while avoiding desirable vegetation. The acetic acid in the vinegar penetrates the plant cells, causing them to dry out and ultimately die. Keep in mind that vinegar can also harm surrounding plants, so use it with caution.
Salt:
Salt can be used to inhibit weed growth in specific areas, such as cracks or crevices between rocks. Dissolve a generous amount of salt in hot water and pour the solution into a spray bottle or directly onto the targeted weed-infested areas. Salt dehydrates the plants and makes it difficult for them to survive. However, be cautious when using salt, as it can also affect the soil and hinder future plant growth in the treated areas.
Citrus Oil:
Another organic option is to use citrus oil as a natural weed control solution. Citrus oil can be derived from oranges, lemons, or grapefruits. Dilute the citrus oil in water according to the instructions on the product label. Spray the mixture onto the weeds, thoroughly wetting the foliage and base. The oil suffocates the weeds by interfering with their ability to breathe. Citrus oil is generally safe to use around desirable plants and does not harm the environment.
When applying organic weed control solutions, it’s important to note a few considerations. First, these solutions are most effective on young and actively growing weeds. Mature or well-established weeds may require multiple applications for complete eradication.
Additionally, organic weed control solutions may not offer long-term weed prevention. These methods primarily target existing weeds and may not effectively prevent new weed growth. Regular monitoring and maintenance are still necessary to manage any recurring weed issues in your rock garden.
Lastly, keep in mind that organic weed control solutions can have a broad-spectrum effect, meaning they can harm or kill desirable plants if applied indiscriminately. Take care to selectively target the weeds and avoid spraying the solution on desirable plants or nearby vegetation.
By using organic weed control solutions, you can effectively manage weed growth in your rock landscaping while minimizing the use of chemical-based herbicides. However, for larger areas or persistent weed problems, it may be necessary to combine organic solutions with other weed removal methods like hand pulling or utilizing landscape fabric.
Now that you’ve explored the benefits of organic weed control solutions, let’s move on to method four: installing landscape fabric as a physical weed barrier in your rock garden.
Method 4: Installing Landscape Fabric
Installing landscape fabric is an effective strategy for weed control in rock landscaping. Landscape fabric acts as a physical barrier, preventing weeds from growing and competing with your plants in your rock garden.
To begin, remove any existing weeds from the area where you plan to install the landscape fabric. This ensures that the weeds won’t grow through the fabric and compromise its effectiveness. Level the ground and ensure it’s free from any debris or rocks that could potentially puncture or damage the fabric.
Next, measure and cut the landscape fabric to fit the desired area. It’s recommended to use a permeable landscape fabric that allows water and nutrients to flow through while still preventing weed growth.
Once you have the fabric cut, lay it down over the designated area, ensuring that it covers the entire surface. Overlap the edges of the fabric to prevent weeds from finding their way through the gaps.
To secure the landscape fabric in place, use landscape staples or pins. These metal or plastic anchors can be driven into the ground through the fabric at regular intervals, such as every 6 to 12 inches. This prevents the fabric from shifting or being dislodged by wind, rain, or foot traffic.
If you have existing plants in your rock landscaping, carefully cut holes in the fabric to accommodate them. Make sure the holes are slightly larger than the plants to allow for growth and prevent the fabric from obstructing their development.
After the landscape fabric is installed, cover it with an appropriate mulch or decorative rock layer. This not only enhances the appearance of your rock garden but also provides an additional layer of protection against weed growth. The mulch or rocks create a barrier that prevents sunlight from reaching the weed seeds, inhibiting their germination.
While landscape fabric is an effective option for weed control, it’s important to note that it is not foolproof. Over time, weed seeds can still find their way onto the surface of the fabric and take root. Regular inspections and maintenance are necessary to remove any weeds that manage to grow on top of the fabric.
Should weeds penetrate the landscape fabric, carefully lift and pull out the weeds by hand or use a weeding tool. Take care not to damage the fabric or surrounding plants when removing the weeds.
Installing landscape fabric offers long-term weed suppression in your rock garden, reducing the need for frequent hand pulling or chemical weed control. However, it’s essential to regularly monitor and maintain the fabric to maximize its effectiveness. Replenish the mulch or stone layer as needed to maintain the desired aesthetic and weed control performance.
Now that you’ve learned about using landscape fabric as a weed barrier in your rock landscaping, let’s explore method five: utilizing natural weed barriers to prevent weed growth.
Method 5: Utilizing Natural Weed Barriers
Utilizing natural weed barriers is a practical and environmentally-friendly strategy to prevent weed growth in your rock landscaping. By incorporating natural materials as barriers, you can create obstacles that impede weed germination and establishment, leading to a weed-free rock garden.
One of the most commonly used natural weed barriers is cardboard. Simply collect flattened, unfolded cardboard boxes or sheets and place them directly on the ground where you want to control weed growth. Overlap the edges and ensure that the cardboard covers the entire weed-prone area.
Cardboard acts as a physical barrier, blocking sunlight and preventing weed seeds from germinating and reaching the soil. Additionally, as the cardboard breaks down over time, it adds organic matter to the soil, contributing to soil health and fertility.
Another natural weed barrier option is newspaper. Layer multiple sheets of newspaper on the ground, making sure to cover the entire area. Wet the newspaper slightly to prevent it from blowing away, but be careful not to saturate it excessively, as this can hinder water penetration into the soil.
Newspaper provides a similar function to cardboard, creating a barrier that blocks light from reaching the weed seeds. It’s important to apply a thickness of at least 4-6 sheets to ensure effective weed suppression.
Mulch, such as wood chips or bark, can also be used as a natural weed barrier in rock landscaping. Apply a layer of mulch to a depth of 2-3 inches over the desired area, ensuring that the entire surface is covered. Mulch helps to smother weed seeds and prevent them from germinating, while also conserving soil moisture and regulating soil temperature.
When using natural weed barriers, it’s important to regularly monitor the area for any weed growth that may occur. Occasionally, weed seeds may land on top of the barrier and start germinating. Promptly remove any emerging weeds by hand or using a weeding tool to prevent them from establishing a foothold in your rock garden.
It’s worth noting that natural weed barriers are best suited for areas with low foot traffic or where you don’t intend to make frequent changes, as disturbing the barriers can disrupt their effectiveness. However, if adjustments or modifications are necessary, simply lift the barrier, make the required changes, and reapply it as needed.
By utilizing natural weed barriers such as cardboard, newspaper, or mulch, you can significantly reduce weed growth in your rock landscaping. Combined with regular maintenance and inspection, these natural barriers create an environment that discourages weed establishment, allowing you to enjoy a beautiful and weed-free rock garden.
Now that you have learned about the various methods for weed control in rock landscaping, let’s move on to post-weed removal maintenance tips to ensure the long-term health and beauty of your rock garden.
Post-Weed Removal Maintenance Tips
After successfully removing weeds from your rock landscaping, it’s crucial to implement post-weed removal maintenance practices to ensure the long-term health and beauty of your rock garden. These maintenance tips will help prevent weed regrowth and maintain the overall integrity of your landscape:
1. Regular Inspection:
Regularly inspect your rock garden for any signs of new weed growth. Early detection allows you to address the issue before the weeds become established and more difficult to remove. Take note of any small weed seedlings or weed seeds that may have blown onto the surface, and promptly remove them by hand or using a weeding tool.
2. Mulching:
Apply a fresh layer of mulch to your rock landscaping after weed removal. Mulch acts as a protective barrier, suppressing weed growth and conserving soil moisture. It also provides insulation to the roots of your desirable plants, reducing temperature fluctuations and promoting healthy growth.
3. Watering and Fertilizing:
Ensure that your desirable plants receive adequate water and nutrients, as this helps them compete with any potential weeds. Water your rock landscaping deeply but infrequently, allowing the water to penetrate the soil and reach the roots. Avoid overhead watering, as this can promote weed growth. Additionally, fertilize your plants as needed to keep them healthy and vigorous, which helps them outcompete any weed competition.
4. Plant Health Care:
Maintain the overall health of your plants by regularly inspecting them for any signs of pests, diseases, or nutritional deficiencies. Address any issues promptly to prevent the weakening of your plants, which can make them more susceptible to weed invasion.
5. Cleaning Rock Surfaces:
Periodically clean the surfaces of your rocks, removing any debris or fallen leaves. This helps prevent weed seeds from finding fertile ground and germinating. Use a leaf blower, a soft brush, or a water sprayer to remove any loose material that may have accumulated.
6. Ongoing Weed Prevention:
Consider implementing preventative measures such as regular mulch top-ups, natural weed barriers, or landscape fabric maintenance. These measures will provide additional weed prevention and reduce the likelihood of new weed growth in your rock garden.
Implementing these post-weed removal maintenance tips will help keep your rock landscaping weed-free and thriving. Consistency and regular care are key to maintaining the beauty and integrity of your rock garden over time.
By incorporating these maintenance practices into your regular gardening routine, you’ll enjoy the rewards of a stunning and weed-free rock landscaping year after year.
Conclusion
Taking control of the weed problem in your rock landscaping is essential to maintain its beauty and vitality. Weeds can quickly invade and diminish the aesthetic appeal of your rock garden, as well as compete with your desirable plants for vital resources. By following the effective strategies outlined in this guide, you can successfully eliminate weeds and restore the pristine condition of your rock landscaping.
Whether you choose to hand pull weeds, use a weed torch, apply organic weed control solutions, install landscape fabric, or utilize natural weed barriers, each method has its own benefits and considerations. Combining multiple strategies can provide a comprehensive approach that suits your specific needs and ensures long-term weed control.
However, it’s important to remember that weed removal is just the beginning. Implement the post-weed removal maintenance tips to sustain the weed-free environment in your rock garden. Regular inspections, mulching, proper watering and fertilizing, plant health care, and ongoing weed prevention efforts are all crucial for the continued success of your rock landscaping.
By dedicating time and effort to weed control and maintenance, you can create a visually stunning and low-maintenance rock garden that serves as a peaceful oasis within your outdoor space. A weed-free rock landscape will not only enhance your property’s curb appeal but also provide a tranquil setting for relaxation and outdoor activities.
Now armed with the knowledge, strategies, and maintenance practices outlined in this guide, you are well-equipped to tackle the challenge of weeds in your rock landscaping. Embrace the task with confidence, and enjoy the beauty, serenity, and weed-free environment of your stunning rock garden for years to come.