Home>Garden Design>Landscape Design>How To Put Down Rock Landscaping
Landscape Design
How To Put Down Rock Landscaping
Modified: January 22, 2024
Learn how to create stunning rock landscapes with our comprehensive guide on landscape design. Transform your outdoor space with these expert tips and techniques.
(Many of the links in this article redirect to a specific reviewed product. Your purchase of these products through affiliate links helps to generate commission for Chicagolandgardening.com, at no extra cost. Learn more)
Table of Contents
- Introduction
- Step 1: Prepare the Area
- Step 2: Clear the Existing Vegetation
- Step 3: Level the Ground
- Step 4: Install Weed Barrier
- Step 5: Lay the Base Material
- Step 6: Spread and Compact the Base Material
- Step 7: Choose and Place the Rocks
- Step 8: Arrange Rocks in a Natural Pattern
- Step 9: Fill in the Gaps
- Step 10: Add Finishing Touches
- Conclusion
Introduction
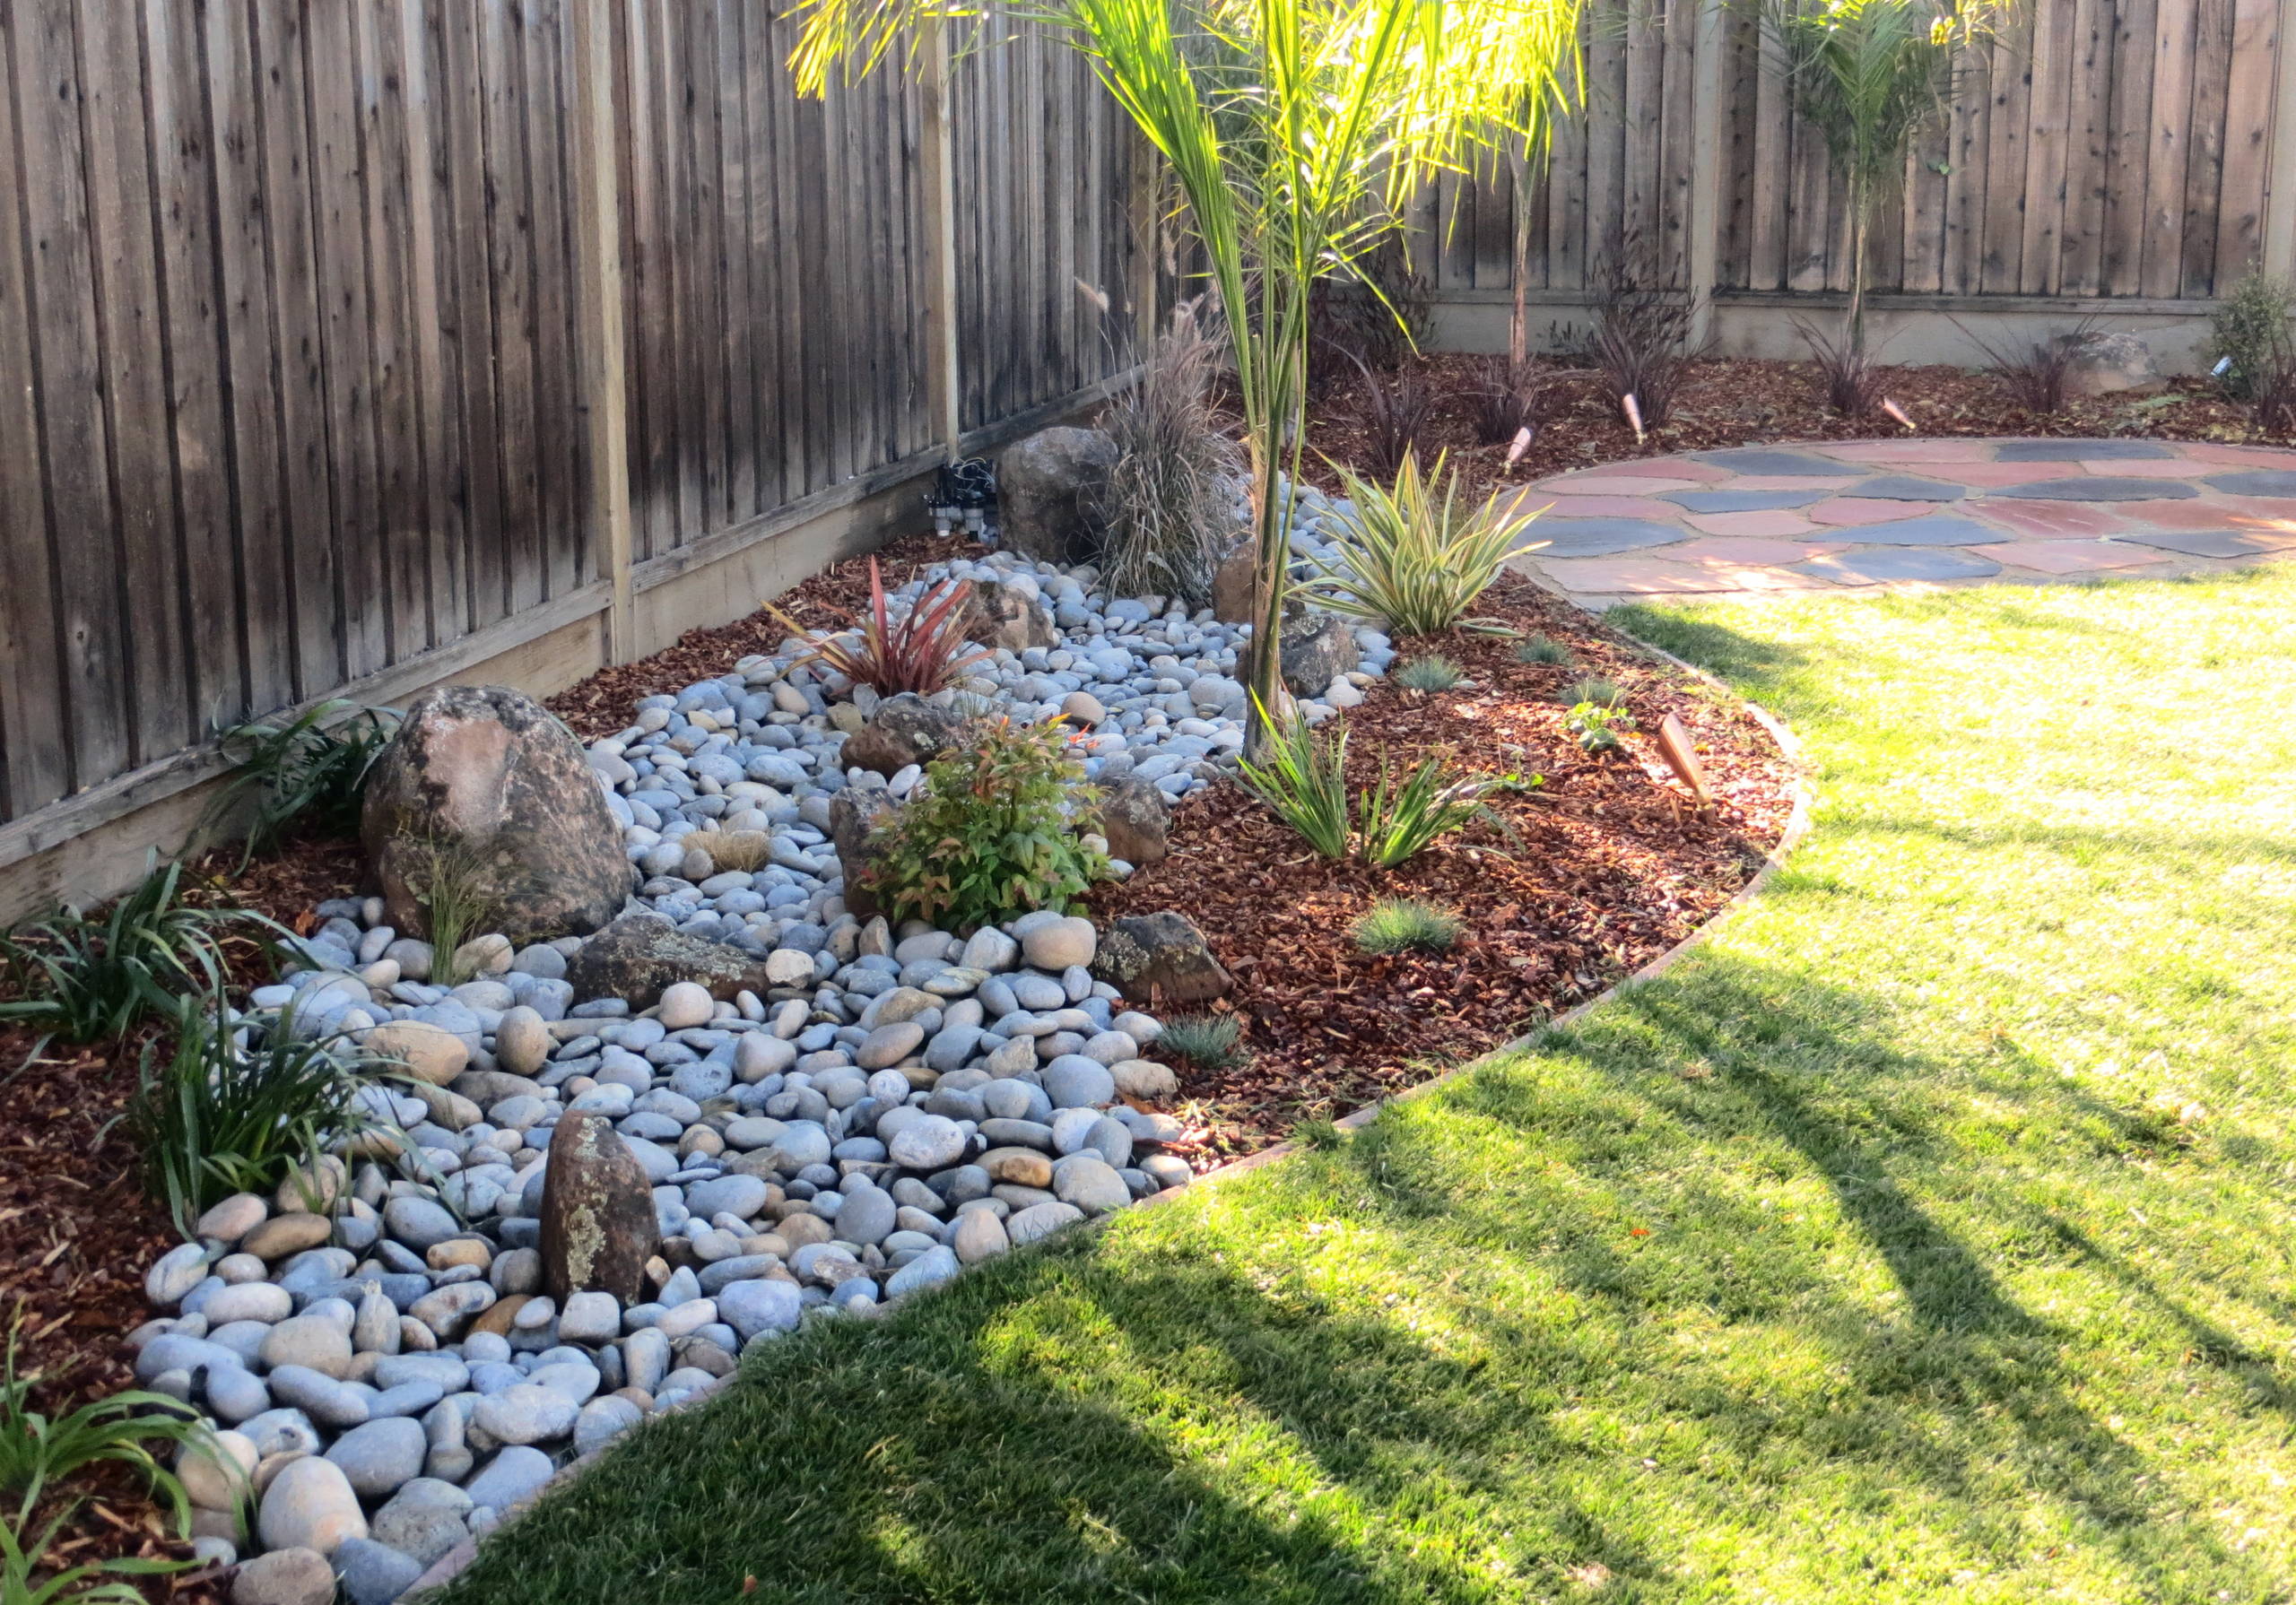
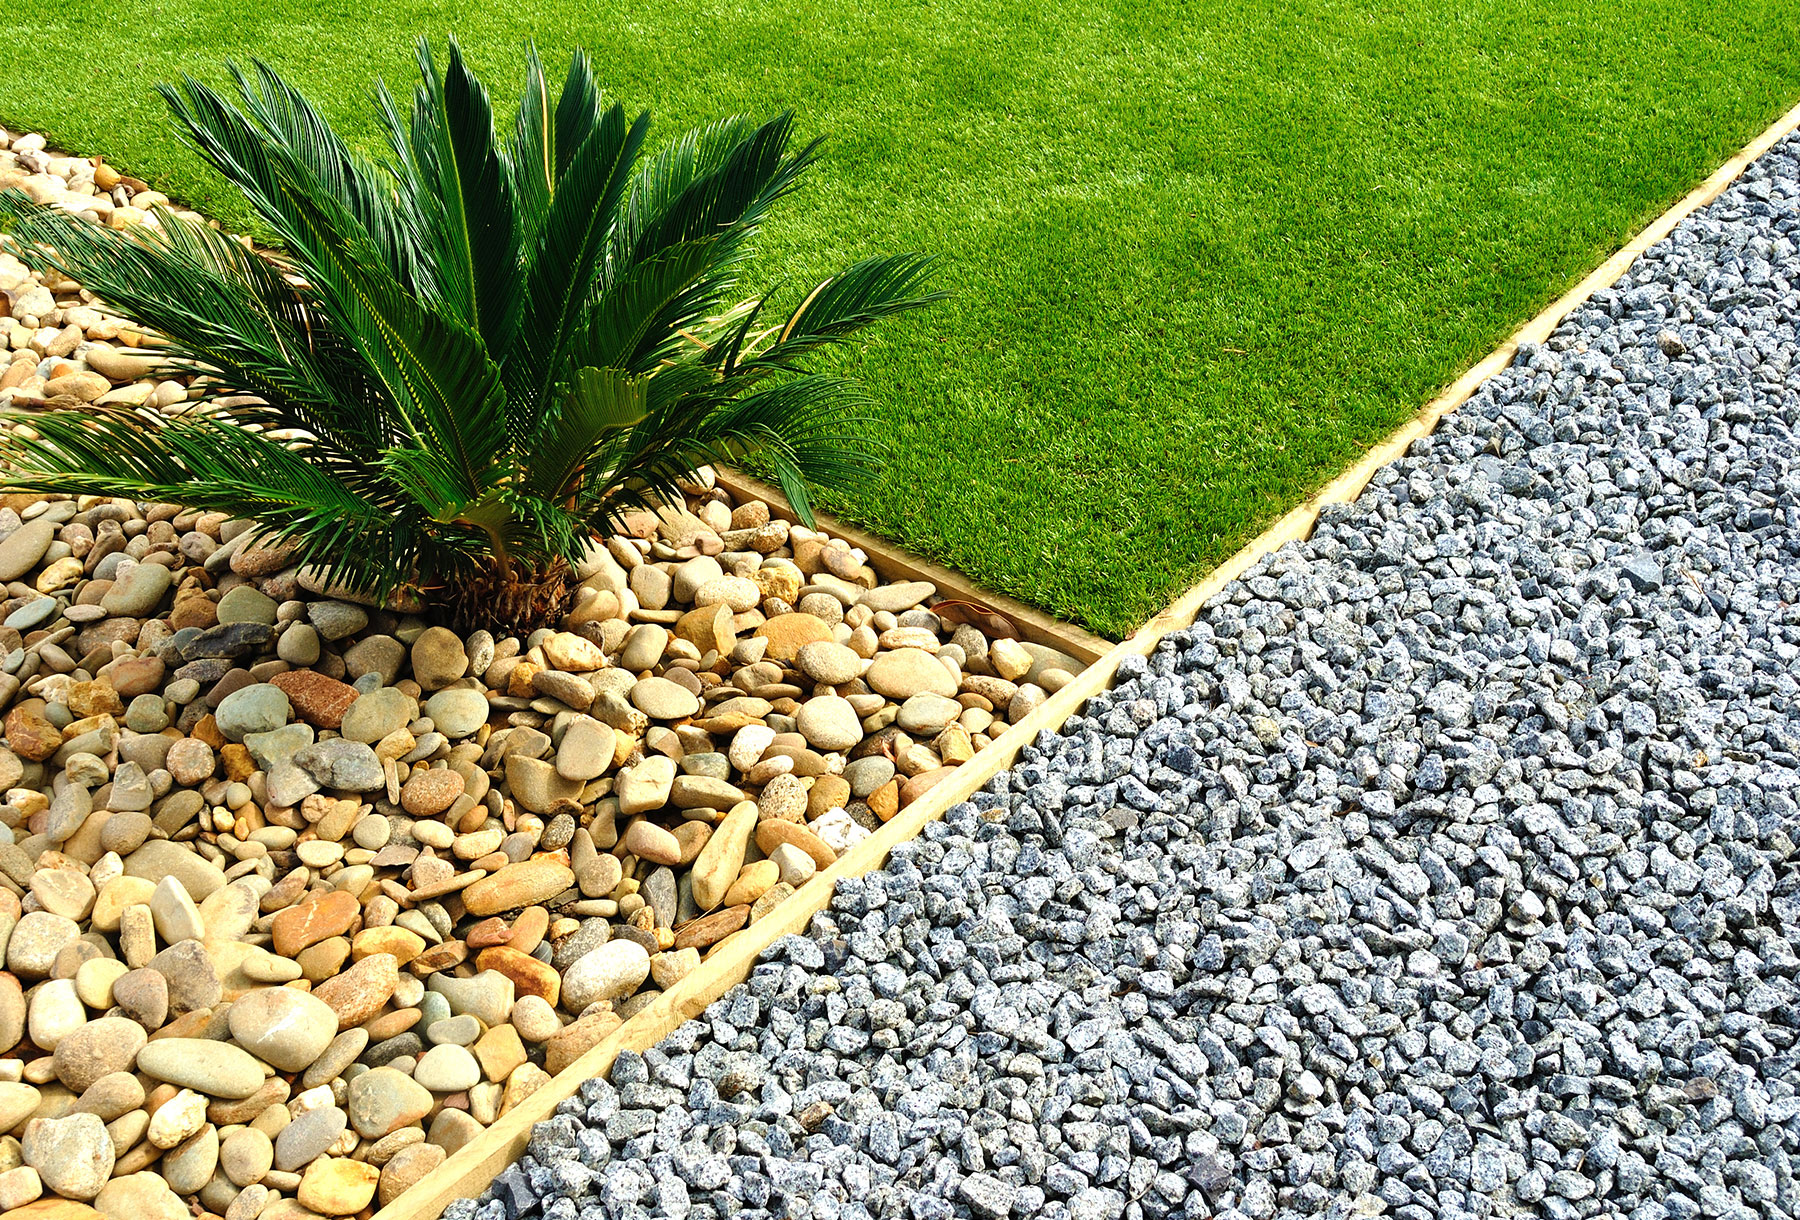
When it comes to landscaping, there are countless options to choose from. From lush green gardens to vibrant flower beds, each choice brings its own unique beauty to your outdoor space. One popular option that has gained significant popularity in recent years is rock landscaping. Favored for its low maintenance and modern aesthetics, rock landscaping can transform any ordinary yard into a stunning oasis.
Rock landscaping involves the strategic placement of various sizes and types of rocks to create a visually appealing and functional landscape. Whether you’re looking to add a rock garden or create a rock pathway, this article will guide you through the steps needed to accomplish the task successfully.
Before we dive into the details, it’s important to note that rock landscaping requires some preparation and planning. It’s essential to have a clear vision of your desired outcome and gather all the necessary materials before getting started. Additionally, checking local regulations and obtaining any necessary permits is crucial to ensure compliance with land usage policies.
Now, let’s get started on your rock landscaping journey! In the following sections, we will discuss the step-by-step process to put down rock landscaping. From preparing the area to adding finishing touches, we will cover everything you need to know to create a stunning rock landscape that will impress your friends and neighbors.
Step 1: Prepare the Area
Before you can start laying down rock landscaping, it’s crucial to prepare the area properly. This step ensures a solid foundation for your rocks and creates an optimal environment for plant growth.
The first task in preparing the area is to clear any existing vegetation. Remove any grass, weeds, or plants in the designated area for your rock landscaping. This can be done by hand or by using tools such as a shovel or garden hoe. Be sure to remove the roots to prevent any vegetation from growing through your rock bed in the future.
Once the vegetation is cleared, it’s time to level the ground. Use a rake or a shovel to even out any uneven spots in the soil. This will create a smooth surface for your rocks to be placed on. If necessary, you can also add or remove soil to achieve the desired level.
After leveling the ground, it’s essential to install a weed barrier. Lay down a high-quality weed barrier fabric over the entire area. This will prevent weeds from penetrating through the rocks and minimize the maintenance required in the future. Secure the fabric with landscape staples to keep it in place.
Preparing the area also involves considering drainage. Ensure that the area has proper drainage to avoid water pooling and potential damage to plants or the foundation. If necessary, make any necessary adjustments to the terrain to facilitate the natural flow of water.
Now that the area is properly prepared, you’re ready to move on to the next step: laying the base material. This will create a stable foundation for your rocks and ensure long-lasting rock landscaping.
Step 2: Clear the Existing Vegetation
Before you can begin your rock landscaping project, it’s important to clear the existing vegetation in the designated area. This step ensures a clean surface for your rocks and prevents any unwanted plants from competing with your desired landscape design.
Start by removing any grass, weeds, or other plants from the area. You can use a shovel, garden hoe, or hand tools to uproot the vegetation. Remember to dig deep enough to remove the entire root system to prevent regrowth. If the area is heavily vegetated, you may need to use a weed eater or lawnmower to cut down the plants before digging them out.
As you clear the vegetation, take care to dispose of it properly. You can either compost the organic matter if it is free from invasive species or dispose of it in yard waste containers. Avoid dumping the vegetation in natural areas or water bodies, as it can introduce non-native species and harm the local ecosystem.
It’s important to note that while clearing the existing vegetation is necessary for rock landscaping, you may choose to preserve certain plants or incorporate them into your design. For example, if there are mature trees or shrubs that add beauty or provide shade, you can work around them or create a rock bed surrounding them. Plan your design accordingly to make the most of existing vegetation or remove it entirely for a clean slate.
Once the vegetation is cleared, rake the area to remove any remaining debris or small roots. This will ensure a smooth surface for your rock installation and prevent any objects from protruding through the rocks.
Remember, thoughtful and thorough vegetation clearance is essential for the success of your rock landscaping project. By starting with a blank canvas, you’ll have the freedom to create a visually stunning and low-maintenance landscape design.
Step 3: Level the Ground
Now that you have cleared the existing vegetation, it’s time to level the ground in preparation for your rock landscaping project. Leveling the ground ensures a smooth and even surface for the rocks to be placed on, creating a visually appealing and functional landscape.
Start by removing any large rocks, debris, or obstacles from the area. Use a rake or shovel to clear the surface of any unwanted objects. This will help prevent uneven spots and make the leveling process easier.
Next, assess the current state of your ground. Look for any dips, bumps, or uneven areas that need to be addressed. Use a leveling tool, such as a long plank or a string attached to stakes, to determine where the ground needs to be leveled. Lay the leveling tool across the ground and adjust the soil accordingly to achieve a flat surface. This may involve adding or removing soil from certain areas.
When leveling the ground, consider the natural grade of your landscape. Ensure that the ground slopes away from any structures to promote proper drainage. This will prevent water from pooling and potentially causing damage to your home or other buildings.
As you level the ground, periodically check for stability by walking or lightly pressing on the soil. The ground should feel firm and compacted. If you notice any soft or unstable areas, additional soil compaction may be necessary.
If your ground is particularly uneven or unstable, you may need to consider adding a layer of gravel or sand as a base. This will help create a more stable and level surface for your rocks to sit on. Be sure to compact the base material before moving on to the next step.
Leveling the ground is a crucial step in rock landscaping, as it provides the foundation for the entire project. Take your time to ensure that the ground is level and stable before moving on to the next steps.
Step 4: Install Weed Barrier
Installing a weed barrier is an important step in your rock landscaping project. A weed barrier helps to prevent unwanted weeds from growing through your rock bed, reducing the amount of maintenance required in the future and keeping your landscape looking clean and polished.
Start by measuring the area that needs to be covered with the weed barrier. Ensure that you have enough fabric to fully cover the designated space. It’s better to have extra fabric than to fall short and leave areas exposed to potential weed growth.
Once you have the measurements, lay out the weed barrier fabric over the area you’ve cleared and leveled. Ensure that it covers the ground completely, extending a few inches beyond the edges of your planned rock bed. This will help to prevent weeds from finding their way around the edges.
Secure the weed barrier fabric in place by using landscape staples or pins. Space the staples or pins every few feet to ensure that the fabric stays in place, especially in areas with high wind or foot traffic.
When installing the weed barrier, it’s important to make sure it is properly aligned and flat. Smooth out any wrinkles or folds in the fabric to create a clean surface for your rocks to be placed on. This will give your rock landscaping a professional and well-maintained appearance.
While the primary purpose of a weed barrier is to prevent weed growth, it also helps with moisture retention in the soil. The fabric allows water to penetrate into the ground while reducing evaporation, helping to keep your plants hydrated and healthy.
With the weed barrier installed, you can now proceed to the next step: laying the base material to provide a stable foundation for your rocks.
Step 5: Lay the Base Material
Once the weed barrier is in place, it’s time to lay down the base material for your rock landscaping project. The base material provides a stable foundation for the rocks, ensuring that they are well-supported and do not shift or sink over time.
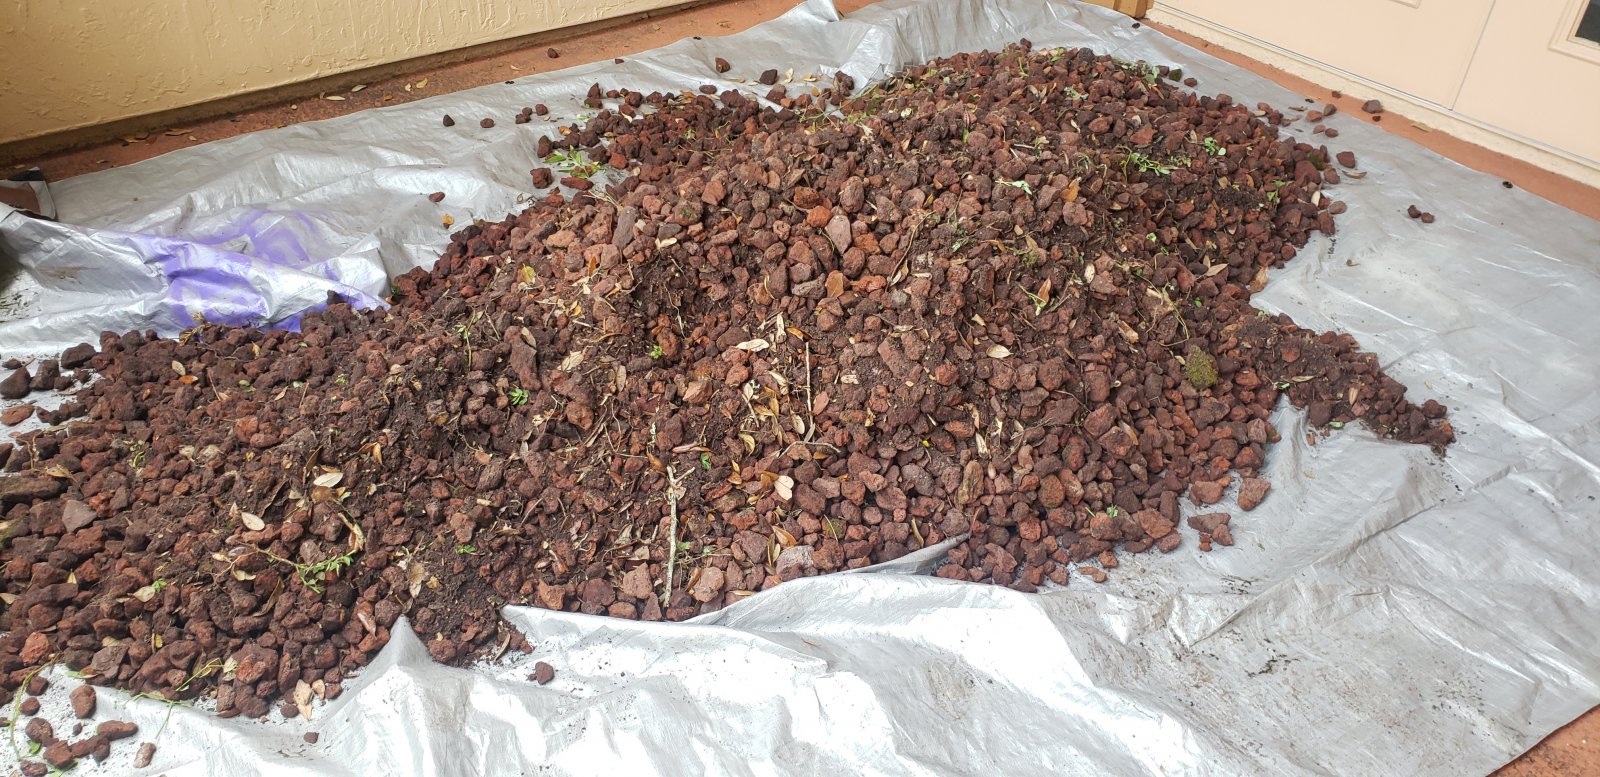
The most commonly used base material for rock landscaping is crushed stone or gravel. This material provides excellent drainage and helps to prevent erosion. When choosing the size of the crushed stone, opt for smaller stones that are no larger than ¾ inch in diameter. This will allow for better compaction and ensure a level surface.
Start by spreading a layer of the base material evenly over the weed barrier. Aim for a thickness of about 2-4 inches, depending on the desired height of your rock bed. Use a rake or shovel to distribute the base material and create an even surface.
As you lay the base material, periodically check the levelness of the surface using a level or by eye. Make any necessary adjustments to ensure that the base material is evenly distributed and provides a level foundation for your rocks.
Once the base material is spread and leveled, it’s important to compact it. This can be done using a tamper or a vibrating plate compactor, which can be rented from a local equipment rental store. Start at one end of the area and work your way towards the other end, making multiple passes to ensure proper compaction.
Compacting the base material is crucial as it helps to reduce the risk of settling and provides a solid foundation for your rock landscaping. Ensure that the entire area is thoroughly compacted, paying extra attention to any areas that appear soft or unstable.
By laying the base material and compacting it properly, you’re setting the stage for a durable and long-lasting rock landscape. With the foundation in place, you’re ready to move on to the exciting part — placing the rocks in a visually appealing pattern.
Step 6: Spread and Compact the Base Material
Now that the base material has been laid, the next step is to spread and compact it to create a stable foundation for your rock landscaping project. Spreading and compacting the base material ensures that it is evenly distributed and tightly packed, providing a solid surface for the rocks to be placed on.
Start by spreading the base material evenly over the designated area. Use a rake or shovel to distribute the material, making sure it covers the entire surface. Aim for a thickness of about 2-4 inches, depending on the desired height of your rock bed.
As you spread the base material, periodically check the levelness of the surface using a level or by eye. Make any necessary adjustments to ensure that the material is evenly distributed and provides a level foundation for your rocks.
Once the base material is spread, it’s important to compact it. This can be done using a tamper or a vibrating plate compactor, which can be rented from a local equipment rental store. Start at one end of the area and work your way towards the other, making multiple passes to ensure proper compaction.
When compacting the base material, apply firm pressure to ensure that it is tightly packed. This will help to prevent shifting and settling of the rocks in the future. Pay extra attention to any areas that appear soft or unstable, compacting them more thoroughly.
Compacting the base material is a critical step in the rock landscaping process, as it creates a solid and stable foundation. Proper compaction will minimize the risk of rocks shifting or sinking over time, ensuring the longevity and durability of your rock landscape.
After compacting the base material, take a step back and assess the surface. Look for any uneven spots or areas that may require additional material or compaction. Make the necessary adjustments to achieve a smooth and level foundation for your rock landscaping project.
With the base material spread and compacted, you’re now ready to move on to the next exciting step – choosing and placing the rocks to create a visually stunning landscape.
Step 7: Choose and Place the Rocks
Choosing and placing the rocks is the creative and exciting part of your rock landscaping project. This step allows you to bring your vision to life and create a visually stunning landscape design that reflects your personal style and preferences.
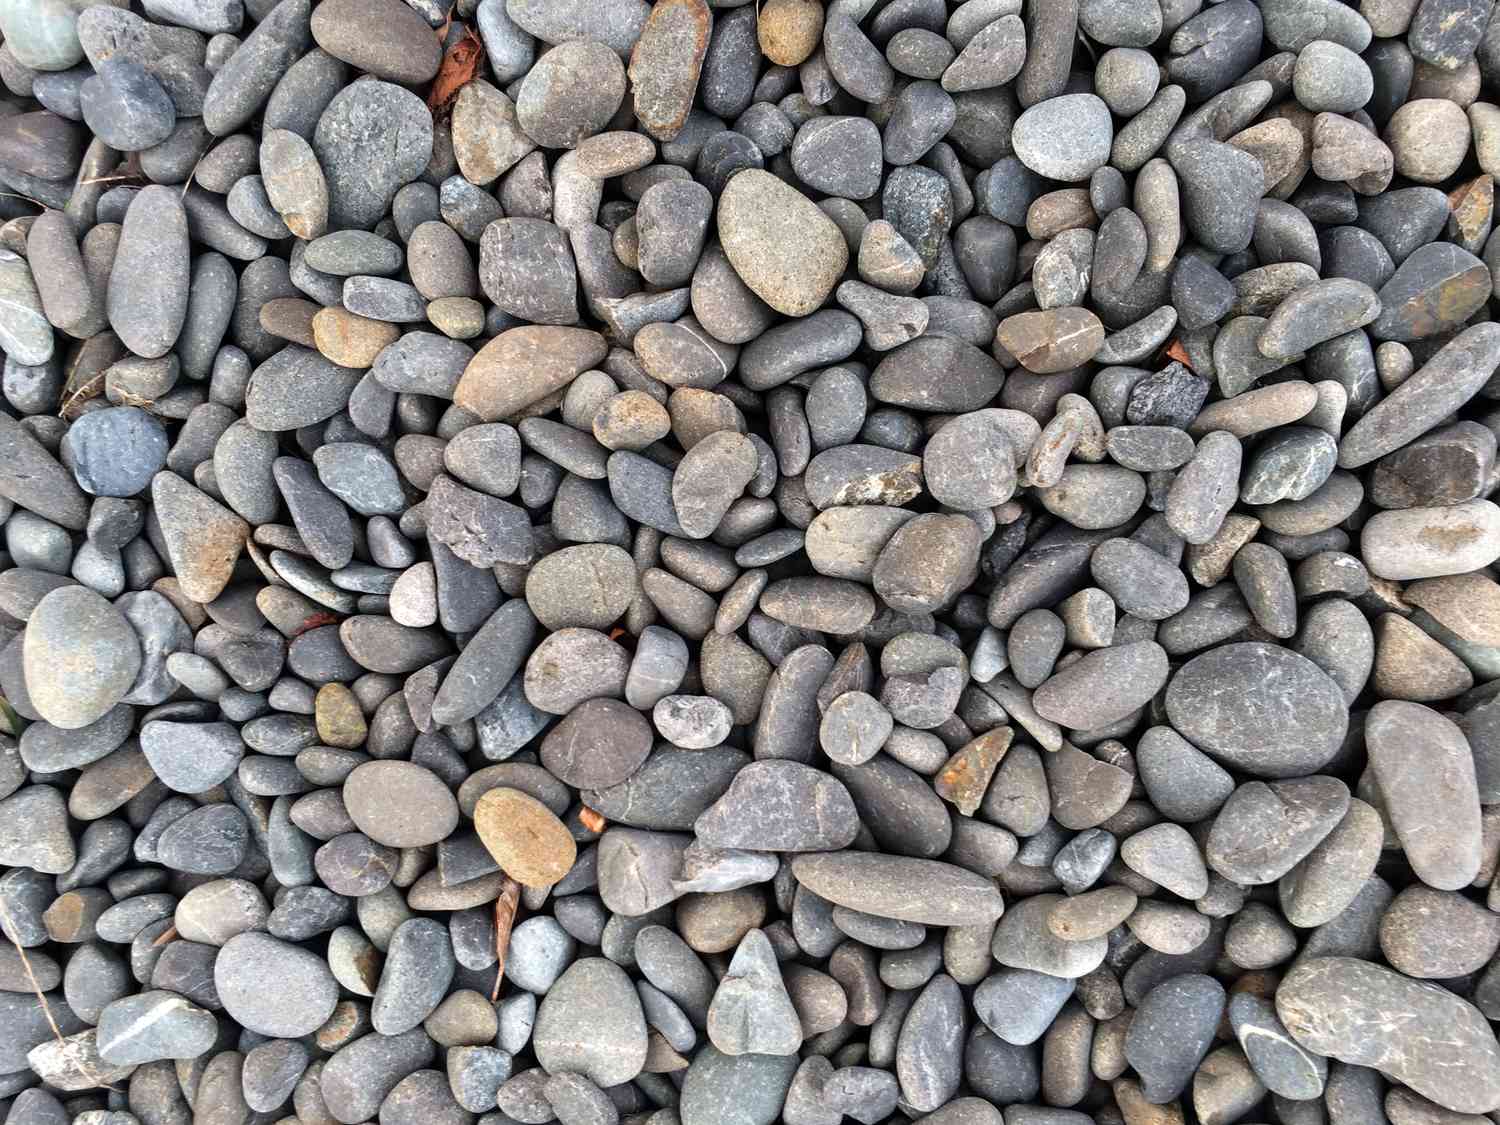
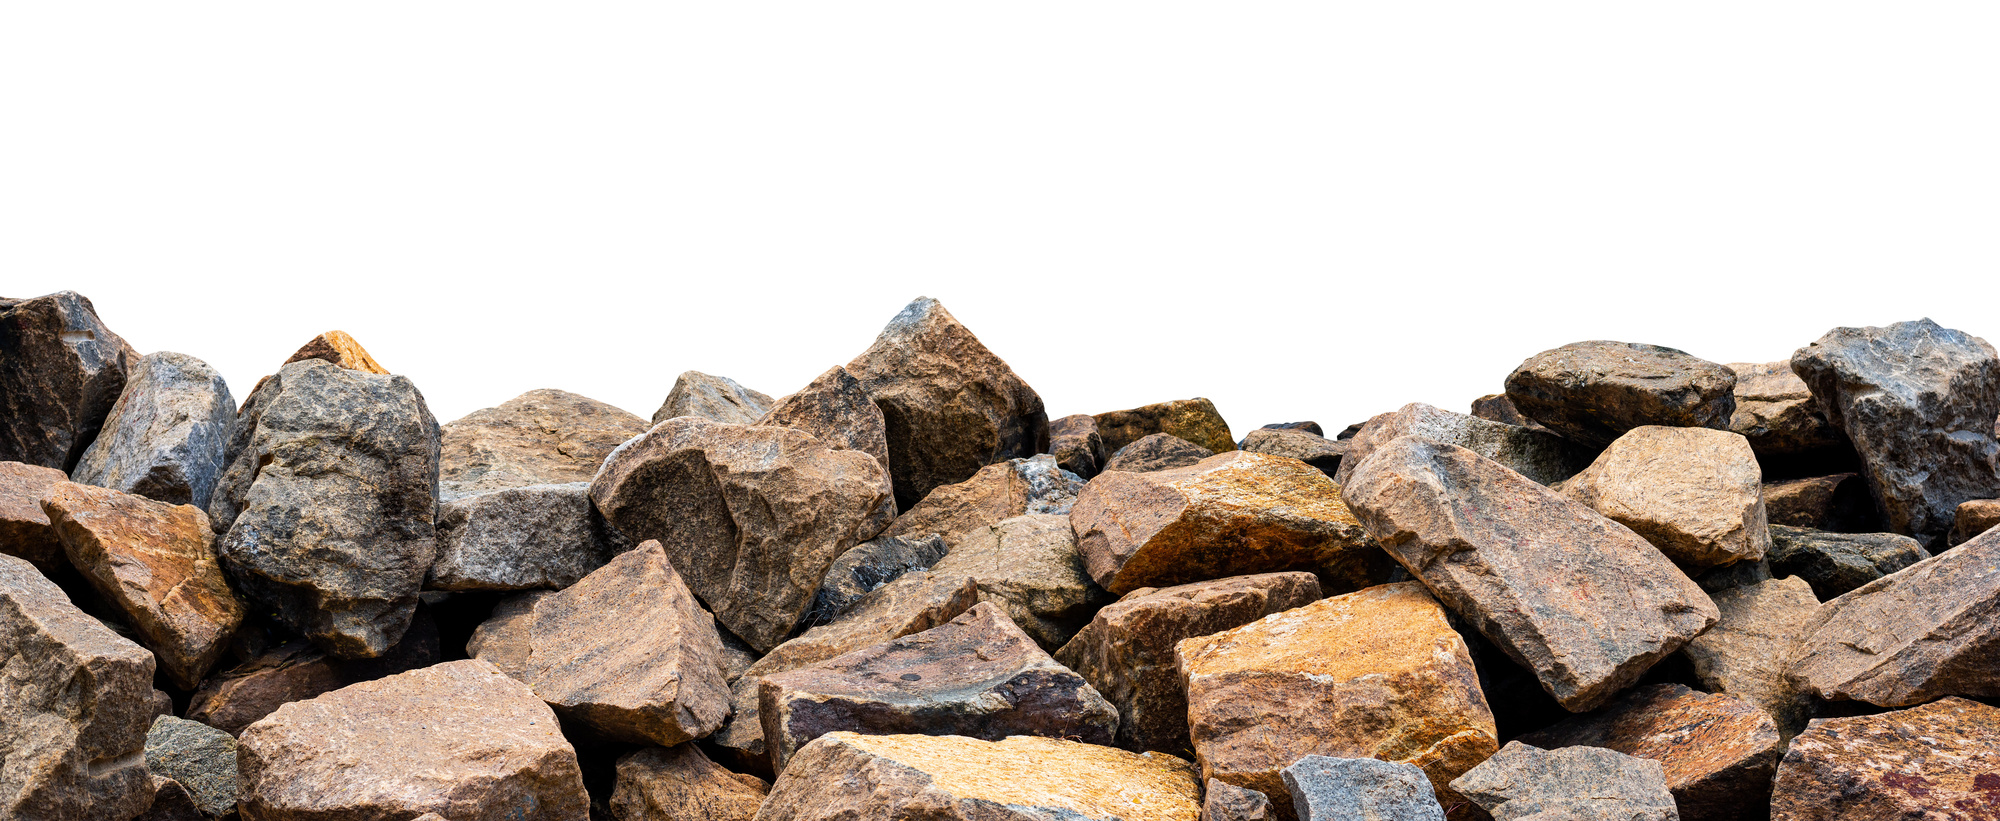
Start by selecting the type of rocks you want to use. There are various options available, including river rocks, pebbles, boulders, or even decorative stones. Consider the size, shape, color, and texture of the rocks to ensure they complement the overall aesthetic of your outdoor space. It’s also important to take into account the theme or mood you want to create, whether it’s a serene zen garden or a vibrant rock pathway.
When placing the rocks, it’s crucial to consider the natural flow and patterns found in nature. Start by placing larger rocks or boulders strategically, utilizing them as anchor points or focal points for your design. Arrange the rocks in a way that appears organic and natural, mimicking the formation you might find in a natural landscape.
As you place the rocks, consider their placement in relation to each other and to any existing elements in your yard, such as trees or structures. Aim for a balanced and harmonious composition that blends seamlessly with the surrounding environment.
Take your time during this process, stepping back periodically to assess the overall look and make any necessary adjustments. Don’t be afraid to experiment with different arrangements and placements until you achieve the desired visual impact.
Remember to leave spaces between the rocks to allow for the growth of plants, if desired. These gaps can provide opportunities for adding low-maintenance groundcovers, succulents, or other plants that will enhance the overall beauty and functionality of your rock landscape.
While placing the rocks, be mindful of their weight and size. Larger rocks may require assistance or additional tools to move and position properly. Safety should always be a priority, so use caution and enlist help if needed.
Keep in mind that rock landscaping is an ongoing process, and you can always make adjustments or additions as you desire. The placement of rocks can also be influenced by seasonal changes or the growth of plants over time. Flexibility and creativity are key when it comes to creating a unique and captivating rock landscape.
With the rocks carefully chosen and strategically placed, your rock landscaping project is starting to take shape. The next step involves filling in the gaps between the rocks to complete the look and enhance the stability of your design.
Step 8: Arrange Rocks in a Natural Pattern
Arranging the rocks in a natural pattern is an important step in creating a visually appealing and harmonious rock landscaping design. By mimicking the patterns and formations of nature, you can achieve a more authentic and organic look for your outdoor space.
Start by considering the size, shape, and color of the rocks. Choose rocks that complement each other and fit well together. Variation in size and shape can add visual interest and create a more natural appearance. Look for rocks with unique textures or colors that will enhance the overall aesthetic of your landscape.
Begin placing the rocks strategically, taking inspiration from the natural world. Consider the flow and movement of landforms and try to replicate that in your design. Arrange rocks in a way that appears effortless and random, as if they were naturally positioned over time.
Consider incorporating different levels or elevations into the arrangement. Gradually build up the rocks to create slopes or small hills, creating depth and dimension in your landscape. This can be particularly effective in creating a natural-looking rock garden or pathway.
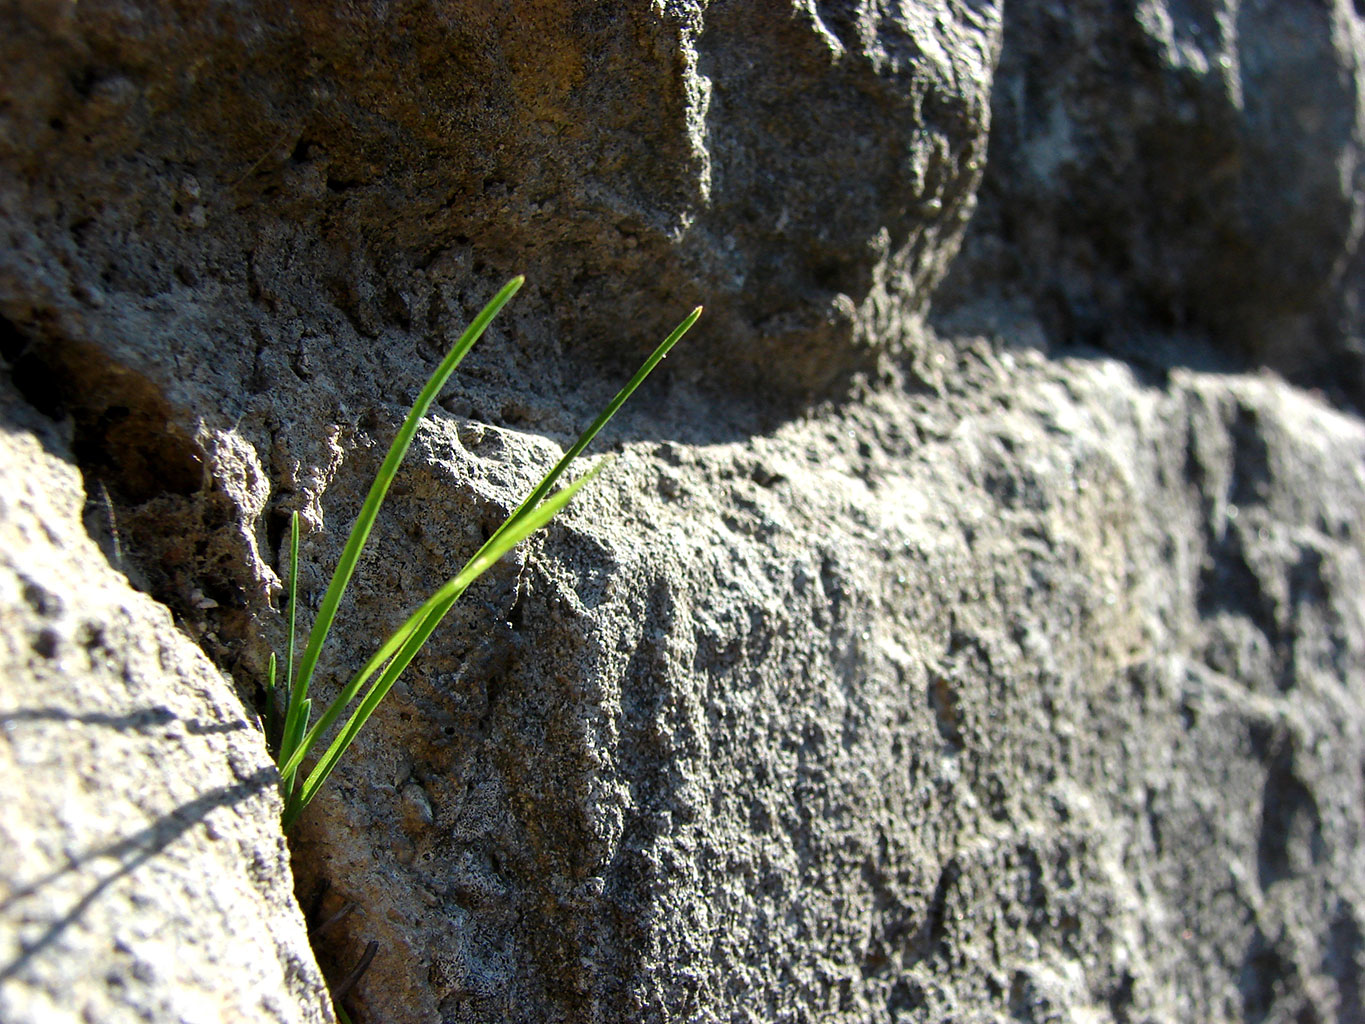
Allow for spaces and gaps between rocks. This not only adds to the natural appearance but also provides opportunities for planting. These gaps can be filled with low-maintenance groundcovers, such as creeping thyme or mosses, to soften the look and enhance the overall aesthetic of your rock landscape.
As you arrange the rocks, step back periodically to assess the overall composition. Take note of any areas that feel unbalanced or overcrowded, and make adjustments as needed. Achieving a balanced and harmonious design is key to creating a visually pleasing rock landscape.
Remember to consider the surrounding elements when arranging the rocks. Take into account the existing vegetation, trees, and structures in your yard. Ensure that the rocks blend seamlessly with the overall landscape and enhance the beauty of the surrounding elements.
Flexibility and creativity are essential during this step. Don’t be afraid to try different configurations and experiment with the placement of rocks. By allowing yourself to explore various arrangements, you’ll have the opportunity to create a unique and captivating rock landscape that reflects your personal style and taste.
With the rocks arranged in a natural pattern, your rock landscaping project is nearing completion. The next step involves filling in the gaps between the rocks to further enhance the stability and aesthetic appeal of your design.
Step 9: Fill in the Gaps
Once you have arranged the rocks in your rock landscape, the next step is to fill in the gaps between the rocks. Filling in the gaps not only enhances the overall stability and durability of your design but also adds a finishing touch to create a polished and cohesive look.
Start by assessing the size and width of the gaps between the rocks. Depending on the desired aesthetic, you can choose different materials to fill the gaps, such as gravel, decorative stones, or even mulch. Consider the color and texture of the materials to ensure they complement the rocks and the overall landscape design.
If you prefer a more natural look, consider using smaller rocks or pebbles to fill the gaps. This creates a seamless and cohesive appearance, making it appear as if the rocks have naturally settled into the ground. You can choose rocks that match the main rocks in your design or select contrasting colors to create visual interest.
An alternative option is to use a groundcover plant to fill the gaps. These low-growing plants not only provide a visually pleasing look but also help to suppress weed growth and retain moisture in the soil. Consider using plants like creeping thyme, sedums, or mosses, depending on your climate and personal preferences.
When filling the gaps, it’s important to distribute the material evenly and fill the spaces generously. This helps to ensure that the rocks are securely held in place and prevents shifting or movement over time. Use a small shovel or your hands to carefully pour or place the filling material into the gaps.
After filling the gaps, use a broom or a brush to gently sweep away any excess material and create a clean and polished appearance. Take a step back and observe the overall look of your rock landscape. Make any necessary adjustments or additions to the filling material to achieve the desired effect and ensure a cohesive and visually appealing final result.
Remember, the filling material you choose not only adds to the aesthetic appeal of your rock landscape but also serves as a functional element in preventing weed growth and stabilizing the rocks. Take the time to choose the right material for your specific design and climate conditions.
By filling in the gaps between the rocks, you’re one step closer to completing your rock landscaping project. The final step involves adding the finishing touches to enhance the beauty and overall impact of your design.
Step 10: Add Finishing Touches
As you near the completion of your rock landscaping project, it’s time to add the finishing touches that will elevate the beauty and functionality of your design. These final additions will help create a polished and cohesive look and may include additional elements that enhance the overall aesthetic appeal.
Consider incorporating decorative elements such as garden sculptures, birdbaths, or ornamental rocks. These additions can serve as focal points in your landscape, adding visual interest and personality to the overall design. Choose pieces that complement the style and theme of your rock landscaping, creating a harmonious and inviting outdoor space.
Lighting is another essential element that can enhance the beauty and functionality of your rock landscaping design. Install outdoor lighting fixtures strategically to highlight specific rocks, pathways, or other key features. This will not only create a dramatic effect at night but also provide safety and ambiance for evening gatherings or walks in the garden.
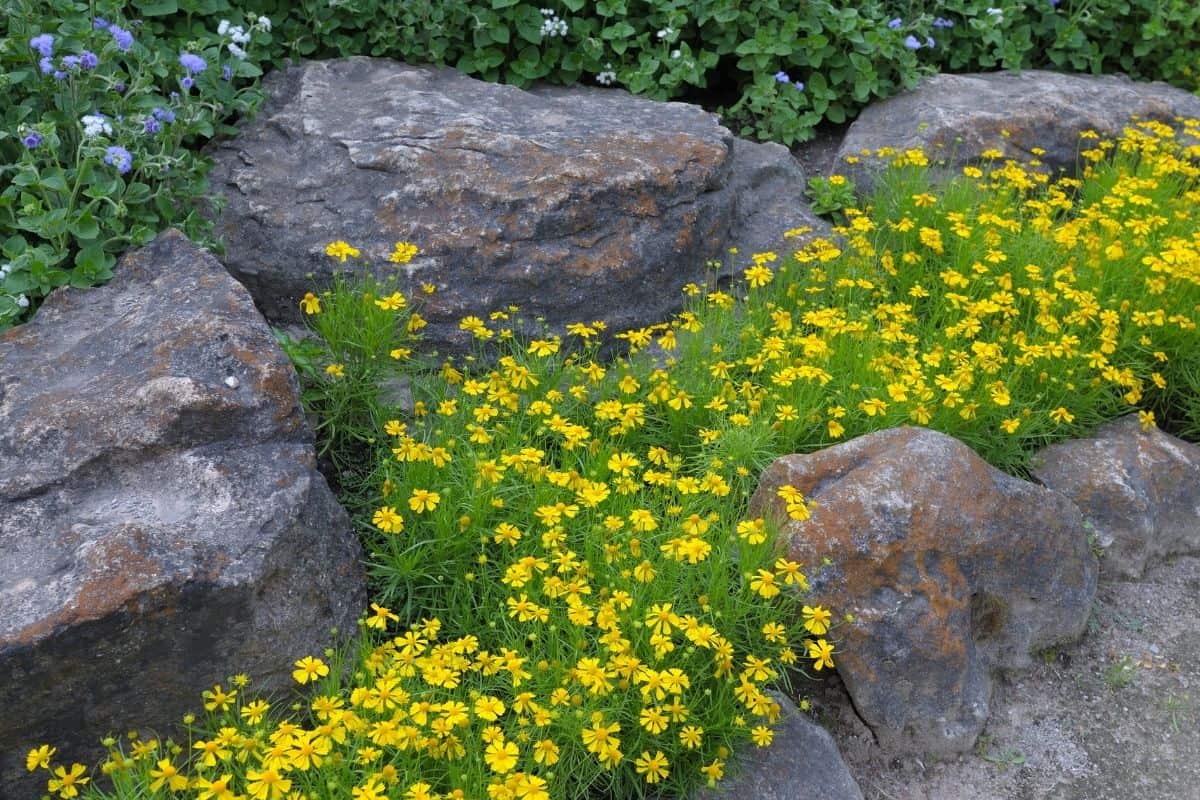
Consider planting additional foliage or flowers around the rocks to add color and texture to your landscape. Select plants that thrive in your climate and complement the rock colors and textures. This will soften the hardscape elements and create a balanced and pleasing contrast between the rocks and the vegetation.
Don’t forget to include seating areas that allow you to enjoy your beautiful rock landscape. Place benches, chairs, or outdoor seating arrangements strategically to take advantage of scenic views or areas of relaxation. This will encourage you and your guests to spend more time in your outdoor space, appreciating the beauty and tranquility of your rock landscaping design.
Consider adding pathways or stepping stones to create a sense of flow and connectivity throughout your rock landscape. This will not only provide functionality and ease of access but also add an element of design and invitation to explore the different areas of your outdoor space.
Lastly, proper maintenance is essential in preserving the beauty of your rock landscaping design. Regularly inspect the area for any weeds or debris and remove them promptly. Prune plants as necessary and monitor the health of the vegetation. Additionally, ensure that the rocks remain stable and secure, making any necessary adjustments as needed.
By adding these finishing touches, your rock landscaping project will be transformed into a cohesive and visually stunning outdoor space. Take the time to carefully consider each element and how they contribute to the overall aesthetic and functionality of your design.
Congratulations! You have completed your rock landscaping project and created a beautiful outdoor oasis that you can enjoy for years to come.
Conclusion
Rock landscaping is a popular choice for transforming outdoor spaces due to its low maintenance requirements and modern aesthetic appeal. By following the step-by-step process outlined in this guide, you can successfully put down rock landscaping and create a visually stunning and functional landscape.
Throughout the process, it’s essential to prepare the area properly by clearing existing vegetation, leveling the ground, and installing a weed barrier. These steps lay the foundation for a durable and long-lasting rock landscape. Then, by carefully selecting and arranging rocks in a natural pattern, you can create a visually appealing and harmonious design that mimics the patterns found in nature.
Filling in the gaps between rocks and adding the finishing touches, such as decorative elements, lighting, and seating areas, will elevate the overall beauty and functionality of your rock landscape. Regular maintenance will ensure that your rock landscaping project continues to thrive and maintain its visual appeal over time.
Remember to unleash your creativity and infuse your personal style into the design to make it a true reflection of your taste and preferences. Enjoy the process of creating your rock landscape and take pride in the remarkable outdoor space you have brought to life.
So, grab your tools, gather your materials, and get ready to embark on a rock landscaping journey that will transform your yard into a stunning oasis.