Home>Gardening Basics>Understanding Soil>How To Spread Topsoil Over Lawn
Understanding Soil
How To Spread Topsoil Over Lawn
Modified: February 10, 2024
Discover the best technique to spread topsoil over your lawn with this comprehensive guide. Understand soil composition and effectively improve the quality of your lawn.
(Many of the links in this article redirect to a specific reviewed product. Your purchase of these products through affiliate links helps to generate commission for Chicagolandgardening.com, at no extra cost. Learn more)
Table of Contents
- Introduction
- Preparation
- Step 1: Assessing the Lawn
- Step 2: Gathering the Materials
- Step 3: Removing Debris and Weeds
- Step 4: Loosening the Soil
- Step 5: Calculating the Amount of Topsoil Needed
- Spreading Topsoil
- Step 6: Starting at One Corner
- Step 7: Using a Rake to Spread the Topsoil
- Step 8: Leveling the Topsoil
- Step 9: Watering the Lawn
- Step 10: Seeding or Sodding (Optional)
- Step 11: Additional Maintenance Tips
- Conclusion
Introduction
Welcome to the world of soil! Soil is a living, dynamic ecosystem that plays a vital role in the growth and health of plants. Understanding soil is key to successful gardening and landscaping. In this article, we will explore the fascinating world of soil, its composition, and how it impacts plant growth. So, whether you are an avid gardener or just someone interested in learning more about the ground beneath our feet, read on to discover the secrets of soil.
Soil is more than just dirt; it is a complex mixture of minerals, organic matter, water, air, and living organisms. It serves as a reservoir for nutrients and water, provides support for plant roots, and acts as a filter for pollutants. Different soils have varying properties such as texture, fertility, and drainage capacity, which influence their suitability for different types of plants.
Understanding the composition of soil is essential for effectively nurturing plants. Sandy soils, for example, have larger particles and tend to drain quickly, making them suitable for drought-tolerant plants. Clay soils, on the other hand, have smaller particles and retain more water, making them ideal for moisture-loving plants. Loamy soils, a balance of sand, silt, and clay, are considered ideal for most plants due to their ability to retain moisture while also providing good drainage.
Soil fertility is another crucial aspect to consider. Fertile soil contains an adequate supply of essential nutrients that plants need for healthy growth. These nutrients include primary macronutrients like nitrogen, phosphorus, and potassium, as well as secondary macronutrients and micronutrients. Improving soil fertility can be achieved through organic matter amendment and the use of fertilizers.
Understanding the pH level of soil is also important, as it influences nutrient availability. Most plants prefer a slightly acidic to neutral soil pH, but some are adapted to more alkaline or acidic conditions. Testing the pH of your soil can help you make informed decisions about the type of plants that will thrive in your garden.
In this article, we will dive deeper into these aspects of soil and explore how soil affects plant growth. By understanding soil composition, fertility, and pH, you will gain valuable insights into how to optimize your gardening efforts for success. So, let’s dig in and uncover the secrets of soil!
Preparation
Before you begin spreading topsoil over your lawn, it’s essential to prepare the area properly. Proper preparation ensures that the topsoil can be spread evenly and effectively, providing a solid foundation for healthy grass growth. Here are some steps to follow in the preparation stage:
- Step 1: Assessing the Lawn
- Step 2: Gathering the Materials
- Step 3: Removing Debris and Weeds
- Step 4: Loosening the Soil
- Step 5: Calculating the Amount of Topsoil Needed
Take some time to assess the condition of your lawn. Look for any bare patches, uneven areas, or areas with compacted soil. These spots will require additional attention during the topsoil spreading process.
Ensure that you have all the necessary materials for the task. Apart from the topsoil, you may need a garden rake, a wheelbarrow or tarp for transporting the topsoil, and a watering can or hose for watering the lawn afterward.
Clear the area of any debris, such as rocks, sticks, or leaves. Also, remove any existing weeds or unwanted vegetation. This step will create a clean canvas for spreading the topsoil and prevent the growth of weeds under the new layer.
If you notice any areas with compacted soil, it’s crucial to loosen it before spreading the topsoil. Use a garden fork or a mechanical aerator to loosen the soil, allowing for better water and nutrient penetration.
Measure the area of your lawn to determine the amount of topsoil needed. The depth of the topsoil layer will depend on the condition of your lawn and any specific requirements. You can use a soil calculator or seek expert advice to calculate the required quantity accurately.
By following these preparation steps, you will create a suitable foundation for spreading topsoil over your lawn. Proper preparation ensures that the topsoil can be applied effectively and helps set the stage for healthy grass growth. Once the preparation is complete, you can proceed to the next step of spreading the topsoil evenly over the lawn.
Step 1: Assessing the Lawn
Before spreading topsoil over your lawn, it’s essential to assess the current condition of your grass. This step will help you identify any problem areas, such as bare patches, uneven spots, or compacted soil, that may require special attention during the topsoil spreading process.
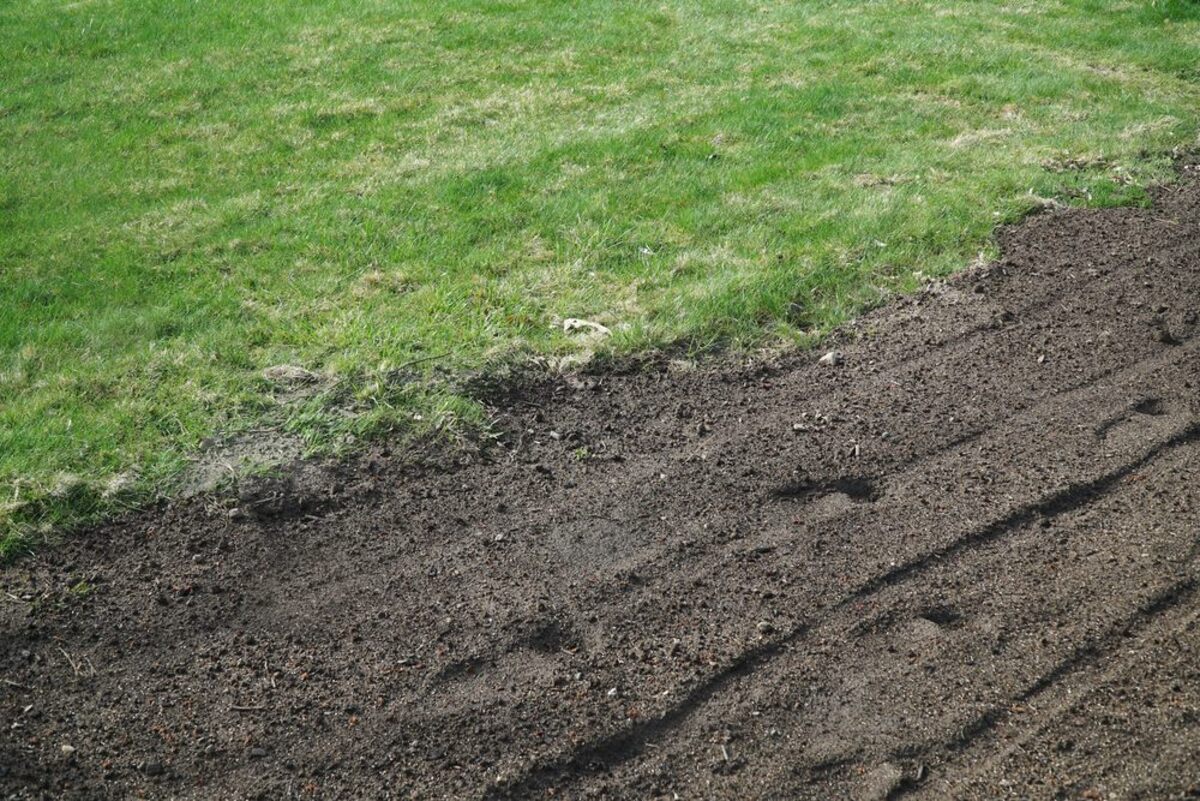
Start by walking around your lawn and closely observing the grass. Look for areas where the grass appears thin or sparse, indicating a need for additional soil and nutrients. These areas might have been damaged due to foot traffic, pet activity, or other factors that have caused the soil to become compacted and hindered grass growth.
Take note of any areas with excessive thatch buildup, which is a layer of organic debris that accumulates between the grass blades and the soil surface. Excessive thatch can prevent water and nutrients from reaching the roots, leading to weak and unhealthy grass.
Additionally, look for signs of poor drainage on your lawn. Areas that retain water or are constantly wet after rainfall may indicate soil compaction or drainage issues. Proper drainage is vital for healthy root development and prevents waterlogging, which can lead to diseases and root rot.
Identify slopes or areas where water runoff is a problem. These areas may need additional measures, such as contouring or the creation of drainage channels, to prevent erosion and encourage proper water flow.
By assessing your lawn, you will gain a better understanding of its specific needs and determine the areas that require attention during the topsoil spreading process. This assessment will enable you to make targeted improvements and create an optimal growing environment for your grass.
Remember, each lawn is unique, and the assessment stage allows you to tailor your approach accordingly. Addressing the specific issues identified during the assessment will set the stage for successful topsoil spreading and promote vigorous, healthy grass growth.
Step 2: Gathering the Materials
Gathering the necessary materials before you start spreading topsoil over your lawn is crucial for a smooth and efficient process. Having the right tools and supplies on hand will help ensure that the task is completed effectively. Here are the essential materials you’ll need:
- Topsoil: The most important material for this process is the topsoil itself. Select high-quality topsoil that is free from contaminants and is well-suited for your specific needs. Consider factors such as soil texture, nutrient content, and organic matter when choosing the right topsoil for your lawn.
- Garden Rake: A garden rake is essential for spreading and leveling the topsoil. Choose a rake with sturdy tines that can easily move and distribute the topsoil evenly over the lawn.
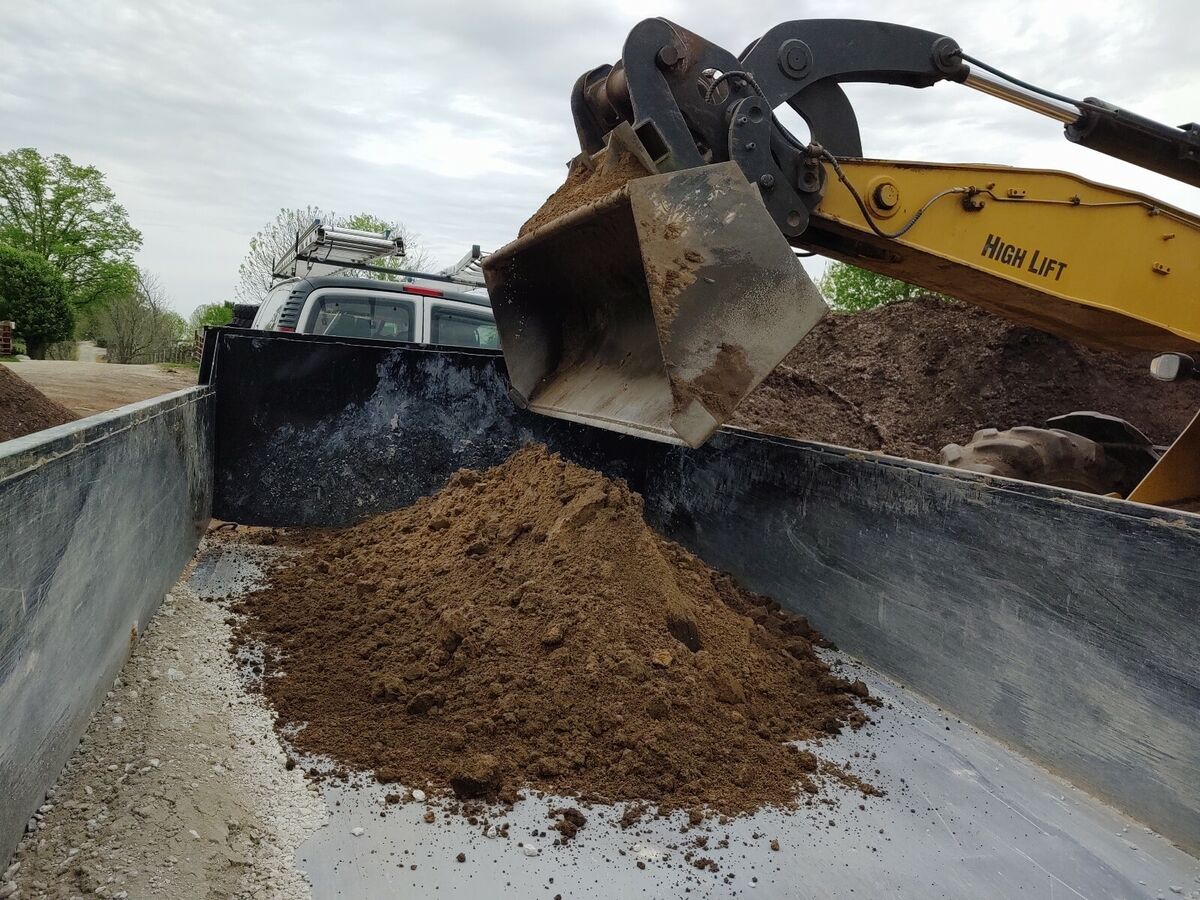
- Wheelbarrow or Tarp: You’ll need something to transport the topsoil from the delivery area to your lawn. A wheelbarrow or tarp can be used to move the topsoil efficiently without causing unnecessary strain on your back.
- Watering Can or Hose: After spreading the topsoil, you’ll need to water the lawn to help settle the soil and ensure good contact between the new topsoil layer and the existing grass. A watering can or hose with a gentle spray attachment can be used for this purpose.
- Optional: Soil Amendments or Fertilizers: Depending on the condition of your lawn and any specific requirements, you may need to incorporate soil amendments or fertilizers. These can help improve soil fertility and provide essential nutrients to support healthy grass growth.
Prioritize obtaining high-quality topsoil, as it serves as the foundation for a healthy lawn. You can acquire topsoil from local nurseries, garden centers, or landscaping supply stores. Consider consulting with experts who can guide you in choosing the right type and quantity of topsoil for your specific lawn needs.
By gathering these materials in advance, you’ll be well-prepared for the topsoil spreading process. Having the necessary tools and supplies on hand will make the task more efficient and ensure that you achieve the desired results for your lawn.
Step 3: Removing Debris and Weeds
Before spreading topsoil over your lawn, it’s important to remove any debris and weeds that may interfere with the process and hinder the healthy growth of your grass. Clearing the area of unwanted materials creates a clean canvas for the topsoil and reduces the risk of weeds taking root in the new layer. Here’s how to effectively remove debris and weeds:
- 1. Clearing Debris: Start by clearing the lawn of any visible debris, such as rocks, sticks, or leaves. Use a garden rake or your hands to pick up larger objects and dispose of them properly. Removing debris prevents any obstructions that could interfere with the even distribution of the topsoil.
- 2. Removing Weeds: Next, target any existing weeds or unwanted vegetation. Weeds compete with your grass for essential resources, so it’s important to eliminate them before spreading topsoil. Pull out weeds by hand, making sure to remove the entire root system to prevent regrowth. You can also use a garden hoe or trowel to help loosen and remove stubborn weeds.
- 3. Addressing Thatch Buildup: Thatch, a layer of dead grass stems and roots that accumulates between the soil and grass blades, can impede the distribution of topsoil and hinder proper grass growth. Use a thatch rake or power rake to remove excessive thatch buildup. Raking the lawn vigorously will dislodge the thatch and allow for better topsoil penetration.
- 4. Weed Control: If the lawn is heavily infested with weeds, you may consider applying an appropriate weed control product before spreading topsoil. Be sure to follow the instructions on the weed control product carefully and allow sufficient time for the weeds to die off before proceeding with the topsoil spreading process.
By thoroughly removing debris and weeds, you create a clean and healthy environment for your grass to thrive. This step ensures that the topsoil can be evenly spread without hindrance and reduces the risk of weed growth under the new layer. Take the time to clear your lawn meticulously before moving on to the next step of loosening the soil.
Step 4: Loosening the Soil
Loosening the soil before spreading topsoil is a crucial step that helps create an optimal environment for healthy grass growth. Soil compaction can restrict root growth and prevent proper water drainage, leading to poor lawn health. By loosening the soil, you improve its structure and promote better nutrient and water absorption. Here’s how to effectively loosen the soil:
- 1. Identify Compacted Areas: Walk around your lawn and identify any areas with compacted soil. These areas may feel hard underfoot or appear thin and patchy. High traffic areas, such as near entrances or walkways, are often prone to compaction.
- 2. Use a Garden Fork or Mechanical Aerator: For small areas, use a garden fork to manually loosen the soil. Push the fork into the ground and gently rock it back and forth to create small holes. This process helps break up compacted soil and improves aeration.
- 3. Mechanical Aeration: For larger areas or severe compaction, consider using a mechanical aerator. Aerators use rotating tines or spikes to penetrate the soil and extract small cores. This process helps break up compacted soil layers, allowing air, water, and nutrients to penetrate deeper into the soil profile.
- 4. Repeat the Process: Work systematically across the entire lawn, focusing on the compacted areas. Walk in a grid pattern to ensure thorough coverage. Overlapping the areas will help ensure that no spot is left unattended.
Loosening the soil before spreading topsoil creates spaces for air, water, and roots to penetrate deeply into the soil. This promotes better nutrient absorption and water drainage, which are essential for healthy grass growth. Adequate soil aeration also reduces the risk of puddling and compaction in the future.
Keep in mind that soil compaction can be an ongoing issue, especially in high-traffic areas. Consider incorporating regular soil aeration into your lawn maintenance routine to prevent future compaction and maintain soil health.
Once the soil is loosened and the compaction is alleviated, you can move on to the next step of calculating the amount of topsoil needed for your lawn.
Step 5: Calculating the Amount of Topsoil Needed
Calculating the quantity of topsoil needed for your lawn is an essential step to ensure that you have enough material to effectively cover the area. Spreading an adequate layer of topsoil provides the necessary nutrients and a healthy growing medium for your grass. Here’s how to calculate the amount of topsoil needed:
- 1. Measure the Area: Start by measuring the length and width of your lawn using a measuring tape. Multiply these two measurements to determine the total square footage of your lawn. For irregularly shaped lawns, divide them into smaller sections and calculate the square footage of each section separately.
- 2. Consider the Desired Depth: Determine the desired depth of the topsoil layer you want to spread. The typical range is between 2 to 6 inches, depending on the soil condition and the grass species. Consider consulting with experts or local gardening resources to determine the appropriate depth for your specific lawn requirements.
- 3. Calculate the Volume: To calculate the volume of topsoil needed, multiply the total square footage of your lawn by the desired depth of the topsoil layer. Convert the measurements to the same units (e.g., inches to feet) before performing the calculation.
- 4. Account for Variations: Keep in mind that not all areas of your lawn may require the same depth of topsoil. If you have uneven spots or areas with existing higher or lower soil levels, adjust the depth accordingly. Make separate calculations for each section of the lawn and add them together to determine the total volume needed.
- 5. Consider Loss and Settling: It’s wise to account for some loss and settling of the topsoil during the spreading process. Adding a little extra topsoil to your calculation, typically around 10%, will help ensure that you have enough material to cover the entire lawn adequately.
By accurately calculating the amount of topsoil needed, you can avoid both shortage and excessive wastage. This allows for efficient coverage and ensures that your lawn receives the right amount of soil to support healthy grass growth.
Once you have calculated the required quantity of topsoil, you can proceed to acquire the necessary amount and move on to the next step of spreading it over your lawn.
Spreading Topsoil
Now that you have completed the preparation steps, including assessing the lawn, gathering the materials, removing debris and weeds, loosening the soil, and calculating the amount of topsoil needed, it’s time to start spreading the topsoil over your lawn. Follow these steps to ensure an even and effective distribution of topsoil:
- Step 6: Starting at One Corner: Begin at one corner of your lawn. This will help you work systematically and ensure consistent coverage.
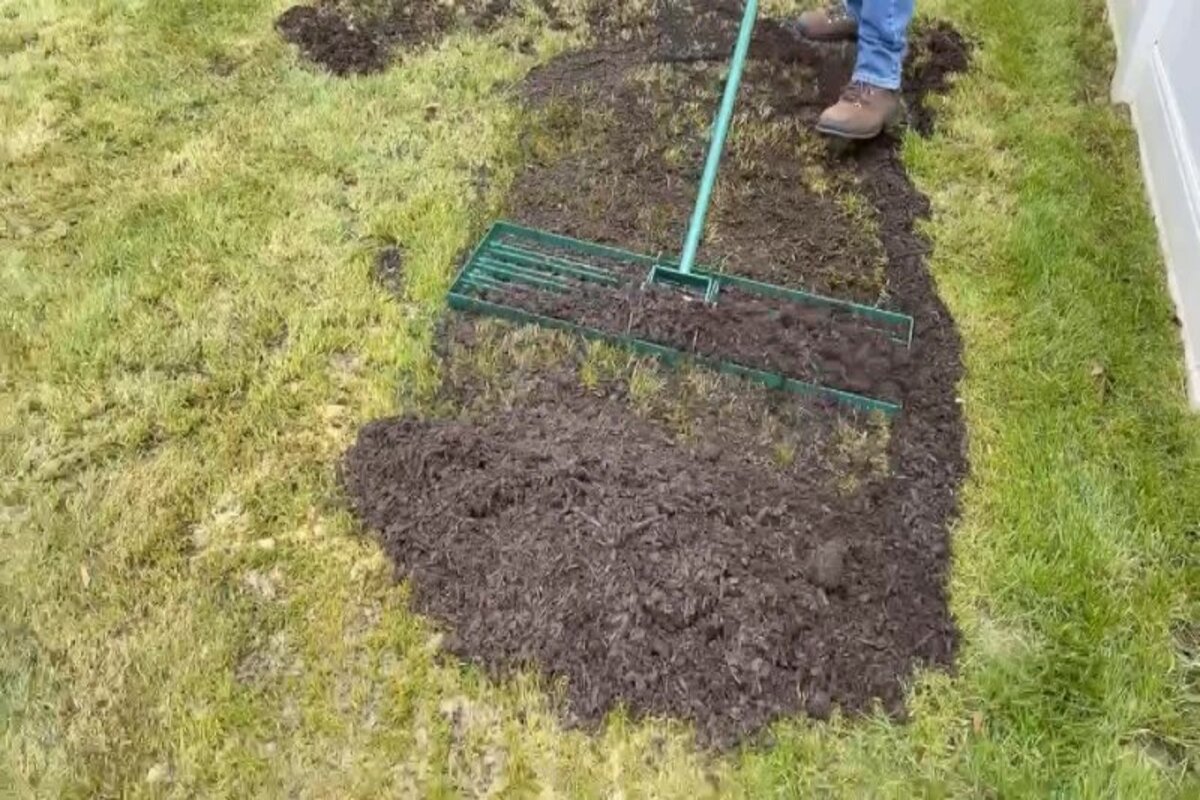
- Step 7: Using a Rake to Spread the Topsoil: Use a garden rake to spread the topsoil evenly across your lawn. Start by scooping up small amounts of topsoil with the rake and gently release it onto the grass. Spread the topsoil in a smooth and even layer, making sure to cover all areas of the lawn.
- Step 8: Leveling the Topsoil: Once you have spread the topsoil, use the rake to level it out. Rake the topsoil gently in a back-and-forth motion to ensure a uniform layer. Pay special attention to any low spots or uneven areas, ensuring that the topsoil is evenly distributed throughout the lawn.
- Step 9: Watering the Lawn: After spreading and leveling the topsoil, water the lawn thoroughly. This helps settle the topsoil and aids in the integration of the new layer with the existing grass. Use a watering can or hose with a gentle spray attachment to avoid displacing the topsoil.
- Step 10: Seeding or Sodding (Optional): If you are looking to establish new grass or repair bare patches, you can choose to seed or sod the area after spreading the topsoil. Follow the specific instructions for seeding or sodding to ensure proper germination and establishment.
- Step 11: Additional Maintenance Tips: After spreading the topsoil, it’s important to maintain proper care for your lawn. This includes regular watering, mowing at the recommended height, and providing necessary nutrients through fertilization. Follow a regular lawn maintenance schedule to support healthy grass growth and maintain the integrity of the topsoil layer.
Spreading topsoil over your lawn provides a fresh start and an ideal growing medium for your grass. The even distribution of topsoil helps improve soil fertility, provide proper nutrition to the grass, and create a level surface for a healthy and vibrant lawn.
By following these steps and being diligent in the spreading process, you can ensure that the topsoil is evenly applied, promoting optimal grass growth and a visually appealing lawn.
Step 6: Starting at One Corner
As you begin the process of spreading topsoil over your lawn, it’s important to have a systematic approach to ensure even coverage and a consistent layer. Starting at one corner of your lawn provides a clear starting point and helps you work methodically. Here’s why it’s beneficial to start at one corner:
1. Systematic Coverage: By starting at a corner, you establish a clear direction and work in a systematic manner. This ensures that you cover the entire lawn and avoid missing any areas. Working in a deliberate pattern helps maintain consistency and prevents the risk of overlapping or leaving gaps in the topsoil layer.
2. Visual Reference: Beginning at a corner gives you a visual reference point to guide your progress. You can visually gauge how much of the lawn you have covered and monitor your spreading technique to ensure even distribution. This helps you maintain a uniform layer of topsoil throughout the lawn.
3. Efficient Workflow: Starting at one corner allows you to move systematically across the lawn, which can enhance your efficiency. With a focused starting point, you can work in a continuous flow without unnecessary backtracking or confusion. This saves time and energy and helps streamline the spreading process.
4. Easier Material Transport: When spreading topsoil, you may need to transport it from a pile or container to the lawn. Starting at a corner facilitates this process as you can work your way towards the source of the topsoil. This minimizes the distance you need to traverse with the topsoil, making the transport more manageable.
Remember to pay attention to the edges and corners as you progress across the lawn. It’s important to provide a consistent layer of topsoil throughout the entire area. Working methodically from one corner to the next ensures that you maintain a well-balanced distribution of soil across the lawn.
By starting at one corner of your lawn, you establish a clear direction, work systematically, and achieve a visually appealing and consistent layer of topsoil. This sets the stage for optimal grass growth and helps create a beautiful and healthy lawn.
Step 7: Using a Rake to Spread the Topsoil
As you proceed with spreading topsoil over your lawn, using a garden rake is an effective technique for evenly distributing the soil. The rake allows you to control the amount of topsoil being applied and ensures a smooth and consistent layer. Here are the steps to follow when using a rake to spread the topsoil:
1. Scoop and Release: Begin by scooping up small amounts of topsoil with the rake. Position the rake parallel to the ground and insert it into the topsoil, keeping the tines slightly angled towards you. Push the rake forward, lifting the topsoil as you go. Then, gently release the topsoil over the lawn.
2. Overlapping Strokes: Work in overlapping strokes to ensure even distribution. Start at the edge of the previously spread area and slightly overlap the previous stroke with each new pass. The overlapping strokes help prevent gaps or uneven areas in the topsoil layer, ensuring uniform coverage.
3. Swivel the Rake: To maintain a consistent layer of topsoil, swivel the rake slightly with each stroke. By varying the angle of the rake slightly, you can distribute the topsoil evenly and prevent any clumping or ridges from forming. This helps create a smooth and level layer across the entire lawn.
4. Light Pressure: Apply light pressure when working with the rake. This prevents the topsoil from being compacted or pushed too heavily into the underlying soil. Gentle and controlled movements allow for better coverage and help promote even settling of the topsoil into the existing grass.
5. Work in Sections: Divide your lawn into manageable sections and focus on spreading topsoil in one section at a time. This approach ensures that you can work efficiently and avoid drying out or unevenly applying the topsoil. It also helps maintain a consistent technique throughout the process.
By using a garden rake to spread the topsoil, you have better control over the amount and distribution of the soil. Following these steps will help ensure that you achieve an even layer of topsoil that provides a foundation for healthy grass growth. Take your time and work diligently to achieve the best results.
Remember, the objective is to create a smooth and consistent layer of topsoil across your lawn. Using a rake as a spreading tool allows you to maintain control and achieve a well-distributed and level topsoil layer that provides the necessary nutrients and support for your grass to thrive.
Step 8: Leveling the Topsoil
After spreading the topsoil evenly over your lawn, the next step is to level it out. Leveling the topsoil ensures a smooth and even surface, which is essential for optimal grass growth and a visually appealing lawn. Here’s how to effectively level the topsoil:
- Observe the Surface: Take a step back and observe the surface of your lawn. Look for any uneven areas, ridges, or depressions in the topsoil layer. These imperfections may be due to variations in the soil or the spreading process.
- Use a Garden Rake: With a garden rake, start by gently raking the surface of the topsoil. Work in smooth, sweeping motions, using the tines of the rake to break up any clumps and distribute the topsoil more evenly.
- Focus on High or Low Spots: Pay particular attention to any high or low spots in the topsoil. If you notice areas where the topsoil is significantly higher than the surrounding surface, use the rake to evenly distribute the excess soil. For low spots, add a small amount of topsoil and use the rake to level it out with the rest of the lawn. Aim to achieve a uniform layer of topsoil across the entire area.
- Smooth out Ridges and Depressions: If there are ridges or depressions in the topsoil, carefully rake the soil towards or away from them to smooth out the surface. Work gently to avoid disturbing the underlying grass or creating new uneven areas.
- Step Back and Assess: Frequently step back and observe the surface as you level the topsoil. This allows you to identify any remaining uneven areas and make adjustments as needed. Take your time to ensure a thorough and uniform leveling process.
- Check with a Leveling Tool: If desired, you can use a leveling tool, such as a long straight board or a landscaping level, to check the smoothness of the soil surface. Place the tool on various sections of the lawn and adjust the topsoil accordingly to achieve a level, even plane.
By leveling the topsoil, you create a consistent surface that facilitates uniform grass growth and enhances the overall appearance of your lawn. A smooth and level topsoil layer provides an optimal foundation for seeds to germinate or sod to establish, giving your lawn the best chance to thrive.
Take the time to carefully level the topsoil, paying attention to high and low spots, ridges, and depressions. By doing so, you ensure that the topsoil is evenly distributed and provide an ideal environment for your grass to flourish.
Step 9: Watering the Lawn
After spreading and leveling the topsoil over your lawn, the next crucial step is to water the area thoroughly. Watering helps settle the topsoil, promotes good contact between the new layer and the existing grass, and aids in the establishment of the topsoil. Here’s how to effectively water your lawn after spreading topsoil:
- Even Coverage: Ensure that you water the entire lawn evenly. Use a watering can or a hose with a gentle spray attachment to disperse water across the area. Avoid using a strong stream of water, as it can displace the topsoil or create erosion.
- Sufficient Water Amount: Water the lawn until the topsoil layer is thoroughly moist. Aim for at least an inch of water, as this will encourage deep penetration and allow the moisture to reach the grass roots.
- Monitor Watering Depth: As you water, pay attention to the depth of the water. Ensure that it penetrates the topsoil layer and reaches the underlying soil. This promotes integration between the topsoil and the existing roots, fostering better nutrient absorption.
- Avoid Waterlogging: Be cautious not to overwater your lawn, as excessive water can lead to waterlogging and root suffocation. Monitor the moisture level of the soil and adjust your watering accordingly. If water starts to collect or puddle on the surface, pause watering and allow it to absorb before resuming.
- Watering Frequency: Water the lawn at least once a day, preferably in the early morning or late afternoon when evaporation is less likely. The exact frequency may vary depending on your climate, soil type, and grass species. Aim to keep the topsoil layer moist until the grass becomes established.
- Follow-up Watering: After the initial watering, monitor the soil moisture regularly and continue to water as needed. Depending on weather conditions, you may need to adjust the watering schedule to prevent the topsoil from drying out or becoming waterlogged.
Proper watering after spreading topsoil plays a vital role in promoting the integration of the new layer with the existing grass and soil. It helps settle the topsoil, encourages root growth, and provides the necessary moisture for the grass to thrive.
Remember that watering needs may vary based on factors such as climate, season, and soil conditions. Adapt your watering practice accordingly and monitor the soil moisture levels consistently. With adequate and timely watering, your lawn will be on its way to establishing a healthy and vibrant appearance.
Step 10: Seeding or Sodding (Optional)
After spreading topsoil over your lawn, you have the option to further enhance the grass growth by seeding or sodding the area. Seeding involves planting grass seeds directly into the topsoil, allowing them to germinate and establish new grass. Sodding, on the other hand, involves laying pre-grown grass rolls or patches onto the topsoil. Here’s what you need to know about these optional steps:
Seeding:
- Select Suitable Grass Seeds: Choose grass seeds that are well-suited for your climate, soil type, and lawn usage preferences. Consider factors like shade tolerance, drought resistance, and maintenance requirements. Select high-quality seeds from reputable sources.
- Follow Proper Seeding Techniques: Prepare the soil surface by raking lightly to create a loose seedbed. Spread the grass seeds evenly over the topsoil according to the recommended seeding rate. Lightly rake the seeds into the topsoil or gently press them down to ensure good seed-to-soil contact.
- Watering and Germination: After seeding, water the area gently to keep the topsoil moist. Continue watering regularly to support seed germination. Follow the specific instructions for watering frequency and duration provided with the seed packaging. Protect the newly seeded area and prevent foot traffic until the grass is well-established.
- Maintenance and Growth: As the grass seeds start to germinate and grow, follow a consistent watering and maintenance routine. Gradually reduce watering frequency while allowing the grass to develop deeper roots. Once the grass reaches a suitable height, resume regular mowing following the recommended height for the particular grass species.
Sodding:
- Purchase Quality Sod: Choose high-quality sod from a reputable supplier. Look for sod that is freshly cut, healthy, and free from weeds or disease. Match the type of sod to your climate, lawn usage, and desired aesthetics.
- Prepare the Soil: Before laying the sod, ensure that the topsoil is level, smooth, and adequately moist. Remove any debris, loosen the soil if necessary, and lightly rake the surface.
- Lay the Sod: Start laying the sod along one edge of the lawn. Stagger the sod pieces so that the seams do not align with each other. Press down firmly on each piece of sod to ensure good contact with the topsoil. Use a sharp knife or scissors to trim the sod to fit irregular shapes or edges.
- Watering and Establishment: Immediately after laying the sod, water the area thoroughly to ensure proper root contact with the soil. Continue to water the sod consistently to keep the topsoil moist until the roots become established. Avoid foot traffic on the new sod until it has rooted firmly into the topsoil.
- Maintenance and Growth: Follow a regular watering and maintenance schedule as recommended for the specific sod variety. Gradually reduce watering frequency as the sod establishes itself. Once the sod has rooted, resume regular mowing, following the appropriate height for the type of grass.
Seeding or sodding your lawn after spreading topsoil can provide quicker and more reliable results in establishing a lush and healthy lawn. Consider these optional steps based on your preferences, budget, and time available for lawn establishment.
Ensure you follow proper techniques and maintenance practices to maximize the success of seeding or sodding. With the right approach and continued care, you can enjoy a beautiful, vibrant lawn that enhances the overall appearance of your outdoor space.
Step 11: Additional Maintenance Tips
After completing the process of spreading topsoil, there are additional maintenance steps that you can take to ensure the long-term health and vitality of your lawn. By following these tips, you can maintain a beautiful and thriving lawn for years to come:
- Regular Watering: Consistent and proper watering is crucial for the health of your lawn. Water deeply and infrequently, allowing the top few inches of soil to dry out between watering sessions. This encourages the grass roots to grow deeper, making them more resilient to drought conditions.
- Mowing Height: Set your mower’s cutting height to the recommended level for your grass species. Avoid mowing too short, as it can weaken the grass and make it susceptible to stress and disease. Regular mowing, with the appropriate height, promotes stronger root growth and helps prevent weed invasion.
- Aerate the Soil: Over time, soil can become compacted, hindering water and nutrient absorption. Aerating the lawn, through core aeration or using a mechanical aerator, helps loosen the soil and improves air circulation to the grass roots. It also aids in the breakdown of thatch.
- Overseed as Needed: Over time, bare spots or thin areas may appear in your lawn. Overseeding those areas can help fill in the gaps and maintain a dense and lush lawn. Follow proper seeding techniques and ensure good seed-to-soil contact for successful germination.
- Fertilization: Apply a balanced fertilizer according to the specific needs of your grass species. Fertilizers provide essential nutrients that promote healthy growth and vibrant color. Follow the instructions on the fertilizer package carefully, and avoid over-application, as it can lead to excessive growth and environmental pollution.
- Weed and Pest Control: Regularly inspect your lawn for weed and pest infestations. Use appropriate methods such as hand-pulling weeds, applying herbicides, or employing organic pest control strategies to keep your lawn healthy and weed-free. A healthy lawn is more resistant to weed and pest problems.
- Manage Thatch: Thatch, the layer of dead plant material that accumulates between the grass blades and the soil surface, should be managed. If thatch buildup becomes excessive, it can impede water and nutrient absorption. Regular dethatching or aerating can help control thatch and improve overall lawn health.
- Seasonal Maintenance: Adjust your lawn care practices according to the seasons. Properly prepare your lawn for winter by gradually reducing the cutting height and removing excess leaves and debris. In the spring, perform necessary tasks like overseeding, fertilizing, and assessing the overall health of your lawn.
By following these additional maintenance tips, you can provide the necessary care and attention that your lawn requires. Regular watering, appropriate mowing, aeration, overseeding, fertilization, weed and pest control, thatch management, and seasonal adjustments all contribute to a healthy and beautiful lawn.
Remember, every lawn is unique, and it’s essential to tailor your maintenance practices to the specific needs of your grass species, soil type, and climate. By investing in proper lawn care, you can enjoy a lush, green, and inviting outdoor space that enhances the overall beauty and appeal of your property.
Conclusion
Congratulations! You have successfully learned the step-by-step process of spreading topsoil over your lawn and gained valuable insights into the world of soil and its impact on plant growth. Understanding soil composition, fertility, and proper maintenance techniques is key to achieving a beautiful, healthy, and thriving lawn.
By following the steps outlined in this guide, you have set the foundation for optimal grass growth. Starting with assessing the condition of your lawn, gathering the necessary materials, removing debris and weeds, loosening the soil, and calculating the amount of topsoil needed, you have prepared the groundwork for success.
Spreading topsoil evenly using a rake, leveling the soil, and watering thoroughly ensure that the topsoil is properly integrated and in contact with the existing grass, creating the ideal environment for healthy growth. Optional steps like seeding or sodding can further enhance the lawn’s appearance and establish new grass or fill in bare patches.
Remember, maintaining your lawn with regular watering, proper mowing, aeration, fertilization, weed and pest control, thatch management, and seasonal adjustments is vital for its long-term health and beauty.
As you continue to care for your lawn, love and dedication will be rewarded with a lush, vibrant, and visually appealing outdoor space. Embrace the journey of nurturing your lawn, adapting your practices as needed, and enjoying the fruits of your labor.
Now that you have a deeper understanding of soil and its significance, you are equipped with the knowledge to create and maintain a stunning lawn that will be the envy of the neighborhood. So go forth with confidence, put the information into practice, and watch your lawn flourish!