Home>Gardening Basics>Understanding Soil>How To Level A Lawn With Topsoil
Understanding Soil
How To Level A Lawn With Topsoil
Modified: January 22, 2024
Learn how to level your lawn using topsoil and gain a deeper understanding of soil composition, types, and best practices for optimal lawn growth.
(Many of the links in this article redirect to a specific reviewed product. Your purchase of these products through affiliate links helps to generate commission for Chicagolandgardening.com, at no extra cost. Learn more)
Table of Contents
- Introduction
- Understanding the Need to Level Your Lawn
- Assessing the Condition of Your Lawn
- Gathering the Required Materials
- Preparing Your Lawn for Topsoil
- Spreading the Topsoil
- Leveling the Topsoil
- Watering and Packing the Topsoil
- Seeding or Re-sodding the Leveled Lawn
- Maintenance Tips for a Leveled Lawn
- Conclusion
Introduction
Welcome to our comprehensive guide on how to level a lawn with topsoil. A beautiful, well-maintained lawn is a source of pride for many homeowners. However, over time, uneven areas can develop, leading to an unsightly and potentially hazardous landscape. Fortunately, with the right tools and techniques, you can easily level your lawn and restore its natural beauty.
Uneven lawns can occur due to a variety of factors, including settling soil, erosion, or animal activity. These uneven areas not only look unattractive but can also make it difficult to mow the lawn, walk, or even play outdoor activities. Leveling your lawn helps to create a smooth and even surface, making it safer and more enjoyable for your family and guests.
Leveling a lawn involves adding topsoil to low spots and removing excess soil from higher areas to create a uniform surface. Topsoil is the uppermost layer of soil that contains essential nutrients for healthy plant growth. In addition to its nutrient-rich composition, topsoil also helps retain moisture and provide drainage, promoting a healthy lawn ecosystem.
Before you begin the leveling process, it’s important to assess the condition of your lawn. This involves identifying the areas that require leveling and determining the extent of the unevenness. By understanding the scope of the project, you can gather the necessary materials and plan accordingly, ensuring a successful outcome.
In this guide, we will walk you through the step-by-step process of leveling your lawn with topsoil. We’ll discuss how to prepare your lawn for topsoil, spread and level the topsoil, and properly maintain your leveled lawn for long-lasting results. So let’s dive in and transform your uneven lawn into a lush, green paradise!
Understanding the Need to Level Your Lawn
Having a level lawn is not just about aesthetics; it also has practical benefits. When your lawn is uneven, it can become a breeding ground for various problems that can affect the health, look, and usability of your outdoor space. Understanding why you need to level your lawn will help you appreciate the importance of this task.
Firstly, an uneven lawn can be a safety hazard, especially if you have children or elderly individuals in your household. Uneven areas can create tripping hazards and increase the risk of accidents. By leveling your lawn, you can ensure a smooth and even surface, making it safer for everyone to walk, play, and enjoy outdoor activities.
In addition to safety concerns, leveling your lawn can also improve the overall appearance of your landscape. Uneven areas can make your lawn look patchy and unkempt, detracting from its natural beauty. By creating a level surface, you can enhance the visual appeal of your lawn and create a more polished and inviting outdoor environment.
Furthermore, leveling your lawn can have a positive impact on its health and maintenance. Uneven areas can cause water to pool in low spots, leading to waterlogging and creating an environment conducive to the growth of mold, fungus, and other pests. By leveling the lawn, you can ensure proper drainage and prevent water-related issues that can damage your grass and plants.
Additionally, an uneven lawn can make mowing a challenging and time-consuming task. The uneven surface can cause your lawnmower to scalp the grass in certain areas and leave it too long in others. This can result in an uneven and unattractive lawn appearance. By leveling your lawn, you can create a smooth surface for easy and efficient mowing, saving you time and effort in your lawn maintenance routine.
Lastly, leveling your lawn provides an opportunity to improve the soil quality. Adding a layer of topsoil to low spots can help enrich the soil, providing essential nutrients for your grass to thrive. It also helps to address any soil compaction issues, allowing for better root penetration and overall healthier grass growth.
Understanding why it is necessary to level your lawn can motivate you to take action and transform your uneven landscape into a beautiful and functional outdoor space. By addressing the safety, aesthetics, health, and maintenance aspects, you can reap the benefits of a leveled lawn for years to come.
Assessing the Condition of Your Lawn
Before you begin the process of leveling your lawn, it’s essential to assess its condition thoroughly. Assessing the condition of your lawn will help you identify the areas that require leveling and determine the extent of the unevenness. Here are a few steps to guide you through the assessment process:
- Walk around your lawn: Take a walk around your lawn and observe any noticeable unevenness. Look for areas where the ground is sunken or raised. Pay attention to areas where water accumulates after rainfall as these are usually low spots that require attention.
- Use a measuring tool: To get a more accurate assessment, use a measuring tool like a tape measure or a long board. Measure the height difference between the lowest point and the highest point of your lawn. This will give you a clear idea of the extent of the unevenness.
- Check for slope variations: Examine your lawn for any significant slope variations. While a slight slope can be natural and essential for proper drainage, excessive slopes can lead to erosion and other issues. Identify any areas that require additional leveling to create a more even slope.
- Consider soil compaction: Check for signs of soil compaction, which can contribute to unevenness. Hard, compacted soil prevents proper water infiltration and hampers root growth. If you notice areas that are compacted, these might require additional soil preparation before leveling.
- Evaluate grass health: Assess the overall health of your lawn. Look for areas with patchy or thin grass, as these may require extra attention during the leveling process. Thin grass is often an indicator of soil issues, such as nutrient deficiencies or inadequate drainage.
By carefully assessing the condition of your lawn, you’ll have a clear understanding of the areas that need leveling and any potential underlying issues that need to be addressed. This knowledge will enable you to plan your leveling project more effectively and ensure a successful outcome.
Gathering the Required Materials
Before you can start leveling your lawn, it’s important to gather all the necessary materials. Having the right tools and supplies will make the process more efficient and ensure that you achieve the desired results. Here is a list of essential materials you will need:
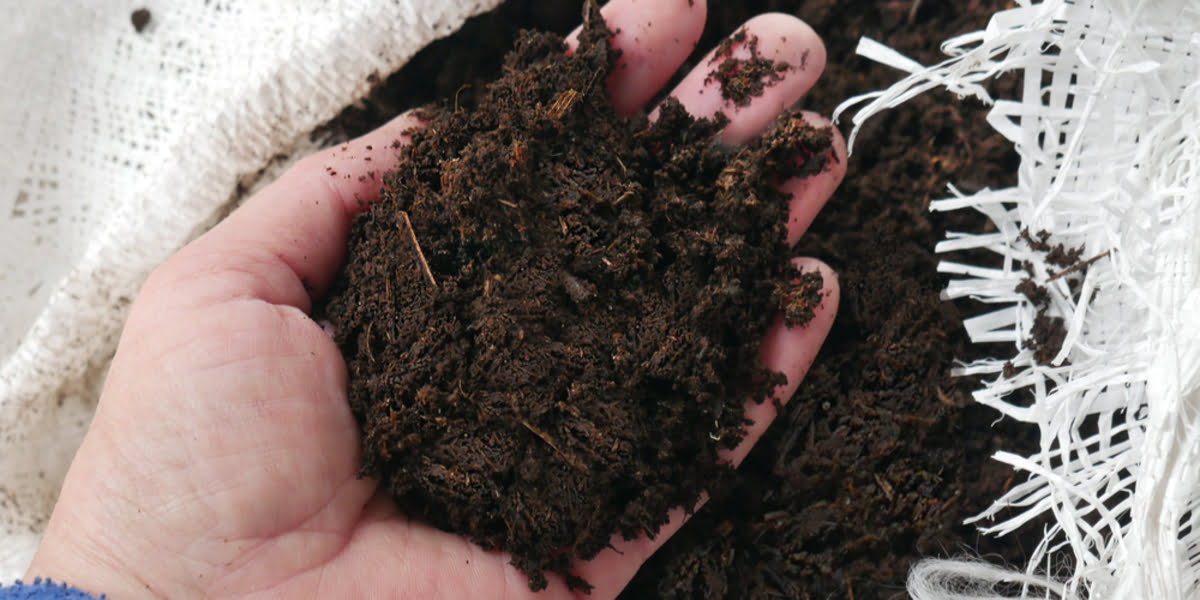
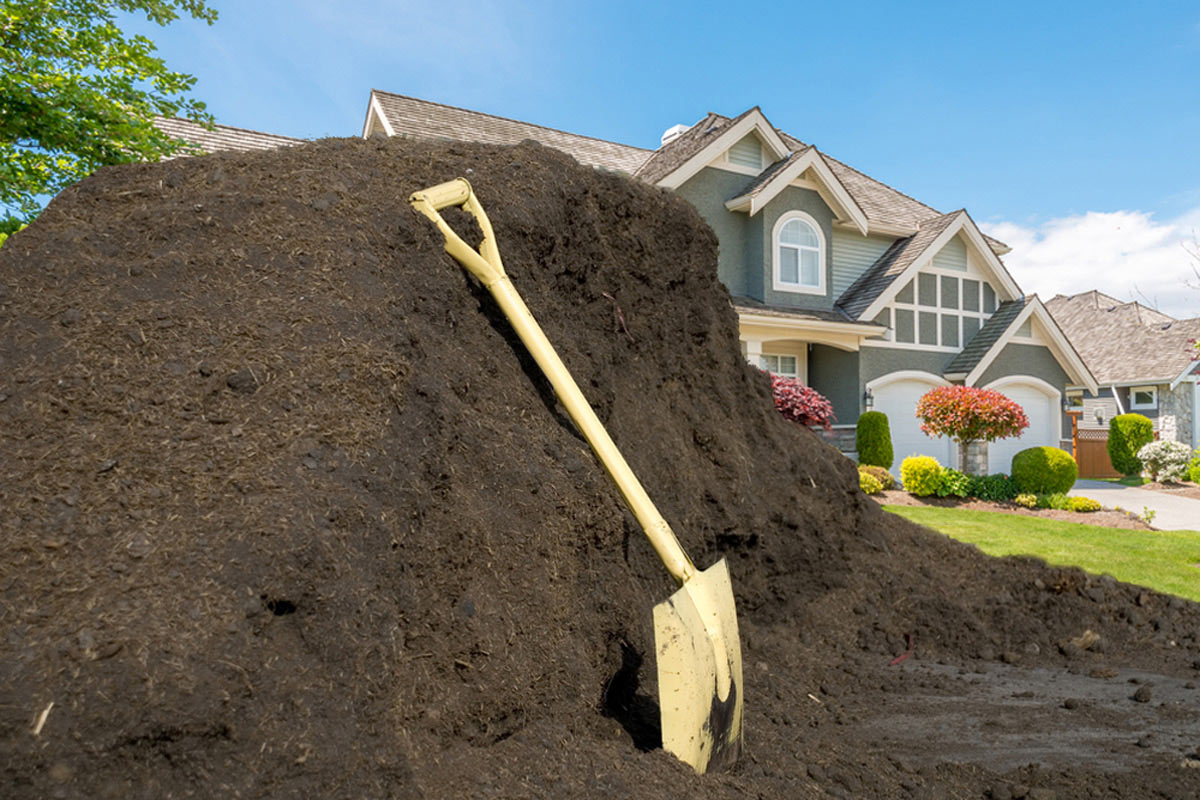
- Topsoil: The main component of leveling your lawn is adding topsoil to low spots. Calculate the amount of topsoil you’ll need based on the size and depth of the areas you want to level. It’s recommended to choose high-quality screened topsoil to ensure its nutrient-rich and free from debris.
- Rake: A sturdy garden rake will be your best friend during the leveling process. It will help you spread and distribute the topsoil evenly across your lawn. Opt for a rake with strong, flexible tines for best results.
- Landscape or leveling rake: This specialized tool is designed explicitly for leveling surfaces. It has a flat edge that will help you smooth out the topsoil and create an even surface. It’s recommended to have both a standard rake and a leveling rake for more precision.
- Wheelbarrow: You’ll need a wheelbarrow to transport the topsoil from the delivery area to your lawn. Consider the size and capacity of the wheelbarrow to ensure it can handle the amount of topsoil you require.
- Shovel: A shovel will come in handy for transferring topsoil from the wheelbarrow to specific areas that need leveling. Opt for a sturdy shovel with a comfortable grip to make the process easier on your back.
- Garden hose or sprinkler system: Proper watering is crucial after leveling your lawn. Ensure you have a garden hose or a functional sprinkler system to adequately water the topsoil and help it settle into place.
- Grass seed or sod: Depending on the condition of your existing grass, you may need to reseed or re-sod certain areas after leveling. Have the appropriate grass seed or pre-cut sod ready to fill in these areas for a seamless lawn appearance.
- Compost or organic fertilizer (optional): If your soil lacks nutrients, you may consider incorporating compost or organic fertilizer into the topsoil before spreading it. This will promote healthy grass growth and improve the overall health of your lawn.
Take inventory of these materials and make sure you have everything ready before starting the leveling process. This will allow you to work efficiently and avoid unnecessary delays. Plus, having all the required materials at hand will ensure that the leveling process goes smoothly and enables you to achieve a beautifully leveled lawn.
Preparing Your Lawn for Topsoil
Before you can begin spreading topsoil to level your lawn, proper preparation is essential. Preparing your lawn will help ensure that the topsoil adheres well to the existing surface and allows for optimal grass growth. Here are the key steps to follow:
- Remove debris: Clear your lawn of any debris such as sticks, rocks, or branches. These objects can interfere with the leveling process and create uneven areas. Raking the lawn thoroughly to remove debris will create a clean and uniform surface.
- Mow the grass: Start by giving your lawn a mow to remove excess growth. This will make it easier to work with and prevent the grass from getting damaged during the leveling process. Set your lawnmower to a low setting, but be careful not to scalp the grass too much.
- Water the lawn: It’s important to water the lawn a day or two before leveling to ensure adequate moisture. This will help the topsoil settle into place more evenly and reduce the risk of air pockets. Aim to moisten the soil to a depth of about 6 inches.
- Soil aeration (optional): If your lawn has compacted soil, you might consider aerating it before leveling. Soil aeration involves creating small holes in the ground, allowing for better airflow and improved root penetration. This step can enhance the overall health of your lawn.
- Address drainage issues: Take note of areas that drain poorly or have standing water. If these issues persist, consider incorporating proper drainage solutions such as installing a French drain or regrading those areas before adding topsoil.
- Apply compost or organic fertilizer (optional): If your soil lacks nutrients, you may consider incorporating compost or organic fertilizer into the existing soil before spreading the topsoil. This will provide essential nutrients and organic matter to promote healthy grass growth.
- Level the lawn surface: Use your garden rake to level the surface by breaking up any clumps and filling in depressions. This will create a smooth base for the topsoil and help achieve a more even and visually appealing result.
By following these preparation steps, you’ll ensure that your lawn is ready to receive the topsoil. Taking the time to prepare the surface properly will contribute to a successful leveling process and promote the long-term health and beauty of your lawn.
Spreading the Topsoil
Once your lawn is prepared, it’s time to begin spreading the topsoil. Spreading the topsoil evenly is crucial for achieving a level surface and ensuring proper grass growth. Here are the steps to follow when spreading the topsoil:
- Start at the lowest point: Begin at the lowest point of your lawn, usually the area that requires the most soil. This could be a depression or a sunken area that needs filling. Use a shovel or wheelbarrow to deposit a layer of topsoil onto the area.
- Distribute the topsoil: Use your rake to distribute the topsoil evenly over the area. Aim for a layer of topsoil about 1 to 2 inches thick. Make sure to cover the entire low spot and extend the topsoil slightly beyond the edges to create a smooth transition to the surrounding lawn.
- Level the topsoil: Use a leveling rake or the backside of your garden rake to smooth and level the topsoil. Work in a back-and-forth motion, gently pushing and pulling the rake to create an even surface. Pay attention to any remaining high spots or low spots and adjust accordingly.
- Check for drainage: While leveling, ensure that the surface maintains proper drainage slopes. The soil should slope away from structures and towards accessible drainage areas. This will prevent water from pooling and contributing to future leveling issues.
- Repeat the process: Continue spreading the topsoil and leveling the lawn, working your way around the entire area that requires leveling. Take your time and pay attention to detail to create a consistent and uniform surface.
Remember, it’s important not to overdo it with the topsoil. Aim for a thin layer to avoid suffocating the existing grass. Once the topsoil is evenly spread and leveled, take a step back and assess the overall surface. Make any necessary adjustments to ensure a smooth and visually appealing result.
Keep in mind that the topsoil may settle over time, so it’s better to slightly overfill low spots initially. This will compensate for any settling and maintain a level surface in the long run.
Spreading the topsoil is a critical step in the leveling process. Taking the time to distribute the topsoil evenly will ensure optimal grass growth and create a beautiful and level lawn surface.
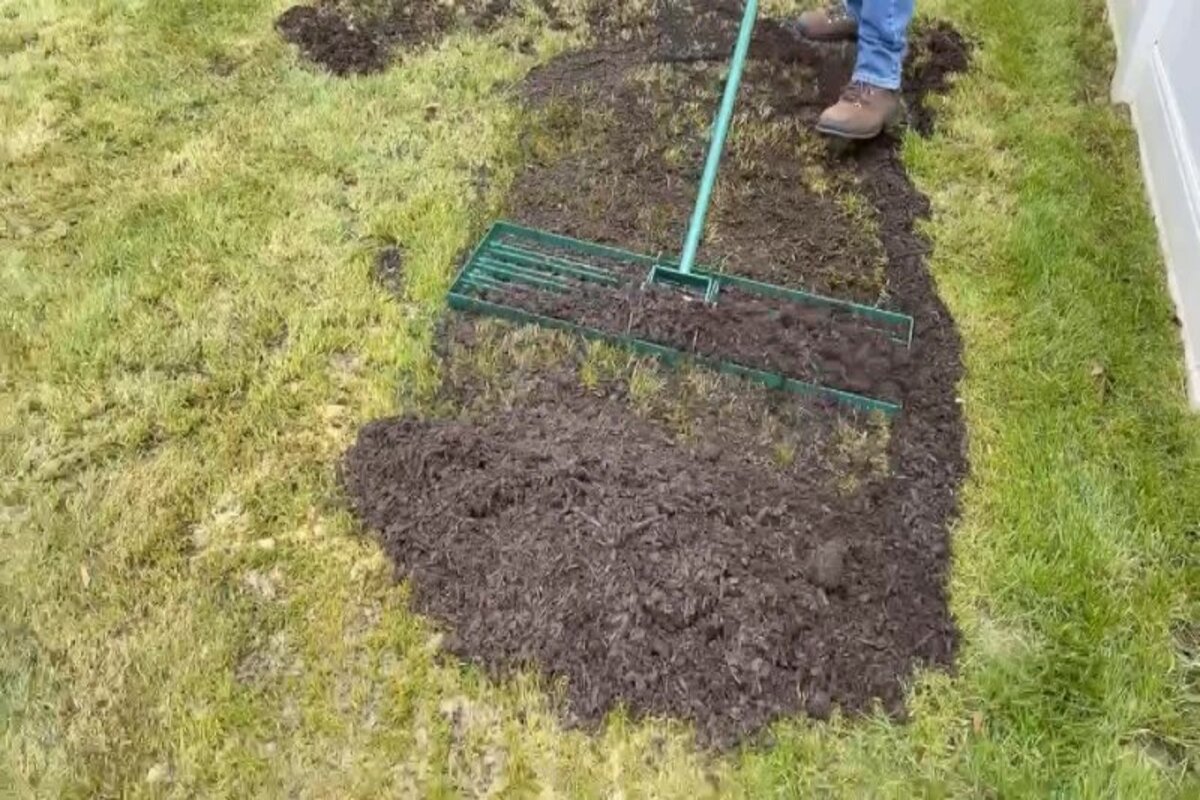
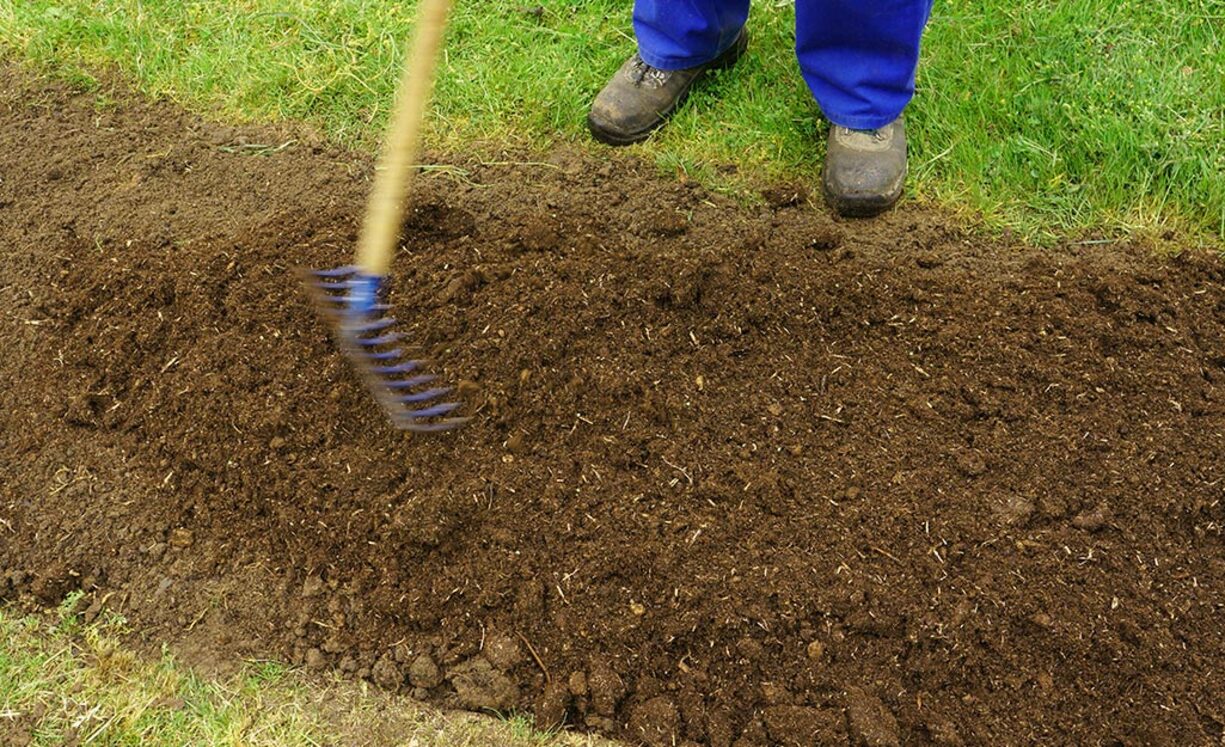
Leveling the Topsoil
After spreading the topsoil, the next step in leveling your lawn is to ensure it is properly leveled. Leveling the topsoil is important to create a smooth and even surface that promotes healthy grass growth. Here’s how you can level the topsoil:
- Use a leveling rake: Begin by using a leveling rake, also known as a landscaping rake, to further distribute the topsoil and remove any noticeable bumps or high spots. Hold the rake firmly and use a back-and-forth motion to smooth out the surface.
- Pay attention to low spots: As you level, keep an eye out for any remaining low spots. These areas may require additional topsoil to bring them up to the desired level. Gradually add small amounts of topsoil to these areas and use the leveling rake to distribute and blend it in with the rest of the lawn.
- Check the level: Periodically step back and check the level of the lawn surface from different angles. This will help you identify any areas that still require adjustment. Use visual cues, such as shadows, to gauge if the surface is even and free of any visible irregularities.
- Adjust as needed: If you notice any uneven areas, use your rake or shovel to redistribute the topsoil accordingly. Smooth out any remaining lumps or indentations to achieve a consistent and level lawn surface. Take your time during this step to ensure an even result.
Remember that achieving a perfectly level lawn may not be possible due to natural variations in the terrain. The goal is to create a relatively flat and even surface that allows for proper water drainage and mowing.
Throughout the leveling process, it’s important to maintain a balanced approach. Avoid overworking the topsoil or packing it down too tightly, as this can hinder the infiltration of air, water, and nutrients. Additionally, be careful not to disturb the existing grass too much, as excessive disruption can damage its root systems.
By diligently leveling the topsoil, you’ll create an ideal foundation for your lawn and set the stage for successful grass growth. Once the topsoil is level, you’re ready to move on to the next step—watering and packing the topsoil to help it settle in and establish a strong base for your new lawn surface.
Watering and Packing the Topsoil
After leveling the topsoil, the next crucial step in the process of leveling your lawn is to properly water and pack the topsoil. This helps to settle the soil and create a firm base for your new lawn surface. Here’s how to effectively water and pack the topsoil:
- Water thoroughly: Begin by thoroughly watering the entire area where you have spread the topsoil. Watering helps the soil particles settle and reduces air pockets. Ensure that the topsoil is evenly moist but not overly saturated. This will promote good seed germination and proper establishment of the grass.
- Use a lawn roller or hand tamper: A lawn roller or hand tamper can be used to pack the topsoil gently. Rollers are typically filled with water to provide weight, while hand tampers are manually pressed onto the soil surface. Start at one end of the lawn and work your way across in a pattern, exerting moderate pressure to firmly pack the topsoil.
- Repeat the process: For larger areas, you may need to go over the entire lawn multiple times to ensure a uniformly packed surface. Be mindful not to over-pack, as excessive compaction can restrict the movement of air, water, and nutrients within the soil.
- Check for settling: After watering and packing, monitor the topsoil for any settling or depressions. If you notice areas that have sunk, add additional topsoil and repeat the packing process to ensure a smooth and level surface throughout.
Watering and packing the topsoil not only helps it settle, but it also aids in bonding the topsoil with the existing soil. This improves the overall stability of the soil and provides a solid base for the grass roots to take hold.
Remember to follow the recommended watering guidelines for your specific type of grass. Proper watering is essential to encourage healthy root development and ensure successful germination and growth of the grass seeds. Maintain consistent moisture levels during the initial stage of lawn establishment.
Once the topsoil is properly watered and packed, it’s time to move on to the next step—seeding or re-sodding the leveled lawn to establish a lush and even grass cover.
Seeding or Re-sodding the Leveled Lawn
Once you have leveled and prepared your lawn, the next step is to establish a healthy and even grass cover. This can be done through seeding or re-sodding, depending on your preference and the condition of your existing grass. Here’s what you need to know about each method:
Seeding:
Seeding is an affordable and efficient way to establish a new lawn or fill in thin areas. Follow these steps for successful seeding:
- Choose the right seed: Select grass seed that is appropriate for your climate and the specific conditions of your lawn. Consider factors such as sun exposure, soil type, and foot traffic when choosing the seed variety.
- Seed application: Spread the grass seed evenly over the leveled lawn according to the recommended seeding rate. Use a handheld spreader or a mechanical spreader to ensure uniform distribution.
- Rake and cover: Use a garden rake to lightly incorporate the seeds into the topsoil, ensuring good seed-to-soil contact. You can also cover the seeded area with a thin layer of straw or mulch to help retain moisture and protect the seeds from birds or excessive sunlight.
- Watering: Water the seeded area regularly to keep the soil moist. Avoid overwatering, as this may cause the seeds to wash away. Follow the watering guidelines specific to the grass variety you have seeded.
- Regular maintenance: As the new grass begins to germinate and grow, continue to water and care for it according to the recommended guidelines. Follow proper mowing practices and avoid heavy foot traffic until the grass is fully established.
Re-sodding:
If you prefer instant results and have the budget for it, re-sodding your lawn can provide a faster way to achieve a lush and even grass cover. Here are the steps for re-sodding:
- Purchase quality sod: Purchase fresh, healthy sod from a reputable supplier. Choose a sod variety suitable for your climate and lawn conditions.
- Prepare the area: Clear the leveled lawn of any debris and ensure the topsoil is still slightly moist. Trim the edges of the sod pieces to fit the layout of your lawn.
- Lay the sod: Begin by laying the first row of sod along a straight edge of your lawn. Stagger subsequent rows like bricks, ensuring tight seams between sod pieces. Avoid stretching or overlapping the sod, as this can lead to uneven growth.
- Water and roll: Immediately after laying the sod, thoroughly water the entire area to settle the soil and eliminate air pockets. Use a lawn roller filled with water to gently press the sod into the soil for good root-to-soil contact.
- Watering and maintenance: After re-sodding, follow a regular watering schedule to keep the soil consistently moist for the first few weeks. Avoid heavy foot traffic during the establishment period and follow proper maintenance practices for your specific grass variety once the sod is fully established.
Both seeding and re-sodding methods require proper care and maintenance to ensure successful establishment and growth of the grass. Follow the recommended guidelines specific to your chosen method to maximize the chances of a lush and uniform lawn.
Maintenance Tips for a Leveled Lawn
Once you have successfully leveled your lawn and established a lush and even grass cover, it’s important to maintain it properly to ensure its long-term health and beauty. Regular maintenance will help your leveled lawn thrive and provide an enjoyable outdoor space for years to come. Here are some essential maintenance tips:
Watering:
Proper and regular watering is crucial for a healthy lawn. Water deeply and infrequently, allowing the water to penetrate the soil to a depth of at least 6 inches. Depending on your climate and the grass variety, aim to provide about 1 inch of water per week, either through rainfall or irrigation. However, avoid overwatering, as it can lead to shallow root growth and promote disease.
Mowing:
Mow your leveled lawn at the recommended height for your grass variety. Adjust your lawnmower to ensure you are not cutting more than one-third of the grass blade length at a time. Regular mowing helps maintain an even and uniform appearance, prevents the grass from becoming too long and prone to disease, and encourages healthy growth.
Fertilizing:
Feed your leveled lawn with appropriate fertilizers to promote healthy growth and maintain vibrant green color. Follow the recommended application rates and timings for your specific grass variety. Consider using slow-release fertilizers to provide a consistent source of nutrients over time. Be mindful not to over-fertilize, as it can burn the grass and harm the environment.
Weeding:
Regularly inspect your lawn for weeds and address them promptly. Use appropriate weed control methods, such as hand-pulling or targeted herbicides, to prevent weeds from taking hold. Maintaining a dense and healthy grass cover will naturally discourage weed growth and keep your leveled lawn looking pristine.
Aeration:
Periodically aerate your leveled lawn to alleviate soil compaction and promote proper airflow, water absorption, and nutrient uptake. Core aeration is a recommended method that involves removing small plugs of soil to create channels for air, water, and nutrients to reach the grass roots. Aeration can be done annually or as needed, especially in high-traffic areas.
Monitoring and Repairing:
Regularly inspect your leveled lawn for any signs of unevenness, low spots, or damage. Address any issues promptly by topdressing with additional topsoil, reseeding, or re-sodding as necessary. Regular monitoring and prompt repairs will help maintain the level surface and prevent future problems.
By following these maintenance tips, you can ensure that your leveled lawn remains healthy, lush, and visually appealing. Regular care and attention will allow your lawn to thrive and provide a beautiful outdoor space for relaxation, recreation, and enjoyment.
Conclusion
Leveling a lawn with topsoil is a rewarding process that can transform an uneven and unattractive landscape into a beautiful and functional outdoor space. By understanding the need to level your lawn, assessing its condition, gathering the necessary materials, and following the proper steps, you can achieve impressive results.
Proper preparation, including removing debris, mowing the grass, and assessing drainage issues, sets the stage for successful leveling. Spreading the topsoil evenly and leveling it creates a smooth and uniform surface, while watering and packing the topsoil helps it settle and establish a solid base.
Whether you choose seeding or re-sodding, establishing a healthy and even grass cover is essential for long-lasting results. With regular maintenance, including proper watering, mowing, fertilizing, and weed control, you can ensure your leveled lawn thrives and remains beautiful over time.
Remember, maintaining a leveled lawn not only enhances the aesthetic appeal of your outdoor space but also contributes to safety, usability, and the health of your grass. By consistently caring for your lawn, you can enjoy a lush, green, and evenly leveled lawn that becomes the envy of the neighborhood.
So, roll up your sleeves and get ready to embark on this exciting journey of leveling your lawn with topsoil. With the knowledge and steps outlined in this guide, you have the tools to create a stunning and inviting landscape that will bring joy and relaxation to your outdoor living. Happy leveling!