Home>Gardening Techniques>DIY Projects>How To Bend A Bonsai Tree

DIY Projects
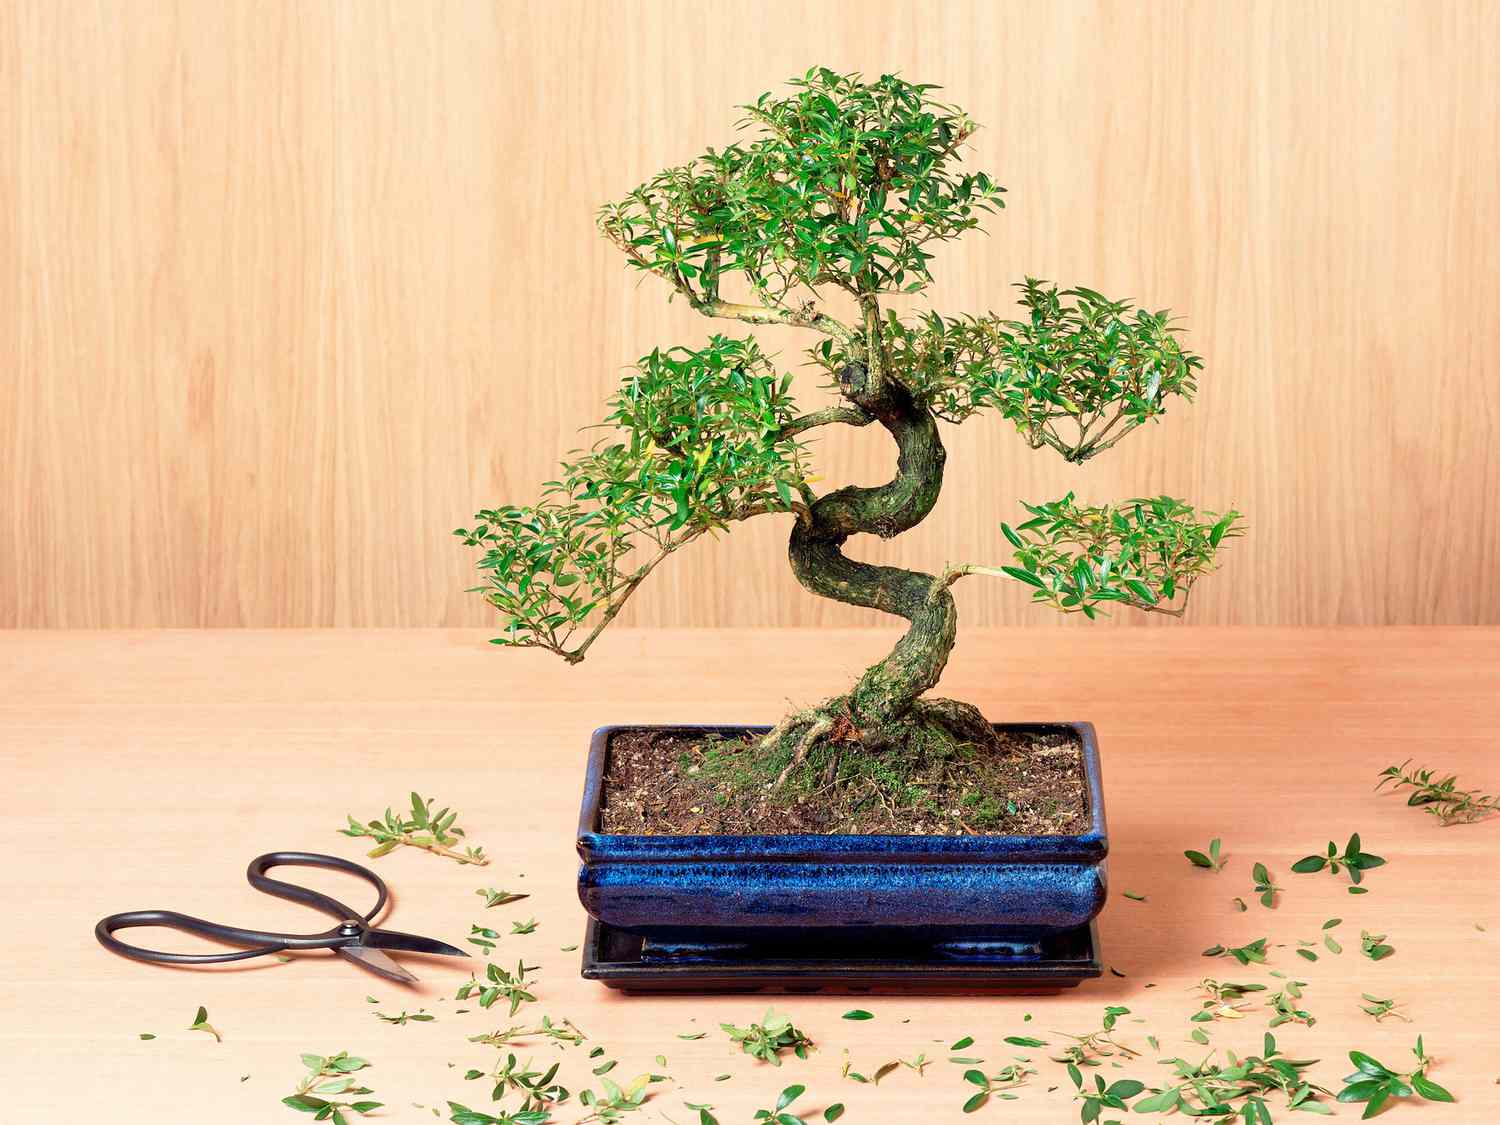
How To Bend A Bonsai Tree
Modified: February 9, 2024
Learn how to bend a bonsai tree with this helpful DIY projects guide. Explore step-by-step instructions and tips to create your own unique bonsai masterpiece.
(Many of the links in this article redirect to a specific reviewed product. Your purchase of these products through affiliate links helps to generate commission for Chicagolandgardening.com, at no extra cost. Learn more)
Table of Contents
- Introduction
- Materials Needed
- Step 1: Selecting the Right Bonsai Tree
- Step 2: Understanding the Tree’s Growth Patterns
- Step 3: Preparing the Tree for Bending
- Step 4: Wiring the Tree’s Branches
- Step 5: Bending the Tree Gradually
- Step 6: Securing the Bent Position
- Step 7: Monitoring the Tree’s Progress
- Step 8: Removing the Wiring
- Conclusion
Introduction
Welcome to the wonderful world of bonsai trees. Bonsai, derived from the Japanese words for “tray cultivation,” is a unique and captivating art form that involves the cultivation and shaping of miniature trees. One of the key techniques in bonsai cultivation is bending the tree’s branches and trunk, which helps to create the desired shape and aesthetic appeal.
Bending a bonsai tree requires patience, skill, and a deep understanding of the tree’s growth patterns. It is a delicate process that must be approached with care to ensure the tree’s health and longevity. In this article, we will guide you through the steps of bending a bonsai tree, from selecting the right tree to removing the wiring once the desired shape has been achieved.
Whether you are a seasoned bonsai enthusiast or just starting out on your bonsai journey, this article is packed with valuable information to help you master the art of bending bonsai trees. So let’s dig in and discover the secrets of creating stunning and graceful bonsai trees through the art of bending.
Materials Needed
Before you begin bending your bonsai tree, it’s important to gather all the necessary materials. Having the right tools will make the process easier and more efficient. Here are the essential materials you’ll need:
- Bonsai tree: Choose a healthy and well-established bonsai tree that is suitable for bending. Different tree species have varying levels of flexibility, so research the specific requirements of your tree before starting.
- Wire: Bonsai wire is crucial for bending and shaping the branches. It should be strong and flexible enough to hold the desired shape without causing damage to the tree. Aluminum wire is commonly used, as it is easy to handle and does not rust.
- Pliers or wire cutters: These tools are essential for cutting and manipulating the wire. Pliers with a rounded tip are ideal for preventing damage to the branches.
- Wound sealant: When bending a bonsai tree, minor injuries may occur, such as small tears or breaks in the bark. Applying wound sealant helps protect the tree from infections and aids in the healing process.
- Bonsai soil: It’s important to have the right soil mixture for your bonsai tree. Well-draining soil with proper nutrients will ensure the health and vitality of the tree during and after the bending process.
- Watering can or spray bottle: Maintaining proper moisture levels is crucial for the health of your bonsai tree. A watering can or spray bottle will help you keep the soil evenly moist without causing excessive waterlogging.
- Pruning shears: Trimming the excess foliage and branches is often necessary during the bending process. Use sharp pruning shears to make clean and precise cuts.
With these materials in hand, you’ll be well-equipped to begin bending your bonsai tree and creating the desired shape. Remember to handle the tools and materials with care to avoid any unnecessary damage to the tree. Now that you have everything you need, let’s move on to the next step: selecting the right bonsai tree for bending.
Step 1: Selecting the Right Bonsai Tree
The first step in bending a bonsai tree is to select the right tree for the process. Not all trees are suitable for bending, so it’s important to choose a tree species that is known for its flexibility and adaptability. Here are some factors to consider when selecting a bonsai tree:
- Choose a young and flexible tree: Younger trees are generally more flexible and can withstand the bending process better than older trees. Look for trees that have not yet developed a thick and rigid trunk.
- Consider the species: Different species of trees have varying levels of flexibility. Some popular bonsai tree species that are known for their bending capabilities include the juniper, pine, and maple. Research the specific requirements and characteristics of the species you are interested in to ensure it is suitable for bending.
- Assess the health of the tree: A healthy tree is better equipped to handle the stress of bending. Look for a bonsai tree that has vibrant foliage, strong roots, and no signs of disease or pest infestation.
- Shape and style: Consider the desired shape and style you want to achieve with your bonsai tree. Some tree species are naturally more suited for certain styles, such as cascading or windswept. Take this into account when selecting your tree.
Once you have selected the right bonsai tree, you are ready to move on to the next step: understanding the tree’s growth patterns. This knowledge will help you effectively bend and shape the tree without causing damage. So let’s dive in and explore the fascinating world of bonsai tree growth.
Step 2: Understanding the Tree’s Growth Patterns
Before you start bending your bonsai tree, it’s crucial to have a deep understanding of its growth patterns. Each tree species has its own unique growth characteristics, and knowing how the tree naturally grows will help you achieve the desired shape more effectively. Here are some key points to consider:
- Study the natural growth direction: Observe how the branches of the tree naturally grow. Some branches may naturally arch upwards, while others may have a more horizontal or drooping growth habit. Understanding these growth patterns will assist you in bending the tree in a way that is most harmonious with its natural form.
- Identify the strongest and weakest branches: Take note of the branches that are sturdy and well-developed, as they can handle more bending pressure. Conversely, identify the weaker branches that may be more prone to breakage or damage during the bending process. This knowledge will guide you in applying the right amount of pressure while bending.
- Consider the age of the branches: Younger branches are generally more pliable and flexible, making them easier to bend. Older branches, on the other hand, may be more rigid and resistant to bending. Take this into account when choosing which branches to bend.
- Understand the healing process: Bending a tree can cause minor injuries, such as tears or breaks in the bark. Knowing how the tree naturally heals itself will help you anticipate and manage any potential damage. The tree will produce callus tissue to heal the wounded areas, and understanding this process will guide you in applying wound sealant and monitoring the healing progress.
By understanding the growth patterns of your bonsai tree, you will be able to work with the tree’s natural tendencies, creating a more cohesive and visually appealing bonsai masterpiece. With this knowledge in mind, let’s move on to preparing the tree for bending in the next step.
Step 3: Preparing the Tree for Bending
Before you begin bending your bonsai tree, it’s crucial to prepare the tree to minimize stress and ensure a successful bending process. Proper preparation will help prevent unnecessary damage and increase the chances of the tree adapting to the new shape. Here are the steps to prepare the tree for bending:
- Water the tree: Ensuring the tree is well-hydrated is essential before any manipulation. Water the tree thoroughly a day or two before you plan to bend it. Moist soil will make the branches and trunk more pliable, reducing the risk of snapping or breaking during the bending process.
- Trim excess foliage: Remove any excess foliage and branches that may obstruct your view or hinder the bending process. Use sharp pruning shears to make clean cuts and maintain the overall balance and aesthetics of the tree.
- Clean and sterilize tools: Before you start working on the tree, clean and sterilize your tools to minimize the risk of introducing any diseases or pathogens. Wipe down your wire cutters, pliers, and any other tools you’ll be using with a sterilizing solution or rubbing alcohol.
- Apply wound sealant: If you anticipate any potential injuries or tears in the bark during the bending process, it’s advisable to apply wound sealant to those areas. This will help protect the tree from infections and accelerate the healing process. Follow the manufacturer’s instructions for proper application.
Once you have prepared your bonsai tree, you can proceed with confidence to the actual bending process. Remember to work slowly and carefully, allowing the tree to adjust gradually to its new shape. In the next step, we will guide you through the process of wiring the tree’s branches to facilitate bending. Let’s dive in!
Step 4: Wiring the Tree’s Branches
Wiring the branches of your bonsai tree is a crucial step in the bending process. The purpose of wiring is to provide support and control as you shape the branches into the desired position. Here’s a step-by-step guide on how to wire your bonsai tree’s branches:
- Select the appropriate wire: Choose a wire that is strong yet flexible enough to hold the branches in place. Aluminum wire is commonly used for bonsai wiring, as it is easy to work with and does not harm the tree.
- Measure and cut the wire: Measure the length of wire needed to wrap around the branch and add a few extra inches for twisting and securing. Use pliers or wire cutters to cut the wire to the desired length.
- Anchor the wire: Start by anchoring the wire to the trunk or a sturdy part of the tree. Wrap the wire around the trunk and twist it to secure it in place. Ensure that the wire is tight enough to provide support but not too tight to damage the tree.
- Wrap the branches: Gently wrap the wire along the length of the branch, spacing the coils evenly apart. Avoid applying too much pressure to prevent branches from snapping. Use a technique called “clip and grow” to encourage controlled growth and direction.
- Shape the branches: Once the wire is in place, carefully bend the branches into the desired position. Start with small adjustments and gradually increase the bends. Be mindful of the tree’s natural growth patterns and avoid forcing the branches into unnatural positions.
- Double-check the wire tension: Ensure the wire is snug against the branches without causing excessive pressure. You should be able to feel a slight resistance as you bend the branches, but it should not cut into the bark or cause damage.
Remember that wiring should be done during the tree’s active growing period when it is most flexible. Be patient and take your time to achieve the desired shape. Once the branches are wired and positioned, it’s time to move on to the next step: bending the tree gradually. Let’s continue!
Step 5: Bending the Tree Gradually
Now that the branches of your bonsai tree are properly wired, it’s time to begin the bending process. Bending should always be done gradually to avoid causing stress or damage to the tree. Here are the steps to follow when bending your bonsai tree:
- Start with gentle adjustments: Begin by applying gentle pressure to the wired branches, slowly bending them in the desired direction. Use your hands to support the branch while applying pressure. Avoid applying excessive force to prevent breakage.
- Monitor the tree’s response: As you gradually bend the branches, observe how the tree responds. Pay attention to any signs of resistance or strain. If you notice the branches becoming too rigid or showing signs of stress, pause and adjust your approach. It’s important to listen to the tree and make any necessary adjustments to the bending process.
- Work from the trunk to the tip: Begin bending closer to the trunk and work your way towards the tips of the branches. This approach allows for a more natural appearance and helps distribute the stress evenly along the branch.
- Make small adjustments over time: Bending a bonsai tree takes time and patience. Avoid making drastic changes all at once. Instead, make small adjustments and monitor the tree’s response. If needed, allow the tree to rest for a few days between bending sessions to minimize stress. Gradual bending encourages the tree to adapt and grow in the desired shape over time.
- Use caution with brittle branches: Some tree species have more brittle branches that may be prone to snapping. Exercise caution and be extra gentle when bending these branches. Consider using support or additional wiring for added stability if necessary.
Remember, the key to successful bending is to be patient and gentle with the tree. Rushing the process or applying excessive force can lead to irreversible damage. Take your time and let the tree adjust to its new shape gradually. Once you are satisfied with the bending, it’s time to secure the position in the next step. Let’s proceed!
Step 6: Securing the Bent Position
After bending the branches of your bonsai tree into the desired position, it’s crucial to secure them to maintain the shape and encourage long-term growth. This step ensures that the branches stay in place and continue to develop in the desired direction. Here are the steps for securing the bent position:
- Use additional wire if necessary: Assess the stability of the bent branches. If you feel that they need additional support, you can apply a secondary piece of wire to hold them in place. Be careful not to tighten the wire too much to avoid causing damage to the branches.
- Attach the wire to nearby branches or trunk: Find anchor points on the tree where you can attach the wire to provide stability. This can be another branch, the trunk, or even the pot. The goal is to ensure that the bent branches don’t spring back to their original position.
- Twist the wire to secure the position: Once you have anchored the wire, gently twist it to tighten and secure the bent branches. The wire should provide enough tension to keep the branches in place, but not too much that it causes excessive stress.
- Avoid crossing or overlapping wires: As you secure the bent branches, be mindful of the wire’s placement. Avoid crossing or overlapping wires, as this can create pressure points and restrict the tree’s growth. Maintain a neat and organized wiring system.
- Monitor the tree’s growth: Keep a close eye on the tree as it continues to grow. Check periodically to ensure that the branches are maintaining their position and not becoming too constricted by the wire. If necessary, adjust or remove the wire to prevent any damage to the tree.
Securing the bent position of your bonsai tree is essential for maintaining the desired shape and supporting healthy growth. Remember to check the wires regularly and make any necessary adjustments to promote the tree’s overall well-being. Now that the tree is secured, it’s time to monitor its progress in the next step. Let’s continue the journey!
Step 7: Monitoring the Tree’s Progress
Once you have finished bending and securing the branches of your bonsai tree, it’s important to closely monitor its progress. Monitoring allows you to ensure that the tree is adapting well to the new shape and to address any issues promptly. Here are the key steps for monitoring your bonsai tree:
- Observe the branches and trunk: Regularly inspect the branches and trunk for any signs of stress, such as discoloration, wilting, or damage. Be on the lookout for branches that seem constricted by the wire or show signs of growth direction changes.
- Check wire tension: Keep an eye on the wire to ensure it remains at the proper tension. If you notice the wire digging into the branches or causing damage, it’s important to adjust or remove it immediately to prevent further harm.
- Monitor growth patterns: Assess the direction and growth of the branches to ensure they are developing in the desired shape. If any branches are straying from the intended shape, gently adjust them back into place.
- Water and feed appropriately: Provide the tree with the necessary water and nutrients to support healthy growth and recovery after bending. Follow proper watering techniques for the specific species of your bonsai tree and ensure it receives adequate sunlight for optimal growth.
- Trim and prune as needed: As the tree continues to grow and develop, you may need to trim or prune branches to maintain the desired shape. Regular pruning helps maintain the overall balance and aesthetics of the bonsai tree.
Regular monitoring is essential for the ongoing health and well-being of your bonsai tree. By closely observing its progress, you can address any issues and make necessary adjustments to ensure the tree continues to thrive. Proper monitoring sets the stage for the next step: removing the wiring. Let’s move on!
Step 8: Removing the Wiring
After a period of time, once the branches of your bonsai tree have set in their desired position, it’s time to remove the wiring. Removing the wire ensures that it doesn’t leave any marks or constrict the growth of the branches. Here’s how you can safely remove the wire:
- Start with the older wires: Begin by removing the older wires first. These wires were likely applied earlier in the bending process and may have already served their purpose. Use wire cutters or pliers to carefully cut and remove the wire.
- Work your way to the newer wires: Once the older wires have been removed, proceed to remove the newer wires. Take extra care when working with the newer wires, as they may still be providing support to the branches. Remove them one by one, ensuring not to disturb the branches.
- Untwine the wire if necessary: In some cases, the wire may have twisted or intertwined with the branches. Take your time to untwine any sections where the wire has become entangled. Gently unravel the wire to avoid damaging the tree.
- Inspect for any wire marks: As you remove the wire, inspect the branches and trunk for any marks or indentations left by the wire. If you notice any marks, gently massage the affected areas to encourage the tree’s natural healing process.
- Opt for alternative training methods: Once the wire is removed, you may opt for alternative training methods, such as clip and grow, to further shape and refine your bonsai tree. These methods involve selective pruning and encouraging new growth in specific areas.
Removing the wire is a crucial step in the bonsai bending process. It allows the tree to continue growing and adjusting naturally, without any constraints. After removing the wire, continue to monitor the tree’s progress and make any necessary adjustments as it develops. Congratulations! You have successfully bent your bonsai tree. Now, sit back and enjoy the beauty of your masterpiece.
Conclusion
Bending a bonsai tree is a fascinating and rewarding process that allows you to shape and create a unique masterpiece. By following the step-by-step guide outlined in this article, you have learned how to select the right bonsai tree, understand its growth patterns, prepare it for bending, wire the branches, and gradually bend them into the desired position. You have also learned how to secure the bent position, monitor the tree’s progress, and remove the wiring once the branches have set in place.
Throughout the process, it’s important to approach bending with patience, care, and a deep understanding of the tree’s needs. Remember to work gradually, making small adjustments over time, and closely monitor the tree’s response to ensure its health and vitality.
Bonsai tree bending is an art form that requires dedication and practice to master. It allows you to create unique and captivating shapes while maintaining the essence of the tree. As you continue on your bonsai journey, explore different bending techniques, experiment with various tree species, and embrace the beauty of nature’s miniature form.
Now, armed with the knowledge and skills you have acquired, go ahead and create stunning bonsai trees through the art of bending. Enjoy the process, the creativity, and the breathtaking results that await you. Happy bending!