Home>Types of Gardening>Ornamental Gardening>How To Repot A Ficus Bonsai Tree

Ornamental Gardening
How To Repot A Ficus Bonsai Tree
Modified: February 9, 2024
Learn the step-by-step process of repotting a Ficus Bonsai tree in this comprehensive guide for ornamental gardening enthusiasts.
(Many of the links in this article redirect to a specific reviewed product. Your purchase of these products through affiliate links helps to generate commission for Chicagolandgardening.com, at no extra cost. Learn more)
Table of Contents
- Introduction
- Supplies Needed
- Step 1: Choosing the Right Time for Repotting
- Step 2: Preparing the New Pot and Soil
- Step 3: Removing the Bonsai from Its Current Pot
- Step 4: Trimming the Roots
- Step 5: Placing the Bonsai in the New Pot
- Step 6: Filling the Pot with Fresh Soil
- Step 7: Watering and Caring for the Repotted Bonsai
- Conclusion
Introduction
Welcome to the world of ornamental gardening! If you have a passion for plants and a flair for creativity, you’re in for a treat. One aspect of ornamental gardening that has gained popularity in recent years is bonsai cultivation. Bonsai trees are small, miniature versions of their full-sized counterparts, carefully pruned and shaped to mimic the beauty of nature in a confined space.
While maintaining a bonsai tree takes dedication and patience, one of the essential tasks in bonsai care is repotting. Repotting not only helps ensure the health and vitality of your bonsai but also allows you to control its growth, shape, and overall aesthetic appeal. In this article, we will guide you through the process of repotting a ficus bonsai tree.
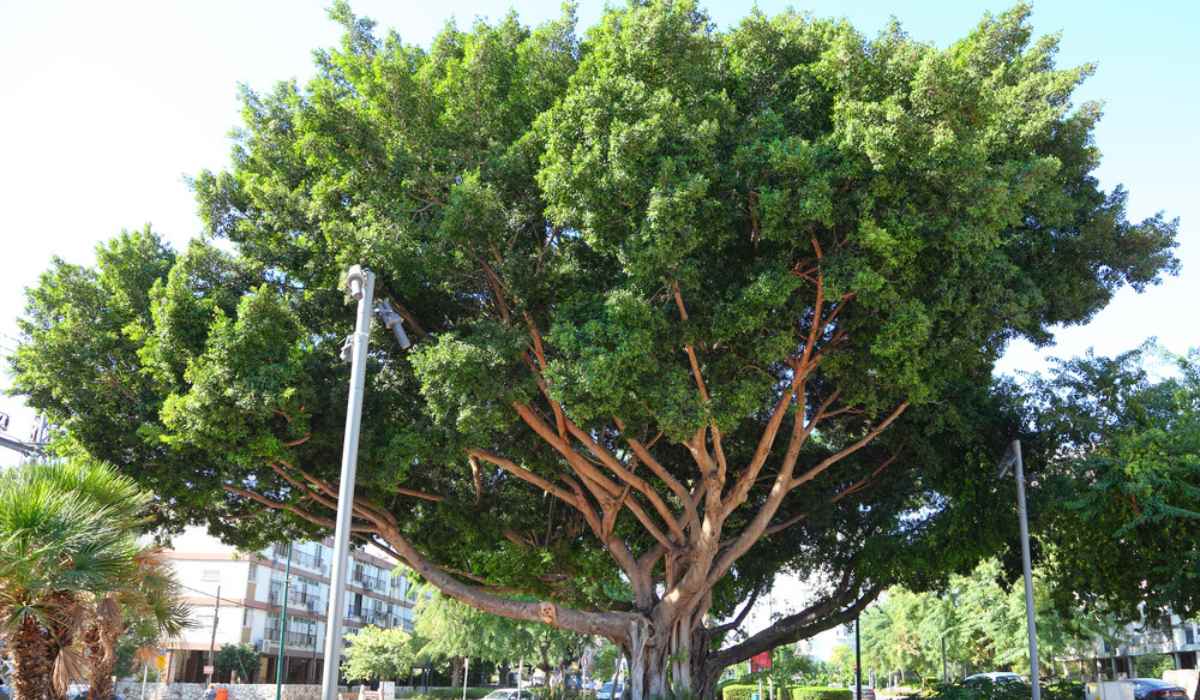
The ficus genus is one of the most popular choices for bonsai enthusiasts due to its versatility and adaptability. It is known for its vibrant foliage, stunning aerial roots, and the ability to thrive both indoors and outdoors, making it an excellent choice for beginners and experienced gardeners alike.
Before we begin the repotting process, it’s essential to gather the necessary supplies. You will need a new pot, suitable bonsai soil, pruning shears, a root hook, a watering can or spray bottle, and a sheet of plastic or a saucer to catch excess water. Having these supplies on hand will ensure a smooth and efficient repotting experience.
Now, let’s dive into the steps involved in repotting your ficus bonsai tree to help it thrive and reach its full potential.
Supplies Needed
Before we embark on the journey of repotting your ficus bonsai tree, it’s important to have the necessary supplies ready. Here is a list of items you’ll need:
- New pot: Select a pot that is slightly larger than the current one to allow for root growth. Choose a pot with drainage holes and an appropriate style and design that complements your bonsai’s aesthetic
- Bonsai soil: The right soil mix is essential for the health of your bonsai. Opt for a well-draining, nutrient-rich bonsai-specific soil mix or create your own using a combination of ingredients such as akadama, pumice, and lava rock
- Pruning shears: A sharp pair of pruning shears is necessary for trimming the roots and maintaining the overall shape of your bonsai
- Root hook: This tool is used to gently loosen the roots from the current pot and tease them apart to promote healthy growth
- Watering can or spray bottle: You’ll need a tool to water your bonsai and ensure proper hydration during and after repotting
- Sheet of plastic or saucer: Place a plastic sheet or saucer under the pot to catch excess water
- Plastic mesh or mesh screen: Use a mesh screen to cover the drainage holes in the new pot, preventing soil from escaping while allowing for proper drainage
- Wire or bonsai clips: If necessary, wire or clips can be used to secure the bonsai in the new pot and maintain its desired position
- Bucket or basin: Having a bucket or basin will be useful for soaking and rinsing the bonsai’s roots
Gathering these supplies ahead of time will ensure a smooth and efficient repotting process, allowing your ficus bonsai tree to flourish in its new environment. Let’s move on to the steps involved in repotting your bonsai.
Step 1: Choosing the Right Time for Repotting
Timing plays a crucial role when it comes to repotting your ficus bonsai tree. It’s important to choose the right time to ensure the health and vitality of your tree. The ideal time for repotting ficus bonsai trees is during the early spring before new growth begins.
During this time, the tree is transitioning from its dormant phase to the active growth phase, which makes it more resilient and better able to recover from the stress of repotting. Repotting during the active growth season allows the tree to quickly establish its roots in the new soil and promotes healthy development.
However, it’s important to note that every bonsai tree is unique, and other factors such as climate and individual tree health should also be taken into consideration. If your ficus bonsai exhibits signs of stress or shows signs of outgrowing its current pot, it may be necessary to repot it outside of the recommended timeframe.
Additionally, it’s crucial to avoid repotting during extreme weather conditions, such as intense heat or freezing temperatures. These conditions can further stress the tree and hinder its ability to recover. Aim for a mild, consistent climate to provide the optimum conditions for repotting.
Before proceeding to the next steps, take a moment to assess your ficus bonsai tree’s overall health and growth. Look for signs of rootboundness, such as roots circling around the pot or emerging from the drainage holes. It may also be beneficial to observe the overall vigor and vitality of the tree, noting any signs of nutrient deficiency or pest damage.
By choosing the right time for repotting and considering the specific needs of your ficus bonsai tree, you can ensure a successful and stress-free transition to a new pot. Now that we’ve determined the ideal timing, let’s move on to the preparation of the new pot and soil in Step 2.
Step 2: Preparing the New Pot and Soil
Now that you’ve chosen the right time to repot your ficus bonsai tree, it’s time to prepare the new pot and soil. This step is crucial to ensure the optimal health and growth of your bonsai.
Start by selecting a new pot that is slightly larger than the current one. This will give the roots room to expand and grow. Ensure that the new pot has drainage holes to prevent waterlogging and promote healthy root development. Additionally, choose a pot that complements the aesthetic of your bonsai and reflects your personal style.
Once you have the pot ready, it’s time to prepare the soil. Bonsai-specific soil mixes are widely available and provide the necessary drainage and nutrients for your ficus bonsai tree. Alternatively, you can create your own soil mix using a combination of ingredients such as akadama, pumice, and lava rock. This mixture provides optimal water retention while maintaining good airflow to the roots.
Before filling the new pot with soil, cover the drainage holes with a plastic mesh or mesh screen. This will prevent the soil from escaping while allowing excess water to drain freely. Place a thin layer of soil at the bottom of the pot to provide a foundation for the roots, ensuring they have a stable environment to grow.
Now it’s time to carefully remove the ficus bonsai tree from its current pot to prepare it for the transfer. Gently tap on the sides of the pot and manipulate it to loosen the tree’s roots. Be careful not to damage or break any of the tender roots during this process.
Once the bonsai tree is free from the pot, carefully comb out the roots using a root hook. This will help tease apart any tangled or compacted roots and stimulate new growth. Be thorough but gentle while working with the roots to avoid causing unnecessary stress to the tree.
Now that the roots are prepared, it’s time to move on to the next step—trimming the roots. But first, take a moment to appreciate the progress you have made in preparing the new pot and soil. The careful selection of the pot and the suitable soil mixture will create a nurturing environment for your ficus bonsai tree to thrive. Now, let’s move on to Step 3.
Step 3: Removing the Bonsai from Its Current Pot
With the new pot and soil ready, it’s time to remove the ficus bonsai tree from its current pot. This step requires careful handling to ensure the tree’s roots remain intact and undamaged.
Start by placing the pot on its side and gently tapping or squeezing the sides to loosen the tree’s root ball. This will help dislodge the soil and create space for the tree to be lifted out. If the tree is stubborn and doesn’t come out easily, use a root hook to gently loosen the outer layer of roots from the pot.
Once the tree is loosened, carefully grasp the base of the trunk or the root ball and slowly lift the bonsai out of its pot. It’s important to handle the tree with care and avoid pulling on the trunk or branches, as this can cause damage or breakage.
As you lift the bonsai out of the pot, take a moment to observe the root system. Look for any roots that are circling around the root ball or protruding from the drainage holes. These roots may need to be trimmed or pruned to promote healthier growth and prevent them from becoming rootbound in the new pot.
Once the bonsai is out of its pot, gently shake off any loose soil to reveal the root structure. Take the time to examine the roots for any signs of damage, decay, or pests. If you notice any issues, you may need to take additional steps to address and treat them before repotting.
Now that the bonsai has been successfully removed from its current pot, it’s time to move on to the next step—trimming the roots. This process is crucial to maintain the tree’s overall health and ensure its successful transition to the new pot. Let’s explore Step 4 in more detail.
Step 4: Trimming the Roots
Trimming the roots of your ficus bonsai tree is a critical step in the repotting process. It helps promote healthy root growth, prevents overcrowding, and encourages the tree’s overall development and vitality.
Start by carefully examining the roots of your bonsai. Look for any excessively long or tangled roots, as well as any damaged or decaying sections. Using sharp and sterile pruning shears, trim away these problematic roots, making clean and precise cuts. It’s important to avoid cutting too much or too close to the root ball, as this can shock or harm the tree.
While trimming, aim to maintain a balance between removing enough roots to encourage new growth and preserving an adequate root structure to support the tree’s health. As a general rule of thumb, aim to remove approximately one-third of the root mass.
If you encounter any large, thick roots, it may be necessary to use a saw or concave cutter to make clean and smooth cuts. This will aid in the healing process and minimize the potential for further damage to the bonsai.
Trimming the roots also presents an opportunity to create nebari, which refers to the visible surface roots that enhance the overall aesthetic appeal of the bonsai. If desired, selectively remove some of the smaller roots to expose and emphasize the nebari, allowing it to become a focal point of your bonsai’s design.
Once you have completed the root trimming process, it’s crucial to take steps to prevent infection and promote healing. Apply a rooting hormone or wood sealant to the cut surfaces to protect them from disease and promote quicker healing.
With the roots trimmed and treated, your ficus bonsai tree is now ready to be placed in its new pot. The next step, Step 5, will guide you through the process of properly positioning the bonsai in the pot and creating a stable foundation for it to thrive. Let’s continue on to the next step!
Step 5: Placing the Bonsai in the New Pot
After trimming the roots of your ficus bonsai tree, it’s time to carefully place it in the new pot. This step ensures that the bonsai is properly positioned and allows for optimal growth and stability.
Begin by creating a mound of soil in the center of the new pot. The height of the mound should be such that, when the bonsai is placed on top, the base of the trunk is at the desired height within the pot.
Gently place the bonsai on top of the soil mound, ensuring that the tree is centered in the pot. Take a moment to step back and assess the positioning from all angles and make any necessary adjustments to achieve the desired aesthetic balance.
Once you’re satisfied with the positioning, use your hands to carefully fill the remaining space in the pot with the prepared bonsai soil. Start from the sides and work your way towards the center, pressing the soil gently to ensure good contact with the roots and eliminating any air pockets.
As you fill the pot, periodically use a chopstick or your finger to gently tease out any compacted roots and ensure the soil is evenly distributed. Be careful not to apply too much pressure, as you don’t want to compact the soil excessively.
Continue this process until the pot is filled to the desired level, leaving a small space between the soil surface and the edge of the pot. This space allows for watering without the risk of overflow.
While filling the pot, keep an eye on the nebari—the visible surface roots. Adjust the soil level and positioning to accentuate and showcase the nebari, enhancing the overall appearance of your bonsai tree.
Once the bonsai is securely in place and the pot is filled with soil, give it a gentle shake and tap to help settle the soil and eliminate any remaining air pockets. This will provide a stable foundation for the tree. Take a moment to make any final adjustments to the soil level and positioning, if necessary.
With the bonsai successfully placed in its new pot, it’s time to move on to the final step—filling the pot with fresh soil. Here, we will complete the repotting process by ensuring the proper nutrition and hydration of your ficus bonsai tree. Let’s proceed to Step 6.
Step 6: Filling the Pot with Fresh Soil
Now that your ficus bonsai tree is securely placed in its new pot, the next step is to fill the pot with fresh soil. This step provides the necessary nutrition and support for the tree’s continued growth and well-being.
Begin by adding a layer of soil on top of the existing soil in the pot. Use your fingers or a small tool to gently work the soil into the gaps and spaces between the roots. Take care not to exert too much pressure, as the soil should be loose and well-aerated.
Continue filling the pot with soil, ensuring that it reaches all areas and covers the roots evenly. As you fill, gently shake the pot or lightly tap the sides to settle the soil and remove any air pockets. It’s important to maintain a consistent and level surface throughout.
Pay attention to the level of the soil in relation to the trunk of the bonsai. The soil should come up to the base of the trunk, but avoid burying the trunk or creating a “well” around it, as this can lead to moisture retention and potentially harm the tree.
While filling the pot, periodically use a chopstick or your finger to check for any gaps or pockets of air. Gently press the soil into these areas to ensure good contact between the roots and the soil. This helps prevent air pockets that can disrupt moisture and nutrient uptake.
Additionally, consider incorporating slow-release fertilizers into the soil during this step. These fertilizers provide essential nutrients over an extended period, ensuring your ficus bonsai tree receives the nourishment it needs for healthy growth and vibrant foliage.
Once the pot is filled with fresh soil and the bonsai is properly covered, gently water the soil to further settle it and encourage root establishment. Be mindful not to flood the pot or allow water to overflow. Gradually water until the soil is evenly moist, allowing excess water to drain away.
With the pot filled with fresh soil and properly irrigated, your ficus bonsai tree is now in a favorable environment to thrive and flourish. The next step, Step 7, will guide you through the important process of watering and caring for the repotted bonsai. Let’s progress to the final step!
Step 7: Watering and Caring for the Repotted Bonsai
Now that you’ve successfully repotted your ficus bonsai tree, it’s time to focus on its ongoing care, with a particular emphasis on proper watering techniques and general maintenance.
Watering is a crucial aspect of bonsai care, as it provides the necessary hydration for the tree’s overall health and vitality. After repotting, it’s important to ensure that the tree receives adequate moisture without risking overwatering.
As a general guideline, water your newly repotted bonsai thoroughly until you see water flowing out from the drainage holes. This signals that the soil is evenly moist and the tree has received sufficient hydration. However, avoid leaving the pot sitting in standing water, as it can lead to root rot.
Monitor the moisture levels of the soil on a daily basis, especially during the first few weeks after repotting. Use your finger or a moisture meter to assess the moisture content of the soil. Water only when the top inch of the soil feels slightly dry.
Alongside adequate watering, it’s important to provide your ficus bonsai with the right balance of light and shade. Ficus trees thrive in bright, indirect light conditions. Place your bonsai in an area that receives bright, filtered light for a significant portion of the day.
Protect your bonsai from extreme temperatures and drafts. Ficus trees prefer moderate temperatures between 60-80°F (15-27°C) and can be damaged by sudden temperature fluctuations or exposure to cold drafts.
Regularly inspect your bonsai for any signs of pest infestation or disease. Common pests that can affect ficus bonsai include aphids, scales, and spider mites. If you notice any unusual discoloration, holes in the leaves, or signs of pest activity, take immediate action to address the issue. Consult with a reputable garden center or bonsai expert for appropriate treatment options.
Additionally, maintain a consistent feeding schedule with a balanced bonsai fertilizer to ensure your ficus bonsai tree receives the essential nutrients it needs for healthy growth. Follow the instructions provided by the fertilizer manufacturer, adjusting the dosage based on the needs of your specific tree.
Finally, continue to monitor the overall health and appearance of your bonsai. Prune and shape the tree as necessary to maintain its desired form, and periodically check the wire and remove it if it begins to bite into the branches.
With proper watering, adequate lighting, pest control, and regular maintenance, your repotted ficus bonsai tree will continue to thrive and bring you joy for years to come.
Conclusion
Congratulations on successfully repotting your ficus bonsai tree! By following the steps outlined in this guide, you have taken a crucial step in promoting the health, growth, and aesthetic appeal of your bonsai.
Remember, repotting a bonsai tree is not just about changing its pot; it’s an opportunity to rejuvenate and optimize its overall well-being. Choosing the right time, preparing the new pot and soil, removing the bonsai from its current pot, trimming the roots, placing it in the new pot, filling it with fresh soil, and providing proper care afterwards are all essential steps in this process.
Throughout the repotting journey, it’s important to approach the task with care, patience, and an understanding of your bonsai tree’s specific needs. Observation and attention to detail are key as you assess the health and growth of your bonsai tree, making necessary adjustments along the way.
Additionally, always keep in mind the basic principles of bonsai care, such as proper watering, light exposure, pest control, and regular maintenance. By adhering to these practices, your ficus bonsai tree will continue to flourish and showcase its beauty.
Remember to enjoy the process and embrace the artistry of ornamental gardening. Your ficus bonsai tree is a living masterpiece that will bring you joy and satisfaction as you witness its growth and transformation over time.
Continue to learn and explore the world of bonsai, gather inspiration from experienced gardeners, and experiment with different techniques to nurture and refine your bonsai skills.
Enjoy the journey of tending to your ficus bonsai tree, and may it bring you a sense of tranquility, connection to nature, and personal fulfillment—all while adding a touch of natural beauty to your surroundings.