Home>Gardening Techniques>Plant Care>How To Repot Sunflowers
Plant Care
How To Repot Sunflowers
Modified: February 9, 2024
Learn the essential steps for repotting sunflowers and ensuring proper plant care. Discover expert tips and tricks for a successful transplant and healthy growth.
(Many of the links in this article redirect to a specific reviewed product. Your purchase of these products through affiliate links helps to generate commission for Chicagolandgardening.com, at no extra cost. Learn more)
Table of Contents
- Introduction
- Choosing the Right Time for Repotting
- Selecting the Appropriate Pot
- Preparing the New Pot
- Gently Removing the Sunflower from Its Current Pot
- Loosening the Plant’s Root Ball
- Placing the Sunflower in the New Pot
- Filling the Pot with Fresh Soil
- Watering the Repotted Sunflower
- Providing Proper Care After Repotting
- Conclusion
Introduction
Welcome to the world of plant care! Repotting is an essential task that every plant parent needs to master. If you have sunflowers in your garden or as indoor plants, knowing when and how to repot them can ensure their healthy growth and blooming. Repotting sunflowers not only provides them with fresh nutrients but also gives their roots enough space to spread out and thrive.
In this article, we will guide you through the process of repotting sunflowers step-by-step. From selecting the right time for repotting to choosing the appropriate pot and providing proper care after the process, we will cover everything you need to know to successfully repot your sunflowers.
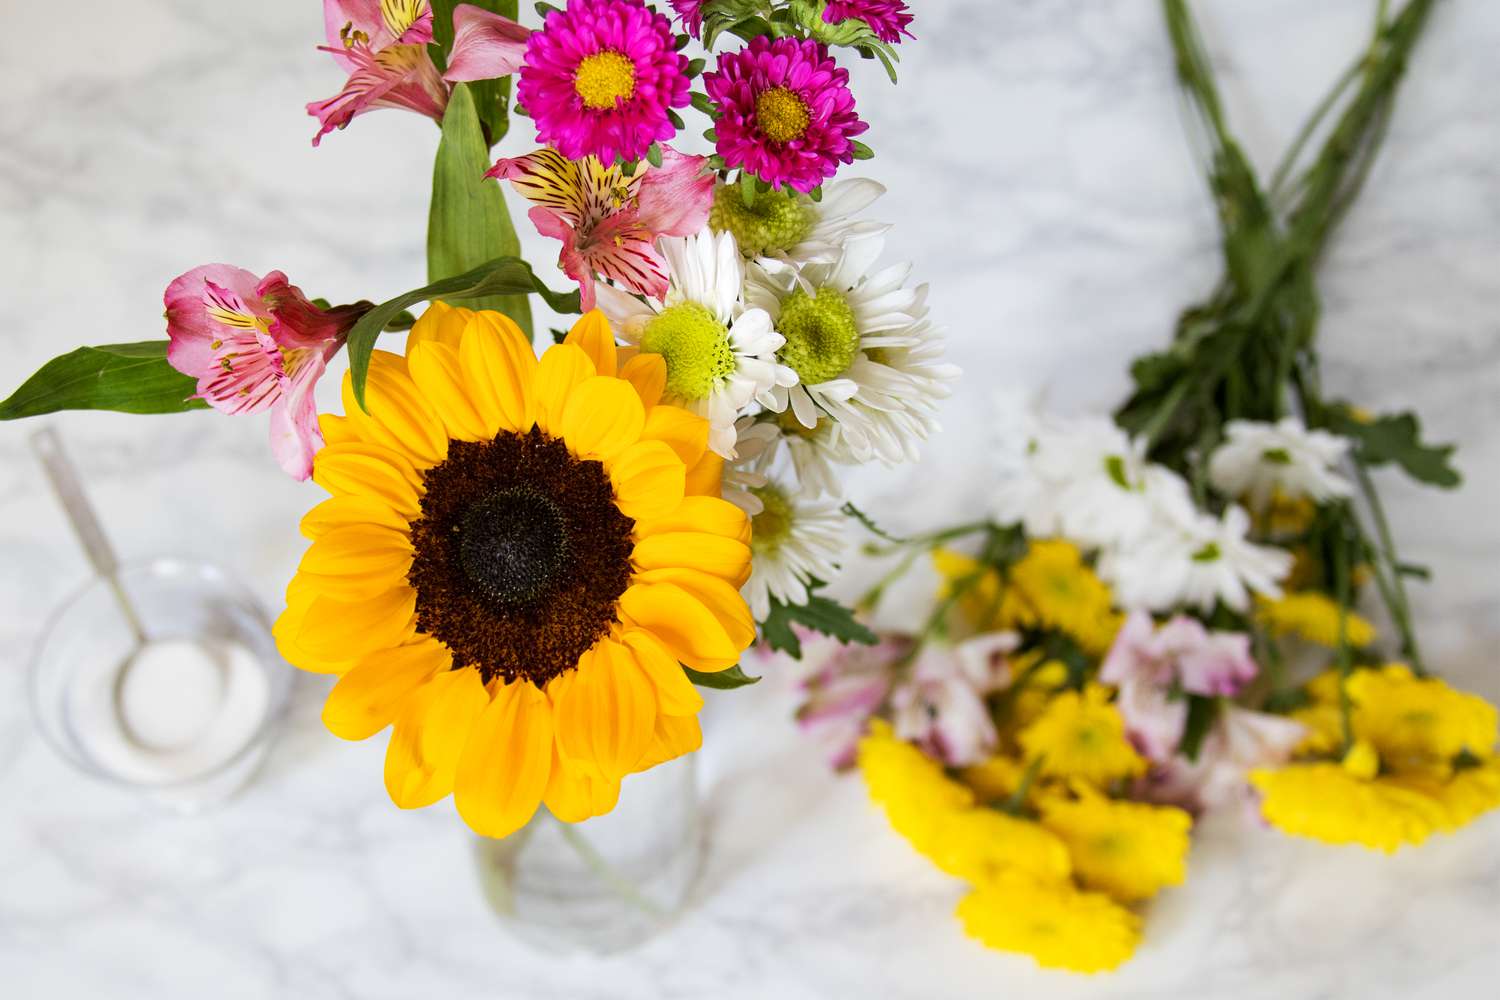
Sunflowers are known for their vibrant yellow blooms and tall stems that can bring a touch of happiness and beauty to any space. Whether you grow sunflowers in your backyard or in containers indoors, they will surely brighten up your surroundings.
However, just like any other plant, sunflowers will eventually outgrow their pots and require repotting. Repotting is essential for their continued growth and overall health. By providing a larger pot, fresh soil, and ample room for their roots to develop, you are setting them up for success.
So, let’s dive in and learn how to properly repot your sunflowers, ensuring they have the best environment to thrive and flourish.
Choosing the Right Time for Repotting
Timing plays a crucial role in successfully repotting sunflowers. You want to choose a time when the plant is in its active growth phase, typically during the spring or early summer. This allows the sunflower to recover and establish itself before the colder months arrive.
One way to determine if it’s the right time to repot is by examining the roots. If you notice that the roots are densely packed and circling around the bottom of the pot, it’s a clear indication that your sunflower is root-bound and in need of more space.
Another factor to consider is the weather. It’s best to avoid repotting during extreme temperatures, whether it’s sweltering heat or freezing cold. Sunflowers are sensitive to temperature changes, and repotting during extreme conditions could cause stress and hinder their growth.
Additionally, take into account the flowering cycle of your sunflower. If it’s currently blooming, it’s better to wait until the blossoms fade before repotting. This allows the plant to focus its energy on recovery rather than diverting resources to producing flowers.
Lastly, it’s important to assess the health of the sunflower. If you notice any signs of disease or pest infestation, it’s crucial to address those issues before considering repotting. Repotting a stressed or unhealthy sunflower can further weaken the plant, so ensure that it’s in optimal condition before proceeding.
By choosing the right time to repot, you provide your sunflower with the best chance of thriving in its new container. Being mindful of the season, the root condition, the weather, and the plant’s overall health allows you to create the ideal environment for successful repotting and subsequent growth.
Selecting the Appropriate Pot
Choosing the right pot is essential for the health and growth of your sunflower. Here are some factors to consider when selecting an appropriate pot:
- Size: Opt for a pot that is slightly larger than the current one. The new pot should provide enough room for the sunflower’s roots to spread out and grow. However, avoid selecting a pot that is excessively large, as it can lead to overwatering and nutrient deficiencies.
- Material: Sunflowers thrive in pots made of porous materials such as clay or terracotta. These materials allow for better airflow and moisture regulation, preventing waterlogging and root rot. Avoid plastic pots if possible, as they can retain moisture and lead to fungal issues.
- Drainage: Ensure that the pot you choose has drainage holes at the bottom. Proper drainage is crucial to prevent water accumulation, which can drown the roots and cause root rot.
- Stability: Select a pot that is sturdy and stable. Sunflowers can grow tall, and a lightweight or flimsy pot may tip over due to their size and weight. This can lead to damage to the plant and its roots.
- Aesthetics: Consider the overall aesthetics of the pot. Choose a design, shape, and color that complements the beauty of the sunflower. A visually appealing pot can enhance the overall appearance of the plant and its surroundings.
Before transferring your sunflower to the new pot, make sure to clean and sanitize it to remove any dirt or contaminants from previous use. This helps to maintain a healthy and disease-free environment for the plant.
By carefully selecting the appropriate pot for your sunflower, you provide it with the necessary space, airflow, and stability for optimal growth. A well-chosen pot promotes healthy root development and ensures the overall well-being of your sunflower.
Preparing the New Pot
Before repotting your sunflower, it is crucial to prepare the new pot to ensure a healthy and conducive environment for the plant’s growth. Here are the steps to prepare the new pot:
- Clean the Pot: Thoroughly clean the new pot with warm water and mild dish soap or a solution of one part bleach to ten parts water. This removes any dirt, debris, or potential disease-causing pathogens from the pot.
- Sanitize the Pot: After cleaning, sanitize the pot by rinsing it with a solution of one-part bleach to ten parts water. This helps eliminate any remaining bacteria or fungi that may be present.
- Check Drainage Holes: Ensure that the drainage holes in the new pot are clear and not blocked by debris. Good drainage is essential to prevent water from accumulating and causing root rot.
- Add a Drainage Layer: Place a layer of small pebbles or stones at the bottom of the pot. This helps to facilitate drainage and prevents the soil from blocking the drainage holes.
- Add Fresh Potting Mix: Fill the pot with a well-draining potting mix suitable for sunflowers. You can either purchase a commercial potting mix specifically formulated for flowering plants or create your own mix using a combination of organic matter, compost, and perlite or vermiculite to improve drainage.
It is important to note that sunflowers prefer well-draining soil to avoid waterlogged conditions that can lead to root rot. Avoid using heavy garden soil, as it tends to become compacted and may not provide the necessary drainage for the plant.
By properly preparing the new pot, you create a clean, sanitized, and well-draining environment for your sunflower to thrive. This sets the stage for a successful repotting process and ensures the plant’s health and vitality in its new container.
Gently Removing the Sunflower from Its Current Pot
When it’s time to repot your sunflower, you need to be gentle and cautious to avoid causing damage to the plant’s roots or stem. Follow these steps to safely remove the sunflower from its current pot:
- Prepare the Work Area: Find a clean and spacious area where you can safely work on repotting your sunflower. This will make it easier to handle the plant and minimize the risk of any accidental damage.
- Water the Sunflower: Before removing the sunflower from its current pot, water it thoroughly. Moist soil helps to keep the root ball intact and reduces the risk of root damage during the repotting process.
- Loosen the Soil: Gently slide a small gardening tool or your fingers along the inner edges of the pot to loosen the soil. This will help to separate the root ball from the sides of the pot, making it easier to lift the sunflower out.
- Support the Stem: Place one hand on the base of the sunflower stem, close to the soil surface. This will provide support and stability as you lift the plant out of the pot, preventing any accidental bending or breaking.
- Turn the Pot Upside Down: Carefully turn the pot upside down while keeping a firm grip on the stem. Gently tap the bottom of the pot, if necessary, to encourage the sunflower to slide out. Avoid pulling or yanking on the stem, as this can lead to damage.
- Inspect the Root Ball: Once the sunflower is out of the pot, gently examine the root ball. Look for any signs of root-bound growth, such as tightly packed or circling roots. If you notice any, it’s necessary to loosen the root ball before repotting.
Remember to handle the sunflower with care while removing it from the pot. Being gentle and cautious will help prevent any unnecessary stress or damage to the plant, ensuring a smooth transition to its new container.
Loosening the Plant’s Root Ball
After gently removing the sunflower from its current pot, it’s essential to inspect the root ball and take steps to loosen it before repotting. Loosening the root ball promotes healthier root growth and allows the sunflower to adjust to its new pot more easily. Follow these steps to effectively loosen the plant’s root ball:
- Examine the Root Ball: Carefully assess the root ball’s condition, looking for any signs of compacted or circling roots. These issues can restrict the plant’s growth and nutrient uptake, so addressing them is crucial.
- Gently Tease Out the Roots: Use your fingers or a small gardening tool to gently tease out any circling or tangled roots. Be careful not to damage the roots or break them, as they are vital to the plant’s overall health.
- Prune Overgrown Roots: If you come across long, tangled, or damaged roots, consider pruning them. Use clean and sharp pruning shears or scissors to remove any excessively long or unhealthy roots. Pruning helps rejuvenate the root system and encourages new, healthier root growth.
- Loosen Compact Soil: If the soil around the root ball is compacted, gently loosen it with your fingers or a gardening tool. Loosening the soil allows for better airflow and water drainage, preventing root suffocation and waterlogged conditions.
- Create Vertical Cuts: If the root ball is tightly packed, make vertical cuts into its sides. Use a clean and sharp knife or gardening tool to make several shallow cuts, allowing the roots to grow outward more easily and establish themselves in the new pot.
- Inspect and Repeat if Necessary: Once you have loosened the root ball, inspect it again to ensure all tangled and compacted roots have been addressed. Repeat the process if needed, focusing on areas that may still have tightly packed or circling roots.
Loosening the sunflower’s root ball allows for better nutrient absorption, aeration, and root expansion. You are creating an environment that encourages healthy root growth and sets the stage for successful repotting and future plant development.
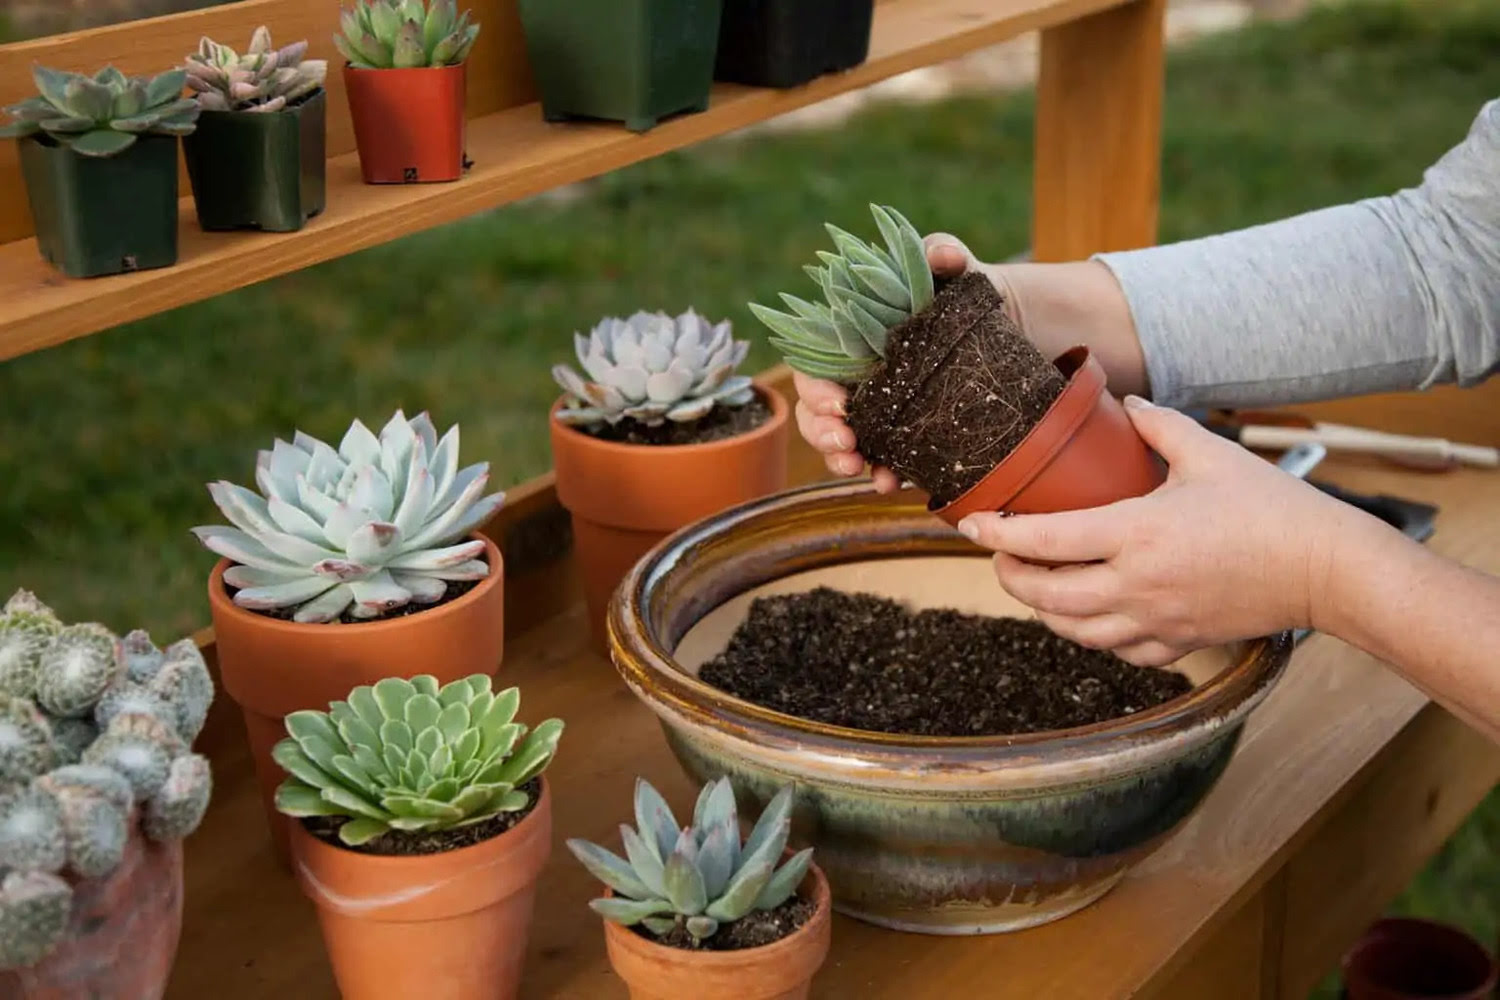
Placing the Sunflower in the New Pot
Now that you have prepared the new pot and loosened the sunflower’s root ball, it’s time to carefully place the plant into its new home. This step ensures that the sunflower is properly positioned and gives its roots space to grow. Follow these guidelines for placing the sunflower in the new pot:
- Center the Sunflower: Position the sunflower in the center of the new pot, ensuring that it will have enough space to grow and that the stem is upright. This will allow for optimal sun exposure and prevent the sunflower from leaning or toppling over.
- Add Potting Mix: Begin filling the pot with fresh potting mix around the sunflower, gently pressing it down to ensure good root-to-soil contact. Gradually fill the pot up to the base of the stem, leaving enough space for watering.
- Check the Depth: Make sure that the sunflower is planted at the same depth or slightly deeper than it was in the previous pot. The soil level should be just below the bottom leaves to avoid stem rot.
- Stabilize the Sunflower: As you add more soil, gently support the sunflower’s stem with one hand to prevent any shifting or tilting during the process. This ensures that the root ball remains intact and undisturbed.
- Build Soil Support: Create a slight soil mound around the base of the sunflower to provide additional stability. This helps anchor the plant and prevent it from becoming top-heavy or prone to wind damage.
- Lightly Water: After placing the sunflower in the new pot, give it a light watering to settle the soil and eliminate any air pockets around the root ball. This helps ensure that the roots have good contact with the soil and promotes healthy root growth.
Properly placing the sunflower in the new pot is crucial for establishing a strong foundation for growth. By centering the plant, adding sufficient soil, and providing stability, you are setting the sunflower up for success in its new environment.
Filling the Pot with Fresh Soil
After placing the sunflower in the new pot, the next step is to fill the pot with fresh soil. Choosing the right soil and properly filling the pot ensures that the sunflower has the necessary nutrients and growing conditions for optimal development. Follow these steps to effectively fill the pot with fresh soil:
- Select a Well-Draining Potting Mix: Choose a high-quality potting mix that is specifically formulated for flowering plants, preferably one with good drainage properties. Avoid using heavy garden soil, as it can become compacted and hinder water drainage.
- Fill the Pot Gradually: Begin filling the pot with the potting mix, adding it in layers. Gently press down the soil as you go to ensure that it fills any gaps and provides support to the sunflower’s root system.
- Avoid Compacting the Soil: While filling the pot, be careful not to over-compact the soil. Lightly tap the pot or use your fingers to settle the soil, but avoid packing it down too firmly. This allows for good aeration and prevents waterlogging.
- Leave Adequate Space: Leave a small space at the top of the pot to allow for easy watering without causing overflow. This prevents the water from running off the soil surface and ensures that it penetrates the root zone effectively.
- Level the Soil Surface: Use your hand or the back of a gardening tool to level the soil surface in the pot. This promotes even water distribution and provides a neat and tidy appearance.
- Avoid Covering the Stem: Make sure the sunflower’s stem is not covered by the soil. The base of the stem should sit just above the soil level to prevent rotting and fungal diseases. Adjust the soil level if necessary.
It’s important to note that different sunflower varieties may have different soil preferences. Some may thrive in slightly sandy or loamy soil, while others may prefer a mix with more organic matter. Consider the specific needs of your sunflower variety when choosing and filling the pot with fresh soil.
By properly filling the pot with fresh soil, you provide the sunflower with a nutrient-rich environment and promote healthy root development. This sets the stage for the plant to thrive and reach its full potential in its new pot.
Watering the Repotted Sunflower
After repotting your sunflower, proper watering is essential to help it settle into its new surroundings and promote healthy growth. Here are some guidelines to ensure proper watering for your repotted sunflower:
- Start with a thorough watering: After repotting, give the sunflower a generous watering to help the soil settle and eliminate any air pockets. Make sure to thoroughly saturate the soil until water drains out from the bottom of the pot.
- Allow adequate drainage: Ensure that the pot has proper drainage to prevent waterlogged conditions. Excess water can lead to root rot and other diseases. Always check if the pot has drainage holes and remove any excess water from the saucer or tray underneath.
- Observe the moisture levels: Sunflowers prefer well-drained soil, so it’s important to let the surface of the soil dry out slightly before watering again. Stick your finger about an inch into the soil to check the moisture level. If it feels dry at that depth, it’s time to water.
- Water deeply, but infrequently: Aim for deep watering rather than shallow watering. This encourages the sunflower’s roots to grow deeper into the soil. Water thoroughly, ensuring that the moisture reaches the entire root ball.
- Water according to the plant’s needs: Sunflowers generally require regular watering, especially during hot and dry periods. However, be cautious not to overwater as this can lead to root rot. Adjust your watering frequency based on the sunflower’s specific needs and the environmental conditions.
- Use room temperature water: Water your sunflower with room temperature water to avoid shocking the plant with cold or hot water. Allow tap water to sit for a few hours before watering to allow any chlorine in the water to dissipate.
- Consider external factors: Factors such as temperature, humidity, and sunlight exposure can affect the sunflower’s watering needs. During hot and dry weather or when the sunflower is in direct sunlight, it may require more frequent watering.
Remember to strike a balance with watering. Overwatering can cause root problems, while underwatering can lead to wilting and stress. Adjust your watering routine accordingly, monitoring the sunflower’s response to ensure it remains healthy and hydrated.
By providing adequate and mindful watering, you are giving your repotted sunflower the necessary hydration it needs to thrive in its new pot. This helps maintain its overall health and promotes optimal growth and blooming.
Providing Proper Care After Repotting
After repotting your sunflower, it’s important to provide proper care to ensure its successful transition and continued growth. Here are some essential care tips to follow:
- Placement: Choose a suitable location for your sunflower that provides adequate sunlight. Most sunflowers require full sun, which means they need at least 6-8 hours of direct sunlight each day. Place it in an area with good air circulation, away from drafts or extreme temperature fluctuations.
- Monitor Watering: Regularly monitor the moisture level of the soil and adjust your watering routine as needed. Water the sunflower when the top inch of soil feels dry, but avoid overwatering, which can lead to root rot. Strike a balance to keep the soil consistently moist, but not waterlogged.
- Fertilization: Feed your sunflower with a balanced flower fertilizer or a slow-release granular fertilizer specifically designed for flowering plants. Follow the product instructions for application rates and frequency. Fertilize during the growing season to provide the sunflower with the necessary nutrients for healthy growth.
- Stake if necessary: Tall sunflower varieties may require staking to support their stems as they grow. Place a stake near the stem and loosely tie the stem with a soft plant tie. This prevents the sunflower from bending or falling over due to wind or its own weight.
- Pruning: Regularly inspect your sunflower for any dead or yellowing leaves, wilted flowers, or signs of disease or pest infestation. Prune these unhealthy parts to maintain the plant’s overall health and appearance. Use clean and sharp pruning tools to prevent the spread of disease.
- Monitor for Pests and Diseases: Watch out for common pests such as aphids, snails, and slugs. Apply organic pest control measures, such as using insecticidal soap or manually removing the pests. Also, keep an eye out for signs of diseases like powdery mildew or fungal infections. Treat any issues promptly to prevent further damage to the plant.
- Provide Support: As your sunflower grows, it may require additional support. Install taller stakes or use a trellis to provide stability for the stem. Gently tie the plant to the support structure to prevent it from being damaged by wind or its own weight.
Every sunflower is unique, and its care requirements may vary slightly based on its variety and environmental conditions. Be attentive and proactive in observing your sunflower’s needs, adjusting your care routine as necessary to promote healthy growth and blooming.
By providing proper care after repotting, you give your sunflower the best chance to adapt to its new environment and thrive. With proper sunlight, watering, fertilization, and monitoring, your sunflower will continue to bring you joy with its vibrant blooms and radiant beauty.
Conclusion
Congratulations! You have learned the essential steps for successfully repotting your sunflower. By following the guidelines provided, you can ensure the health and growth of your sunflower as it transitions to its new pot. Remember, each step of the repotting process is crucial, from choosing the right time and pot to gently removing the sunflower and loosening its root ball.
Proper care after repotting is equally important. Give your sunflower the right amount of sunlight, monitor its watering needs, provide fertilization as needed, and stay vigilant for pests and diseases. By providing proper care, you are creating a nurturing environment for your sunflower to thrive.
Remember to observe your sunflower closely and make adjustments to its care routine based on its specific needs. Every sunflower is unique, and attentive care ensures its continued growth and beautiful blooms.
So, go ahead and apply your new knowledge of repotting and caring for sunflowers. Watch as your sunflower flourishes, bringing joy and beauty to your home or garden. Happy gardening!