Home>Types of Gardening>Ornamental Gardening>How To Repot Cactus And Succulents
Ornamental Gardening
How To Repot Cactus And Succulents
Modified: February 9, 2024
Learn how to repot your cactus and succulents for a thriving ornamental garden. Expert tips and techniques for successful repotting.
(Many of the links in this article redirect to a specific reviewed product. Your purchase of these products through affiliate links helps to generate commission for Chicagolandgardening.com, at no extra cost. Learn more)
Table of Contents
- Introduction
- Choosing the Right Time
- Preparing the Work Area
- Gathering the Necessary Tools and Materials
- Removing the Plant from its Current Pot
- Inspecting the Roots
- Trimming Overgrown Roots
- Preparing the New Pot
- Selecting an Appropriate Soil Mix
- Placing the Plant in the New Pot
- Adding New Soil Mix
- Watering the Repotted Plant
- Allowing the Plant to Adjust
- Conclusion
Introduction
Are you a plant enthusiast looking to give your cactus or succulent a fresh start? Repotting is a crucial task that not only promotes the health and growth of your ornamental plants but also provides an opportunity for you to showcase them in beautiful new containers. Whether you’re a seasoned gardener or a beginner, learning how to repot cactus and succulents is a valuable skill that will ensure the longevity and aesthetic appeal of your plants.
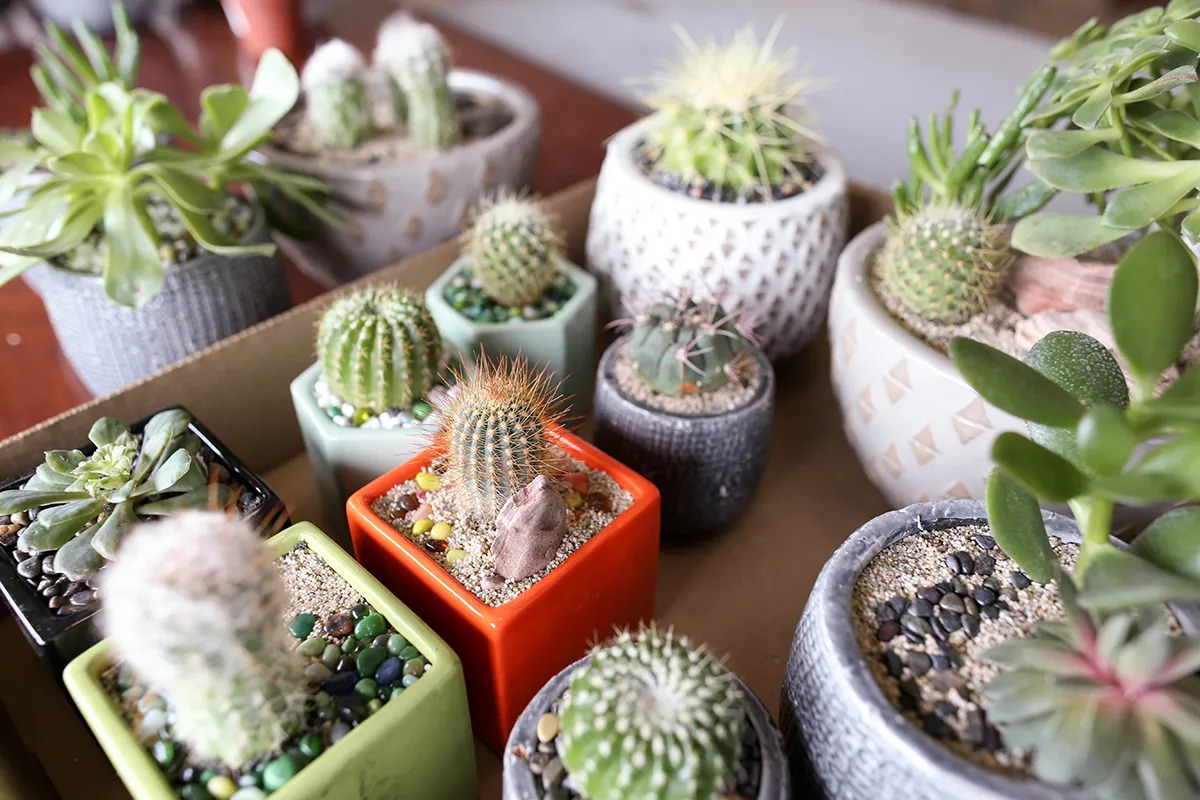
Cacti and succulents, known for their unique and captivating shapes and their ability to thrive in arid conditions, have gained popularity as popular houseplants. These resilient plants require little maintenance, making them perfect for busy individuals or those lacking a green thumb.
Repotting should be done periodically to prevent the plant from becoming root bound, where the roots outgrow the current pot. It allows for proper root development and provides space for the plant to grow and flourish. Additionally, repotting gives you the opportunity to refresh the potting mix, removing any old or depleted soil and replacing it with nutrient-rich media that promotes healthy growth.
In this guide, we will walk you through the step-by-step process of repotting your cactus or succulent, from choosing the perfect time to gathering the necessary tools and materials. You’ll learn how to inspect and trim the roots, prepare the new pot, and properly place your plant in its new home. By the end, you’ll have all the knowledge you need to confidently repot your ornamental plants and give them the best chance at thriving and beautifying your living space.
Choosing the Right Time
Choosing the right time to repot your cactus or succulent is crucial for ensuring a successful and stress-free transition. While these plants are known for their resilience, it’s best to avoid repotting during times of high stress, such as during extreme temperature fluctuations or when the plant is in the middle of its active growth phase.
Spring and early summer are generally the best times to repot your cactus or succulent. During this time, the plants are coming out of their winter dormancy and preparing for their growth season. Their energy reserves are at their peak, making it ideal to disturb their roots without causing excessive stress.
It’s important to avoid repotting during the winter or late summer months when the plants are dormant or experiencing slower growth. Repotting during these periods can disrupt their natural cycles and may lead to poor root development or even harm the plant.
Additionally, check the weather forecast before planning to repot your plants. It’s best to choose a day when the weather is mild and there are no extreme temperatures or heavy rain expected. This will provide a comfortable environment for both you and your plants.
Lastly, keep in mind that newly purchased cacti and succulents may require repotting soon after bringing them home. The pots they are sold in are often small and may not provide enough room for growth. It’s a good idea to inspect the plant’s roots and consider repotting if they appear overcrowded or if the plant seems unhealthy.
By choosing the right time to repot your cactus or succulent, you’ll ensure the best chances for success and give your plants a fresh start in their new homes.
Preparing the Work Area
Before you begin repotting your cactus or succulent, it’s important to prepare a clean and organized work area. This will ensure a smooth and efficient process, as well as minimize the risk of damaging the plant and yourself.
First, choose a well-lit area with enough space to comfortably work with your plants. Natural light is ideal, but if that’s not available, set up a bright artificial light source. Adequate lighting will help you see the plant’s roots clearly and make more accurate decisions during the repotting process.
Cover your work area with a plastic or cloth sheet that can catch any soil or debris that may fall during the repotting process. This will make cleanup much easier and prevent any mess from spreading to other surfaces.
Gather the necessary tools and materials beforehand. You will need a pair of clean, sharp scissors or pruning shears for any necessary root trimming, a clean and appropriately sized pot for the new home of your plant, and a well-draining potting mix suitable for cacti and succulents. Ensure that all tools and pots are thoroughly cleaned and sanitized to prevent the spread of any potential diseases.
If you’re repotting multiple plants, it’s a good idea to set up a designated area for each plant. This will help you keep track of which plant is in which pot and avoid any confusion later on.
Lastly, make sure to have some gloves and a small brush or cloth on hand. Gloves will protect your hands from potential thorns or spines on the plants, and the brush or cloth will come in handy for gently cleaning any soil off the leaves or stems after repotting.
By properly preparing your work area, you’ll create an environment that promotes efficiency and minimizes the risk of mistakes or accidents, allowing you to enjoy the repotting process to the fullest.
Gathering the Necessary Tools and Materials
Before you embark on the repotting journey for your cactus or succulent, it’s important to gather all the necessary tools and materials. Being well-prepared will ensure a smooth and hassle-free process, allowing you to give your plants the attention they deserve.
Here are the essential tools and materials you’ll need:
- A clean and sharp pair of scissors or pruning shears: These will be used to trim any overgrown or damaged roots during the repotting process. Make sure they are clean and in good condition to prevent any potential damage to the plant.
- A new pot: Choose a pot that is slightly larger than the current pot but not too big to overwhelm the plant. Ensure that the pot has drainage holes to allow excess water to escape.
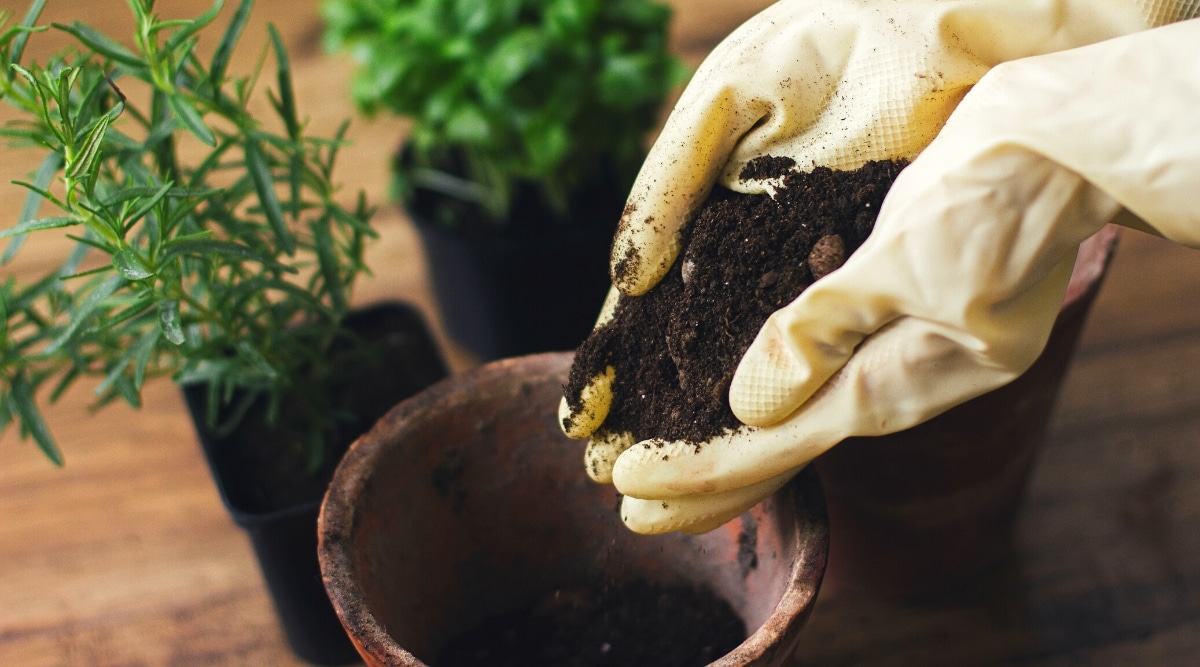
- Well-draining potting mix: Cacti and succulents require a well-draining soil mix to prevent waterlogged roots. You can find pre-made potting mixes specifically formulated for these types of plants at your local garden center or create your own by combining coarse sand, perlite, and potting soil.
- Gloves: It’s a good idea to wear gloves during the repotting process to protect your hands from potential spines or thorns. Choose gloves that are comfortable and provide adequate dexterity.
- A plastic sheet or cloth: Cover your work area with a plastic sheet or cloth to catch any soil or debris that may spill during the repotting process. This will make cleanup much easier and prevent any mess from spreading to other surfaces.
- A small brush or cloth: Have a small brush or cloth on hand to gently clean any soil off the leaves or stems of the plant after repotting. This will help maintain the plant’s appearance and prevent any potential issues.
Once you’ve gathered all the necessary tools and materials, you’ll be ready to begin the repotting process. Having everything prepared beforehand will save you time and ensure that the process goes smoothly, allowing you to give your plants the care they need.
Removing the Plant from its Current Pot
Now that you have gathered all the necessary tools and materials, it’s time to carefully remove your cactus or succulent from its current pot. This step requires caution and attention to prevent any damage to the plant’s roots or stem.
Follow these steps to safely remove the plant:
- Prepare the plant: Water your plant a few days before the repotting process. Moist soil will help the plant hold together during the transition, making it easier to remove from the pot without damaging the roots.
- Protect yourself: Put on a pair of gloves to protect your hands from any potential spines or thorns your plant may have.
- Gently loosen the soil: Carefully tap or squeeze the sides of the pot to loosen the soil around the edges. This will help the plant slide out more easily.
- Support the plant: Place one hand firmly over the top of the soil, holding the plant in place, while using your other hand to gently turn the pot upside down. Use your fingers to support the base of the plant, ensuring it doesn’t fall out of your hand.
- Tap the bottom of the pot: With the pot still upside down, tap the bottom of the pot gently to release the plant. If the plant doesn’t come out easily, you can carefully slide a clean, blunt tool, like a butter knife, along the inner edges of the pot to loosen the root ball.
- Inspect the plant and roots: Once the plant is out of the pot, take a moment to inspect its overall condition. Check for any signs of root rot or pests. Look for healthy roots that are firm, white, and growing. If you notice any rotten or damaged roots, you’ll need to trim them later in the repotting process.
By following these steps, you’ll be able to safely remove your plant from its current pot, setting the stage for the next crucial steps in the repotting process.
Inspecting the Roots
Once you have successfully removed your cactus or succulent from its current pot, it’s time to inspect the roots. This step is vital to assess the health and condition of the root system and make any necessary adjustments during the repotting process.
Follow these steps to inspect the roots of your plant:
- Gently remove excess soil: Carefully shake off or gently brush away any loose soil clinging to the roots. This will allow you to have a clear view of the roots and determine their condition.
- Look for healthy roots: Healthy roots should be firm, white, and plump. They will have a fibrous appearance and show signs of active growth. These roots are essential for absorbing water and nutrients and ensuring the overall health of the plant.
- Check for signs of rot or damage: Inspect the roots for any signs of rot, mushiness, or discoloration. Rotting roots will be soft and dark brown or black. If you notice any rotten or damaged roots, it’s crucial to remove them to prevent further damage to the plant. Trim them with clean and sharp scissors or pruning shears, making sure to cut back to healthy tissue.
- Assess root-bound plants: If the roots are densely packed and tangled, it indicates that the plant is root-bound and in need of a larger pot. A root-bound plant may have difficulty absorbing water and nutrients properly. In this case, you’ll need to gently loosen the roots by teasing them apart with your fingers or a blunt tool.
Remember to be gentle during the root inspection process to avoid causing any unnecessary damage. By carefully examining the roots, you’ll have a better understanding of the overall health of your plant and can take appropriate action during the repotting process.
Trimming Overgrown Roots
During the inspection of your cactus or succulent roots, you may come across overgrown or tangled roots that need to be trimmed. Trimming the roots is an important step in the repotting process as it helps to promote healthy growth and prevent the plant from becoming root-bound.
Follow these steps to trim overgrown roots:
- Prepare your tools: Ensure that your scissors or pruning shears are clean and sharp to make clean cuts. It’s crucial to prevent any potential damage to the roots during the trimming process.
- Identify the overgrown roots: Look for roots that are excessively long, circling around the root ball, or crowding the pot. These roots may hinder the plant’s ability to absorb water and nutrients properly.
- Trim the roots: Carefully cut the overgrown roots using sharp scissors or pruning shears. Remove any dead or damaged roots as well. Make clean and straight cuts, ensuring that you’re cutting back to healthy tissue.
- Be mindful of the amount to trim: It’s important to strike a balance when trimming roots. Remove enough to alleviate overcrowding and encourage new growth, but be careful not to remove too much, as it can stress the plant. Aim to trim around 10-20% of the root mass.
- Prune the top growth (optional): If your plant has grown leggy or out of shape, you can also consider pruning the top growth. This will help balance the plant and promote compact and healthy growth.
Remember to take your time and be gentle while trimming the roots. It’s better to trim conservatively and adjust if necessary rather than removing too much at once. Proper trimming of overgrown roots will rejuvenate your plant and ensure its continued health and growth.
Preparing the New Pot
Now that you have inspected and trimmed the roots of your cactus or succulent, it’s time to prepare the new pot. Proper preparation of the pot ensures a suitable environment for your plant to thrive and grow.
Follow these steps to prepare the new pot:
- Clean the pot: Before using a new pot or reusing a previously used one, make sure it is clean and free of any debris. Wash it with warm water and mild soap, or rinse it with a diluted bleach solution to disinfect it. This step helps prevent the risk of transmitting any diseases or pests to your plant.
- Add a layer of drainage material: Create a layer of drainage material at the bottom of the pot to allow excess water to escape. This can be small stones, broken pottery pieces, or a layer of horticultural charcoal. The layer should be about an inch thick, enough to prevent water saturation in the soil.
- Choose the right pot size: Select a new pot that is slightly larger than the previous one. The extra space will provide room for the roots to grow and prevent the plant from becoming root-bound too quickly. Avoid using a pot that is too large, as it can result in excessive moisture and potential root rot.
- Ensure proper drainage: Check that the new pot has drainage holes to allow excess water to flow out. Proper drainage is crucial for preventing waterlogged soil, which can lead to root rot and other issues. If the pot doesn’t have drainage holes, consider drilling or puncturing them to improve drainage.
- Position the plant in the pot: Place the cactus or succulent in the center of the pot, ensuring that it sits at the same level it was in the previous pot. Gently hold the plant in place as you continue with the next steps.
By following these steps, you’ll create an ideal environment for your cactus or succulent in its new pot. The proper preparation of the pot sets the foundation for healthy root growth and ensures the overall well-being of your plant.
Selecting an Appropriate Soil Mix
Choosing the right soil mix is essential for the health and well-being of your cactus or succulent. These plants have specific soil requirements to thrive due to their unique water storage capabilities and need for good drainage. A well-draining soil mix provides the necessary aeration and prevents overwatering, reducing the risk of root rot and other issues.
Follow these guidelines when selecting an appropriate soil mix:
- Consider ready-made mixes: You can find pre-made potting mixes specifically formulated for cacti and succulents at your local garden center or online. These mixes often contain a combination of materials like peat moss, perlite, coarse sand, and other organic matter, providing the ideal balance of drainage and moisture retention.
- Create your own mix: If you prefer to create your own soil mix, you can combine equal parts of potting soil, perlite, and coarse sand. This blend provides excellent drainage while retaining enough moisture for the plants.
- Avoid heavy, moisture-retaining soils: Steer clear of heavy, water-retaining soils, such as those designed for indoor houseplants or garden flowers. These types of soil retain moisture for prolonged periods, increasing the risk of overwatering and root rot for cacti and succulents.
- Consider adding additional amendments: Depending on your specific plants and their preferences, you can consider adding extra amendments to the soil mix. These may include materials like pumice, crushed granite, or horticultural charcoal, which enhance drainage, provide better aeration, and prevent soil compaction.
- Ensure proper pH: Cacti and succulents generally prefer a slightly acidic to neutral soil pH. The ideal range is around 6.0 to 7.0. You can easily test the pH level using a soil pH testing kit and make adjustments if needed with the addition of organic matter or lime.
Remember, the key aspect of a suitable soil mix for cacti and succulents is its ability to provide excellent drainage while retaining enough moisture. By choosing or creating an appropriate soil mix, you are setting the stage for healthy root development and overall plant growth.
Placing the Plant in the New Pot
Now that you have prepared the new pot and selected the appropriate soil mix, it’s time to carefully place your cactus or succulent in its new home. Proper placement ensures optimal root growth and stability for the plant.
Follow these steps to place your plant in the new pot:
- Hold the plant steady: Gently hold the plant by its base or the rootball to avoid damaging the stem or leaves. Make sure it sits at the same level it was in the previous pot.
- Add the soil mix: Begin by filling the new pot with the prepared soil mix, leaving enough space for the plant’s rootball. Fill the pot about halfway, ensuring an even layer of soil.
- Position the plant: Carefully lower the plant into the pot, ensuring it is centered and upright. Adjust its position if necessary to achieve your desired aesthetic.
- Add more soil mix: Gradually add more soil mix around the sides of the rootball, gently firming it in place. Avoid applying excessive pressure, as this can compact the soil and hinder root growth.
- Fill the pot to the top: Continue filling the pot with the soil mix until it reaches the desired level, leaving a small gap between the soil surface and the rim of the pot. This space prevents water from overflowing during watering.
- Gently tap and settle the soil: Give the pot a gentle tap on a solid surface to help settle the soil and remove any air pockets. Take care not to damage the plant during this process.
While placing the plant in the new pot, be mindful of the size of the pot and the space available for the roots to accommodate proper growth. A well-positioned plant ensures stability, promotes healthy root development, and creates an aesthetically pleasing home for your cactus or succulent.
Adding New Soil Mix
Once you have carefully placed your cactus or succulent in the new pot, the next step is to add the new soil mix. This step ensures that the plant is properly supported, has access to nutrients, and is surrounded by the right growing medium for optimal growth.
Follow these steps to add the new soil mix:
- Fill the pot: Start by adding the soil mix around the sides of the rootball, gently pressing it down to ensure even distribution. Gradually fill the pot, working your way up to the top, until the soil mix reaches the desired level.
- Avoid overpacking: Be careful not to overpack or compact the soil as you add it to the pot. The soil should be loose and well-aerated to allow for proper root development and water drainage.
- Leave a gap: As you near the top of the pot, leave a small gap between the soil surface and the rim of the pot. This space allows for easier watering without the risk of overflow.
- Level the surface: Use your fingers or a small tool to gently level the soil surface, ensuring it is even and smooth. This step also helps maintain a tidy appearance of the potted plant.
During this process, be mindful of the amount of soil mix you add. It’s important not to bury the stem or leaves of the plant in too much soil, as it can lead to excess moisture retention and potential rotting.
Once you have added the new soil mix, your cactus or succulent is one step closer to thriving in its new pot. The addition of a suitable soil mix provides the plant with the necessary support and growing medium for healthy development and growth.
Watering the Repotted Plant
After successfully repotting your cactus or succulent, it’s essential to provide it with the proper amount of water. Watering plays a crucial role in the plant’s establishment and ensures that it receives the necessary hydration for healthy growth.
Follow these guidelines when watering your repotted plant:
- Wait before watering: Allow the plant to settle in its new pot for a few days before watering. This gives the root system time to recover from any stress caused during the repotting process.
- Assess the soil moisture: Before watering, check the moisture level of the soil by inserting your finger about an inch into the soil mix. If it feels slightly dry or has completely dried out, it’s time to water. If it still feels moist, wait a few more days before checking again.
- Water sparingly: When watering, aim for a thorough watering but be cautious not to overwater. Cacti and succulents are adapted to arid conditions and prefer slightly drier soil. Pour water around the base of the plant until it starts to seep out of the drainage holes, indicating proper saturation.
- Allow excess water to drain: After watering, allow any excess water to drain out of the pot completely. Ensure the pot is not sitting in standing water, as this can lead to root rot. Discard any water that collects in the saucer or tray.
- Observe for signs of dehydration or overwatering: After watering, keep an eye on your plant for signs of dehydration or overwatering. Wilting or shriveling leaves often indicate a need for more water, while yellowing, mushy stems, or soggy soil indicate overwatering. Adjust your watering routine accordingly.
Remember that the watering frequency may vary based on various factors such as the plant species, pot size, humidity levels, and environmental conditions. It’s best to err on the side of underwatering rather than overwatering, as cacti and succulents are more tolerant of drought than excessive moisture.
By following these watering guidelines, you’ll provide your repotted cactus or succulent with the right amount of moisture to support its growth and maintain its health.
Allowing the Plant to Adjust
After repotting your cactus or succulent and providing it with the necessary care, it’s important to allow the plant time to adjust to its new environment. This period of adjustment is crucial for the plant’s overall health and success in its new pot.
Follow these steps to allow your plant to adjust:
- Find the right location: Place the repotted plant in an appropriate location where it can receive the right amount of light. Most cacti and succulents thrive in bright, indirect sunlight. Avoid placing them in areas with intense, direct sunlight as it can cause sunburn.
- Monitor the temperature: Keep an eye on the temperature around the plant. Cacti and succulents tend to prefer warm temperatures during the day and slightly cooler temperatures at night. Avoid placing them near drafts or extreme temperature changes.
- Limit watering: During the adjustment period, it’s best to limit watering to prevent overwatering. Allow the soil to partially dry out before watering again. Remember that it’s easier to revive an underwatered plant than to rescue an overwatered one.
- Observe and care for your plant: Regularly check on your plant and observe its response to the new pot and environment. Look for signs of growth, such as new leaves or shoots, as well as any signs of stress, such as wilting or discoloration. Adjust your care routine accordingly.
- Be patient and avoid frequent disturbances: Avoid repositioning or repotting the plant again too soon. Allow the plant to establish its roots and adjust to the new pot for a few months before considering any further changes.
Each plant is unique and may require a different adjustment period. Some plants may adapt quickly, while others may take longer. Patience and attentiveness are key during this time, as it allows the plant to settle and thrive in its new pot.
By allowing your repotted cactus or succulent to adjust at its own pace, you give it the best chance of thriving and growing in its new environment.
Conclusion
Repotting your cactus or succulent is a rewarding process that promotes the health and growth of these stunning ornamental plants. By following the steps outlined in this guide, you can confidently repot your plants and provide them with the optimal conditions for thriving.
Choosing the right time to repot, preparing the work area, gathering the necessary tools and materials, and carefully removing the plant from its current pot are all crucial steps in the process. Inspecting and trimming overgrown roots, preparing the new pot with appropriate soil mix, and placing the plant in the new pot ensure proper root development and stability.
Watering the newly repotted plant and allowing it time to adjust are vital for its overall health and success. Proper watering practices, along with finding the right location and monitoring temperature, create a nurturing environment for your plants to flourish.
Remember to be patient and observe your cactus or succulent during the adjustment period. Each plant is unique and may have different requirements. By giving your plants the time and care they need, they will adapt and thrive in their new pots.
With your newfound knowledge and skills, you can create a beautiful collection of healthy and vibrant cacti and succulents. Enjoy the process and the joy that these remarkable plants bring to your ornamental garden or indoor space.