Home>Gardening Techniques>DIY Projects>How To Trim Tall Trees Yourself
DIY Projects
How To Trim Tall Trees Yourself
Modified: January 22, 2024
Learn how to safely trim tall trees with these DIY projects, save money and take pride in maintaining your own landscape.
(Many of the links in this article redirect to a specific reviewed product. Your purchase of these products through affiliate links helps to generate commission for Chicagolandgardening.com, at no extra cost. Learn more)
Table of Contents
- Introduction
- Safety Precautions
- Tools and Equipment Needed
- Planning and Preparation
- Step 1: Assess the Tree
- Step 2: Remove Dead or Damaged Branches
- Step 3: Prune Overgrown Branches
- Step 4: Maintain Proper Branch Structure
- Step 5: Trim Away Excessive Growth
- Step 6: Clear Surrounding Area
- Step 7: Clean Up and Dispose of Trimmings
- Conclusion
Introduction
Welcome to the world of DIY tree trimming! Many homeowners are often daunted by the task of trimming tall trees themselves, as it can seem like a challenging and risky endeavor. However, with the right knowledge, tools, and precautions, you can successfully undertake this project and give your trees the care they need. Not only will DIY tree trimming save you money, but it will also allow you to take control of the appearance and health of your trees.
Tree trimming is an essential maintenance practice that promotes healthy growth, reduces the risk of disease and pests, and improves the overall aesthetics of your landscape. By trimming trees regularly, you can address issues such as overgrown branches, dead or damaged limbs, and excessive growth.
In this comprehensive guide, we will take you through the step-by-step process of how to trim tall trees yourself, ensuring safety and efficiency along the way. We will discuss essential safety precautions, the tools and equipment you will need, and provide detailed instructions for each stage of the tree trimming process. Whether you have a single tree or an entire grove to tackle, we’ve got you covered.
Before we dive into the details, it’s important to note that while DIY tree trimming can be a rewarding project, it is not without its risks. If you have concerns about your ability to safely complete the task, or if the trees you need to trim are exceptionally tall or pose other hazards, it may be advisable to hire a professional tree service instead.
Now, if you’re ready to roll up your sleeves and take on the challenge of trimming tall trees yourself, let’s dive into the necessary safety precautions and the tools you’ll need for the job.
Safety Precautions
Before you embark on any DIY tree trimming project, it’s crucial to prioritize safety. Working with tall trees can be hazardous, especially if you’re not properly prepared. By following these essential safety precautions, you can minimize the risk of accidents and ensure a safe and successful tree trimming experience.
1. Assess the tree: Before starting your tree trimming project, carefully assess the condition and stability of the tree. Look for signs of disease, rot, or structural issues that could make the tree unstable or prone to falling. If you notice any red flags, it’s best to consult with a professional arborist or tree service.
2. Use safety equipment: Always wear the appropriate safety gear, including a hard hat, safety glasses, ear protection, and work gloves. Additionally, consider using a safety harness and sturdy, non-slip boots with good traction if you’ll be working at heights.
3. Check weather conditions: Avoid trimming trees during inclement weather, such as high winds, storms, or icy conditions. These conditions can increase the risk of falling branches or accidents. Wait for a calm and dry day to ensure optimal safety.
4. Inform others: If you’re undertaking tree trimming near a public area or close to neighboring properties, be sure to inform and warn others about the work you’ll be doing. Erect caution signs or barriers to keep people away from the work zone.
5. Use the right tools: Ensure that you have the proper tools for the job, including pruning shears, loppers, pruning saws, and a sturdy ladder or adjustable pole pruner for reaching higher branches. High-quality, sharp tools will make the trimming process more efficient and reduce the risk of accidents caused by dull or faulty equipment.
6. Work with a partner: It’s advisable to have someone nearby when trimming tall trees. A partner can assist with holding a ladder, providing guidance, or seeking help in case of an emergency. Avoid working alone whenever possible.
7. Be aware of power lines: Take extra caution when trimming trees near power lines. Contact your local utility company to disconnect the power or seek professional assistance to ensure safe trimming practices. Never attempt to trim trees that are in contact with power lines.
8. Proper ladder safety: If you’re using a ladder for reaching higher branches, make sure it is secure and placed on stable ground. Maintain three points of contact with the ladder at all times, and avoid reaching too far from the ladder. For taller trees, consider using an extendable pole pruner or hiring a professional.
By adhering to these safety precautions, you can significantly reduce the risks associated with DIY tree trimming. Taking the time to prioritize safety will ensure a smooth and accident-free tree trimming experience.
Tools and Equipment Needed
Before you begin trimming tall trees, it’s important to gather the necessary tools and equipment to ensure a smooth and efficient process. Having the right tools at your disposal will make the task easier and help you achieve the desired results. Here are the essential tools you’ll need for DIY tree trimming:
- Pruning shears: These handheld tools are perfect for trimming small branches and foliage that are within easy reach.
- Loppers: Loppers have long handles and are ideal for cutting thicker branches. They provide extra reach and leverage for branches that are out of reach of pruning shears.
- Pruning saw: A pruning saw is essential for cutting thicker branches that cannot be easily tackled with shears or loppers. Opt for a curved blade saw as it allows for better control and cutting precision.
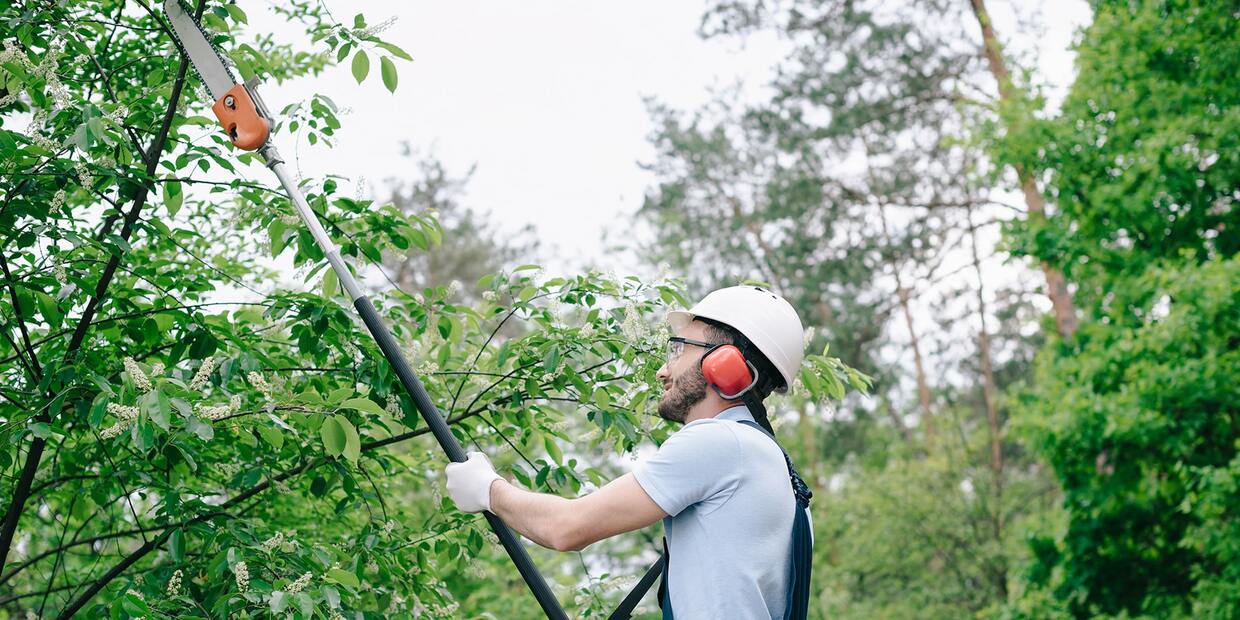
- Pole pruner: For taller trees or branches that are out of reach, a pole pruner is a valuable tool. It consists of a telescopic pole with a saw or pruner attached to the end, allowing you to trim branches from the ground.
- Safety gear: As mentioned earlier in the safety precautions section, wearing the proper safety gear is crucial. Invest in a hard hat, safety glasses, ear protection, and work gloves to protect yourself from potential hazards.
- Ladder: A stable and sturdy ladder is essential for reaching high branches safely. Make sure the ladder is in good condition and placed on a level surface. Alternatively, consider using an adjustable pole pruner to minimize the need for a ladder.
- Rope or harness: If you’ll be working at heights or need to secure branches while trimming, a rope or harness can be very useful. It adds an extra layer of safety and prevents accidental falls.
- Garden cart or tarp: A garden cart or tarp is handy for collecting and transporting the trimmed branches and debris. It helps keep the work area clean and makes disposal easier.
These are the basic tools and equipment you’ll need for trimming tall trees yourself. Depending on the size, condition, and specific needs of your trees, you may require additional tools or specialized equipment. Remember to always use sharp, well-maintained tools for efficient and safe trimming.
Planning and Preparation
Proper planning and preparation are key to successfully trimming tall trees yourself. Before you start the actual trimming process, take the time to assess the tree, identify the areas that require attention, and make a plan of action. Here are the essential steps for planning and preparing for your tree trimming project:
1. Identify the objectives: Determine your goals for trimming the tree. Are you aiming to improve its appearance, remove dead or overgrown branches, or enhance its overall health and structure? Having a clear objective will guide your decision-making throughout the trimming process.
2. Research tree species: Familiarize yourself with the specific needs and characteristics of the tree species you will be trimming. Different trees have different pruning requirements, so understanding their growth patterns and response to pruning will ensure that you trim them appropriately.
3. Choose the right time: Timing is essential when it comes to tree trimming. In general, it’s best to trim trees during their dormant season, typically in late winter or early spring. This is when the tree is less likely to experience stress, and it allows for optimal healing and regrowth.
4. Consider the tree’s health: Assess the overall health and condition of the tree before trimming. If the tree is diseased, severely damaged, or shows signs of structural instability, it may require professional intervention. Consult an arborist to evaluate the tree’s health and determine the best course of action.
5. Determine the trimming scope: Take a close look at the tree and identify the specific branches that need attention. Look for dead, damaged, or diseased branches, as well as any branches that are crossing or rubbing against each other. Create a plan to address each issue systematically.
6. Prune for tree structure: To maintain a strong and healthy tree structure, focus on removing branches that disrupt the central leader or main trunk. Eliminate branches that grow vertically, inward, or downward, as they can compromise the overall structure and balance of the tree.
7. Prepare the work area: Clear the area around the tree of any obstacles or potential tripping hazards. Ensure there are no power lines or other overhead obstructions that could interfere with the trimming process. If needed, consult with utility companies to safely work around power lines.
8. Communicate and collaborate: If you’ll be working near neighboring properties, inform your neighbors about the tree trimming project. Discuss any potential concerns or issues, and ensure that you have their consent and understanding before proceeding.
By thoroughly planning and preparing for your tree trimming project, you can approach the task with confidence and efficiency. Taking the time to understand the tree’s needs and setting clear objectives will ensure that you achieve the desired results while promoting its health and longevity.
Step 1: Assess the Tree
Assessing the tree is the crucial first step before starting any trimming activities. Understanding the tree’s health, structure, and specific needs will guide your decision-making throughout the tree trimming process. Here’s how to effectively assess the tree:
1. Look for signs of disease and decay: Inspect the tree for any visible signs of disease or decay, such as fungal growth, cankers, or discolored leaves. Pay attention to areas where branches meet the trunk, as these are common sites for decay. If you observe any signs of disease, consult with an arborist for evaluation and guidance.
2. Examine the tree’s structure: Assess the overall structure of the tree, looking for any irregular growth patterns, crossing branches, or poor branch attachments. Identify any branches that are rubbing against each other or growing too closely together, as these can cause damage and compromise the tree’s stability. Consider removing or trimming these branches to improve the tree’s structure.
3. Check for dead or damaged branches: Dead or damaged branches not only detract from the tree’s appearance, but they can also pose a safety risk if they fall. Look for branches with no foliage, brittle or decaying wood, or signs of insect infestation. These branches should be removed to promote the health and safety of the tree.
4. Assess the tree’s growth patterns: Observe how the tree has been growing over time. Note any excessive upward growth, unbalanced canopy, or branches that are significantly longer and heavier than the rest. These growth patterns may require pruning to maintain a healthy and aesthetically pleasing tree shape.
5. Consider the tree’s location and surroundings: Take into account the tree’s proximity to buildings, power lines, or other structures. If the tree is encroaching on these structures or posing a safety risk, it may require significant pruning or even removal. Consult with professionals if you are unsure about the best course of action.
By thoroughly assessing the tree, you will gain a better understanding of its individual needs and develop a clearer plan for trimming. This step ensures that you address any underlying issues and make informed decisions that will benefit the tree’s health and longevity.
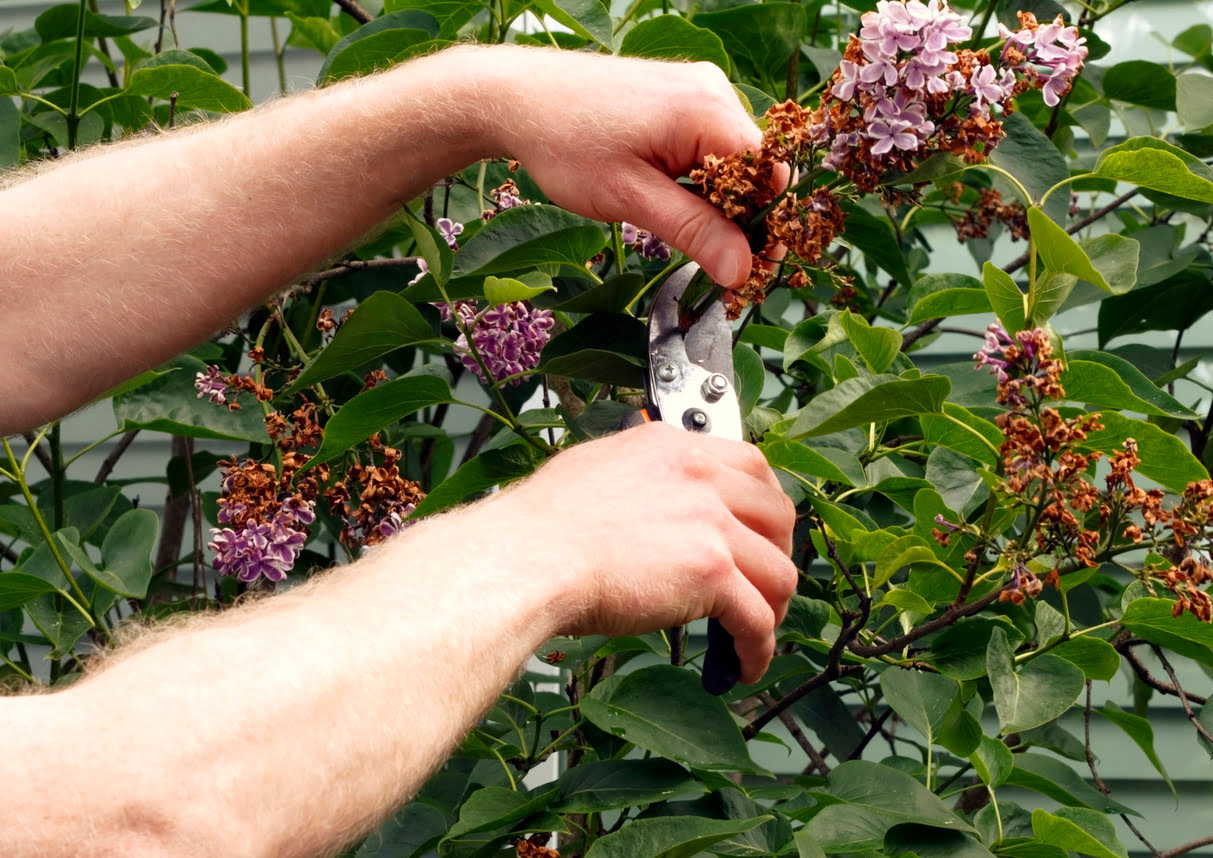
Step 2: Remove Dead or Damaged Branches
Removing dead or damaged branches is an essential part of tree trimming. Dead or damaged branches not only detract from the tree’s aesthetics but also pose safety hazards. By removing these branches, you promote the overall health and longevity of the tree. Follow these steps to effectively remove dead or damaged branches:
1. Identify dead or damaged branches: Start by identifying branches that appear lifeless or show signs of damage. These branches may be brittle, lack foliage, have discolored bark, or show signs of decay or pest infestations. Carefully inspect the entire tree, from the top to the lower branches, to ensure no dead or damaged branches are left behind.
2. Prepare your tools: Equip yourself with the appropriate tools for removing dead or damaged branches. Depending on the size and thickness of the branches, use pruning shears, loppers, or a pruning saw. Ensure that your tools are sharp and in good working condition to make clean cuts.
3. Make proper cuts: When removing a dead or damaged branch, make a clean cut near the branch collar, which is the slightly swollen area where the branch attaches to the trunk. Avoid cutting too close or too far away from the collar, as this can hinder the tree’s healing process. Use the appropriate tool for the branch size to ensure a smooth cut.
4. Beware of falling branches: Be cautious while cutting and removing branches, especially if they are high up in the tree. Always assess the branch’s weight and ensure that it won’t swing or fall unexpectedly. If necessary, use ropes or a harness to lower branches safely to the ground.
5. Dispose of branches properly: As you remove dead or damaged branches, have a designated area for collecting and disposing of the branches. Use a garden cart, tarp, or a dedicated compost pile. If the branches are large or have disease or pest infestation, consider contacting your local waste management services for proper disposal.
6. Inspect the tree after removal: Once you have removed all dead or damaged branches, take a step back and assess the tree’s appearance. Ensure that the tree’s shape remains balanced and natural. If any other branches require further trimming to maintain the overall aesthetic, proceed with caution and make strategic cuts.
Removing dead or damaged branches is a crucial step in tree trimming. It eliminates safety hazards and promotes the tree’s health and vitality. By following these steps, you can effectively remove dead or damaged branches while maintaining the integrity and beauty of the tree.
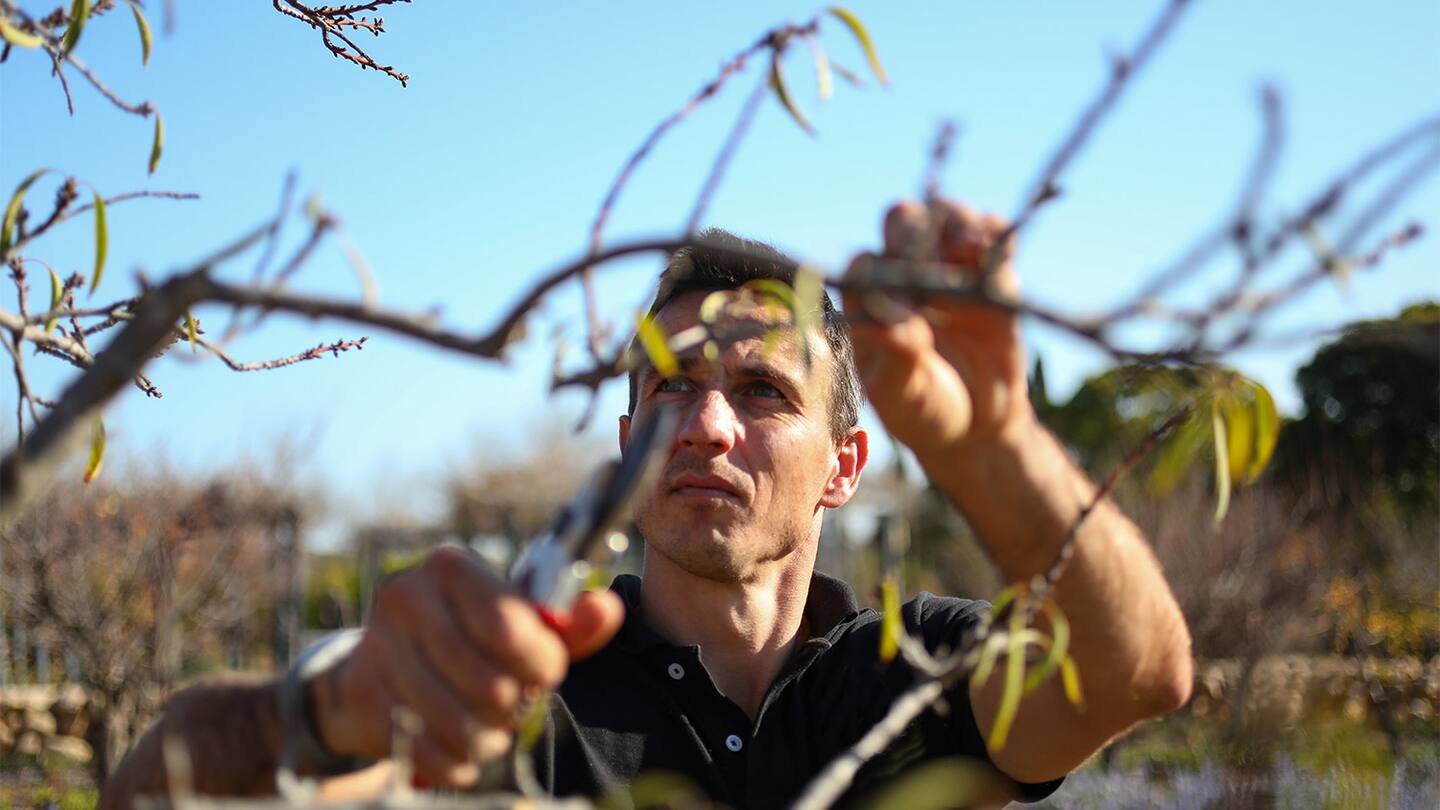
Step 3: Prune Overgrown Branches
Pruning overgrown branches is an important step in maintaining the health and aesthetics of a tree. Overgrown branches can hinder the tree’s growth, create imbalances, and increase the risk of breakage. By pruning these branches, you can improve the tree’s structure and promote proper growth. Follow these steps to effectively prune overgrown branches:
1. Identify overgrown branches: Start by identifying branches that have become excessively long or are significantly larger than others in the canopy. These branches may extend beyond the natural shape of the tree, creating imbalances and potentially causing damage.
2. Determine the pruning type: Depending on the size and location of the overgrown branch, you may need to choose between three pruning cuts: branch removal (thinning), heading back (shortening), or drop crotch (reducing). Each pruning type has a specific purpose and should be carefully considered to achieve the desired results.
3. Assess the branch collar: Before making any cuts, locate the branch collar, which is the swollen area where the branch attaches to the trunk. It is important to make the cut just outside the branch collar to avoid damaging the trunk and promote proper healing.
4. Make strategic cuts: Using pruning shears or loppers, make a clean cut just beyond the branch collar. Avoid leaving a stub or cutting too close to the trunk, as this can inhibit the tree’s healing response and increase the risk of infection.
5. Remove excessive growth: When pruning overgrown branches, focus on removing the excess growth while maintaining the tree’s natural shape and balance. Be mindful of cutting too many branches at once, as this can shock the tree and impede its ability to recover.
6. Step back and reassess: After pruning the overgrown branches, take a step back and evaluate the tree’s appearance. Ensure that the pruning has improved the tree’s structure and created a more balanced canopy. If necessary, make additional strategic cuts to achieve the desired shape and aesthetics.
7. Dispose of pruned branches: Collect all the pruned branches and dispose of them properly. You can use a garden cart, tarp, or compost pile for smaller branches. For larger branches, consider contacting your local waste management services for proper disposal options.
Pruning overgrown branches is crucial for maintaining the health and aesthetics of a tree. By following these steps and making deliberate cuts, you can promote proper growth, prevent imbalances, and enhance the overall structure and vitality of the tree.
Step 4: Maintain Proper Branch Structure
Maintaining proper branch structure is an important aspect of tree care as it promotes stability, reduces the risk of breakage, and enhances the tree’s overall aesthetics. By ensuring that branches are well-distributed and properly spaced, you can help the tree thrive and maintain its natural form. Follow these steps to maintain proper branch structure:
1. Assess branch attachments: Take a close look at how branches attach to the trunk. Look for any weak or narrow branch attachments, as these can be prone to breakage. Identify branches that grow too closely together or are crossing, as they can create rubbing and potential damage.
2. Choose the right branches to keep: Select the strongest, well-spaced branches that exhibit good attachment angles to the trunk. These branches should ideally have wide U-shaped angles, rather than V-shaped angles, which tend to be weaker. Retain branches that contribute to a balanced and natural canopy.
3. Determine branch removal: Identify branches that require removal to improve the tree’s structure and spacing. Focus on branches that are competing for space, growing inward or downward, or excessively cluttering the canopy. By removing these branches, you allow the tree to allocate resources more efficiently.
4. Make proper pruning cuts: Use clean and sharp pruning tools, such as pruning shears or loppers, to make well-placed cuts just beyond the branch collar. Be careful not to cut into the collar, as this can impede the tree’s healing ability. Aim for clean, angled cuts that promote healthy regrowth.
5. Maintain a central leader: For trees with a central leader, such as conifers or certain deciduous trees, ensure the main central leader remains dominant. Remove any competing branches that try to take over as the leader, as this can result in a weakened or misshapen form.
6. Thin branches, if necessary: In cases where the tree has an excessively dense canopy, consider thinning out some branches to improve light penetration and air circulation. Thinning involves selectively removing branches from within the canopy, focusing on branches that are weak, diseased, or overgrown.
7. Step back and evaluate: After pruning and shaping the branches, step back and evaluate the tree’s appearance. Make sure that the overall structure looks balanced and aesthetically pleasing. Adjust as needed by making strategic cuts to create a visually appealing and structurally sound tree.
Maintaining proper branch structure is essential for the health and longevity of a tree. By carefully assessing branch attachments, making strategic pruning cuts, and maintaining a well-distributed canopy, you can promote a strong, stable, and visually appealing tree.
Step 5: Trim Away Excessive Growth
Trimming away excessive growth is an important step in maintaining the health and aesthetics of a tree. Over time, trees can develop excessive or aggressive growth in certain areas, which can lead to imbalances, shade issues, and overall decline. By trimming away the excessive growth, you can restore balance, promote proper airflow, and encourage healthy regrowth. Follow these steps to effectively trim away excessive growth:
1. Identify areas of excessive growth: Carefully examine the tree and identify areas where there is an abundance of new growth, particularly in terms of branches or foliage density. Look for sections that are overcrowded, encroaching on structures, or causing excessive shade in certain areas of your landscape.
2. Determine the extent of trimming required: Assess the severity of the excessive growth and decide how much trimming is necessary. Be mindful of not removing too much growth at once, as it can stress the tree. Aim for a balanced approach that allows the tree to recover and adjust gradually.
3. Choose the appropriate pruning cuts: Depending on the nature of the excessive growth, you may choose between thinning cuts or heading cuts. Thinning cuts involve selectively removing entire branches or hand-picked foliage, while heading cuts involve shortening branches to encourage new growth.
4. Make intentional and strategic cuts: Use sharp pruning tools, such as pruning shears or loppers, to make clean and precise cuts. When thinning, remove branches or foliage from within the excessive growth area, focusing on reducing density and maintaining a balanced overall appearance. For heading cuts, shorten branches selectively, considering the tree’s natural shape and desired size.
5. Maintain a proportional and natural look: As you trim away excessive growth, ensure that the tree retains its natural shape and form. Avoid creating an unnatural or overly pruned appearance. Step back periodically to assess the tree’s appearance and make adjustments as necessary.
6. Consider future growth patterns: While trimming away excessive growth, also evaluate the potential for future growth. Anticipate how the tree may respond and adjust its growth patterns accordingly. This may involve redirecting growth away from structures or encouraging growth in areas where shade is desired.
7. Dispose of trimmed foliage: Collect the trimmed branches and foliage and dispose of them properly. Use a garden cart, tarp, or compost pile for smaller clippings, and consult local waste management services for the proper disposal of larger branches.
By trimming away excessive growth, you can restore balance and promote the overall health and aesthetics of a tree. By taking a thoughtful and strategic approach, you can achieve a visually pleasing and well-maintained tree that thrives in its environment.
Step 6: Clear Surrounding Area
Clearing the surrounding area is a crucial step in the tree trimming process as it ensures a safe, efficient, and clutter-free work environment. Removing obstacles, debris, and unwanted vegetation can improve accessibility, reduce tripping hazards, and create a more organized space for the trimming activities. Follow these steps to effectively clear the surrounding area:
1. Remove potential obstacles: Before starting the tree trimming process, clear the area of any potential obstacles that may impede your movement or obstruct the work. This includes garden furniture, tools, toys, and any other objects in the vicinity of the tree.
2. Trim or remove overhanging vegetation: If there are any overhanging branches or vegetation that interfere with the trimming process, consider trimming them back or removing them entirely. This will provide better access to the tree and prevent branches or leaves from interfering with your work.
3. Clear the ground: Clear away fallen leaves, brush, and other debris from the ground around the tree. This not only allows for better visibility of the tree’s base but also reduces the risk of slipping or tripping during the trimming process.
4. Create a safe work zone: Mark the work zone with caution tape or signs to alert others to keep a safe distance. If the tree trimming area is near a public space or close to neighboring properties, communicate with others to ensure their awareness and cooperation during the process.
5. Protect valuable plants or structures: If there are valuable plants, flowerbeds, or structures in close proximity to the tree, consider protecting them by using temporary barriers or covering them with tarpaulin. This will prevent accidental damage during the trimming activities.
6. Ensure proper working conditions: Assess the lighting conditions and make any necessary adjustments to ensure adequate visibility during the trimming process. If needed, work during daylight hours or provide additional lighting to ensure safe and accurate cuts.
7. Stay clear of power lines: Take extra caution if there are power lines near the tree. Ensure that you maintain a safe distance from any electrical infrastructure and avoid trimming branches that are in contact with power lines. Contact your local utility company for assistance if required.
By clearing the surrounding area before starting the tree trimming process, you create a safe and organized workspace that allows for efficient and effective trimming. A clutter-free and well-prepared area enhances safety, reduces the risk of accidents, and enables you to focus on the task at hand.
Step 7: Clean Up and Dispose of Trimmings
After completing the tree trimming process, it’s essential to properly clean up and dispose of the trimmings. This final step ensures a tidy and well-maintained landscape, reduces the risk of pests and diseases, and demonstrates your commitment to proper tree care. Follow these steps to effectively clean up and dispose of the trimmings:
1. Collect the trimmings: Gather all the trimmed branches and foliage into a designated area. Use a garden cart, tarp, or large bags to easily transport and contain the trimmings.
2. Cut branches into manageable pieces: If necessary, cut large branches into smaller, more manageable pieces. This will make it easier to handle and dispose of the trimmings.
3. Compost the trimmings: If you have a compost pile or bin, consider composting the smaller branches and foliage. Composting not only reduces waste but also provides valuable organic material for your garden.
4. Consult local waste management services: Check with your local waste management services about the proper disposal methods for larger branches or trimmings that cannot be composted. They may have guidelines or specific locations where such waste can be dropped off or collected.
5. Hire professional services, if necessary: If the amount of trimmings is excessive or beyond your capacity to manage, consider hiring professional tree removal or disposal services. They will have the necessary equipment and expertise to handle the trimmings safely and efficiently.
6. Restore the work area: Once the trimmings have been collected and disposed of, restore the work area to its original condition. Remove any protective barriers or coverings, and clear away any remaining debris or tools.
7. Inspect the surroundings: Take a moment to inspect the surrounding area and ensure that no trimmings or debris have been left behind. This includes checking for any branches or foliage that may have fallen onto nearby structures, walkways, or neighboring properties.
By properly cleaning up and disposing of the trimmings, you contribute to a well-maintained and aesthetically pleasing landscape. It also reduces the risk of pests, diseases, and accidents, and demonstrates responsible and considerate tree care practices.
Conclusion
Congratulations! You have successfully learned how to trim tall trees yourself. By following the step-by-step process outlined in this guide and taking the necessary safety precautions, you can achieve a well-maintained, healthy, and visually appealing tree. DIY tree trimming not only saves you money but also allows you to take control of the care and maintenance of your landscape.
Remember, before starting any tree trimming project, assess the tree’s condition, gather the appropriate tools, and carefully plan and prepare for the task at hand. Remove dead or damaged branches, prune overgrown branches, and maintain proper branch structure to ensure the tree’s health and stability. Trim away excessive growth, clear the surrounding area, and properly dispose of the trimmings to maintain a safe and tidy work environment.
Throughout the process, keep in mind that tree trimming is an ongoing maintenance practice. Regular inspections and proactive trimming will help keep your trees in optimal condition.
If at any point you feel unsure or uncomfortable with trimming tall trees yourself, it is best to consult with a professional arborist or tree service. They have the knowledge, experience, and specialized equipment to tackle complex tree trimming tasks safely and effectively.
By practicing proper tree care techniques, you can enhance the beauty of your landscape, ensure the health and longevity of your trees, and create a safe outdoor environment for you and your family to enjoy.
So, grab your tools, put on your safety gear, and get ready to trim tall trees like a pro. Happy trimming!