Home>Gardening Techniques>DIY Projects>How To Cover Greenhouse With Plastic
DIY Projects
How To Cover Greenhouse With Plastic
Modified: January 22, 2024
Learn how to cover your greenhouse with plastic using easy DIY projects. Transform your space and protect your plants with this simple and cost-effective solution.
(Many of the links in this article redirect to a specific reviewed product. Your purchase of these products through affiliate links helps to generate commission for Chicagolandgardening.com, at no extra cost. Learn more)
Table of Contents
Introduction
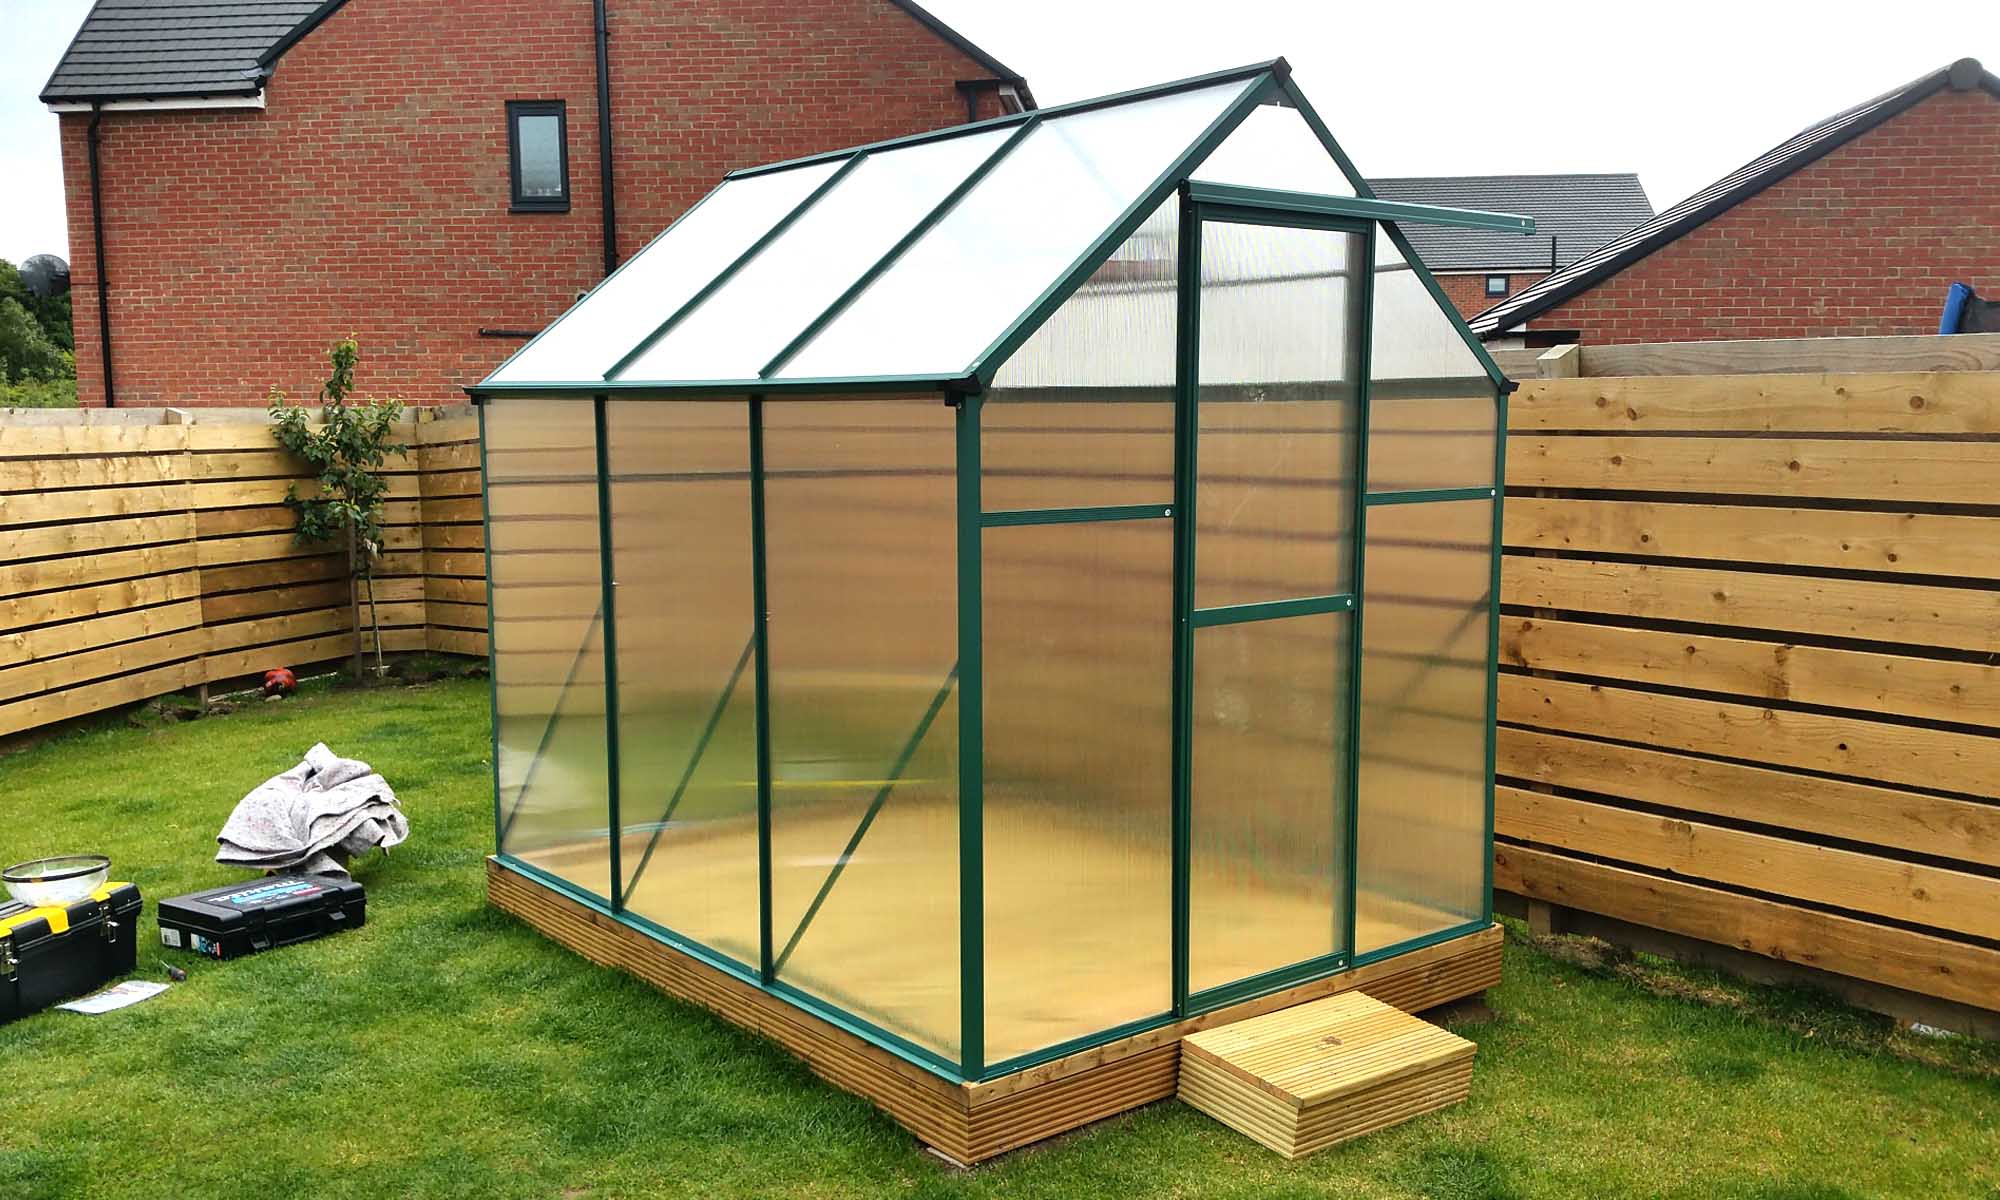
Welcome to the world of DIY greenhouse projects! Building and maintaining your own greenhouse is an exciting endeavor that allows you to grow your plants and vegetables year-round, no matter the weather conditions outside. One of the key elements in constructing a functional greenhouse is the plastic cover.
A greenhouse plastic cover acts as a barrier, creating a controlled environment within the structure by regulating temperature, humidity, and protecting the plants from harsh weather elements. Whether you are a seasoned gardener or a beginner, understanding how to properly cover your greenhouse with plastic is essential to ensure the success of your growing endeavors.
In this article, we will guide you through the process of choosing the right plastic cover, preparing your greenhouse, measuring and cutting the plastic, attaching it to the frame, securing it in place, insulating the greenhouse, and maintaining the plastic cover. By the end, you will have all the knowledge and confidence you need to embark on your greenhouse project.
So, let’s dive in and learn how to cover your greenhouse with plastic!
Choosing the Right Plastic Cover
When it comes to selecting a plastic cover for your greenhouse, there are a few factors to consider. First and foremost, you need to choose a material that is durable and able to withstand the elements for an extended period of time. Common options include polyethylene, polyvinyl chloride (PVC), and polycarbonate.
Polyethylene is a popular choice due to its affordability and UV resistance. It comes in different thicknesses, typically ranging from 4 to 10 millimeters. Thicker plastic provides better insulation but may be more expensive. Consider the climate in your area when selecting the appropriate thickness.
PVC covers are known for their durability and longevity. They are resistant to cracking and can withstand extreme temperatures. However, they may be more expensive than polyethylene covers. Polycarbonate covers, on the other hand, are highly impact-resistant and offer excellent insulation. They are ideal for regions with harsh weather conditions.
Another factor to consider is the transparency of the plastic cover. Clear covers allow maximum sunlight transmission, while diffused covers disperse the sunlight, reducing shadowing and providing more even light distribution. Choose the transparency level based on the specific needs of your plants.
Additionally, consider the shape and size of your greenhouse. Some plastic covers come in pre-cut sizes, while others can be customized to fit your specific dimensions. Make sure to measure your greenhouse accurately before purchasing the plastic cover.
Lastly, take into account your budget. Different plastic covers come at various price points. While quality and durability are important, it’s essential to find a balance between cost and functionality that suits your needs.
By carefully considering the material, thickness, transparency, size, and budget, you can select the right plastic cover that will not only provide optimal protection and insulation but also meet the specific requirements of your greenhouse.
Preparing the Greenhouse
Before you can cover your greenhouse with plastic, it’s vital to ensure that the structure is prepared and in good condition. Here are the steps to take when preparing your greenhouse:
- Clean the greenhouse: Start by removing any debris, dirt, or old coverings from the greenhouse. This will not only make the installation process easier but also help prevent the growth of mold or mildew.
- Inspect the frame: Carefully examine the frame of your greenhouse for any signs of damage. Look for loose or missing bolts, cracked or rotten wood, or rusted metal. Repair or replace any compromised parts to ensure the structural integrity of the greenhouse.
- Repair any leaks: Check for any leaks in the roofing or walls of your greenhouse. This can be done by spraying water on the outside and checking for any water infiltration on the inside. Seal any gaps or cracks with an appropriate weather-resistant sealant.
- Improve ventilation: Proper airflow is essential in a greenhouse to prevent excessive heat and humidity buildup. Ensure that the ventilation system, such as vents and fans, is in good working condition. Clean or replace filters if necessary.
- Level the ground: Make sure the ground where the greenhouse will sit is level. Use a shovel or a rake to remove any unevenness or bumps. A level ground will ensure stability and prevent any potential damage to the greenhouse structure.
- Install a foundation: Depending on the type of greenhouse and your personal preference, consider installing a foundation. It can be made of wood, concrete, or gravel. A solid foundation adds stability to the structure and helps with the overall insulation of the greenhouse.
By thoroughly preparing your greenhouse, you create a solid foundation for the plastic cover installation. This not only ensures a smooth and successful process but also extends the lifespan of your greenhouse and improves the growing conditions for your plants.
Measuring and Cutting the Plastic Cover
Accurate measurement and precise cutting are crucial steps when covering your greenhouse with plastic. Follow these steps to ensure a properly fitted cover:
- Measure the dimensions: Using a measuring tape, carefully measure the length, width, and height of your greenhouse. Make sure to measure from the outside edge of the frame for an exact fit.
- Add extra length: When measuring, add an additional 2-4 feet to each dimension. This extra length will provide enough material to securely attach the plastic cover to the frame.
- Unroll the plastic: Lay the plastic cover flat on the ground in an open area, ensuring there are no sharp objects or debris that could damage the material. If the plastic cover is wrinkled, you can use weights or heavy objects to flatten it out.
- Mark the dimensions: Using a pencil or a marker, mark the dimensions of your greenhouse on the plastic cover. Double-check the measurements to ensure accuracy.
- Cut the plastic: Using sharp scissors or a utility knife, carefully cut along the marked lines to create the plastic cover for your greenhouse. Take your time to ensure clean and straight cuts.
- Label the pieces: To make installation easier, label each cut piece of plastic according to its corresponding position on the greenhouse frame. This will help prevent any confusion or mistakes when attaching the cover.
Remember to take your time and double-check the measurements before cutting the plastic cover. It is always better to be precise and slightly overestimate the size rather than cutting it too small.
By accurately measuring and cutting the plastic cover, you will ensure a snug and secure fit that provides maximum protection for your greenhouse and its contents.
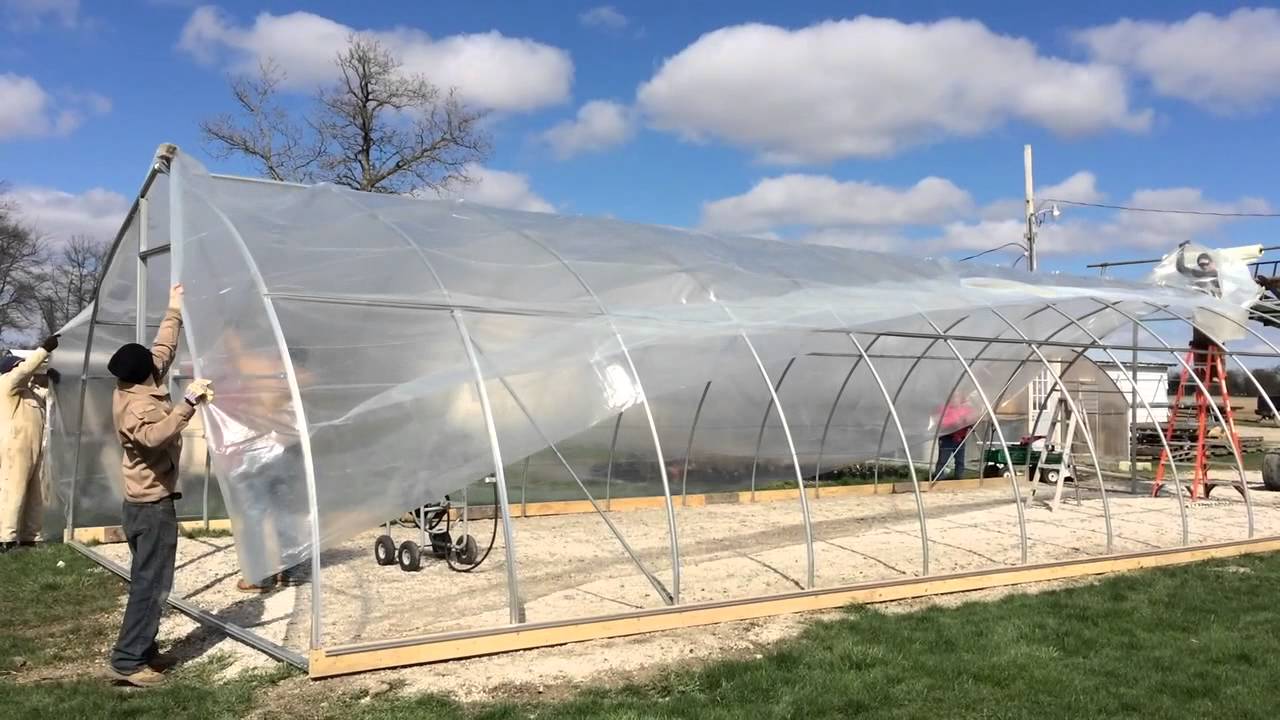
Attaching the Plastic Cover to the Greenhouse Frame
Once you have measured and cut the plastic cover for your greenhouse, it’s time to attach it to the frame. Proper installation is crucial to ensure a tight and secure fit. Follow these steps to attach the plastic cover to the greenhouse frame:
- Start with one end: Begin by aligning one end of the plastic cover with one side of the greenhouse frame. Make sure the plastic cover extends beyond the frame to allow for proper fastening.
- Secure the corners: Use heavy-duty clips or fasteners to secure the corners of the plastic cover to the frame. Make sure to tighten the clips securely to prevent any movement or shifting.
- Work your way along the sides: Move along the sides of the greenhouse, pulling the plastic cover taut as you go. Secure the plastic cover to the frame at regular intervals, using clips or fasteners. Be sure to evenly distribute the tension along the sides.
- Smooth out wrinkles: As you attach the plastic cover, smooth out any wrinkles or creases that may have formed. This will help ensure a neat appearance and reduce the risk of tears or damage to the plastic.
- Repeat for the other end: Once you have reached the opposite end of the greenhouse, repeat the process of securing the corners and working along the sides to attach the plastic cover.
- Double-check the tightness: After attaching the plastic cover to the frame, go back and double-check the tightness of the fasteners. Ensure that the cover is snugly fitted and there are no loose or flapping areas.
Throughout the process, it’s important to keep the plastic cover smooth and tight to minimize the risk of tearing or damage caused by wind or other environmental factors. Taking the time to properly attach the plastic cover will ensure the longevity and functionality of your greenhouse.
Securing the Plastic Cover in Place
Once you have attached the plastic cover to the greenhouse frame, it’s essential to secure it properly to ensure it stays in place even in challenging weather conditions. Here are some methods to secure the plastic cover:
- Use greenhouse fasteners: Greenhouse fasteners, such as batten tape, wiggle wire, or snap clamps, are designed specifically for securing plastic covers to greenhouse frames. These fasteners provide a tight grip and are easy to install.
- Secure with screws or staples: For added stability, you can use screws or staples to secure the plastic cover to the frame. Be sure to use weather-resistant or galvanized screws or staples to prevent rusting or damage to the plastic.
- Tension ropes or bungee cords: Attach ropes or bungee cords to the corners or sides of the plastic cover, then secure them to the greenhouse frame or anchors in the ground. This method provides additional support and helps keep the cover taut.
- Add weights or sandbags: If you live in an area prone to strong winds, you can place weights or sandbags along the perimeter of the plastic cover. This will help prevent the cover from lifting or shifting during gusty conditions.
- Install windbreaks: Consider adding windbreaks around your greenhouse to provide additional protection against strong winds. Fences, hedges, or strategically placed barriers can help redirect wind and reduce the impact on the plastic cover.
- Regularly inspect and adjust: Keep an eye on the plastic cover and regularly inspect it for any signs of looseness or damage. After heavy storms or high winds, check the fasteners and adjust them if needed to ensure a secure fit.
By taking these measures to secure the plastic cover, you can prevent damage to your greenhouse and ensure the longevity of the cover. Remember, a properly secured cover not only protects your plants from the elements but also maintains a stable and optimal growing environment inside the greenhouse.
Insulating the Greenhouse with Plastic
Insulating your greenhouse is essential for maintaining a consistent and optimal growing environment, especially during colder months. Adding an insulating layer of plastic can help retain heat, prevent drafts, and protect your plants. Here’s how you can insulate your greenhouse with plastic:
- Double-layer method: One common method is to create a double layer of plastic with an air pocket in between. This air pocket acts as insulation and helps retain heat. Install the first layer of plastic as previously described, then install a second layer about 2-3 feet away from the first layer, creating an air pocket in between.
- Air inflation: To further enhance insulation, you can inflate the air pocket between the two layers of plastic. This is typically done using a small fan or blower. The inflated air creates an additional barrier and helps prevent heat loss due to convection.
- Sealing: Properly seal the edges and any openings in the plastic layers to prevent air leakage. This can be achieved with the use of greenhouse tape or sealant. Pay particular attention to the corners, vents, and any gaps where air could escape.
- Insulating the floor and walls: In addition to the roof, consider insulating the greenhouse floor and walls using insulating blankets or bubble wrap. This helps minimize heat loss from the ground and provides additional insulation throughout the entire greenhouse structure.
- Shade cloth: During warmer months or in regions with intense sunlight, consider using shade cloth to regulate temperatures and prevent overheating. This can be installed on the outside of the greenhouse or inside on the ceiling.
- Monitor temperature and humidity: Regularly monitor the temperature and humidity levels inside your greenhouse to ensure they remain within the desired range. Make adjustments to your insulation and ventilation methods accordingly to create a stable and optimal environment for your plants.
Insulating your greenhouse with plastic is a cost-effective and efficient way to regulate temperature and protect your plants from harsh weather conditions. It helps create a more controllable environment, allowing you to extend your growing season and enjoy a wider range of plants throughout the year.
Maintaining and Repairing the Plastic Cover
Regular maintenance and prompt repairs are crucial to ensure the longevity and effectiveness of your greenhouse’s plastic cover. Here are some tips for maintaining and repairing the plastic cover:
- Clean the cover: Regularly clean the plastic cover to remove dirt, debris, and algae buildup. Gently wash it with a mild soap solution and rinse thoroughly. Avoid using harsh chemicals or abrasive materials that could damage the plastic.
- Inspect for damage: Regularly inspect the plastic cover for any signs of wear and tear, such as holes, tears, or loose edges. Check for any areas where the cover may have loosened or stretched over time.
- Repair small holes: Small holes or tears can be repaired using clear adhesive patches designed for plastic. Clean the area around the hole, apply the patch, and smooth out any air bubbles or wrinkles. This will prevent further damage and extend the life of the cover.
- Replace severely damaged sections: If a section of the plastic cover is severely damaged, it may need to be replaced entirely. Remove the damaged section and install a new piece of plastic cover as described earlier.
- Protect from UV damage: Plastic covers are susceptible to UV degradation over time. To protect against UV damage, apply a UV-resistant coating or use shade cloth to reduce direct sunlight exposure.
- Reinforce stress points: Strengthen stress points, such as corners or areas prone to wind pressure, using additional fasteners or reinforcing tapes. This will help distribute the stress evenly and prevent excessive strain on the plastic cover.
- Winterize the greenhouse: In colder climates or during the winter months, consider adding an extra layer of insulation or a thermal blanket to protect the plastic cover from extreme temperatures and reduce heat loss.
- Keep spare plastic cover: It’s always a good idea to keep a spare piece of plastic cover on hand. This way, if any major damage occurs or if the cover needs to be replaced, you will have a replacement readily available.
Regular maintenance and timely repairs will help maximize the lifespan of your greenhouse’s plastic cover and ensure the optimal growing conditions for your plants. By taking care of the cover, you can continue to enjoy the benefits of your greenhouse for many seasons to come.
Conclusion
Covering your greenhouse with plastic is a crucial step in creating a controlled and productive growing environment for your plants. From choosing the right plastic cover to securing it in place and maintaining its integrity, each aspect plays a significant role in the success of your DIY greenhouse project.
By carefully selecting the appropriate plastic cover material, considering the transparency and size, and being mindful of your budget, you can ensure a durable and functional covering for your greenhouse. Preparing the greenhouse by cleaning, inspecting, and repairing any damage or leaks is essential to create a stable foundation for the plastic cover installation.
Accurately measuring and cutting the plastic cover, followed by securely attaching it to the greenhouse frame, helps create a snug and weather-resistant seal. Properly securing the plastic cover with fasteners, ropes, or weights enhances its stability and longevity, ensuring it withstands even the harshest weather conditions.
Insulating the greenhouse with plastic, through methods such as double-layering, air inflation, or using insulating blankets, enables you to maintain a consistent and optimal growing environment. Regular maintenance, including cleaning, inspecting, and promptly repairing any damage, is crucial for the long-term durability and functionality of the plastic cover.
In conclusion, with the knowledge and steps outlined in this article, you have the tools to successfully cover your greenhouse with plastic. Take the time to choose the right material, prepare the greenhouse, measure and cut the plastic, attach and secure it in place, insulate the structure, and maintain the cover. By following these guidelines, your DIY greenhouse project will thrive, providing you with a year-round oasis for growing plants, vegetables, and flowers.