Home>Gardening Tips and Tricks>How To Compost Weeds Fast
Gardening Tips and Tricks
How To Compost Weeds Fast
Modified: January 22, 2024
Learn how to solve the problem of composting weeds quickly with our expert tips and techniques. Transform your garden waste into nutrient-rich compost in no time!
(Many of the links in this article redirect to a specific reviewed product. Your purchase of these products through affiliate links helps to generate commission for Chicagolandgardening.com, at no extra cost. Learn more)
Table of Contents
- Introduction
- Why Composting Weeds is Important
- Materials You Will Need
- Step 1: Collecting the Weeds
- Step 2: Preparing the Compost Bin
- Step 3: Layering the Weeds in the Bin
- Step 4: Adding Compost Accelerator
- Step 5: Turning the Compost Regularly
- Step 6: Monitoring the Composting Process
- Step 7: Using the Composted Weeds in Your Garden
- Conclusion
Introduction
Welcome to our comprehensive guide on how to compost weeds fast! If you’re an avid gardener, you know that weeds can quickly become a nuisance in your garden. However, instead of throwing them away or using harmful herbicides, there’s a beneficial and eco-friendly solution – composting them.
Composting weeds not only helps you manage their growth but also provides a sustainable way to enrich your soil with nutrient-rich organic matter. By following the steps outlined in this article, you’ll be able to turn those pesky weeds into a valuable resource for your garden.
Composting weeds not only helps reduce waste but also has numerous environmental benefits. When weeds are left to decompose in a landfill, they produce methane, a potent greenhouse gas that contributes to climate change. By composting weeds at home, you’re minimizing the production of methane and making a positive impact on the environment.
Composting also contributes to soil health. The decomposed weeds transform into nutrient-rich compost that improves soil structure, retains moisture, and increases microbial activity. This results in healthier plants and a more productive garden.
In this guide, we will take you through a step-by-step process of composting weeds quickly and efficiently. From collecting the weeds to utilizing the compost in your garden, we’ve got you covered. So, roll up your sleeves, put on your gardening gloves, and let’s get started on turning those troublesome weeds into black gold for your garden.
Why Composting Weeds is Important
Composting weeds is not only a practical solution for gardeners, but it is also an essential practice for sustainable and eco-friendly gardening. Here are some key reasons why composting weeds is important:
- Nutrient Recycling: Weeds often absorb valuable nutrients from the soil. When left to decompose in a compost pile, these nutrients are released back into the soil, making them available for other plants to utilize. Composting weeds allows for nutrient recycling, reducing the need for synthetic fertilizers and promoting a healthier garden ecosystem.
- Weed Seed Disposal: One of the biggest concerns with weeds is their ability to spread through seeds. Tossing weeds into the trash or leaving them on the ground can lead to their seeds germinating, causing more weed growth. Composting weeds, however, heats up the pile, effectively killing the weed seeds and preventing them from sprouting later on.
- Preventing Chemical Use: Many gardeners resort to using chemical herbicides to control weed growth. However, these chemicals can have detrimental effects on the environment, wildlife, and even human health. By composting weeds, you can avoid the use of harmful chemicals and opt for a natural, organic method of weed management.
- Soil Health: Compost is often referred to as “black gold” because of its ability to improve soil health. When you compost weeds, their organic matter breaks down, adding nutrients and organic material to the soil. This enriches the soil structure, enhances its ability to retain moisture, improves aeration, and promotes beneficial microbial activity. Ultimately, composting weeds leads to healthier soil and more robust plant growth.
- Reducing Landfill Waste: When weeds are thrown in the trash, they end up in landfills, where they decompose anaerobically, producing methane – a potent greenhouse gas. Composting weeds at home diverts this organic waste from the landfill, reducing greenhouse gas emissions and contributing to a more sustainable waste management system.
By composting weeds, you are not only tackling the issue of weed control but also playing your part in promoting environmentally-friendly practices in your garden. Composting not only reduces waste but also enhances soil fertility and supports a healthier and more sustainable garden ecosystem. So, embrace the power of composting and transform those pesky weeds into a valuable resource for your garden.
Materials You Will Need
Before you start composting your weeds, it’s essential to gather the necessary materials to ensure smooth and efficient composting. Here are the materials you will need:
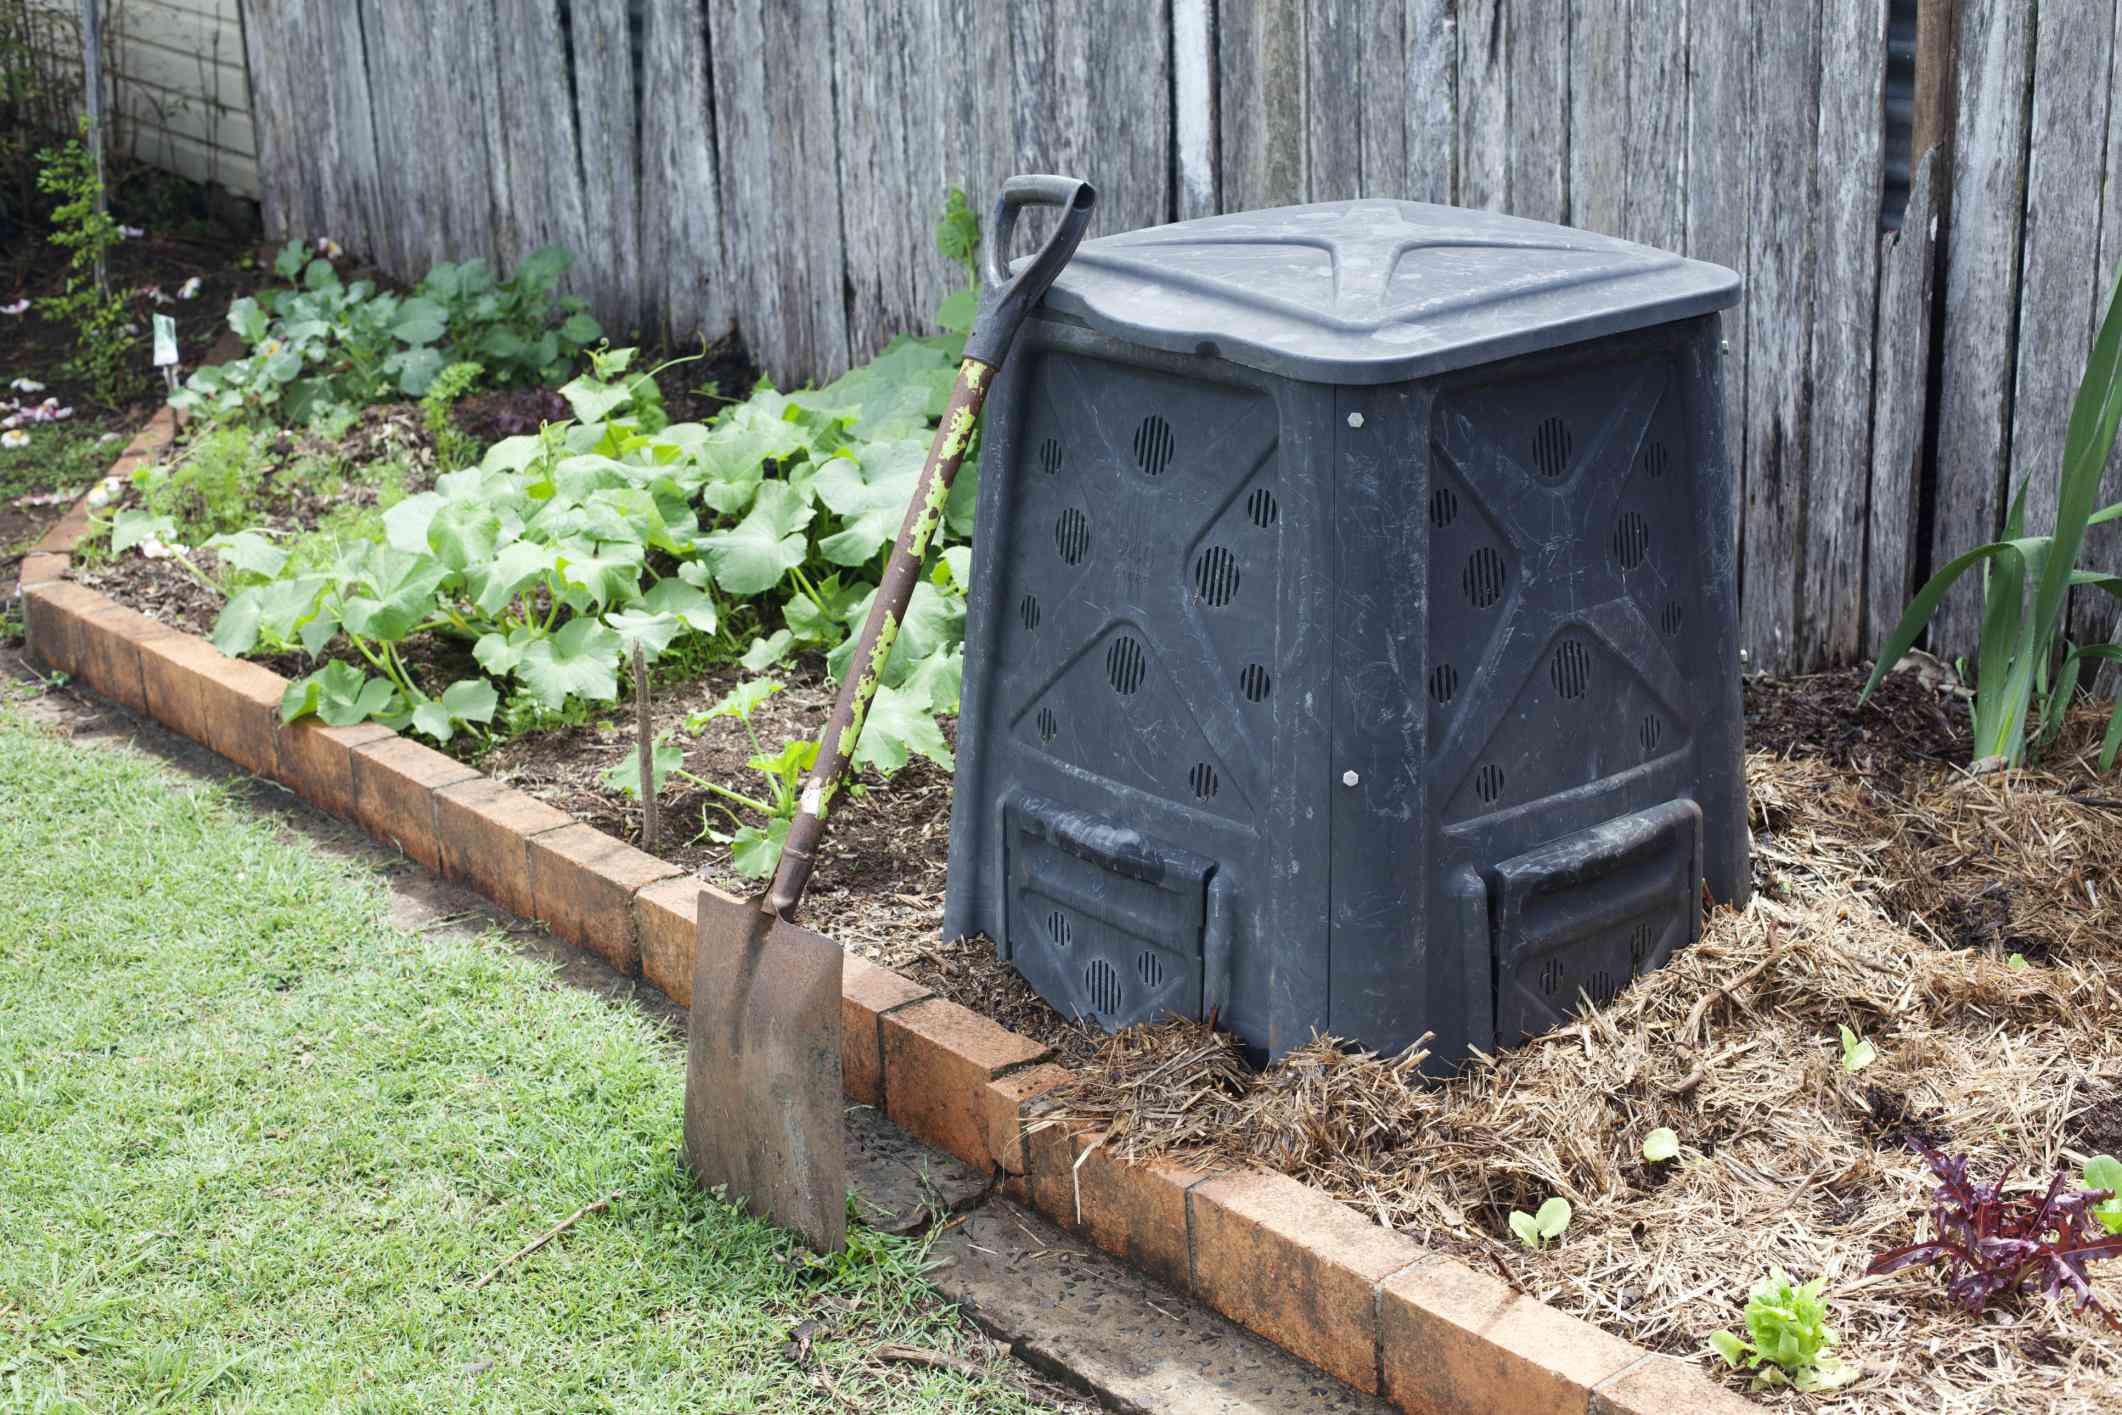
- Compost Bin: You will need a compost bin to contain the weed composting process. This can be a traditional compost bin, a compost tumbler, or even a simple DIY setup using pallets or wire mesh.
- Garden Gloves: Protect your hands from any thorns or prickles while handling the weeds by wearing a sturdy pair of garden gloves.
- Garden Fork or Pitchfork: This tool will come in handy for turning and aerating the compost pile, ensuring proper decomposition.
- Compost Accelerator: While not essential, using a compost accelerator, such as compost activator, organic fertilizer, or finished compost, can help speed up the decomposition process by introducing beneficial microorganisms.
- Water: Water is necessary to maintain the moisture level in your compost pile. Having access to a water source near your compost area will make it easier to keep the pile moist.
- Mulch or Straw: Adding a layer of mulch or straw on top of your compost pile can help retain moisture and regulate the temperature within the pile.
While these are the basic materials you will need to start composting weeds, feel free to adapt and modify based on your specific gardening needs and available resources. Remember, the goal is to create a composting system that works for you and fits your unique circumstances.
Now that you have all the necessary materials ready, it’s time to delve into the step-by-step process of composting weeds fast. Follow the upcoming steps carefully, and soon you’ll be turning those pesky weeds into nutrient-rich compost to fuel the growth of your garden.
Step 1: Collecting the Weeds
The first step in composting weeds is to collect them from your garden. Here are some essential tips to keep in mind:
- Select the Right Weeds: Choose weeds that have not gone to seed or produced flowers yet to prevent the spread of more weeds in your compost pile. Avoid weeds with tough, woody stems or those that have been treated with pesticides.
- Timing: It’s best to collect weeds after rain or watering, as the moisture makes it easier to pull them out, including their roots. This ensures that the entire plant, including the roots, is removed from your garden, preventing regrowth.
- Use Gloves: Wear garden gloves to protect your hands from any potential thorns, spines, or prickles while collecting the weeds. Safety should always come first during gardening tasks.
- Separate from Other Garden Waste: Keep the weeds separate from other garden waste, such as leaves or grass clippings. This will make it easier to distinguish between compostable materials and reduces the risk of unintentionally composting weeds with seeds.
- Avoid Flowering and Invasive Weeds: If you have invasive weeds or those that spread aggressively, it’s best to dispose of them in a different manner to prevent them from reestablishing themselves in your garden.
Once you have collected the weeds, it’s time to move on to the next step – preparing the compost bin. By following these guidelines, you can ensure that you collect the right types of weeds and handle them in a safe and effective manner during the composting process.
Step 2: Preparing the Compost Bin
Before you start composting your weeds, it’s important to prepare your compost bin or designated composting area. Follow these steps to ensure that your composting setup is ready for the weed composting process:
- Choose the Right Location: Select a suitable location for your compost bin, preferably a well-drained area that receives partial sunlight. This will help with the decomposition process and prevent the compost pile from becoming too soggy.
- Consider the Size: Assess the amount of weed waste you have and choose a compost bin size that can accommodate it. If you have a large garden with abundant weeds, a larger bin or multiple compost bins may be necessary.
- Airflow and Drainage: Ensure that your compost bin has adequate airflow and drainage. This can be achieved by placing the bin on a bed of twigs or bricks to allow airflow from below and using a bin with ventilation holes or a compost tumbler that can be turned regularly.
- Layering: If you have a traditional compost bin, consider layering it with a few inches of course material, such as twigs or straw, at the bottom. This creates air pockets and promotes proper drainage.
- Keep it Contained: If you’re concerned about weeds spreading, you can line the base and sides of the compost bin with wire mesh or use a closed system with a lid. This will prevent the weeds from escaping and re-establishing themselves in your garden.
- Accessibility: Ensure that your compost bin is easily accessible so that you can add and turn the compost pile effortlessly. Consider proximity to a water source for easily watering the pile.
Once you have prepared your compost bin, it’s time to move on to the next step – layering the weeds in the bin. By following these steps, you can establish an ideal environment for weed composting and ensure the success of your compost pile.
Step 3: Layering the Weeds in the Bin
Now that you have prepared your compost bin, it’s time to layer the collected weeds in the bin. This step is crucial for creating a balanced compost pile. Follow these guidelines to ensure proper layering:
- Start with Coarse Material: Begin by adding a layer of coarse material at the bottom of the compost bin. This could be twigs, small branches, or straw. This layer helps with air circulation and drainage.
- Add a Layer of Weeds: Place a layer of weeds on top of the coarse material. Make sure to break them down into smaller pieces to hasten the decomposition process. Try to spread the weeds evenly, covering the entire surface area of the bin.
- Alternate Layers: Continue layering the weeds with other organic materials such as kitchen scraps, leaves, or grass clippings. This helps balance the carbon-to-nitrogen ratio in the pile. Aim for a ratio of approximately 3 parts carbon-rich materials (such as dried leaves) to 1 part nitrogen-rich materials (such as green plant matter).
- Maintain Moisture: As you layer the weeds, lightly moisten each layer to ensure that the compost pile remains adequately hydrated. The moisture level should resemble that of a damp sponge. Avoid soaking the pile, as excessive moisture can impede decomposition.
- Avoid Compaction: Gently tamp down each layer with a garden fork or pitchfork, but avoid excessive compaction. The goal is to create a well-structured pile with enough airflow for the decomposition process.
- Finish with a Coarse Layer: Once you have added all the layers, finish with a final layer of coarse material like twigs or straw. This provides a protective covering and helps regulate the temperature and moisture levels within the compost pile.
Remember to maintain a balance between green (nitrogen-rich) and brown (carbon-rich) materials as you layer the compost pile. This balance facilitates proper decomposition and prevents issues like foul odors or slow decomposition.
Now that you have successfully layered the weeds in the compost bin, it’s time to move on to the next step – adding compost accelerator. By following these steps, you are one step closer to transforming those weeds into nutrient-rich compost for your garden.
Step 4: Adding Compost Accelerator
In order to speed up the decomposition process and ensure rapid breakdown of the weed material, it is beneficial to add a compost accelerator to your compost pile. While not essential, a compost accelerator helps introduce beneficial microorganisms that aid in breaking down the organic matter more quickly.
Here are a few options for compost accelerators that you can choose from:
- Compost Activator: Compost activators are commercially available products that contain a mixture of microorganisms, enzymes, and organic matter designed to jumpstart the decomposition process. Follow the instructions provided by the manufacturer to determine the appropriate amount to add to your compost pile.
- Finished Compost: If you have finished compost from a previous batch, you can add a layer of it as a compost accelerator. This introduces mature microorganisms that are already actively breaking down organic matter.
- Organic Fertilizer: Another option is to add a nitrogen-rich organic fertilizer, such as blood meal or poultry manure, to the compost pile. These materials provide a boost of nitrogen, which helps the microorganisms thrive and accelerate decomposition.
- Green Plant Material: If you don’t have access to commercial compost accelerators or finished compost, you can use freshly cut green plant material, such as grass clippings or comfrey leaves. These materials are nitrogen-rich and serve as natural compost accelerators.
- Avoid Synthetic Chemicals: While it may be tempting to add synthetic fertilizers or chemical additives to speed up the composting process, it’s best to avoid them. These products can disrupt the natural balance of microorganisms and harm beneficial organisms in your compost pile.
Once you have chosen your compost accelerator, sprinkle or spread it on top of each layer of weeds in your compost bin. Follow the recommended application rate provided with the product or use a general guideline of about a handful or two per layer. Make sure to lightly mix the accelerator into the layer to incorporate it into the compost pile.
Adding a compost accelerator is an optional step, but it can significantly speed up the composting process and help you achieve nutrient-rich compost faster. With the accelerator added, your compost pile is now ready for the next step – turning the compost regularly. Stay tuned to learn more about this crucial step in the composting process.
Step 5: Turning the Compost Regularly
Turning the compost regularly is a vital step in the composting process as it helps to aerate the pile, distribute moisture, and facilitate the breakdown of organic matter. By turning the compost, you create an environment that is conducive to the activity of beneficial microorganisms and accelerates the decomposition process. Here’s how to turn the compost:
- Frequency: Aim to turn the compost every 1-2 weeks. This ensures that all parts of the pile receive adequate oxygen and helps to prevent the formation of anaerobic pockets.
- Tools: Use a garden fork or pitchfork to turn the compost. These tools allow for easy penetration and turning of the compost pile.
- Layering Technique: When turning the compost, use a layering technique. Start by transferring the material from the top of the pile to the bottom, placing the outer edges towards the center. This effectively mixes the materials and promotes uniform decomposition.
- Moisture Check: As you turn the compost, assess the moisture content. The compost should be damp but not overly wet. If it feels too dry, lightly moisten it with water. If it feels too wet, add dry brown materials like shredded leaves or sawdust to absorb excess moisture.
- Avoid Overturning: While it’s important to turn the compost regularly, be mindful of overdoing it. Overturning can disrupt the decomposition process and delay the production of finished compost. Aim for a balance between providing enough aeration and allowing microorganisms to do their work.
- Monitor Temperature: Pay attention to the temperature of your compost pile as you turn it. A healthy compost pile should heat up during the decomposition process. If the temperature drops significantly, it may indicate that you need to adjust the carbon-to-nitrogen ratio or add more compost accelerator.
Turning the compost not only aerates the pile but also helps to break down the weeds more effectively. It mixes in the compost accelerator, ensures uniform decomposition, and minimizes any unpleasant odors that may arise from anaerobic conditions. Regular turning encourages a faster breakdown of organic matter into nutrient-rich compost.
Continue to turn the compost regularly, maintaining the balance of moisture and ingredients, until your compost reaches a dark, crumbly texture. At this point, it is ready to be used in your garden. In the next step, we will discuss how to monitor the composting process to ensure optimal conditions for decomposition.
Step 6: Monitoring the Composting Process
Monitoring the composting process is essential to ensure that your weed compost is progressing properly and to make any necessary adjustments along the way. By keeping an eye on the compost pile, you can take proactive measures to maintain optimal conditions for decomposition. Here’s how to monitor the composting process:
- Temperature: Use a compost thermometer to regularly check the temperature of the pile. During active decomposition, the temperature should rise between 120°F to 160°F (49°C to 71°C). This indicates that the microorganisms are working efficiently to break down the organic matter. If the temperature drops significantly or remains consistently low, you may need to adjust the compost pile to provide more aeration or add more nitrogen-rich materials.
- Moisture Levels: Maintain the right moisture level in the compost pile by checking its moisture content regularly. Squeeze a handful of compost to assess its moisture. It should feel similar to a damp sponge. If the pile feels too dry, sprinkle water while turning it. If it is too wet, add dry carbon-rich materials like shredded leaves or newspaper to help absorb excess moisture.
- Airflow: Ensure proper airflow in your compost pile by fluffing and turning it regularly. Adequate airflow helps the microorganisms thrive and promotes efficient decomposition. If you notice compacted areas, break them up with a garden fork or pitchfork while turning the compost.
- Noxious Odors: Pay attention to any foul odors coming from the compost pile. While some earthy or slightly musty smells are normal, strong odors like ammonia or rotting eggs may indicate anaerobic conditions or an imbalance in the compost. If unpleasant odors persist, adjust the compost pile by incorporating more oxygen and balancing the ingredients.
- Appearance: Observe the appearance of the compost pile. Over time, the weed material will break down, and the compost will turn dark, crumbly, and have an earthy smell. These are signs that the compost is maturing and becoming ready for use in your garden.
- Composting Time: The time required for the weed compost to fully decompose varies depending on various factors such as temperature, moisture, the size of the weed material, and the ingredients in the pile. On average, compost can take anywhere from a few months to a year to fully mature. Regular monitoring helps you gauge the progress and determine when the compost is suitable for use.
By monitoring the composting process, you can make necessary adjustments and ensure that the conditions are ideal for efficient decomposition. Regularly check the temperature, moisture levels, and odors to maintain a healthy compost pile. With consistent monitoring, you’ll be able to produce high-quality compost that will enrich your garden soil and support the growth of healthy plants.
Now that you’re actively monitoring the composting process, let’s move on to the final step – using the composted weeds in your garden. Stay tuned to discover the benefits of utilizing your nutrient-rich compost and how to apply it effectively.
Step 7: Using the Composted Weeds in Your Garden
After patiently composting your weeds, it’s time to reap the rewards of your efforts by utilizing the nutrient-rich compost in your garden. Here’s how you can use the composted weeds effectively:
- Soil Amendment: Incorporate the composted weeds into your garden soil as a soil amendment. Mix the compost into the top few inches of soil to improve its structure, fertility, and water retention capabilities. This will provide a rich source of organic matter and essential nutrients for your plants.
- Planting Mix: Use the composted weeds as part of your planting mix when transplanting or reseeding. Blend the compost with existing soil or potting mix to create a nutrient-dense medium that promotes healthy plant growth.
- Topdressing: Apply a layer of compost on the surface of your garden beds, around established plants, or in container gardens. This acts as a protective mulch, conserves moisture, regulates soil temperature, and slowly releases nutrients as it breaks down.
- Compost Tea: Brew compost tea by steeping a small amount of compost in water for several days. Use this nutrient-rich liquid to water and feed your plants. Compost tea provides an instant nutrient boost and enhances the overall health of your garden.
- Amending Potting Mix: Enhance the quality of your potting mix by incorporating composted weeds. This adds organic matter, improves drainage, and provides essential nutrients for container-grown plants.
- Compost Mulch: Spread a layer of composted weeds around the base of plants to act as a mulch. This suppresses weeds, retains moisture, and gradually releases nutrients – promoting healthy plant growth while reducing weed competition.
- Vermicomposting: If you have a vermicompost system with composting worms, you can feed the composted weeds to your worms. They will break down and consume the organic matter, transforming it into nutrient-rich worm castings that can be used as a potent fertilizer for your garden.
The composted weeds you have created are a valuable resource for your garden. When used correctly, they can improve soil fertility, enhance plant growth, and support a thriving garden ecosystem. By recycling the weeds through composting, you have transformed a potential nuisance into a valuable asset for your gardening endeavors.
Remember to continue composting any new weeds you collect, along with other organic materials, to maintain a steady supply of nutrient-rich compost for your garden. With each successful batch of compost, you are not only enriching your soil but also contributing to a more sustainable and environmentally-friendly approach to gardening.
Congratulations on completing all the steps of composting weeds! By following this comprehensive guide, you have acquired the knowledge and skills to turn those bothersome weeds into a valuable resource for your garden. Enjoy the benefits of nutrient-rich compost and the healthy, vibrant plants it will help nurture.
Conclusion
Congratulations! You have reached the end of this comprehensive guide on how to compost weeds fast. By following the step-by-step process outlined in this article, you can efficiently and effectively turn those pesky weeds into nutrient-rich compost to benefit your garden.
Composting weeds not only helps you manage weed growth, but it also promotes sustainable and eco-friendly gardening practices. By recycling organic material, reducing waste, and enhancing soil health, you are taking active steps towards creating a more sustainable and productive garden ecosystem.
From collecting the weeds to preparing the compost bin, layering the weeds, adding compost accelerators, turning the compost regularly, monitoring the process, to finally using the composted weeds in your garden, each step is integral to the success of the composting journey.
Remember, composting is a continuous process. As you collect new weeds or organic materials in your garden, keep adding them to your compost pile. With time and patience, you will keep producing nutrient-rich compost to nourish your plants year after year.
By composting your weeds, you are supporting the health and longevity of not only your garden but also the environment. You are reducing landfill waste, minimizing the use of harmful chemicals, enhancing soil fertility, and fostering a more sustainable approach to gardening.
So, put on your gardening gloves, roll up your sleeves, and embark on this eco-friendly journey of composting weeds. Turn those nuisances into valuable resources, and watch as your garden flourishes with vibrant, healthy plants!