Home>Gardening Techniques>DIY Projects>How To Compost Pine Needles Fast
DIY Projects
How To Compost Pine Needles Fast
Modified: January 22, 2024
Learn how to compost pine needles fast with this DIY project. Discover effective techniques and tricks to turn pine needles into nutrient-rich compost for your garden.
(Many of the links in this article redirect to a specific reviewed product. Your purchase of these products through affiliate links helps to generate commission for Chicagolandgardening.com, at no extra cost. Learn more)
Table of Contents
- Introduction
- Benefits of Composting Pine Needles
- Preparing the Composting Area
- Collecting Pine Needles
- Shredding Pine Needles
- Adding Pine Needles to the Compost Pile
- Balancing the Compost Pile
- Turning the Compost Pile Regularly
- Monitoring the Composting Process
- Using Composted Pine Needles in the Garden
- Conclusion
Introduction
Welcome to the world of DIY projects! Whether you’re a seasoned DIY enthusiast or just starting out, there’s always something new and exciting to create with your own two hands. From building furniture to crafting home decor, the possibilities are endless. But have you ever considered incorporating composting into your DIY routine? Composting is not only a great way to reduce waste and help the environment, but it can also provide nutrient-rich soil for your garden. In this article, we’ll specifically explore the fascinating world of composting pine needles.
Pine needles, also known as pine straw, can be found abundantly in many regions. They have unique properties that make them an excellent addition to your compost pile. However, due to their acidity and slow decomposition rate, composting pine needles can be a bit challenging. But fear not! With the right techniques and a little patience, you can compost pine needles fast and effectively.
In the following sections, we’ll delve into the benefits of composting pine needles, the preparation required, how to collect and shred pine needles, as well as the key steps to successfully compost them. Additionally, we’ll discuss how to balance your compost pile, the importance of regular turning, and monitoring the composting process. Lastly, we’ll explore how you can utilize the rich composted pine needles in your garden to improve soil fertility and promote plant growth.
So, if you’re ready to take your DIY projects to the next level and embark on a composting adventure, let’s dive in and discover how to compost pine needles fast and efficiently!
Benefits of Composting Pine Needles
Composting pine needles comes with a host of benefits that can enhance both your garden and the environment. Here are the key advantages of incorporating pine needles into your compost pile:
- Nutrient-rich compost: Pine needles are rich in essential nutrients such as nitrogen, phosphorus, and potassium. When properly composted, these nutrients become readily available to your plants, providing them with the necessary nourishment for healthy growth.
- Improved soil structure: The long, fibrous nature of pine needles helps to improve soil aeration and drainage. They act as a natural mulch, preventing soil erosion and maintaining moisture levels in dry conditions.
- Acidic soil amendment: Pine needles have a naturally acidic pH, which makes them an excellent addition for plants that thrive in acidic soil, such as azaleas, blueberries, and rhododendrons. Composting pine needles can help balance soil pH levels, creating a more favorable environment for these acidic-loving plants.
- Carbon-rich material: Pine needles are classified as a carbon-rich “brown” material, which is essential for achieving the right balance in your compost pile. Balancing carbon and nitrogen ratios is crucial for efficient decomposition and the production of high-quality compost.
- Availability and cost-effective: Pine needles are often abundant and readily available, especially in areas with pine trees. It’s a sustainable and cost-effective choice for composting, as you can gather them from your own property or nearby forests.
- Reduces waste and landfill contributions: By composting pine needles, you’re diverting organic material from landfills, reducing greenhouse gas emissions, and promoting a more sustainable approach to waste management.
As you can see, composting pine needles is not only beneficial for your garden but also plays a part in reducing your ecological footprint. With these advantages in mind, let’s move on to the preparation steps needed to successfully compost pine needles.
Preparing the Composting Area
Before you start composting pine needles, it’s important to prepare the composting area to ensure optimal conditions for decomposition. Here are the key steps to get your composting area ready:
- Choose the right location: Select a suitable location for your compost pile. It should be well-drained and receive some sunlight, but not too much to prevent excessive drying. If possible, choose an area away from strong winds to prevent the pile from getting scattered.
- Clear the area: Remove any debris, rocks, or weeds from the chosen location. Having a clean and clear area will make it easier to manage your compost pile and prevent any unwanted contaminants from entering the mix.
- Prepare the base: Lay a sturdy base or use a compost bin to contain the compost pile. This helps to contain the materials and prevents them from spreading out. It also provides better insulation and aids in maintaining consistent composting temperatures.
- Provide adequate drainage: Ensure proper drainage by placing the compost pile on a layer of gravel or adding drainage holes to your compost bin. This will prevent waterlogging and promote air circulation, both critical for successful composting.
- Consider using a compost activator: If you want to speed up the decomposition process, you can use a compost activator or accelerator. These products are designed to introduce beneficial microorganisms that help break down organic matter more efficiently. However, they are optional, and it’s still possible to compost pine needles without them.
By taking the time to prepare your composting area, you’ll create an optimal environment for the decomposition of pine needles and other organic materials. With the compost area ready, it’s time to move on to the next step – collecting pine needles.
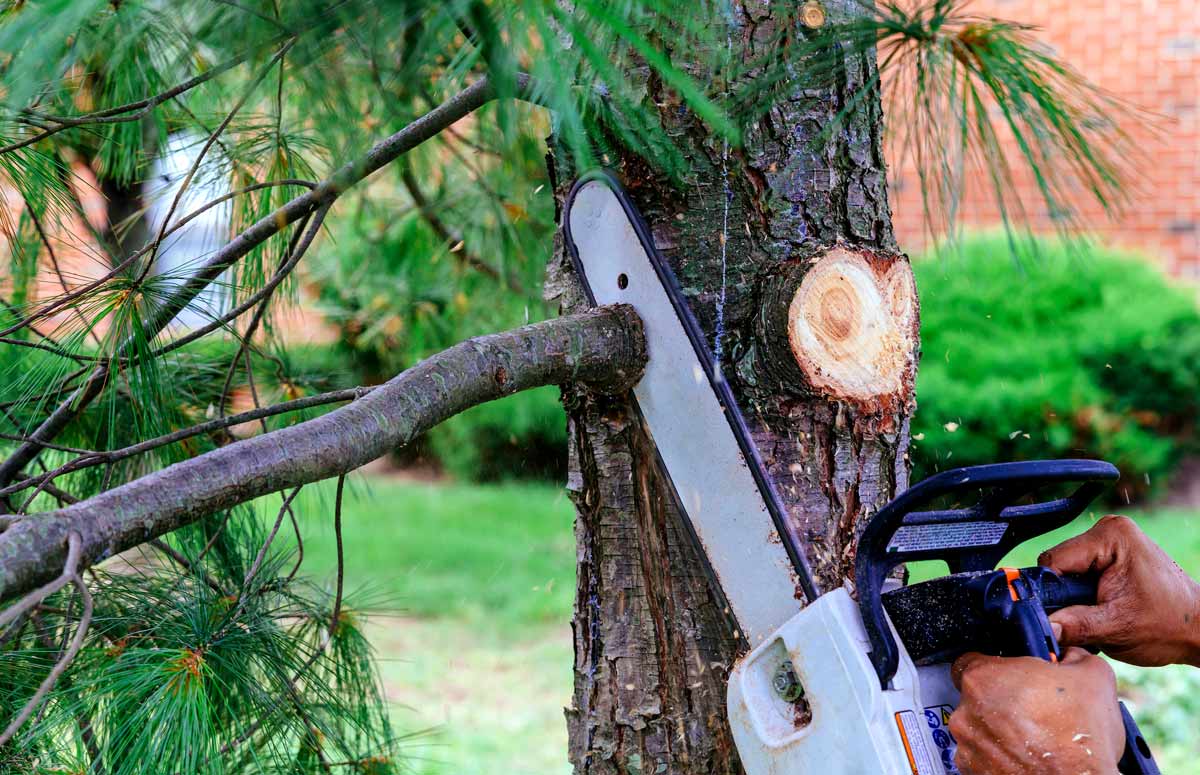
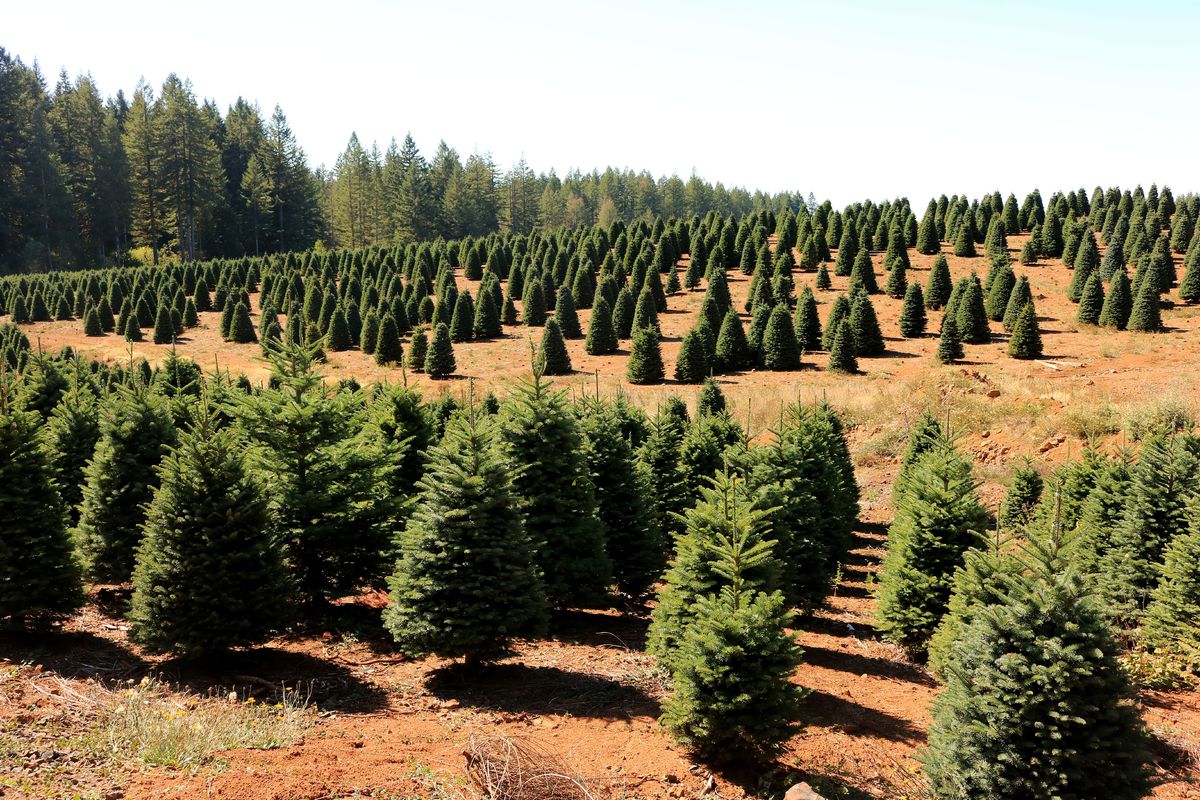
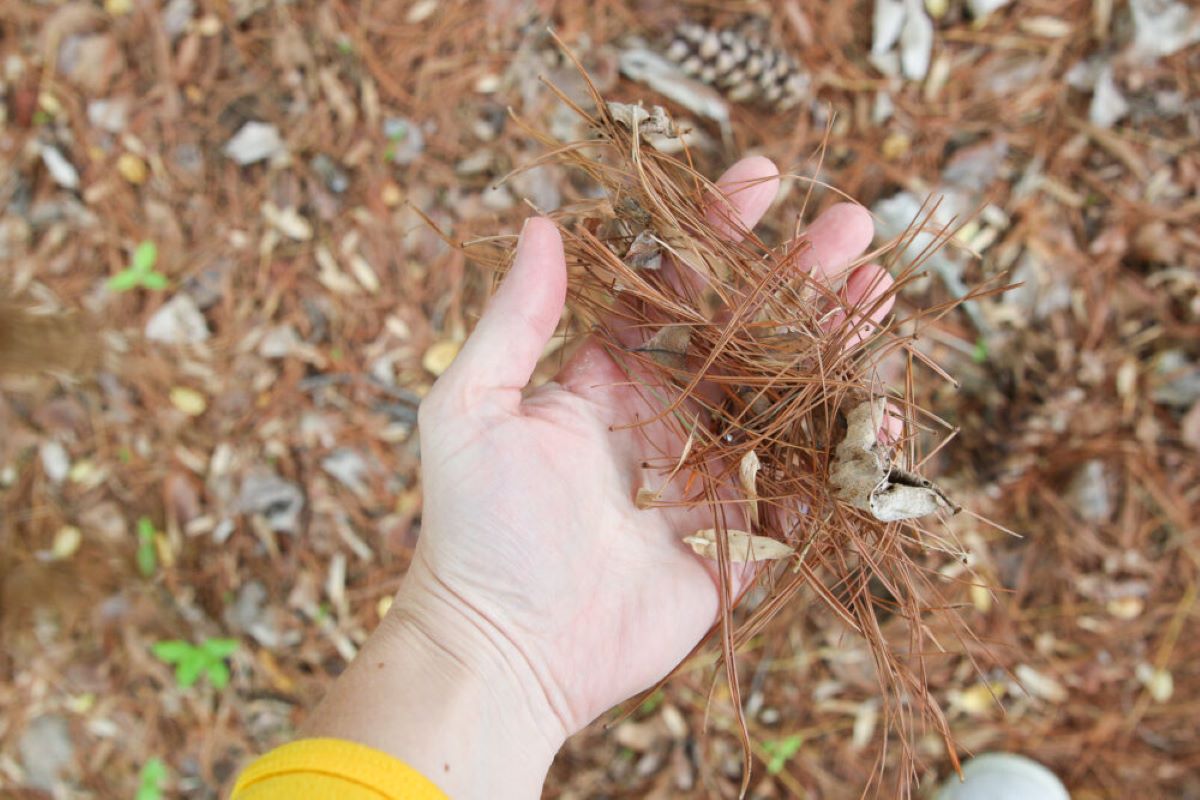
Collecting Pine Needles
Collecting pine needles for composting is a simple and straightforward process. Here’s how you can gather pine needles effectively:
- Timing: Choose the right time to collect pine needles. It’s best to collect them when they’re dry, as wet pine needles can clump together and become more difficult to handle.
- Identification: Familiarize yourself with the types of pine trees in your area. Different pine tree species may have slightly different needle characteristics, such as length and color. This knowledge can help you identify which needles are suitable for composting.
- Appropriate tools: Equip yourself with the right tools for gathering pine needles. A rake or a large garden fork can be handy for gathering larger quantities. Alternatively, you can use your hands or a smaller handheld rake for smaller amounts.
- Protective gear: Consider wearing gloves and long sleeves when collecting pine needles, as they can be prickly and cause skin irritation for some individuals.
- Responsible collection: Practice responsible collection by avoiding areas where pine needles may be scarce or protected. If you have pine trees on your property, you can gather fallen needles from the ground. If collecting from public areas or forests, obtain permission if necessary and be mindful of any regulations or guidelines.
- Quantity: Collect a sufficient quantity of pine needles to create a balanced compost pile. Aim for a mix of pine needles with other organic materials, such as kitchen scraps or grass clippings, to achieve the optimal carbon-to-nitrogen ratio.
Remember, it’s important to collect pine needles sustainably and without causing harm or disruption to the environment. Once you have gathered the pine needles, it’s time to move on to the next step – shredding them to aid in faster decomposition.
Shredding Pine Needles
Shredding pine needles before adding them to your compost pile can greatly accelerate the decomposition process. By breaking down the needles into smaller pieces, you increase the surface area, allowing beneficial microorganisms to work more efficiently. Here’s how you can shred pine needles effectively:
- Equipment: You have several options for shredding pine needles. One method is to use a garden shredder or chipper, if available. These machines can quickly and effectively reduce the size of the needles. Alternatively, you can use a lawnmower or a string trimmer with a mulching blade attachment. These tools can also shred the pine needles effectively.
- Batch shredding: If you have a large quantity of pine needles, consider shredding them in batches. This prevents overloading the shredder or mower, ensuring a more efficient shredding process.
- Consistency: Aim to shred the pine needles into smaller pieces, around 1 to 2 inches in length. This size is ideal for promoting faster decomposition and allows for better mixing within the compost pile.
- Collection: Use a collection bag or container to capture the shredded pine needles. This makes it easier to transport them to the compost pile and prevents them from scattering in the wind.
- Time-saving tip: If you don’t have access to a shredder or prefer not to shred the pine needles, you can still compost them without shredding. However, keep in mind that the decomposition process may take longer, as the larger pieces will break down at a slower pace.
Shredding pine needles is an optional step, but it can significantly speed up the composting process. By breaking down the needles into smaller pieces, you create optimal conditions for decomposition and ensure that they integrate well with other organic materials in the compost pile. Once you’ve shredded the pine needles, it’s time to add them to the compost pile and start the transformation process.
Adding Pine Needles to the Compost Pile
Now that you have your shredded pine needles ready, it’s time to add them to your compost pile. Here are the key steps to ensure proper incorporation of pine needles into the compost:
- Layering: Start by creating a base layer of coarse materials, such as twigs or shredded branches, at the bottom of the compost pile. This promotes airflow and prevents the pile from becoming compacted.
- Alternate layers: Add a layer of shredded pine needles on top of the base layer. Then, alternate with other organic materials like kitchen scraps, grass clippings, and other “green” materials. This creates a balanced mixture of carbon-rich (brown) and nitrogen-rich (green) materials.
- Avoid thick layers: Avoid adding too thick of a layer of pine needles at once, as they can compact and impede airflow. It’s best to add a thin layer of pine needles and then cover it with a layer of other materials.
- Moisture adjustment: Ensure that the compost pile remains moist throughout the process. Pine needles have a tendency to dry out quickly, so it’s essential to monitor the moisture level and adjust as needed. If the pile becomes too dry, add water to keep it slightly damp, but not soggy.
- Optional nitrogen supplementation: As pine needles are carbon-rich, they need additional nitrogen-rich materials to balance the compost pile. You can add nitrogen sources like grass clippings or kitchen scraps to provide the necessary nitrogen for decomposition.
It’s important to note that pine needles will break down slower than other organic materials due to their natural acidity and resistant structure. However, by following these steps and maintaining the right conditions, the pine needles will eventually decompose and contribute to nutrient-rich compost.
Continue layering the compost pile with alternating materials, including shredded pine needles, until you have used up all your available pine needles or reached the desired height for your compost pile. With the pine needles added, it’s time to focus on maintaining a balanced compost pile.
Balancing the Compost Pile
Creating a balanced compost pile is essential for successful decomposition and the production of nutrient-rich compost. When composting pine needles, it’s important to pay attention to the carbon-to-nitrogen ratio and ensure that the compost pile is properly balanced. Here’s how you can achieve that:
- Carbon-to-nitrogen ratio: The ideal carbon-to-nitrogen (C:N) ratio for composting is around 30:1. Pine needles are considered a “brown” material with a high carbon content. To balance the compost pile, add nitrogen-rich “green” materials such as grass clippings, kitchen scraps, or manure. This provides the necessary nitrogen for decomposition.
- Mixing the compost pile: Regularly mix or turn the compost pile to ensure proper blending of materials. This helps distribute the nitrogen-rich materials evenly with the pine needles, promoting efficient decomposition and preventing any localized nutrient imbalances.
- Monitoring the moisture: Pine needles have a tendency to dry out quickly, so it’s important to maintain proper moisture levels in the compost pile. The ideal moisture content should resemble a damp sponge. If the pile becomes too dry, add water to increase moisture. Conversely, if it becomes too wet, add dry materials like shredded leaves or straw to absorb excess moisture.
- Avoid compacting the pile: Avoid compacting the compost pile, as this restricts airflow and slows down the decomposition process. Turning the pile regularly helps prevent compaction and ensures that the pine needles and other materials receive adequate oxygen for decomposition.
- Patience and adjustment: Remember that composting takes time, and pine needles may take longer to decompose compared to other materials. Be patient, and continue to monitor and adjust the compost pile as needed, making sure to maintain the proper balance of carbon and nitrogen.
By balancing the carbon-to-nitrogen ratio, regularly mixing the pile, monitoring moisture levels, and avoiding compaction, you’ll create an optimal environment for the decomposition of pine needles and the production of high-quality compost.
Next, let’s explore the importance of turning the compost pile regularly to further facilitate the composting process.
Turning the Compost Pile Regularly
Regularly turning or remixing the compost pile is a crucial step in the composting process, especially when composting pine needles. Turning the pile helps to enhance decomposition, accelerate breakdown of materials, and create a more uniform and nutrient-rich compost. Here’s why turning the compost pile is important and how to do it effectively:
Improved aeration: Turning the compost pile introduces oxygen into the mix, which is essential for the growth and activity of aerobic microorganisms. These microorganisms require oxygen to break down organic matter efficiently. By turning the pile, you promote better aeration, ensuring that the pine needles and other materials receive sufficient oxygen for decomposition.
Even distribution of heat and moisture: Turning the compost pile helps to distribute heat and moisture evenly. Pine needles have a tendency to dry out quickly, so turning the pile enables you to incorporate any dry or moisture-laden areas, ensuring a good balance throughout the pile. This helps maintain optimal moisture levels and temperature, which are important factors for efficient decomposition.
Faster decomposition: Regularly turning the compost pile accelerates the breakdown of organic materials, including pine needles. This is especially beneficial for pine needles, as they have a slower decomposition rate. By turning the pile, you expose fresh surfaces to microorganisms, increasing their accessibility to break down the pine needles faster.
Prevention of odor and pests: Turning the compost pile helps to prevent unpleasant odors and deter pests. By keeping the pile well-mixed, you minimize the risk of anaerobic conditions that can lead to putrid smells. Additionally, turning the pile disrupts pest habitation, reducing the chances of infestation.
To effectively turn your compost pile:
- Frequency: Aim to turn the pile every 1-2 weeks, or whenever the internal temperature drops or the decomposition appears to slow down.
- Tools: Use a pitchfork, garden fork, or a compost turning tool to turn the pile. These tools allow you to mix the materials thoroughly without causing excessive disruption.
- Mixing technique: Start by removing the outer layer of the pile and setting it aside. Then, use the tool to stir and mix the inner portion of the pile. Bring the outer layer back in, placing it on the newly mixed portion. This helps expose previously undecomposed materials to the center of the pile, ensuring they receive proper aeration and heat.
- Moisture and adjustments: As you turn the pile, monitor the moisture levels. If the pile appears too dry, add water as you turn. On the other hand, if it’s too wet, incorporate dry materials like shredded leaves or straw. Aim for a moist but not overly saturated consistency.
Regularly turning the compost pile encourages decomposition, enhances airflow, and promotes the breakdown of pine needles and other materials. By incorporating this step into your composting routine, you’ll ensure a more efficient and successful composting process.
Now, let’s move on to the next section, where we discuss the importance of monitoring the composting process to achieve optimal results.
Monitoring the Composting Process
Monitoring the composting process is vital to ensure the success of your compost pile, especially when composting pine needles. By regularly monitoring and assessing the conditions of your compost, you can make necessary adjustments and ensure optimal decomposition. Here’s what you should keep an eye on as you monitor the composting process:
Temperature: Check the internal temperature of your compost pile regularly. A well-functioning compost pile will generate heat as organic materials decompose. The ideal temperature range for composting is between 120°F to 160°F (49°C to 71°C). However, pine needles can slow down the heating process due to their resistant structure, so don’t be alarmed if the temperature is slightly lower in the presence of pine needles.
Moisture levels: Pine needles tend to dry out quickly, so monitoring moisture levels is critical. The compost pile should be moist, similar to a damp sponge, but not too wet or overly saturated. If it’s too dry, add water while turning the pile. If it’s too wet, incorporate dry materials like shredded leaves or straw to absorb excess moisture.
Odor: Pay attention to any unusual or foul odors coming from the compost pile. A well-balanced and properly aerated pile should have a mild earthy smell. Strong, putrid smells may indicate anaerobic conditions, indicating the need for increased aeration and turning.
Appearance and texture: Observe the appearance and texture of the compost pile. A healthy pile should have a dark, crumbly texture. It should also show signs of decomposition, such as the breakdown of materials and the disappearance of recognizable pine needle fragments.
Turning frequency: Evaluate the frequency of turning the compost pile. If decomposition seems slow or the temperature drops significantly, consider increasing the frequency of turning. Turning the pile distributes heat, moisture, and oxygen, promoting faster decomposition.
Timing: Keep in mind that composting pine needles may take longer compared to other materials due to their durability. Exercise patience and give the process ample time to ensure thorough decomposition.
Regular monitoring allows you to address any issues promptly and adjust your composting practices as needed. By paying attention to temperature, moisture, odor, appearance, turning frequency, and timing, you can fine-tune the composting process and achieve optimal results.
In the next section, we’ll explore the exciting part – using the composted pine needles in your garden to cultivate healthy plants and soil.
Using Composted Pine Needles in the Garden
After patiently waiting for the pine needles to fully decompose, you can reap the benefits of your hard work by using the composted pine needles in your garden. Composted pine needles offer numerous advantages for plant growth and soil health. Here are some effective ways to utilize composted pine needles in your garden:
- Mulching: Spread a layer of composted pine needles around your plants as a natural mulch. The pine needles act as a protective barrier, helping to retain soil moisture, suppress weed growth, and insulate plant roots from temperature fluctuations.
- Soil amendment: Incorporate composted pine needles into garden beds or vegetable patches as a soil amendment. The rich organic matter improves soil structure, enhances water retention, and increases nutrient availability to plants.
- Acid-loving plants: Composted pine needles are particularly beneficial for acid-loving plants such as azaleas, blueberries, and rhododendrons. Spread the composted pine needles around these plants to create the acidic conditions they require for optimal growth.
- Potting mix: Blend composted pine needles with other organic materials like compost, peat moss, and perlite to create a well-balanced potting mix. This mixture provides a lightweight, well-draining medium for container gardening.
- Compost tea: Steep a handful of composted pine needles in water to create a nutrient-rich compost tea. Use this tea to water your plants or as a foliar spray to provide a boost of nutrients and promote healthy growth.
As you use composted pine needles in your garden, remember to consider the specific needs of your plants and adjust accordingly. While pine needles offer numerous benefits, some plants may not thrive in highly acidic conditions. Always test the soil pH and ensure it is suitable for the plants you are growing.
Additionally, integrate the composted pine needles into the soil before planting to ensure proper distribution of nutrients and organic matter. This will help establish a balanced and fertile growing environment for your plants.
By utilizing the nutrient-rich composted pine needles in these various ways, you can significantly improve the health and productivity of your garden, while also reducing waste and promoting sustainability.
Now that you are well-equipped with the knowledge of composting pine needles and utilizing the resulting compost in your garden, it’s time to put these techniques into action and witness the transformative power of DIY composting.
Conclusion
Composting pine needles can be a rewarding and environmentally-friendly DIY project. By following the steps outlined in this article, you can successfully compost pine needles and create nutrient-rich compost for your garden. We’ve explored the benefits of composting pine needles, from the nutrient-rich compost they produce to their ability to improve soil structure and balance pH levels.
Throughout the process, it’s important to prepare the composting area, collect and shred the pine needles, and add them to the compost pile with a balanced mix of other organic materials. Regularly turning the pile, monitoring temperature and moisture levels, and adjusting as necessary, will ensure efficient decomposition and the creation of high-quality compost.
Once the pine needles have fully composted, you can use the resulting compost to mulch your garden beds, amend the soil, nourish acid-loving plants, create potting mix, or even make compost tea for your plants. These applications will improve soil fertility, retain moisture, suppress weeds, and promote healthy plant growth.
Remember, composting is a journey that requires patience, observation, and adjustment. Be mindful of the specific needs of your plants, test the soil pH when necessary, and continue to monitor and maintain the composting process for optimal results.
With the knowledge and techniques provided in this article, you are well-equipped to embark on your composting adventure and make the most of those abundant pine needles. Enjoy the process of creating nutrient-rich compost while contributing to a more sustainable and eco-friendly lifestyle.
So roll up your sleeves, gather those pine needles, and let the magic of composting transform your garden and DIY projects!