Home>Types of Gardening>Edible Gardening>How To Care For Tomato Seedlings
Edible Gardening
How To Care For Tomato Seedlings
Modified: January 22, 2024
Learn how to care for tomato seedlings in your edible garden and ensure healthy growth with these valuable gardening tips and advice.
(Many of the links in this article redirect to a specific reviewed product. Your purchase of these products through affiliate links helps to generate commission for Chicagolandgardening.com, at no extra cost. Learn more)
Table of Contents
- Introduction
- Choosing the Right Tomato Seeds
- Preparing the Seed Starting Mix
- Planting Tomato Seeds
- Providing Adequate Light
- Watering Tomato Seedlings
- Fertilizing Tomato Seedlings
- Transplanting Tomato Seedlings
- Protecting Tomato Seedlings from Pests and Diseases
- Hardening Off Tomato Seedlings
- Final Thoughts on Caring for Tomato Seedlings
Introduction
Welcome to the wonderful world of edible gardening! If you’re looking to start a garden of your own, growing your own tomatoes is a fantastic place to begin. Not only are tomatoes versatile and delicious, but they are also relatively easy to grow, making them a great choice for novice gardeners.
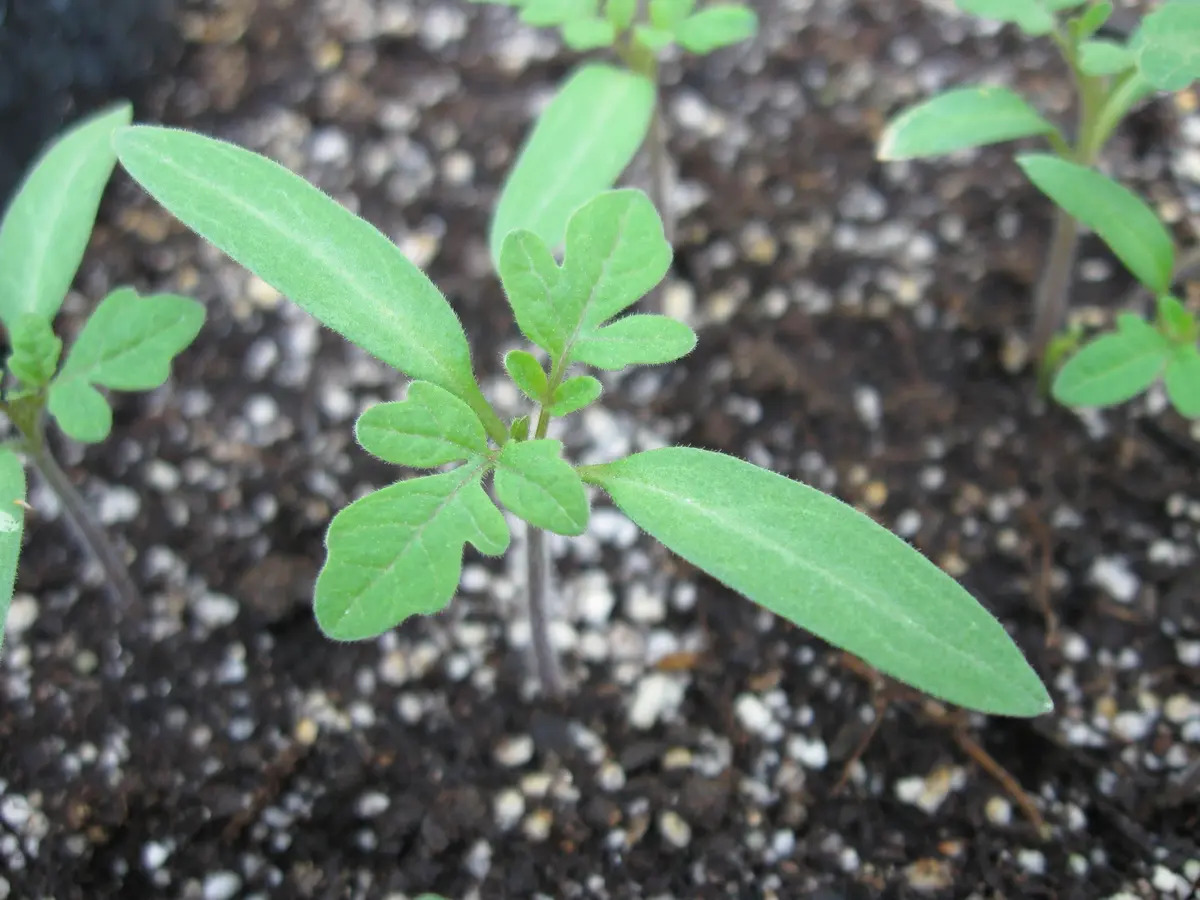
Tomato seedlings require special care in their early stages of growth to ensure they develop into strong and healthy plants. In this article, we will guide you through the process of caring for tomato seedlings, from choosing the right seeds to transplanting them into your garden.
Before we dive into the details, let’s take a moment to understand why starting from seed is advantageous. Growing tomatoes from seeds gives you access to a wider variety of cultivars, allowing you to experiment with different flavors, sizes, and colors. Additionally, starting from seeds is more cost-effective than buying mature plants from a nursery.
So, if you’re ready to embark on this exciting gardening journey, let’s get started with the first step – choosing the right tomato seeds.
Choosing the Right Tomato Seeds
When it comes to choosing tomato seeds, there are a few key factors to consider. The first is the variety of tomato you want to grow. Do you prefer large slicing tomatoes, cherry tomatoes, or perhaps a unique heirloom variety? Think about your personal preferences and what you plan to use the tomatoes for – salads, sauces, or snacking.
Next, consider the growing conditions in your area. Are you planting in a sunny garden bed, or do you have limited space and need a variety suited for containers? Take note of the recommended growing conditions on the seed packets, as some tomatoes thrive in full sun, while others can tolerate partial shade.
It’s also important to pay attention to the “days to maturity” listed on the seed packets. This indicates how long it will take for the plants to produce ripe fruits. If you have a short growing season, choose varieties with a shorter maturity period to ensure a successful harvest.
If you’re a beginner, it might be helpful to choose disease-resistant varieties. These tomatoes have been bred to be more resistant to common diseases such as blight and wilt, which can save you a lot of frustration and disappointment in the long run.
Lastly, don’t forget to consider your own gardening skills and experience level. Some tomato varieties require more intensive care and attention, while others are more forgiving and suitable for beginners. By choosing the right seeds for your level of expertise, you’ll set yourself up for a more successful gardening experience.
Once you’ve decided on the perfect tomato seeds for your garden, it’s time to start preparing the seed starting mix. Let’s move on to the next section to learn how.
Preparing the Seed Starting Mix
Creating a nutrient-rich and well-draining seed starting mix is essential for the healthy development of tomato seedlings. You can either purchase a pre-made seed starting mix or make your own using a combination of ingredients.
If you decide to make your own seed starting mix, start with a base of peat moss or coconut coir. These organic materials help retain moisture while providing good aeration for the roots. Next, add a portion of perlite or vermiculite to improve drainage and prevent waterlogged soil.
To further enhance the fertility of the mix, you can add compost or well-decomposed organic matter. These additions provide essential nutrients for seedling growth. However, be cautious not to use uncomposted or fresh manure, as it can introduce harmful pathogens to the seedlings.
Once you have the ingredients for your seed starting mix, thoroughly combine them in a bucket or large container. Ensure that the mix is well-blended to promote consistent moisture distribution and nutrient availability.
Before filling your seed trays or pots, moisten the seed starting mix with water. This will help settle the mix and make it easier to fill the containers. Be careful not to make it too wet, as overly saturated soil can lead to damping-off disease and hinder seedling growth.
Remember to thoroughly clean and sterilize your seed trays or pots before filling them with the seed starting mix. This helps prevent the spread of diseases and ensures a clean environment for your seedlings.
With the seed starting mix prepared, it’s now time to move on to planting the tomato seeds. In the next section, we will guide you through the process step by step.
Planting Tomato Seeds
Planting tomato seeds is an exciting step in the journey of growing your own tomatoes. To ensure successful germination and healthy seedling development, follow these steps:
- Select your seed trays or small pots. Ensure they have drainage holes to prevent waterlogging.
- Fill the trays or pots with the prepared seed starting mix, leaving a small space at the top.
- Moisten the mix with water, making it just damp, not overly saturated.
- Make small indentations in the soil using your finger or a pencil, about ¼ to ½ inch deep.
- Place a tomato seed in each indentation, then cover the seeds lightly with soil.
- Gently press down on the soil to ensure good seed-to-soil contact.
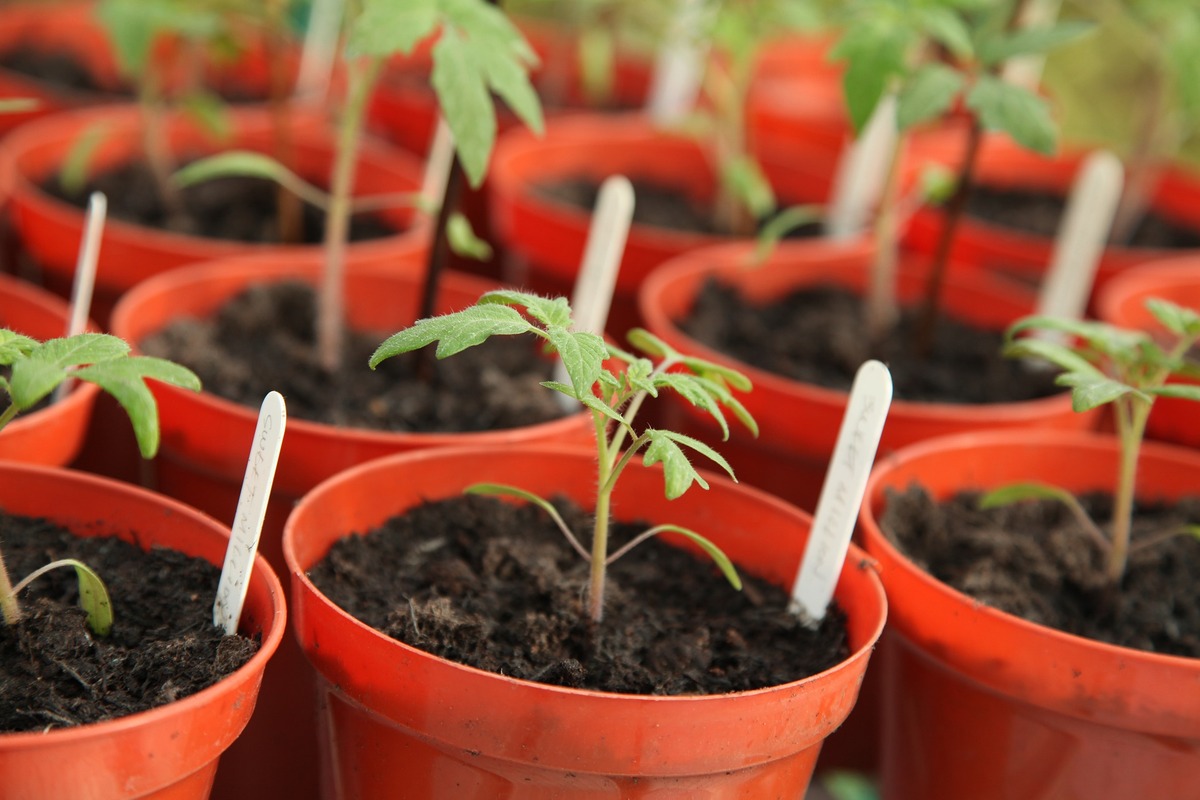
- Label each tray or pot with the tomato variety to keep track of what you’ve planted.
- Cover the trays or pots with a clear plastic dome or plastic wrap to create a greenhouse-like environment that retains moisture.
- Place the trays or pots in a warm location, ideally between 70-80°F (21-27°C), such as on a windowsill or using a heating mat.
- Check the trays or pots regularly and mist the soil with water if it starts to dry out.
- Germination typically occurs within 7-14 days, but some varieties may take longer, so be patient.
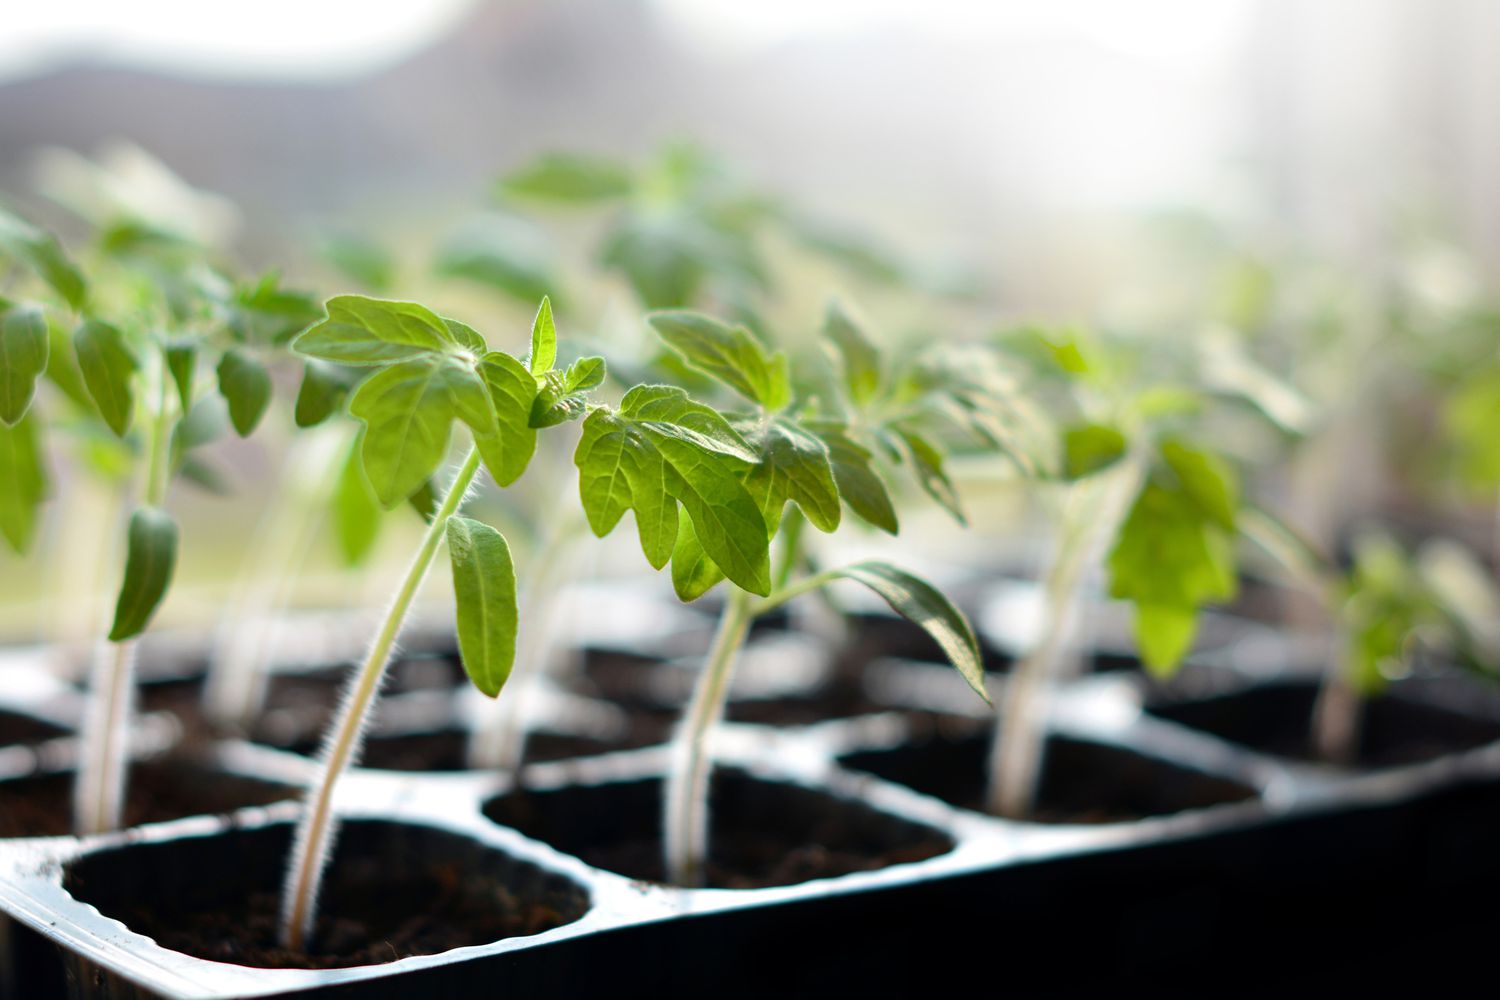
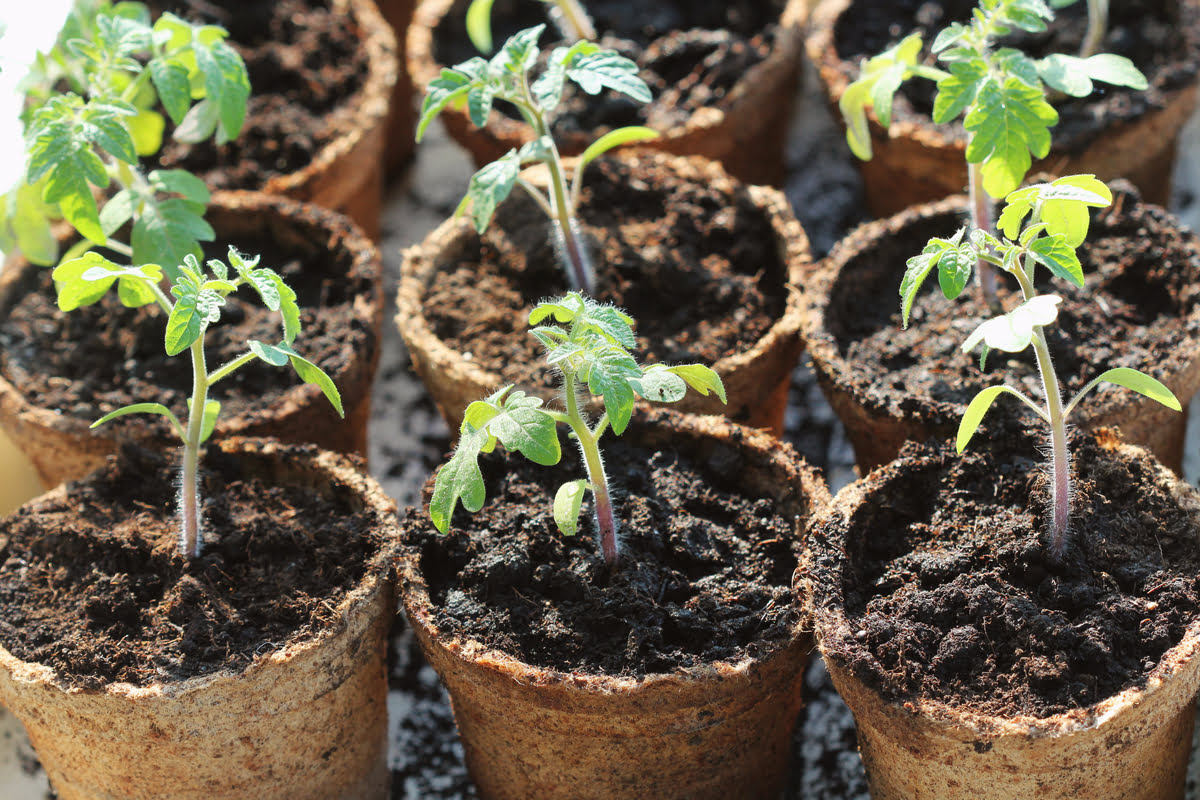
As the seedlings emerge, remove the plastic cover to prevent excessive humidity and encourage airflow. Place the trays or pots in a well-lit area, preferably under grow lights or near a sunny window. Provide at least 12-14 hours of light per day to ensure proper growth.
Now that your tomato seeds are planted, it’s time to ensure they receive adequate light for healthy growth. We will explore this topic in the next section.
Providing Adequate Light
Proper lighting is crucial for the development of strong and healthy tomato seedlings. When natural sunlight is limited, supplemental lighting becomes necessary to ensure optimal growth.
Seedlings require at least 12-14 hours of light per day to thrive. If you’re growing tomatoes indoors or in a location with insufficient natural light, consider using fluorescent grow lights or LED grow lights. These lights provide the necessary spectrum of light for photosynthesis.
When using grow lights, position them 2-4 inches above the tops of the seedlings. As the plants grow, adjust the lights accordingly to maintain the recommended distance. Keep the lights on for 12-14 hours a day, mimicking natural daylight hours.
It’s important to note that seedlings also need a period of darkness to rest. Aim for 8-10 hours of darkness during the night, ensuring they receive enough uninterrupted sleep. Providing the right balance of light and darkness will promote healthy and sturdy growth.
Keep an eye on your seedlings as they grow. If you notice them leaning or reaching towards the light source, it’s a sign that the light is not sufficient or too far away. Adjust the lights to ensure they are evenly distributed and maintain proper distance.
Rotate the trays or pots regularly to ensure all sides of the seedlings receive equal exposure to light. This will prevent the plants from becoming leggy and weak on one side.
Remember to monitor the temperature around the lights. Seedlings can be sensitive to heat, so make sure the lights don’t emit excessive heat that can damage the tender plants.
Providing adequate light is essential for strong and healthy tomato seedlings. In the next section, we will discuss another critical aspect of their care – watering.
Watering Tomato Seedlings
Proper watering is essential for the healthy development of tomato seedlings. However, it’s important to strike a balance – overwatering can lead to root rot and other problems, while underwatering can cause the seedlings to wilt and stunt their growth.
When watering your tomato seedlings, use a gentle and fine spray to prevent disturbing the delicate roots. Water the soil evenly, ensuring that it is moist but not saturated. Aim to keep the soil consistently damp, but not waterlogged.
One way to check if your seedlings need watering is by gently touching the top layer of soil. If it feels dry to the touch, it’s a sign that the seedlings require water. On the other hand, if the soil feels wet or if water puddles on the surface, hold off on watering until it dries out slightly.
It’s important to avoid letting the soil completely dry out or staying constantly soggy. Either extreme can harm the seedlings and hinder their growth. Consistency is key – provide a regular watering schedule to maintain moist but well-drained soil.
The frequency of watering will depend on various factors such as the size of the container, the type of soil, and environmental conditions. As a general guideline, check the soil moisture daily and adjust the watering accordingly. Hot and dry weather may require more frequent watering, while cool and humid conditions may warrant less frequent watering.
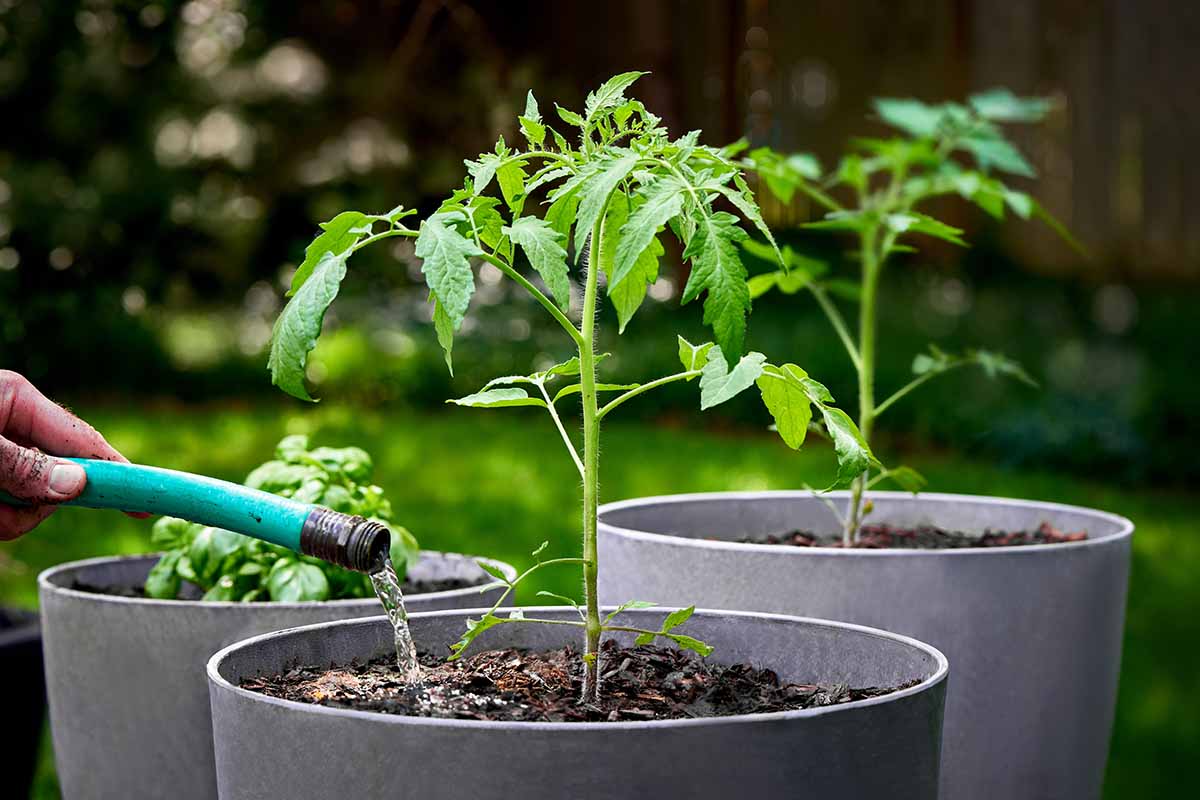
When watering, it’s best to direct the water at the base of the plants, avoiding wetting the foliage as much as possible. Wet leaves can increase the risk of fungal diseases. If water accidentally splashes onto the leaves, gently wipe them dry to prevent moisture retention.
Remember to provide consistent moisture to the seedlings throughout their growth. As they mature, their water needs will increase – continue to monitor the soil moisture and adjust your watering routine accordingly.
In the next section, we will discuss the importance of fertilizing tomato seedlings to provide them with the necessary nutrients for healthy growth.
Fertilizing Tomato Seedlings
Fertilizing tomato seedlings is an important step in their care to provide them with essential nutrients for healthy growth. While the seed starting mix may contain some nutrients initially, they are limited, and additional fertilization is necessary as the seedlings grow.
Before applying any fertilizer, it’s essential to understand the nutritional needs of tomato plants. They require a balanced blend of nitrogen (N), phosphorus (P), and potassium (K). Nitrogen promotes leaf and stem growth, phosphorus enhances root development and flower production, while potassium improves overall plant health and disease resistance.
There are various types of fertilizers available, including synthetic and organic options. Synthetic fertilizers provide nutrients in a readily available form, while organic fertilizers release nutrients slowly over time. Both can be effective, but many gardeners prefer organic fertilizers for their environmentally friendly and soil-building qualities.
When choosing a fertilizer, look for one specifically formulated for tomatoes or vegetables. These blends typically have the right balance of nutrients for optimal growth. Follow the instructions on the package regarding application rates, as over-fertilizing can burn the roots and damage the seedlings.
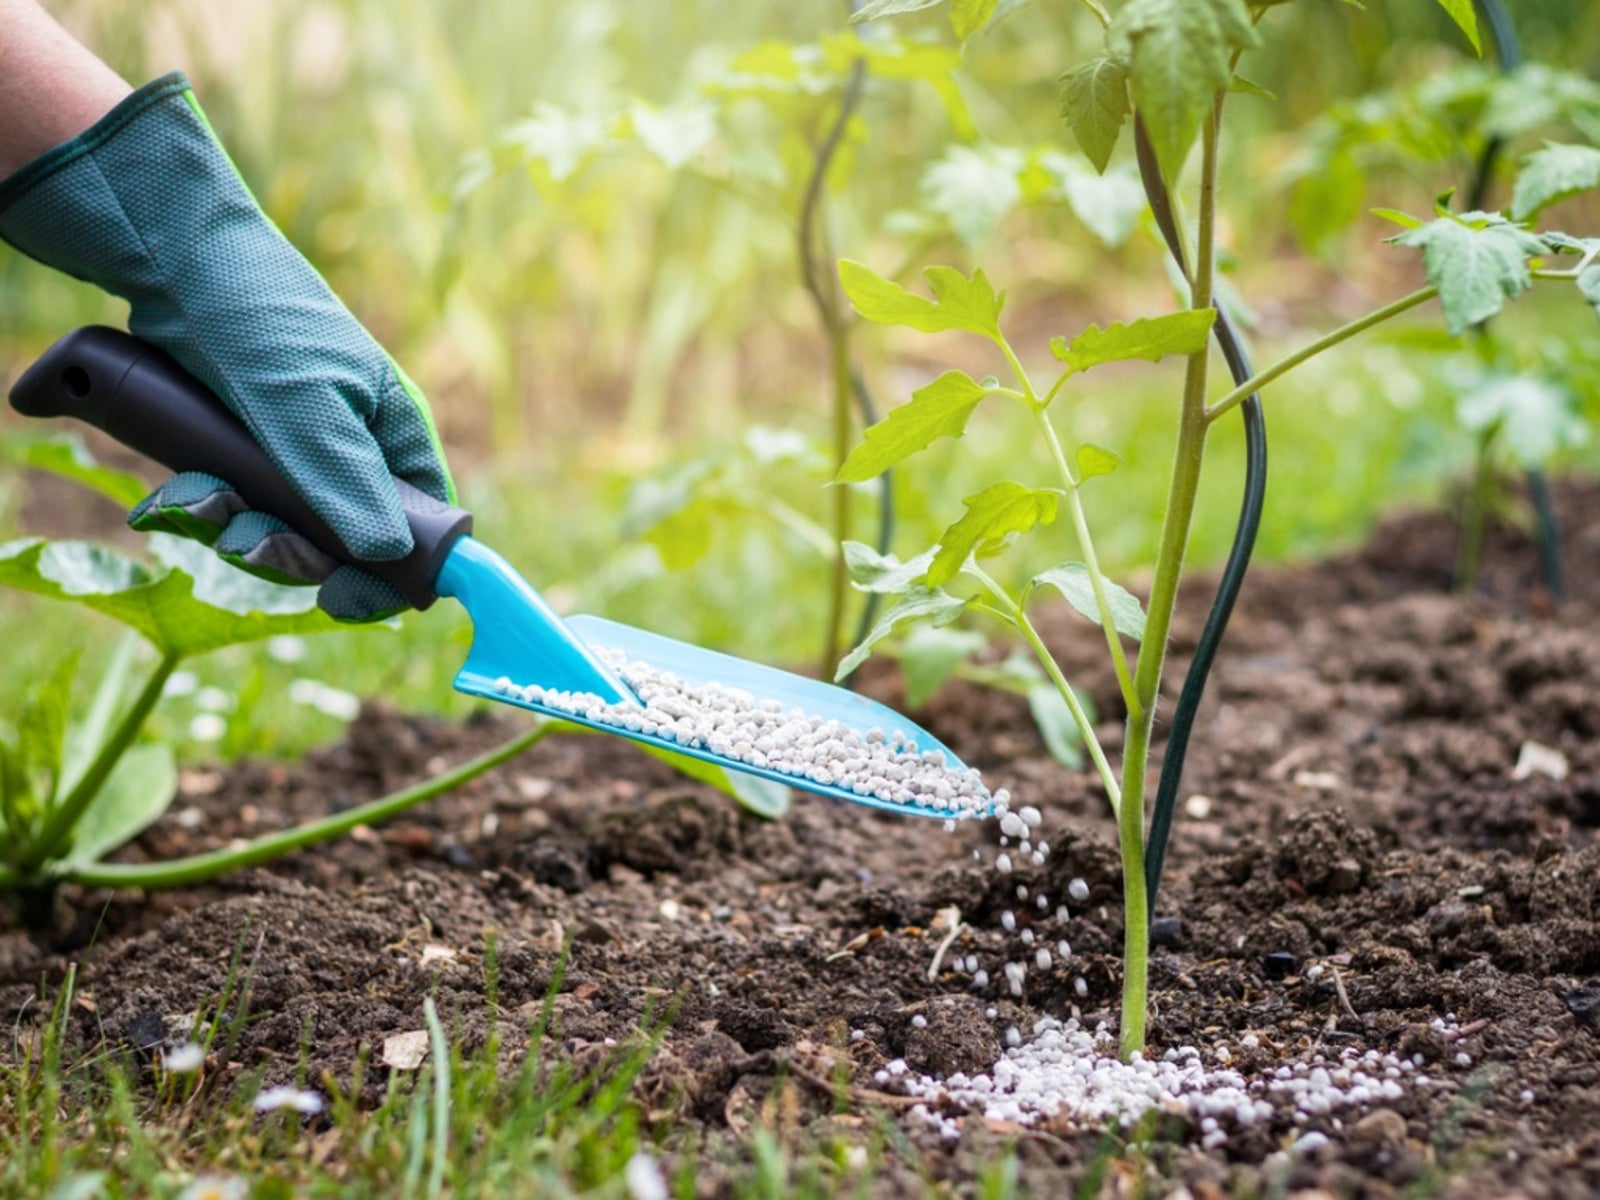
Start fertilizing tomato seedlings approximately two weeks after they have sprouted. Apply a diluted fertilizer solution according to the package instructions, avoiding direct contact with the seedlings’ stems. It’s best to water the seedlings first to prevent the fertilizer from concentrating in one spot.
Repeat the fertilization process every two to three weeks throughout the growing season to ensure a continuous supply of nutrients. As the seedlings mature and are ready for transplant, adjust the fertilizer application to match the needs of established tomato plants.
In addition to regular fertilization, it’s beneficial to incorporate organic matter into the soil before planting to improve overall soil fertility. Compost, well-rotted manure, or other organic amendments can enrich the soil and provide a gradual release of nutrients to the plants.
Keep in mind that too much fertilizer can be as detrimental as too little. Nitrogen excess can lead to excessive foliage growth at the expense of fruit production. Pay attention to the plants’ overall health and adjust the fertilization accordingly.
In the next section, we will discuss the process of transplanting tomato seedlings into their permanent garden or container homes.
Transplanting Tomato Seedlings
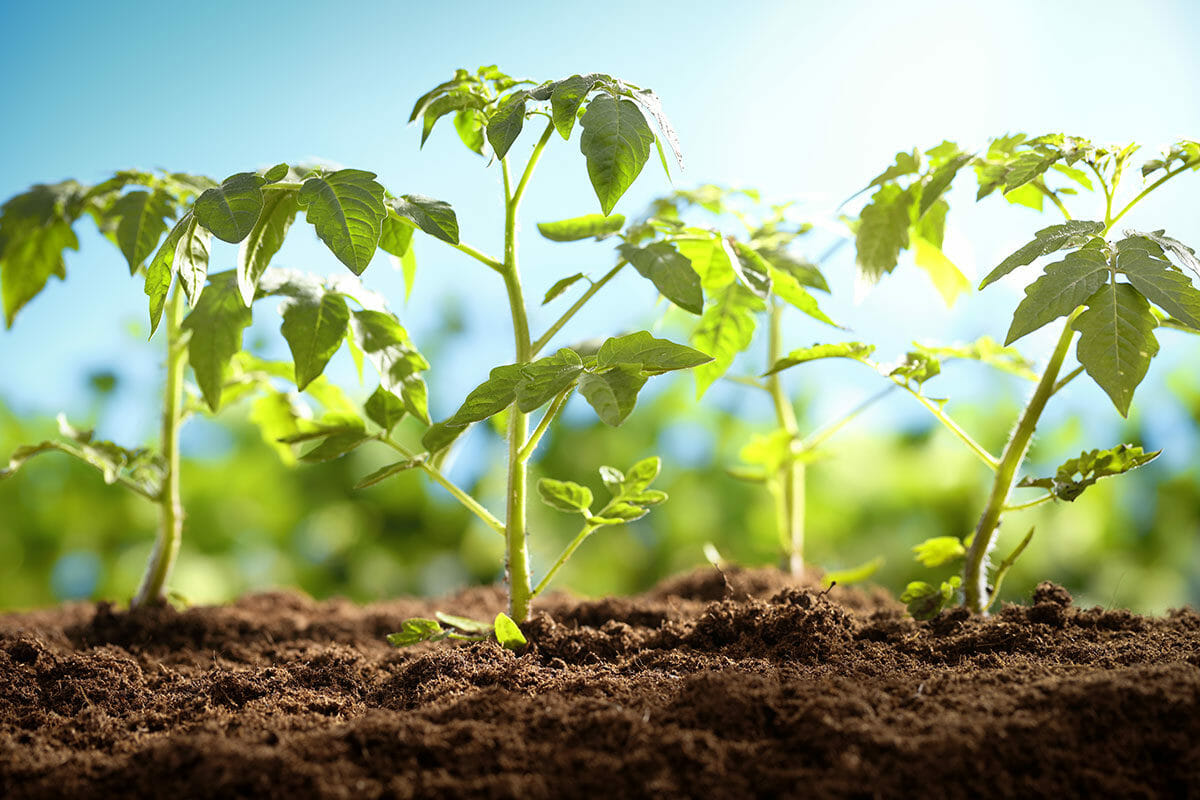
Transplanting tomato seedlings is an exciting step in the gardening journey, as it means your plants are ready to move into their permanent garden or container homes. This process should be done once the seedlings have developed sturdy stems and a few sets of true leaves, typically around 6-8 weeks after sowing.
Before transplanting, prepare the planting area by clearing any weeds and loosening the soil. Tomatoes prefer well-drained soil enriched with organic matter. If planting in containers, choose pots that are at least 18 inches deep and wide to accommodate the plant’s root system.
To avoid transplant shock, it’s important to harden off the seedlings before moving them outdoors. Harden off by gradually exposing them to outdoor conditions over the course of a week. Start by placing them in a sheltered spot with filtered sunlight for a few hours a day, gradually increasing the exposure time.
When transplanting, handle the seedlings carefully, holding them by the leaves to avoid damaging the delicate stems. Dig a hole in the planting area or container that is slightly larger than the root ball of the seedling. Gently place the seedling in the hole, making sure the soil level matches the level of the surrounding soil.
Once the seedling is in place, backfill the hole with soil, firming it gently around the base of the plant. Ensure there are no air pockets around the roots. Water the newly transplanted seedlings thoroughly to help settle the soil and provide immediate hydration.
After transplanting, monitor the seedlings closely for the first few days. Provide protection from extreme weather conditions such as strong winds or intense sunlight. Consider using tomato cages or stakes to support the plants as they grow and prevent them from bending or breaking.
It’s important to note that tomatoes thrive in warm temperatures. If there’s still a risk of frost in your region, consider using protective coverings such as row covers or cloches to provide additional warmth until the danger of frost has passed.
Continue to provide regular watering, making sure the soil stays consistently moist but not waterlogged. As the tomato plants establish themselves, regular deep watering is important to encourage deep root growth.
Now that the tomato seedlings are successfully transplanted, it’s time to focus on protecting them from pests and diseases. We will explore this topic in the next section.
Protecting Tomato Seedlings from Pests and Diseases
Just like any other plants in the garden, tomato seedlings are susceptible to various pests and diseases. Taking proactive measures to protect them is essential to ensure their healthy growth and a successful harvest. Here are some tips to keep pests and diseases at bay:
1. Keep the garden clean: Remove any debris, weeds, or fallen leaves around the tomato plants. These can attract pests and harbor diseases. Maintaining a clean and tidy garden reduces the hiding places for pests and minimizes the spread of diseases.
2. Provide adequate spacing: Proper spacing between tomato plants allows for better airflow and sunlight penetration. This helps to reduce the risk of fungal diseases, such as blight, by allowing the foliage to dry faster after rainfall or watering.
3. Mulch the soil: Apply a layer of organic mulch, such as straw or wood chips, around the base of the tomato plants. Mulch helps to suppress weeds, retain moisture, and regulate soil temperature. It also acts as a barrier, preventing soil-borne diseases from splashing onto the leaves during watering.
4. Monitor for pests: Regularly inspect the tomato plants for any signs of pest infestation. Common pests that attack tomatoes include aphids, tomato hornworms, and whiteflies. Remove any visible pests by hand or use organic pest control methods, such as spraying with insecticidal soap or introducing beneficial insects like ladybugs.
5. Practice crop rotation: Avoid planting tomatoes in the same spot year after year. Rotating crops helps to break the pest and disease cycle. Wait at least two to three years before replanting tomatoes in the same spot to reduce the risk of soil-borne diseases.
6. Use companion planting: Some plants repel pests or attract beneficial insects that can help protect tomato seedlings. For example, planting marigolds or basil near tomato plants can deter certain pests. Research companion planting options to maximize pest control in your garden.
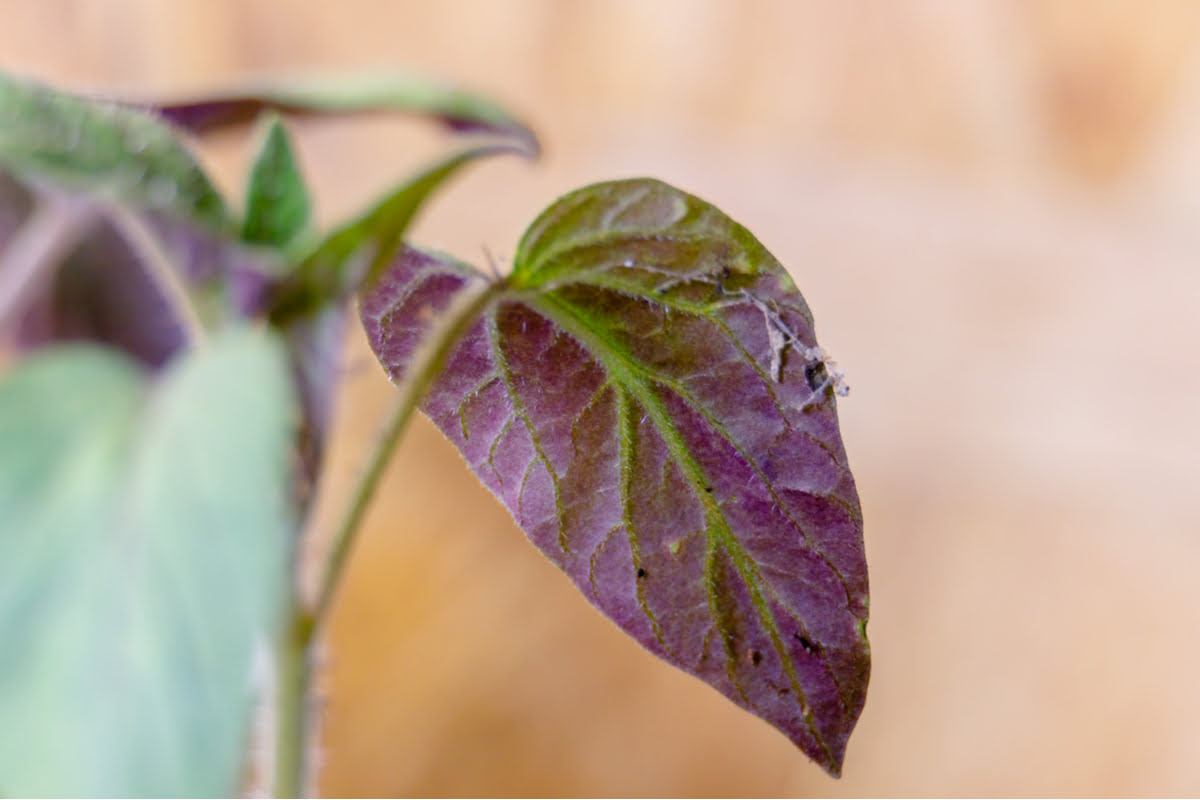
7. Act early on disease control: If you notice any signs of disease on your tomato plants, such as wilting, spots on leaves, or discoloration, take swift action. Remove and destroy affected plant parts to prevent the spread of the disease. Use organic fungicides if necessary and follow the instructions carefully.
By implementing these preventative measures and maintaining a vigilant eye on your tomato seedlings, you can minimize the impact of pests and diseases and ensure healthy plant growth.
In the next section, we will explore the process of hardening off tomato seedlings to prepare them for life outdoors.
Hardening Off Tomato Seedlings
Hardening off is a crucial step in the transition of tomato seedlings from the protected indoor environment to the harsher outdoor conditions. This process gradually acclimates the seedlings to factors such as temperature, sunlight, and wind, preparing them for life in the garden.
Start the hardening off process about a week before you plan to transplant the seedlings into the garden. Here’s a step-by-step guide for successful hardening off:
- Begin by placing the seedlings outdoors in a sheltered spot, such as a covered porch or under a shade tree. This will expose them to milder outdoor conditions while still offering some protection.
- Start with a few hours of outdoor exposure during the first day and gradually increase the time each day.
- Gradually expose the seedlings to direct sunlight, starting with filtered or early morning sun and gradually increasing the intensity over the course of a few days.
- Watch for signs of stress, such as wilting or yellowing leaves. If necessary, move the seedlings back to a more protected area or provide shade during the hottest part of the day.
- Gradually expose the seedlings to gentle breezes or light wind. This helps strengthen the stems and prepares them for outdoor gusts.
- Continue the hardening off process for about a week until the seedlings are spending the majority of the day outdoors.
During the hardening off period, continue regular watering as needed to keep the seedlings adequately hydrated. Be mindful of the outdoor conditions and adjust watering accordingly – outdoor air tends to be drier than indoor air, so the soil may dry out more quickly.
Remember that hardening off is a gradual process, allowing the seedlings to acclimate slowly to prevent shock or damage. Patience and attentiveness are key during this phase.
Once the tomato seedlings have successfully undergone the hardening off process, they are ready to be transplanted into the garden or containers. Take care to follow the proper transplanting guidelines discussed earlier.
In the next section, we will wrap up our discussion on caring for tomato seedlings and provide some final thoughts on the topic.
Final Thoughts on Caring for Tomato Seedlings
Caring for tomato seedlings is a rewarding and fulfilling experience that can ultimately lead to a bountiful harvest of delicious homegrown tomatoes. By following the proper techniques and giving attention to key aspects of care, you can set your seedlings up for success.
Remember to choose the right tomato seeds based on your preferences and growing conditions. Prepare a well-draining and nutrient-rich seed starting mix or purchase a pre-made one. Plant the seeds at the appropriate depth and provide them with adequate moisture and warmth for germination.
Once the seedlings emerge, ensure they receive sufficient light with the help of grow lights or proximity to a sunny window. Water the seedlings carefully, keeping the soil consistently moist but not waterlogged. Regularly fertilize with a balanced tomato-specific fertilizer to provide essential nutrients for growth.
When it’s time to transplant the seedlings, harden them off gradually to acclimate them to outdoor conditions. Protect the seedlings from pests and diseases by maintaining a clean garden, monitoring for signs of infestation, and practicing proper crop rotation.
Finally, enjoy the process of watching your seedlings grow and mature. Monitor their progress, make any necessary adjustments, and stay attentive to their needs.
As your tomato plants establish themselves in the garden, continue to provide them with care and attention. Prune when necessary to promote airflow, remove suckers for better fruit production, and stake or cage the plants for support.
Throughout the growing season, monitor for any signs of pests or diseases and take immediate action if needed. Water consistently and deeply, paying attention to soil moisture. Regularly harvest ripe tomatoes to encourage continued fruiting.
By caring for your tomato seedlings with diligence and passion, you’re setting the stage for a successful gardening journey. Soon enough, you’ll be rewarded with juicy, flavorful tomatoes that you can proudly say you grew yourself.
So, grab your gardening gloves, roll up your sleeves, and get ready to experience the joy of growing your own tomatoes from seed. Happy gardening!