Home>Garden Design>Landscape Design>How To Trim Landscaping Bushes
Landscape Design
How To Trim Landscaping Bushes
Modified: January 22, 2024
Learn how to trim your landscaping bushes and enhance your landscape design with our step-by-step guide. Achieve a well-manicured garden with expert tips.
(Many of the links in this article redirect to a specific reviewed product. Your purchase of these products through affiliate links helps to generate commission for Chicagolandgardening.com, at no extra cost. Learn more)
Table of Contents
Introduction
Welcome to the world of landscape design, where the beauty of nature meets the artistry of human creativity. One of the key elements in creating a stunning landscape is maintaining well-trimmed and manicured bushes. Whether you have a small residential garden or a large commercial space, knowing how to trim landscaping bushes is essential in achieving a polished and visually appealing outdoor environment.
Trimming bushes not only enhances their aesthetic appeal but also promotes their overall health and longevity. Regular trimming helps to shape the bushes, control their growth, and maintain their desired size. It also improves air circulation and sunlight penetration, reducing the risk of diseases and pest infestations.
However, trimming bushes is not simply about taking a pair of shears and snipping away. It requires careful planning, proper technique, and the right tools to achieve optimal results. In this article, we will guide you through the step-by-step process of trimming landscaping bushes, ensuring that you have the skills and knowledge to transform your outdoor space into a picturesque paradise.
Before we dive into the details, let’s take a look at the tools and equipment you will need for the task at hand.
Tools and Equipment Needed
Trimming landscaping bushes requires the right tools and equipment to ensure efficiency and accuracy. Before you begin, make sure you have the following items at your disposal:
- Pruning Shears: These handheld tools are essential for precise and clean cuts on smaller branches and stems. Look for pruning shears with a bypass or anvil design, as they tend to offer better control and minimize damage to the bushes.
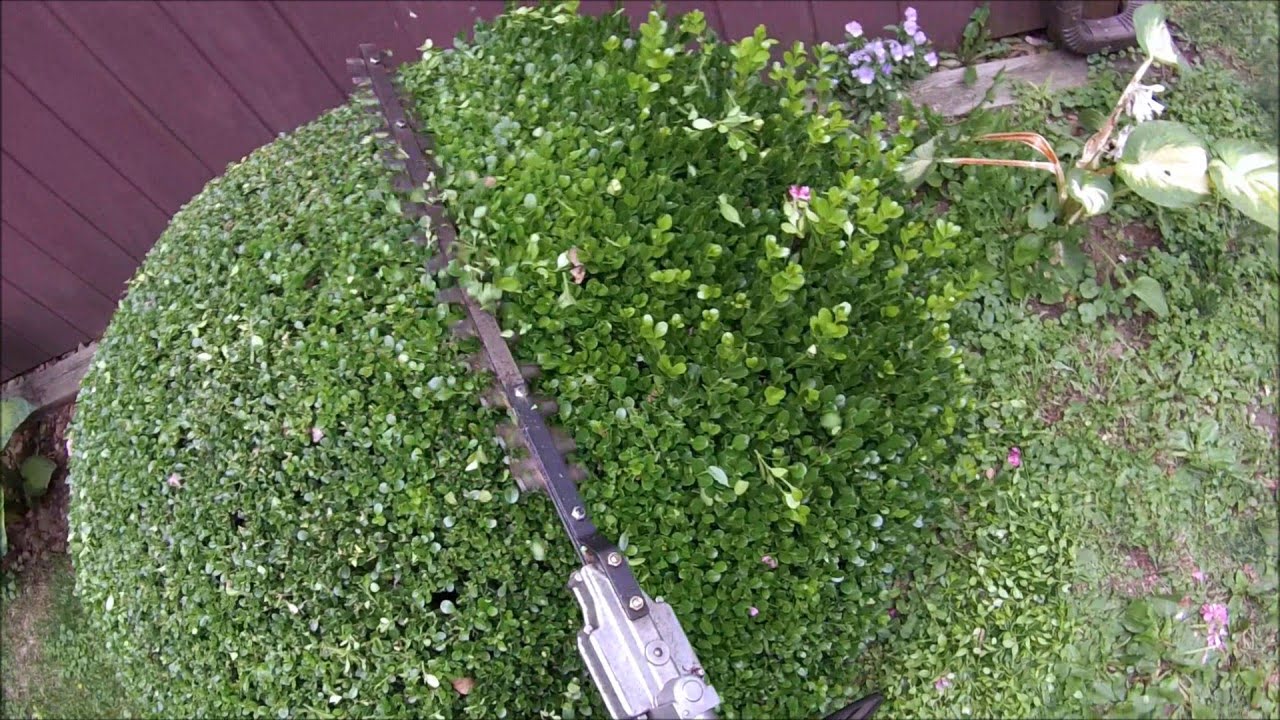
- Hedge Trimmers: For larger bushes or hedges, a pair of hedge trimmers will come in handy. They have longer blades and are designed to trim multiple branches at once. Choose between manual hedge trimmers, which require more physical effort, or electric hedge trimmers for a more effortless trimming experience.
- Lopping Shears: Lopping shears are ideal for trimming thicker branches that are too large for pruning shears. These long-handled tools provide extra leverage, making it easier to cut through dense bushes.
- Pole Pruners: If you have tall bushes or trees, a pole pruner allows you to reach higher branches without the need for a ladder. They consist of a long pole with a cutting mechanism attached to the end, providing you with the necessary reach and control.
- Gloves: Protect your hands with a pair of sturdy gardening gloves. They will not only provide extra grip on the tools but also shield your hands from thorns and other potential hazards.
- Safety Glasses: When trimming bushes, there is always a risk of debris or branches flying towards your face. Protect your eyes with safety glasses to prevent any injuries.
- Ladder: If you have bushes or hedges that are taller than you can reach, a sturdy ladder will be necessary for safe and efficient trimming. Choose a ladder that is the appropriate height and stable.
These tools and equipment will ensure that you are well-equipped to tackle any trimming task that comes your way. Once you have gathered everything you need, let’s move on to the first step: assessing the bushes.
Step 1: Assessing the Bushes
Before you start trimming your landscaping bushes, it’s important to assess their current condition and determine your desired outcome. Take a walk around your garden or outdoor space and carefully examine each bush. Here are a few factors to consider during the assessment:
- Growth Pattern: Observe how the bushes have grown over time. Look out for any branches that are overgrown, crossing each other, or growing in unwanted directions.
- Shape and Size: Think about the desired shape and size for your bushes. Are they intended to be formal hedges or more natural, free-flowing shapes? This will help guide your trimming techniques later on.
- Health and Vitality: Check for any signs of disease or pest infestations. Look for discolored foliage, dead branches, or evidence of insect damage. Make a note of any areas that may require extra attention or potential treatment.
- Environment and Surroundings: Consider the overall aesthetics of your outdoor space. Determine how the bushes fit into the larger landscape and whether they complement other elements such as trees, flowers, or structures.
By assessing these factors, you can develop a clear vision of how you want your bushes to look and identify any problem areas that need to be addressed during the trimming process. This assessment will help you make informed decisions about how much to trim and which trimming techniques to use.
Once you have completed the assessment, it’s time to move on to step two: choosing the right trimming technique.
Step 2: Choosing the Right Trimming Technique
Choosing the appropriate trimming technique is crucial to achieving the desired look for your landscaping bushes. The technique you use will depend on the shape and style you want to create. Here are a few common trimming techniques to consider:
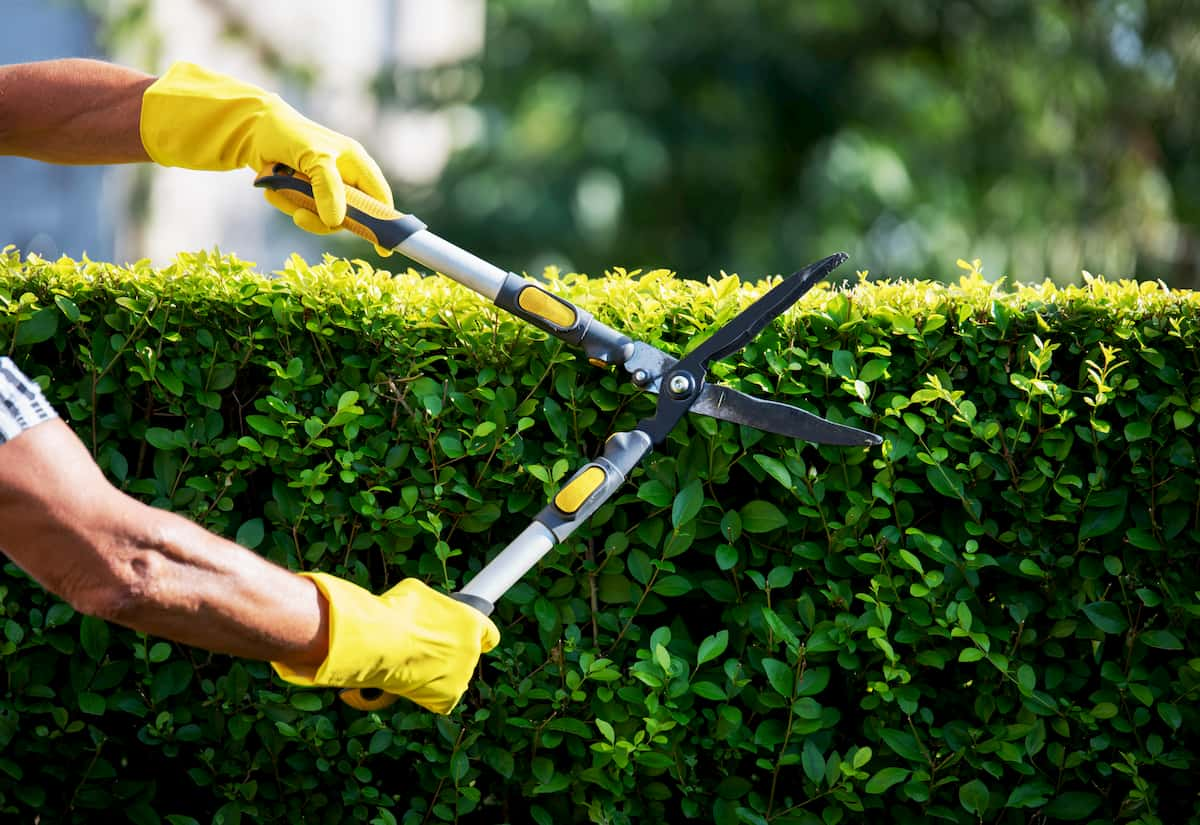
- Formal Hedge Trim: This technique is often used for creating neat and structured hedges. It involves trimming the bushes into a straight or geometric shape, such as a box or a cone. To achieve a clean and uniform look, use hedge trimmers and guide the blade along a string or a guide board for straight lines.
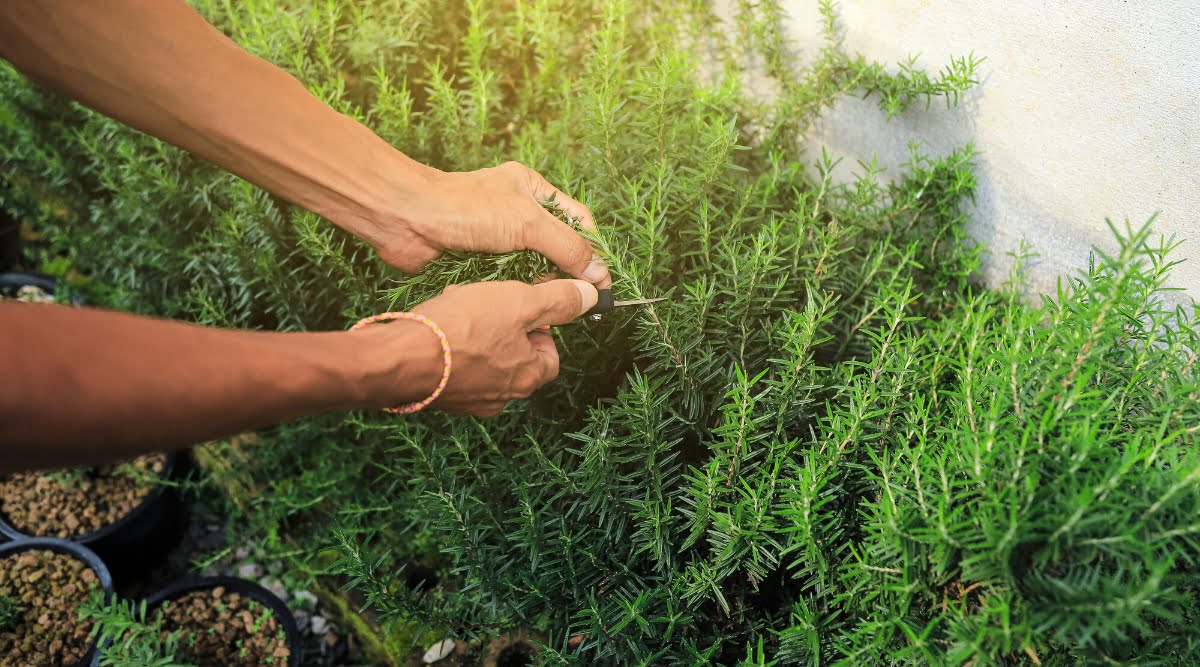
- Natural or Free-Form Trim: If you prefer a more organic and natural look, opt for this technique. It involves selectively pruning branches to maintain the overall shape of the bush while allowing for a more relaxed and irregular silhouette. Use pruning shears to carefully trim back any overgrown branches or to shape the bush to your desired form.
- Topiary Trim: This technique is for those who want to unleash their creativity and transform their bushes into unique shapes and designs. Topiary involves carefully shaping the bushes into intricate forms such as animals, geometric shapes, or sculptures. It requires meticulous trimming and may require specialized topiary shears or wire frames to guide the shaping process.
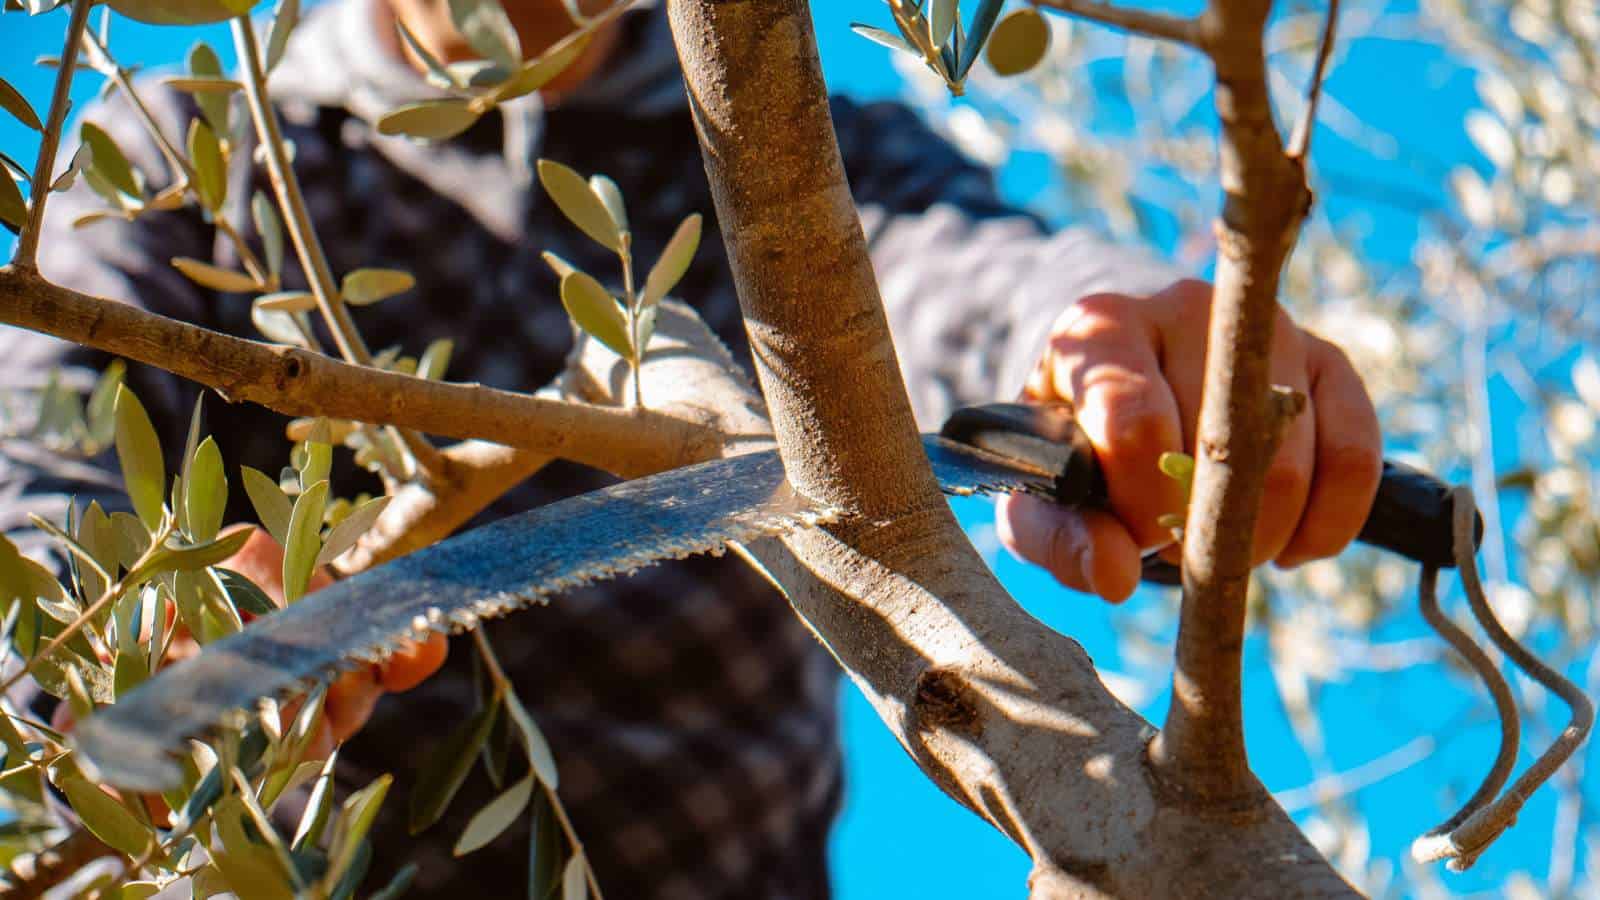
- Renewal Trim: If your landscaping bushes have become overgrown or untidy, a renewal trim can help rejuvenate their appearance. This technique involves removing old, dead, or damaged branches to promote new growth and improve the overall health of the bushes. Use lopping shears or pole pruners to reach higher branches, and pruning shears for smaller ones.
Consider the shape and style you want to achieve, as well as the growth pattern and health of your bushes when choosing the most suitable trimming technique. Remember, it’s important to strike a balance between achieving your desired look and maintaining the overall health and well-being of the bushes.
Once you have selected the appropriate trimming technique, it’s time to move on to step three: preparing the bushes for trimming.
Step 3: Preparing the Bushes for Trimming
Before you dive into trimming your landscaping bushes, it’s important to properly prepare them for the task at hand. This step will ensure smooth and effective trimming while minimizing the risk of damage. Here are some key steps to follow when preparing the bushes:
- Clean the Area: Clear away any debris or fallen leaves around the bushes. This will give you a clean workspace and make it easier to see the shape and structure of the bushes.
- Water the Bushes: Make sure the bushes are well-hydrated before trimming. Watering them a day or two in advance will help ensure they are not stressed and will recover more easily from any pruning cuts.
- Disinfect your Tools: If you have previously used your pruning tools on diseased plants or bushes, it’s essential to disinfect them before using them on healthy ones. This will prevent the spread of diseases and protect the overall health of your landscaping.
- Identify Dead or Diseased Branches: Take a close look at the bushes and identify any dead or diseased branches that need to be removed. Dead branches may be brittle and easily break, while diseased branches can spread infections. Remove them using the appropriate pruning shears or lopping shears.
- Remove Suckers and Sprouts: Suckers are the unwanted shoots that grow from the base of the bushes, while sprouts are the vigorous vertical shoots that emerge from the middle of the bushes. Prune them back to maintain a clean, well-shaped appearance.
- Follow the Natural Growth Pattern: When trimming, try to work with the natural growth pattern of the bushes. This will help maintain their natural shape and ensure optimal growth in the long run. Avoid excessive pruning that could weaken or distort the bushes.
By following these preparation steps, you will create a favorable environment for successful trimming. Your bushes will be hydrated and in good health, and your tools will be clean and ready to go. With the bushes prepared, you are now ready to move on to the next step: trimming the bushes.
Step 4: Trimming the Bushes
Now that you have prepared the bushes and selected the appropriate trimming technique, it’s time to dive into the actual trimming process. Follow these steps to achieve precise and professional-looking results:
- Start with the Outer Branches: Begin trimming from the outermost branches and work your way towards the center. This will ensure an even and balanced look for the bushes.
- Use the Right Tools: Depending on the size and thickness of the branches, switch between pruning shears, hedge trimmers, or lopping shears as needed. Ensure that your tools are sharp and clean for efficient and clean cuts.
- Trim at an Angle: For a more natural and aesthetically pleasing look, trim the branches at a slight angle rather than straight across. This will help prevent water from pooling on the cut surface and promote proper healing.
- Step Back and Assess: Periodically step back and assess the bushes to gauge your progress. This will allow you to make any necessary adjustments and ensure that you are achieving the desired shape and look.
- Balance the Growth: While trimming, pay attention to the growth patterns and balance the branches accordingly. Trim back any excessively long or unruly branches to maintain overall symmetry and form.
- Layer the Bushes: If you have multiple layers of bushes or hedges, trim each layer to give them a tiered and visually appealing appearance. Gradually trim each layer shorter than the one in front to create depth and dimension.
- Remove Potential Hazards: During trimming, keep an eye out for any branches that may pose a safety risk or obstruct pathways. Trim them back to ensure a safe and clear outdoor environment.
Remember to take breaks as needed and keep yourself hydrated throughout the trimming process. The key is to approach the task with patience and precision, ensuring that each cut contributes to the overall beauty and health of the bushes.
Once you have completed the trimming process, it’s time to move on to the next step: cleaning up the trimmings.
Step 5: Cleaning up the Trimmings
After you have successfully trimmed your landscaping bushes, it’s important to clean up the trimmings and maintain a tidy outdoor space. Here are some steps to follow for efficient cleanup:
- Collect the Trimmings: Gather all the branches, leaves, and debris that have been trimmed from the bushes. Use a rake or a leaf blower to gather them into a pile for easier disposal.
- Compost or Dispose: If the trimmings are mostly organic, consider composting them if you have a composting area. If not, dispose of the trimmings in accordance with your local waste management guidelines.
- Sweep or Hose Down: Use a broom or a hose to remove any small twigs, leaves, or clippings that are left on the ground. This will help prevent tripping hazards and keep your outdoor space looking neat and clean.
- Inspect for Damage: Once the trimmings are cleared, take a moment to inspect the bushes for any accidental damage that may have occurred during the trimming process. Make note of any broken branches or signs of stress and address them appropriately.
- Prune Overgrown Neighbors: If your bushes are close to other plants, structures, or fences, take the opportunity to prune any overgrown branches that may be encroaching on these neighboring elements. This will help maintain a harmonious and well-defined outdoor space.
- Dispose of Tools Safely: Properly clean your trimming tools and store them in a safe and dry location. This will keep them in good condition for future use and prevent any accidents or injuries.
By thoroughly cleaning up the trimmings and ensuring the surrounding area is free from debris, you will not only create a visually appealing outdoor environment but also maintain a safe and inviting space for yourself and others to enjoy.
With the trimmings cleaned up, you are now ready for the final step: adding the finishing touches and implementing maintenance tips.
Step 6: Final Touches and Maintenance Tips
With the trimming process complete, it’s time to add the final touches to your beautifully manicured landscaping bushes. Here are some final touches and maintenance tips to consider:
- Apply Mulch: Add a layer of mulch around the base of the bushes to retain moisture, suppress weed growth, and improve the overall appearance of your landscaping. Mulch also helps regulate soil temperature, providing a conducive environment for healthy growth.
- Fertilize: Give your bushes a nutrient boost by applying a slow-release fertilizer designed for shrubs and bushes. This will provide essential nutrients and promote healthy growth and vibrant foliage.
- Water Adequately: Make sure to provide the bushes with sufficient water, especially during dry spells or hot summer months. Deep watering promotes stronger root development and helps the bushes withstand stress and disease.
- Monitor for Pests and Diseases: Regularly inspect your bushes for signs of pests, diseases, or nutrient deficiencies. Early detection and treatment will help prevent the spread of problems and maintain the health of your landscaping.
- Prune Regularly: Schedule regular pruning sessions to maintain the shape and size of your landscaping bushes. Light and selective pruning throughout the year will keep the bushes looking neat and prevent them from becoming overgrown.
- Adjust the Trimming Schedule: Depending on the growth rate of your bushes, you may need to trim them more frequently. Monitor their growth and adjust your trimming schedule accordingly to ensure they maintain their desired shape and size.
- Protect from Extreme Weather: During harsh weather conditions such as strong winds, heavy snowfall, or intense heat, consider protecting your bushes with burlap wraps or temporary coverings to prevent damage.
- Consult a Professional: If you are unsure about any aspect of trimming or maintaining your landscaping bushes, don’t hesitate to seek guidance from a professional landscaper or horticulturist. They can provide expert advice tailored to your specific needs.
By implementing these final touches and adhering to proper maintenance practices, your landscaping bushes will continue to thrive and enhance the beauty of your outdoor space for years to come.
Congratulations! You have completed the steps to successfully trim your landscaping bushes. By following this comprehensive guide, you have gained the skills and knowledge to transform your outdoor environment into a stunning and well-maintained landscape.
Remember, maintaining your bushes is an ongoing process, and regular attention and care will ensure that they stay healthy and visually appealing. So, put on your gardening gloves, grab your shears, and let your creativity and love for nature shine as you trim and shape your landscaping bushes.
Conclusion
Trimming landscaping bushes is an essential skill for those seeking to create a visually stunning and well-maintained outdoor space. By following the step-by-step guide outlined in this article, you have learned the intricacies of assessing the bushes, choosing the right trimming technique, preparing the bushes, and effectively carrying out the trimming process. Additionally, you have gained knowledge about cleaning up trimmings, adding final touches, and implementing maintenance tips to ensure the long-term health and beauty of your landscaping.
Remember, proper trimming not only enhances the aesthetics of your bushes but also promotes their overall health and longevity. It allows for better airflow and sunlight penetration, reducing the risk of diseases and pest infestations. Regular maintenance, including proper watering, fertilizing, and monitoring for pests, is equally essential to maintain the health and beauty of your bushes.
While this guide provides a comprehensive overview of trimming landscaping bushes, it’s important to tailor your approach to the specific needs of your bushes and the landscape as a whole. Each outdoor space is unique, with different types of bushes, growth patterns, and environmental factors to consider. Don’t hesitate to seek guidance from professionals or garden centers if you come across specific challenges or require further expertise.
With the knowledge and skills acquired from this guide, you are well-equipped to transform your outdoor environment into a breathtaking landscape. So, put on your gardening gloves, pick up your shears, and let your creativity and passion for landscaping flourish as you trim and shape your bushes. Enjoy the process, and marvel at the beauty you can create with a little bit of patience, technique, and love for nature.