Home>Gardening Techniques>Plant Care>How To Trim Shrubs Round
Plant Care
How To Trim Shrubs Round
Modified: January 22, 2024
Learn effective plant care techniques to trim shrubs into beautiful round shapes. Discover expert tips and step-by-step instructions for achieving professional results.
(Many of the links in this article redirect to a specific reviewed product. Your purchase of these products through affiliate links helps to generate commission for Chicagolandgardening.com, at no extra cost. Learn more)
Table of Contents
Introduction
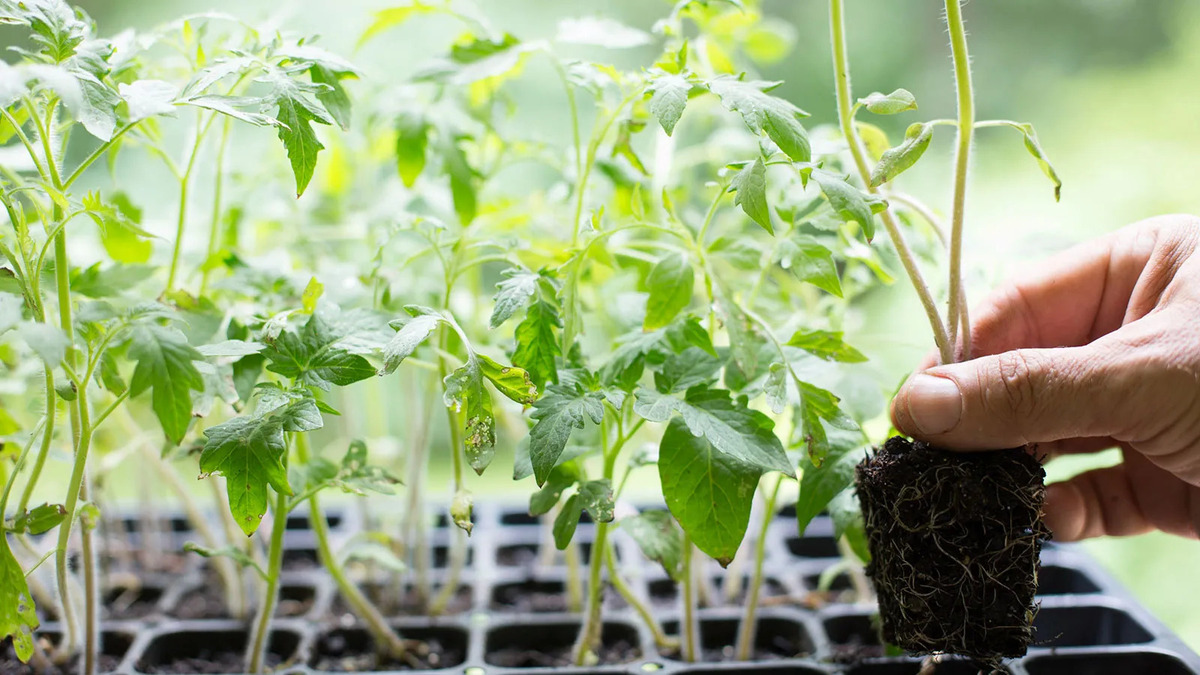
Welcome to the world of plant care! If you’re looking to add a touch of elegance to your garden or outdoor space, maintaining well-trimmed shrubs is essential. Not only do they enhance the overall aesthetic appeal, but they also promote healthy growth and development.
Trimming shrubs is not just about giving them a uniform shape. It’s a delicate art that requires careful attention to detail and an understanding of the plant’s needs. Whether you’re a seasoned gardener or just starting your plant care journey, this article will guide you through the process of trimming shrubs. From the tools and materials needed to the step-by-step techniques, we’ll cover everything you need to know to keep your shrubs in top shape.
But before we jump into the practical aspects, let’s take a moment to understand the importance of shrub trimming. Trimming not only improves their overall appearance but also promotes the growth of new branches and leaves. It helps maintain the plant’s size and shape, preventing it from getting out of control and overgrowing its designated space.
Regular trimming also enhances air circulation within the shrub, reducing the risk of diseases and pest infestation. By removing dead or damaged branches, trimming encourages the growth of healthy ones and promotes better nutrient absorption. In essence, trimming is like giving your shrubs a rejuvenating makeover, ensuring their long-term health and vitality.
So, whether you have ornamental shrubs in your front yard or hedges lining your property, it’s essential to learn how to trim them properly. Not only will this add beauty to your outdoor space, but it will also provide you with a sense of pride and satisfaction in caring for your plants. Now, let’s gather our tools and get ready to transform your shrubs into stunning works of art!
Tools and Materials Needed
Before you start trimming your shrubs, it’s important to gather the necessary tools and materials. Having the right equipment will make the process easier and more efficient. Here are the essential tools and materials you’ll need:
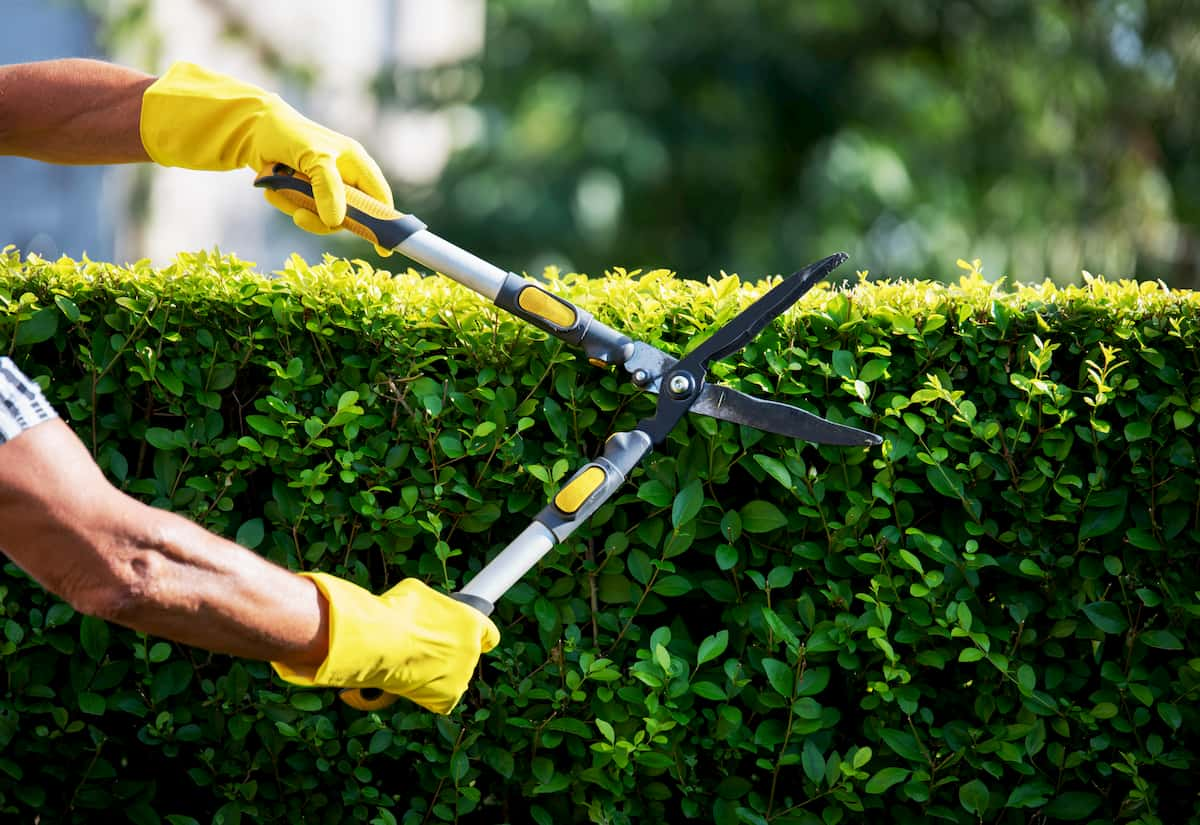
- Pruning Shears: These handheld scissors-like tools are perfect for making precise cuts on small branches and stems.
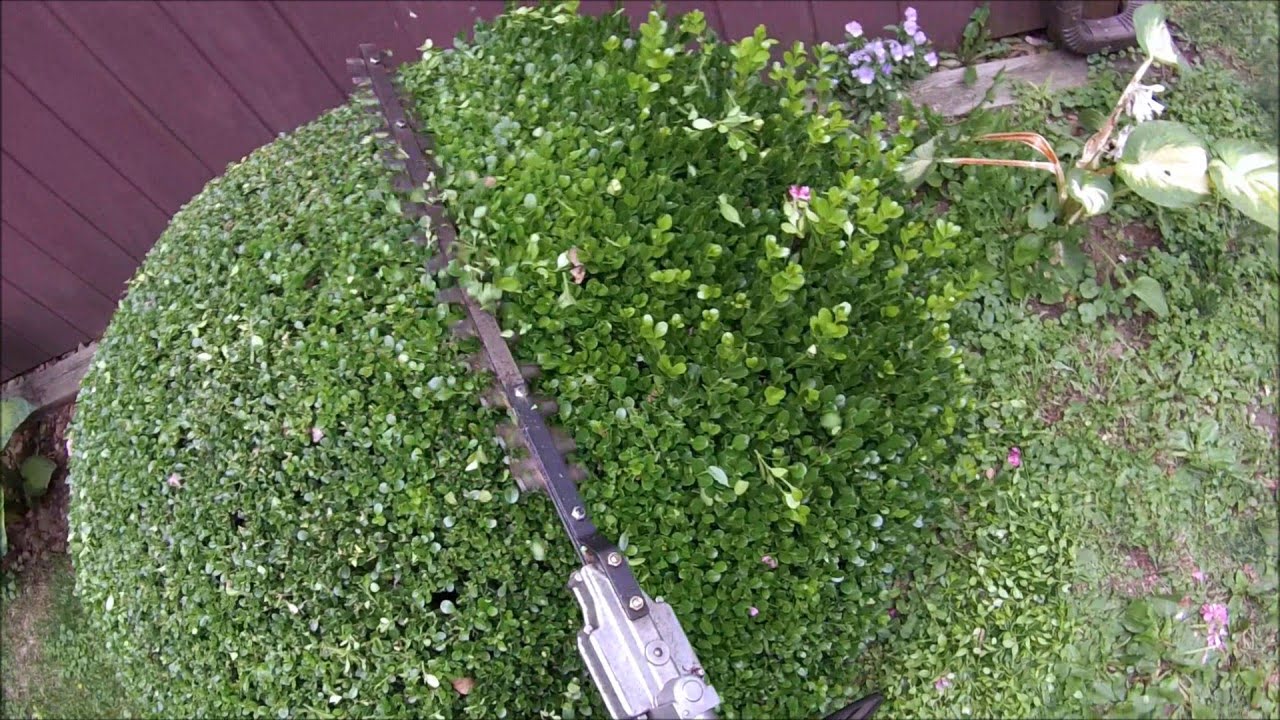
- Hedge Trimmers: If you have larger shrubs or hedges, invest in a good pair of hedge trimmers. These powerful tools make it easier to shape and trim larger areas in less time.
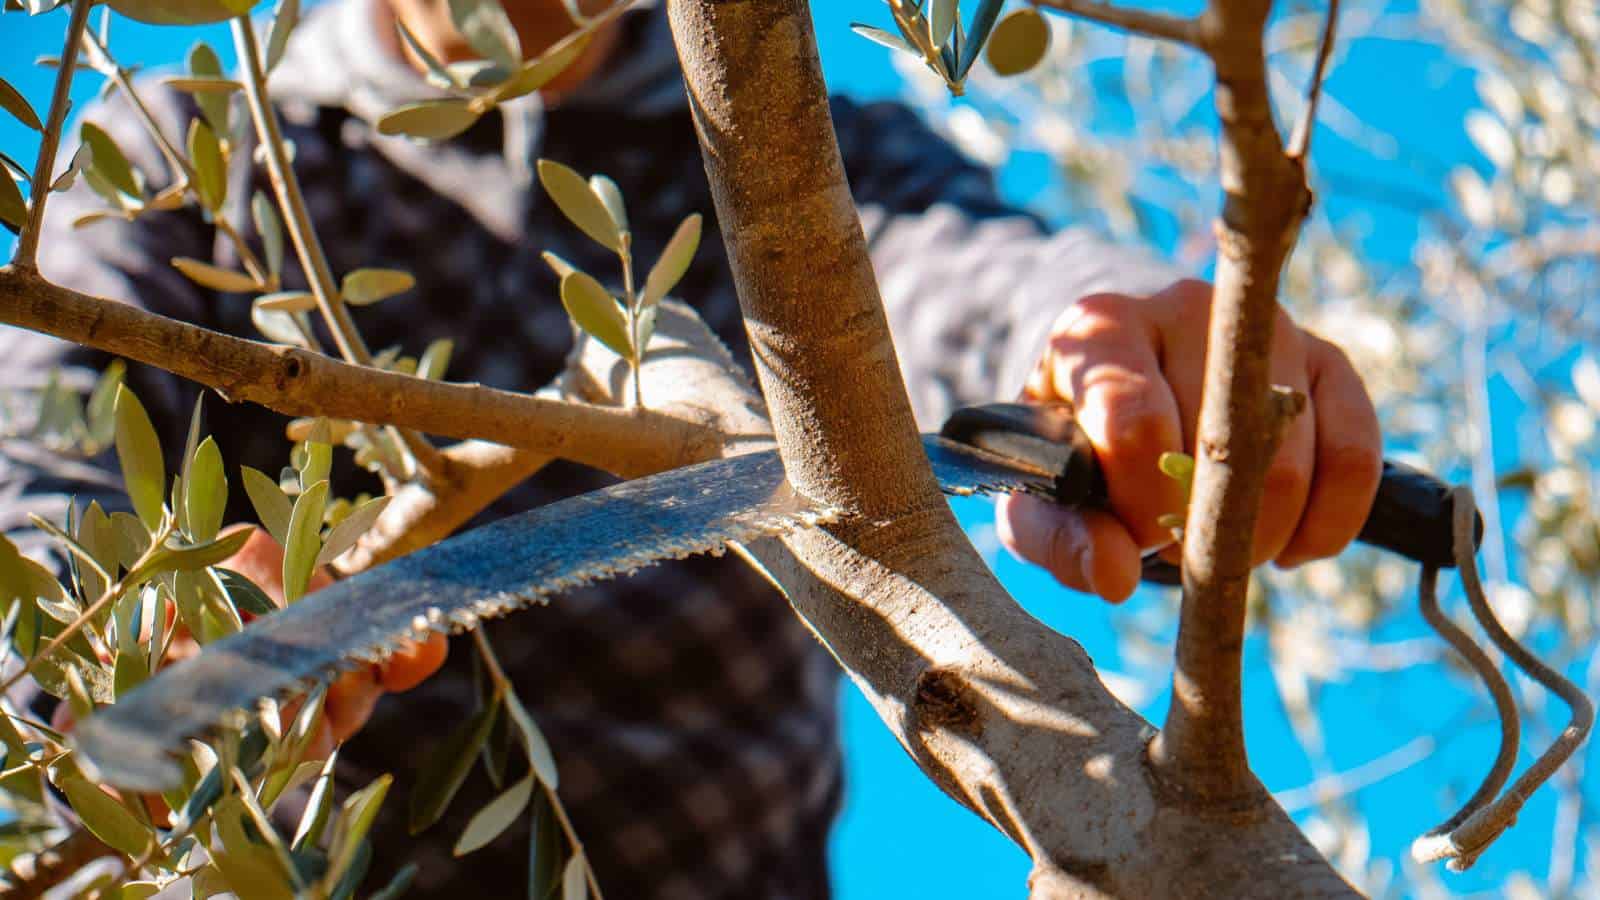
- Loppers: Loppers are designed for cutting through thicker branches. They have long handles and a pruning blade that can handle branches with a diameter of up to 2 inches.
- Pruning Saw: For larger shrubs with thicker branches, a pruning saw will come in handy. This tool allows you to make clean and precise cuts on branches that are too thick for loppers or shears.
- Gloves: Protect your hands from prickly shrubs and potential cuts by wearing a pair of sturdy gardening gloves.
- Safety Goggles: Safety should always be a priority when working with sharp tools. Wear safety goggles to protect your eyes from flying debris.
- Ladder or Step Stool: Depending on the height of your shrubs, you may need a ladder or step stool to reach the higher branches safely.
- Rake and Shears Cleaner: After trimming, you’ll need a rake to collect the trimmed branches and leaves. Additionally, investing in a shears cleaner will help keep your tools in top shape by removing sap and dirt.
- Disinfectant: It’s important to clean and disinfect your tools before and after trimming to prevent the spread of diseases or pests.
With these tools and materials ready, you are well-prepared to tackle the task of trimming your shrubs. Remember to prioritize safety by wearing protective gear and ensuring that your tools are in good working condition. Now that you have everything you need, let’s move on to the next steps to achieve beautifully trimmed shrubs!
Step 1: Assessing the Shrubs
Before you dive into trimming your shrubs, it’s crucial to assess their current condition and determine the goals you want to achieve with your trimming efforts. By taking the time to assess your shrubs, you’ll have a better understanding of where and how much to trim. Here are some important factors to consider during the assessment:
- Overall Health: Examine the overall health of the shrub. Look for signs of disease, pest infestation, or any other issues that may require special attention.
- Growth Pattern: Take note of the growth pattern of the shrub. Identify any branches that are crossing or rubbing against each other, as these may need to be trimmed to prevent further damage.
- Size and Shape: Determine the desired size and shape of the shrub. This will guide you in making decisions about how much to trim and the style you want to achieve.
- Location: Consider the location of the shrubs and how they fit into the overall landscape. Keep in mind any nearby structures, walkways, or other plants that may be affected by the shrub’s growth.
- Seasonal Considerations: Consider the time of year and the specific requirements of the shrub species. Some shrubs may have specific growth patterns or flowering seasons that may influence your trimming decisions.
- Personal Preference: Lastly, take into account your personal preference and the desired aesthetic for your garden or outdoor space. Consider whether you prefer a more formal and manicured look or a more natural and organic appearance.
By carefully assessing your shrubs, you can make informed decisions about which areas to trim and how to achieve your desired results. This step is crucial for achieving a well-balanced and visually pleasing final outcome.
Once you have assessed your shrubs, you are ready to move on to the next step: choosing the right time for trimming. This step is essential to ensure the optimal growth and health of your shrubs. Let’s explore this further in the next section.
Step 2: Choosing the Right Time for Trimming
Timing is crucial when it comes to trimming shrubs. Choosing the right time to trim ensures the best results and minimizes any potential harm to the plants. While the specific timing can vary depending on the type of shrub, there are some general guidelines to follow:
Post-Flowering: For flowering shrubs, it’s generally recommended to wait until after they have finished flowering before trimming. This allows the plant to fully bloom and ensures that you won’t unintentionally cut off any potential flowers.
Early Spring: Early spring is an ideal time for trimming most types of shrubs. By trimming in early spring, you allow the shrub to redirect its energy towards new growth and development. It also gives the plant ample time to recover before facing the stresses of summer.
Post-Growth Spurt: Another suitable time for trimming is just after the shrub’s growth spurt during the summer. This is typically in late summer or early fall. Trimming at this time helps maintain the shape and size of the shrub and promotes healthy growth for the following year.
Winter Dormancy: Some deciduous shrubs can be pruned during their dormant period in winter. However, it’s important to note that not all shrubs can be safely pruned during winter. Consult specific plant care guides or seek advice from a gardening professional to ensure you’re making the right choice.
In addition to considering the seasonal timing, it’s crucial to avoid trimming during extreme weather conditions such as extreme heat or cold. Trimming during these times can put additional stress on the plant and hinder its recovery.
Remember, each shrub species may have its own unique requirements when it comes to trimming. Be sure to research specific shrubs or consult with local gardening experts for more guidance on the best time to trim each particular type of shrub in your garden.
Now that you’ve chosen the right time for trimming, it’s time to prepare the shrubs for the trimming process. In the next section, we’ll explore the essential steps to get your shrubs ready for a fresh new look.
Step 3: Preparing the Shrubs
Before you start trimming your shrubs, it’s important to prepare them properly. This step ensures that the trimming process goes smoothly and reduces the risk of damage to the plants. Here are the essential steps to prepare your shrubs:
- Clean the Surrounding Area: Clear away any debris, mulch, or fallen leaves around the base of the shrubs. This not only provides you with a clear workspace but also prevents any excess trimmings from getting tangled in the surrounding plants or ground cover.
- Inspect and Remove Obstacles: Check the shrubs for any obstacles, such as rocks, stakes, or other plants growing too close to the shrub. Remove any obstructions that may hinder your access or cause damage during the trimming process.
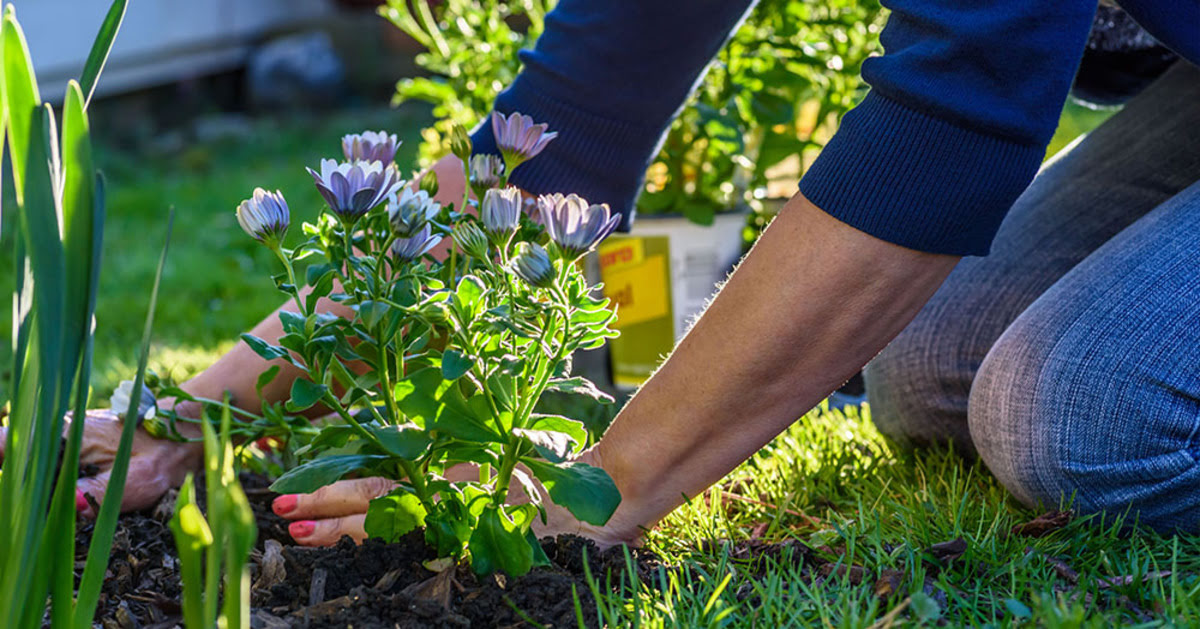
- Water the Shrubs: Ensure that the shrubs are well-hydrated before trimming. Adequate hydration helps the shrub recover from the trimming process and promotes healthy growth. Water the shrubs a day or two before trimming if they haven’t received enough moisture recently.
- Disinfect Your Tools: Before you start trimming, it’s important to clean and disinfect your pruning tools. This prevents the spread of diseases or pests between plants. Use a mild bleach solution or a disinfectant specifically designed for garden tools, and follow the manufacturer’s instructions. Wipe down the blades and handles of your tools to remove any dirt or residue.
- Decide on a Trim Style: Determine the desired style or shape you want to achieve with your shrubs. This will help guide your trimming decisions and ensure consistency throughout the process. Popular trim styles include rounded, square, and natural-looking shapes that complement the overall landscape.
- Set Realistic Goals: Assess the size and condition of the shrubs and set realistic goals for trimming. Remember that over-pruning can harm the shrubs’ health and appearance. Focus on removing dead or damaged branches, improving shape and structure, and creating a tidy and well-maintained appearance.
By taking the time to properly prepare your shrubs, you’re setting the stage for a successful trimming session. Following these steps will minimize any potential risks and ensure a clean and precise trimming process. Now that you’ve prepared your shrubs, you’re ready to dive into the trimming technique. We’ll explore this in the next section.
Step 4: Trimming Technique
Now that you have prepared your shrubs, it’s time to delve into the trimming technique. A proper trimming technique ensures clean cuts, promotes healthy growth, and enhances the overall appearance of the shrubs. Here are the step-by-step instructions to follow:
- Start with Dead or Damaged Branches: Begin by identifying and removing any dead or damaged branches. These branches inhibit the shrub’s growth and can potentially spread diseases to healthy parts of the plant. Use pruning shears or loppers to make clean cuts just above the branch collar.
- Trim for Shape and Size: Next, focus on shaping the shrub to achieve your desired style. Trim branches that extend beyond the desired shape or size, making sure to maintain a balanced appearance. Use your pruning shears or hedge trimmers to make precise cuts at a slight angle.
- Thin Out Dense Areas: If your shrub looks too dense, consider thinning it out by selectively removing some branches from the interior. This improves airflow and light penetration, reducing the risk of diseases and promoting healthier growth. However, be cautious not to remove too many branches, as it may harm the shrub’s structure and overall health.
- Check for Crossed or Rubbing Branches: Look for branches that are crossing or rubbing against each other. These branches can create wounds and increase the risk of disease. Select one of the crossing branches and trim it back to the main branch to eliminate the rubbing. This allows for better airflow and prevents further damage.
- Step Back and Assess: As you trim, step back frequently to assess your progress. This helps ensure that you’re maintaining the desired shape and balance. Take your time and make adjustments as needed. Remember, it’s better to take a conservative approach and make gradual adjustments rather than over-pruning.
Throughout the trimming process, it’s important to make clean and precise cuts. Avoid leaving stubs, as they can become entry points for pests and diseases. Also, be mindful of the shrub’s natural growth pattern and work with it rather than against it. This helps maintain the shrub’s natural form and promotes healthier growth.
Now that you have mastered the trimming technique, let’s move on to the next step: shaping the shrubs. Shaping adds the finishing touch, giving your shrubs a polished and well-defined appearance. We’ll explore this in the following section.
Step 5: Shaping the Shrubs
Shaping your shrubs is the final step in achieving a well-manicured and aesthetically pleasing appearance. This step adds the finishing touch and helps create a cohesive look in your garden. Here’s how you can shape your shrubs:
- Refine the Outline: Step back and assess the overall shape of your shrub. Use handheld shears or hedge trimmers to refine the outline and create clean, crisp edges. Trim any stray branches or shoots that disrupt the desired shape.
- Create Smooth Transitions: Pay attention to the transition areas between different parts of the shrub. Make gradual and subtle adjustments to ensure a smooth flow between sections. This helps create a natural and visually appealing appearance.
- Consider the Viewpoints: Think about how the shrub will be viewed from various angles and perspectives. Trim the shrub accordingly to achieve a pleasing shape and balance from all viewpoints. Remember, the shrub should look visually appealing from all sides, not just from one angle.
- Add Tapering Effects: To create a more natural and organic appearance, consider adding tapering effects to the shrub’s branches. Tapering involves trimming branches in a way that leaves the lower branches slightly longer than the upper ones. This creates a layered effect and adds depth to the shrub’s appearance.
- Maintain Proportions: Ensure that the size and proportions of your shrub are appropriate for its surroundings. Take into consideration the other plants, structures, and space available. Aim for a well-balanced and harmonious composition that complements the overall landscape.
- Step Back and Assess Again: As you shape your shrub, step back frequently to assess your progress. This helps ensure consistency and allows you to make any necessary adjustments. Take your time and make gradual changes until you achieve the desired shape and appearance.
Remember, shaping is a process that requires patience and attention to detail. Take your time and make small adjustments as needed. Avoid over-shaping or removing too much foliage, as it can harm the shrub’s overall health and compromise its natural form.
Once you are satisfied with the shape of your shrubs, it’s time to move on to the final step: post-trimming care. This step is important to promote the shrubs’ recovery and maintain their health. Let’s explore this further in the next section.
Step 6: Post-Trimming Care
After you have completed trimming and shaping your shrubs, it’s important to provide them with proper post-trimming care. This care helps the shrubs recover from the trimming process and ensures their continued health and vitality. Here are some essential post-trimming care steps to follow:
- Clean Up Trimmed Debris: Remove any trimmings from the shrub and the surrounding area. Rake up fallen branches, leaves, and clippings to prevent them from smothering the plant or becoming a breeding ground for pests and diseases. Proper cleanup also enhances the overall appearance of your garden.
- Water the Shrubs: Give your shrubs a thorough watering after trimming. This helps them replenish their moisture levels and aids in their recovery. Water the shrubs deeply, ensuring the root zone receives enough moisture. However, avoid overwatering, as excess moisture can lead to root rot.
- Apply Mulch: Apply a layer of organic mulch around the base of the shrubs. Mulch helps conserve moisture, regulate temperature, and reduce weed growth. It also adds nutrients to the soil as it breaks down over time. Avoid piling mulch against the shrub’s trunk, as it can lead to rot or pests.
- Monitor for New Growth: Keep an eye on your shrubs for any signs of new growth. This indicates that the trimming process has stimulated the shrubs and they are recovering well. New growth is a positive sign that your shrubs are on the path to regaining their health and vitality.
- Fertilize if Necessary: Depending on the specific needs of your shrubs, you may consider applying a slow-release, balanced fertilizer. This can provide necessary nutrients for healthy growth and aid in the recovery process. Follow the packaging instructions and avoid over-fertilization, as it can harm the shrubs.
- Pest and Disease Prevention: Keep a close watch for any signs of pests or diseases on your shrubs. Regularly inspect them for any abnormalities, such as leaf discoloration, pest infestation, or unusual growth patterns. Taking immediate action against pests or diseases can prevent them from spreading and causing further damage.
Proper post-trimming care goes a long way in ensuring the success of your shrub trimming efforts. By following these steps, you’ll help your shrubs recover quickly, promoting healthy growth and beautiful foliage. Remember to continue providing regular maintenance and care to keep your shrubs thriving in the long run.
With the completion of post-trimming care, you have successfully gone through the essential steps of trimming and caring for your shrubs. By following these steps and incorporating your personal style, you can maintain beautiful, well-trimmed shrubs that add beauty and elegance to your garden or outdoor space.
Conclusion
Trimming shrubs is a rewarding and essential aspect of plant care. By following the step-by-step process outlined in this article, you can maintain the health, shape, and aesthetic appeal of your shrubs. Remember to assess your shrubs, choose the right time for trimming, and properly prepare them before diving into the trimming process.
Throughout the trimming process, use proper technique to make clean and precise cuts. Take your time to shape the shrubs, considering the desired style, proportions, and viewpoints. Post-trimming care, including cleaning up debris, watering, and monitoring for new growth, is crucial to ensuring the shrubs’ recovery and continued health.
By incorporating these practices into your plant care routine, you can keep your shrubs looking their best year-round. Regular trimming and maintenance will promote healthy growth, improve air circulation, and prevent the risk of diseases and pests.
Remember to consider the specific needs of each shrub species and seek guidance if needed. Gardening is a dynamic process, and it’s important to stay informed and adapt your trimming approach accordingly.
So, go ahead and put your newfound knowledge into practice. Take pride in caring for your shrubs and enjoy the beauty they bring to your outdoor space. With the right tools, techniques, and a touch of creativity, you can transform your shrubs into stunning visual masterpieces!