Home>Gardening Techniques>Plant Care>How To Transplant Shrubs
Plant Care
How To Transplant Shrubs
Published: October 22, 2023
Learn how to transplant shrubs and ensure their proper growth with our comprehensive guide on plant care.
(Many of the links in this article redirect to a specific reviewed product. Your purchase of these products through affiliate links helps to generate commission for Chicagolandgardening.com, at no extra cost. Learn more)
Table of Contents
- Introduction
- Step 1: Assessing the shrub
- Step 2: Choosing the right time
- Step 3: Preparing the new planting hole
- Step 4: Preparing the shrub for transplanting
- Step 5: Digging up the shrub
- Step 6: Transplanting the shrub
- Step 7: Watering and Mulching the Shrub
- Step 8: Caring for the Transplanted Shrub
- Conclusion
Introduction
Welcome to the world of plant care! Whether you’re a seasoned gardener or just starting out, knowing how to properly transplant shrubs is a valuable skill. Transplanting allows you to reposition a shrub to a more suitable location, rejuvenate its growth, or expand your garden. However, it’s crucial to approach the process with care to ensure the health and longevity of the shrub.
In this article, we’ll guide you through the step-by-step process of transplanting shrubs. We’ll cover everything from assessing the shrub to caring for it after the transplant. By following these steps, you’ll be well-equipped to successfully undertake this task and achieve stunning results.
Transplanting shrubs involves more than just digging up and moving the plant. It requires careful planning, timing, and execution. You need to consider factors such as the shrub’s size, root system, age, and the conditions of the new planting spot. By taking these factors into account, you can reduce stress on the shrub and increase its chances of thriving in its new environment.
Before we dive into the steps, it’s important to note that different shrub species may have specific requirements or preferences when it comes to transplanting. It’s always a good idea to consult plant care resources or seek advice from a local nursery or gardening expert. They can provide tailored guidance for your specific shrub species.
Are you ready to learn how to transplant shrubs like a pro? Let’s get started with the first step: assessing the shrub to determine if it’s a good candidate for transplanting.
Step 1: Assessing the shrub
Before you jump right into transplanting a shrub, take the time to assess its overall health and viability for relocation. Not all shrubs are suitable candidates for transplanting, especially if they are in poor condition or have extensive root systems. Here’s how to assess your shrub:
1. Evaluate the health of the shrub: Look for signs of disease, pest infestations, or other issues that may affect the shrub’s long-term survival. If the shrub is struggling or severely compromised, it may not be a good candidate for transplanting. It’s better to focus your efforts on rejuvenating the shrub or replacing it with a healthier specimen.
2. Consider the size and age of the shrub: Transplanting large, mature shrubs can be more challenging due to their extensive root systems and size. Younger shrubs with smaller root balls are generally easier to transplant. Keep in mind that older shrubs may have deeper roots that could make digging more difficult.
3. Examine the root system: Carefully inspect the roots of the shrub to ensure they are healthy and well-structured. Look for a well-developed and balanced network of roots. If the roots are tangled, circling, or compacted, it may be a sign that the shrub has outgrown its current location and needs to be transplanted.
4. Assess the site conditions: Determine if the shrub’s current location is suitable for its long-term growth. Factors to consider include sunlight exposure, soil conditions, drainage, and proximity to other plants. If the site conditions are unfavorable, moving the shrub to a more suitable location can improve its overall health and vitality.
5. Timing is crucial: Transplanting should ideally be done during the shrub’s dormant season in late fall or early spring. Avoid transplanting during periods of extreme heat, drought, or freeze, as these conditions can stress the shrub and reduce its chances of successful establishment.
Remember: If you’re uncertain about the health or suitability of a shrub for transplanting, seeking advice from a professional landscaper or horticulturist is always a good idea. They can provide expert guidance and help you make informed decisions about the best course of action for your shrub.
Step 2: Choosing the right time
Timing is crucial when it comes to transplanting shrubs. Choosing the right time ensures that the shrub has the best chance of successfully establishing itself in its new location. Here are some factors to consider when determining the optimal time for transplanting:
1. Dormant season: The dormant season, which is typically late fall or early spring, is the best time to transplant most shrubs. During this period, the shrub is not actively growing and is more resilient to the stress of being uprooted. Transplanting during the dormant season allows the shrub to focus its energy on developing a new root system rather than diverting resources to support its foliage.
2. Weather conditions: Pay attention to the weather forecast when planning your transplanting project. Ideally, choose a day when the weather is mild and stable, with moderate temperatures and no extreme weather conditions such as heavy rain, strong winds, or frost. Extreme weather can increase the stress on the shrub and negatively impact its chances of survival.
3. Soil moisture: Ensure that the soil is slightly moist before transplanting. If the soil is too dry, the shrub may not have enough moisture to support its new root growth. Water the shrub thoroughly a day or two before transplanting to ensure that the soil is adequately hydrated.
4. Time of day: It’s best to transplant shrubs in the early morning or late afternoon when the sun is less intense. Avoid transplanting during the hottest part of the day, as the heat can cause the shrub to wilt and increase the risk of transplant shock. Transplanting during cooler parts of the day minimizes stress on the shrub and gives it a better chance of quickly recovering.
5. Consider the specific shrub: Different shrub species may have specific timing preferences for transplanting. Some may tolerate transplanting better when they are actively growing, while others may prefer the dormant season. Research the specific requirements of the shrub you are transplanting or consult with a gardening expert to ensure you choose the optimal time for that particular species.
By carefully considering these factors and choosing the right time for transplanting, you set the stage for a successful and seamless transition for your shrub. It’s always better to plan ahead and ensure ideal conditions rather than rushing the transplanting process.
Step 3: Preparing the new planting hole
Before you can transplant the shrub, it’s essential to prepare a suitable planting hole in its new location. The quality of the planting hole plays a vital role in ensuring the shrub’s successful establishment. Follow these steps to prepare the new planting hole:
1. Choose the right location: Select a location for the new planting hole based on the shrub’s specific requirements. Consider factors such as sunlight exposure, soil drainage, and proximity to other plants. Ensure that the new location provides optimal conditions for the shrub’s growth and health.
2. Measure the root ball: Determine the size of the shrub’s root ball, which is the soil and root system that will be transplanted. Use a tape measure to measure the diameter and depth of the root ball. The planting hole should be slightly larger than the root ball to allow for proper root expansion.
3. Dig the hole: Use a shovel or a garden spade to dig the new planting hole. Make the hole wide and deep enough to accommodate the root ball. The depth of the hole should be equal to the height of the root ball, and the width should be two to three times the diameter of the root ball.
4. Loosen the soil: Break up any compacted soil at the bottom of the planting hole to promote better root growth. Use a garden fork or a small hand rake to loosen the soil. This will help the shrub’s roots penetrate the soil more easily and establish themselves in the new location.
5. Improve soil quality: If the soil in the planting hole is poor in quality or lacking nutrients, consider amending it with organic matter such as compost or well-rotted manure. This will help provide the shrub with essential nutrients and improve the soil structure for better root development.
6. Backfill the hole: Fill the bottom of the planting hole with a layer of soil, creating a small mound. Carefully place the shrub’s root ball on top of the mound, ensuring that it is positioned at the same depth as it was in its previous location. Gradually backfill the hole with soil, gently firming it around the root ball as you go.
7. Water the shrub: After backfilling the hole, thoroughly water the shrub to settle the soil and remove any air pockets around the roots. This will help the shrub establish good root-to-soil contact. Use a slow, gentle stream of water to avoid washing away the soil.
Remember: Proper preparation of the new planting hole sets the foundation for the shrub’s successful transition. Take the time to ensure that the soil is well-prepared, nutrient-rich, and properly sized for the shrub’s root ball. This will give the shrub the best chance to thrive in its new home.
Step 4: Preparing the shrub for transplanting
Preparing the shrub for transplanting is a critical step in ensuring its successful relocation. By taking the necessary precautions and steps to prepare the shrub, you can minimize stress and increase its chances of thriving in its new environment. Here’s how to prepare the shrub for transplanting:
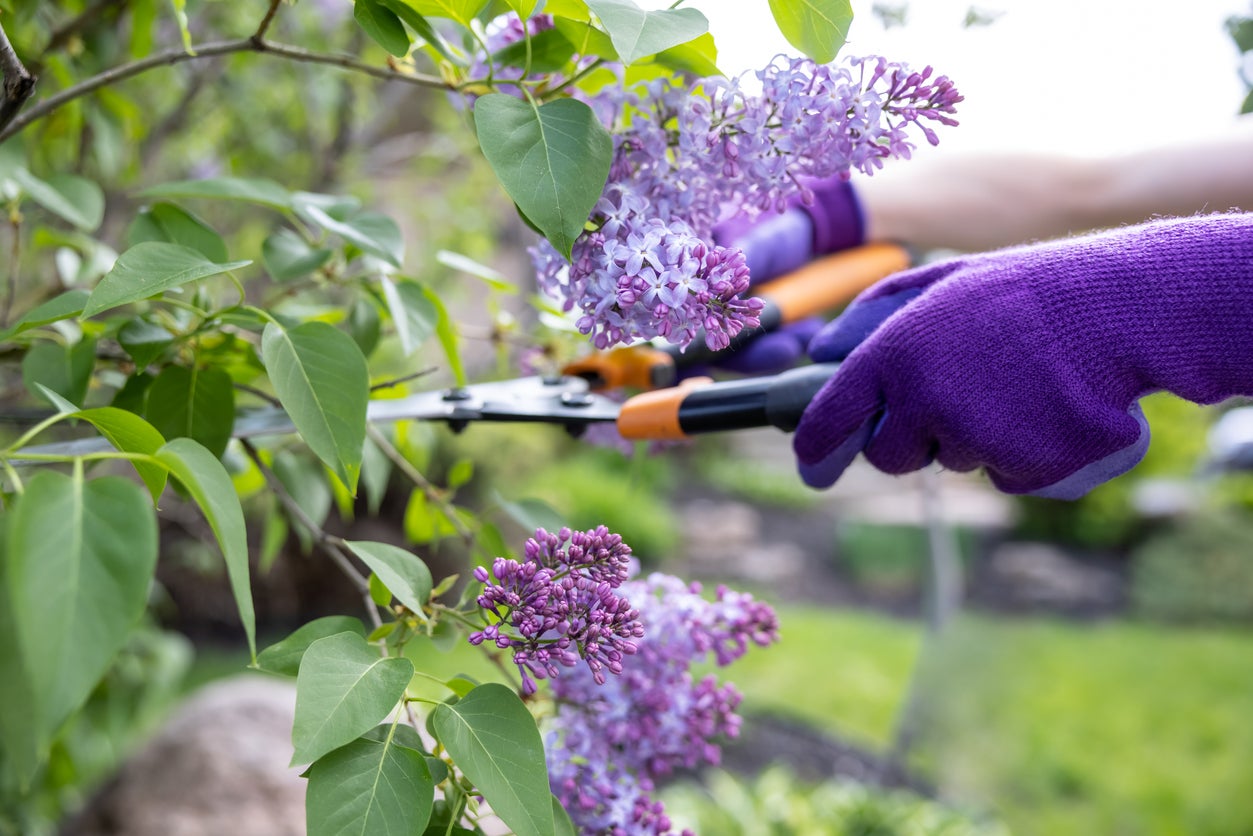
1. Prune the shrub: Start by pruning the shrub a few weeks before transplanting. Trim away any damaged, dead, or overgrown branches. This will reduce the size of the shrub and minimize the loss of water and nutrients during the transplanting process. Use sharp, clean pruning shears to make clean cuts.
2. Water the shrub: Proper hydration is crucial before transplanting. A few days before the transplant, water the shrub thoroughly to ensure it is well-hydrated. Adequate moisture helps minimize stress on the plant and makes it easier to remove from the ground without damaging the roots.
3. Root pruning: In some cases, you may need to prune the shrub’s roots to encourage the growth of new roots and to make it easier to transplant. Root pruning involves cutting some of the larger roots in a circle around the shrub, about 12 to 18 inches away from the base. This encourages the development of new feeder roots closer to the root ball.
4. Protect the shrub: If you’re transplanting during a hot or sunny day, provide some temporary shade for the shrub to prevent it from undergoing excessive stress. You can create some shade using a piece of shade cloth or a temporary shade structure. This helps reduce moisture loss and prevents sunburn on the foliage.
5. Manage soil moisture: In the days leading up to the transplant, monitor the moisture levels in the soil. Make sure the soil is slightly moist but not overly saturated. Excessively wet soil can make digging and handling the shrub more challenging. If the soil is too dry, water the shrub a day or two before transplanting to ensure adequate hydration.
6. Consider using root hormone: In some cases, using a root hormone can aid in the shrub’s successful transplanting. Root hormone stimulates root growth and can increase the plant’s ability to establish quickly in its new location. Follow the instructions on the product label for proper application.
Remember: Taking the time to prepare the shrub for transplanting is essential to minimize stress and promote healthy growth in its new environment. Pruning, proper watering, root pruning when necessary, providing shade, and managing soil moisture all contribute to a smooth and successful transplanting process.
Step 5: Digging up the shrub
Properly digging up the shrub is a crucial step in the transplanting process. By carefully removing the shrub from its current location, you’ll minimize damage to the roots and increase its chances of establishing in its new home. Here’s how to dig up the shrub:
1. Prepare the tools: Gather the necessary tools, including a sharp spade, a garden fork, and a tarp or burlap to transport the shrub. Make sure the spade’s blade is clean and sharp to ensure clean cuts and minimize damage to the roots.
2. Create a root ball: Start by marking out a circular area around the shrub that extends beyond the drip line (the outermost edge of the foliage). This will give you an idea of the size of the root ball you need to dig. The root ball should be as wide and as deep as possible without damaging too many of the shrub’s roots.
3. Loosen the soil: Use a garden fork to gently loosen the soil around the marked circle. Insert the fork into the soil and rock it back and forth to loosen the soil without damaging too many of the roots. This step helps make it easier to remove the shrub from the ground.
4. Start digging: Use a sharp spade to start digging around the circumference of the marked circle. Begin at least a foot away from the base of the shrub and work your way inward. Dig at a slight angle, angling the spade towards the center of the shrub to create a cone-shaped hole.
5. Lift the shrub: Once you’ve completed digging around the shrub, place the spade underneath the root ball and carefully lift the shrub from the ground. Take care to support the root ball and prevent it from falling apart during the lifting process.
6. Transfer to the tarp or burlap: Once the shrub is lifted, gently transfer it to a tarp or burlap that you’ve prepared. Keep the root ball intact and wrap it securely to protect the roots and retain soil moisture during transport to the new location.
7. Transport and transplant: Move the shrub to its new location on the tarp or burlap and carefully place it in the prepared planting hole. Ensure that the shrub is positioned at the same depth as it was in its previous location. Fill in the remaining space around the root ball with soil, gently firming it to eliminate air pockets.
Remember: Digging up the shrub requires careful execution to minimize root damage. Take your time and be gentle during the process. Properly supporting the root ball and protecting it during transport will help ensure a smooth and successful transplanting experience.
Step 6: Transplanting the shrub
Transplanting the shrub from its original location to the newly prepared hole requires a careful and methodical approach. By following the right techniques, you can ensure the successful establishment of the shrub in its new environment. Here’s how to transplant the shrub:
1. Carefully remove the tarp or burlap: If you used a tarp or burlap to transport the shrub, carefully unwrap it once you have placed the shrub in the new hole. Make sure to completely remove any synthetic materials like plastic or nylon that may hinder the shrub’s growth.
2. Position the shrub: Place the shrub in the center of the new planting hole, ensuring that it is straight and upright. Check that the shrub is at the same level as it was in its previous location. Adjust the soil level if needed to achieve the correct planting depth.
3. Backfill the hole: Start backfilling the hole with the soil that was previously removed. Gently pack the soil around the root ball, being careful not to compact it too tightly. Gradually build up the soil until the hole is filled, ensuring that the shrub remains stable and upright.
4. Water thoroughly: Water the shrub immediately after transplanting, giving it a deep and thorough watering. This will help settle the soil and remove any air pockets around the roots. Ensure that the entire root ball receives adequate moisture.
5. Apply mulch: After watering, apply a layer of organic mulch, such as wood chips or bark, around the base of the shrub. Mulch helps retain moisture, regulate soil temperature, and suppress weed growth. Keep the mulch a few inches away from the base of the shrub to prevent stem rot.
6. Stake if necessary: In some cases, you may need to provide temporary support to the shrub with stakes or bracing. This is especially important for larger shrubs or those in wind-prone areas. Use soft materials like tree ties or old stockings to secure the shrub without causing damage or constriction.
7. Monitor and water regularly: Keep a close eye on the transplanted shrub in the weeks following transplantation. Water the shrub regularly to ensure the roots stay hydrated, especially during dry periods. Avoid overwatering, as excessive moisture can lead to root rot.
Remember: Transplanting the shrub is a delicate process, and proper care is essential for its successful establishment. Taking the time to position the shrub correctly, backfill with care, provide adequate water, and mulch for moisture retention will help ensure the shrub’s healthy growth in its new home.
Step 7: Watering and Mulching the Shrub
Watering and mulching are vital steps in the transplanting process that help promote the healthy establishment and growth of the shrub in its new location. Proper hydration and mulch application contribute to moisture retention, soil temperature regulation, and weed suppression. Follow these guidelines for watering and mulching the shrub:
1. Watering: Immediately after transplanting the shrub, give it a deep watering. Ensure that the water reaches the entire root ball. Provide enough water to keep the soil consistently moist, but avoid overwatering, as it can lead to root rot. Monitor the soil moisture regularly and adjust your watering schedule accordingly, especially during dry periods.
2. Watering frequency: In the weeks following transplanting, the shrub will require more frequent watering to support its root development. Water the shrub at least once or twice a week, depending on the weather conditions and the soil’s moisture retention capacity. Adjust the watering schedule as needed, keeping in mind that consistency is key for healthy growth.
3. Mulching: Apply a layer of organic mulch around the base of the shrub, maintaining a thickness of 2-3 inches. Use materials like wood chips, bark, or compost. Avoid piling mulch directly against the shrub’s stem, as this can lead to stem rot. Leave a small gap between the mulch and the stem to allow air circulation.
4. Benefits of mulching: Mulching provides numerous benefits to the transplanted shrub. It helps retain soil moisture, reducing the frequency of watering and preventing moisture stress. Mulch also acts as an insulating layer, regulating soil temperature and protecting the shrub’s roots from extreme heat or cold. Additionally, mulch suppresses weed growth, minimizing competition for nutrients and water.
5. Mulching technique: To properly mulch the shrub, spread the organic material evenly around the base, extending it to the drip line or slightly beyond. Avoid creating excessive mulch mounds, as this can retain too much moisture and lead to root rot. Maintain a consistent thickness throughout the mulched area to ensure even coverage.
6. Mulch maintenance: Regularly monitor the mulch layer and replenish it as needed. Over time, mulch can break down and compact, reducing its effectiveness. Add a fresh layer of mulch annually, typically in spring or fall, to maintain its benefits and appearance.
Remember: Proper watering and mulching are essential for the shrub’s successful establishment after transplanting. Consistent watering, avoiding overwatering, and maintaining a well-mulched area around the shrub will help provide the necessary moisture, temperature regulation, and weed control for its healthy growth in its new environment.
Step 8: Caring for the Transplanted Shrub
After transplanting the shrub, it’s crucial to provide ongoing care to ensure its successful adaptation and long-term health in its new surroundings. Proper care includes regular maintenance, monitoring for signs of stress or problems, and taking preventive measures to promote strong growth. Here are some essential care tips for your transplanted shrub:
1. Regular watering: Established shrubs typically require about an inch of water per week. Pay attention to rainfall levels and adjust your watering schedule accordingly, making sure the soil remains consistently moist but not waterlogged. Long, deep watering sessions are preferable to frequent shallow watering.
2. Pruning: Monitor the shrub for any pruning needs. Remove dead, damaged, or diseased branches promptly. Shape the shrub as desired, but avoid excessive pruning during the first year after transplantation, as the shrub is still establishing its root system.
3. Fertilizing: Apply a slow-release, balanced fertilizer specifically formulated for shrubs in accordance with the manufacturer’s instructions. Fertilize in early spring or as recommended for your specific shrub species. Ensure the fertilizer is distributed evenly around the shrub’s root zone and watered in afterward.
4. Pest and disease monitoring: Keep a close eye on the shrub for any signs of pests or diseases. Common issues include aphids, powdery mildew, and fungal infections. Identify and address problems promptly using appropriate organic or chemical solutions to prevent further damage.
5. Mulch maintenance: Regularly monitor the mulch layer around the shrub and replenish it as needed. Maintain a consistent depth of 2-3 inches and keep the mulch a few inches away from the base of the shrub to avoid stem rot. Mulch helps retain moisture, regulate soil temperature, and suppress weed growth.
6. Seasonal care: Different seasons bring different care requirements. In the summer, provide adequate water during periods of heat and drought. In the fall, remove fallen leaves and debris to prevent pest and disease buildup. In the winter, protect the shrub from freeze or frost damage with burlap or a frost cover if necessary.
7. Regular monitoring: Regularly inspect the shrub for any signs of stress, such as wilting, discoloration, or unusual growth patterns. Additionally, check for any potential issues with the soil, drainage, or nearby plants that could affect the shrub’s health. Early detection allows for timely intervention and prevention of further problems.
Remember: Caring for a transplanted shrub requires ongoing attention and maintenance. By providing regular watering, appropriate pruning, fertilization when needed, monitoring for pests and diseases, maintaining mulch, and adapting care to the seasons, you give your shrub the best chance to flourish in its new home.
Conclusion
Congratulations! You have now learned the step-by-step process of transplanting shrubs with care and precision. By assessing the shrub, choosing the right time, preparing the new planting hole, and properly handling the shrub during the transplanting process, you have set the stage for successful establishment in its new location.
Remember to provide ongoing care for the transplanted shrub, including regular watering, proper pruning, fertilizing as needed, monitoring for pests and diseases, maintaining mulch, and adjusting care according to the seasons. By following these guidelines, you will promote healthy growth and ensure the long-term health and beauty of your shrub.
Transplanting shrubs can be a rewarding endeavor that allows you to create the garden of your dreams, reinvigorate the appearance of your landscape, or simply give a well-loved shrub a fresh start. It requires patience, proper planning, and attention to detail, but the results are well worth the effort.
As you continue your plant care journey, don’t forget to research specific requirements for different shrub species and consult with gardening experts when needed. Each shrub has its own unique needs, and understanding them will help you provide the best care and ensure successful transplantation.
So go ahead and embark on your next transplanting project with confidence. With the knowledge and techniques you have gained, you are well-equipped to tackle any shrub transplanting endeavor and create a thriving and beautiful garden.