Home>Gardening News and Trends>Latest News>How To Ferment Vegetables
Latest News
How To Ferment Vegetables
Modified: January 22, 2024
Discover the latest news and expert tips on how to ferment vegetables for maximum flavor and health benefits. Start your fermentation journey now!
(Many of the links in this article redirect to a specific reviewed product. Your purchase of these products through affiliate links helps to generate commission for Chicagolandgardening.com, at no extra cost. Learn more)
Table of Contents
Introduction
Fermented vegetables have been gaining popularity in recent years due to their numerous health benefits and delicious flavors. This age-old preservation method not only extends the shelf life of fresh produce but also enhances its nutritional value. The process of fermenting vegetables involves using saltwater brine or a lacto-fermentation method to encourage the growth of beneficial bacteria.
Consuming fermented vegetables can have a positive impact on your gut health. The fermentation process breaks down the sugars and starches present in the vegetables, creating probiotics that aid digestion and boost the immune system. Additionally, fermented vegetables are rich in vitamins, minerals, and antioxidants, providing a natural and nutrient-dense addition to your meals.
Whether you’re a seasoned fermentation enthusiast or a beginner looking to explore this culinary practice, this article will guide you through the process of fermenting vegetables. From choosing the right vegetables to troubleshooting common issues, we will cover everything you need to know to create delicious and probiotic-rich fermented vegetables in your own kitchen.
So, roll up your sleeves, grab your favorite vegetables, and let’s embark on a journey of flavor and well-being through the fascinating world of fermented vegetables.
Benefits of Fermented Vegetables
Fermented vegetables offer a multitude of benefits for both your physical health and culinary endeavors. Let’s explore some of the key advantages of incorporating fermented vegetables into your diet:
- Gut Health: The fermentation process produces beneficial bacteria, such as lactobacilli, which help maintain a healthy balance of gut flora. These bacteria support digestion, nutrient absorption, and contribute to a strong immune system. Consuming fermented vegetables regularly can aid in relieving digestive issues, such as constipation or bloating.
- Nutrient Boost: Fermentation increases the bioavailability of nutrients in vegetables, making them easier for your body to absorb. This transformation enhances the nutritional value of the vegetables, resulting in increased levels of vitamins, minerals, and antioxidants. Fermented vegetables are particularly rich in vitamins A, C, and K, as well as potassium and folate.
- Improved Digestion: The beneficial bacteria produced during fermentation help break down complex carbohydrates and proteins in vegetables, which can support better digestion. This can be especially beneficial for individuals with digestive disorders, such as irritable bowel syndrome or leaky gut syndrome.
- Diverse Flavor Profiles: Fermentation adds depth and complexity to the flavors of vegetables. The tangy and slightly sour taste of fermented vegetables can elevate your dishes, turning them into culinary delights. You can experiment with different vegetables and flavor combinations to create unique and exciting taste experiences.
- Preservation: Fermentation is a natural and traditional method of preserving vegetables. It extends the shelf life of perishable produce, allowing you to enjoy seasonal vegetables throughout the year. This can help reduce food waste and ensure you have a plentiful supply of nutritious vegetables even when they are out of season.
By incorporating fermented vegetables into your diet, you can reap these incredible benefits and add a burst of flavor to your meals. So, let’s dive into the next section, where we’ll discuss how to choose the right vegetables for fermentation.
Choosing the Right Vegetables
When it comes to fermenting vegetables, not all varieties are created equal. While almost any vegetable can be fermented, some lend themselves better to the process, resulting in more flavorful and desirable outcomes. Here are some key factors to consider when selecting vegetables for fermentation:
- Crispness: Vegetables with a crisp texture work best for fermentation. They maintain their crunch throughout the process and provide a satisfying texture in the end product. Examples of crisp vegetables suitable for fermentation include cabbage, cucumbers, carrots, radishes, and bell peppers.
- Flavor: Choose vegetables with flavors that you enjoy, as fermentation will enhance and potentially intensify their taste. Experiment with different combinations of sweet, spicy, and savory flavors to create unique and exciting fermented vegetable blends.
- Seasonality: Opt for vegetables that are in season for the best flavor and quality. Seasonal vegetables are typically more abundant and affordable, making them a great choice for fermentation projects. Plus, fermenting seasonal vegetables allows you to enjoy the flavors of each season year-round.
- Organic and Fresh: Whenever possible, choose organic vegetables to ensure that you are fermenting produce that is free from pesticides, herbicides, and other harmful chemicals. Additionally, select fresh vegetables that are firm and free from blemishes or signs of spoilage.
- Diversity: The beauty of fermenting vegetables lies in the ability to mix and match different varieties. Don’t be afraid to get creative and experiment with combinations of vegetables to create unique flavors and vibrant colors in your ferments.
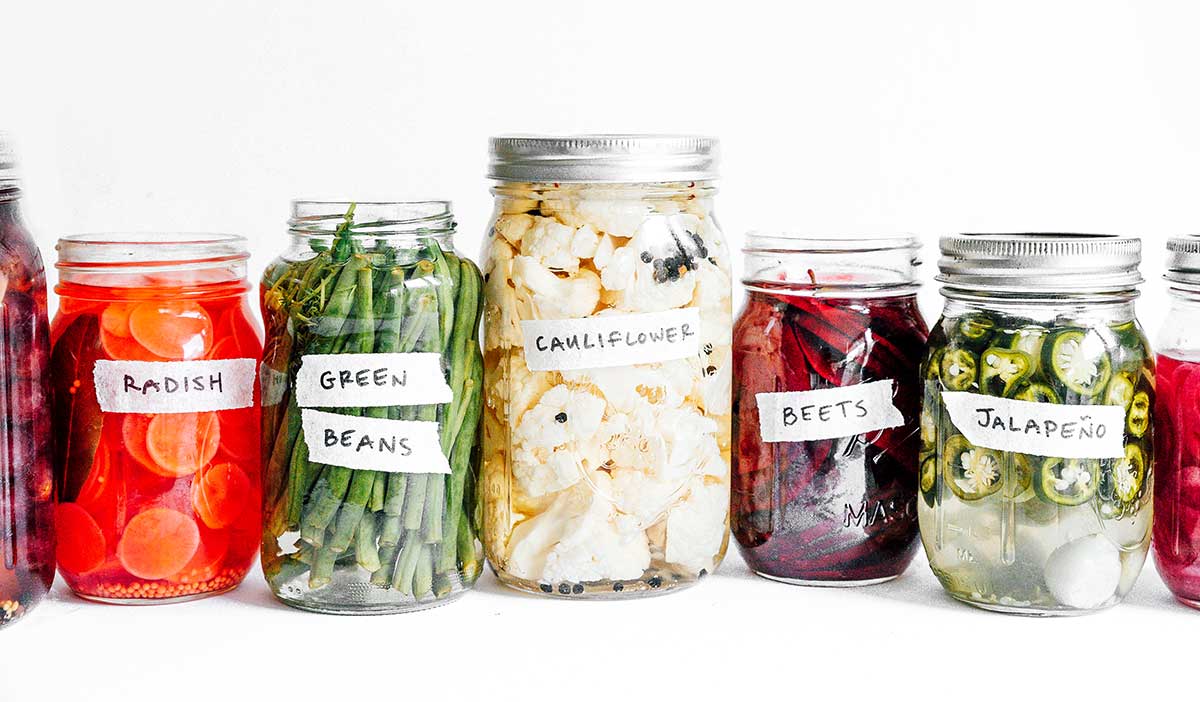
Popular choices for fermentation include cabbage for sauerkraut, cucumbers for pickles, and a medley of carrots, cauliflower, and peppers for a colorful and delicious mixed vegetable ferment.
Remember, the most important aspect of choosing vegetables for fermentation is to select ones that you enjoy eating. So, head to your local farmers’ market or grocery store, explore the vibrant array of vegetables, and let your taste buds guide you in selecting the perfect vegetables for your fermented creations.
Now that you have a better understanding of how to choose the right vegetables let’s move on to preparing the vegetables for the fermentation process.
Preparing the Vegetables
Properly preparing the vegetables is a crucial step in the fermentation process, as it ensures the best texture, flavor, and overall quality of your fermented vegetables. Follow these steps to prepare your vegetables for fermentation:
- Wash and Trim: Start by washing the vegetables thoroughly under cool running water to remove any dirt or debris. Remove any damaged or bruised parts of the vegetables and trim them into the desired size and shape. For example, shred cabbage for sauerkraut or slice cucumbers into spears for pickles.
- Salt and Massage: Next, sprinkle salt over the prepared vegetables. The salt acts as a natural preservative and draws out moisture from the vegetables. Massaging the salt into the vegetables helps to break down their cell structure and release additional juices. This step also helps to create an environment conducive to lacto-fermentation.
- Rest and Drain: Allow the salted vegetables to rest for about 30 minutes to an hour. During this time, the salt will draw out moisture from the vegetables, creating a brine. Drain the excess liquid from the vegetables and reserve it for later use in the fermentation process.
- Pack into Fermentation Container: Transfer the salted and drained vegetables into a clean, sterilized fermentation container. Press down firmly to remove any air pockets and ensure the vegetables are tightly packed. The goal is to submerge the vegetables in their own brine, creating an anaerobic environment for fermentation.
- Save the Brine: If the vegetables have not released enough liquid to completely submerge themselves, add the reserved brine to cover them. The brine acts as a protective layer and prevents the growth of harmful bacteria while allowing the beneficial lactobacilli to thrive.
It’s important to note that the exact process may vary depending on the specific recipe you’re following. Some recipes may require additional steps, such as blanching or fermenting in layers. Refer to the specific recipe instructions for any additional preparation steps.
Now that you have your vegetables prepared and packed in the fermentation container, it’s time to move on to the next critical step: determining the correct salt brine ratio.
Salt Brine Ratio
The salt brine ratio is a crucial element in the fermentation process, as it influences the environment in which the beneficial bacteria thrives while inhibiting the growth of harmful bacteria. Finding the right salt brine ratio ensures successful fermentation and flavorful results. Here’s how to determine the appropriate salt brine ratio for your fermented vegetables:
- The Basic Rule: As a general rule, you will need about 1 to 2 tablespoons of salt per quart (or liter) of water to create a proper salt brine. This ratio is often referred to as a 2% to 3% salt solution.
- Taste and Texture: The desired saltiness of your final product is subjective and depends on personal preference. Start with a 2% salt solution (roughly 1 tablespoon of salt per quart of water) and taste the brine. If you prefer a saltier taste, gradually add more salt and taste until you achieve the desired flavor. Keep in mind that the saltiness will mellow as the fermentation process progresses.
- Crunchy vs. Soft: The salt concentration in the brine also affects the texture of your fermented vegetables. A higher salt brine ratio (around 3%) will result in a firmer and crunchier texture, while a lower ratio (closer to 2%) will yield softer and more tender vegetables. Consider your preference for texture when determining the salt brine ratio.
- Vegetable Varieties: Different vegetables have different water content, which can impact the salt brine ratio. Some vegetables naturally release more liquid during the fermentation process, requiring less brine and salt. Monitor the brine level during fermentation and adjust as needed by adding additional brine if necessary.
- Experiment and Adapt: Don’t be afraid to experiment with different salt brine ratios to find your preferred taste and texture. As you gain more experience and confidence in fermentation, you can modify the salt brine ratio to suit your personal preference and the specific vegetables you’re fermenting.
Remember to use high-quality salt, such as non-iodized sea salt or kosher salt, as additives like iodine or anti-caking agents can interfere with the fermentation process. It’s also important to use filtered water to avoid any impurities that may affect the fermentation.
Now that you have determined the appropriate salt brine ratio, let’s move on to the next step, where we’ll explore how to enhance the flavor of your fermented vegetables by adding flavor enhancers.
Adding Flavor Enhancers
While fermented vegetables have a delicious tangy flavor on their own, you can elevate their taste by adding flavor enhancers. These ingredients impart unique aromas and tastes, creating a personalized and delightful fermentation experience. Here are some popular flavor enhancers to consider:
- Spices: Spices offer a burst of flavor and can add depth to your fermented vegetables. Common spices to consider include peppercorns, mustard seeds, coriander seeds, dill seeds, and chili flakes. Experiment with different combinations to create your desired level of heat and spice.
- Herbs: Fresh or dried herbs can contribute distinct flavors to your ferments. Some popular choices include dill, basil, tarragon, thyme, and rosemary. Choose herbs that complement the flavors of the vegetables you are fermenting.
- Aromatics: Aromatics like garlic, ginger, and onions can add complexity and a punch of flavor to your fermented vegetables. Consider using them in grated or minced form to evenly distribute their flavors throughout the fermentation.
- Citrus Zest: Citrus zest from lemons, limes, or oranges can bring a bright and refreshing flavor to your ferments. Use a microplane or citrus zester to carefully remove the brightly colored outer layer of the citrus fruit, being mindful not to include the bitter white pith.
- Fermentation Brine Add-ins: For additional complexity, consider adding a small amount of brine from a previous successful fermentation. This method, known as “back-slopping,” helps kickstart the fermentation process and introduces the beneficial bacteria from a proven batch.
When adding flavor enhancers, it’s important to find the right balance to avoid overpowering the natural flavors of the vegetables. Start with a small amount of each flavoring agent and taste the brine periodically during fermentation. You can adjust and add more flavors as needed to achieve your desired taste profile.
Remember that some vegetables may require longer fermentation times to allow the flavors to meld and develop fully. Experimentation and taste testing during the fermentation process will help you find the perfect balance of flavors for your palate.
Now that you’ve learned about adding flavor enhancers to your fermented vegetables, let’s move on to discussing the various fermentation containers you can use.
Fermentation Containers
Choosing the right fermentation container is essential to create an optimal environment for the fermentation process. The ideal container should be food-safe, non-reactive, and allow for easy monitoring and control of the fermentation conditions. Here are some common fermentation container options:
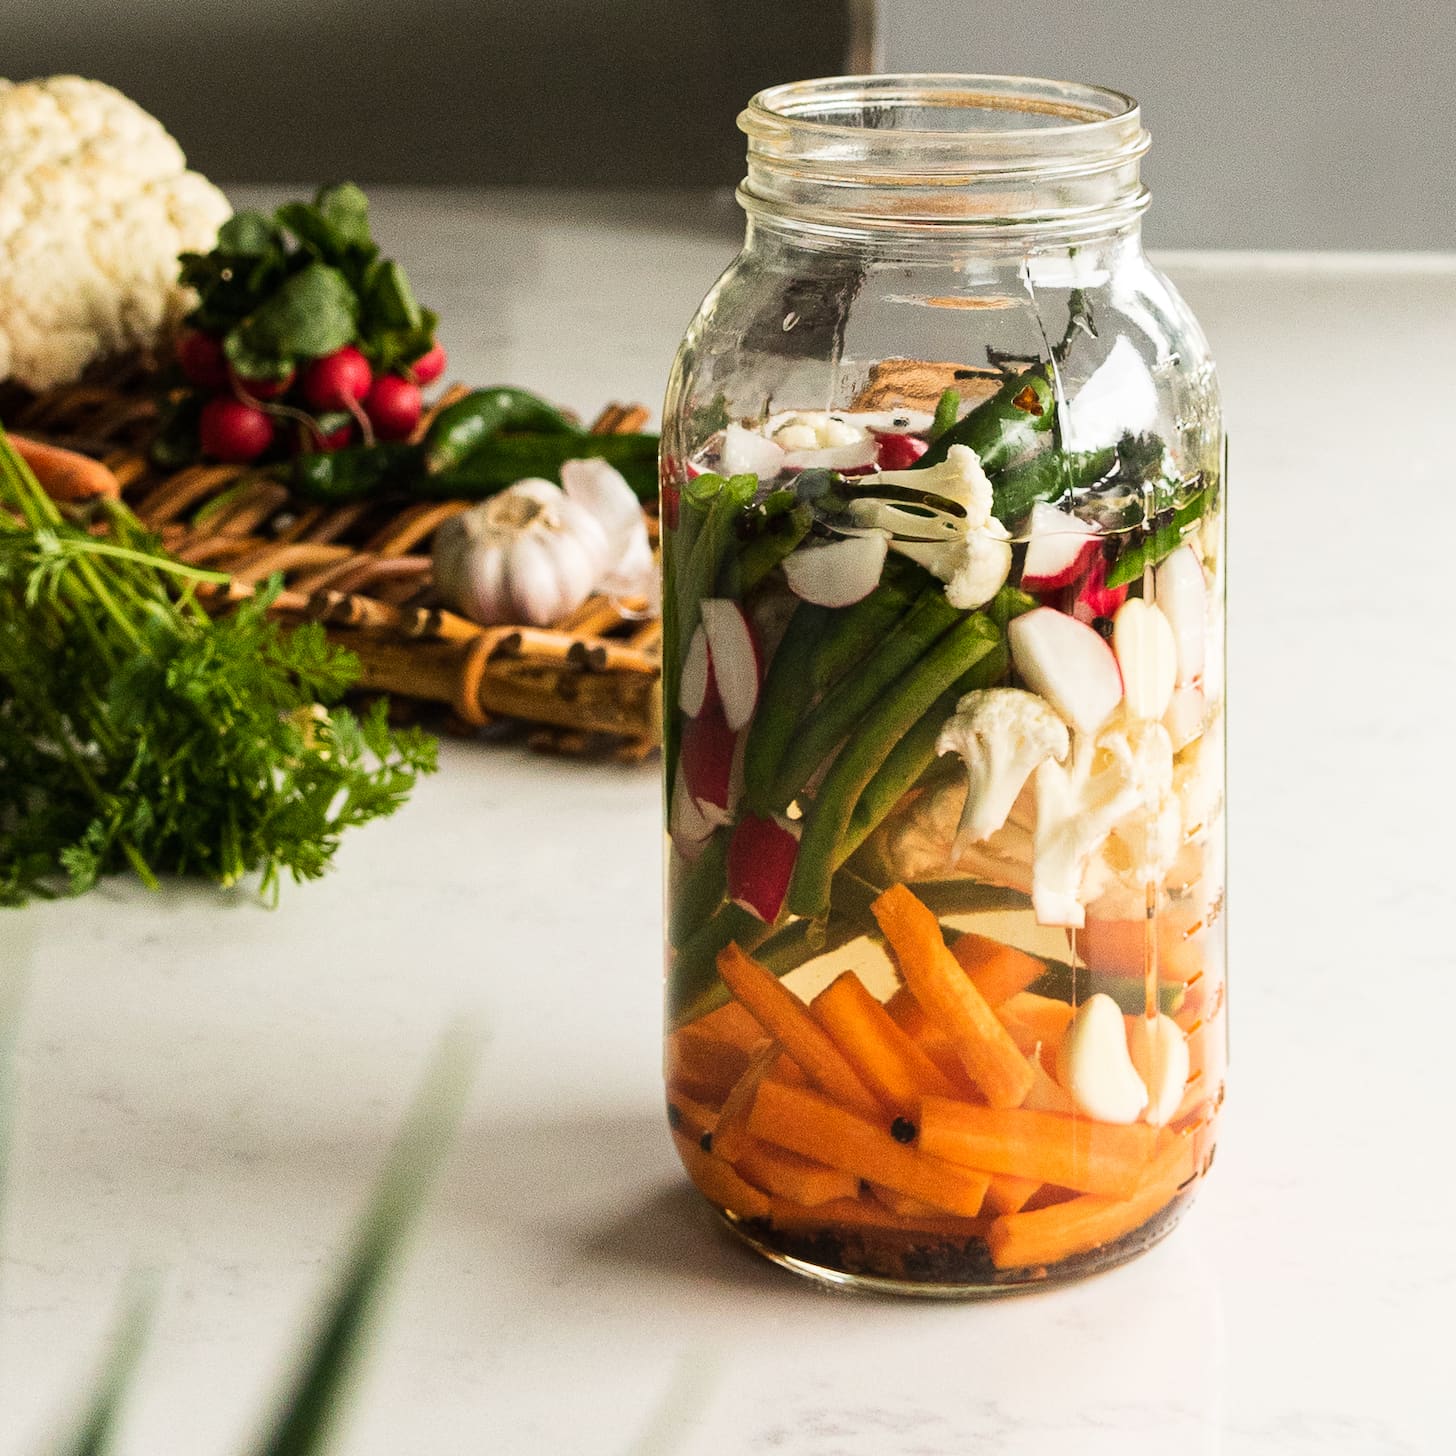
- Glass Jars: Glass jars are a popular choice for fermenting vegetables. They are non-reactive, easy to clean, and allow visual monitoring of the fermentation process. Choose jars with wide mouths for easier packing and accessibility. Mason jars or flip-top jars with a rubber gasket are often used for their airtight seal.
- Ceramic Crocks: Ceramic crocks offer a traditional and aesthetically pleasing option for fermentation. They provide a stable environment for fermentation due to their thick walls, which help maintain a consistent temperature. Look for crocks with water-sealed lids or a water moat that creates an airtight barrier.
- Fermentation Weights and Airlocks: To keep the vegetables submerged under the brine and create an anaerobic environment, fermentation weights are used. These can be specifically designed glass weights, ceramic weights, or even sealed food-grade bags filled with brine or water. Airlocks are also beneficial as they allow carbon dioxide to escape while preventing oxygen and contaminants from entering the container.
- Food-Grade Plastic Buckets: Food-grade plastic buckets are a practical option for fermenting larger quantities of vegetables. Make sure the plastic is BPA-free and suitable for food contact. Plastic containers with built-in airlocks and gaskets are available and provide an airtight and convenient solution.
- Open Crocks with Covers: Some fermenters prefer using open crocks with covers. These crocks allow oxygen to reach the ferments, resulting in a different type of fermentation known as aerobic fermentation. While this style is less common, it can lead to unique flavors and textures.
When choosing a fermentation container, it’s essential to ensure that it is thoroughly cleaned and sanitized before use. This helps create a controlled environment free from harmful bacteria and ensures a successful fermentation process.
Remember, the most important aspect of a fermentation container is that it suits your needs and preferences. Whether you opt for glass jars, ceramic crocks, or food-grade plastic buckets, choose a container that allows you to monitor and control the fermentation process effectively.
Now that you have your fermentation container ready, let’s move on to the next step: packing the vegetables into the container.
Packing the Vegetables
Packing the vegetables properly in your fermentation container is essential to ensure they remain submerged in the brine and create an optimal environment for fermentation. Here are the steps to effectively pack your vegetables:
- Layering: Start by layering the prepared vegetables in your fermentation container. Place a small amount of vegetables at a time, pressing them down firmly with your hands or a clean utensil to remove any air pockets. Make sure to distribute the vegetables evenly throughout the container.
- Compactness: Pack the vegetables as tightly as possible without crushing them. The goal is to ensure that the vegetables remain submerged under the brine and prevent the growth of harmful bacteria that thrive in the presence of oxygen.
- Brine Submersion: As you pack the vegetables, the natural juices should be released, forming a brine. Ensure that the brine completely covers the vegetables, creating an anaerobic environment. If the brine level is insufficient, use the reserved brine (from the draining step) or a prepared salt brine to cover the vegetables completely.
- Leave Headroom: Leave some headspace at the top of the fermentation container to allow for expansion during the fermentation process. As the vegetables ferment, carbon dioxide gas is produced, causing pressure to build up. Leaving some space allows for this gas to escape without causing overflow or breakage of the container.
- Weight the Vegetables: To ensure the vegetables stay submerged in the brine, place fermentation weights on top of them. The weights should be food-safe and fit snugly in the container, creating pressure that keeps the vegetables submerged. Alternatively, you can use a large cabbage leaf or a clean rock to hold the vegetables down.
Properly packing the vegetables helps create an environment that promotes the growth of beneficial bacteria and prevents spoilage. Ensure that the vegetables are completely covered by the brine, as exposure to air can lead to mold growth and spoilage.
Now that your vegetables are packed, it’s time to discuss different methods of creating an airtight environment for fermentation using airlocks or lids.
Weights and Pressing
Using weights and applying pressure on the vegetables during the fermentation process is important to ensure that they remain submerged in the brine. This helps create an anaerobic environment that promotes the growth of beneficial bacteria and prevents the growth of harmful bacteria. Here’s how to effectively use weights and apply proper pressure:
- Fermentation Weights: Place fermentation weights on top of the vegetables to keep them submerged in the brine. These weights can be specifically designed glass or ceramic weights that fit inside the fermentation container. Ensure that the weights cover the entire surface area of the vegetables and press down firmly to eliminate air pockets.
- Food-Grade Bags with Brine: Another method is to use sealed food-grade bags filled with brine or water as weights. Place the filled bags on top of the vegetables, making sure they cover the entire surface area. The weight of the bags will press down on the vegetables, keeping them submerged in the brine.
- Pressing Method: For certain fermented vegetables like sauerkraut, pressing the vegetables with force is crucial to release their juices and create a solid mass. To do this, place a plate or fermentation lid that fits inside the fermentation container directly on top of the vegetables. Then, place a weight on top of the plate or lid. This weight will exert pressure on the vegetables, helping to extract their liquid and create a compact ferment.
- Checking and Adjusting: During the fermentation process, check the weights periodically to ensure they remain in place and the vegetables stay submerged. Over time, the fermentation process may cause some liquid to evaporate, so you may need to top up the brine if it falls below the vegetable surface. Use the salt brine solution you prepared earlier in the process to adjust the liquid level.
Properly weighting and pressing the vegetables are critical to successful fermentation. This allows the brine to penetrate all parts of the vegetables and prevents the growth of unwanted molds or harmful bacteria. It also helps create a consistent environment for the fermentation process.
Now that you have effectively weighed and pressed your vegetables, it’s time to explore the different methods of creating an airtight environment for fermentation using airlocks or lids.
Airlock or Lid Method
Creating an airtight environment is crucial during the fermentation process to allow carbon dioxide gas to escape while preventing oxygen and contaminants from entering. There are two common methods for achieving an airtight seal: the airlock method and the lid method.
Airlock Method:
The airlock method involves using a specialized fermentation lid, often referred to as an airlock lid, which incorporates a small airlock device. The airlock consists of a chamber filled with water or brine that allows carbon dioxide to escape while preventing oxygen and contaminants from entering the fermentation vessel.
To use the airlock method, simply affix the airlock lid to your fermentation container, ensuring a tight seal. As the fermentation process progresses, carbon dioxide released by the bacteria creates pressure, causing bubbles to form and rise through the airlock. This indicates that fermentation is occurring.
The airlock method is convenient because it allows for minimal air exposure and eliminates the need for burping or manual release of gas. It provides a hands-off approach to fermentation, allowing the process to proceed without much intervention.
Lid Method:
The lid method involves using a regular lid or cover on your fermentation container, securing it tightly to create a seal. However, it is essential to periodically “burp” or release the built-up carbon dioxide gas to prevent excess pressure from building up inside the container.
To burp the fermentation container, simply open the lid slightly to allow the gas to escape. Burping should be done carefully to minimize air exposure and contamination. This method requires more attention and monitoring during the fermentation process to ensure that proper gas release is maintained.
Both the airlock method and the lid method can be effective in creating the necessary anaerobic environment for fermentation. The choice between the two methods often comes down to personal preference and convenience.
Now that you’ve learned about the different methods for creating an airtight environment, you’re closer to successfully fermenting your vegetables. Let’s move on to discussing the fermentation time required and how to store your fermented vegetables once they are ready.
Fermentation Time
The fermentation time for your vegetables can vary depending on multiple factors, including the type of vegetable, the desired level of fermentation, and the ambient temperature. Fermentation is a natural process that takes time for flavors to develop and for beneficial bacteria to proliferate. Here are some key considerations regarding fermentation time:
- Vegetable Type: Different vegetables require different fermentation times. Some vegetables, like cucumbers for pickles, may be ready in as little as a few days, while others, such as cabbage for sauerkraut, may take several weeks. Generally, it is recommended to ferment vegetables for a minimum of one to two weeks to allow enough time for flavors to develop.
- Desired Taste and Texture: The length of fermentation affects the taste and texture of your vegetables. Fermenting for a shorter duration will result in a milder flavor and crunchier texture, while a longer fermentation time will deepen the flavors and create a softer texture. Taste your ferment periodically to determine when it has reached the desired balance of flavors and texture.
- Ambient Temperature: The fermentation process is influenced by temperature. Warmer temperatures generally speed up fermentation, while cooler temperatures slow it down. Ideal fermentation temperatures typically range between 60°F (15°C) and 75°F (24°C). However, keep in mind that fermentation can still occur outside this range, although at a slower or faster pace.
- Personal Preference: Fermentation time is ultimately a matter of personal preference. Some people enjoy a shorter fermentation for a milder flavor, while others prefer a longer fermentation for a more robust and tangy taste. Experiment with different fermentation times to find your desired balance.
During the fermentation process, you may notice changes in color, texture, and aroma. These are normal signs that beneficial bacteria are at work. If you encounter any mold or foul odors, it is best to discard the batch and start anew, as these are indications of spoilage or contamination.
Once your vegetables have reached the desired level of fermentation, it’s time to move on to the next step: storing them for long-term use.
Storing Fermented Vegetables
Proper storage is essential to maintain the quality and longevity of your fermented vegetables. Consider the following guidelines when storing your fermented creations:
- Refrigeration: Once your fermented vegetables have reached the desired taste and texture, transfer them to a clean, airtight container and store them in the refrigerator. Refrigeration significantly slows down the fermentation process and helps preserve the flavors and crispness of the vegetables. The colder temperature of the refrigerator helps to maintain the quality of your ferments over a longer period.
- Use Clean Utensils: When serving or using your fermented vegetables, make sure to use clean utensils to avoid introducing contaminants that can spoil the ferments. As you remove portions from your container, ensure that the remaining vegetables remain submerged in the brine.
- Label and Date: To keep track of the fermentation time and maintain freshness, it is helpful to label your containers with the date of preparation. This way, you can keep an eye on the aging process and consume your vegetables within a reasonable time frame.
- Flavor Development: Fermented vegetables will continue to develop flavor over time, even after refrigeration. The taste may become tangier and more robust as the fermentation progresses. Periodically taste your ferments to monitor the changes in flavor and decide when you prefer to consume them.
- Long-Term Storage: If you prefer to store your ferments for an extended period or do not have access to refrigeration, you can transfer them to a cool basement or cellar. The lower temperature and stable environment in these areas can help slow down the fermentation process. Ensure that the containers are airtight and that the vegetables remain fully submerged in their brine.
It’s important to note that while refrigeration and proper storage can extend the shelf life of your fermented vegetables, they will eventually lose their crunchiness and may soften over time. It is best to consume them within a few months for the best quality and flavor.
Now that you are equipped with the knowledge of how to store your fermented vegetables, you can confidently enjoy them in a variety of dishes or as flavorful accompaniments to your meals.
Troubleshooting Tips
While fermenting vegetables is generally a straightforward process, occasionally issues may arise. Here are some troubleshooting tips to address common problems that may occur during fermentation:
- Mold Growth: If you notice fuzzy or discolored mold on the surface of your ferment, it is best to discard the entire batch. Mold growth usually indicates contamination and can make the ferment unsafe to consume. To prevent mold, ensure that the vegetables are fully submerged in the brine and that all equipment and containers are thoroughly cleaned and sanitized.
- Foul Odor: If your ferment emits a foul or rotten smell, this could indicate spoilage. An unpleasant odor may arise from improper fermentation conditions or the growth of harmful bacteria. Discard the batch and ensure proper sanitation and fermentation practices in future attempts.
- Soft or Slimy Texture: If your fermented vegetables have a slimy or mushy texture, it could be a sign of over-fermentation or improper brine concentration. Ensure that you follow the recommended fermentation time and maintain the correct salt brine ratio. Excessive heat or prolonged fermentation can also lead to a softer texture.
- No Bubbling or Activity: Lack of bubbling or activity in the airlock or lid may indicate that the fermentation process is not occurring. Check that the vegetables are fully submerged in the brine, the temperature is within the optimal range, and the container is airtight. If there is no sign of fermentation after a couple of days, it may be necessary to start the fermentation process over with fresh vegetables.
- Uneven Fermentation: Sometimes, the fermentation process may not be even throughout the container, resulting in some parts of the vegetables being more fermented than others. To avoid this issue, ensure that you pack the vegetables tightly and evenly distribute them in the fermentation container. Consider using weights to keep the vegetables submerged and evenly compacted.
As with any culinary technique, troubleshooting and learning from your experiences are valuable parts of the fermentation process. Don’t be discouraged if you encounter issues along the way – they often provide insights for future improvements and help you refine your fermentation skills.
By keeping these troubleshooting tips in mind and maintaining good fermentation practices, you can increase your chances of producing quality fermented vegetables and enjoying their delicious flavors and health benefits.
Conclusion
Congratulations! You have now gained a comprehensive understanding of how to ferment vegetables and create delicious, probiotic-rich additions to your meals. Fermented vegetables offer a multitude of health benefits, including improved digestion, enhanced nutrition, and a boost to your immune system.
Starting from choosing the right vegetables and properly preparing them, to determining the salt brine ratio and adding flavor enhancers, you have learned the crucial steps of the fermentation process. Packing the vegetables, weighing them down, and creating an airtight fermentation environment are essential for successful fermentation. And finally, storing your fermented vegetables in the refrigerator or a cool cellar ensures their longevity and maintains their flavor and texture for an extended period.
Remember, fermentation is an art that allows you to express your creativity and experiment with diverse flavors and combinations. As you continue your fermentation journey, you may encounter troubleshooting situations. But don’t be discouraged! Learning from these experiences will help you refine your skills and create even better batches of fermented vegetables in the future.
So, roll up your sleeves, gather your favorite vegetables, and embark on the exciting adventure of fermenting vegetables. From tangy sauerkraut to zesty pickles, the possibilities are endless. Embrace the transformative power of fermentation and enjoy the flavors, health benefits, and joy that homemade fermented vegetables bring to your life and table.