Home>Gardening Techniques>DIY Projects>How To Hang Lights In Trees Outside
DIY Projects
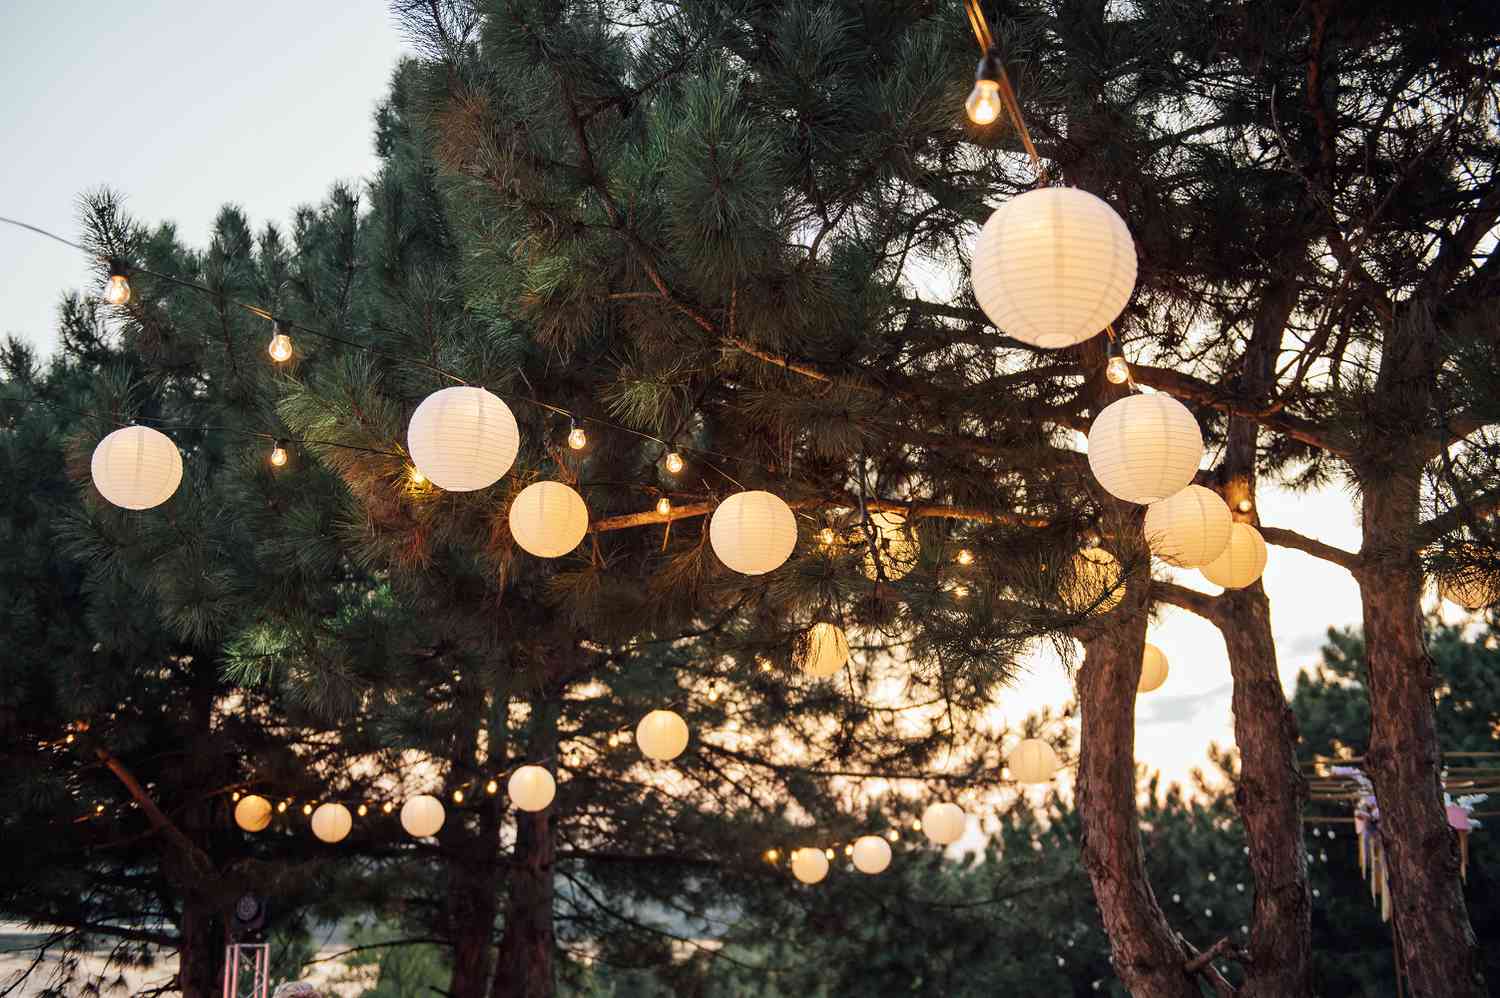
How To Hang Lights In Trees Outside
Published: November 1, 2023
Learn how to hang lights in trees outside with this easy DIY project guide. Illuminate your outdoor space and create a magical ambiance with our step-by-step instructions.
(Many of the links in this article redirect to a specific reviewed product. Your purchase of these products through affiliate links helps to generate commission for Chicagolandgardening.com, at no extra cost. Learn more)
Table of Contents
Introduction
Adding lights to outdoor trees is a fantastic way to create a magical and enchanting ambiance in your backyard or garden. Whether you’re planning a special event or simply want to enhance your outdoor space, hanging lights in trees can transform the atmosphere and make any occasion memorable.
Before you embark on this DIY project, it’s important to assess the tree and carefully plan the light placement to achieve the desired effect. Additionally, selecting the right lights and accessories, preparing the tree, and correctly hanging the lights are crucial steps to ensure a successful installation.
In this article, we will guide you through the step-by-step process of hanging lights in trees outside. We’ll cover everything from assessing the tree and selecting the right lights, to preparing the tree, hanging the lights, powering them, and important safety considerations. Whether you’re a seasoned DIYer or a beginner, this comprehensive guide will help you achieve stunning results.
So, let’s dive in and discover how you can create a magical outdoor setting by hanging lights in trees!
Assessing the Tree and Light Placement
Before you begin hanging lights in a tree, it’s important to assess the tree itself and determine the best placement for the lights. Here are some factors to consider:
Tree Characteristics: Take a close look at the tree’s branches, shape, and size. Is it sturdy enough to support the weight of the lights? Are there any dead or weak branches that may pose a risk? Choose a healthy tree with strong branches that can accommodate the weight of the lights.
Tree Height: Consider the height of the tree and the type of lights you plan to hang. If the tree is tall, you may need a ladder or an extension pole to reach the higher branches. It’s important to have the necessary equipment and to take safety precautions when working at heights.
Lighting Design: Think about the overall design and effect you want to achieve. Do you want a scattered, whimsical look with lights spread throughout the tree? Or do you prefer a more structured approach with lights following the lines of the branches? Consider the style and ambiance you want to create and plan the light placement accordingly.
Power Source: Determine the distance from the tree to the nearest power source. This will help you identify the length and type of extension cords you may need. Ensure that the power source can handle the wattage of the lights and any additional electrical accessories you may be using.
Weather Conditions: Consider the climate and weather conditions in your area. If you live in an area with strong winds or heavy rain, select lights that are durable and weather-resistant. Take precautions to secure the lights properly to prevent damage during inclement weather.
Once you’ve assessed the tree and considered these factors, you can plan the placement of the lights. Experiment with different configurations and visualize how the lights will illuminate the tree and surrounding area. Keep in mind that the goal is to create a magical and inviting atmosphere that complements your outdoor space.
By taking the time to assess the tree and carefully plan the light placement, you’ll ensure a stunning display that will impress your guests and bring joy to your outdoor gatherings.
Selecting the Right Lights and Accessories
Choosing the right lights and accessories is essential to create the desired ambiance and ensure a successful installation. Here are some factors to consider when selecting lights and accessories for your outdoor tree:
Lighting Types: There are several types of lights available for outdoor use, including string lights, fairy lights, LED lights, and globe lights. Consider the style and effect you want to achieve, as well as the durability and energy efficiency of the lights. LED lights are a popular choice due to their long lifespan and energy-saving benefits.
Light Color: Lights are available in a range of colors, from warm white to multicolor options. Consider the mood and theme of your outdoor space and choose a color that complements the overall design. Warm white lights create a cozy and inviting atmosphere, while multicolor lights add a festive and playful touch.
Length and Quantity: Measure the distance from the power source to the tree and plan the length of lights accordingly. Consider the height and width of the tree and ensure that you have enough lights to cover the branches adequately. It’s better to have slightly more lights than needed to avoid any gaps in the illumination.
Accessories: In addition to lights, you may need accessories such as extension cords, timers, and hooks or clips for hanging the lights. Ensure that the accessories are suitable for outdoor use and can withstand the weather conditions in your area. Use waterproof connectors and secure the lights properly to prevent any accidents or damage.
Power Source: Consider the availability of power sources near the tree. If there is no convenient power source, you may need to use a generator or solar-powered lights. Ensure that the power source can handle the wattage of the lights and any additional electrical accessories you may be using.
Budget: Set a budget for your lighting project and prioritize the features that are most important to you. Compare prices and read reviews to find the best quality lights and accessories within your budget. Remember, investing in high-quality lights will ensure longevity and reduce the need for frequent replacements.
By carefully selecting the right lights and accessories, you can create a captivating and breathtaking display in your outdoor tree. Take your time to research and choose lights that align with your vision and budget, and don’t forget to consider the practical aspects such as length, power source, and durability.
Preparing the Tree and Lights
Before hanging the lights in your outdoor tree, it’s essential to properly prepare both the tree and the lights to ensure a safe and secure installation. Here are the steps to follow:
Clean the Tree: Remove any debris, dirt, or spider webs from the tree branches. This will not only make the lights look more aesthetically pleasing but also prevent any potential hazards or damage to the lights. Use a broom or a gentle brush to clean the branches.
Inspect the Lights: Before you begin, check the lights for any damaged bulbs or frayed wires. Replace any faulty bulbs or damaged strands to avoid electrical hazards. It’s important to only use lights that are in good working condition and approved for outdoor use.
Untangle and Test the Lights: Carefully untangle the lights, avoiding any unnecessary tugging or pulling. Once untangled, plug in the lights and test them to ensure they are working properly. This will save you time and frustration later during the installation process.
Create Lighting Plan: Plan the placement of the lights on the tree branches. Determine if you want a spiral effect, zigzag pattern, or if you prefer to wrap the lights around specific branches. You can also combine different techniques for a unique and picturesque display.
Consider Power Source: Position the lights in a way that allows for easy access to a power source. If you need an extension cord, make sure it is rated for outdoor use and protect it from moisture or damage. Ensure that the extension cord is long enough to reach the power source without stretching or causing hazards.
Secure the Lights: Once you have determined the positioning of the lights, use clips or hooks designed for outdoor use to secure the lights to the tree branches. Ensure that the lights are evenly distributed and properly attached to prevent them from sagging or falling.
Waterproofing: If you anticipate wet weather conditions, consider waterproofing the connections and plugs with weatherproof tape or sealant. This will protect the lights from moisture and reduce the risk of electrical damage or short circuits.
By taking the time to properly prepare the tree and lights, you will ensure a smooth installation process and minimize any potential hazards. Cleaning the tree, inspecting the lights, untangling and testing them, and creating a lighting plan will lay a solid foundation for a stunning display that will delight and impress.
Hanging the Lights
Now that you have prepared the tree and lights, it’s time to start hanging the lights. Follow these steps to ensure a successful and visually pleasing installation:
Start from the Bottom: Begin by attaching the lights to the bottom branches of the tree. This will provide a solid foundation and help guide the placement of the lights as you work your way up.
Wrap the Branches: To achieve a natural and seamless look, gently wrap the lights around the branches, following the natural curves and lines. You can also crisscross the lights across the branches for a more intricate pattern.
Secure with Clips or Hooks: As you wrap the lights around the branches, use outdoor-approved clips or hooks to secure them in place. This will ensure that the lights stay in position and won’t slide or fall off.
Space the Lights Evenly: Distribute the lights evenly across the tree to create a balanced and harmonious display. Avoid clumping too many lights on one side or leaving large gaps between the lights. Step back occasionally to assess the overall look and make adjustments as needed.
Work Your Way Up: Continue wrapping and securing the lights as you move up the tree. Take your time and be patient, making sure each section of lights is properly attached before moving on to the next. This will help maintain consistency and avoid any loose or sagging sections.
Cover Exposed Wires: As you hang the lights, be mindful of any exposed wires. Make sure to hide them behind branches or tuck them into crevices to create a clean and tidy appearance. Exposed wires not only detract from the overall look but also pose a safety hazard.
Double-Check the Lights: Once you have finished hanging all the lights, step back and inspect the tree from different angles. Look for any gaps, uneven spacing, or areas that may need additional lights. Make any necessary adjustments to ensure a visually appealing and well-balanced display.
Nighttime Testing: Wait until it gets dark to test the lights and assess the overall effect. Make any final adjustments or fine-tuning to create the desired ambiance. This will help you determine if any changes need to be made before your event or gathering.
By following these steps and taking your time, you can achieve a stunning display of lights in your outdoor tree. The process of hanging the lights may require patience and attention to detail, but the end result will be well worth it, creating a captivating and magical atmosphere for your outdoor space.
Powering the Lights
Once you have successfully hung the lights in your outdoor tree, it’s important to ensure they are properly powered to create a captivating and long-lasting display. Here are some steps to follow when powering the lights:
Determine Power Source: Identify the nearest power source to the tree. This could be an outdoor electrical outlet or a nearby extension cord connected to a power source inside your home.
Extension Cords: If you need to use an extension cord, make sure it is designed for outdoor use and has a sufficient length to reach the power source without causing any hazards. Use waterproof connectors and ensure the cord is secure and protected from moisture.
Timers: Consider using timers to automate the lighting. Timers can be set to turn the lights on and off at specific times, saving energy and ensuring that the lights are always illuminated when desired. This is especially useful for long-term installations or during holiday seasons.
Power Load: Determine the power load of the lights and ensure that the power source can handle it. Avoid overloading circuits by plugging in too many lights or additional electrical devices. Distribute the load across multiple outlets or circuits if needed.
Safety Precautions: While powering the lights, ensure that all connections are secure and free from any potential hazards. Keep electrical cords away from water, and check for any signs of wear or damage. If you notice any issues or abnormalities, promptly address them to ensure safety.
LED Lights: Consider using LED lights, as they are energy-efficient and have a longer lifespan compared to traditional incandescent lights. LED lights consume less power and generate less heat, making them a safer and more environmentally friendly option.
Keep an Eye on the Lights: Regularly check the lights to ensure they are functioning properly and inspect for any signs of damage or wear. Replace any burnt-out bulbs or faulty strands promptly to maintain the overall appearance and safety of the installation.
Power-Down at the End: When not in use, turn off the lights to conserve energy and extend their lifespan. It’s also advisable to unplug the lights during inclement weather to prevent any electrical damage or short circuits.
By following these guidelines for powering the lights, you can ensure a safe and efficient operation of your outdoor tree lighting. Taking the necessary precautions and using appropriate power sources will not only provide you with a captivating display but also ensure the longevity and safety of your installation.
Safety Considerations
When hanging lights in trees outside, it’s vital to prioritize safety to prevent any accidents or damage. Here are some important safety considerations to keep in mind:
Use Outdoor-rated Lights: Ensure that the lights you choose are specifically designed for outdoor use. These lights are built to withstand the elements and are less likely to be damaged by rain, wind, or other weather conditions.
Check for Safety Certifications: Look for lights that have been tested and certified by recognized safety organizations. This ensures that they meet specific safety standards and have undergone rigorous testing for quality and durability.
Check for Damaged Cords: Before installing the lights, inspect the cords for any fraying, exposed wires, or other damage. Damaged cords should be replaced immediately to avoid the risk of electrical shock or fire.
Secure Lights Properly: Ensure that the lights are securely attached to the tree. Use clips, hooks, or other proper fasteners designed for outdoor use. This will prevent the lights from falling or becoming entangled in the branches, reducing the risk of accidents.
Be Mindful of Electrical Overload: Avoid connecting too many lights to a single power source or circuit. Overloading the circuit can cause overheating and increase the risk of electrical fires. Spread the load across multiple circuits or outlets to distribute the power evenly.
Waterproof Connections: Use waterproof connectors or cover the connections with weatherproof tape to protect them from moisture. Moisture can cause electrical shorts, leading to malfunctions or even electrical shock.
Be Cautious with Ladders and Heights: When working at heights, always use a sturdy ladder and follow proper safety guidelines. Ensure that the ladder is stable and positioned on a level surface. Have someone spot you while you ascend or descend the ladder, especially when carrying lights or other equipment.
Follow Manufacturer’s Instructions: Read and carefully follow the manufacturer’s instructions for both the lights and any other accessories you use. This will ensure that you are using the equipment correctly and safely.
Turn Off Lights When Unattended: When you’re not actively enjoying the lights, remember to turn them off. This will conserve energy and reduce the risk of overheating or electrical hazards. Unplug the lights during severe weather conditions to further mitigate risks.
Monitor the Lights Regularly: Regularly inspect the lights for any signs of damage, wear, or malfunction. Check the connections, bulbs, and cords to identify any potential issues. Promptly replace any faulty components to maintain the safety and functionality of the lights.
By following these safety considerations, you can enjoy your outdoor tree lights with peace of mind. Prioritizing safety will help to mitigate potential risks and ensure that you and your loved ones can safely enjoy the enchanting beauty of the illuminated tree.
Troubleshooting Tips
While hanging lights in trees outside can create a magical and captivating display, it’s not uncommon to encounter some challenges along the way. Here are some troubleshooting tips to help you overcome common issues:
Check Power Source: If the lights aren’t turning on, ensure that the power source is functioning correctly. Check if the outlet or extension cord is receiving power, and if needed, try plugging the lights into a different outlet to eliminate the possibility of a faulty power source.
Inspect the Bulbs: If individual bulbs or sections of the lights are not working, carefully check the bulbs for any signs of damage or looseness. Replace any burnt-out bulbs with new ones of the same type and wattage to restore the functionality of the lights.
Address Connectivity Issues: If there are connectivity issues between different strands of lights, double-check the connections and ensure that they are securely plugged into each other. Sometimes, a loose connection can interrupt the flow of electricity and cause the lights to go out.
Avoid Overloading Circuits: If the lights are flickering or consistently turning off, it may be a sign that you are overloading the circuit. Reduce the number of lights connected to that circuit or distribute the load across multiple circuits to ensure a stable power supply.
Check for Damaged Wires: If the lights are not working despite all troubleshooting attempts, carefully inspect the cord for any signs of damage or exposed wires. Damaged wires can cause electrical shorts and prevent the lights from functioning. If the cord is damaged, replace it immediately.
Weatherproof Connections: If the lights keep going out during rainy or damp conditions, make sure that the connections are adequately weatherproofed. Use waterproof connectors or cover the connections with weatherproof tape to protect them from moisture and prevent electrical malfunctions.
Secure Loose Lights: If the lights are sagging or coming loose, reattach them more securely to the branches. Use outdoor-approved clips or hooks to ensure they stay in place. Regularly check the attachments and make adjustments as needed to maintain the desired appearance.
Consider Timer or Dimmer Issues: If you’re using timers or dimmers, double-check their settings and ensure they are functioning correctly. Reset or replace the timer/dimmer as needed to regain control over the lighting schedule or brightness levels.
Consult Manufacturer’s Troubleshooting Guides: If you’ve exhausted all troubleshooting options and the lights still aren’t working, review the manufacturer’s troubleshooting guide or contact their customer support for further assistance. They may have specific recommendations or solutions for the lights you are using.
Remember, troubleshooting can sometimes require patience and persistence. By following these tips and troubleshooting steps, you can overcome common issues and get your outdoor tree lights shining beautifully once again.
Conclusion
Hanging lights in trees outside can transform your outdoor space into a magical and enchanting setting. With careful planning, preparation, and the right tools, you can create a captivating display that enhances your backyard or garden for any occasion.
In this comprehensive guide, we have covered the step-by-step process of hanging lights in trees outside. We discussed the importance of assessing the tree and planning the light placement, selecting the right lights and accessories, preparing the tree and lights, hanging the lights properly, powering them, and considering safety measures and troubleshooting tips.
Remember to assess the tree’s suitability, taking into consideration its characteristics and height. Select lights that align with your design preferences and ensure they are in good working condition. Prepare the tree by cleaning it and untangling and testing the lights. Secure the lights properly, distribute them evenly, and strive for a visually pleasing display.
When powering the lights, consider the power source, use appropriate extension cords, and make use of timers to automate the lighting. Always prioritize safety by checking for damaged cords, securing the lights properly, and being cautious when working at heights.
In case you encounter any issues, our troubleshooting tips can help resolve common problems such as power outages, connectivity issues, and loose or damaged wires.
By following these guidelines and putting in the necessary effort, you can create a captivating outdoor space that will impress your guests and provide a cozy and inviting atmosphere for relaxation or special events.
So, unleash your creativity, embrace the DIY spirit, and let the magic of hanging lights in trees outside illuminate your outdoor space!