Home>Gardening Techniques>DIY Projects>How To Make A Rosemary Smudge Stick


DIY Projects
How To Make A Rosemary Smudge Stick
Published: January 31, 2024
Learn how to make a fragrant rosemary smudge stick at home with this easy DIY project. Enjoy the calming and cleansing benefits of this natural herb. Perfect for beginners!
(Many of the links in this article redirect to a specific reviewed product. Your purchase of these products through affiliate links helps to generate commission for Chicagolandgardening.com, at no extra cost. Learn more)
Table of Contents
Introduction
Welcome to the world of DIY herbal crafting, where ancient traditions meet modern creativity. In this guide, we'll delve into the art of making a rosemary smudge stick—a fragrant and visually appealing tool that has been used for centuries in various cultures for spiritual and cleansing purposes. Whether you're drawn to the soothing aroma of rosemary, interested in incorporating smudging rituals into your spiritual practices, or simply seeking a unique and meaningful craft project, creating your own rosemary smudge stick can be a fulfilling and rewarding experience.
The process of making a rosemary smudge stick is not only a hands-on way to connect with nature and tradition but also an opportunity to infuse your living space with the cleansing and uplifting properties of this beloved herb. As you embark on this journey, you'll discover the simple yet meditative nature of the craft, allowing you to slow down, focus on the present moment, and engage all your senses in the creative process.
By the end of this guide, you'll have a beautifully crafted rosemary smudge stick ready to be used in rituals, ceremonies, or simply to purify and freshen the air in your home. So, gather your supplies, clear a space for crafting, and let's begin this aromatic and enlightening adventure into the world of herbal smudge sticks.
Materials Needed
Before diving into the creative process of making a rosemary smudge stick, it’s essential to gather the necessary materials. The beauty of this DIY project lies in its simplicity and accessibility, requiring just a few basic items that can be easily sourced. Here’s what you’ll need:
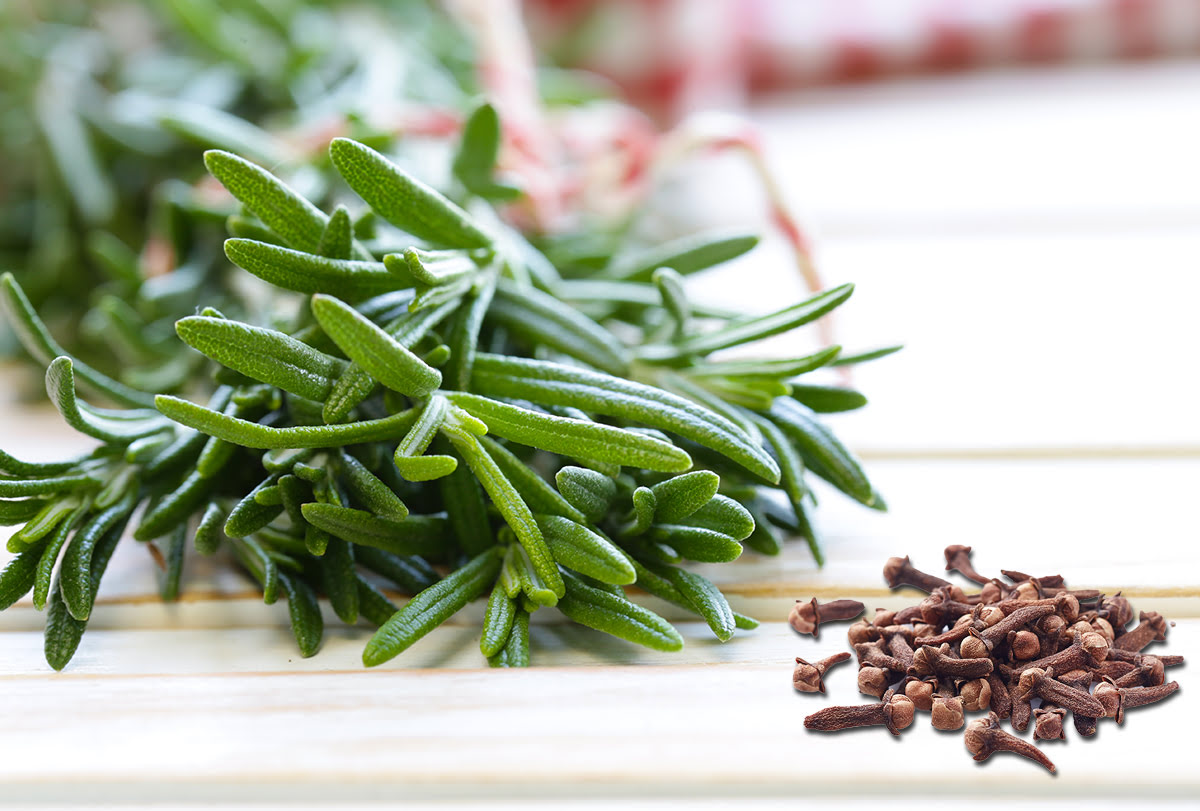
- Fresh Rosemary: Seek out fresh rosemary sprigs, either from your own garden or a local market. The aromatic and resilient nature of fresh rosemary makes it ideal for crafting a smudge stick that not only looks beautiful but also releases a delightful scent when burned.
- Cotton String or Hemp Twine: Choose a natural, unbleached cotton string or hemp twine to bind the rosemary sprigs together. This will ensure that your smudge stick remains pure and free from synthetic materials when burned.
- Scissors: A pair of sharp scissors will be used to trim the rosemary sprigs and cut the string during the assembly process.
- Cleansing Herbs (Optional): While rosemary is the star of the show, you may also consider incorporating other cleansing herbs such as sage, lavender, or cedar for a personalized touch. These additional herbs can complement the properties of rosemary and add depth to the smudging experience.
With these materials at hand, you’re well-equipped to embark on the journey of creating your very own rosemary smudge stick. The simplicity of the required items ensures that this project is accessible to beginners and seasoned DIY enthusiasts alike, inviting everyone to partake in the ancient art of smudge stick crafting.
Step 1: Gather Fresh Rosemary
The first step in creating a rosemary smudge stick is to gather fresh rosemary, either from your own herb garden or a local market. When selecting rosemary for your smudge stick, opt for vibrant, fragrant sprigs that are free from blemishes or discoloration. The aromatic oils within fresh rosemary not only contribute to its cleansing properties but also infuse the smudge stick with a delightful scent when burned.
If you have the opportunity to harvest rosemary from your garden, consider doing so during the plant’s peak growing season, typically in the spring or early summer. This is when the rosemary is brimming with essential oils and is at its most potent state. When harvesting, use sharp gardening shears to snip the rosemary sprigs, ensuring a clean cut that promotes the plant’s continued growth.
For those obtaining rosemary from a market or grocery store, take a moment to appreciate the herb’s appearance and fragrance. Look for rosemary with sturdy stems and abundant leaves, as these characteristics will contribute to a visually appealing and aromatic smudge stick. Whether you’ve cultivated a personal connection to the rosemary through gardening or simply appreciate its natural beauty, gathering this foundational ingredient sets the stage for a meaningful and hands-on crafting experience.
By taking the time to select high-quality rosemary, you’re not only ensuring the efficacy of your smudge stick but also honoring the ancient traditions and modern practices that celebrate the inherent properties of this revered herb. With your fresh rosemary in hand, you’re ready to proceed to the next step of preparing the herb for smudge stick assembly.
Step 2: Prepare the Rosemary
With your freshly gathered rosemary at the ready, the next step in crafting a rosemary smudge stick is to prepare the herb for assembly. This crucial stage involves cleaning the rosemary, removing any excess foliage, and ensuring that the sprigs are ready to be fashioned into a cohesive smudge stick.
Begin by gently inspecting the rosemary sprigs, taking note of any damaged or discolored leaves. Using your fingers or a pair of scissors, carefully strip away any undesirable foliage, focusing on creating a uniform and visually appealing appearance. While a certain rustic charm is inherent to handmade smudge sticks, tidying up the rosemary sprigs at this stage will contribute to a more polished final product.
As you prepare the rosemary, consider the length at which you’d like your smudge stick to be. Whether you prefer a compact and slender design or a more substantial smudge stick, trimming the rosemary sprigs to a consistent length will facilitate the assembly process and result in a visually balanced end product. This is also an opportunity to set aside any particularly fragrant or aesthetically pleasing sprigs to be showcased prominently in the smudge stick.
Furthermore, take a moment to infuse your intentions and gratitude into the rosemary as you prepare it for the smudge stick. Reflect on the cleansing and revitalizing properties of the herb, and visualize the purpose for which your smudge stick will be used. This mindful approach adds a personal and meaningful dimension to the crafting process, infusing the smudge stick with your positive energy and intentions.
By carefully tending to the rosemary and imbuing it with purposeful energy, you’re laying the foundation for a thoughtfully crafted smudge stick that not only cleanses spaces but also resonates with your own intentions and creativity. With the rosemary now prepared, you’re ready to move on to the next step: assembling the smudge stick.
Step 3: Assemble the Smudge Stick
Assembling the rosemary smudge stick is a pivotal stage in the crafting process, where individual sprigs are bound together to form a cohesive and aromatic tool for cleansing and ritualistic use. This step invites a hands-on approach, allowing you to engage with the rosemary in a tactile and creative manner as you construct the smudge stick.
To begin, gather a small bundle of prepared rosemary sprigs, ensuring that they are of similar length and free from excess foliage. Lay them out on a clean surface, and take a moment to arrange the sprigs in a way that pleases the eye and aligns with your desired smudge stick size and shape. This initial arrangement sets the visual foundation for the smudge stick and provides an opportunity to infuse your creativity into the crafting process.
Once you’re satisfied with the arrangement, take a length of cotton string or hemp twine and secure one end to the base of the bundle with a tight knot. With the knot in place, begin wrapping the string tightly around the rosemary sprigs, working your way upward in a spiral motion. As you wrap, ensure that the sprigs remain snugly bound together, forming a compact and secure smudge stick.
While binding the rosemary, consider incorporating your intentions and positive energy into the smudge stick. Envision the purpose for which it will be used, whether for cleansing, meditation, or spiritual rituals. This mindful approach infuses the smudge stick with a personalized touch, making it a reflection of your intentions and creativity.
As you near the end of the bundle, tuck the loose end of the string under a wrap to secure it, forming a neat and tidy finish. Take a moment to ensure that the rosemary sprigs are firmly bound and that the smudge stick has a pleasing and balanced appearance. With the assembly complete, you now have a beautifully crafted rosemary smudge stick ready for the final stage of the crafting process: drying.
Step 4: Dry the Smudge Stick
Once the rosemary smudge stick has been assembled, the next crucial step is to allow it to dry thoroughly. Drying not only sets the shape of the smudge stick but also intensifies the aromatic properties of the rosemary, ensuring a rich and fragrant experience when the smudge stick is burned.
Find a well-ventilated and dry area to hang the smudge stick, such as a sunny windowsill or a porch with good airflow. It’s important to choose a location where the smudge stick can air dry undisturbed for approximately 1 to 2 weeks. During this time, the rosemary will gradually dehydrate, resulting in a smudge stick that is both visually appealing and ready for ceremonial or cleansing use.
When hanging the smudge stick to dry, consider using a length of twine or string to suspend it from a hook or peg. This allows for optimal airflow around the entire smudge stick, promoting uniform drying and preventing any moisture buildup that could compromise the quality of the finished product.
As the smudge stick dries, take the opportunity to infuse it with your intentions and positive energy. Visualize the purpose for which it will be used and imbue it with feelings of gratitude, cleansing, and revitalization. This mindful approach adds a personal and meaningful dimension to the crafting process, ensuring that the smudge stick becomes a reflection of your intentions and creativity.
Throughout the drying period, periodically check on the smudge stick to ensure that it is drying evenly and free from any signs of mold or mildew. If you notice any issues, gently adjust the position of the smudge stick to promote balanced drying and address any potential concerns. Patience is key during this stage, as allowing the smudge stick to thoroughly dry is essential for optimal burning and longevity.
Once the smudge stick is completely dry to the touch and retains its shape, it is ready for use. The dried rosemary will release a fragrant and cleansing aroma when burned, making it an ideal tool for rituals, meditation, or simply refreshing the atmosphere in your living space. With the smudge stick now dried and infused with your intentions, you’re prepared to explore the final step: using the rosemary smudge stick.
Step 5: Use the Rosemary Smudge Stick
After the careful crafting and drying of your rosemary smudge stick, it’s time to embrace the ritualistic and cleansing practice for which it was created. Using the smudge stick offers an opportunity to engage in mindful and intentional actions, whether for spiritual rituals, space clearing, or simply to enjoy the aromatic benefits of burning rosemary.
To begin, find a heat-resistant vessel, such as a ceramic bowl or abalone shell, to hold the smudge stick while it burns. This not only provides a safe and contained space for the smudging ritual but also allows you to easily carry the smudge stick throughout your living space if desired.
Before igniting the smudge stick, take a moment to center yourself and set your intentions for the smudging ritual. Whether you seek to cleanse and purify a specific area, create a sacred space for meditation, or simply enjoy the aromatic experience, infusing the ritual with your intentions adds depth and meaning to the practice.
Using a flame, gently ignite the tip of the smudge stick, allowing the flame to flicker for a few moments before gently blowing it out. The goal is to create a steady stream of fragrant smoke rather than a roaring flame. As the smoke begins to billow from the smudge stick, use a feather, your hand, or a dedicated fan to gently guide the smoke throughout the space, paying special attention to corners, doorways, and areas where energy may feel stagnant.
As you move through the space, visualize the smoke carrying away any negative or stagnant energy, leaving behind a sense of clarity, peace, and positivity. The aromatic properties of the burning rosemary will infuse the air, creating a refreshing and uplifting atmosphere within your home.
After completing the smudging ritual, allow the smudge stick to naturally extinguish in the heat-resistant vessel. Take a moment to express gratitude for the cleansing and revitalizing properties of the rosemary, as well as for the intentions you’ve infused into the smudging practice.
With the smudging ritual complete, you may choose to store the partially burned smudge stick for future use or allow it to naturally decompose, returning its organic materials to the earth. Regardless of the approach, the act of using the rosemary smudge stick serves as a powerful and intentional practice, allowing you to engage with the ancient tradition of smudging while infusing it with your own creativity and energy.
