Home>Gardening Techniques>DIY Projects>How To Make Rosemary Oil
DIY Projects
How To Make Rosemary Oil
Modified: January 29, 2024
Learn how to make rosemary oil at home with this easy DIY project. Harness the natural benefits of rosemary for your skincare routine or culinary creations.
(Many of the links in this article redirect to a specific reviewed product. Your purchase of these products through affiliate links helps to generate commission for Chicagolandgardening.com, at no extra cost. Learn more)
Table of Contents
Introduction
Are you looking for a natural and versatile DIY project? Why not try making your own rosemary oil? Rosemary oil is known for its wonderful aroma and numerous benefits. Whether you want to use it for aromatherapy, hair care, or as a gourmet cooking ingredient, making rosemary oil at home is simple and rewarding.
Rosemary (Rosmarinus officinalis) is an aromatic herb that has been used for centuries for its medicinal and culinary properties. It is rich in antioxidants, vitamins, and minerals, making it a popular choice for DIY enthusiasts. Rosemary oil is extracted from the leaves of the rosemary plant and can be used in various ways to promote health and well-being.
In this guide, we will walk you through the step-by-step process of making rosemary oil. From harvesting fresh rosemary to creating an infusion base and finally infusing the oil, you will learn how to create a high-quality product right in the comfort of your own home.
Not only is making rosemary oil a cost-effective option, but it also allows you to have control over the ingredients and ensure that you are using a pure and natural product. So, let’s dive in and discover how to make your own rosemary oil!
Benefits of Rosemary Oil
Rosemary oil offers a wide range of benefits for both your physical and mental well-being. Let’s explore some of the remarkable advantages of incorporating rosemary oil into your daily routine.
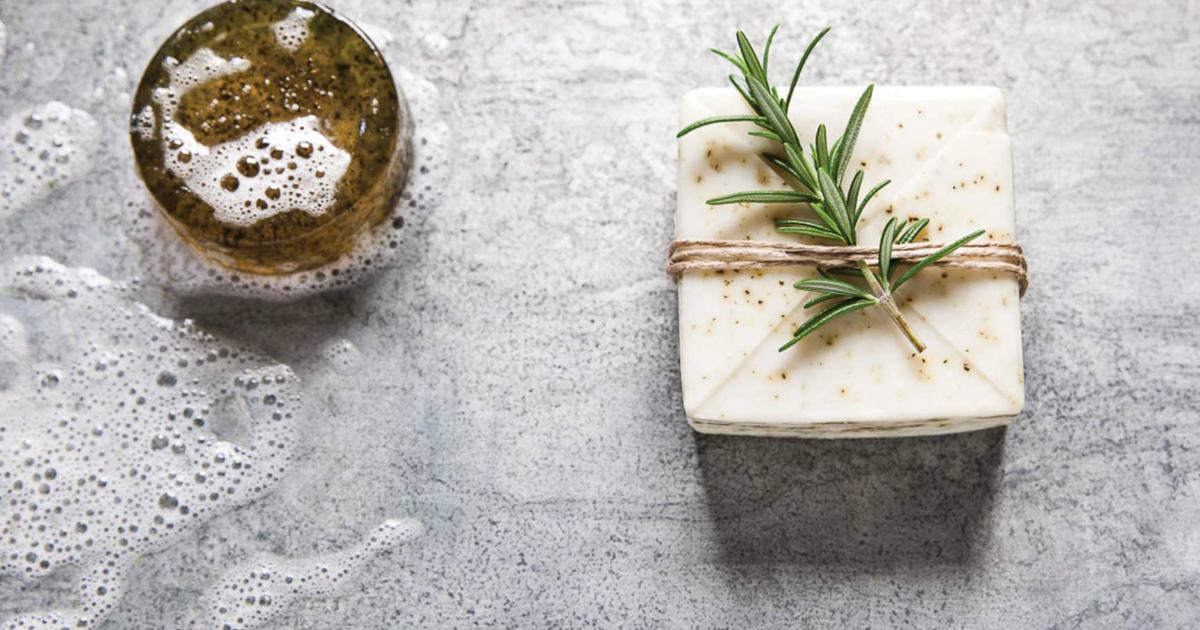
- Improves Hair and Scalp Health: Rosemary oil is excellent for maintaining a healthy scalp and promoting hair growth. The oil stimulates blood circulation, nourishes the hair follicles, and helps prevent dandruff and hair loss.
- Enhances Cognitive Function: Inhaling the scent of rosemary oil has been shown to improve memory, concentration, and mental clarity. It can provide a natural boost to your focus and productivity, making it an ideal choice for studying or working.
- Relieves Stress and Anxiety: The soothing aroma of rosemary oil has a calming effect on the mind and body. It helps reduce stress levels, anxiety, and promotes relaxation. The oil can be used in aromatherapy or added to bathwater for a rejuvenating experience.
- Boosts Immune System: Rosemary oil is known for its antimicrobial properties, which help fight off infections and strengthen the immune system. It can be used topically to treat minor skin irritations and wounds.
- Provides Pain Relief: The anti-inflammatory properties of rosemary oil make it an effective natural remedy for relieving muscle and joint pain. Massaging the oil onto the affected area can help reduce inflammation and ease discomfort.
These are just a few of the many benefits that rosemary oil has to offer. Its versatility and effectiveness make it a valuable addition to your DIY projects and everyday life. Whether you want to improve the health of your hair, boost your cognitive function, or promote relaxation, rosemary oil can be your go-to solution.
Things You’ll Need
Before you begin the process of making rosemary oil, it’s important to gather the necessary materials and equipment. Here’s a list of items you’ll need to ensure a successful DIY project:
- Fresh Rosemary: Harvest a bunch of fresh rosemary sprigs. Aim for about 1 cup of rosemary leaves for the infusion.
- Drying Rack or Baking Sheet: You’ll need a drying rack or a baking sheet lined with parchment paper to dry the rosemary leaves.
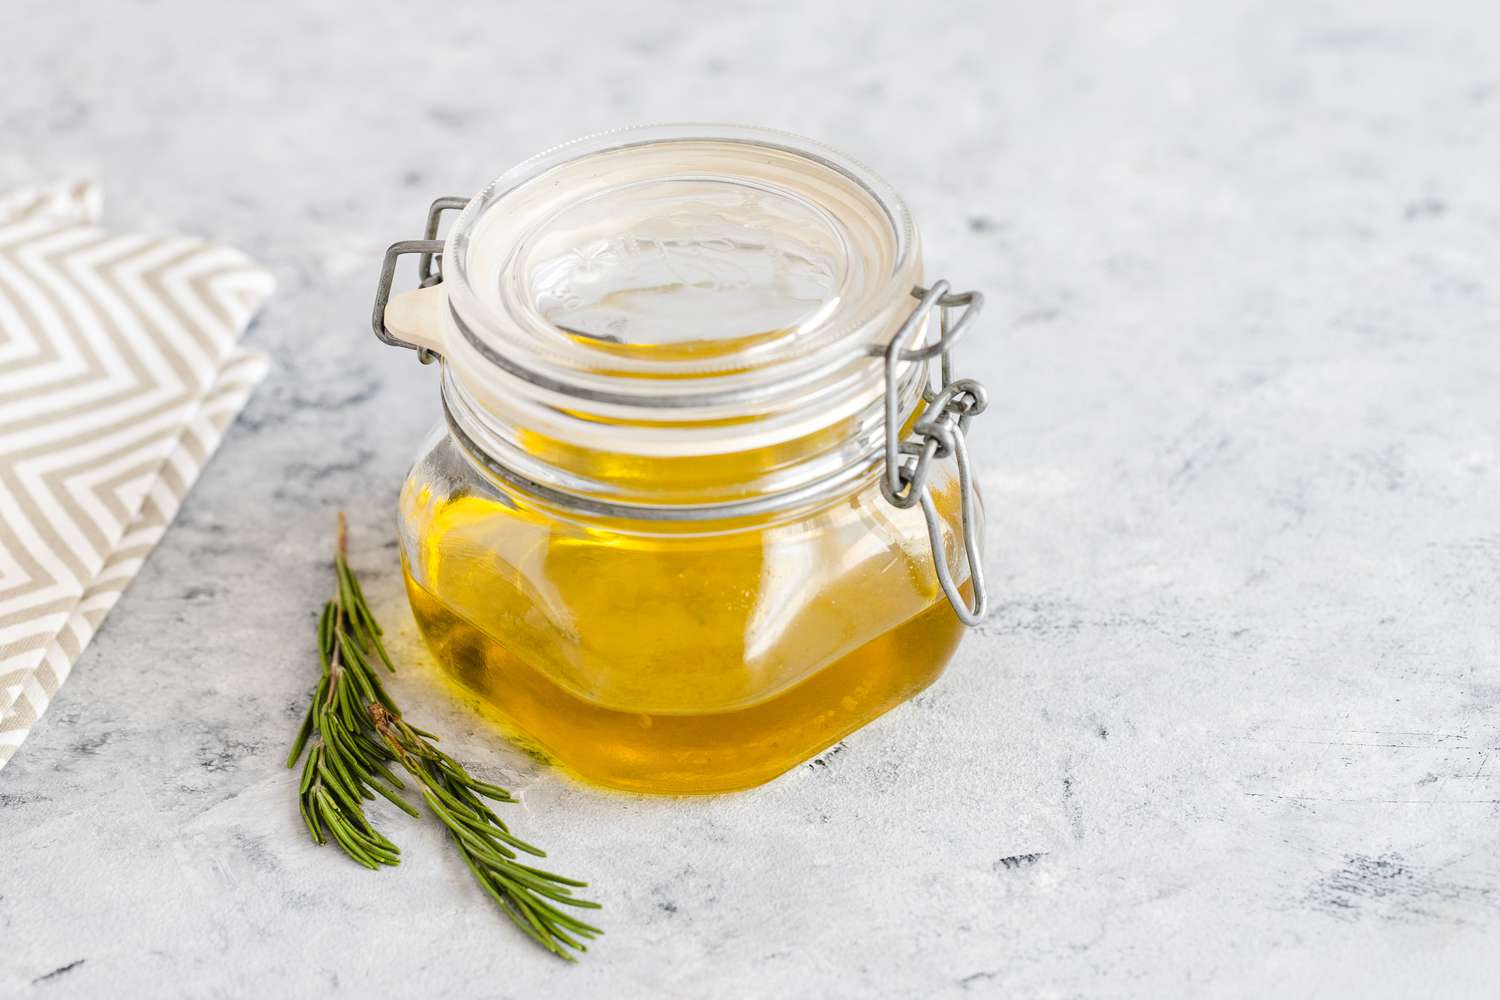
- Glass Jar: Use a clean and sterilized glass jar with a tight-fitting lid to store the infused oil.
- Carrier Oil: Choose a high-quality carrier oil, such as olive oil, jojoba oil, or sweet almond oil. The carrier oil will be used to infuse the rosemary leaves.
- Cheesecloth or Fine Mesh Strainer: You’ll need cheesecloth or a fine mesh strainer to strain the infused oil and remove any plant material.
- Funnel: A funnel can help you easily transfer the infused oil into the storage jar without any spills or mess.
- Labels: Don’t forget to label your jar with the date and contents to keep track of the shelf life and usage.
Having these essential items on hand will ensure that you have a smooth and enjoyable experience while making your very own rosemary oil. Once you’ve gathered all the necessary materials, you’re ready to embark on the journey of creating this versatile and aromatic oil at home.
Step 1: Harvest Fresh Rosemary
The first step in making rosemary oil is to harvest fresh rosemary from your garden or purchase it from a trusted source. Harvesting the rosemary just before making the oil ensures its freshness and maximum flavor extraction. Here’s how you can do it:
- Select Healthy Rosemary: Look for rosemary plants that are vibrant, healthy, and free from pests or diseases. Choose stems that have plump and aromatic leaves.
- Choose the Right Time: The best time to harvest rosemary is in the morning after the dew has dried, as the essential oils in the leaves are at their peak concentration.
- Use Pruning Shears or Scissors: Snip the rosemary sprigs using clean pruning shears or scissors. Cut the stems close to the base of the plant, leaving about 4-6 inches of stem length for regrowth.
- Harvest Selectively: Take a selective approach when harvesting rosemary, only snipping the amount you need. Avoid removing more than one-third of the plant, as it can strain the plant’s growth.
- Clean and Dry the Sprigs: Remove any dirt or debris from the harvested rosemary sprigs by gently rinsing them under cool water. Pat them dry with a clean towel or leave them to air dry for a few minutes.
Harvesting fresh rosemary is an essential first step in creating high-quality rosemary oil. By carefully selecting healthy sprigs and correctly harvesting them, you are setting a solid foundation for the rest of the oil-making process. So, get out into your garden or visit a local herb supplier and gather the freshest rosemary you can find.
Step 2: Dry the Rosemary
After harvesting the fresh rosemary, the next step is to dry the herb before infusing it with oil. Drying the rosemary helps remove moisture from the leaves and concentrates its flavor and aroma. Here’s how you can dry rosemary effectively:
- Remove Excess Moisture: Gently pat the harvested rosemary sprigs dry with a clean towel to remove any excess moisture. Avoid squeezing or crushing the leaves, as this can cause them to lose their essential oils.
- Choose a Drying Method: There are two main methods for drying rosemary: air drying and oven drying. Choose the method that suits your preference and time availability.
- Air Drying: Tie the rosemary sprigs together at the base with a kitchen twine or rubber band. Hang them upside down in a well-ventilated area away from direct sunlight. This allows for natural air circulation, which aids in the drying process.
- Oven Drying: If you prefer a quicker drying method, you can use your oven. Preheat the oven to its lowest temperature setting, place the rosemary sprigs on a baking sheet lined with parchment paper, and leave the oven door slightly ajar. Check the rosemary frequently to ensure it doesn’t burn.
- Check for Dryness: The drying time varies depending on humidity levels and the drying method used. The rosemary leaves should become brittle and crumble easily when touched. This indicates that they are dry and ready for the next step.
By properly drying the rosemary, you are preserving its flavors and ensuring that the essential oils are fully concentrated. This step is crucial for creating an aromatic and potent rosemary oil that can be used in a variety of applications. Once the rosemary is fully dried, you’re ready to move on to the next step of infusing the oil.
Step 3: Prepare the Infusion Base
Now that your rosemary is dry, it’s time to prepare the infusion base for your rosemary oil. The infusion base acts as a carrier for the rosemary leaves, allowing their beneficial properties to transfer into the oil. Follow these steps to prepare the infusion base:
- Choose a Carrier Oil: Select a high-quality carrier oil to infuse with the rosemary. Olive oil, jojoba oil, and sweet almond oil are popular choices due to their mild scent and long shelf life. Ensure that the oil is fresh and of good quality.
- Sterilize the Glass Jar: Clean and sterilize a glass jar with a tight-fitting lid to prevent any contaminants from affecting the oil. You can sterilize the jar by boiling it in water for a few minutes or by washing it with hot, soapy water and rinsing it thoroughly.
- Add the Rosemary Leaves: Place the dried rosemary leaves into the sterilized glass jar. You can leave them whole or slightly bruise them to release more of their aromatic oils.
- Fill the Jar with Carrier Oil: Pour the carrier oil into the glass jar, ensuring that the rosemary leaves are completely submerged. Leave some space at the top of the jar to allow for expansion during the infusion process.
- Secure the Lid: Tightly close the lid of the jar and give it a gentle shake to ensure that the rosemary leaves are evenly distributed and coated with the oil.
By properly preparing the infusion base, you are creating a rich environment for the rosemary leaves to infuse their beneficial properties into the oil. The carrier oil will serve as a natural vehicle, capturing the essence of the rosemary and allowing it to develop and intensify over time. Once the infusion base is ready, it’s time to move on to the next step, which is infusing the rosemary oil.
Step 4: Infuse the Rosemary
Now that you have prepared the infusion base, it’s time to infuse the rosemary into the carrier oil. This step involves allowing the rosemary leaves to steep in the oil, extracting their aromatic compounds and beneficial properties. Follow these steps to infuse the rosemary oil:
- Place the Jar in a Warm Area: Find a warm spot in your home, away from direct sunlight, to place the jar. The warmth helps facilitate the infusion process and allows the oil to extract the flavors and properties of the rosemary.
- Let it Infuse: Allow the rosemary to infuse in the carrier oil for at least two weeks. During this time, the oil will absorb the aroma and beneficial compounds of the rosemary leaves.
- Shake the Jar Occasionally: Every few days, give the jar a gentle shake to agitate the contents and ensure that the rosemary leaves are fully immersed in the oil. This helps promote even infusion.
- Taste Test: After about two weeks, you can perform a taste test to determine the desired intensity of the rosemary flavor. If the flavor is to your liking, move on to the next step. If you prefer a stronger flavor, you can continue infusing for a few more days.
Infusing the rosemary in the carrier oil allows for the transfer of the herb’s aromatic compounds and beneficial properties. The longer the infusion period, the stronger the flavor and scent of the rosemary oil will be. Remember to be patient during this process and resist the temptation to rush it. Once the rosemary oil has reached your desired flavor intensity, it’s time to move on to the next step of straining the oil.
Step 5: Strain the Oil
After the infusion period, it’s time to strain the oil to remove the rosemary leaves and any impurities. This step ensures that you have a smooth and clear rosemary oil ready for use. Follow these steps to strain the oil effectively:
- Prepare a Straining Setup: Set up a straining setup by placing a fine mesh strainer or a piece of cheesecloth over a clean container or bowl. Make sure the container is deep enough to hold the strained oil without any spills.
- Pour the Infused Oil: Carefully pour the infused oil from the glass jar into the strainer or cheesecloth-lined container. Use a spatula or the back of a spoon to press down on the rosemary leaves to extract any remaining oil.
- Strain the Oil: Gently lift the strainer or cheesecloth from the container, allowing the oil to strain through. Let the oil drip freely until there is no more oil left in the leaves or strainer.
- Discard the Rosemary Leaves: Once the oil has been strained, discard the used rosemary leaves. You can compost them or use them in cooking, if desired.
Straining the oil is an important step to ensure a clear and pure rosemary oil. The strained oil can be used immediately or stored for future use. With the rosemary leaves removed, you can fully appreciate the aromatic properties and versatility of the oil. Now that you have strained the oil, it’s time to move on to the final step of storing the rosemary oil properly.
Step 6: Store the Rosemary Oil
Properly storing your homemade rosemary oil is essential for maintaining its freshness and potency. Follow these guidelines to ensure that your oil stays in optimal condition:
- Transfer the Oil into a Clean Container: Use a clean, sterilized glass jar or bottle with a tight-fitting lid to store the rosemary oil. Make sure the container is dry to prevent any moisture from contaminating the oil.
- Label the Container: Clearly label the container with the date of preparation and contents. This will help you keep track of the oil’s freshness and usage.
- Store in a Cool, Dark Place: Place the container of rosemary oil in a cool and dark area, away from direct sunlight or heat sources. Exposure to light and heat can cause the oil to degrade and lose its potency.
- Check for Rancidity: Over time, oils can become rancid. To ensure the quality of your rosemary oil, periodically check for any signs of rancidity such as an off smell or an unpleasant taste. If you detect any signs, it’s best to discard the oil and make a fresh batch.
- Enjoy Within a Reasonable Timeframe: While rosemary oil can have a relatively long shelf life, it is best enjoyed within six months to a year. However, do monitor its freshness and use your discretion when determining if it’s still suitable for use.
By storing your rosemary oil properly, you can ensure its longevity and maintain its quality. Whether you use the oil for culinary purposes, aromatherapy, or skincare, having a freshly made and well-preserved rosemary oil on hand can enhance your DIY projects and daily routines.
Conclusion
Congratulations! You have successfully learned how to make your own rosemary oil. This simple and rewarding DIY project allows you to harness the natural power of rosemary for various purposes, from hair care to aromatherapy and beyond. By following the step-by-step process outlined in this guide, you can create a high-quality rosemary oil right in the comfort of your own home.
Rosemary oil offers a myriad of benefits, including promoting hair and scalp health, enhancing cognitive function, relieving stress and anxiety, boosting the immune system, and providing pain relief. With its versatility and effectiveness, rosemary oil is a valuable addition to your DIY projects and everyday life.
Remember, the key to making the best rosemary oil is to start with fresh rosemary, properly dry the herb, and infuse it in a carrier oil for an adequate amount of time. Straining the oil and storing it properly will ensure its longevity and maintain its quality.
So, why wait? Gather your materials, harvest some fresh rosemary, and embark on the journey of creating your own rosemary oil. The rewards of this DIY project are not only the aromatic and versatile oil itself but also the satisfaction and pride that come with making something from scratch.
Enjoy the process, experiment with different variations, and discover the many ways you can incorporate rosemary oil into your life. Whether you use it in cooking, for hair and skincare routines, or to create a calming atmosphere, your homemade rosemary oil is sure to bring joy and wellness to you and those around you.