Home>Gardening Techniques>DIY Projects>How To Make Liquid Fertilizer For Plants
DIY Projects
How To Make Liquid Fertilizer For Plants
Modified: January 22, 2024
Learn how to make your own liquid fertilizer for plants with these easy DIY projects. Boost the health and growth of your garden with homemade plant nourishment.
(Many of the links in this article redirect to a specific reviewed product. Your purchase of these products through affiliate links helps to generate commission for Chicagolandgardening.com, at no extra cost. Learn more)
Table of Contents
- Introduction
- Benefits of Using Liquid Fertilizer
- Understanding Nutrient Needs of Plants
- Choosing the Right Ingredients for Liquid Fertilizer
- Methods for Making Liquid Fertilizer
- Compost Tea
- Manure Tea
- Seaweed Solution
- Epsom Salt Solution
- Fish Emulsion
- Applying Liquid Fertilizer to Plants
- Precautions and Tips for Using Liquid Fertilizer
- Conclusion
Introduction
Welcome to the world of DIY projects! If you’re passionate about gardening and nurturing your plants, then learning how to make your own liquid fertilizer can be an incredibly rewarding endeavor. Not only does it allow you to have complete control over the ingredients used, but it also saves you money and reduces the dependency on store-bought fertilizers.
In this comprehensive guide, we will explore the benefits of using liquid fertilizer, understand the nutrient needs of plants, choose the right ingredients, and explore various methods for making your own liquid fertilizer at home.
Giving your plants the right nutrition is vital for their overall health and productivity. While solid fertilizers can be effective, liquid fertilizers offer certain advantages that make them an excellent choice for garden enthusiasts. Liquid fertilizers provide a quick and efficient way to deliver essential nutrients directly to the plant roots. The nutrients in liquid form are readily available for absorption, ensuring faster growth, improved flowering, and increased fruiting.
By making your own liquid fertilizer, you have the flexibility to customize the nutrient ratios according to the specific needs of your plants. This is particularly beneficial for different plant varieties and growth stages, as their nutrient requirements can vary significantly.
Another advantage of liquid fertilizer is its versatility in application. You can easily use it as a foliar spray, allowing the plants to absorb nutrients through their leaves. This method is especially effective for foliage plants or for giving a quick boost to plants showing signs of nutrient deficiency. Liquid fertilizers can also be applied directly to the soil for root absorption, providing a well-rounded approach to plant nutrition.
Now that you understand the benefits of liquid fertilizer, let’s delve deeper into understanding the nutrient needs of plants and how to choose the right ingredients to create a nutrient-rich liquid fertilizer customized for your garden.
Benefits of Using Liquid Fertilizer
Using liquid fertilizer in your garden can offer a range of benefits that contribute to the overall health, growth, and productivity of your plants. Here are some key advantages of incorporating liquid fertilizer into your gardening routine:
- Improved Nutrient Absorption: Liquid fertilizers are formulated in a way that allows nutrients to be readily available for plant uptake. This means that plants can absorb the nutrients more efficiently, leading to faster growth and better overall health.
- Customizable Nutrient Ratios: One of the biggest advantages of making your own liquid fertilizer is the ability to customize the nutrient ratios based on the specific needs of your plants. Different plants have different nutrient requirements at various growth stages, and liquid fertilizers allow you to tailor the nutrient composition accordingly.
- Fast-Acting Results: Liquid fertilizer can deliver nutrients to the plants more quickly compared to solid fertilizers. The absorption of nutrients through the leaves or root system is faster, resulting in visible improvements in plant health and growth in a shorter period of time.
- Enhanced Plant Development: Liquid fertilizers can promote healthier root development, which in turn leads to stronger, more robust plants. The balanced nutrient composition aids in the development of foliage, flowers, and fruits, ensuring a bountiful harvest.
- Convenient Application: Liquid fertilizers offer flexibility in application methods. They can be easily sprayed directly onto the foliage, allowing for efficient absorption through the leaves. This is particularly beneficial for foliar feeding and treating nutrient deficiencies. Alternatively, liquid fertilizers can also be applied to the soil for root absorption.
- Cost-Effective: Making your own liquid fertilizer can be cost-effective in the long run. By using readily available ingredients and DIY techniques, you can save money on commercial fertilizers while still providing your plants with the necessary nutrients.
- Sustainable Gardening: Creating your own liquid fertilizer promotes sustainable gardening practices by reducing the reliance on chemical-based fertilizers. By utilizing organic ingredients and natural processes, you contribute to a healthier environment and promote the overall well-being of your plants.
Now that we understand the benefits of using liquid fertilizer, let’s dive into the crucial aspect of understanding the nutrient needs of plants to ensure we provide them with the right nourishment.
Understanding Nutrient Needs of Plants
Having a solid understanding of the nutrient needs of plants is crucial when it comes to creating an effective liquid fertilizer. Each plant requires a specific balance of essential nutrients for optimal growth and development. By understanding these needs, you can ensure that your homemade liquid fertilizer provides the necessary elements for healthy plant growth.
The primary nutrients that plants require are nitrogen (N), phosphorus (P), and potassium (K), commonly referred to as NPK. These three nutrients are essential for different aspects of plant development:
- Nitrogen (N): Nitrogen is crucial for promoting leafy growth and overall plant vigor. It plays a significant role in the formation of proteins and enzymes, essential components for plant structure and function.
- Phosphorus (P): Phosphorus is vital for promoting root development, flowering, and fruit production. It is involved in energy transfer reactions within the plant and plays a critical role in the development of seeds and flowers.
- Potassium (K): Potassium contributes to overall plant health and stress tolerance. It helps regulate water movement within the plant, aids in the formation of sugars and carbohydrates, and enhances disease resistance.
In addition to the primary nutrients, plants also require secondary nutrients and micronutrients in smaller quantities:
- Secondary Nutrients: These include calcium (Ca), magnesium (Mg), and sulfur (S). Although plants require these nutrients in smaller amounts, they are still essential for healthy growth and development.
- Micronutrients: Micronutrients, also known as trace elements, are necessary for plant growth in tiny amounts. These include iron (Fe), manganese (Mn), zinc (Zn), copper (Cu), boron (B), molybdenum (Mo), and chlorine (Cl).
Understanding the nutrient requirements of the specific plants in your garden will help you select the right ingredients to create a custom liquid fertilizer. Different plants have varying nutrient needs, so it’s important to research and identify the specific nutrient deficiencies or requirements for each plant variety.
A soil test can be a helpful tool in determining the nutrient composition of your soil and identifying any deficiencies. This information will guide you in formulating a liquid fertilizer with the appropriate nutrient ratios to address any deficiencies and promote optimal plant growth.
Now that we have a solid understanding of plant nutrient needs, let’s move on to choosing the right ingredients to create an effective liquid fertilizer for your plants.
Choosing the Right Ingredients for Liquid Fertilizer
When it comes to creating a homemade liquid fertilizer, selecting the right ingredients is essential for providing your plants with the nutrients they need. Here are some key considerations to keep in mind when choosing the ingredients for your liquid fertilizer:
- Organic Matter: Incorporating organic matter into your liquid fertilizer helps improve soil structure and fertility. Ingredients such as compost, worm castings, and well-rotted manure provide a rich source of nutrients and beneficial microorganisms that promote overall plant health.
- Nutrient Sources: Different ingredients provide different nutrients. For example, banana peels are a good source of potassium, while eggshells contribute calcium. By diversifying the ingredients in your liquid fertilizer, you ensure a well-rounded nutrient profile that meets the specific needs of your plants.
- Availability and Cost: Consider the availability and cost of the ingredients you choose. Opt for ingredients that are easily accessible and affordable, as this will make it more sustainable and practical to produce your own liquid fertilizer.
Specific Plant Needs: Take into account the specific nutrient requirements of the plants you are growing. Some plants may have a higher need for certain nutrients, so adjusting your recipe accordingly can ensure tailored nutrition for each specific plant species.
Here are some common ingredients that you can incorporate into your liquid fertilizer:
- Compost: Compost is a fantastic source of organic matter and nutrients. It provides a range of beneficial microorganisms and nutrients that improve soil health and promote plant growth.
- Manure: Well-rotted manure, such as cow, horse, or chicken manure, is a nutrient-rich ingredient that adds essential nitrogen, phosphorus, and potassium to your liquid fertilizer.
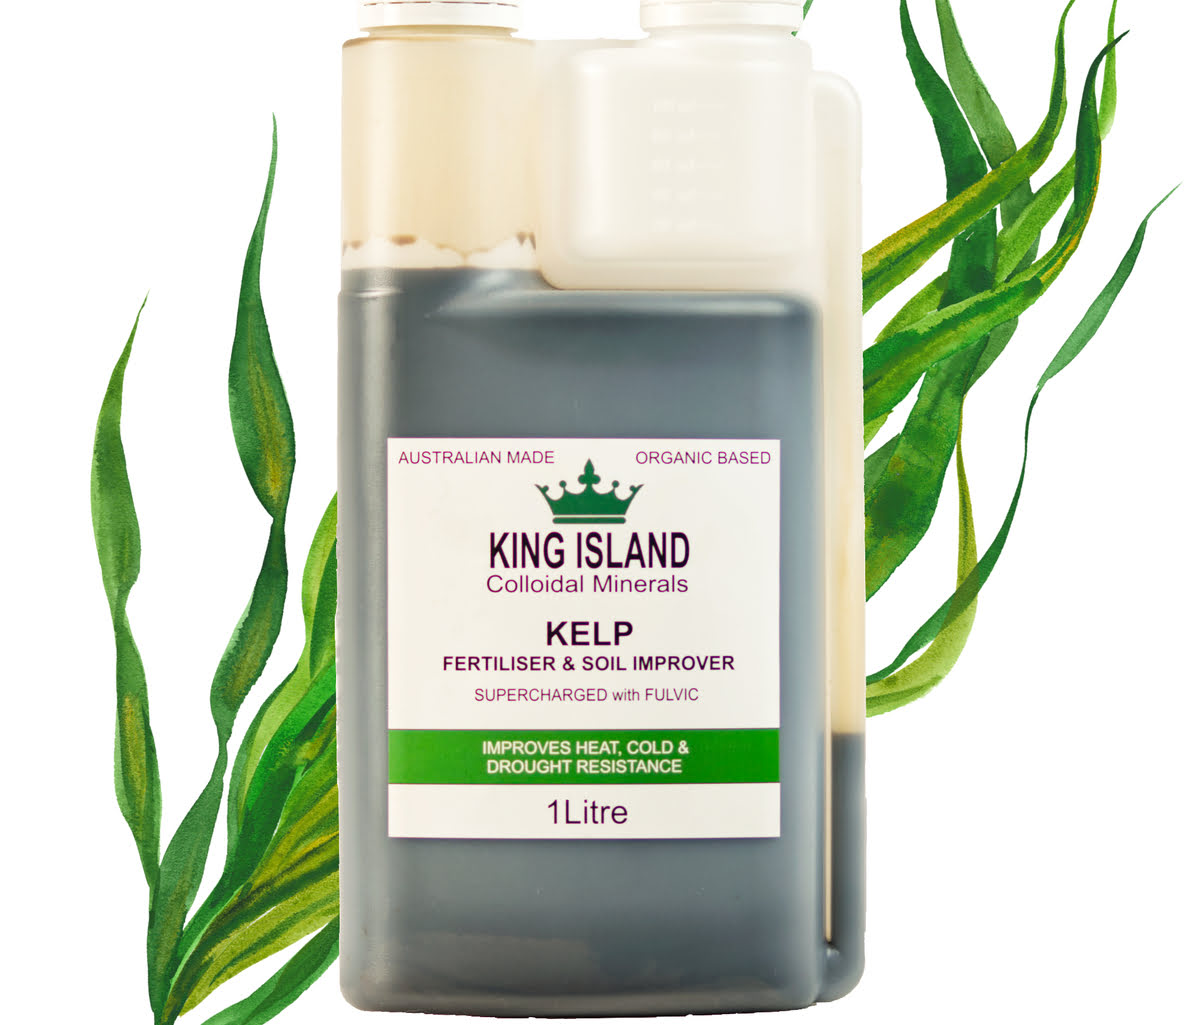
- Seaweed: Seaweed contains a wide spectrum of trace elements and growth-promoting hormones. Seaweed extracts or dried seaweed can be used to create a liquid fertilizer that boosts plant growth and enhances resistance to stress.
- Epsom Salt: Epsom salt is a great source of magnesium, which is essential for chlorophyll production. Adding Epsom salt to your liquid fertilizer can help green up your plants and improve nutrient uptake.
- Fish Emulsion: Fish emulsion is a popular organic fertilizer made from fish waste. It provides a rich source of nitrogen, phosphorus, and trace elements that promote healthy plant growth.
Experimenting with different combinations of these ingredients can help you create a liquid fertilizer that suits the specific needs of your plants. It’s important to note that the proportions of these ingredients may vary depending on the specific recipe you choose or the nutrient requirements of your plants.
Now that we have covered the ingredient selection process, let’s explore various methods for making your own liquid fertilizer at home.
Methods for Making Liquid Fertilizer
Making your own liquid fertilizer at home is a simple and cost-effective way to provide your plants with the nutrients they need. Here are five popular methods for creating liquid fertilizer:
- Compost Tea: Compost tea is made by steeping compost in water to extract the nutrients. Simply fill a bucket with water, add a few shovels of compost, and let it steep for a few days. Strain the liquid and use it to water your plants or as a foliar spray.
- Manure Tea: Similar to compost tea, manure tea involves steeping well-rotted manure in water. Fill a cloth bag with the manure and let it soak in water for a few days. Dilute the resulting tea and use it to fertilize your plants.
- Seaweed Solution: To make a seaweed fertilizer, soak dried seaweed in water for a few days until it softens and begins to break down. Strain the liquid and use it as a foliar spray or root drench. Alternatively, you can purchase concentrated seaweed extracts and dilute them with water as per the instructions.
- Epsom Salt Solution: Dissolve Epsom salt in water according to the package instructions. Epsom salt is particularly beneficial for plants that require magnesium. Apply the solution to the soil or use it as a foliar spray.
- Fish Emulsion: Fish emulsion can be either homemade or purchased. To create a homemade version, blend fish waste (such as fish scraps or heads) with water and let it ferment for a few weeks. Strain the liquid and use it to fertilize your plants.
These methods allow you to create liquid fertilizers using readily available ingredients, providing your plants with the necessary nutrients for healthy growth. It’s important to follow the instructions for each method and apply the liquid fertilizers appropriately, whether as a soil drench or as a foliar spray.
Remember to consider the specific needs of your plants when choosing the method and ingredients for your liquid fertilizer. Experiment with different recipes and proportions to find what works best for your garden.
Now that you’ve learned about the methods for making liquid fertilizer, let’s move on to the next step – applying the liquid fertilizer to your plants.
Compost Tea
Compost tea is a nutrient-rich liquid fertilizer that is made by steeping compost in water. It is a fantastic way to harness the benefits of compost and provide your plants with a boost of organic nutrients. Here is a step-by-step guide on how to make compost tea:
- Fill a clean bucket or container with water. Use non-chlorinated water if possible, as chlorine can inhibit the growth of beneficial microorganisms.
- Add a few shovels or handfuls of well-aged compost to the water. The compost should be fully decomposed to release its nutrient content.
- Stir the compost in the water to ensure thorough mixing.
- Leave the mixture to steep for at least 48 hours. You can cover the container with a cloth or lid to prevent debris from falling in while still allowing air circulation.
- After the steeping period, strain the liquid using a fine mesh sieve or cheesecloth to remove any solid particles.
- Dilute the compost tea by adding water. The dilution ratio can vary depending on the strength of the tea and the needs of your plants. A common ratio is 10 parts water to 1 part compost tea.
- Transfer the diluted compost tea to a watering can or sprayer.
- Apply the compost tea to the soil around the base of your plants or as a foliar spray. If using as a foliar spray, ensure to thoroughly wet the leaves.
- Repeat the application every 2-4 weeks, adjusting the frequency based on the specific needs of your plants.
Compost tea provides a wide range of nutrients and beneficial microorganisms that enhance soil fertility and plant health. It helps improve nutrient availability, enhances soil structure, and promotes the growth of beneficial soil organisms.
Remember to use compost that is free from any contaminants or chemicals. Additionally, it’s important to properly store and use compost tea within a few days to prevent the growth of harmful bacteria.
Now that you know how to make compost tea, let’s explore another popular method for creating liquid fertilizer – manure tea.
Manure Tea
Manure tea is a nutrient-rich liquid fertilizer that utilizes the benefits of well-rotted manure to provide essential nutrients for your plants. It’s a cost-effective and organic way to nourish your garden. Here is a step-by-step guide on how to make manure tea:
- Start by collecting well-rotted manure, such as cow, horse, or chicken manure. Avoid using fresh manure, as it can be too strong and may burn your plants.
- Fill a cloth bag or burlap sack with the manure, ensuring that it is tightly tied to prevent any loose particles from entering the tea.
- Fill a large bucket or container with water, using non-chlorinated water if possible.
- Place the bag of manure in the water, ensuring it is fully submerged.
- Let the manure steep in the water for at least 3 to 5 days. During this time, microorganisms will break down the nutrients in the manure, infusing the water with valuable plant nutrients.
- After the steeping period, remove the bag of manure from the container and discard it.
- Strain the liquid through a fine mesh sieve or cheesecloth to remove any remaining solid particles.
- Dilute the manure tea with water before using it. The ratio of water to manure tea will depend on the strength of the tea and the needs of your plants. A common ratio is 10 parts water to 1 part manure tea.
- Transfer the diluted manure tea to a watering can or sprayer.
- Apply the manure tea to the soil around the base of your plants or as a foliar spray. Ensure that the roots or leaves are thoroughly coated.
- Repeat the application every 2-3 weeks during the growing season to provide a continuous supply of nutrients.
Manure tea provides an excellent source of nitrogen, phosphorus, and potassium, along with other essential nutrients. It helps improve soil fertility, promotes healthy plant growth, and enhances overall plant vigor.
It’s important to note that different types of manure may have varying nutrient compositions. Adjust the brewing time and dilution ratio based on the specific manure used and the needs of your plants.
Now that you know how to make manure tea, let’s explore another method for creating liquid fertilizer – seaweed solution.
Seaweed Solution
Seaweed solution, also known as seaweed fertilizer or seaweed extract, is a nutrient-rich liquid fertilizer made from seaweed. Seaweed is packed with beneficial compounds, trace elements, and growth-promoting hormones that can greatly benefit your plants. Here is a step-by-step guide on how to make a seaweed solution:
- Start by collecting dried seaweed. You can either gather it from the beach or purchase dried seaweed from gardening stores or online.
- Rinse the dried seaweed with water to remove any salt or debris.
- Soak the seaweed in a bucket or container filled with water. Use non-chlorinated water if possible. The seaweed should be fully submerged.
- Allow the seaweed to soak for a few days or until it becomes soft and starts to break down.
- Strain the liquid through a fine mesh sieve or cheesecloth to remove any solid particles.
- Dilute the seaweed solution with water. The dilution ratio can vary depending on the strength of the solution and the needs of your plants. A common ratio is 1 part seaweed solution to 10 parts water.
- Transfer the diluted seaweed solution to a watering can or sprayer.
- Apply the seaweed solution to the soil around the base of your plants or as a foliar spray. Ensure thorough coverage of the roots or leaves.
- Repeat the application every 2-4 weeks or as needed to support plant growth and development.
Seaweed solution provides a wide array of nutrients, including potassium, nitrogen, phosphorus, calcium, magnesium, and trace elements. It also contains growth-promoting hormones like auxins, cytokinins, and gibberellins, which can boost plant growth, flowering, and fruiting.
Using seaweed solution can help enhance plant resilience, improve nutrient uptake, stimulate root development, and increase resistance to stressors such as drought, pests, and diseases.
If you prefer not to make your own seaweed solution, you can also find commercially available concentrated seaweed extracts. Follow the instructions on the product label for dilution rates and application methods.
Now that you have learned about making a seaweed solution, let’s explore another method for creating liquid fertilizer – Epsom salt solution.
Epsom Salt Solution
Epsom salt, chemically known as magnesium sulfate, can be used to create an effective liquid fertilizer for your plants. Epsom salt is rich in magnesium and sulfur, two essential nutrients that play vital roles in plant growth and development. Here is a step-by-step guide on how to make an Epsom salt solution:
- Fill a clean container with water. Use non-chlorinated water if possible, as chlorine can hinder nutrient absorption.
- Add Epsom salt to the water according to the package instructions. The recommended rate is typically 1 tablespoon of Epsom salt per gallon of water.
- Stir the water gently until the Epsom salt is fully dissolved.
- Transfer the Epsom salt solution to a watering can or sprayer.
- Apply the solution to the soil around the base of your plants or as a foliar spray. Ensure thorough coverage of the roots or leaves.
- Repeat the application every 2-4 weeks or as needed based on the specific needs of your plants.
Epsom salt contains magnesium, a nutrient that is essential for chlorophyll production, photosynthesis, and enzyme activation in plants. It also provides sulfur, which is involved in protein synthesis and overall plant development.
Using an Epsom salt solution can help improve nutrient uptake, enhance chlorophyll production, promote lush foliage growth, and increase the overall health and vigor of your plants.
It’s important to note that Epsom salt is beneficial for plants that specifically require magnesium and sulfur. Conduct a soil test or observe your plants for any deficiency symptoms before applying the Epsom salt solution.
Remember to follow the recommended application rate to avoid overuse, as excessive amounts of Epsom salt can cause harm to your plants. Always read and follow the instructions on the package for proper usage.
Now that you have learned about creating an Epsom salt solution, let’s explore another method for making liquid fertilizer – fish emulsion.
Fish Emulsion
Fish emulsion is a nutrient-rich liquid fertilizer made from fish waste or fish byproducts. It provides a potent source of nitrogen, phosphorus, and trace elements that are essential for plant growth and development. Here is a step-by-step guide on how to make fish emulsion at home:
- Collect fish waste, such as fish heads, scraps, or fish guts, or purchase fish waste or fish byproducts specifically made for creating fish emulsion.
- Blend the fish waste with water in a blender or food processor. Use a ratio of 1 part fish waste to 2 parts water.
- Transfer the blended fish mixture into a large container or bucket.
- Seal the container loosely with a lid or cover it with a cloth to allow for air circulation.
- Place the container in a warm and sunny area, such as near a window or outdoors.
- Allow the fish mixture to ferment for several weeks, stirring it occasionally. Fermentation helps break down the fish waste and release the nutrients into the water.
- Strain the liquid through a fine mesh sieve or cheesecloth to remove any solid particles.
- Dilute the fish emulsion by adding water. The dilution ratio can vary depending on the strength of the emulsion and the needs of your plants. A common ratio is 1 part fish emulsion to 10 parts water.
- Transfer the diluted fish emulsion to a watering can or sprayer.
- Apply the fish emulsion to the soil around the base of your plants or as a foliar spray. Ensure thorough coverage of the roots or leaves.
- Repeat the application every 2-3 weeks during the growing season to provide consistent nutrients to your plants.
Fish emulsion provides a rich source of organic nutrients, including nitrogen, phosphorus, potassium, and various trace elements. It promotes healthy plant growth, enhances foliage development, and increases overall plant vigor.
It’s important to note that fish emulsion has a strong odor due to its organic origin. Be prepared for the smell during the fermentation process and choose an appropriate location for the container.
Commercially produced fish emulsion is also available if you prefer not to make your own. Follow the instructions on the product label for dilution rates and application methods.
Now that you have learned about making fish emulsion, you are equipped with various methods of creating your own liquid fertilizers to nourish your plants and support their growth.
Applying Liquid Fertilizer to Plants
Applying liquid fertilizer to your plants is an important step to ensure that they receive the necessary nutrients for healthy growth. Here are some guidelines for effectively applying liquid fertilizer:
- Timing: Apply liquid fertilizer during the active growing season when plants have an increased demand for nutrients. This is typically in spring and summer, depending on the specific plants you are growing.
- Dilution: Dilute the liquid fertilizer according to the instructions or recommended ratios. Over-fertilizing can lead to nutrient imbalances or plant burn, so it’s important to follow the suggested dilution rates.
- Soil Application: For root absorption, pour or sprinkle the liquid fertilizer directly onto the soil, ensuring that it is evenly distributed around the base of the plant. Avoid applying the fertilizer too close to the stem to prevent the risk of root damage.
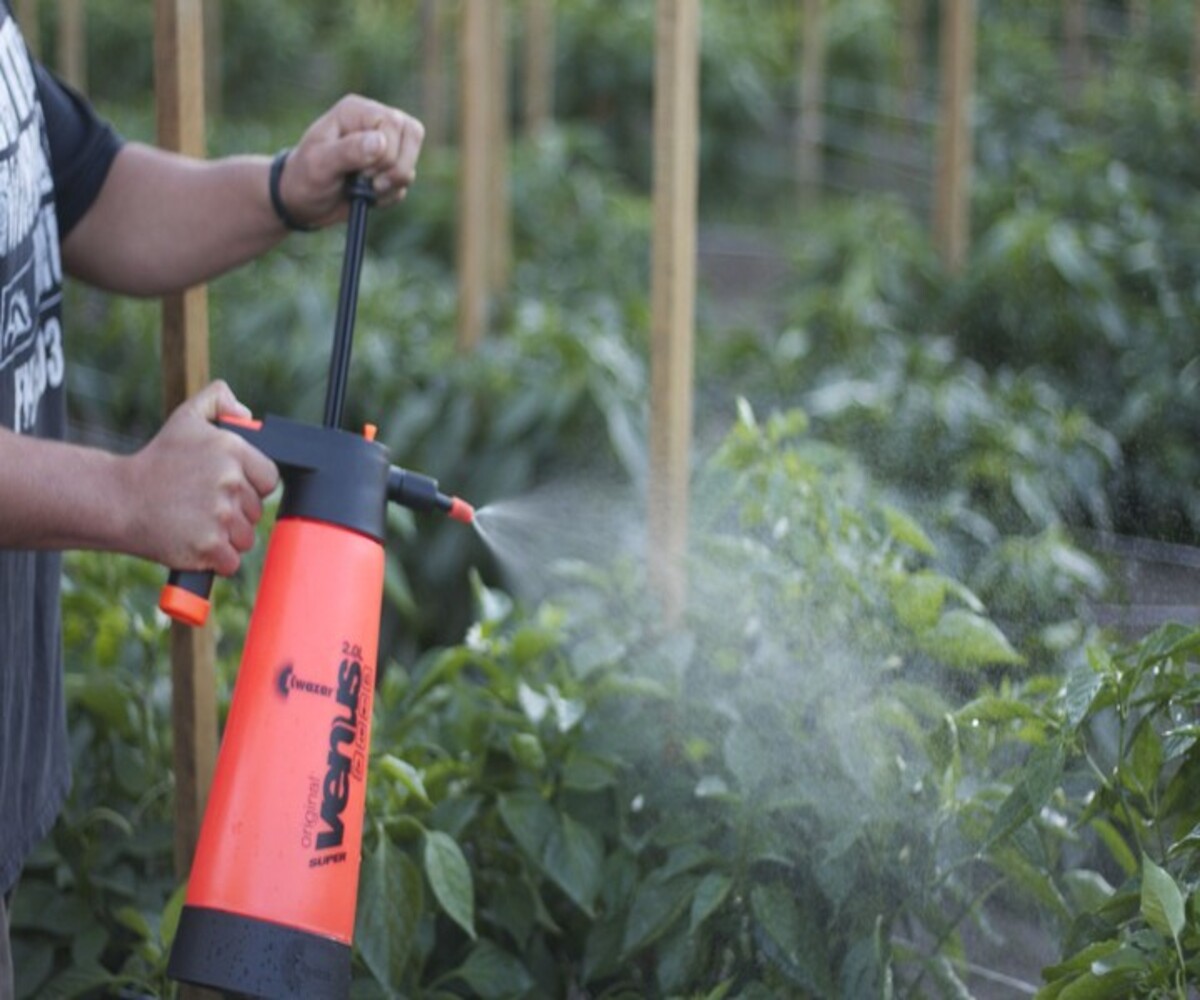
- Foliar Application: To apply the liquid fertilizer as a foliar spray, use a handheld spray bottle or sprayer. Thoroughly wet the leaves on both sides, ensuring complete coverage. This method allows the plants to absorb nutrients directly through their foliage.
- Avoid Leaves Contact: When applying liquid fertilizer as a foliar spray, avoid spraying directly on flowers or sensitive plant parts, as it may cause damage or discoloration.
- Watering: After applying liquid fertilizer, water the plants thoroughly. This helps to incorporate the nutrients into the soil and ensures they reach the root zone where they are needed.
- Frequency: The frequency of application will depend on the specific needs of your plants and the type of liquid fertilizer used. In general, applying liquid fertilizer every 2-4 weeks during the growing season is a good practice to maintain consistent nutrient availability.
- Consider Plant Varieties: Different plants have varying nutrient requirements. It’s important to consider the specific needs of the plants in your garden and adjust your fertilization schedule and method accordingly.
By applying liquid fertilizer correctly and consistently, you provide your plants with the nutrients they need for optimal growth, development, and overall health.
Lastly, it’s important to keep in mind that excessive fertilization or improper application can lead to nutrient imbalances, plant stress, or even damage. Always follow the recommended guidelines for your specific liquid fertilizer and monitor the response of your plants to ensure they are growing healthy and thriving.
Now that you know how to apply liquid fertilizer, let’s explore some precautions and additional tips for using liquid fertilizers in your garden.
Precautions and Tips for Using Liquid Fertilizer
Using liquid fertilizer in your garden can provide numerous benefits, but it’s important to take precautions and follow these tips to ensure safe and effective use:
- Proper Dilution: Always follow the recommended dilution rates provided on the product label or recipe instructions. Over-fertilizing can lead to nutrient imbalances and harm your plants.
- Test on a Small Area: Before applying a new liquid fertilizer to your entire garden, test it on a small area or a few plants to determine how they respond. This will help you assess its compatibility and potential effects.
- Timing: Apply liquid fertilizer during the appropriate time – during the active growing period for your plants. Avoid fertilizing during dormant or stressful periods as plants may be less responsive and more susceptible to potential damage.
- Proper Storage: Store liquid fertilizer in a cool, dry place, away from direct sunlight and extreme temperatures. Follow any specific instructions for storing the particular liquid fertilizer you are using.
- Labeling: Clearly label your liquid fertilizer containers with the name, date of creation, and instructions for application. This helps you keep track of the contents and maintain proper usage.
- Protective Gear: When handling liquid fertilizer, especially if working with concentrated forms, wear protective gear such as gloves, goggles, and appropriate clothing. Some fertilizers may cause skin irritation or be harmful if ingested.
- Environmental Considerations: Take care not to overapply or let excess liquid fertilizer run off into nearby water sources. This can cause water pollution and harm aquatic life. Follow recommended application rates and consider the environmental impact of your gardening practices.
- Monitor Plant Response: Keep a close eye on your plants after applying liquid fertilizer. Monitor for any signs of nutrient deficiencies, nutrient burn, or adverse reactions. Adjust the fertilizer application or dilution rate if needed.
- Rotate Fertilizers: To avoid nutrient imbalances and build-up in the soil, consider rotating different types of liquid fertilizers or alternate with other organic fertilizers. This helps ensure a more balanced and diverse nutrient supply to your plants.
Following these precautions and tips will help you use liquid fertilizer safely and effectively, supporting the health and growth of your plants while minimizing any potential risks or negative impacts.
Now that you are equipped with the necessary knowledge, you can confidently create and apply liquid fertilizers in your garden to nurture your plants’ specific nutrient needs.
Conclusion
Congratulations! You now have a comprehensive understanding of how to create and utilize liquid fertilizer for your plants. By making your own liquid fertilizer, you have the power to control the nutrient composition, save money, and reduce your environmental impact. Whether you choose to make compost tea, manure tea, seaweed solution, Epsom salt solution, or fish emulsion, each method brings its own set of benefits to your garden.
Remember to consider the specific nutrient needs of your plants and tailor your liquid fertilizer recipes accordingly. Take precautions in the storage, handling, and application of liquid fertilizers, ensuring your safety and protecting the environment. Regularly monitor your plants’ response to the fertilizers and make adjustments as needed.
With the right knowledge and careful application, liquid fertilizer can provide the necessary nutrients to promote healthy growth, vibrant blooms, and bountiful harvests. It’s an excellent way to nourish your plants and cultivate a thriving garden.
So why not embark on this DIY journey and create your own liquid fertilizer? Experiment with different recipes, ingredients, and application methods to find what works best for your specific plants and gardening goals. By taking a hands-on approach, you’ll reap the rewards of a flourishing garden and enjoy the satisfaction of nurturing your plants from the ground up.
Get ready to give your plants the nutritional boost they need and watch them thrive with the power of homemade liquid fertilizer.