Home>Gardening Tips and Tricks>Eco-Friendly Gardening>How Do Worms Help Compost
Eco-Friendly Gardening
How Do Worms Help Compost
Modified: February 9, 2024
Discover the benefits of eco-friendly gardening with worms! Learn how worms help compost and enrich your soil for a thriving garden. Start composting today!
(Many of the links in this article redirect to a specific reviewed product. Your purchase of these products through affiliate links helps to generate commission for Chicagolandgardening.com, at no extra cost. Learn more)
Table of Contents
- Introduction
- The Role of Worms in Composting
- Benefits of Using Worms in Composting
- Types of Worms for Composting
- Creating a Worm Bin for Composting
- Feeding and Caring for Worms in Composting
- Maintaining Optimal Conditions for Worms in Composting
- Harvesting and Using Worm Castings
- Troubleshooting Common Issues in Worm Composting
- Conclusion
Introduction
Welcome to the world of eco-friendly gardening! If you’re passionate about reducing waste and promoting sustainable practices, then composting with worms is an excellent way to do your part for the environment. Worm composting, also known as vermicomposting, is a natural and efficient method of transforming kitchen scraps and garden waste into nutrient-rich organic fertilizer.
Composting with worms offers numerous benefits, both for your garden and the planet. By harnessing the power of earthworms, you can divert organic materials from landfills, decrease greenhouse gas emissions, and create a valuable resource that enriches your soil and supports healthy plant growth.
In this comprehensive guide, we will delve into the fascinating world of worm composting. We’ll explore the vital role that worms play in the composting process, the various benefits of using worms in your composting system, and the different types of worms that are ideal for composting.
Additionally, we will walk you through creating a worm bin, which is the essential home for your composting worms. We’ll discuss how to feed and care for your worms, ensuring they thrive and continue to efficiently break down organic matter into nutrient-rich castings.
To maintain optimal conditions for your composting worms, we’ll cover the factors you need to consider, such as temperature, moisture levels, and bedding materials. We will also detail the process of harvesting and utilizing the precious end product of worm composting – worm castings – to benefit your plants and garden.
Finally, we’ll address some common issues that may arise during worm composting and provide troubleshooting tips to overcome them. By the end of this guide, you’ll be well-equipped with the knowledge and tools to embark on your own worm composting journey and reap the rewards of sustainable gardening.
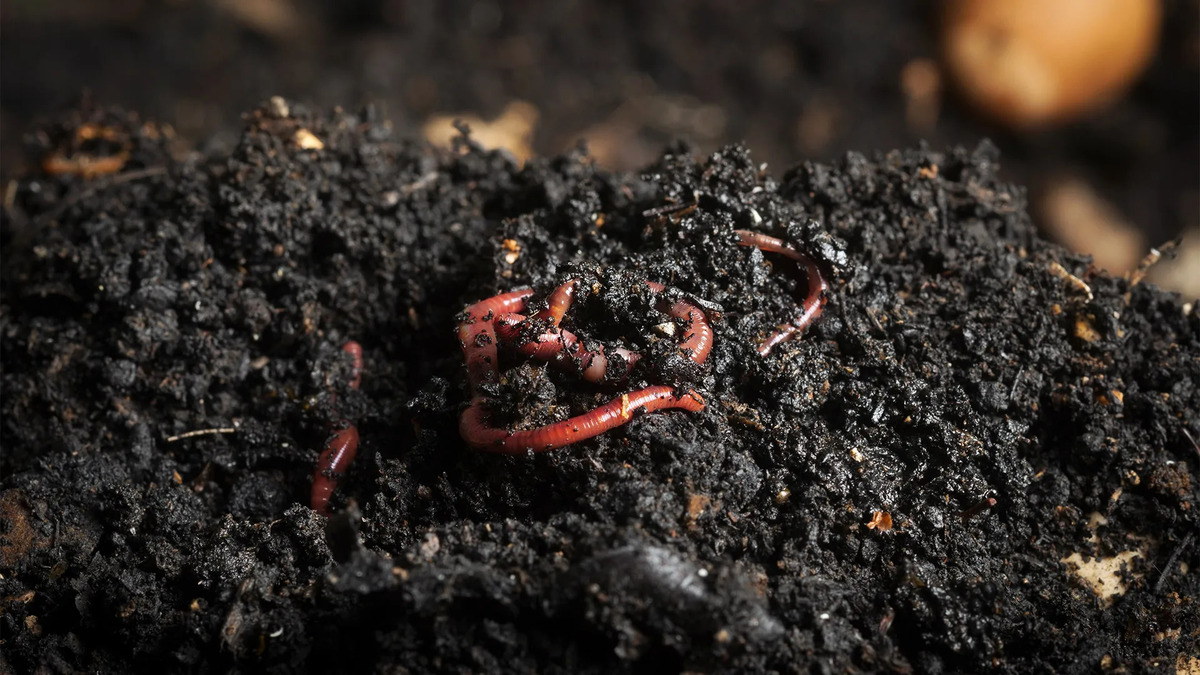
The Role of Worms in Composting
Worms play a pivotal role in the composting process. Their natural behavior of breaking down organic matter into nutrient-rich castings accelerates the decomposition process and enhances the quality of the compost. But how do these little wriggly creatures work their magic?
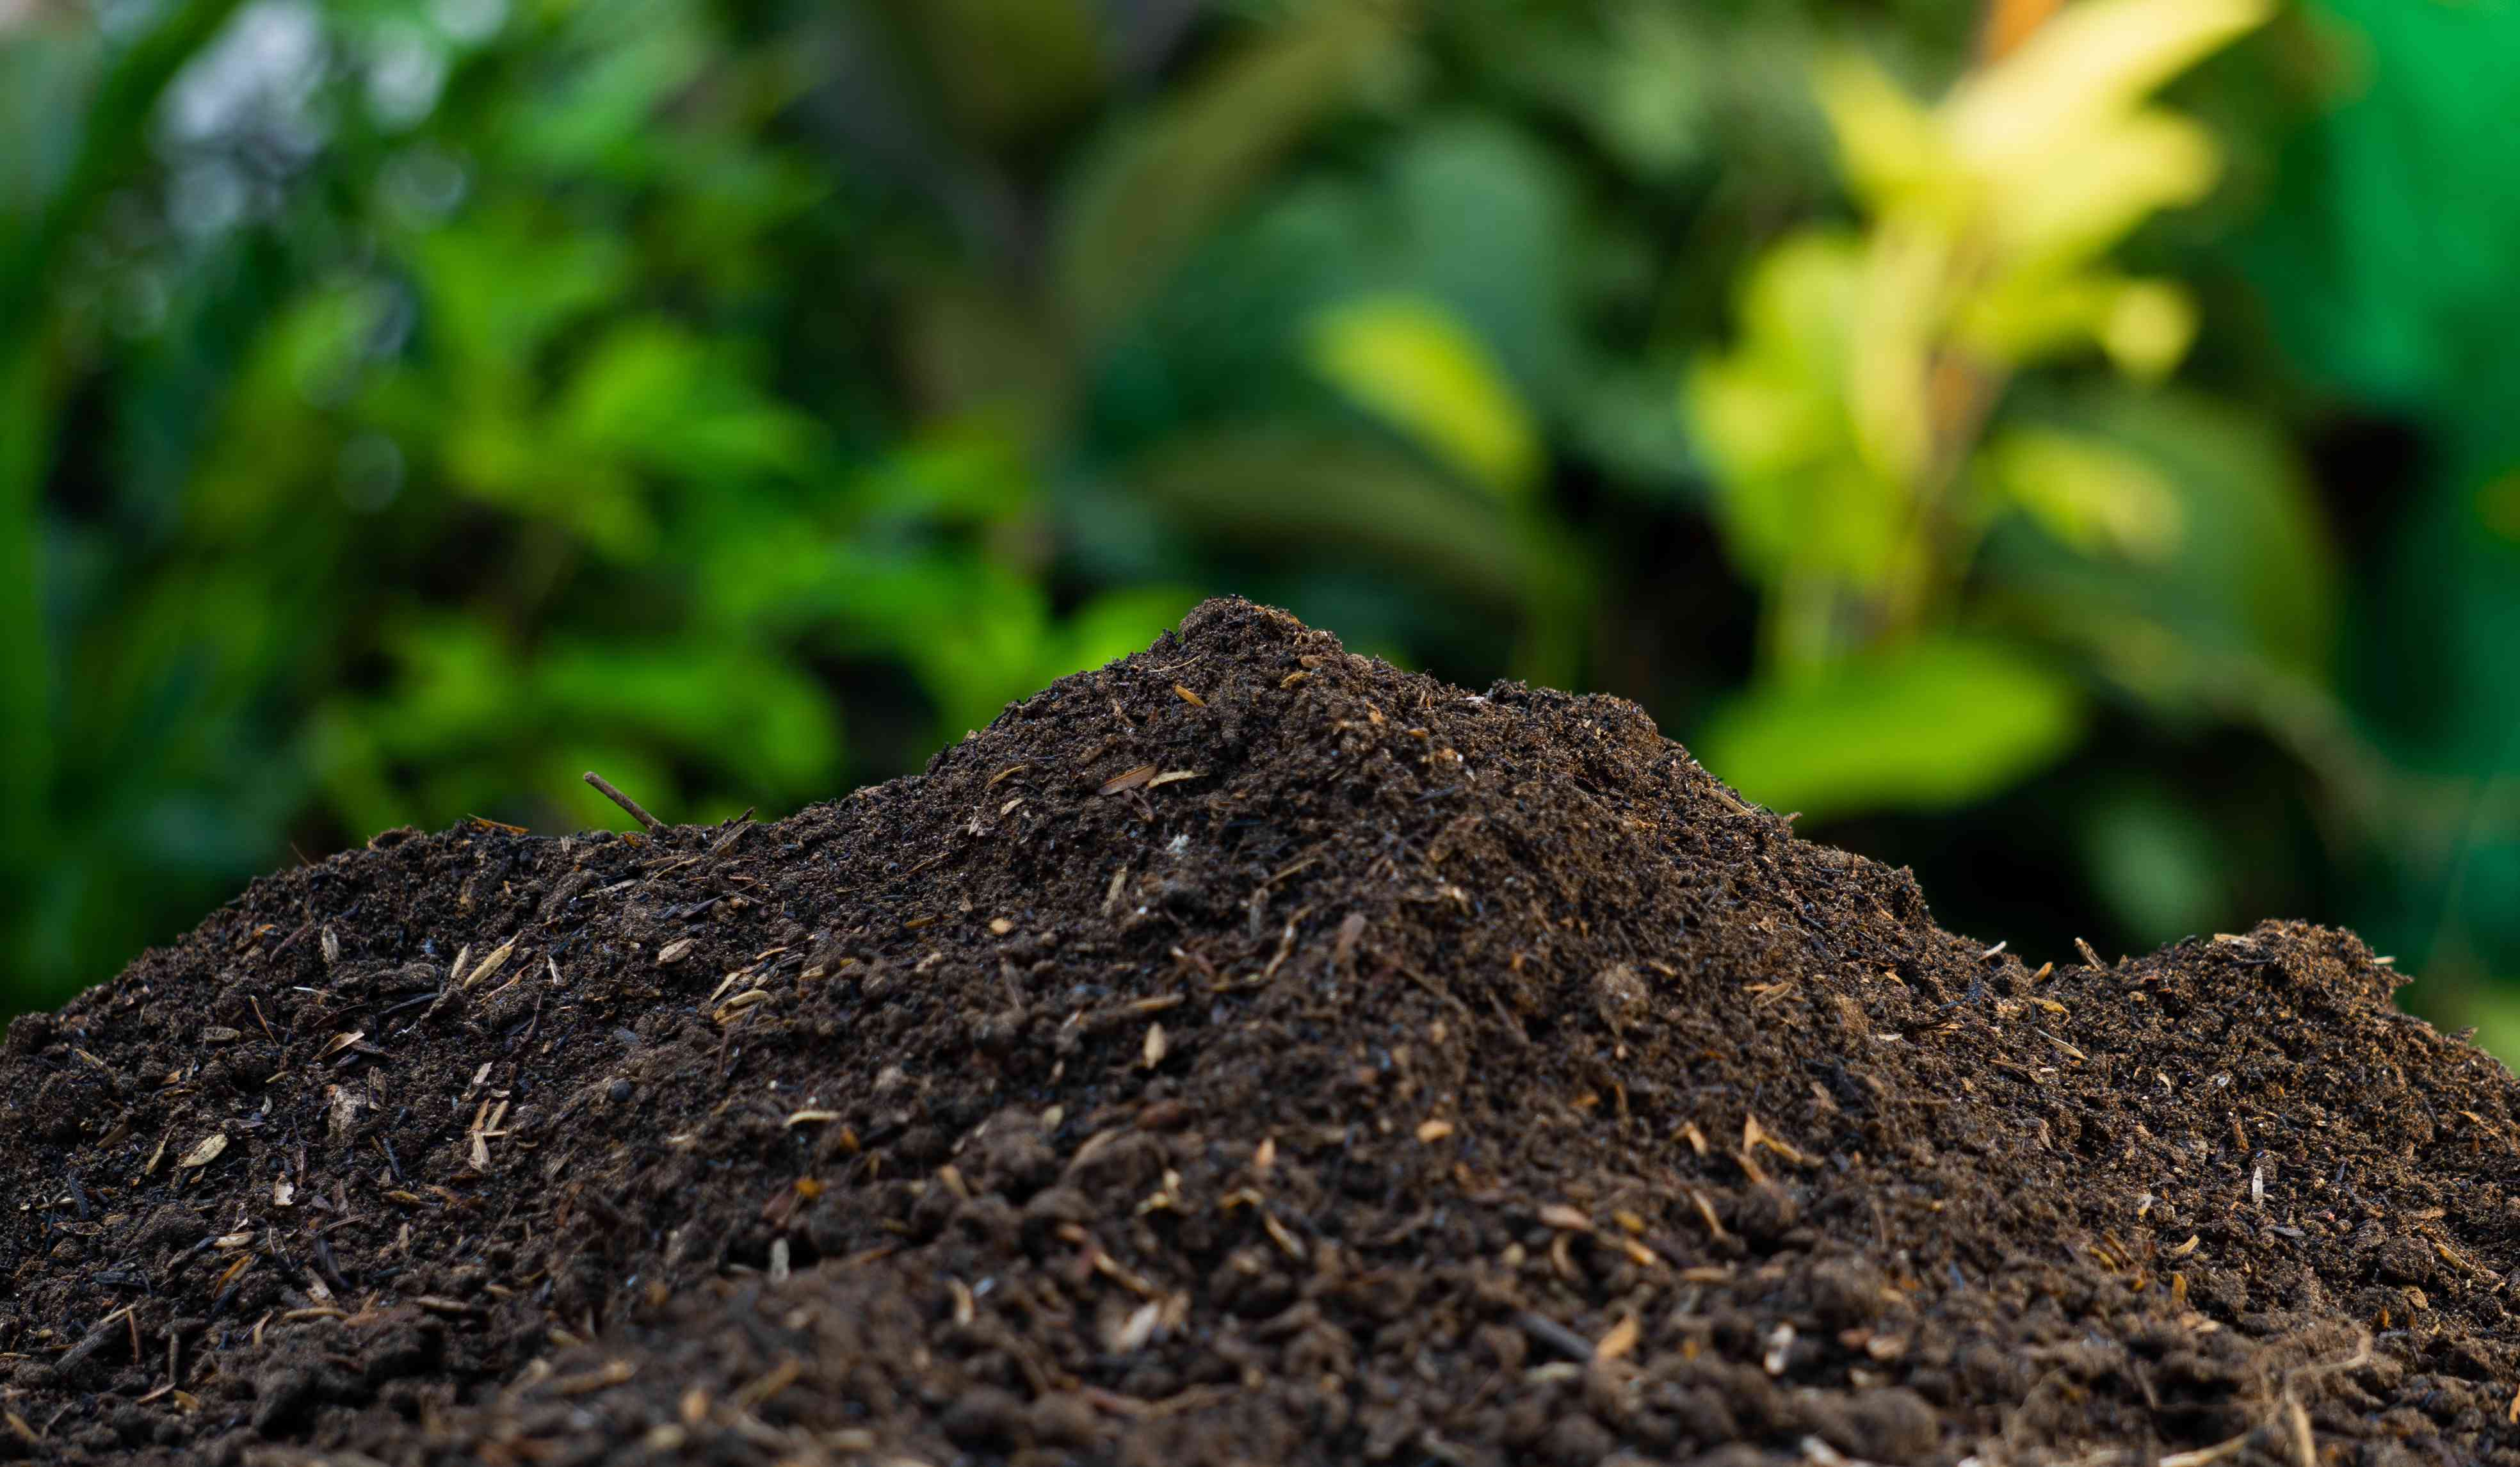
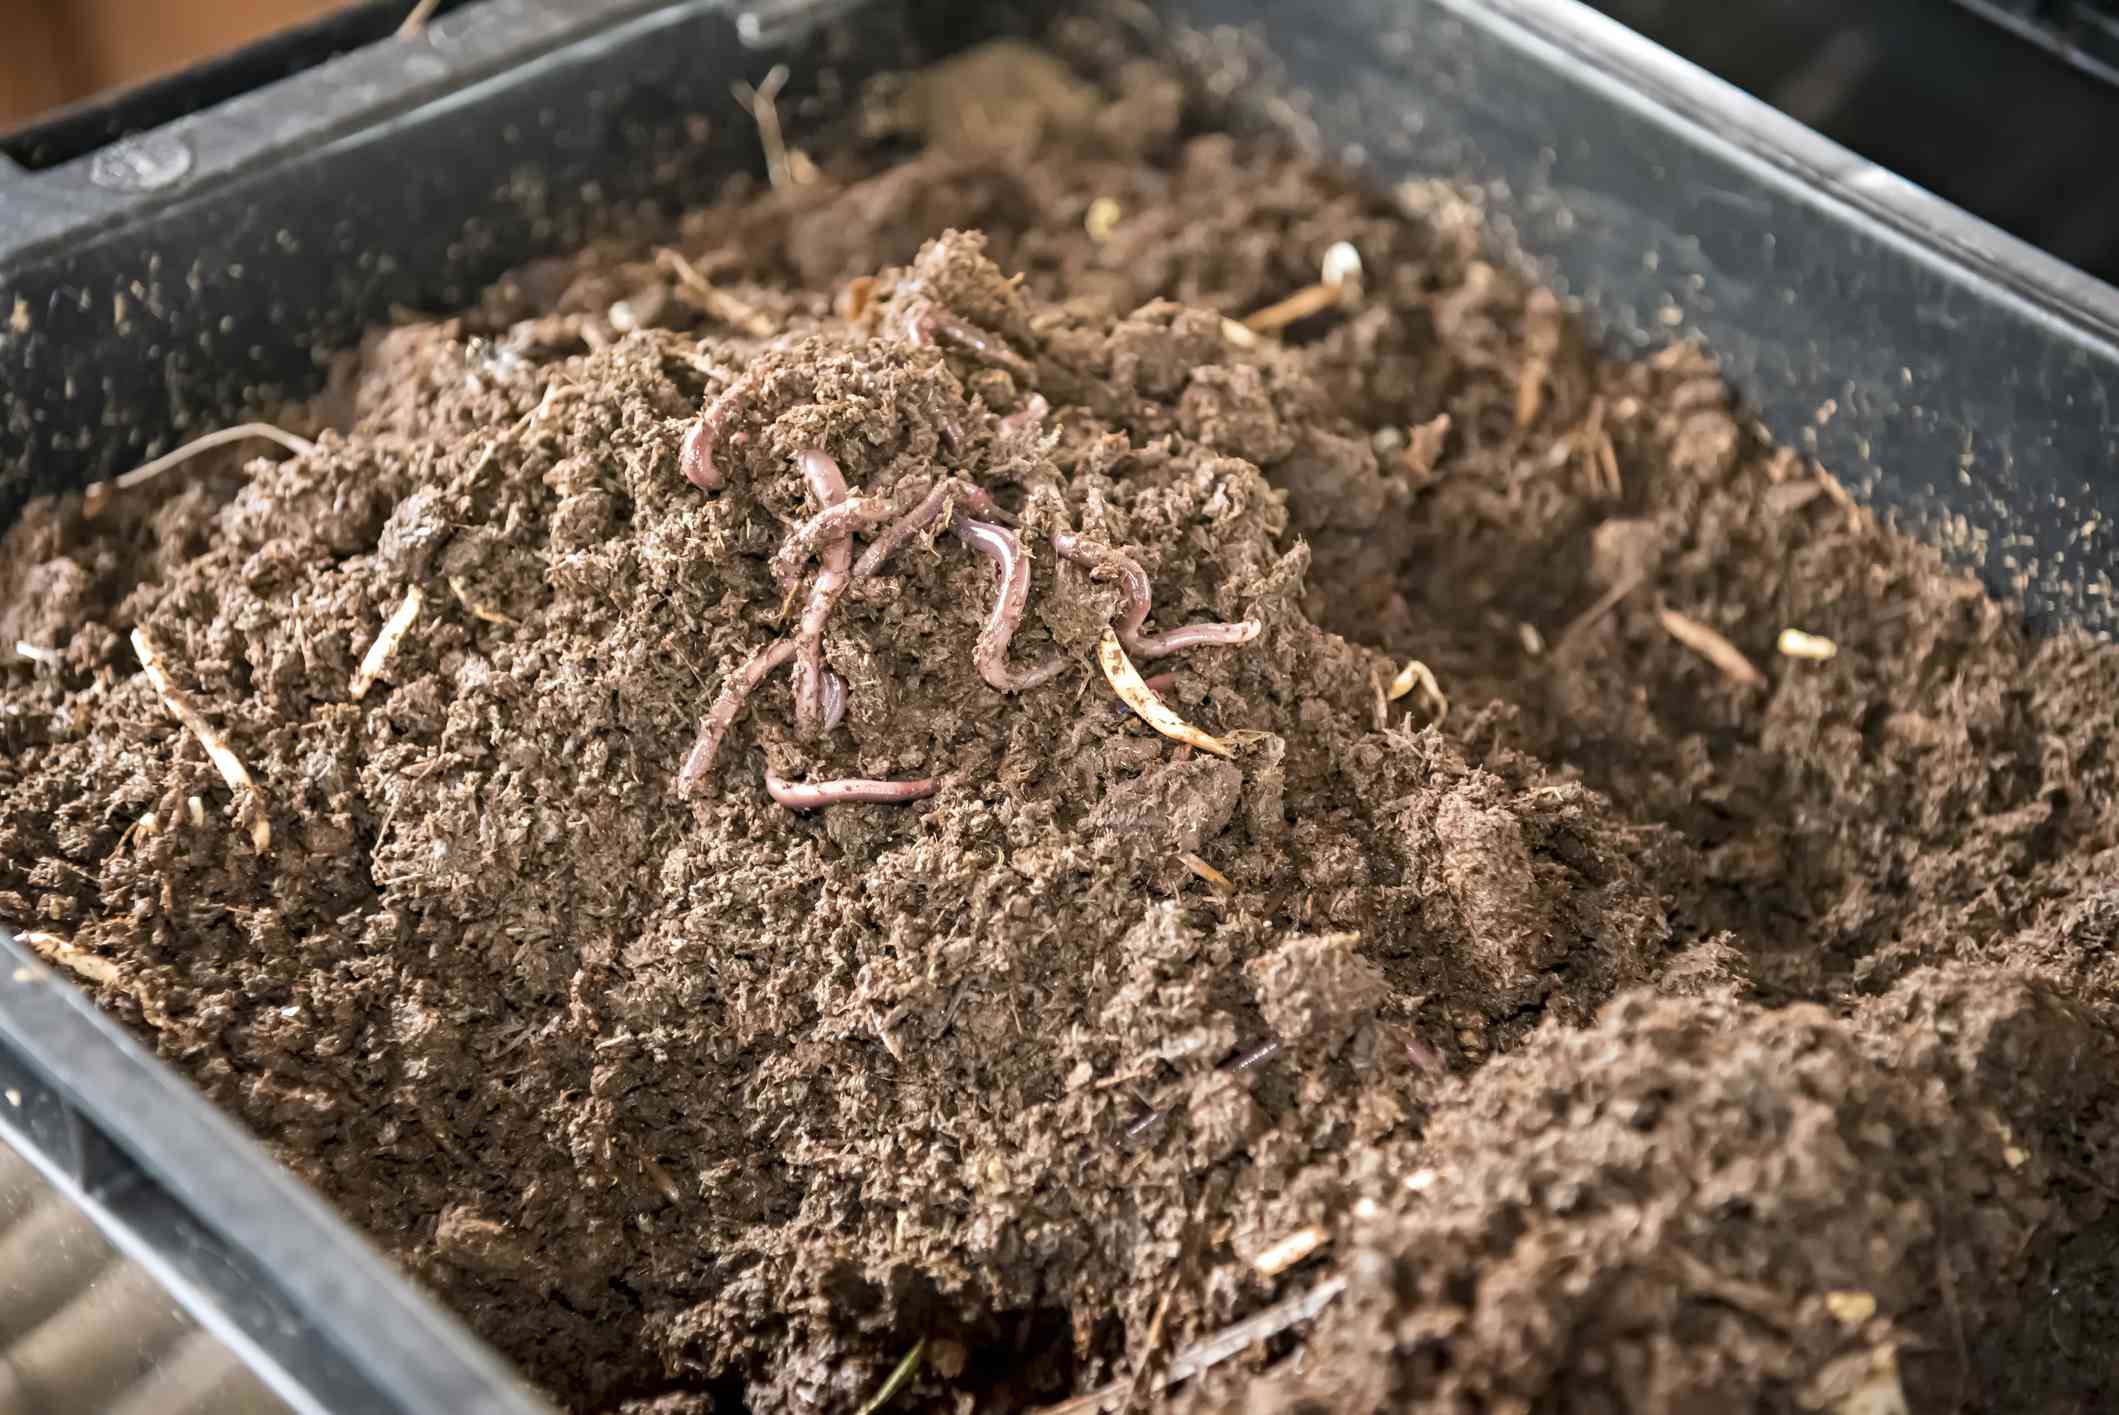
When worms consume organic materials, such as kitchen scraps and garden waste, they digest and break them down in their gut. As they digest, they excrete nutrient-rich castings, commonly known as worm poop. These castings are incredibly valuable as they contain essential nutrients and beneficial microorganisms necessary for healthy plant growth. Worm castings are often referred to as “black gold” due to their potent fertility and ability to enhance soil quality.
Worms, particularly species like redworms (Eisenia fetida) and red wigglers (Lumbricus rubellus), are voracious eaters. They can consume nearly their own weight in organic matter each day. Their constant feeding and movement within the compost pile help to break down the materials more quickly, facilitating decomposition.
Moreover, the process of digestion and movement inside the worm’s digestive tract creates aeration and loosens the compost pile, promoting the circulation of oxygen. Adequate oxygen is crucial for the growth of beneficial aerobic bacteria and other microorganisms that aid in decomposition. The presence of worms in the compost also helps to prevent compaction and improves the overall structure of the compost pile.
Furthermore, the digestive enzymes and mucus secreted by worms contain beneficial bacteria. These bacteria assist in breaking down complex organic matter, such as cellulose and lignin, into simpler forms that are easier for plants to absorb. Worms serve as nature’s recyclers, transforming waste into valuable nutrients that plants can readily utilize.
In addition to their composting prowess, worms also help to neutralize the pH level of the compost. As they consume acidic or alkaline substances, their digestive process ensures that the final output, worm castings, has a near-neutral pH. This makes worm castings suitable for most plants and reduces the need for additional pH adjustments in your garden soil.
Benefits of Using Worms in Composting
Composting with worms offers a wide range of benefits, making it an attractive option for eco-conscious gardeners. Here are some key advantages of incorporating worms into your composting process:
- Efficient decomposition: Worms have a remarkable ability to break down organic matter quickly. Their constant feeding and movement within the compost pile speed up the decomposition process, allowing you to create nutrient-rich compost in a shorter time compared to traditional composting methods.
- Nutrient-rich castings: The waste produced by worms, known as worm castings, is a highly concentrated and balanced fertilizer. It contains essential plant nutrients like nitrogen, phosphorus, and potassium, as well as trace minerals and beneficial microorganisms. By using worm castings in your garden, you’re providing a natural and complete package of nutrients to support healthy plant growth.
- Improves soil structure: The presence of worms in the compost pile helps to improve soil structure. Their constant burrowing and movement create channels and tunnels, enhancing soil aeration and drainage. This improves root development, water retention, and nutrient uptake by plants.
- Reduces waste: Composting with worms allows you to divert a significant amount of organic waste from ending up in landfills. By reusing kitchen scraps, garden waste, and other organic materials, you’re reducing the volume of waste that contributes to methane gas emissions and environmental pollution.
- Environmentally-friendly: Worm composting is a sustainable and eco-friendly practice. It reduces the need for harsh chemical fertilizers, pesticides, and herbicides by providing natural and organic nutrients to your plants. It also promotes soil health and biodiversity, supports beneficial organisms, and reduces the overall environmental impact of gardening.
- Cost-effective: By producing your own nutrient-rich compost using worms, you can save money on commercial fertilizers and soil amendments. Additionally, worm composting reduces the need for synthetic fertilizers, which can be costly and harmful to the environment.
- Encourages biodiversity: Worms are an essential part of the soil food web, attracting other beneficial organisms like bacteria, fungi, and other microorganisms. This biodiversity enhances the overall health of the soil, supports natural pest control, and creates a balanced ecosystem in your garden.
These benefits demonstrate why worm composting is a valuable and sustainable practice for any gardener seeking to improve soil fertility, reduce waste, and cultivate a thriving, eco-friendly garden.
Types of Worms for Composting
Choosing the right type of worms for your composting system is crucial to ensure successful decomposition and nutrient-rich compost production. While there are various species of worms that can be used for composting, two popular choices are redworms (Eisenia fetida) and red wigglers (Lumbricus rubellus).
Redworms (Eisenia fetida): Commonly known as redworms or red composting worms, Eisenia fetida is one of the most popular species for vermicomposting. These worms thrive in organic waste-rich conditions and have a voracious appetite for decaying organic matter. They reproduce quickly and can consume large amounts of kitchen scraps, paper waste, and garden waste, efficiently converting them into nutrient-rich castings.
Redworms are well-suited for smaller-scale composting systems such as worm bins or vermicomposting bins, as they prefer moist environments with moderate temperatures. They tolerate a wide range of temperatures, ideally between 55°F (12.5°C) and 77°F (25°C).
Red Wigglers (Lumbricus rubellus): Red wigglers, also known as manure worms, are another popular choice for composting. They are similar to redworms in terms of their composting abilities and preferences. Red wigglers are highly adaptable and can thrive in various environments, making them suitable for both indoor and outdoor composting systems.
These worms can consume a wide range of organic materials, including kitchen scraps, coffee grounds, and leaf litter. They are slightly larger than redworms and can tolerate a wider temperature range, with their ideal temperature range being between 55°F (12.5°C) and 77°F (25°C).
While redworms and red wigglers are the most commonly used worms for composting, other species, such as European nightcrawlers (Eisenia hortensis) and African nightcrawlers (Eudrilus eugeniae), may also be suitable for specialized applications or specific geographic regions.
When choosing worms for composting, it’s important to source them from reputable suppliers to ensure their health and suitability for the composting environment. Opting for worms specifically designated as “composting worms” will increase the chances of success in your vermicomposting endeavors.
Remember to consider the size of your composting system, your location, and the amount of organic waste you generate when deciding which type of worms to use. With the right worms in place, you can create an efficient and productive composting system that will transform your organic waste into valuable, nutrient-rich compost.
Creating a Worm Bin for Composting
A worm bin, also known as a vermicomposting bin, provides a home for your composting worms and creates an optimal environment for them to thrive. Creating a proper worm bin is essential for successful vermicomposting. Here are the steps to follow when setting up your own worm bin:
- Choose a container: Select a suitable container for your worm bin. It can be a plastic storage bin, a wooden box, or a specialized vermicomposting bin available on the market. Ensure the container has a tight-fitting lid to maintain proper moisture levels and prevent odors.
- Drill ventilation holes: Drill small ventilation holes on the sides and bottom of the container to allow for proper airflow. These holes will help maintain adequate oxygen levels for the worms.
- Add bedding material: Start by adding a layer of moist bedding material to the bottom of the worm bin. Bedding materials can include shredded newspaper, cardboard, coconut coir, or a combination of these. dampen the bedding with water to achieve a moist but not soggy consistency.
- Introduce the worms: Place your composting worms on top of the bedding material. Gently spread them out to encourage them to move into the bedding. It is recommended to start with about one pound (about 500 grams) of worms for a standard-sized worm bin.
- Add organic waste: Begin adding your kitchen scraps and garden waste to the worm bin. Chop or shred larger pieces to facilitate faster decomposition. Avoid adding meat, dairy, oily foods, and acidic materials as these can attract pests and upset the balance in the bin.
- Cover and maintain: Cover the organic waste with a layer of bedding material to keep it well-insulated and to prevent fruit flies or other pests. Replace the lid on the worm bin, but ensure it is not completely airtight. Periodically check the moisture level of the bedding and add water if necessary to maintain a damp but not soaked environment.
It is important to locate the worm bin in a suitable location. Opt for a shaded area with a relatively stable temperature, ideally between 55°F (12.5°C) and 77°F (25°C). Avoid placing the bin in direct sunlight or in extreme temperatures, as this can harm or stress the worms.
Remember to regularly monitor the moisture level, feed the worms appropriately, and provide adequate ventilation to ensure a healthy and active worm population. With proper care and maintenance, your well-constructed worm bin will become a productive and efficient vermicomposting system, transforming your organic waste into valuable worm castings for your garden.
Feeding and Caring for Worms in Composting
Properly feeding and caring for your composting worms is essential to their health and the success of your vermicomposting system. Here are some guidelines to keep in mind:
- Feeding frequency: Worms are efficient eaters, but it’s important not to overfeed them. Start by offering a small amount of food and observe how quickly the worms consume it. Increase the quantity gradually as they adjust to the new feeding routine. Generally, worms can be fed every 2-3 days, depending on the volume of waste and the number of worms in your bin.
- Proper food choices: Worms thrive on a balanced diet of organic waste. Suitable food scraps include fruit and vegetable peels, coffee grounds, tea leaves, crushed eggshells, and moderate amounts of paper waste. Avoid feeding them meat, dairy, oily foods, and acidic materials as these can attract pests or disturb the delicate balance in the bin.
- Chop or blend food: To expedite the decomposition process and make it easier for the worms to consume, chop or blend larger food scraps into smaller pieces. This increases the surface area, allowing for quicker breakdown and reducing the chances of the food rotting or becoming moldy in the bin.
- Spread food evenly: Distribute food waste across the surface of the bedding, rather than piling it up in one area. This encourages the worms to spread out and prevents the accumulation of excessive heat or odors in specific spots.
- Avoid overfeeding: It’s crucial not to overload the worm bin with too much food at once. Overfeeding can lead to a buildup of excess moisture, foul odors, and an imbalance in the bin. Monitor the feeding habits of your worms and adjust the quantity of food accordingly to maintain a healthy and active worm population.
- Maintain moisture levels: Worms require a moist environment to thrive. Monitor the moisture content of the bedding regularly and add water as needed. If the bedding feels dry, mist it with water to increase moisture. If it becomes too wet, add dry bedding materials to absorb excess moisture.
- Avoid disturbing the worms: Minimize disturbance to the worm bin as much as possible. Worms are sensitive creatures, and excessive handling or disturbing the bedding can stress or harm them. Keep the worm bin in a quiet area where it can remain undisturbed by foot traffic or excessive vibrations.
By following these guidelines, you can ensure that your composting worms receive a balanced diet, optimal moisture levels, and a comfortable living environment. With proper feeding and care, your worms will thrive and continue to efficiently transform organic waste into valuable worm castings for your garden.
Maintaining Optimal Conditions for Worms in Composting
Creating and maintaining optimal conditions for your composting worms is crucial to ensure their overall health and productivity. Here are some key factors to consider:
- Temperature: Worms thrive within a specific temperature range. The ideal temperature for most composting worms, such as red worms and red wigglers, is between 55°F (12.5°C) and 77°F (25°C). Avoid exposing the worms to extreme temperatures, as they are sensitive to heat and cold.
- Moisture levels: Proper moisture is essential for the worms’ survival and digestion. The bedding should be moist, similar to a wrung-out sponge. Too much moisture can drown the worms, while too little can cause dehydration. Regularly check the moisture level and adjust by adding water or dry bedding as necessary.
- Aeration: Worms require oxygen for respiration. Proper aeration is achieved through the ventilation holes in the worm bin and the loose structure of the bedding material. Avoid compacting the bedding and periodically fluff it up to maintain adequate airflow.
- Bedding materials: Choose suitable bedding materials that provide a comfortable environment for the worms. Common options include shredded newspaper, cardboard, coconut coir, or a mix of these materials. Bedding provides insulation, retains moisture, and allows the worms to burrow and move freely within the bin.
- pH balance: Worms prefer a near-neutral pH level in their environment. The pH of the worm bin should be around 6.5 to 7.5. If the pH becomes too acidic or alkaline, it can negatively impact the worms. Monitor the pH periodically and amend if necessary by adding limestone to raise the pH or a small amount of garden sulfur to lower it.
- Regular maintenance: Regularly monitor and maintain the worm bin. Check for any signs of pests, excessive moisture, or unpleasant odors. Remove any uneaten food scraps to prevent mold, rot, or attracting pests. As the worms consume the bedding and organic matter, periodically add fresh bedding materials to provide a comfortable environment and maintain the carbon-to-nitrogen ratio.
- Avoid harmful substances: Avoid adding substances that can harm or kill the worms. These include chemicals, pesticides, herbicides, and medications. Stick to organic waste and avoid treated wood or materials that may contain harmful toxins.
By maintaining optimal conditions for your composting worms, you are providing them with a suitable habitat, allowing them to thrive and efficiently break down organic waste into valuable castings. Regular observation, adjusting as needed, and providing proper care will ensure the success of your vermicomposting system.
Harvesting and Using Worm Castings
After patiently tending to your worm bin and allowing the worms to work their magic, it’s time to harvest the valuable end product – worm castings. Here’s how to harvest and make the most of these nutrient-rich organic fertilizers:
- Stop feeding: About two weeks before you plan to harvest, stop adding new food waste to the worm bin. This allows the worms to finish consuming the existing organic matter in preparation for harvesting.
- Move the worms: Before harvesting, you’ll need to separate the worms from the castings. There are a few methods you can use:
- Migration method: Create a pile of fresh bedding and food scraps on one side of the bin. The worms will naturally move towards the new food source. After a day or so, carefully remove the castings from the other side of the bin, where the worms have migrated away from.
- Light method: Worms are sensitive to light, so place a bright light source over one side of the worm bin. The worms will instinctively move away from the light towards the darkest section of the bin, allowing you to scoop out the castings from the illuminated side.
- Screening method: Dump the contents of the bin onto a screen with a mesh size that allows the castings to fall through while capturing the worms. Gently shake the screen to separate the worms from the castings. Return the worms to the worm bin and collect the harvested castings.
- Cure the castings: Once harvested, allow the worm castings to cure before using them in your garden. Spread them in a thin layer and let them dry in a well-ventilated area for a week or two. This drying process helps to further stabilize the castings and prevent any potential odor or mold issues.
- Utilize worm castings: Worm castings are a valuable source of nutrients and beneficial microorganisms for your plants. Here are some ways to use them:
- Soil amendment: Mix worm castings into your garden soil to improve its fertility, structure, and moisture retention. Apply them when planting new seedlings or as a top dressing around existing plants.
- Compost tea: Create a nutrient-rich compost tea by steeping a quantity of worm castings in water for a period of time. Strain the mixture and use it as a liquid fertilizer for your plants.
- Seed starting mix: Add worm castings to your seed starting mix to provide young seedlings with a rich source of nutrients as they establish their roots.
- Potting mix: Incorporate worm castings into your potting mix to enhance the fertility and overall health of potted plants.
Worm castings are a natural and sustainable alternative to synthetic fertilizers. They enrich the soil with a multitude of nutrients, improve soil structure, and enhance plant growth and resilience. By properly harvesting and utilizing worm castings, you can maximize the benefits of vermicomposting and create a thriving, nutrient-rich garden.
Troubleshooting Common Issues in Worm Composting
While worm composting is a rewarding and relatively simple process, occasional challenges may arise. Understanding common issues and knowing how to troubleshoot them can help you maintain a healthy and productive vermicomposting system. Here are some common issues and their solutions:
- Foul odor: A strong, unpleasant smell in your worm bin indicates an imbalance in the system. It may be due to excessive moisture, overfeeding, or the presence of rotting food. To remedy this, ensure proper drainage and ventilation, adjust the moisture levels if necessary, remove any rotting food scraps, and refrain from overfeeding the worms.
- Fruit flies or other pests: Fruit flies can be attracted to overly ripe or rotting fruits in your worm bin. To prevent their presence, bury food scraps deeper into the bedding or freeze scraps before adding them to the bin. If pests persist, reduce the amount of fruit waste and ensure proper ventilation to discourage their breeding.
- Mold or fungal growth: Mold or fungal growth can occur if the bedding becomes excessively wet or if there is insufficient aeration. To address this issue, adjust the moisture levels by adding dry bedding or conducting a thorough fluffing of the bedding to improve airflow. Avoid overwatering the bin and ensure proper drainage.
- Worms trying to escape: If your worms are trying to escape the bin, it typically indicates an unfavorable condition inside. Check for factors like excessive heat, lack of food, or acidic conditions that may be stressing the worms. Adjust the environment as needed, ensuring optimal temperature, providing enough bedding and food, and maintaining a neutral pH level.
- Slow decomposition: If the worms are not processing the organic waste as quickly as expected, it could be due to improper feeding or unsuitable conditions. Evaluate your feeding habits to ensure you’re not overfeeding or offering food the worms dislike. Verify that the bedding is moist, well-drained, and provides adequate aeration. Adjustments may be needed to create a more balanced and inviting environment for the worms.
- Decreased worm population: If you notice a decline in the number of worms in your bin, it could be a sign of an unfavorable environment, overfeeding, or other stress factors. Evaluate the conditions in the bin, including moisture levels, temperature, and food availability. Adjust as needed and monitor the population for signs of recovery.
Regular observation, patience, and proactive troubleshooting will help you address and overcome common issues in worm composting. Remember, it may take some time and adjustments to achieve a well-balanced and efficient vermicomposting system. With perseverance and attentiveness, you’ll find solutions and continue to enjoy the numerous benefits of composting with worms.
Conclusion
Embarking on the journey of worm composting is not only beneficial for the environment but also rewarding for your garden. By harnessing the power of worms, you can transform kitchen scraps and garden waste into nutrient-rich compost, reducing waste, and promoting sustainability.
In this comprehensive guide, we explored the vital role of worms in composting and the benefits they bring to the process. We learned about the different types of worms suitable for composting, such as redworms and red wigglers, and how to create a proper worm bin to support their growth and productivity.
We discussed the importance of feeding and caring for the worms, emphasizing the significance of a balanced diet and maintaining optimal moisture levels. We explored the factors involved in maintaining ideal conditions for the worms, such as proper temperature, aeration, and pH balance.
Additionally, we covered the process of harvesting worm castings and the various ways to utilize this valuable end product. From soil amendment to compost tea, worm castings offer a sustainable and nutrient-rich solution for enhancing plant growth and improving soil fertility.
Lastly, we addressed common issues that may arise during the worm composting journey and provided troubleshooting tips to overcome them. By staying proactive and monitoring the vermicomposting system, we can maintain a healthy and thriving worm population.
As you venture into the world of worm composting, remember to approach it with patience and curiosity. Experiment with different feeding routines and bedding materials, and observe how the worms respond. With time and experience, you’ll develop a deeper understanding of the complexities and wonders of the eco-friendly process.
By embracing worm composting as part of your gardening practices, you not only contribute to a more sustainable planet but also create a flourishing garden filled with vibrant, nutrient-rich plants. So, grab your worms, set up your worm bin, and embark on this rewarding journey of eco-friendly gardening and sustainable composting!