Home>Types of Gardening>Ornamental Gardening>When Should You Plant Lily Bulbs

Ornamental Gardening
When Should You Plant Lily Bulbs
Published: January 24, 2024
Looking to enhance your ornamental gardening? Discover the perfect time to plant lily bulbs and enjoy a vibrant and beautiful garden.
(Many of the links in this article redirect to a specific reviewed product. Your purchase of these products through affiliate links helps to generate commission for Chicagolandgardening.com, at no extra cost. Learn more)
Table of Contents
- Introduction
- Factors to Consider Before Planting Lily Bulbs
- Best Time to Plant Lily Bulbs
- Planting Lily Bulbs in the Spring
- Planting Lily Bulbs in the Fall
- How to Prepare the Soil for Planting Lily Bulbs
- Steps to Plant Lily Bulbs
- Caring for Lily Bulbs After Planting
- Common Mistakes to Avoid When Planting Lily Bulbs
- Conclusion
Introduction
Ornamental gardening is a fulfilling and rewarding hobby that allows you to create beautiful outdoor spaces filled with vibrant colors and exquisite scents. One of the most popular plants used in ornamental gardening is the lily. With their majestic appearance and captivating fragrance, lilies are a favorite among garden enthusiasts.
Planting lily bulbs is an essential part of growing these stunning flowers. However, knowing the ideal time to plant lily bulbs can make a significant difference in their growth and overall success. Factors such as climate, soil conditions, and the specific variety of lily can greatly influence the outcome. Therefore, it’s crucial to have a thorough understanding of when to plant lily bulbs to achieve the best possible results.
This article aims to guide you on the optimal timing for planting lily bulbs and provide you with essential tips to ensure a successful gardening experience. Whether you’re a seasoned gardener looking to expand your lily collection or a beginner just starting with ornamental gardening, this article will equip you with the knowledge needed to make informed decisions.
By exploring the different seasons and considering various factors, such as temperature and moisture levels, you can determine the ideal time to plant lily bulbs in your specific region. Additionally, we’ll delve into the preparation of the soil and the necessary steps for planting lily bulbs, ensuring they have the best environment to thrive.
So, grab your gardening gloves and get ready to learn about the optimal time to plant lily bulbs and transform your outdoor space into a haven of exquisite beauty. Let’s dive into the fascinating world of ornamental gardening and discover the wonders of lilies!
Factors to Consider Before Planting Lily Bulbs
Before you embark on planting lily bulbs, there are several important factors to consider. Understanding these factors will help ensure that your lilies thrive and flourish in your garden. Let’s take a closer look at some key considerations:
- Climate: Lilies are versatile flowers that can be grown in various climates. However, different lily varieties have specific climate preferences. Some lilies thrive in cooler climates, while others prefer warmer temperatures. Before planting, research the specific lily variety you intend to grow and determine whether it is suitable for your local climate.
- Soil Conditions: Lilies prefer well-draining soil that is rich in organic matter. They thrive in slightly acidic to neutral pH levels. Before planting, test your soil’s pH and make any necessary amendments to ensure it aligns with the lilies’ requirements. Incorporating compost or well-rotted manure can improve the soil structure and provide essential nutrients.
- Light Requirements: Lilies are sun-loving plants that require ample sunlight to bloom abundantly. Ensure that your chosen planting location receives at least six hours of direct sunlight per day. If your garden has areas with partial shade, select lily varieties that can tolerate such conditions.
- Spacing: Proper spacing is crucial when planting lily bulbs. Give each bulb enough room to grow and expand without crowding neighboring plants. Consult the planting instructions for your specific lily variety to determine the appropriate spacing requirements.
- Protection from Pests and Diseases: Lilies are susceptible to certain pests and diseases, including aphids, lily beetles, and fungal infections. Take preventive measures, such as using organic insecticides and fungicides, to protect your lilies from potential damage. Regularly inspect your plants for signs of infestation or disease and take prompt action if necessary.
By considering these factors, you can create an optimal environment for your lilies to thrive. Taking the time to prepare the soil, understand your lily’s specific requirements, and protect against pests and diseases will contribute to the overall success of your ornamental gardening endeavors.
Best Time to Plant Lily Bulbs
The timing of planting lily bulbs plays a crucial role in their growth and blooming. The best time to plant lily bulbs largely depends on the geographical location and the specific variety of lilies you wish to grow. Let’s explore the two common seasons for planting lily bulbs:
Spring: Planting lily bulbs in the spring is a popular choice for many gardeners. As the weather begins to warm up and the threat of frost subsides, it is an ideal time to get the bulbs into the ground. Spring planting allows the roots to establish themselves before the arrival of the warmer summer months. This ensures the lilies have a solid foundation for growth and can produce beautiful blooms during the summer or early fall. If you choose to plant in the spring, aim for a time when the soil is workable but not overly wet.
Fall: Another opportune time to plant lily bulbs is in the fall. Generally, late summer or early fall is recommended for cooler regions where winters are harsh. By planting in the fall, lily bulbs have ample time to develop strong root systems before the ground freezes. The dormant period during winter allows essential physiological changes to occur within the bulb, leading to healthier and more vigorous growth in the following spring. Ensure that you plant the bulbs at least six weeks before the ground freezes to allow them enough time to root successfully.
Ultimately, the best time to plant lily bulbs depends on your specific climate, lily variety, and personal preference. Some gardeners may choose both spring and fall planting to extend the blooming period and enjoy lilies throughout the year. Remember to take into account the frost dates in your region and avoid planting during extremely hot or cold weather, as these conditions can negatively impact bulb development.
By understanding the best time to plant lily bulbs, you can optimize their growth and maximize the beautiful blooms that these enchanting flowers have to offer.
Planting Lily Bulbs in the Spring
Spring is a wonderful time to plant lily bulbs, as the soil begins to warm up and the threat of frost diminishes. Here are some essential steps to follow when planting lily bulbs in the spring:
- Selecting the Bulbs: Choose healthy, firm bulbs that are free from any signs of disease or damage. Look for bulbs that are plump and feel heavy in your hand.
- Preparing the Soil: Before planting, ensure that the soil is well-draining and has been amended with organic matter, such as compost or well-rotted manure. Loosen the soil and remove any weeds or debris.
- Choosing the Planting Location: Select a location that offers at least six hours of direct sunlight per day. Lilies thrive in full sun, although some varieties can tolerate partial shade. Consider the height and color of the lilies when deciding on the placement in your garden.
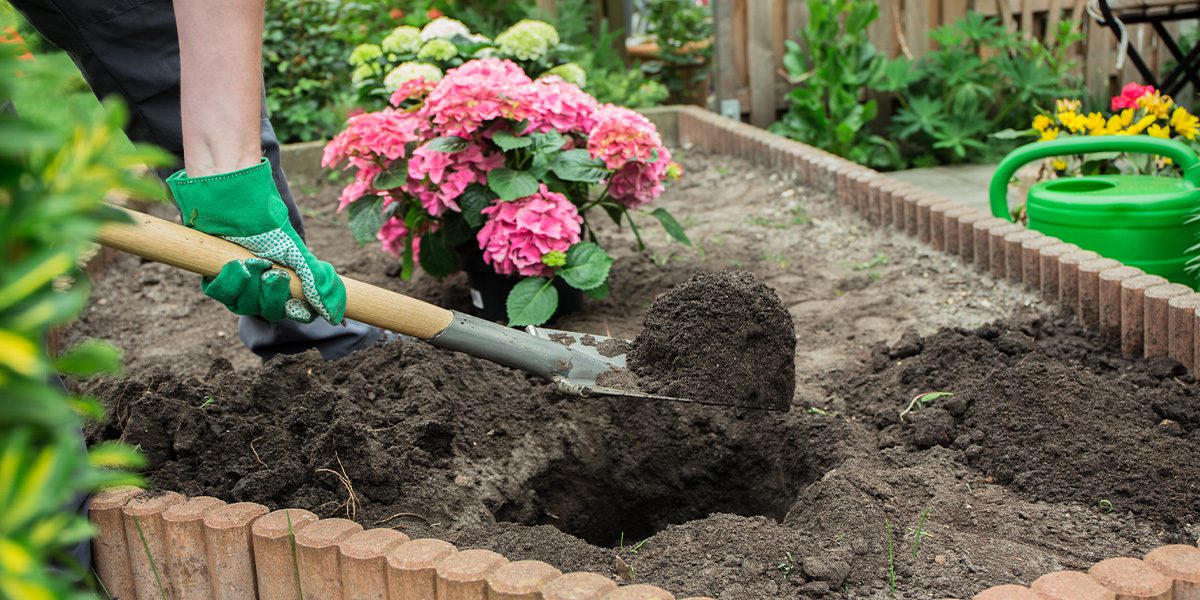
- Planting Depth: Dig a hole that is two to three times the height of the bulb. Place the bulb in the hole with the pointed end facing up. The top of the bulb should be covered with approximately 4 to 6 inches of soil.
- Spacing: Space the bulbs at least 8 to 12 inches apart to allow them room to grow and spread. Ensure that neighboring plants do not overshadow the lilies and impede their access to sunlight.
- Watering: After planting, water the bulbs thoroughly to help settle the soil and provide the necessary moisture for the roots to establish. Keep the soil consistently moist but not soggy during the growing season.
- Maintenance: Apply a layer of organic mulch, such as bark chips or straw, around the planted area to help retain moisture and suppress weed growth. Monitor the soil moisture regularly and water when necessary. Remove any weeds that may compete with the lilies for nutrients and sunlight.
By following these steps, you can ensure that your lily bulbs are off to a great start in the spring. Remember to continue providing optimal care throughout the growing season, including regular watering, fertilizing as needed, and protecting the plants from pests and diseases.
With a little patience and care, your lily bulbs will establish themselves in the soil, and you will soon be rewarded with the breathtaking beauty and fragrance of blooming lilies in your garden.
Planting Lily Bulbs in the Fall
Fall is an excellent time to plant lily bulbs, especially in regions with colder winters. By planting in the fall, you give the bulbs a head start in establishing roots before the ground freezes. Here are the steps to follow when planting lily bulbs in the fall:
- Choosing the Right Time: Plan to plant your lily bulbs in late summer or early fall, at least six weeks before the first frost is expected. This timeframe ensures that the bulbs have sufficient time to root and establish before winter.
- Preparing the Soil: Prepare the soil by removing any weeds, rocks, or debris. Ensure that the soil is well-draining and has been enriched with organic matter, such as compost or well-rotted manure. Loosen the soil to a depth of about 12 inches to provide a loose, fertile bed for the bulbs.
- Planting Depth: Dig holes that are approximately two to three times the height of the bulb. Place the bulbs in the holes with the pointed end facing up. The top of the bulb should be covered with about 4 to 6 inches of soil.
- Spacing: Space the bulbs at least 8 to 12 inches apart to allow for adequate air circulation and future growth. Avoid overcrowding, as it can lead to competition for nutrients and hinder the development of the lilies.
- Watering: After planting, water the bulbs thoroughly to settle the soil and provide the necessary moisture for root development. This initial watering helps the bulbs establish before winter dormancy. Avoid overwatering, as excessively wet soil can cause the bulbs to rot.
- Applying Mulch: Apply a layer of mulch, such as straw or shredded leaves, around the planting area. Mulch helps regulate soil temperature, retain moisture, and suppress weed growth. It also provides a protective layer for the bulbs during the winter months.
- Winter Protection: In colder regions, consider adding an extra layer of protective mulch or using a plant cover to insulate the bulbs from harsh winter conditions. This precautionary measure can help prevent freeze-thaw cycles that may damage the bulbs.
By following these steps, you can ensure that your lily bulbs have a strong start in the fall. Although there may not be any immediate growth during this season, the bulbs will undergo necessary physiological changes and prepare for the upcoming spring season.
Remember to monitor the planting area throughout the winter, ensuring that the bulbs remain protected and the soil doesn’t dry out excessively. Come spring, your lily bulbs will emerge from the ground, ready to dazzle you with their vibrant blooms.
How to Prepare the Soil for Planting Lily Bulbs
Preparing the soil properly is essential for the successful growth and blooming of lily bulbs. By providing the right conditions, you can ensure that your lilies receive the necessary nutrients and moisture to thrive. Here are the steps to prepare the soil for planting lily bulbs:
- Test the Soil: Before planting, it’s a good idea to test the soil’s pH levels. Lilies prefer slightly acidic to neutral soil, with a pH range of 6.0 to 7.0. You can easily test the soil using a home testing kit or by sending a soil sample to a local extension service or laboratory for analysis.
- Amend the Soil: Once you know the pH levels, adjust the soil accordingly. If the soil is too acidic, add lime to raise the pH. Conversely, if the soil is too alkaline, add elemental sulfur to lower the pH. Follow the manufacturer’s instructions and make gradual adjustments over time to avoid drastic changes in pH.
- Improve Drainage: Lilies prefer well-draining soil to prevent bulb rot. If your soil has poor drainage, you can improve it by incorporating organic matter such as compost, well-rotted manure, or peat moss into the soil. This will help loosen compacted soil and provide better aeration and drainage for the lily bulbs.
- Remove Weeds and Debris: Clear the planting area of any weeds, rocks, or debris that may interfere with the growth and development of the lilies. Weeds can compete for nutrients and water, so it’s important to start with a clean planting bed.
- Loosen the Soil: Use a garden fork, spade, or tiller to loosen the soil to a depth of at least 12 inches. Loosening the soil will make it easier for the lily bulbs to establish strong root systems and allow better penetration of water and nutrients.
- Apply Fertilizer: Lilies benefit from a balanced fertilizer that is low in nitrogen but high in phosphorus and potassium. Prior to planting, apply a slow-release or granular fertilizer according to the package instructions. Work it into the soil to ensure that the nutrients are evenly distributed and readily available to the bulbs.
By following these steps, you can create an optimal soil environment for planting lily bulbs. Proper soil preparation will promote healthy root development, nutrient uptake, and overall growth of your lilies. Remember to continue monitoring the soil moisture levels and fertilize as needed throughout the growing season to keep your lilies flourishing.
Steps to Plant Lily Bulbs
Planting lily bulbs is a straightforward process that requires careful attention to detail to ensure successful growth and blooming. By following these steps, you can plant your lily bulbs with confidence:
- Select Healthy Bulbs: Choose firm and healthy lily bulbs without any signs of damage or disease. Look for bulbs that feel heavy in your hand and have no soft spots.
- Identify the Planting Location: Find a suitable planting location that offers the right amount of sunlight and well-draining soil. Lilies thrive in full sun to partial shade, depending on the variety.
- Prepare the Soil: Loosen the soil in the planting area to a depth of about 12 inches. Remove any weeds, rocks, or debris that may hinder the growth of the bulbs.
- Determine Planting Depth: Dig holes that are two to three times the height of the bulb. The general rule of thumb is to plant the bulb with the pointed end facing up and cover with approximately 4 to 6 inches of soil. The exact planting depth may vary depending on the specific lily variety, so refer to the instructions for your bulb.
- Space the Bulbs: Place the bulbs in the holes, ensuring they are adequately spaced. Leave at least 8 to 12 inches between each bulb to allow for proper growth and development. Avoid overcrowding, as this can lead to competition for nutrients and hinder the lilies’ progress.
- Backfill the Holes: Gently backfill the holes with soil, ensuring that the bulbs are securely planted. Lightly press down on the soil around the bulbs to remove any air pockets and promote good soil-to-bulb contact.
- Water Thoroughly: Once the bulbs are planted, water them thoroughly to help settle the soil and provide the necessary moisture for root development. Ensure that the soil is consistently moist but not waterlogged, as this can cause bulb rot.
- Apply Mulch: Apply a layer of organic mulch, such as bark chips or straw, around the planted area. Mulch helps regulate soil temperature, retain moisture, and suppress weed growth. It also provides a protective barrier during extreme weather conditions.
Remember to label your lily bulbs or keep a record of their location to easily identify them once they start to emerge. Regularly monitor the soil moisture levels and adjust watering as necessary to keep the bulbs hydrated but not overly saturated.
With these simple steps, you can plant your lily bulbs with confidence. Soon enough, you’ll witness the beautiful emergence of lily shoots that will develop into stunning blooms, gracing your garden with their enchanting presence.
Caring for Lily Bulbs After Planting
After planting lily bulbs, proper care is crucial to ensure their healthy growth and longevity. By following these essential care tips, you can provide the ideal conditions for your lilies:
- Watering: Lilies require consistent moisture to thrive. Water the bulbs deeply after planting and monitor the soil moisture regularly. Aim to keep the soil evenly moist but not waterlogged. Adjust watering frequency based on weather conditions and rainfall. Avoid overhead watering, as wet foliage can lead to fungal diseases.
- Fertilizing: Lilies benefit from regular fertilizing to maintain their vigor and promote blooming. Apply a balanced slow-release fertilizer or a liquid fertilizer diluted according to the package instructions. Start fertilizing in early spring when new growth appears, and continue every six to eight weeks throughout the growing season.
- Staking: Depending on the lily variety and its height, some lilies may require staking to prevent bending or flopping. Install stakes or plant supports near the bulbs at the time of planting or before the stems grow too tall. Use soft ties or twine to loosely secure the stems to the stakes, allowing room for movement and growth.
- Deadheading: To encourage prolonged blooming and prevent the formation of seeds, it’s recommended to remove faded flowers. Gently pinch or cut off the spent blooms once they start to wither. Deadheading diverts the plant’s energy towards producing new blooms rather than seed production.
- Weeding and Mulching: Regularly remove weeds that compete for nutrients and sunlight with the lilies. Apply a fresh layer of organic mulch, such as bark chips or straw, around the lily bulbs and over the soil surface. Mulch helps suppress weed growth, conserve moisture, and maintain an even soil temperature.
- Pest and Disease Control: Monitor your lilies for common pests like aphids, lily beetles, and snails, as well as signs of diseases such as fungal infections. Take prompt action if you notice any infestations or signs of damage. Consider using organic insecticides or contacting a local garden center for appropriate treatment options.
- Winter Protection: In regions with harsh winters, protect your lilies by adding an extra layer of mulch or using a plant cover to insulate the bulbs. Ensure that the soil remains well-drained and that the bulbs are not exposed to extreme cold or frost. Remove the winter protection in early spring to allow the bulbs to emerge.
By following these caring tips, you can help your lily bulbs stay healthy and thrive throughout the growing season. Remember to observe your lilies regularly, paying attention to any changes in appearance, and address any issues promptly. With proper care, your lilies will reward you with stunning blooms that bring joy and beauty to your garden.
Common Mistakes to Avoid When Planting Lily Bulbs
Planting lily bulbs can be a rewarding experience, but it’s important to avoid common mistakes that can hinder their growth and overall success. By being aware of these potential pitfalls, you can ensure that your lilies thrive and bloom beautifully. Here are some mistakes to avoid when planting lily bulbs:
- Planting Too Deep or Too Shallow: Planting lily bulbs at the wrong depth can have adverse effects on their growth. Planting too deep may result in poor emergence, while planting too shallow can expose the bulbs to weather extremes. Follow the specific planting depth recommendations for your lily variety to ensure optimal growth.
- Overwatering or Underwatering: Incorrect watering is a common mistake in lily care. Overwatering can lead to bulb rot and other fungal issues, while underwatering can cause the bulbs to dry out and fail to flourish. Find a balance by watering the bulbs thoroughly after planting and monitoring soil moisture regularly throughout the growing season.
- Neglecting Soil Preparation: Failing to properly prepare the soil before planting can prevent lilies from receiving the necessary nutrients and drainage they require. Take time to amend the soil with organic matter, improve drainage, and remove weeds and debris before planting the bulbs.
- Planting in Unsuitable Locations: Planting lily bulbs in areas with insufficient sunlight or poor soil conditions can impede their growth. Ensure that your chosen planting location offers at least six hours of direct sunlight per day and has well-draining soil enriched with organic matter.
- Not Providing Adequate Support: Some lily varieties, particularly the taller ones, may require staking to prevent bending or flopping. Failing to provide support can result in less sturdy stems and weakened growth. Install stakes or plant supports early on to provide necessary support as the lilies grow.
- Skipping Pest and Disease Control: Neglecting to monitor for pests and diseases can lead to significant damage to your lilies. Aphids, lily beetles, and fungal infections are common issues that can affect lilies. Regular inspections and prompt treatment with organic insecticides and fungicides can help protect your lilies from these threats.
- Not Deadheading Spent Blooms: Allowing faded flowers to remain on the plant can inhibit new growth and reduce blooming. Deadheading, the removal of spent blooms, redirects the plant’s energy towards producing new flowers. Make a habit of regularly deadheading your lilies throughout the blooming season.
By avoiding these common mistakes, you can set the stage for healthy and thriving lilies in your garden. Take the time to plan, prepare the soil, and provide proper care, and you will be rewarded with stunning blooms and vibrant colors that will enhance the beauty of your outdoor space.
Conclusion
Cultivating lilies in your ornamental garden can bring a sense of joy, elegance, and natural beauty to your outdoor space. By understanding the best time to plant lily bulbs and following proper planting and care techniques, you can ensure that your lilies thrive and produce breathtaking blooms.
Before planting lily bulbs, consider factors such as climate, soil conditions, and light requirements. These factors will help you determine the optimal time and location for planting your lilies. Spring planting allows the bulbs to establish themselves before the summer, while fall planting helps them develop strong root systems during the dormant winter period.
To plant lily bulbs successfully, prepare the soil by ensuring proper drainage, removing weeds, and testing and adjusting the pH levels. Follow the recommended planting depths, spacing, and watering techniques to help the bulbs settle and establish in their new environment.
Caring for lily bulbs after planting involves consistent watering, appropriate fertilization, regular deadheading of spent blooms, and vigilance in pest and disease control. Providing adequate support and winter protection, when necessary, will aid in the continued health and success of your lilies.
Avoid common mistakes such as planting at incorrect depths, overwatering or underwatering, neglecting soil preparation, choosing unsuitable locations, and skipping pest and disease control. By avoiding these pitfalls, you can significantly enhance the growth and longevity of your lilies.
Remember, cultivating lily bulbs requires patience, attention to detail, and ongoing care. By putting in the effort and following proper techniques, you will be rewarded with a bountiful display of stunning lilies that will delight your senses and bring beauty to your ornamental garden.