Home>Types of Gardening>Ornamental Gardening>When Do You Plant Freesia Bulbs

Ornamental Gardening
When Do You Plant Freesia Bulbs
Published: January 23, 2024
Discover when is the best time to plant Freesia bulbs for stunning ornamental gardening. Learn tips and techniques for successful growing and blooming.
(Many of the links in this article redirect to a specific reviewed product. Your purchase of these products through affiliate links helps to generate commission for Chicagolandgardening.com, at no extra cost. Learn more)
Table of Contents
Introduction
Welcome to the world of ornamental gardening, where beauty and nature harmoniously blend. One popular flowering plant that can add a touch of elegance to any garden is the freesia. With its vibrant colors and delightful fragrance, freesias have become a favorite among garden enthusiasts.
But before you start planting freesia bulbs in your garden, it’s important to understand the basics of their cultivation. From the ideal time to plant to the care required for their successful growth, this article will provide you with all the information you need to know.
Freesia bulbs, scientifically known as Freesia hybrida, belong to the iris family. They are native to South Africa and are cherished for their graceful, funnel-shaped flowers that bloom in a wide range of colors, including shades of white, yellow, pink, orange, and purple. Not only do they add a splash of color to your garden, but their sweet scent also fills the air with a pleasant fragrance.
Before you get your hands dirty, it’s crucial to consider a few factors that can affect the growth and development of the freesia bulbs. Firstly, freesias thrive in areas with well-drained soil and plenty of sunlight. Additionally, they require regular watering but can be sensitive to overwatering, which can lead to root rot. Understanding these factors will ensure that your freesia bulbs have the best possible chance of reaching their full potential in your garden.
So, when is the ideal time to plant freesia bulbs? The answer to this question depends on the climate in your region. Freesias are frost-tender bulbs, meaning they cannot tolerate freezing temperatures. Therefore, it’s crucial to plant them after the danger of frost has passed. In colder regions, you may need to wait until spring, while in milder climates, planting in late fall can also be suitable.
Now that we have covered the basics let’s delve into the step-by-step process of planting freesia bulbs and the care required for their successful growth. Get ready to embark on a journey of transforming your garden into a vibrant and fragrant oasis!
What are Freesia Bulbs?
Freesia bulbs, scientifically known as Freesia hybrida, are small, bulbous plants that belong to the iris family. They are native to South Africa and have gained popularity among garden enthusiasts for their vibrant colors and delightful fragrance.
The bulbs of the freesia plant are the storage organs that contain all the necessary nutrients and energy for the plant’s growth. These bulbs are often teardrop-shaped, with a firm exterior and a soft, fleshy interior. They have a protective papery skin that surrounds the dormant bud of the plant.
What makes freesia bulbs so remarkable is their ability to produce beautiful, trumpet-shaped flowers in a wide range of colors. These flowers are known for their distinctive fragrance, which can vary from subtly sweet to intensely perfumed. They often bloom in clusters along a stalk, adding a burst of color and fragrance to any garden.
Freesias are known for their exquisite blooms that come in a variety of colors, including white, yellow, pink, orange, and purple. The flowers themselves have six petals, gently opening to reveal the intricate pattern and delicate stamens at the center.
Along with their aesthetic appeal, freesias are also treasured for their captivating fragrance. The scent of freesia is often described as fresh, citrusy, and slightly spicy. It is not overpowering but rather a pleasant and gentle aroma that can fill the air around the plant.
These bulbs are not only loved by gardeners but are also sought after for their use in floral arrangements. Their graceful flowers and delightful fragrance make them a popular choice for bouquets and flower displays.
When it comes to their growth habit, freesias generally grow to be around 12 to 20 inches tall and prefer areas with well-drained soil and full sunlight. While they can tolerate partial shade, they thrive when exposed to ample direct sunlight.
Now that you have a better understanding of what freesia bulbs are and their remarkable qualities, let’s explore the factors you need to consider before planting them in your garden.
Factors to Consider Before Planting Freesia Bulbs
Before diving into the exciting process of planting freesia bulbs, it’s important to consider several factors that can greatly impact their growth and overall success in your garden. By taking the time to assess these factors, you can ensure that your freesia bulbs have the ideal conditions for thriving and producing stunning blooms.
1. Soil Conditions: Freesias prefer well-drained soil that is rich in organic matter. Before planting, make sure to amend your soil with compost or well-rotted manure to improve its fertility and drainage. Heavy or clayey soils can lead to waterlogged conditions, which can cause the bulbs to rot.
2. Sunlight Requirements: Freesias thrive when exposed to full sunlight. Ideally, they should receive at least 6 to 8 hours of direct sunlight daily. Insufficient sunlight can result in weak, spindly growth and reduced flower production.
3. Watering: While freesias require regular watering, it’s important to strike a balance. Overwatering can lead to bulb rot, while underwatering can cause the bulbs to dry out and hinder their growth. Aim to keep the soil evenly moist, but not waterlogged, throughout the growing season.
4. Temperature: Freesias are frost-tender bulbs, which means they cannot tolerate freezing temperatures. Therefore, it’s crucial to plant them after the danger of frost has passed. In colder regions, this may mean waiting until spring to plant. If you live in a milder climate, late fall planting can be suitable.
5. Climate Suitability: Freesias prefer mild to warm climates with moderate winters. They thrive in areas with cool, but not freezing, winter temperatures and mild, temperate summers. If you live in an area with harsh winters or extremely hot summers, growing freesias may be more challenging.
6. Pest and Disease Resistance: Freesias are generally resistant to most pests and diseases. However, they can be susceptible to aphids, snails, and slugs. Regular monitoring and appropriate pest control measures can help prevent infestations and ensure the health of your freesia bulbs.
7. Companion Planting: Consider companion planting freesias with other flowers that have similar cultural requirements and aesthetics. Plants such as daffodils, tulips, and lilies make great companions for freesias, creating a visually appealing and harmonious garden display.
By keeping these factors in mind, you can create the optimal conditions for your freesia bulbs to thrive. In the next section, we will explore the ideal time to plant freesia bulbs based on your specific climate.
Ideal Time to Plant Freesia Bulbs
The success of growing freesia bulbs largely depends on planting them at the right time. The ideal planting time can vary depending on your climate and the specific conditions in your region. Understanding the optimal planting time will ensure that your freesias have the best chance of thriving and producing beautiful blooms.
As a general rule, freesias should be planted after the danger of frost has passed. Since freesias are frost-tender bulbs, they cannot tolerate freezing temperatures. Planting them too early in the season when frost is still a possibility can result in the bulbs rotting or the leaves and flowers becoming damaged.
In regions with milder climates and winters, late fall is often the best time to plant freesia bulbs. This timing allows the bulbs to establish their root systems before the arrival of winter, and they will be ready to bloom in the spring. Areas with cool and mild winters, such as coastal regions, are particularly suitable for fall planting.
On the other hand, if you live in an area with cold winters, it’s best to wait until spring to plant your freesia bulbs. This ensures that the bulbs do not experience frost or freezing temperatures, which can harm their growth and development. Planting in early spring, when the soil has started to warm up, will give the bulbs the necessary conditions to sprout and produce flowers.
Before planting, it’s essential to prepare the soil by removing any weeds or debris and adding organic matter, such as compost or well-rotted manure, to improve its fertility and drainage. Freesias prefer well-drained soil with good moisture retention.
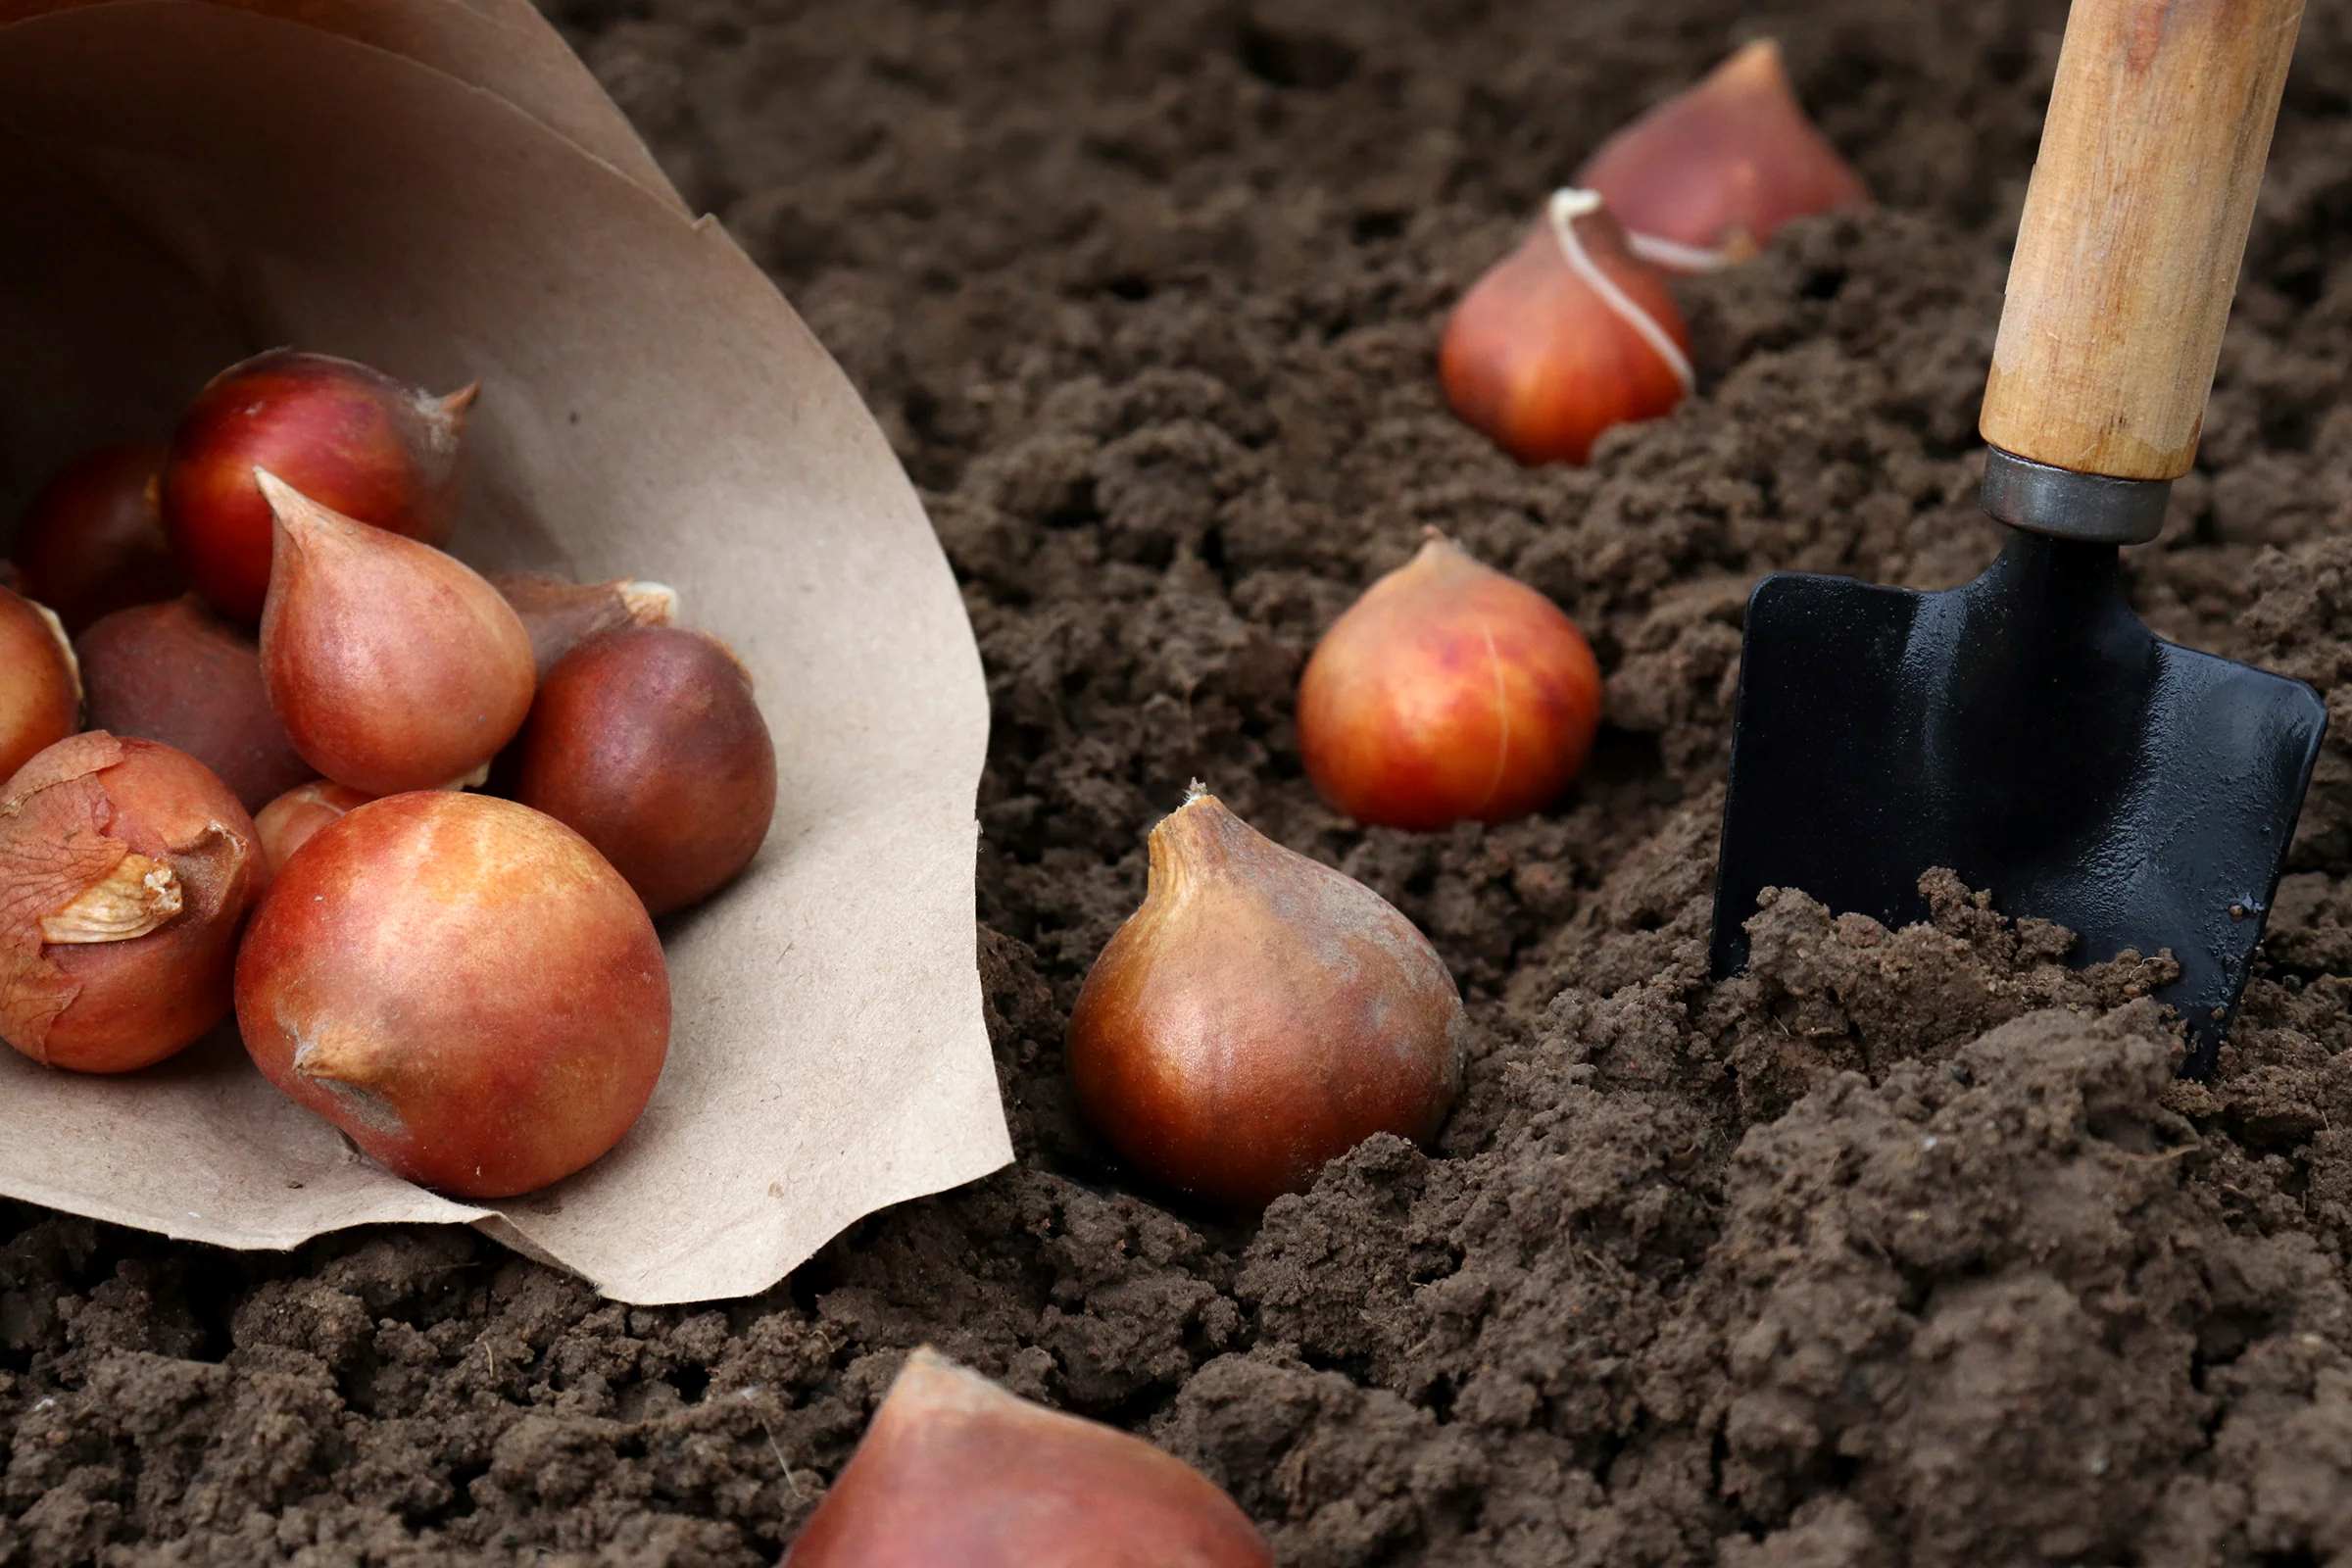
When planting freesia bulbs, make sure to place them about 2 to 3 inches deep in the soil, with the pointed end facing upward. Space the bulbs about 3 to 4 inches apart to allow room for them to grow and spread. After planting, gently water the bulbs to settle the soil around them.
By following these guidelines and planting your freesia bulbs at the right time, you will create the optimal conditions for their growth and ensure a stunning display of blooms in your garden. In the next section, we will explore the step-by-step process of planting freesia bulbs.
Steps to Plant Freesia Bulbs
Planting freesia bulbs is an exciting process that will set the stage for beautiful blooms in your garden. By following a few simple steps, you can ensure that your freesias have the best possible start and thrive throughout the growing season.
- Choose a Suitable Location: Select a location in your garden that receives full sunlight or partial shade. Freesias thrive in areas with well-drained soil and good air circulation. Avoid planting them in low-lying areas that are prone to waterlogging.
- Prepare the Soil: Before planting, prepare the soil by removing any weeds or debris. Enhance the soil’s fertility by adding organic matter, such as compost or well-rotted manure. This will improve its drainage and nutrient content.
- Planting Depth and Spacing: Dig holes in the soil that are about 2 to 3 inches deep. Place the freesia bulbs in the holes with the pointed end facing upward. Space the bulbs about 3 to 4 inches apart, allowing room for them to grow and spread.
- Backfill and Firm the Soil: Gently backfill the holes with soil, covering the bulbs. Take care not to compact the soil too much, as this can hinder root growth. Firm the soil gently with your hands to ensure good contact between the bulbs and the soil.
- Water the Bulbs: After planting, give the bulbs a thorough watering to settle the soil and provide them with the initial moisture they need. Freesias require regular watering, especially during dry spells, to keep the soil moist but not waterlogged.
- Apply Mulch: Mulching around the planted area can help conserve moisture, suppress weed growth, and regulate soil temperature. Apply a layer of organic mulch, such as wood chips or straw, around the freesia bulbs, leaving a small space around the stems to prevent rotting.
- Monitor and Maintain: Keep an eye on the soil moisture levels and water your freesias as needed. Remove any weeds that may compete with the bulbs for nutrients and space. As the freesias grow, consider staking taller varieties to provide support as needed.
- Consider Fertilizer: Freesias generally do not require heavy fertilization. However, you can apply a balanced fertilizer, low in nitrogen, once or twice during the growing season to provide additional nutrients. Follow the manufacturer’s instructions for proper application.
- Enjoy the Blooms: With proper care, your freesia bulbs will sprout and produce beautiful, fragrant blooms. Enjoy the vibrant colors and delightful fragrance that will fill your garden, making it a delightful oasis.
By following these steps, you can confidently plant your freesia bulbs and set the stage for a spectacular floral display. In the next section, we will explore the essential care tips for your freesias after planting.
Caring for Freesia Bulbs After Planting
Once you have planted your freesia bulbs, it’s important to provide them with proper care to ensure their strong growth, healthy development, and abundant blooms. By following a few essential care tips, you can give your freesias the best possible chance to flourish in your garden.
1. Watering: Freesias require regular watering to keep the soil evenly moist, especially during dry spells. Aim to provide about 1 to 1.5 inches of water per week. However, be cautious not to overwater, as this can lead to bulb rot. Monitor the soil moisture level and adjust watering accordingly.
2. Mulching: Applying a layer of organic mulch around your freesia bulbs can help conserve moisture, suppress weed growth, and regulate soil temperature. Maintain a mulch depth of 2 to 3 inches, leaving a small gap around the stems to prevent rotting.
3. Fertilizing: Freesias benefit from a balanced fertilizer application once or twice during the growing season. Choose a fertilizer low in nitrogen but rich in phosphorus and potassium, as high nitrogen levels can result in excessive foliage growth at the expense of flower production. Follow the package instructions for proper application rates.
4. Deadheading: As the freesia blooms fade, it’s important to remove the spent flowers by deadheading. This process encourages the plant to redirect its energy towards bulb formation rather than seed production. Snip off the faded flowers just above the first set of healthy leaves.
5. Staking: Taller varieties of freesias may require staking to provide support as they grow. As the stems increase in height, gently tie them to stakes using soft twine or garden clips. This prevents them from bending or breaking due to wind or heavy rain.
6. Pest and Disease Management: Freesias are generally resistant to most pests and diseases. However, aphids, snails, and slugs can occasionally pose a threat. Inspect your plants regularly and take appropriate pest control measures if necessary. Remove any damaged or diseased foliage promptly to prevent the spread of disease.
7. Winter Care: In regions with cold winters, freesia bulbs are not hardy and may need to be lifted and stored indoors. After the foliage has yellowed and died back naturally, carefully dig up the bulbs, remove any soil, and allow them to dry for a few days. Store them in a cool, dry place until it is time to replant them in the following growing season.
By providing proper care to your freesia bulbs, you can ensure their optimal growth and maximize their blooming potential. Following these care tips will reward you with a spectacular display of colorful flowers and a garden filled with their delightful fragrance.
Common Problems and Solutions in Growing Freesia Bulbs
While freesia bulbs are generally easy to grow and care for, they can occasionally encounter certain problems that can hinder their growth and affect their overall health. Being aware of these common issues and knowing the appropriate solutions can help ensure the success of your freesias in the garden.
1. Bulb Rot: Excess moisture or poorly drained soil can cause bulb rot, leading to mushy or decaying bulbs. To prevent this, ensure that the soil is well-drained and avoid overwatering. If bulb rot is already present, it’s best to remove the affected bulbs and improve the soil drainage before replanting.
2. Pests: Freesias are generally resistant to many pests but can occasionally attract aphids, snails, and slugs. Use insecticidal soap or organic pest control methods to combat aphids. Handpick snails and slugs or use organic slug pellets to deter them from munching on your freesias.
3. Fungal Diseases: Freesias can sometimes fall victim to fungal diseases, such as gray mold (botrytis blight) or fusarium wilt. To reduce the risk, avoid overhead watering and ensure proper air circulation around the plants. If symptoms appear, remove and destroy infected plant material and apply a fungicide following the product’s instructions.
4. Lack of Flowers: If your freesias are not producing as many flowers as expected, inadequate sunlight or insufficient nutrients may be the issue. Ensure that your freesias are receiving at least 6 to 8 hours of direct sunlight and consider fertilizing with a balanced, low-nitrogen fertilizer to promote healthy blooming.
5. Aphid Infestation: Aphids can sometimes infest freesias and cause damage to the foliage and flower buds. Use a strong stream of water to dislodge aphids from the plant or apply an insecticidal soap to control their population. Beneficial insects such as ladybugs can also help manage the aphid population.
6. Improper Storage: If you live in an area with cold winters, storing freesia bulbs correctly during the dormant period is vital. Bulbs that are stored in excessively warm or humid conditions may rot or dry out. Store the bulbs in a cool, dry place with good ventilation until it’s time to replant them in the next growing season.
By being proactive and taking the necessary steps to address these common problems, you can ensure the health and vitality of your freesia bulbs. Regular monitoring, proper maintenance, and timely interventions will help keep your freesias flourishing year after year.
Harvesting Freesia Bulbs
Harvesting freesia bulbs is an exciting and rewarding process that allows you to enjoy the fruits of your labor. By harvesting the bulbs at the right time and with proper techniques, you can ensure their readiness for storage and future planting.
1. Timing: Freesia bulbs should be harvested when the foliage starts to turn yellow and die back naturally. This typically occurs after the flowers have bloomed and spent their glorious display. Avoid harvesting the bulbs too early before the foliage has fully matured, as this can affect their storage potential.
2. Digging up the Bulbs: Carefully dig around the base of the plant, taking caution not to damage the bulbs. Use a garden fork or trowel to gently lift the bulbs out of the soil. Shake off any excess soil but avoid washing the bulbs, as moisture can cause them to rot during storage.
3. Curing and Drying: After harvesting, allow the bulbs to cure and dry for a few days in a well-ventilated area. Place them in a single layer on a tray or newspaper, making sure they are not touching each other. This will help the outer layer of the bulbs to dry and protect them during storage.
4. Removing Foliage: Once the bulbs have dried, gently remove any remaining foliage or stems. Trim the foliage about an inch above the bulb, leaving a small stub to help identify the top of the bulb during planting. Removing the foliage helps prevent the spread of diseases and allows for better airflow during storage.
5. Storage: Freesia bulbs should be stored in a cool, dry place until it’s time for planting in the next growing season. Ideal storage conditions include temperatures between 35°F and 45°F (2°C and 7°C) with low humidity. Use a breathable container, such as a mesh bag or a paper bag, to allow for proper air circulation and prevent moisture buildup.
6. Inspecting and Sorting: Before storing the bulbs, inspect them for any signs of damage, disease, or rot. Discard any bulbs that appear unhealthy or compromised. Sort the bulbs by size and discard any small or damaged ones, as larger, healthier bulbs tend to produce better results during planting.
7. Labeling: It’s essential to label your stored freesia bulbs to keep track of their variety and planting information. Use waterproof markers or labels to indicate the type, color, and planting depth, ensuring you have all the necessary details for the upcoming planting season.
8. Replanting: When the time comes to replant your harvested freesia bulbs, follow the same planting guidelines as for newly purchased bulbs. Prepare the soil, determine the ideal planting depth, and provide the bulbs with the necessary conditions for growth, ensuring another season of beautiful blooms.
By following these harvesting and storage practices, you can successfully preserve your freesia bulbs and prepare them for future planting, continuing the cycle of delightful blooms year after year.
Conclusion
Growing freesia bulbs can be a truly rewarding experience, allowing you to create a vibrant and fragrant garden display. By understanding the key factors involved in their cultivation, planting them at the right time, and providing proper care, you can enjoy the beauty and fragrance of these stunning flowers in your own backyard.
From the initial selection and preparation of the planting site to the careful harvesting and storage of the bulbs, each step of the process is crucial in ensuring the success of your freesia bulbs. By considering factors such as soil conditions, sunlight requirements, and watering needs, you can create optimal conditions for their growth and development.
The ideal time to plant freesia bulbs depends on your specific climate, with the timing ranging from late fall to early spring. By planting them at the right time, you give them the opportunity to establish their root systems and produce dazzling blooms when the season is right.
Proper care, including regular watering, mulching, fertilizing, and pest management, is essential for the healthy growth of freesia bulbs. Taking steps to prevent common issues such as bulb rot, pests, and diseases will help ensure the longevity and vitality of your freesia plants.
Harvesting and storing freesia bulbs correctly is essential for their future success. By harvesting them at the right time, allowing them to cure and dry, and properly storing them in cool, dry conditions, you can preserve the bulbs and prepare them for replanting in the next growing season.
So, whether you’re planting freesias for their captivating colors, delightful fragrance, or a combination of both, with the right knowledge and care, your garden can be transformed into a stunning oasis of beauty and elegance.
Get ready to immerse yourself in the world of ornamental gardening as you plant, nurture, and witness the marvel of freesia bulbs. Let their vibrant blooms and delightful scents invigorate your senses and bring joy to your gardening endeavors. Enjoy the journey of growing freesia bulbs and marvel at the beauty they bring to your outdoor space season after season.