Home>Types of Gardening>Edible Gardening>How Do You Plant Onion Bulbs

Edible Gardening
How Do You Plant Onion Bulbs
Published: January 22, 2024
Learn how to plant onion bulbs and grow onions in your edible garden. Get expert tips and advice on edible gardening for a successful onion harvest.
(Many of the links in this article redirect to a specific reviewed product. Your purchase of these products through affiliate links helps to generate commission for Chicagolandgardening.com, at no extra cost. Learn more)
Table of Contents
Introduction
Welcome to the world of edible gardening! Growing your own food is not only a rewarding experience but also a great way to ensure the quality and freshness of the produce you consume. If you’re just starting out on your gardening journey or looking to expand your existing garden, planting onion bulbs is an excellent choice. Onions are a versatile vegetable that can add flavor to a wide variety of dishes, and they are relatively easy to grow.
In this article, we will guide you through the process of planting onion bulbs, from selecting the right bulbs to harvesting and storing the mature onions. Whether you have a spacious backyard or a small container garden, you can enjoy a bountiful harvest of flavorful onions with a little bit of planning and care.
Before we dive into the specifics of planting onion bulbs, it’s essential to understand the different types of onions available. Onions are categorized into two main groups: long-day onions and short-day onions. Long-day onions require 14-16 hours of daylight to form bulbs, making them suitable for northern regions with longer daylight hours. On the other hand, short-day onions require 10-12 hours of daylight and are better suited for southern regions with shorter daylight hours.
Now that you have a basic understanding, let’s move on to the first step in growing onions – selecting the right bulbs.
Selecting Onion Bulbs
Choosing the right onion bulbs is crucial for a successful harvest. When selecting onion bulbs, there are a few key factors to consider:
- Variety: There are numerous onion varieties available, each with its own unique flavor profile and growth habit. Popular varieties include Yellow Globe, White Lisbon, and Red Baron. Research the different varieties available and choose one that suits your taste preferences and growing conditions.
- Size and Firmness: Look for onion bulbs that are firm and free from soft spots or blemishes. The bulbs should be of a good size, ideally around 1-2 inches in diameter.
- Onion Sets vs. Seedlings: Onion bulbs are commonly available as sets (small bulbs) or as seedlings. Sets are easier to plant and provide quicker results, while seedlings require more time and care. Consider your garden space, time availability, and gardening experience when deciding which option to choose.
- Local Adaptation: Some onion varieties are more suited to specific regions or climates. Consult with local garden centers or experienced gardeners in your area to determine which onion varieties perform best in your location.
When purchasing onion bulbs, ensure they are from a reputable source and are disease-free. Inspect the bulbs for any signs of mold, decay, or damage. Healthy and high-quality bulbs will give you the best chance of a successful onion harvest.
Once you have selected your onion bulbs, the next step is to prepare the soil for planting. We will discuss this in the next section.
Preparing the Soil
Proper soil preparation is essential for the successful growth of onions. Follow these steps to ensure your soil is ideal for planting onion bulbs:
- Choose a Well-Draining Location: Onions prefer well-draining soil to prevent waterlogged conditions. Select a spot in your garden that receives full sun and has good drainage.
- Remove Weeds and Debris: Clear the planting area of any weeds, rocks, or debris that can hinder onion bulb growth or compete for nutrients.
- Amend the Soil: Onions thrive in soil that is rich in organic matter. Add compost or well-rotted manure to improve soil fertility and enhance moisture retention.
- Adjust Soil pH: Onions prefer a slightly acidic soil with a pH level of 6.0-7.0. Test your soil’s pH using a soil testing kit and make necessary adjustments by adding lime to increase pH or sulfur to decrease pH.
- Loosen the Soil: Use a garden fork or tiller to loosen the soil to a depth of around 8-10 inches. This will help the onion bulbs establish a strong root system and allow for proper aeration.
Before planting, it’s advisable to conduct a soil test to determine its nutrient content. This will help you identify any deficiencies and allow you to make appropriate amendments. However, if you don’t have access to a soil test, incorporating a balanced fertilizer into the soil can provide essential nutrients for onion growth.
Once the soil is prepared, it’s time to move on to the next step – planting the onion bulbs.
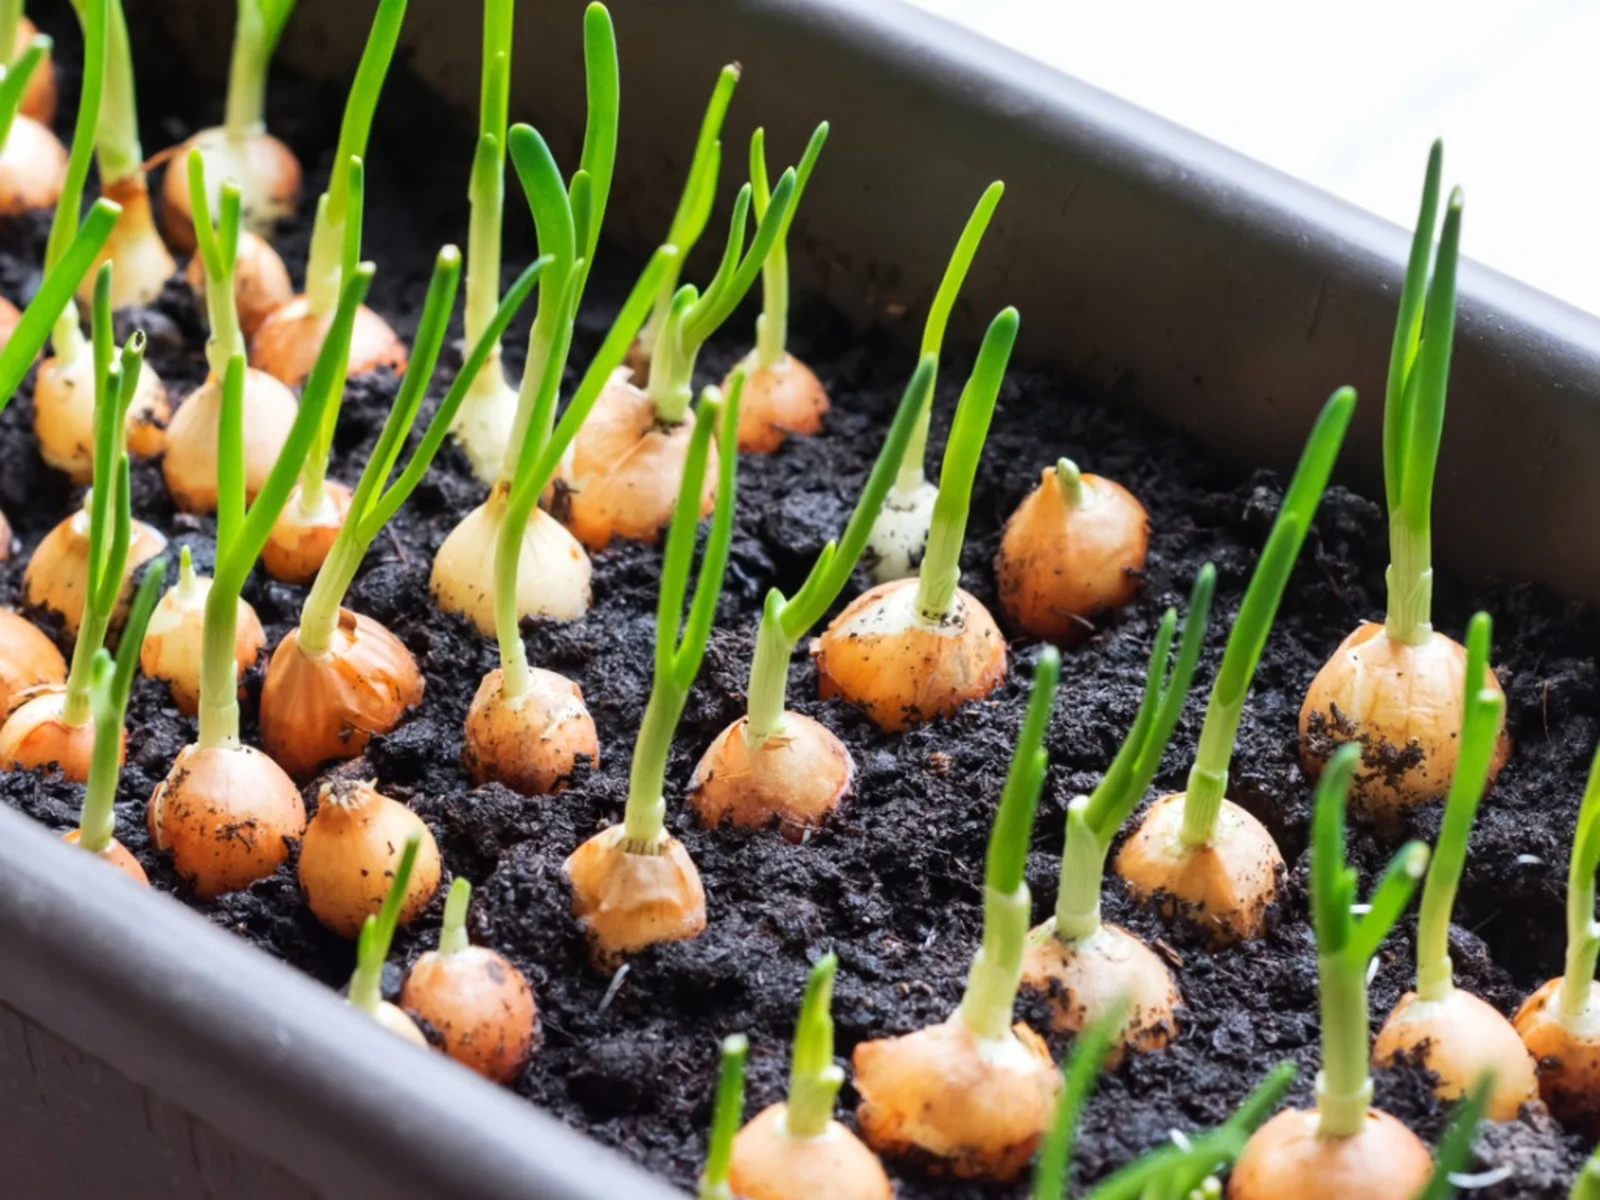
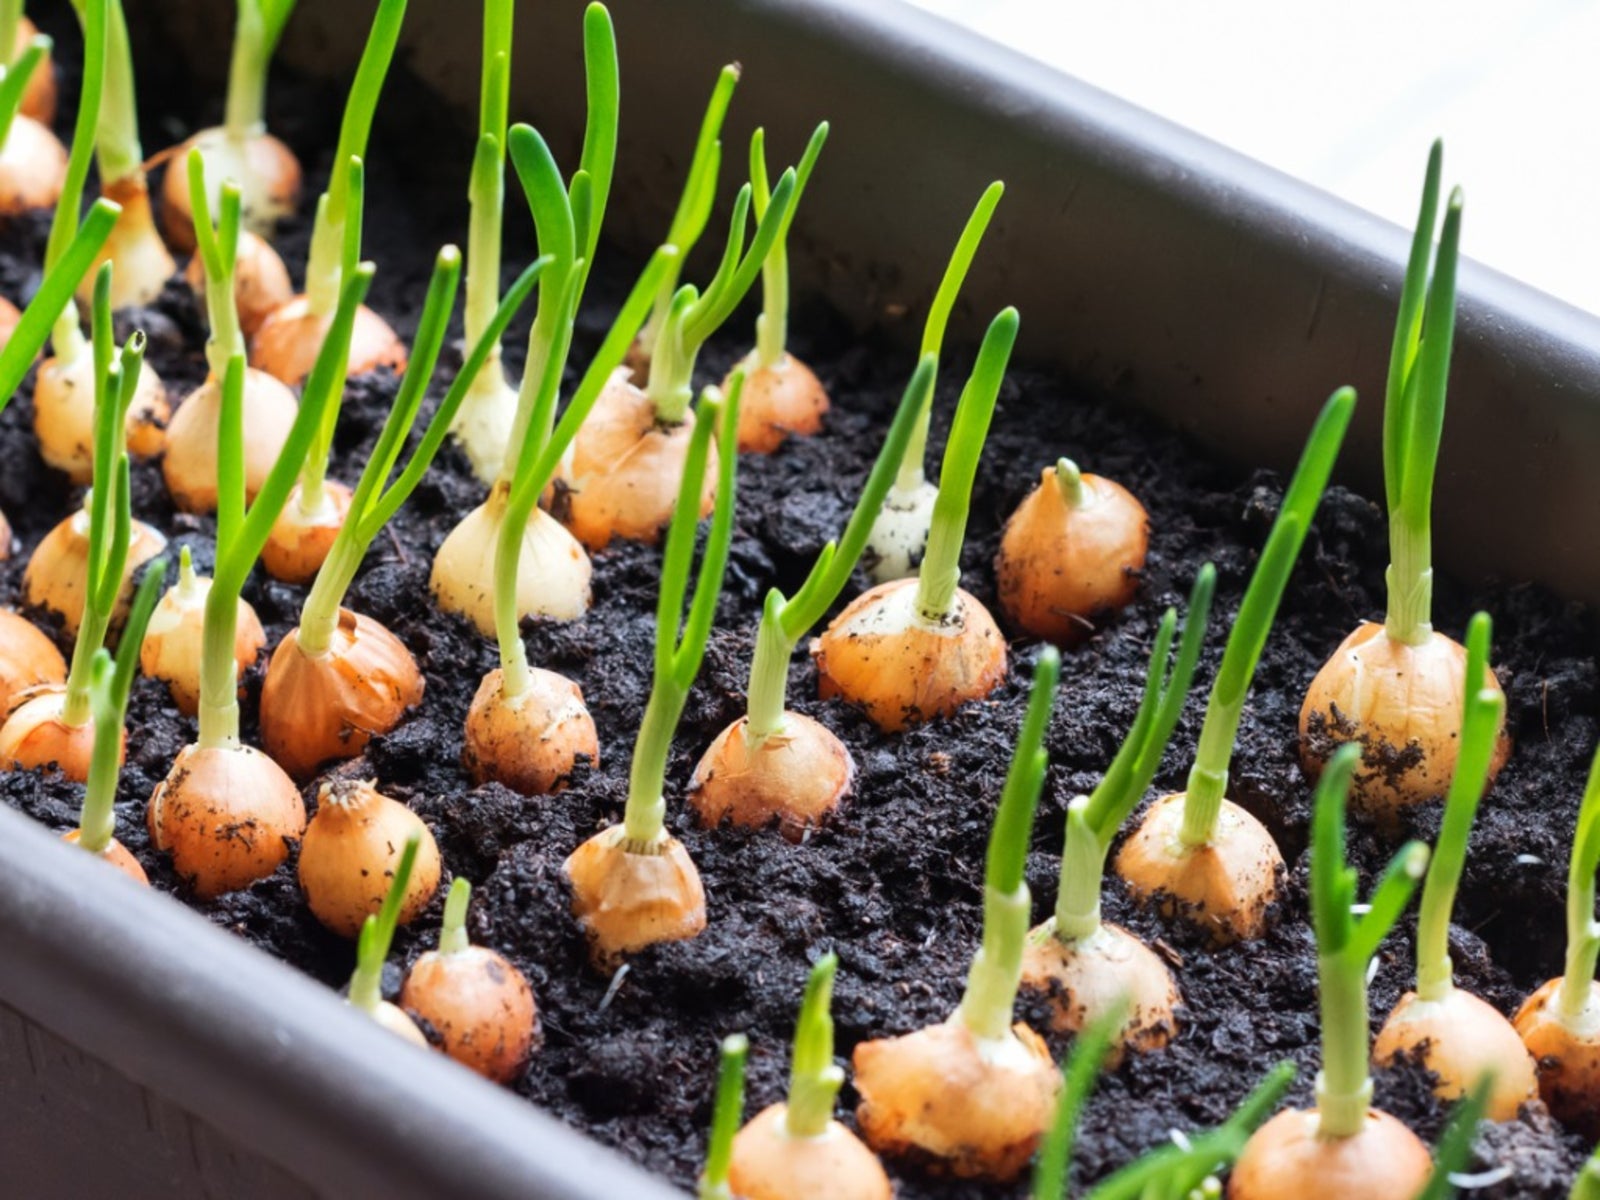
Planting Onion Bulbs
Now that you have selected your onion bulbs and prepared the soil, it’s time to plant them. Follow these steps to ensure successful onion bulb planting:
- Timing: The timing of planting onion bulbs depends on your location and the type of onions you are growing. In general, onions can be planted in early spring or fall. Check the recommended planting timeframe for the specific onion variety you have chosen.
- Spacing: Onions need sufficient space to grow and develop. Plant the bulbs around 3-4 inches apart, with rows spaced approximately 12-18 inches apart. This ensures they have enough room for proper air circulation and bulb expansion.
- Planting Depth: Onion bulbs should be planted with the tip slightly above the soil surface. Gently press them into the soil, making sure the root end is facing downwards and the pointed end is facing upwards.
- Watering: After planting, thoroughly water the soil to ensure good moisture penetration. Moisture is crucial for germination and root establishment. Maintain consistent moisture throughout the growing season, ensuring the soil doesn’t become waterlogged.
- Mulching: Applying a layer of organic mulch, such as straw or compost, around the onion plants can help conserve moisture, suppress weeds, and regulate soil temperatures.
Keep in mind that onions have shallow roots, so avoid excessive tilling or poking around the bulb area, as this can damage the roots and hinder growth.
Once the onion bulbs are planted, it’s important to provide proper care and maintenance for their healthy development. We will discuss this in the next section.
Providing Water and Care
Watering and providing care to your growing onion bulbs are crucial steps in ensuring healthy development and a successful harvest. Follow these guidelines to properly care for your onions:
- Watering: Onions require consistent moisture, especially during their active growth period. Water the plants deeply, providing approximately 1 inch of water per week, either through rainfall or manual irrigation. Avoid overwatering, as this can lead to rotting or fungal diseases. Maintaining a consistent moisture level will help the bulbs to grow and prevent them from cracking.
- Weeding: Keep the onion bed free from weeds that can compete for nutrients and hinder the growth of the onion bulbs. Regularly inspect the area and carefully remove any weeds using your hands or a small gardening tool.
- Fertilizing: Onion plants benefit from regular feeding. Apply a balanced fertilizer high in nitrogen every 4-6 weeks during the growing season. Follow the package instructions for proper application rates and avoid overfertilization, as this can lead to excessive foliage growth and smaller bulb development.
- Thinning: As the onion plants grow, they may become crowded. Thin out the plants when they reach a height of around 4-6 inches. Remove the weaker plants, leaving space for the stronger ones to grow and develop larger bulbs.
- Pest and Disease Control: Onions are generally resistant to pests and diseases. However, common issues include aphids, onion maggots, and fungal diseases such as powdery mildew and downy mildew. Monitor your plants regularly and take appropriate measures if you notice any signs of pests or diseases. This can include using organic insecticides or fungicides, practicing crop rotation, or utilizing natural pest control methods.
Providing proper care and attention to your onion bulbs will contribute to their overall health and ensure a successful harvest. Now, let’s move on to the next step – harvesting the mature onion bulbs.
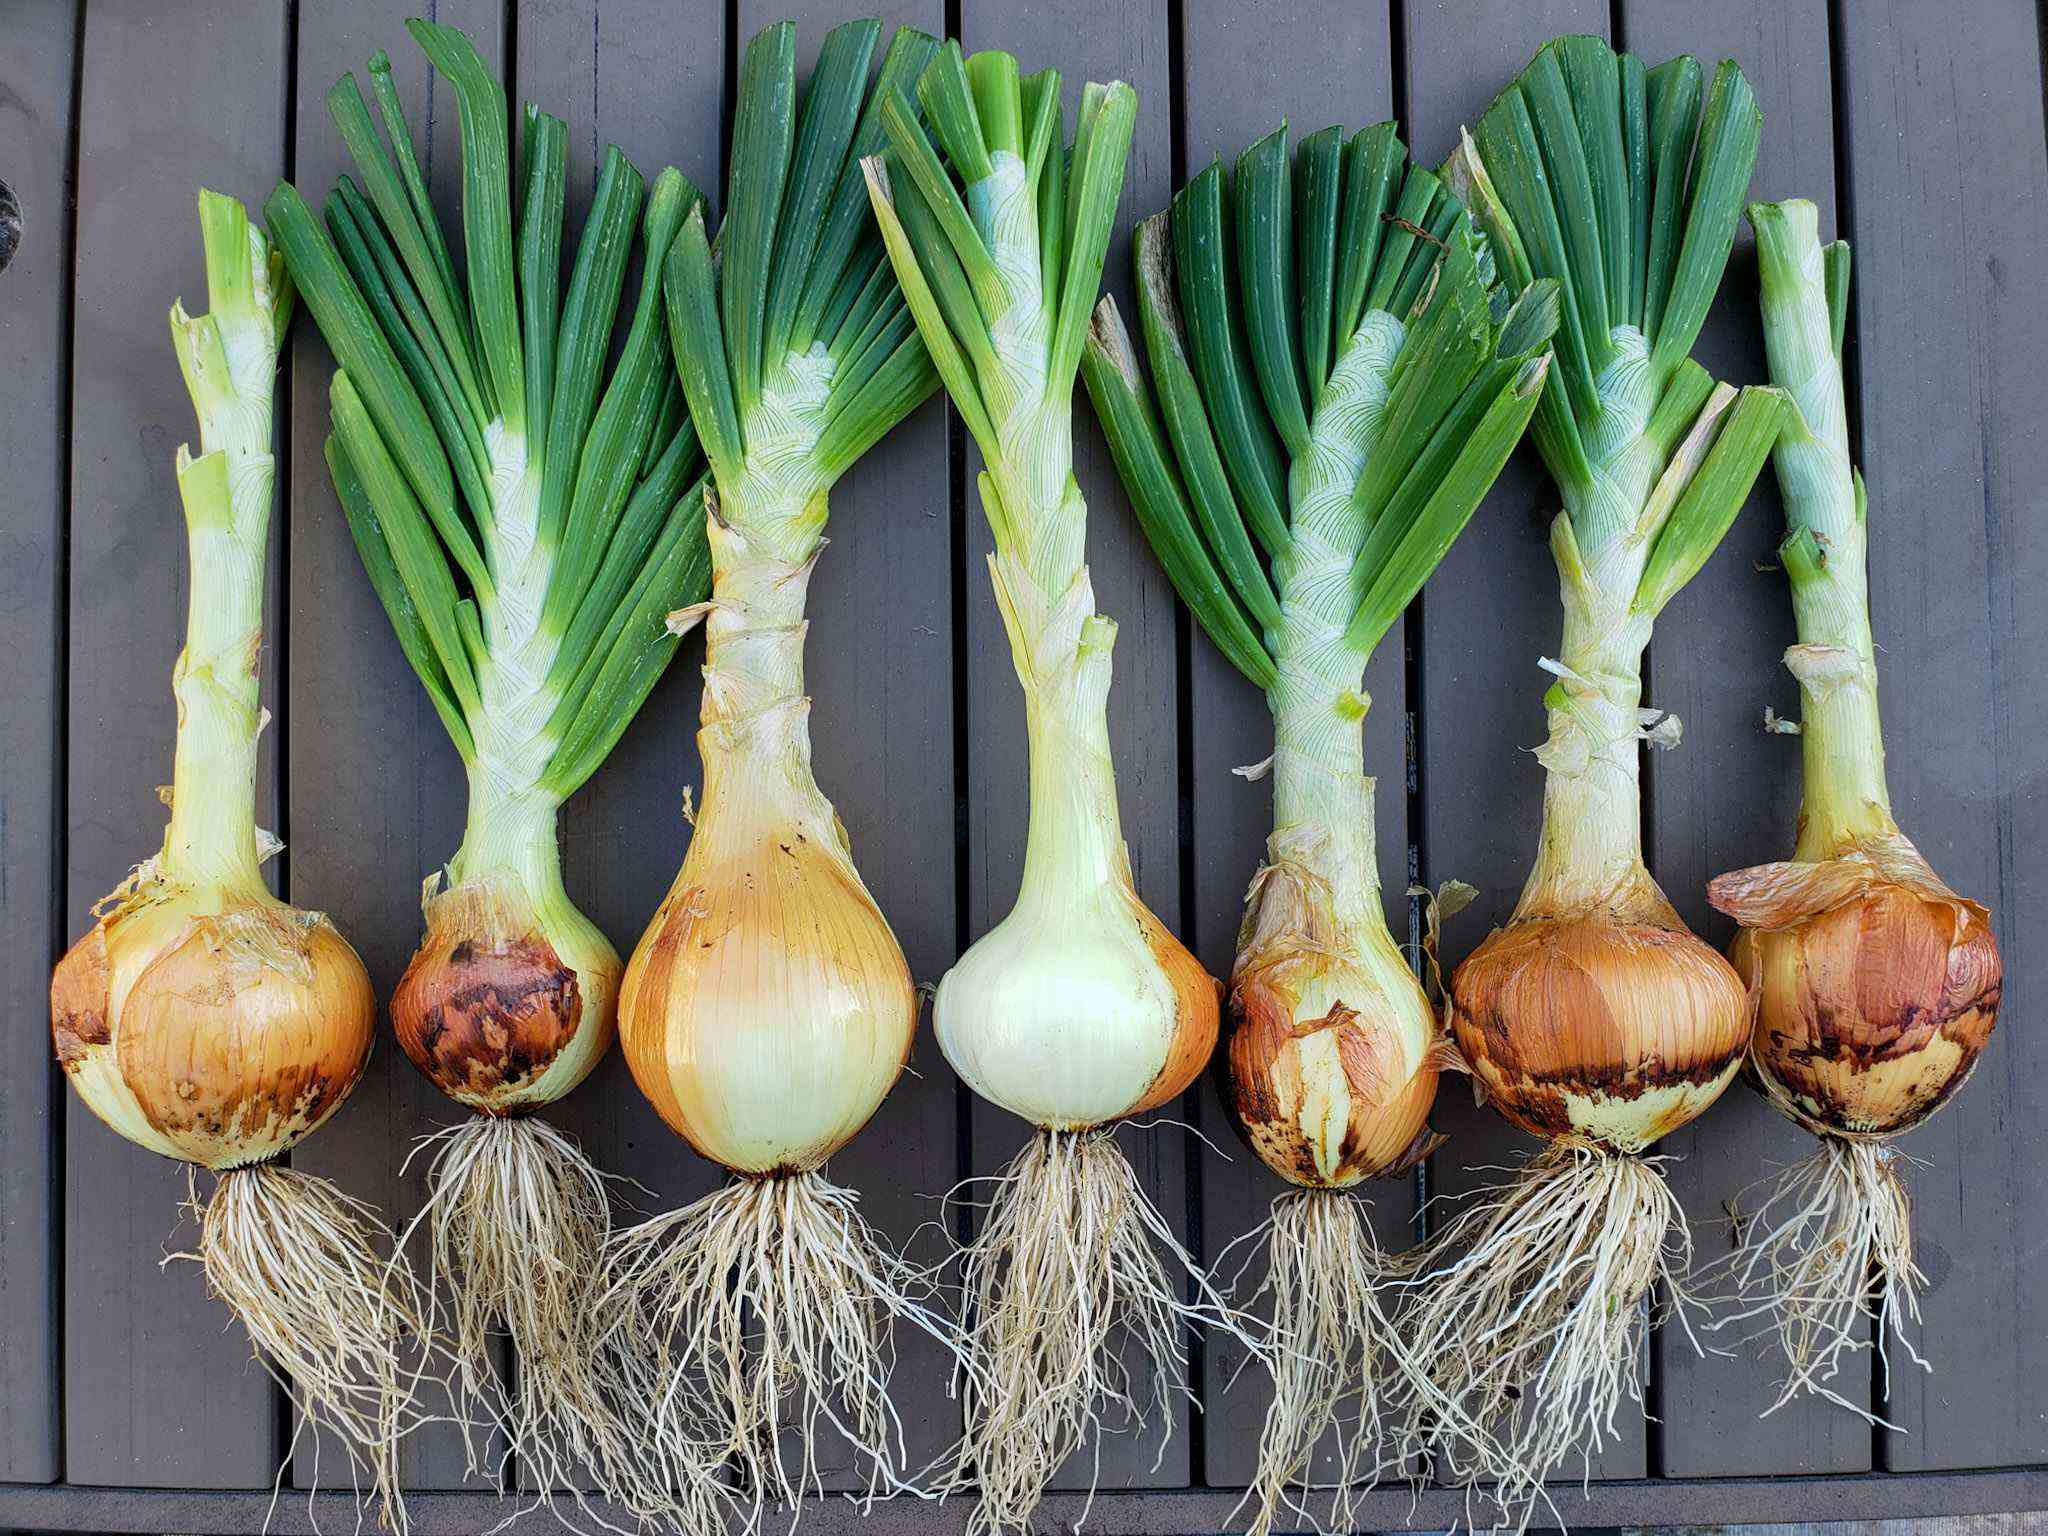
Harvesting Onion Bulbs
After months of nurturing and care, the time has finally come to harvest your onion bulbs. Harvesting onions at the right stage ensures optimal flavor and storage potential. Here’s how to harvest your mature onion bulbs:
- Observation: Keep a close eye on your onion plants. Harvest time is typically indicated when the onion tops start to turn yellow and begin to fall over. This indicates that the growth has stopped, and the bulbs are ready for harvest.
- Drying: Before harvesting, allow the onion bulbs to mature and dry in the garden for a few days. This helps in curing the outer skin and enhancing the storage life of the onions.
- Lifting the Bulbs: Gently loosen the soil around the bulbs using a garden fork or trowel. Carefully lift the onion bulbs from the soil, making sure to avoid damaging them.
- Drying and Curing: Once lifted, lay the onion bulbs in a sunny, well-ventilated area to dry and cure further. This process usually takes about two to three weeks. Ensure that the bulbs are spread out in a single layer and are not touching each other.
- Trimming: After the onions have dried and cured, trim off the excess roots and remove any loose or papery outer layers. Be careful not to remove too much of the outer layers, as they protect the onions during storage.
After the harvesting and trimming process, your onions are ready for storage or immediate use. Properly cured onions can be stored in a cool, dry, and well-ventilated area for several months.
Now that you’ve successfully harvested your onions, let’s discuss some important tips for storing them to maintain their quality and freshness.
Storing Onion Bulbs
Proper storage is essential to maintain the quality and freshness of your harvested onion bulbs. Follow these guidelines to store your onions effectively:
- Curing: Before storing, ensure that the onion bulbs have been properly cured and dried. This helps to develop a protective dry outer layer and extends their shelf life.
- Location: Choose a cool, dry, and well-ventilated area for onion storage. A basement, pantry, or garage can be suitable as long as the conditions are consistent and free from excessive moisture or humidity.
- Container: Use mesh bags, baskets, or wooden crates to store your onions. Avoid plastic bags or airtight containers, as they can trap moisture and lead to rotting.
- Avoid Heat and Light: Keep your stored onions away from direct sunlight and heat sources, as these can cause premature sprouting and spoilage.
- Separation: Store onions away from other fruits and vegetables, as they release ethylene gas, which can cause onions to spoil more quickly.
- Regular Check: Periodically check your stored onions for any signs of spoilage, mold, or sprouting. Remove any damaged or rotting onions to prevent the spread of decay to the rest of the stored bulbs.
By following these storage guidelines, you can enjoy the flavor and freshness of your homegrown onions for several months.
Before we conclude, let’s take a look at some common onion planting mistakes to avoid.
Common Onion Planting Mistakes to Avoid
When planting onions, it’s important to be mindful of certain mistakes that can hinder their growth and overall yield. Here are some common onion planting mistakes to avoid:
- Planting Bulbs too Deep: Planting onion bulbs too deep in the soil can inhibit their growth and make it difficult for them to form proper bulbs. Ensure that the bulbs are planted with the tips slightly above the soil surface.
- Overcrowding: Planting onion bulbs too close to each other can lead to competition for space, nutrients, and water. Give each bulb sufficient space to grow and avoid overcrowding.
- Underwatering or Overwatering: Finding the right balance when it comes to watering onions is crucial. Overwatering can cause rotting and fungal diseases, while underwatering can lead to stunted growth and small bulbs. Maintain consistent moisture levels and water thoroughly and deeply when needed.
- Poor Soil Preparation: Neglecting to prepare the soil adequately can result in nutrient deficiencies or poor drainage, hampering the growth of onion bulbs. Take the time to amend the soil with organic matter and ensure proper drainage.
- Ignoring Pest and Disease Control: Failing to monitor for pests and diseases can jeopardize the health and yield of your onion plants. Regularly check your plants for signs of pests or diseases and take appropriate measures to control them.
- Harvesting Too Early: While it’s exciting to see the progress of your onion plants, harvesting too early can result in underdeveloped bulbs. Wait until the tops have turned yellow and fallen over before harvesting for optimal bulb size and flavor.
By avoiding these common mistakes, you can ensure a successful onion growing experience and enjoy a bountiful harvest.
With this comprehensive guide, you are well-equipped to embark on your edible gardening journey and successfully plant, grow, harvest, and store your own flavorful onion bulbs. Happy gardening!
Conclusion
Congratulations on completing this comprehensive guide to planting, growing, and harvesting onion bulbs! By following the steps outlined in this article, you now have the knowledge and tools to cultivate your own supply of flavorful onions right at home. From selecting the right onion bulbs to preparing the soil, planting, providing care, and harvesting, every stage is essential for a successful onion growing journey.
Remember to choose onion bulb varieties suited to your region’s daylight requirements, ensure well-draining soil, and provide consistent moisture and proper care. Regularly monitor for pests and diseases, and take prompt action when needed. Harvest your onions at the right time and give them proper drying and curing before storing them in a cool, dry, and well-ventilated location.
By avoiding common planting mistakes and applying the tips and techniques discussed, you can enjoy a bountiful harvest of fresh, homegrown onions. Not only will you savor the satisfaction of growing your own food, but you’ll also relish the incredible flavor and quality that homegrown onions bring to your culinary creations. Plus, you’ll have the added benefit of knowing exactly where your produce comes from and how it was cultivated.
So, get your gardening tools ready, select your favorite onion varieties, and start planting! With a little patience, care, and dedication, you’ll soon be enjoying the delicious fruits of your labor. Happy gardening!