Home>Types of Gardening>Ornamental Gardening>When To Dig Up Tulip Bulbs

Ornamental Gardening
When To Dig Up Tulip Bulbs
Modified: January 22, 2024
Discover the best time to dig up tulip bulbs for your ornamental gardening needs. Properly excavate and store your bulbs to ensure a beautiful display next season.
(Many of the links in this article redirect to a specific reviewed product. Your purchase of these products through affiliate links helps to generate commission for Chicagolandgardening.com, at no extra cost. Learn more)
Table of Contents
Introduction
Welcome to the world of ornamental gardening, where beautiful flowers and lush greenery transform ordinary outdoor spaces into enchanting and captivating landscapes. If you’re passionate about creating a stunning garden, then you’ve come to the right place. In this article, we will delve into the fascinating realm of tulip bulbs, one of the most beloved and iconic flowers in ornamental gardening.
Tulips are renowned for their vibrant colors and elegant shapes, making them a favorite choice among gardeners around the world. Whether you’re an experienced gardener or just starting out, understanding when to dig up tulip bulbs is crucial for their long-term health and future growth.
If you’ve ever wondered about the appropriate time to dig up tulip bulbs, you’re not alone. Many gardeners struggle with identifying the right moment to unearth these precious bulbs. By knowing the signs and following some simple steps, you can ensure that your tulips remain healthy and ready for their next season of blooming.
In this article, we will explore the indicators that it’s time to dig up your tulip bulbs and guide you through the process of digging them up properly. We will also discuss how to care for and store your tulip bulbs, so you can enjoy their beauty year after year.
So, if you’re ready to embark on this horticultural adventure, let’s delve into the world of tulip bulbs and discover when the perfect time is to dig them up!
Understanding Tulip Bulbs
Before we delve into when to dig up tulip bulbs, it’s important to have a basic understanding of these fascinating plants. Tulips belong to the Liliaceae family and are native to regions of Europe, Asia, and North Africa. They are known for their bulbous roots, which store energy and nutrients to support the growth of the flowers.
Tulip bulbs are composed of layers, with the outer layer being the protective tunic. The tunic helps to shield the bulb from external damage and provides moisture retention. Inside the bulb, you will find the scales, which protect the developing flower and contain the necessary nutrients for growth.
When planted in the ground, tulip bulbs go through a period of dormancy during the winter months. This dormancy allows the bulbs to regenerate and prepare for the following growing season. Once spring arrives, the bulbs awaken from their dormancy, sending up shoots that eventually lead to the emergence of beautiful tulip blooms.
It’s essential to note that different types of tulips have different blooming times. Some varieties may bloom early in the spring, while others may bloom later in the season. Understanding the specific characteristics of your tulip bulbs will help you determine the best time to dig them up and care for them appropriately.
By understanding the structure and growth cycle of tulip bulbs, you’ll be better equipped to make informed decisions regarding their care. This knowledge will also enable you to maximize their beauty and longevity in your garden.
Signs that it’s Time to Dig Up Tulip Bulbs
Knowing when to dig up your tulip bulbs is essential for their overall health and productivity. If left in the ground for too long, tulip bulbs can become overcrowded, impacting their ability to produce vigorous blooms. Here are some signs that indicate it’s the right time to dig up your tulip bulbs:
- Faded foliage: Once the tulip blooms have faded, the foliage begins to turn yellow and dry up. This is a clear indication that the plant has completed its growth cycle for the season. Wait until the foliage has withered completely before digging up the bulbs.
- No new growth: If you notice that there is no new growth from the bulbs during the current growing season, it may be a sign that it’s time to dig them up. Tulip bulbs should produce new shoots and leaves each year. If they fail to do so, it could be an indication that the bulbs have become dormant or unhealthy.
- Overcrowding: Over time, tulip bulbs can multiply and crowd each other in the soil. This can result in smaller blooms or even no blooms at all. If you notice that the tulip plants are becoming congested and crowded, it’s a good idea to dig up the bulbs and divide them for better spacing and airflow.
- Soft or mushy bulbs: Healthy tulip bulbs should feel firm and solid to the touch. If you notice that the bulbs have become soft, mushy, or rotten, it’s a clear sign that they are diseased or damaged. In this case, it’s best to dig up the bulbs and discard them to prevent the spread of disease to other plants in your garden.
- Desire to relocate or rearrange: Sometimes, you may want to rearrange or relocate your tulip bulbs to other areas of your garden. This could be due to changes in your landscape design or simply to create a fresh look. If you have the urge to move or rearrange your tulips, it’s a good opportunity to dig up the bulbs and transplant them to their new location.
By paying close attention to these signs, you can ensure that you dig up your tulip bulbs at the optimal time for their health and future blooming. Next, we will explore the steps to properly prepare for digging up tulip bulbs.
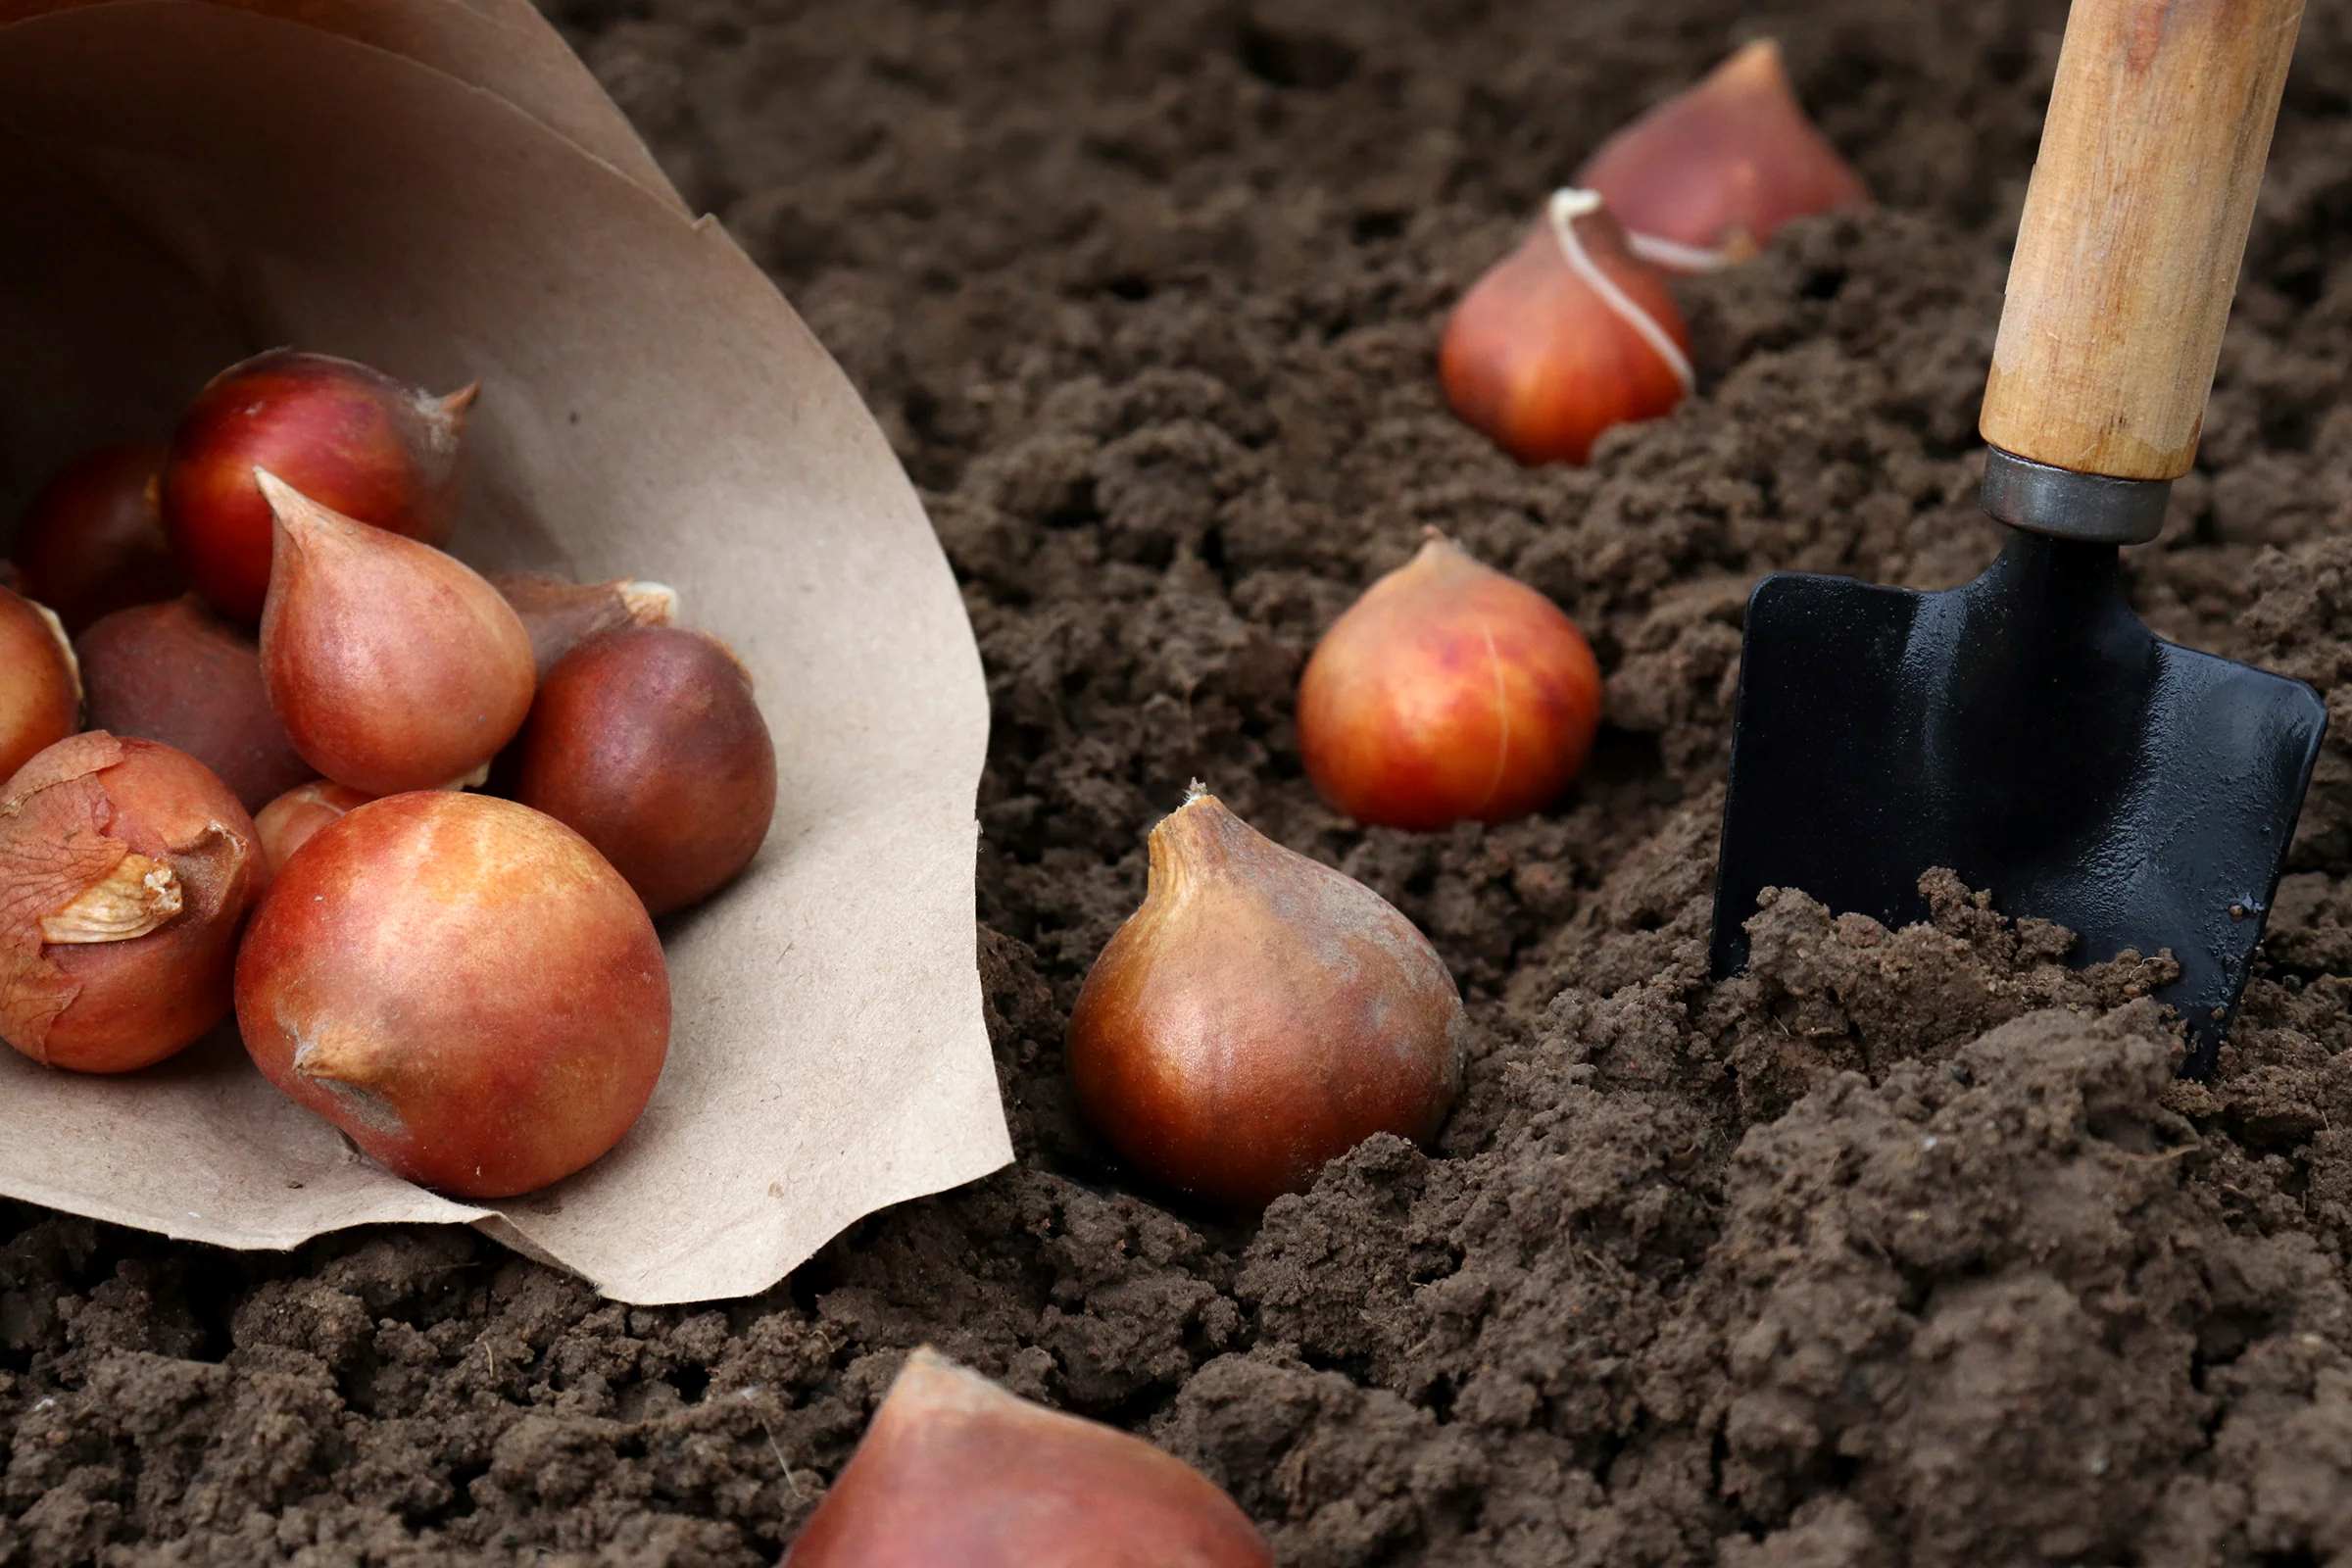
Preparing for Digging Up Tulip Bulbs
Before you start digging up your tulip bulbs, it’s crucial to make the necessary preparations to ensure a successful and seamless process. Here are some steps to follow when preparing to dig up your tulip bulbs:
- Choose the right time: Timing is crucial when it comes to digging up tulip bulbs. Wait until the foliage has completely withered and turned yellow or brown. This indicates that the bulbs have absorbed all the necessary nutrients for the next growing season.
- Gather the necessary tools: To dig up tulip bulbs, you’ll need a few essential tools. These include a trowel or garden fork, gardening gloves, and a bucket or container to hold the bulbs.
- Prepare the planting area: Clear the area around the tulip bulbs by removing any weeds, debris, or other plants that may hinder the digging process. This will make it easier to access the bulbs without causing damage.
- Water the soil: Prior to digging up the tulip bulbs, water the soil thoroughly. This will help loosen the soil and make it easier to remove the bulbs without causing damage.
- Label the bulbs: If you have different varieties or colors of tulip bulbs, it’s a good idea to label them before digging them up. This will help you identify and replant them correctly later on.
By taking these preparatory steps, you’ll set yourself up for a smooth and efficient process of digging up your tulip bulbs. Now that you’re ready, let’s move on to the step-by-step guide on how to dig up tulip bulbs properly.
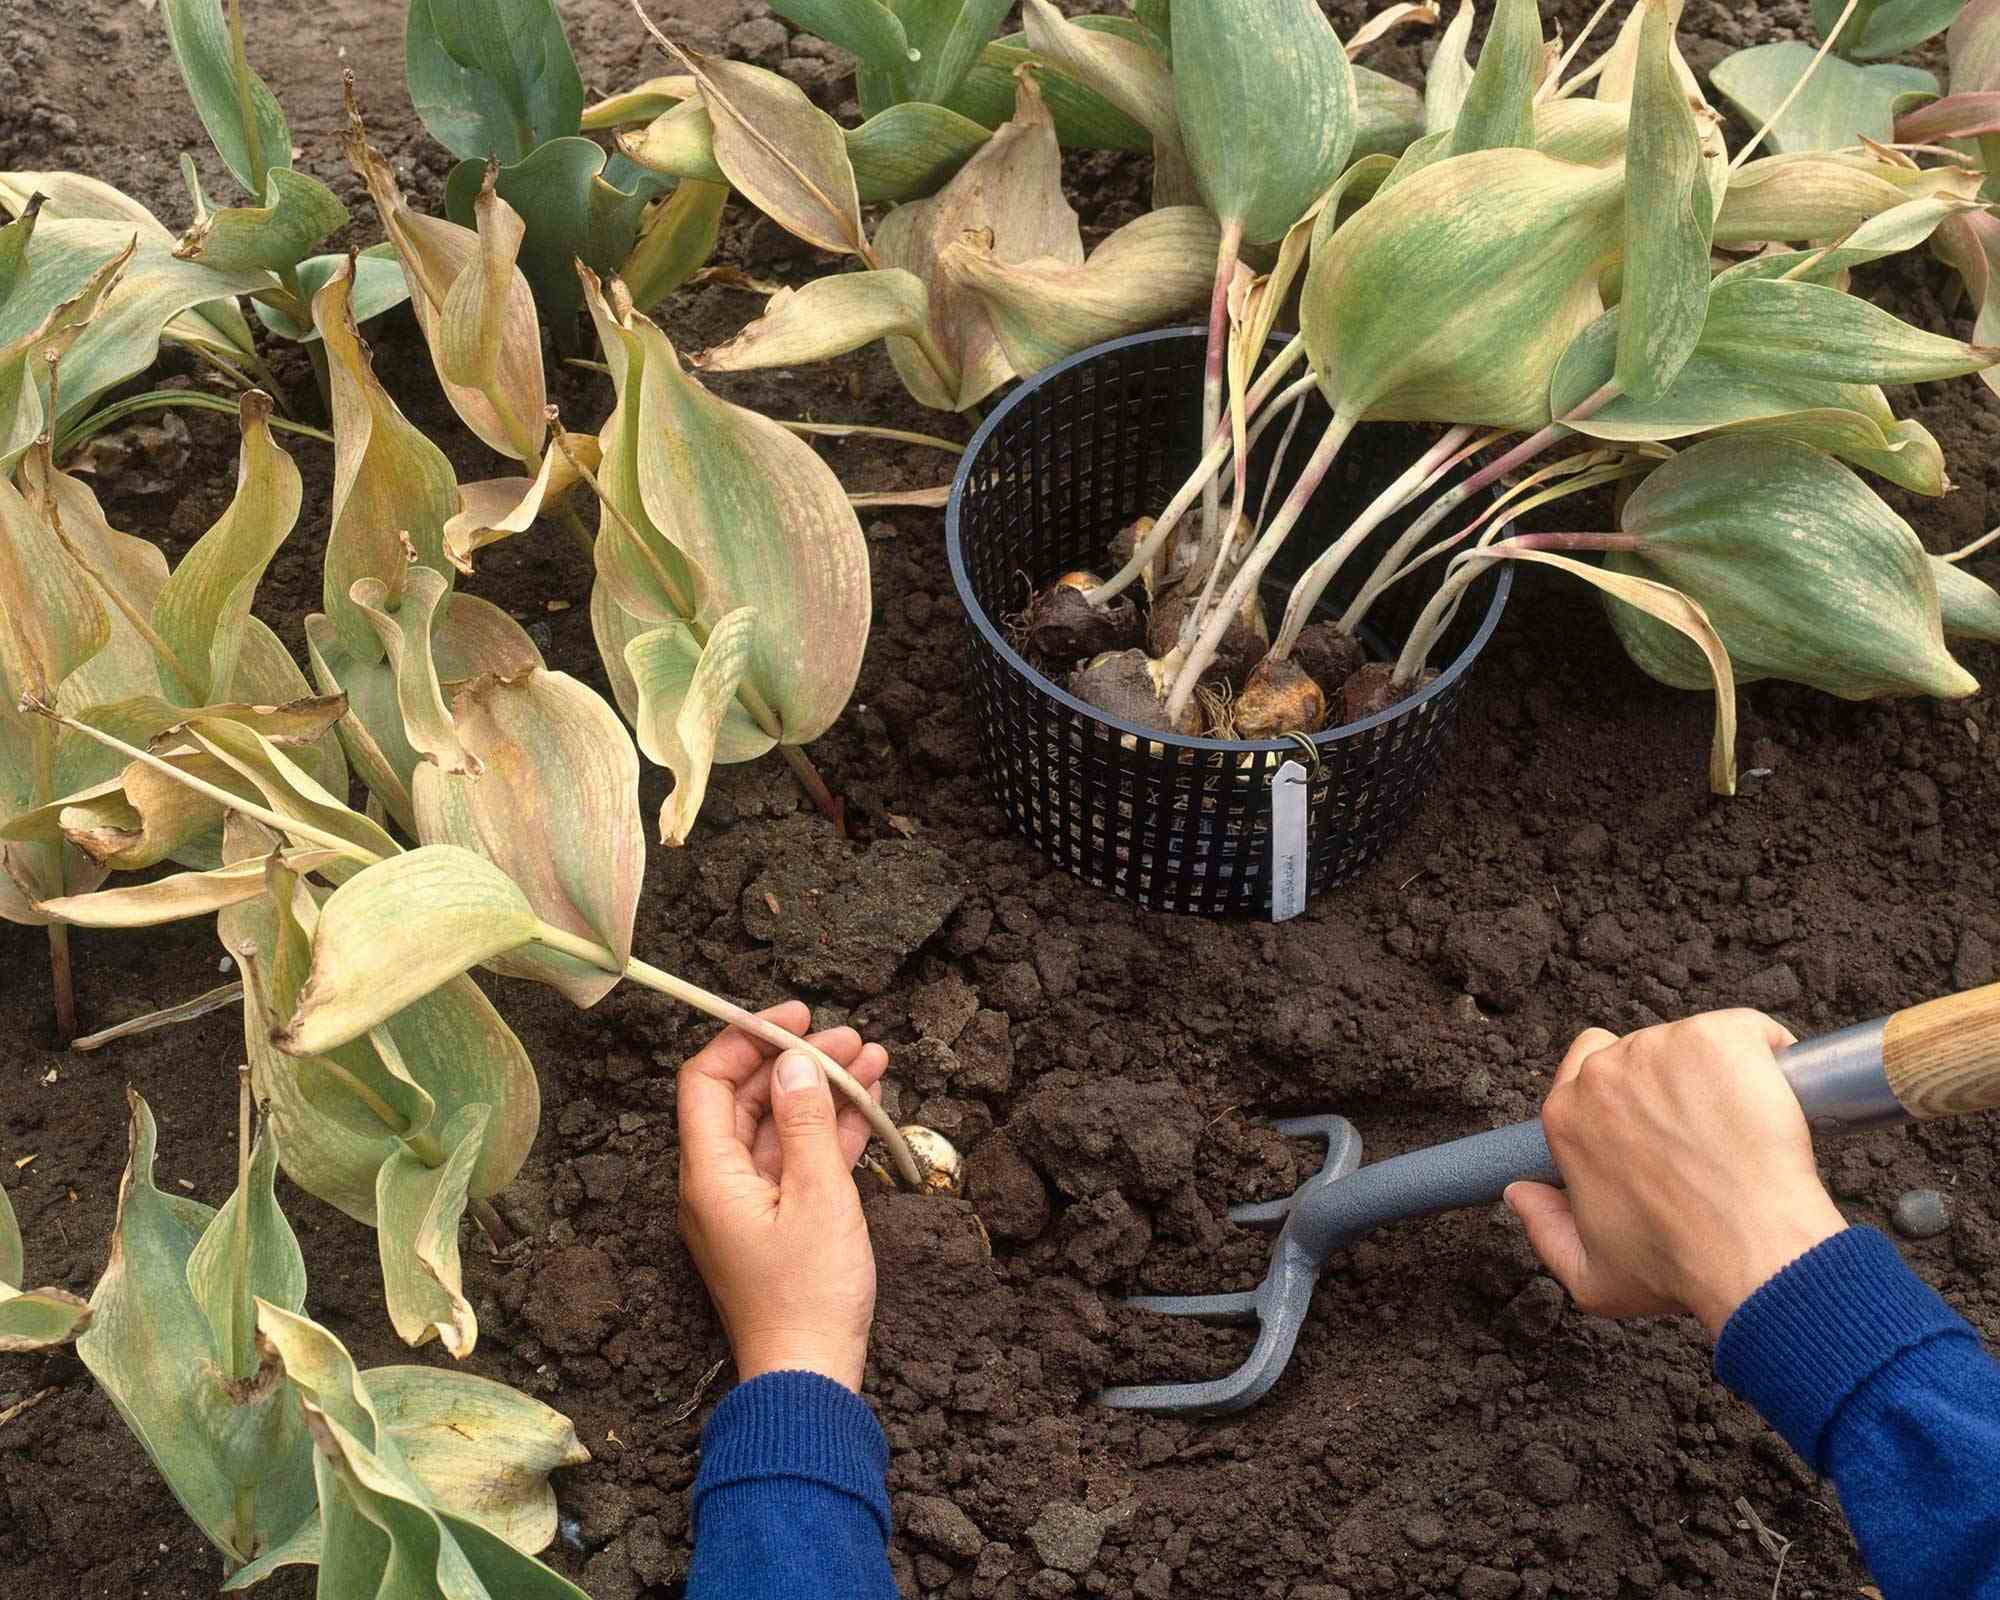
Step-by-Step Guide to Digging Up Tulip Bulbs
Now that you’ve prepared for the task of digging up your tulip bulbs, let’s dive into a step-by-step guide to help you navigate the process:
- Mark the planting area: Start by marking the area where your tulip bulbs are planted. This will ensure that you dig in the right spot and avoid accidentally damaging other plants or bulbs.
- Insert the tool: Using a trowel or garden fork, carefully insert the tool into the soil surrounding the tulip bulbs. Make sure to go deep enough to reach the base of the bulbs without causing damage.
- Lift the bulbs: Gently lift the bulbs from the soil, applying gentle pressure to loosen them from the ground. Be cautious not to tug forcefully, as this may cause damage to the bulbs.
- Remove excess soil: Shake off any excess soil from the tulip bulbs, taking care not to remove the scales or tunic. You can use your hands or a soft brush to gently clean the bulbs.
- Inspect for damage or disease: Take a moment to examine the bulbs for any signs of damage or disease. Discard any bulbs that are soft, mushy, or show signs of rot. This will help prevent the spread of disease to other bulbs or plants.
- Label and separate: If you have labeled your tulip bulbs, separate them based on color or variety, and place them in separate containers or trays. This will make it easier for you to replant them in the desired arrangement later on.
- Store the bulbs: Store the tulip bulbs in a cool, dry, and well-ventilated area until you’re ready to replant them. Avoid exposing them to direct sunlight or extreme temperatures, as this can cause damage.
Following these step-by-step instructions will help you dig up your tulip bulbs successfully and ensure their health for future growth. With your bulbs safely dug up, it’s time to shift our focus to caring for them after the digging process.
Caring for Tulip Bulbs after Digging Them Up
After digging up your tulip bulbs, it’s important to provide proper care to ensure their well-being during the period between digging and replanting. Here are some essential tips for caring for your tulip bulbs:
- Drying: Allow the tulip bulbs to dry naturally after digging them up. Place them in a single layer on a tray or screen in a cool, dry, and well-ventilated area. This will help prevent rot and mold from developing on the bulbs.
- Remove foliage: Once the tulip bulbs have dried, gently remove any remaining foliage. This will divert the plant’s energy into bulb development and prevent the spread of diseases or pests.
- Inspect for damage: Take the time to inspect each bulb carefully for any signs of damage or disease. Discard any bulbs that show signs of rot, pest infestation, or physical damage. It’s essential to only keep healthy bulbs for replanting.
- Store in a cool location: Store the dried and cleaned tulip bulbs in a cool location with a temperature between 45°F (7°C) and 55°F (13°C). Avoid storing them near fruits or vegetables, as ethylene gas emitted from these items can negatively affect the bulbs.
- Provide proper airflow: Ensure that there is adequate airflow around the stored bulbs. This helps prevent the buildup of moisture that can lead to rot. You can achieve this by placing the bulbs in a mesh bag or a container with ventilation holes.
- Check periodically: Check on the stored tulip bulbs periodically to ensure they remain healthy. Discard any bulbs that show signs of decay or disease to prevent spreading to the others.
By following these care instructions, you’ll help maintain the health and vitality of your tulip bulbs during the period between digging them up and replanting them. Now, let’s move on to the final section where we’ll explore the proper storage method for your tulip bulbs until the next planting season.
Storing Tulip Bulbs for Replanting
Proper storage is key to ensuring the successful replanting of your tulip bulbs in the next growing season. By following these guidelines, you can maintain the vitality of the bulbs and set the stage for beautiful blooms. Here are some steps to store tulip bulbs for replanting:
- Keep bulbs dry: Make sure the tulip bulbs are completely dry before storing them. Moisture can lead to rot and damage the bulbs, so it’s important to allow them to air dry for a few weeks after digging them up.
- Choose the right storage container: Opt for a ventilated container, such as a mesh bag or a breathable box, to store your tulip bulbs. These containers allow for proper air circulation and prevent the buildup of moisture that can cause rot.
- Label and separate: If you have different tulip bulb varieties or colors, label them before storing. This will make it easier to identify and separate them when it’s time for replanting.
- Store in a cool, dry location: Find a cool and dry storage location for your tulip bulbs. The ideal temperature is between 45°F (7°C) and 55°F (13°C). Avoid storing them in areas prone to extreme temperature fluctuations or direct sunlight.
- Avoid ethylene exposure: Keep your tulip bulbs away from fruits, especially apples, as they release ethylene gas, which can cause the bulbs to deteriorate.
- Check periodically: Regularly check on the stored bulbs to ensure they remain healthy. Remove any bulbs that show signs of decay or rot to prevent the spread of disease to the others.
By following these storage guidelines, you can ensure that your tulip bulbs remain in optimal condition until the next planting season. When it’s time to replant, you’ll be ready to create a vibrant and stunning display of tulips in your garden.
Now that you have learned the essential steps to dig up, care for, and store tulip bulbs, you can confidently take on this task and enjoy the beauty of these charming flowers year after year. Happy gardening!
Conclusion
Congratulations! You have now become well-versed in the art of digging up, caring for, and storing tulip bulbs. By understanding the signs that indicate it’s time to dig up your tulip bulbs, you can ensure their health and vitality for future blooming seasons. With proper preparation and following the step-by-step guide, you can dig up your tulip bulbs efficiently and without causing damage.
Remember to provide the right care after digging up the bulbs, including drying, removing foliage, inspecting for damage, and storing them in a cool, dry location. By following these care instructions, you will safeguard the quality of your bulbs and prepare them for replanting in the next growing season.
Storing tulip bulbs using the appropriate containers and ensuring proper airflow will help maintain their health and prevent rot or decay. Periodically checking on the stored bulbs will allow you to remove any damaged bulbs and protect the entire collection.
With your newfound knowledge, you can confidently create a vibrant and stunning display of tulips in your garden. Whether you’re a seasoned gardener or just starting out, the beauty and charm of tulips will undoubtedly bring joy and awe to your outdoor space. So grab your gardening tools and get ready to witness the magic of these beloved flowers!