Home>Gardening Basics>Tools and Equipment>How To Sterilize Pruning Shears
Tools and Equipment
How To Sterilize Pruning Shears
Modified: January 22, 2024
Learn how to effectively sterilize your pruning shears and keep your tools and equipment clean and safe. Essential tips for maintaining a healthy garden.
(Many of the links in this article redirect to a specific reviewed product. Your purchase of these products through affiliate links helps to generate commission for Chicagolandgardening.com, at no extra cost. Learn more)
Table of Contents
Introduction
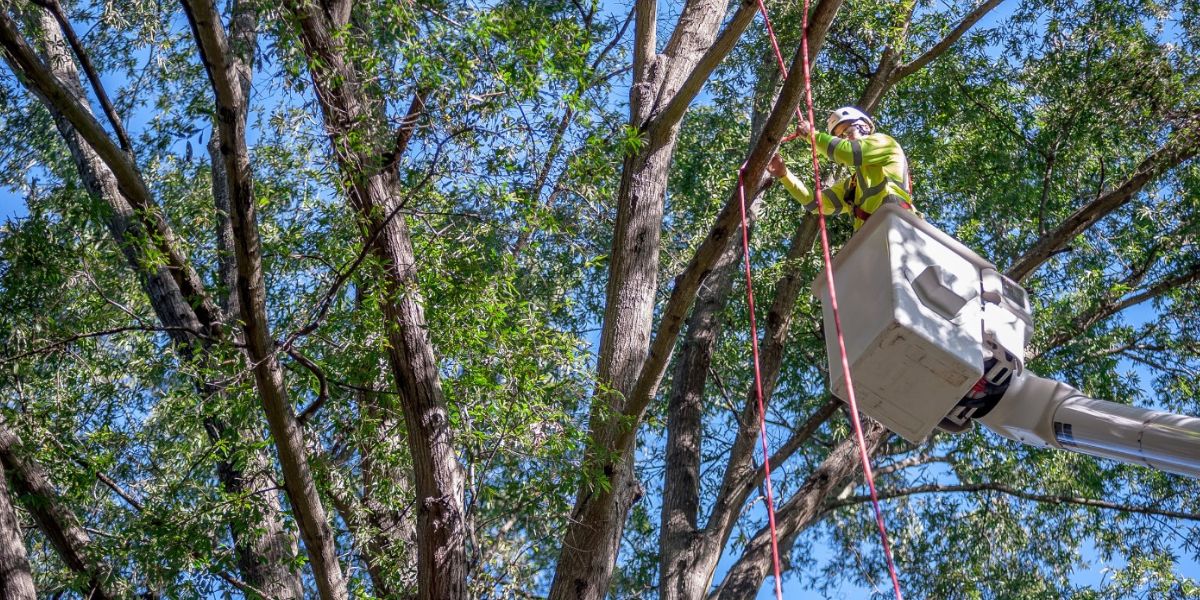
Pruning shears are essential tools for gardeners, arborists, and landscapers. They are used to trim and shape plants, remove dead or damaged branches, and promote healthy growth. However, one often overlooked aspect of pruning shears is their cleanliness and sterilization. Properly sterilizing pruning shears is crucial to prevent the spread of diseases, fungi, and pests from one plant to another. This article will guide you through the different methods of sterilizing pruning shears, ensuring that your tools remain clean and ready for use.
Maintaining the cleanliness of your pruning shears not only preserves the health of your plants but also increases the lifespan of the tools themselves. Over time, dirt, sap, and residue can accumulate on the blades, leading to rust and reduced cutting efficiency. By incorporating sterilization practices into your pruning routine, you can safeguard your plants and extend the longevity of your favorite tools.
In this comprehensive guide, we will explore different sterilization methods that you can easily implement at home or in your gardening workspace. Whether you prefer using household cleaners or natural remedies, there is a sterilization method to suit your needs. From isopropyl alcohol and bleach solutions to hot water and heat sources, we will cover each technique step by step, ensuring that you have all the necessary information to effectively sterilize your pruning shears.
Additionally, we will share some valuable tips for proper pruning shear maintenance to prolong their lifespan and maintain optimal performance. These tips will cover cleaning, lubrication, and storage methods that will keep your pruning shears in excellent condition, ready to tackle any pruning task.
So, let’s dive into the world of pruning shear sterilization and discover the best practices to keep your tools clean, your plants healthy, and your gardening experience enjoyable.
Why is it important to sterilize pruning shears?
Sterilizing pruning shears is of utmost importance for several reasons. Firstly, it helps prevent the spread of diseases and pathogens among plants. When you prune a plant, especially one that is diseased or infected, there is a risk of transferring the pathogens to other plants through the pruning shears. By sterilizing the shears after each use, you eliminate this risk and protect the overall health of your plants.
Secondly, sterilization helps prevent the spread of pests. Insects and other pests can hide on the surface of pruning shears, especially in the nooks and crannies of the blades and handles. If you don’t sterilize your shears, these pests can easily move from one plant to another, causing damage and infestations. Proper sterilization eliminates any hidden pests and reduces the likelihood of spreading them.
Furthermore, sterilization keeps your pruning shears in optimal condition. Regular pruning can result in the buildup of sap, resin, and other debris on the blades, which can impact their cutting performance. By sterilizing the shears, you remove these residues, ensuring smooth and efficient cutting. Additionally, sterilization helps prevent rusting, especially if you use water-based sterilization methods, thus extending the life of your shears.
Another reason to sterilize pruning shears is to prevent the contamination of wounds on plants. When you make a cut with unsterilized shears, you leave behind open wounds on the plants. These wounds are susceptible to infections, which can hinder the healing process and potentially lead to further damage. By sterilizing your shears, you reduce the risk of introducing harmful bacteria or fungi into these wounds, allowing plants to heal properly.
In summary, sterilizing pruning shears is vital for maintaining the health of your plants, preventing the spread of diseases and pests, keeping your tools in optimal condition, and avoiding contamination of wounds. By incorporating regular sterilization practices into your pruning routine, you can ensure a thriving and disease-free garden. In the following sections, we will explore different methods of sterilizing pruning shears, providing you with the knowledge to choose the approach that suits you best.
What materials are needed for sterilization?
Before diving into the various sterilization methods for pruning shears, it’s important to gather the necessary materials. The specific materials required may vary depending on the method you choose, but here are some common items you may need:
1. Isopropyl alcohol: Isopropyl alcohol, also known as rubbing alcohol, is a versatile cleaning solution that can effectively sterilize pruning shears. Look for a concentration of at least 70%.
2. Bleach: Household bleach is a readily available and affordable disinfectant that can be used for sterilization. Ensure that the bleach you use is unscented and contains sodium hypochlorite, preferably in a concentration of 5-6%.
3. Water: Water is a crucial component in many sterilization methods. Whether you’re using hot water or creating a bleach solution, having a source of clean water is essential.
4. A container: A container or basin is necessary for holding the sterilization solution. Choose one that is deep enough to submerge the pruning shears completely.
5. A clean cloth: A clean cloth or paper towel is handy for wiping down the shears after sterilization, removing any remaining residue or sterilizing solution.
6. A heat source: If you prefer using a flame or heat source for sterilization, a lighter, torch, or stove can be used. These heat sources require caution and should only be used in a well-ventilated area.
7. Gloves: While not mandatory, wearing gloves can protect your hands from the sterilizing solution or heat source, especially if you have sensitive skin.
It’s essential to note that different sterilization methods may require additional materials. For example, if you choose to use a commercial sterilizing spray or solution, you will need to purchase or have access to the specific product. Always follow the manufacturer’s instructions when using commercial sterilizers.
By gathering these materials beforehand, you’ll be well-prepared to sterilize your pruning shears effectively and efficiently. In the following sections, we will explore different sterilization methods, providing step-by-step instructions on how to use these materials to maintain clean and hygienic pruning tools.
Method 1: Using Isopropyl Alcohol
Using isopropyl alcohol is a simple and effective method to sterilize pruning shears. Isopropyl alcohol, commonly known as rubbing alcohol, has strong disinfectant properties that kill bacteria, fungi, and other pathogens. Follow these steps to sterilize your pruning shears using isopropyl alcohol:
- Begin by gathering the necessary materials: isopropyl alcohol, a container or basin, water, and a clean cloth.
- Dilute the isopropyl alcohol with water. A ratio of 1 part isopropyl alcohol to 1 part water is typically sufficient. This helps to reduce the concentration of the alcohol, preventing any potential damage to the shears.
- Submerge the pruning shears’ blades in the diluted alcohol solution. Ensure that the blades are completely covered. Let them soak for at least 10-15 minutes. This allows the alcohol to penetrate and disinfect the blades thoroughly.
- While the shears are soaking, you can use a clean cloth to wipe down the handles and other non-metal parts of the shears. This helps to remove any dirt or residue that may have accumulated.
- After the designated soaking time, remove the shears from the alcohol solution and rinse them with clean water. This helps to remove any excess alcohol and residue from the blades.
- Gently dry the pruning shears with a clean cloth, ensuring that they are completely dry before storage. Moisture can lead to rusting, so it’s important to thoroughly dry the shears.
Using isopropyl alcohol for sterilizing pruning shears is not only effective but also quick and easy. It is a convenient method as isopropyl alcohol is readily available in most drug stores or supermarkets. By following these steps, you can maintain clean and sanitized pruning shears, ready to be used for your next gardening task.
Remember to handle isopropyl alcohol with caution as it is flammable. Keep it away from open flames or heat sources, and make sure to work in a well-ventilated area. Additionally, consider wearing gloves to protect your hands while handling the alcohol solution.
In the following sections, we will explore other sterilization methods to provide you with alternative options based on your preferences and the materials you have available.
Method 2: Using Bleach Solution
Using a bleach solution is another effective method for sterilizing pruning shears. Bleach is a powerful disinfectant that can kill a wide range of bacteria, viruses, fungi, and other pathogens. Follow these steps to sterilize your pruning shears using a bleach solution:
- Begin by gathering the necessary materials: bleach, water, a container or basin, and a clean cloth.
- Prepare the bleach solution by mixing one part bleach with ten parts water. This results in a diluted bleach solution that is effective yet safe to use on your pruning shears.
- Submerge the pruning shear blades in the bleach solution, ensuring they are fully covered. Let them soak for about 10-15 minutes. This gives the bleach enough time to kill any bacteria, fungi, or other pathogens on the shears.
- While the shears are soaking, you can use a clean cloth to wipe down the handles and other non-metal parts of the shears. This helps to remove any dirt or residue that may have accumulated.
- After the designated soaking time, remove the shears from the bleach solution and rinse them thoroughly with clean water. Make sure to remove all traces of bleach from the blades to prevent any potential damage or corrosion.
- Gently dry the pruning shears with a clean cloth, ensuring they are completely dry before storage. This helps to prevent rusting and prolong the life of your shears.
When using a bleach solution for sterilization, it’s important to follow safety precautions. Bleach can be corrosive and harmful if not handled properly. Work in a well-ventilated area and avoid contact with your skin or eyes. Remember to wear gloves to protect your hands from the bleach solution. Additionally, be mindful of any potential hazards when disposing of the bleach solution after use.
Using a bleach solution is an effective and affordable method for sterilizing pruning shears. It is readily available in most households and easy to prepare. By following these steps, you can ensure that your pruning shears are properly disinfected and ready for use.
In the following sections, we will explore alternative sterilization methods, providing you with a variety of options to suit your preferences and the materials you have on hand.
Method 3: Using Hot Water
Hot water sterilization is a simple and effective method for sterilizing pruning shears. High temperatures can kill bacteria, fungi, and other pathogens, ensuring the cleanliness of your pruning tools. Follow these steps to sterilize your pruning shears using hot water:
- Begin by gathering the necessary materials: a container or basin large enough to accommodate the pruning shears, water, and a clean cloth.
- Fill the container or basin with hot water. The water should be hot enough to kill pathogens, but not boiling, as boiling water can damage the shears. A temperature of around 140-160°F (60-70°C) is ideal.
- Submerge the pruning shear blades in the hot water, making sure they are fully covered. Allow them to soak for at least 10-15 minutes to ensure proper sterilization.
- While the shears are soaking, you can use a clean cloth to wipe down the handles and other non-metal parts of the shears. This helps to remove any dirt or residue that may have accumulated.
- After the designated soaking time, carefully remove the shears from the hot water using tongs or heat-resistant gloves. Rinse the shears with clean water to remove any remaining debris or residue.
- Gently dry the pruning shears with a clean cloth, ensuring they are fully dry before storing them. Moisture can lead to rusting, so proper drying is essential.
Hot water sterilization is a safe and accessible method that does not require any additional chemical solutions. It is a convenient option if you do not have isopropyl alcohol or bleach readily available. However, it’s important to note that this method may not be as effective at killing certain types of pathogens compared to chemical solutions.
When using hot water, take precautions to protect yourself from burns. Ensure that you are using heat-resistant gloves or tongs to handle the hot shears and hot water. Additionally, work in a well-ventilated area to avoid steam inhalation.
Using hot water for sterilization is a natural and environmentally friendly option. By following these steps, you can effectively sterilize your pruning shears, keeping them clean and ready for use in your gardening endeavors.
In the following sections, we will explore more sterilization methods and provide you with a range of options to choose from based on your preferences and the materials you have available.
Method 4: Using a Flame or Heat Source
Using a flame or heat source is another method for sterilizing pruning shears. Heat can effectively kill bacteria, fungi, and other pathogens, ensuring the cleanliness of your pruning tools. Follow these steps to sterilize your pruning shears using a flame or heat source:
- Begin by gathering the necessary materials: a flame or heat source (such as a lighter, torch, or stove), water, and a clean cloth.
- Light the flame or heat source and adjust it to a high heat setting. Ensure that you are working in a well-ventilated area away from any flammable objects.
- Hold the pruning shears over the flame, focusing on the area near the blades. Move the shears back and forth over the flame to expose the blades to the heat for a few seconds. This will help kill any pathogens present on the blades.
- After exposing the blades to the flame, immediately plunge the shears into a container of cold water for a few seconds. This helps to cool down the shears and prevent any potential damage from prolonged exposure to heat.
- Gently dry the pruning shears with a clean cloth, ensuring they are fully dry before storing them. Moisture can lead to rusting, so make sure the shears are completely dry.
Using a flame or heat source for sterilization is a quick and convenient method that does not require any additional solutions or chemicals. However, it is crucial to exercise caution and follow safety guidelines when using an open flame or heat source.
Ensure that you are working in a well-ventilated area to avoid inhalation of fumes. Additionally, be careful to avoid any contact between the flame and non-metal parts of the shears, such as the handles or any plastic components, as they may melt or become damaged.
Using a flame or heat source for sterilization is beneficial when you need to sterilize the shears quickly or when you do not have access to other sterilization methods. By following these steps, you can effectively sterilize your pruning shears, keeping them clean and free from pathogens.
In the following sections, we will explore more sterilization methods and provide you with a range of options to choose from based on your preferences and the materials you have available.
Tips for Proper Pruning Shear Maintenance
Proper maintenance of pruning shears is essential to ensure their longevity and optimal performance. By following these tips, you can keep your pruning shears in excellent condition and ready for use whenever needed:
- Clean your pruning shears after each use: After pruning, remove any debris, sap, or plant residue from the blades and handles. Use a clean cloth or paper towel to wipe them down thoroughly. This prevents the buildup of sap and other substances that can lead to blade stickiness or corrosion.
- Lubricate the moving parts: Regularly lubricate the pivot point and other moving parts of the shears with a lightweight oil or silicone spray. This helps to maintain smooth and easy operation.
- Sharpen the blades: Dull blades can make pruning tasks more challenging and can also increase the risk of damaging plants. Use a sharpening tool, such as a sharpening stone or file, to keep the blades sharp. Follow the manufacturer’s instructions or seek professional assistance if you are unsure about sharpening the blades yourself.
- Store them properly: After cleaning and drying your pruning shears, store them in a dry place to prevent moisture accumulation. Consider using a tool pouch, sheath, or hanging system to keep them organized and protected from damage.
- Avoid using them on hard materials: Pruning shears are designed for cutting soft stems and branches. Avoid using them to cut hard materials like wire, plastic, or metal, as this can damage the blades and affect their cutting performance.
- Inspect regularly: Regularly inspect your pruning shears for any signs of wear, damage, or loose parts. If you notice any issues, address them promptly by tightening screws, replacing worn parts, or seeking professional repair if necessary.
- Follow safety guidelines: When using pruning shears, always follow proper safety precautions. Wear gloves and eye protection if necessary, and use the shears in a controlled manner to avoid accidents and injuries.
By implementing these maintenance tips into your pruning routine, you can ensure that your pruning shears remain in optimal condition, providing clean and precise cuts for years to come. Regular maintenance not only extends the life of your shears but also improves their cutting performance, making your pruning tasks easier and more efficient.
Remember, taking care of your pruning shears is just as important as using them correctly. By combining proper sterilization techniques with regular maintenance, you can keep your pruning tools in top shape, allowing you to enjoy your gardening endeavors and achieve the desired results.
Conclusion
Properly sterilizing and maintaining your pruning shears is crucial for the health and longevity of both your plants and your tools. Pruning shears can easily transfer diseases, pests, and pathogens from one plant to another if not properly sterilized. By incorporating sterilization practices into your pruning routine, you can prevent the spread of infections and ensure healthy plant growth.
In this article, we explored different methods for sterilizing pruning shears, including using isopropyl alcohol, bleach solutions, hot water, and a flame or heat source. Each method has its benefits and can be selected based on personal preferences and the materials readily available. It’s important to handle each method with caution and follow safety guidelines.
We also discussed essential tips for proper pruning shear maintenance, such as cleaning after each use, lubricating moving parts, sharpening blades, and proper storage. By following these maintenance steps, you can extend the lifespan of your pruning shears and ensure optimal cutting performance.
Remember, pruning shears are vital tools for gardeners, arborists, and landscapers. By keeping them clean, sterilized, and well-maintained, you can enjoy efficient and effective pruning, leading to healthier, more vibrant plants.
So, whether you choose to sterilize your pruning shears with isopropyl alcohol, a bleach solution, hot water, or a flame, remember to prioritize cleanliness and take the necessary steps to maintain your pruning tools. Incorporating these practices into your gardening routine will help you achieve the best results and ensure the overall health and vitality of your plants.
Now, armed with the knowledge and techniques provided in this article, go ahead and sterilize your pruning shears to embark on a successful and fulfilling pruning journey!