Home>Gardening Techniques>DIY Projects>How To Bonsai A Japanese Maple

DIY Projects
How To Bonsai A Japanese Maple
Modified: February 9, 2024
Learn how to bonsai a Japanese maple with this step-by-step DIY project guide. Create a stunning miniature tree in your own garden and enjoy the art of bonsai.
(Many of the links in this article redirect to a specific reviewed product. Your purchase of these products through affiliate links helps to generate commission for Chicagolandgardening.com, at no extra cost. Learn more)
Table of Contents
- Introduction
- Choosing the Right Japanese Maple
- Preparing the Tools and Materials
- Selecting a Bonsai Pot
- Pruning Techniques for Japanese Maple Bonsai
- Wiring and Shaping the Tree
- Repotting and Root Pruning
- Feeding and Watering
- Pest and Disease Management
- Displaying and Caring for Your Japanese Maple Bonsai
- Conclusion
Introduction
Welcome to the world of bonsai, where the ancient Japanese art of cultivating miniature trees meets the creativity and patience of modern-day DIY enthusiasts. Bonsai, which translates to “tray planting,” is a practice that involves the transformation of ordinary trees into exquisite, small-scale sculptures. One of the most popular tree species used for bonsai is the Japanese Maple.
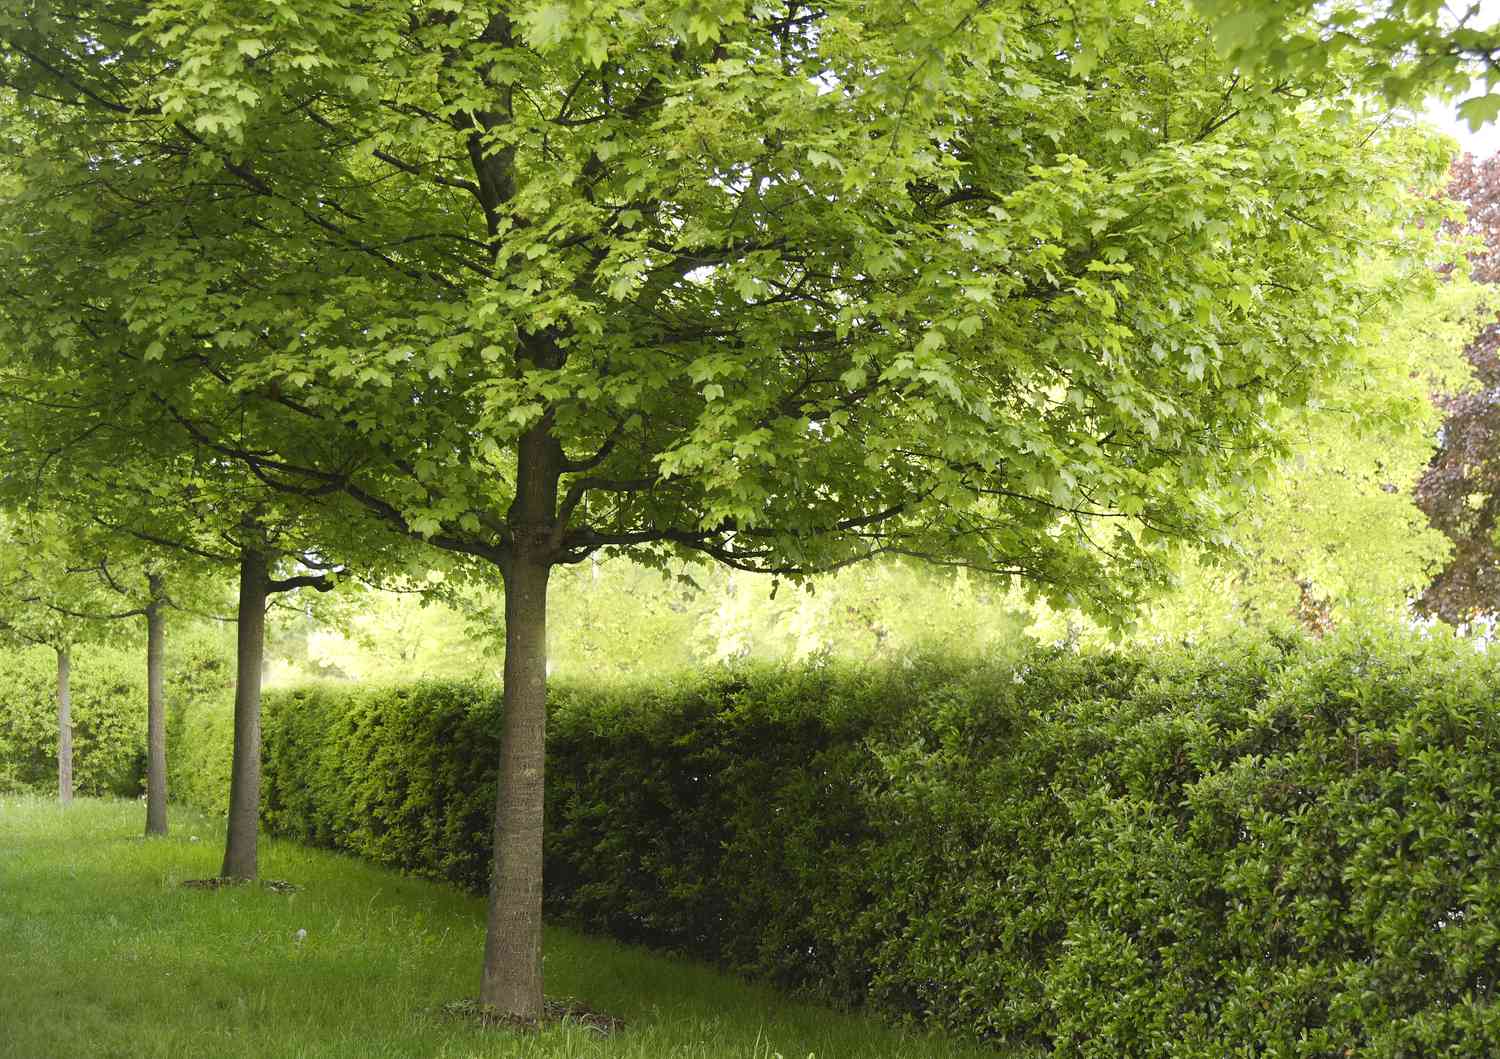
Japanese Maples (Acer palmatum) are renowned for their delicate beauty, vibrant foliage, and graceful form. These trees have been cultivated in Japan for centuries, having unique cultural significance. Bonsai enthusiasts around the world are drawn to the Japanese Maple’s captivating presence and find joy in nurturing and shaping it into a majestic bonsai specimen.
In this article, we will explore the art of bonsai by focusing on how to bonsai a Japanese Maple. We will guide you through the process, step by step, from selecting the right tree to displaying and caring for your bonsai masterpiece. Whether you are a beginner or an experienced bonsai gardener, this comprehensive guide will provide you with the knowledge and techniques needed to create and maintain a stunning Japanese Maple bonsai.
Before embarking on this journey, it’s important to remember that bonsai is not merely a hobby; it’s an art form that requires dedication, attention to detail, and long-term commitment. Each tree has its own unique character, and as a bonsai gardener, your role is to embrace that uniqueness and enhance it through careful pruning, shaping, maintenance, and display.
So, grab your tools, put on your gardening gloves, and let’s dive into the enchanting world of bonsai as we learn how to transform a Japanese Maple into a living work of art.
Choosing the Right Japanese Maple
Choosing the right Japanese Maple is a crucial first step in creating a successful bonsai. With a wide variety of cultivars available, it’s important to consider specific factors to ensure that your chosen tree is suitable for bonsai cultivation.
Firstly, consider the size of the tree. Japanese Maples come in various sizes, ranging from small shrubs to larger trees. As bonsai enthusiasts, we aim to create miniaturized versions, so selecting a smaller cultivar is ideal. Look for varieties that naturally have a compact growth habit and smaller leaf size, as this will make it easier to achieve the desired bonsai proportions.
Leaf shape and color are other important considerations. Japanese Maples display a wide range of leaf shapes, from palmate to dissected varieties. Each shape adds unique character to the bonsai. Additionally, the vibrant and changing foliage colors are a significant attraction of Japanese Maples. Consider the color variations throughout the seasons and choose a cultivar that offers visual interest throughout the year.
Another factor to consider is the tree’s trunk and branch structure. Look for Japanese Maples with interesting and well-developed trunks that exhibit movement, taper, and character. The branches should be evenly spaced and have a pleasing overall structure. Remember, bonsai involves careful pruning and shaping, but starting with a tree that already has good structure will make the process more enjoyable and rewarding.
Lastly, consider the health and condition of the tree. Choose a Japanese Maple that is free from diseases, pests, or any significant damage. Look for healthy leaves, a strong root system, and no signs of stress or decline. A healthy tree will have a better chance of thriving as a bonsai and will require less effort to maintain.
When purchasing a Japanese Maple, it’s recommended to visit a reputable nursery or bonsai specialty store. Speak with knowledgeable staff who can guide you in selecting the right cultivar for your bonsai ambitions. Take your time to examine different options, and don’t hesitate to ask questions or seek advice.
Choosing the perfect Japanese Maple for your bonsai is the first step towards creating a stunning masterpiece. Consider the size, leaf shape and color, trunk and branch structure, and overall health of the tree. By paying attention to these aspects, you’ll lay a strong foundation for your bonsai journey and set yourself up for success in shaping and nurturing your Japanese Maple bonsai.
Preparing the Tools and Materials
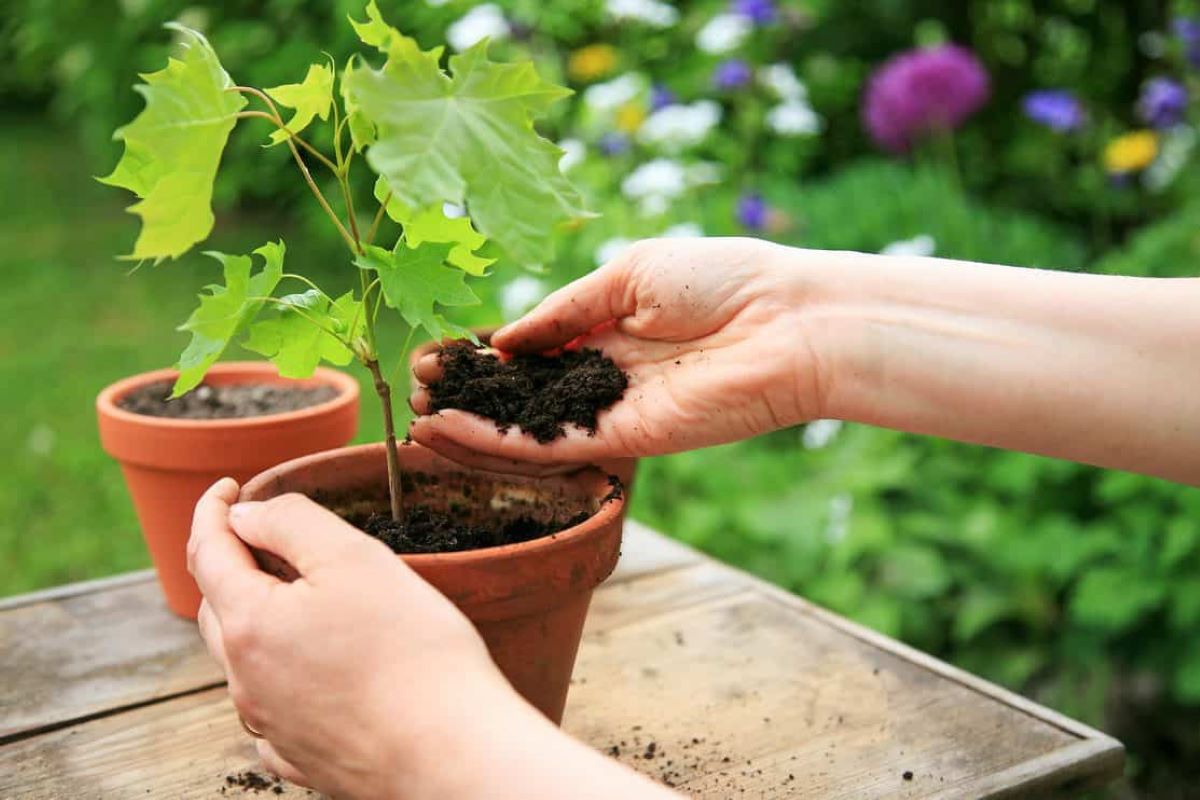
Before you begin bonsai-ing your Japanese Maple, it’s important to gather the necessary tools and materials. Having the right equipment on hand will not only make the process more efficient but also ensure that you can properly care for your tree throughout its bonsai journey.
Here are the essential tools and materials you’ll need:
- Bonsai Shears: These specialized scissors are designed for precise and clean cuts. They are available in various sizes, so choose a pair that fits comfortably in your hand and allows you to reach all parts of the tree.
- Bonsai Wire: Wire is used to shape and train the branches of the Japanese Maple. Choose aluminum wire that is thick enough to hold the branches in place but flexible enough for bending and shaping.
- Bonsai Pliers: Pliers are essential for securing and removing wire. Look for pliers with rounded tips to avoid damaging the branches or trunk.
- Bonsai Soil: A well-draining and nutrient-rich soil mix is vital for the health and growth of your Japanese Maple bonsai. Purchase bonsai-specific soil or create your own mix using components like akadama, pumice, and lava rock.
- Bonsai Fertilizer: Bonsai trees have specific nutritional needs. Invest in a high-quality bonsai fertilizer to provide the necessary nutrients to promote healthy growth and vibrant foliage.
- Bonsai Pot: A bonsai pot not only serves as a decorative element but also provides the necessary space for the root system. Choose a pot that complements the size and style of your Japanese Maple bonsai.
- Bonsai Training Rake: A training rake is used to gently comb through the roots during repotting, allowing for proper root pruning and soil replenishment.
- Bonsai Training Turntable: A turntable or rotating platform makes it easier to view and access all sides of your bonsai during pruning, wiring, and styling. It allows for better maneuverability and precision.
- Bonsai Watering Can: A watering can with a narrow spout is essential for giving your Japanese Maple bonsai the right amount of water without causing excessive soil erosion or damage.
In addition to these tools and materials, it’s also helpful to have a notebook or journal for keeping track of your bonsai care routine, observations, and any adjustments you make along the way. Over time, this documentation will help you understand and refine your approach to nurturing your Japanese Maple bonsai.
Take time to gather all of these tools and materials before you begin working on your Japanese Maple bonsai. They will not only make the process smoother but also ensure that you have everything you need to care for your tree properly. With the right equipment in hand, you’ll be ready to dive into the fascinating world of bonsai and embark on an artistic journey with your Japanese Maple.
Selecting a Bonsai Pot
Choosing the right bonsai pot is a crucial aspect of creating a visually appealing and harmonious composition with your Japanese Maple bonsai. The pot not only serves as a functional container but also enhances the overall aesthetic of your miniature tree. Here are some factors to consider when selecting a bonsai pot:
1. Size: The size of the pot should be proportional to the size of your Japanese Maple bonsai. It should neither overpower the tree nor restrict its growth. Consider the width, depth, and height of the pot in relation to the tree’s trunk and root system. Aim for a pot that provides enough room for the roots to grow and develop while maintaining a balanced and harmonious visual appearance.
2. Style: Bonsai pots come in various styles, including round, rectangular, oval, and cascading designs. Consider the style and shape of your Japanese Maple bonsai when selecting a pot. Traditional bonsai styles often favor shallow, rectangular or oval pots, while more modern or informal styles can be complemented by round or cascading pots. The pot’s style should enhance and complement the overall aesthetics and character of the bonsai tree.
3. Material: Bonsai pots are typically made from ceramic, clay, or plastic. Each material has its own advantages and considerations. Ceramic and clay pots are more traditional and provide better breathability and drainage for the tree’s root system. Plastic pots, on the other hand, are lightweight, durable, and easier to handle. Consider the specific needs of your Japanese Maple bonsai and choose a pot material that suits those requirements.
4. Color and Texture: The color and texture of the bonsai pot can greatly impact the overall visual appeal of your Japanese Maple bonsai. Consider the colors and patterns of the tree’s foliage and bark when choosing a pot. Contrasting colors can create a striking visual effect, while complementary colors can create harmony and balance. Additionally, the texture of the pot’s surface can add depth and visual interest to the composition.
5. Drainage: Proper drainage is essential for the health and vitality of your Japanese Maple bonsai. Ensure that the pot you choose has drainage holes or features that allow excess water to escape. Good drainage helps prevent the roots from becoming waterlogged, which can lead to root rot and other health issues.
When selecting a bonsai pot, it’s recommended to visit a bonsai nursery or pottery shop. Physically examining and comparing different pot options will allow you to assess their size, style, material, and overall suitability for your Japanese Maple bonsai. Take your time to find the perfect pot that enhances the beauty and artistic expression of your miniature tree.
Remember, the bonsai pot is not just a vessel for your Japanese Maple bonsai; it is an integral part of the overall composition and presentation. Choose wisely, and your bonsai pot will become a harmonious and visually captivating element of your bonsai masterpiece.
Pruning Techniques for Japanese Maple Bonsai
Pruning is an essential practice in bonsai cultivation, and mastering the art of pruning is key to shaping and maintaining the aesthetic appeal of your Japanese Maple bonsai. Pruning helps control the size, shape, and overall structure of the tree, and encourages new growth in desired areas. Here are some pruning techniques specific to Japanese Maple bonsai:
1. Structural Pruning: This type of pruning focuses on establishing the overall structure and shape of the bonsai. Begin by identifying the main branches that form the primary structure of the tree. Prune any unnecessary or crossing branches to create an open and balanced structure. Aim for a natural and harmonious arrangement of branches that showcases the unique character of the Japanese Maple.
2. Crown Thinning: Japanese Maple bonsai often have dense foliage, which can obstruct light and airflow within the tree. To prevent this, practice crown thinning. Identify overcrowded areas and selectively prune some of the leaves or branches to create space and allow light to reach inner areas of the tree. This will promote healthier foliage growth and help maintain the desired aesthetic of the bonsai.
3. Reduction Pruning: Reduction pruning is useful for controlling the size of your Japanese Maple bonsai. It involves selectively pruning back branches to reduce their length. This technique helps maintain the balance between the tree’s desired size and the visual proportions of its branches and foliage. Be cautious and avoid excessive pruning as it can weaken the tree and affect its overall health.
4. Fine Pruning: Fine pruning focuses on refining the finer details of your Japanese Maple bonsai. It involves carefully pruning and shaping individual branches and foliage pads to create a more refined and compact appearance. Use bonsai shears to trim back any long or unsightly shoots and maintain a balanced and pleasing silhouette.
5. Pruning during Dormancy: It’s often recommended to perform major pruning on Japanese Maple bonsai during their dormant season, usually in late winter or early spring. During this time, the tree is less susceptible to stress and can heal and recover more effectively. However, minor pruning, such as stray branches or foliage management, can be done throughout the growing season as needed.
When pruning your Japanese Maple bonsai, it’s important to remember a few key principles. First, always use clean and sharp bonsai shears to make clean cuts and minimize damage. Make angled cuts just above a bud or leaf node to encourage new growth in the desired direction. Secondly, take your time and step back occasionally to assess the progress and maintain a balanced appearance. Lastly, focus on preserving the natural beauty and unique characteristics of your Japanese Maple bonsai while still achieving the desired shape and form.
By mastering pruning techniques for your Japanese Maple bonsai, you can shape and refine the tree’s appearance, creating a miniature masterpiece that reflects your artistic vision and showcases the inherent beauty of this remarkable tree species.
Wiring and Shaping the Tree
Wiring is an essential technique in bonsai cultivation that allows you to shape and sculpt your Japanese Maple tree into the desired form. Wiring involves wrapping aluminum or copper wire around the branches to guide their growth and create artistic bends and curves. Here’s a step-by-step guide to wiring and shaping your Japanese Maple bonsai:
1. Selecting the Right Wire: Choose a wire that is thick enough to hold the branches in place but also flexible enough to allow for shaping. The wire should be approximately one-third the diameter of the branch you’re working with. Copper wire is stronger and holds its shape well, but it can leave marks on the bark. Aluminum wire is more forgiving and easier to remove without causing damage to the tree.
2. Preparing the Tree: Ensure that your Japanese Maple bonsai is well-watered before you begin wiring. This will make the branches more pliable and reduce the risk of breakage. Remove any unnecessary foliage or branches that may obstruct the wiring process or impede light and airflow.
3. Wrapping the Wire: Start by securing the wire at the base of the branch, near the trunk. Gently wrap the wire around the branch, applying even tension but avoiding excessive pressure. Guide the wire in a spiral pattern along the branch, spacing the coils evenly. Leave a small gap between each coil to allow for growth, and continue wrapping until you reach the tip of the branch.
4. Bending and Positioning: Once the wire is in place, you can begin to shape the branches. Hold the branch firmly and apply gentle pressure to bend it in the desired direction. Use your other hand to support the branch near the point where you’re bending. Be patient and make incremental adjustments to avoid damaging the branch or breaking it. Aim for graceful and realistic curves that mimic the natural growth patterns of the Japanese Maple.
5. Anchor Wiring: In some cases, you may need to anchor the wire to the trunk or other branches for added stability. Use small pieces of wire, known as guy wires, to secure the main branch or trunk to a more stable part of the tree. This will help maintain the desired position and shape until the branch has set in place.
6. Monitoring and Adjusting: Regularly monitor the wiring and check for any signs of wire biting into the branches. As the tree grows, the wire may start to restrict or cut into the branches. If this occurs, carefully remove or adjust the wire to prevent damage. The wire should be left on for a sufficient period to allow the branch to set in place, but should not be left on for too long to avoid wire scarring.
7. Removing the Wire: After a few months, or when the branch has set in its new position, it’s time to remove the wire. Using wire cutters, carefully cut and remove the wire in the reverse order of its application. Take care not to damage the bark or break any branches as you remove the wire. If any wire is firmly stuck, consider bending it back and forth gently to loosen its grip before removing it.
Wiring and shaping your Japanese Maple bonsai gives you creative control over the tree’s form and structure. Remember to handle the branches with care and apply gradual pressure when bending. Regular monitoring and timely removal of the wire will ensure that your bonsai grows in the desired shape, allowing you to create a stunning masterpiece that reflects your artistic vision.
Repotting and Root Pruning
Repotting is an essential aspect of Japanese Maple bonsai care that helps maintain the health and vitality of the tree by providing it with fresh soil and allowing for root growth. Repotting also allows you to assess the condition of the root system and address any issues. Here’s a step-by-step guide to repotting and root pruning your Japanese Maple bonsai:
1. Timing: Repotting is typically done every two to three years for young Japanese Maple bonsai, and every four to five years for mature trees. The best time to repot your bonsai is during early spring, just as new growth begins to emerge. This allows the tree ample time to recover and establish new roots before the onset of summer heat.
2. Preparing the Bonsai: Water your Japanese Maple bonsai thoroughly a day or two before repotting. This ensures that the root ball is moist and easier to work with. Remove any moss or debris from the surface of the soil, and gently prune back any long or wayward roots before proceeding with repotting.
3. Removing the Bonsai from the Pot: Carefully remove the bonsai from its current pot by gently loosening the root ball. Use a root hook or bonsai rake to gently comb through the soil and tease out the roots. Be careful not to cause excessive damage to the root system during this process.
4. Root Pruning: Inspect the root system and remove any thick, circling, or tangled roots. Use bonsai pruning shears or root pruning scissors to make clean cuts. Take care to remove only a small portion of the root mass, as Japanese Maple bonsai are sensitive to root disturbance. Aim to maintain a balance between the size of the root ball and the tree’s overall health and vigor.
5. Repotting: Select a new bonsai pot that is slightly larger than the previous one, allowing room for future root growth. Place a layer of bonsai-specific soil at the bottom of the pot and position the Japanese Maple bonsai on top, ensuring that it sits centered and at the desired angle. Add soil around the roots, gently tapping the pot to eliminate air pockets. Continue adding soil until the roots are covered and the bonsai is stable in the pot.
6. Watering and Aftercare: After repotting, water your Japanese Maple bonsai thoroughly to ensure the soil settles around the roots. Place the bonsai in a shady area for a few weeks to allow it to recover from the repotting process. Protect it from strong winds and direct sunlight during this time, as the repotted tree may be more susceptible to stress. Monitor the soil moisture level closely and adjust your watering routine as needed.
Remember, repotting and root pruning should be done with caution and in line with the health and age of your Japanese Maple bonsai. Overly aggressive root pruning or repotting too frequently can cause stress to the tree and affect its vitality. Observe the growth and health of your bonsai over time, making adjustments as needed to ensure its continued well-being.
By practicing proper repotting and root pruning techniques, you’ll support the long-term health and development of your Japanese Maple bonsai, allowing it to thrive and bring you joy for many years to come.
Feeding and Watering
Proper feeding and watering are essential for the health and vitality of your Japanese Maple bonsai. These practices provide the necessary nutrients and hydration to promote growth, vibrant foliage, and overall well-being. Here’s a guide on how to effectively feed and water your Japanese Maple bonsai:
Feeding:
1. Bonsai-Specific Fertilizer: Choose a high-quality, slow-release bonsai fertilizer that is specially formulated for the nutritional needs of your Japanese Maple bonsai. These fertilizers typically contain a balanced ratio of nitrogen (N), phosphorus (P), and potassium (K), as well as essential micronutrients.
2. Timing: Start fertilizing your Japanese Maple bonsai in early spring when new growth begins to emerge. Continue to fertilize throughout the growing season, typically until late summer or early fall. Avoid fertilizing during winter as the tree is in a dormant state.
3. Application: Follow the instructions provided by the fertilizer manufacturer for the correct amount and frequency of application. Apply the fertilizer evenly to the soil surface or use a spoon to distribute the granules around the base of the tree, taking care not to apply it directly onto the leaves or trunk.
4. Monitoring: Regularly monitor the growth and health of your Japanese Maple bonsai. Keep track of the growth patterns, color of the foliage, and overall vigor of the tree. Adjust the fertilizer application as necessary based on the tree’s response and the specific recommendations for your chosen fertilizer.
Watering:
1. Frequency: Japanese Maple bonsai prefer slightly moist soil but can be sensitive to overwatering. Water your bonsai when the top inch of soil feels slightly dry to the touch. The specific watering frequency may vary depending on factors such as the climate, pot size, and the tree’s stage of growth.
2. Technique: Water your Japanese Maple bonsai gently and evenly to ensure thorough hydration. Use a watering can with a narrow spout to direct the water toward the soil and avoid water splashing onto the leaves. Water until you see water draining out of the drainage holes in the bottom of the pot, indicating that the soil is evenly saturated.
3. Proper Drainage: Ensure that your bonsai pot has sufficient drainage holes to prevent waterlogging. Excess water can cause root rot and other health issues. If necessary, consider adding a layer of coarse bonsai soil at the bottom of the pot to enhance drainage.
4. Seasonal Adjustments: Adjust your watering routine according to the changing seasons. In the heat of summer, Japanese Maple bonsai may require more frequent watering to prevent dehydration. During the winter dormancy period, reduce watering to prevent the soil from staying excessively wet.
5. Observation: Regularly observe your Japanese Maple bonsai for signs of under or overwatering. Droopy or discolored foliage may indicate insufficient water, while yellowing leaves or root rot may be signs of overwatering. Adjust your watering schedule and habits based on the specific needs and conditions of your bonsai.
Feeding and watering your Japanese Maple bonsai require careful observation and adjustment to ensure the tree’s optimal health. By providing the right nutrients and proper hydration, you’ll encourage strong growth, lush foliage, and a thriving bonsai that will bring you joy for years to come.
Pest and Disease Management
Ensuring the health and well-being of your Japanese Maple bonsai involves proactive pest and disease management. While these beautiful trees are generally hardy, they can still be susceptible to various pests and diseases. Here are some common issues you may encounter and tips for managing them:
1. Aphids: Aphids are small, sap-sucking insects that can cause damage to the leaves and shoots of your bonsai. To control aphid infestations, you can manually remove them using a strong jet of water or with a soft brush. Alternatively, you can use insecticidal soap or neem oil, following the instructions provided by the product. Regularly inspect your Japanese Maple bonsai for signs of aphids, particularly in the spring and summer months when populations tend to increase.
2. Spider Mites: These tiny pests can be particularly problematic for Japanese Maple bonsai. Spider mites cause discoloration and fine webbing on the foliage. Increase humidity around your bonsai by misting the leaves regularly, as spider mites prefer dry conditions. Introduce natural predators such as ladybugs or lacewings to help control spider mite populations. If the infestation persists, consider using miticides specifically formulated for spider mites.
3. Fungal Diseases: Japanese Maple bonsai, like any other tree, can be susceptible to fungal diseases such as powdery mildew or root rot. To prevent fungal diseases, avoid overwatering and ensure proper drainage. Improve air circulation around your bonsai by pruning overcrowded branches and foliage. If powdery mildew is present, apply a fungicidal spray according to the instructions provided. Treating root rot may involve addressing the underlying cause, such as overwatering or poor soil drainage.
4. Scale Insects: Scale insects are small, immobile pests that attach themselves to the stems and branches, sucking sap from the tree. Control scale insects by individually removing them with a cotton swab dipped in rubbing alcohol or by employing natural predators such as ladybugs or parasitic wasps.
5. Vigilance and Monitoring: Regularly inspect your Japanese Maple bonsai for any signs of pests or diseases. Early detection allows for prompt treatment and minimizes potential damage. Monitor the overall health of the tree, looking for changes in foliage color, wilting, or unusual growth patterns. If you notice any abnormalities, investigate further to identify the cause and take appropriate action.
Remember, prevention is key to pest and disease management. Creating a healthy environment for your Japanese Maple bonsai, with proper watering, good drainage, and well-balanced nutrition, will decrease the likelihood of pest and disease issues. Additionally, maintaining good overall bonsai care practices, such as regular pruning and repotting, will contribute to the tree’s vigor and resilience.
If you are uncertain about the specific pest or disease affecting your Japanese Maple bonsai, it’s recommended to consult with a local bonsai expert or horticulturist who can provide targeted advice and solutions. By staying vigilant and addressing any issues promptly, you can ensure that your Japanese Maple bonsai remains healthy and pest-free, allowing it to thrive and bring you joy for years to come.
Displaying and Caring for Your Japanese Maple Bonsai
Displaying and caring for your Japanese Maple bonsai is a delightful and rewarding experience that allows you to appreciate its beauty and showcase the artistry behind this miniature tree. Here are some tips on how to display and care for your Japanese Maple bonsai:
1. Placement: Choose a location that provides the right balance of sunlight and shade for your Japanese Maple bonsai. These trees prefer dappled or morning sun and thrive in partial shade. Avoid placing them in direct, intense sunlight, as it can scorch the delicate foliage. Experiment with different locations to find the one that offers the ideal lighting conditions for your specific bonsai.
2. Rotation: Regularly rotate your Japanese Maple bonsai to ensure all sides receive equal sunlight exposure. This promotes even growth and prevents the tree from leaning or growing towards one direction. Aim to rotate your bonsai at least once a week during the growing season.
3. Bonsai Display Table: Consider placing your Japanese Maple bonsai on a dedicated display table or stand. This elevates the tree, allowing it to become a focal point and enhancing its visual appeal. Choose a display table that complements the style and aesthetics of your bonsai, such as a traditional wooden stand or a modern minimalist platform.
4. Watering: Proper watering is crucial for the health of your Japanese Maple bonsai. Check the moisture level of the soil regularly and water when the top inch feels slightly dry. Water thoroughly until you see water draining out of the drainage holes. Avoid overwatering, as it can lead to root rot, and underwatering, which can cause stress to the tree. Maintaining a consistent watering schedule is key to the tree’s overall health and vitality.
5. Humidity: Japanese Maple bonsai appreciate higher humidity levels. Mist the foliage regularly, especially during dry periods or when the bonsai is placed in an environment with low humidity. This helps prevent dehydration and keeps the leaves healthy and vibrant.
6. Pruning and Shaping: Continuously monitor the growth of your Japanese Maple bonsai and prune as needed to maintain its desired shape and form. Regularly remove any dead or damaged branches and trim back new growth to maintain the tree’s overall silhouette. Additionally, wire and shape the branches to create the desired aesthetic appeal, taking care to avoid wire scarring or damage.
7. Winter Care: Japanese Maple bonsai require protection during the winter months. Depending on your climate, you may need to provide additional insulation to protect the roots from freezing temperatures. Move the bonsai to a sheltered spot, such as an unheated garage or a cold frame, to shield it from extreme cold. Avoid exposing the tree to sudden temperature changes and drying winds during winter.
8. Observation and Adjustments: Observe your Japanese Maple bonsai closely for any signs of stress, pests, or diseases. Regularly examine the foliage, branches, and root system to ensure the tree’s overall health and vitality. Make adjustments to your care routine as needed, taking into account the specific conditions and needs of your bonsai.
Caring for your Japanese Maple bonsai is not only about maintaining its health but also about appreciating its beauty and the artistry involved in its creation. By providing the right conditions, watering diligently, practicing proper maintenance techniques, and dedicating time to observe and nurture your bonsai, you can create a thriving and stunning masterpiece.
Conclusion
Cultivating a Japanese Maple bonsai is a rewarding and fulfilling endeavor that allows you to bring the beauty of nature into a miniature form. By following the steps outlined in this guide, from choosing the right Japanese Maple tree to displaying and caring for it, you can create a stunning bonsai masterpiece that showcases the unique beauty of this remarkable tree species.
Throughout this process, remember that bonsai is more than just a hobby; it is an art form that requires dedication, patience, and a deep appreciation for the beauty of nature. Take the time to observe your Japanese Maple bonsai closely, understand its unique qualities, and incorporate your artistic vision into its shaping and maintenance.
Whether you are a beginner or have experience in bonsai cultivation, continue to learn and explore the intricacies of Japanese Maple bonsai care. Seek guidance from experienced bonsai enthusiasts, join local bonsai clubs, and never hesitate to ask questions. The journey of bonsai is a lifelong learning experience that allows you to deepen your knowledge and refine your skills.
Remember to provide the necessary care and attention to your Japanese Maple bonsai, including proper watering, feeding, pruning, and protection from pests and diseases. By doing so, you will ensure that your bonsai thrives and continues to bring you joy and a sense of tranquility for many years to come.
So, let your artistic vision flourish as you shape and nurture your Japanese Maple bonsai into a miniature work of art. Embrace the artistry of bonsai, the beauty of nature, and the meditative experience it provides. May your journey with Japanese Maple bonsai be filled with growth, creativity, and a deep connection to the intricate beauty of this ancient art form.