Home>Gardening Techniques>Plant Care>How To Plant Arborvitae Trees
Plant Care
How To Plant Arborvitae Trees
Modified: January 22, 2024
Learn the best way to plant arborvitae trees with our comprehensive guide. Follow our expert tips for proper plant care and watch your trees thrive.
(Many of the links in this article redirect to a specific reviewed product. Your purchase of these products through affiliate links helps to generate commission for Chicagolandgardening.com, at no extra cost. Learn more)
Table of Contents
Introduction
Welcome to the world of plant care! In this article, we will delve into the fascinating realm of arborvitae trees and guide you on how to plant and care for these magnificent additions to your landscape. Whether you are an aspiring plant enthusiast or a seasoned gardener, understanding the essentials of arborvitae care is crucial to ensure their health and vitality.
Arborvitae trees, also known as Thuja, are evergreen conifers that belong to the cypress family. They are valued for their graceful, pyramidal shape, rich foliage, and ability to provide privacy and windbreak. These trees can reach impressive heights, making them ideal for creating natural boundaries or adding vertical interest to your garden.
Planting arborvitae trees is not just about adding beauty to your outdoor space, but also about creating a thriving ecosystem. When properly cared for, arborvitae trees can make a significant impact on the environment by improving air quality, reducing noise pollution, and providing shelter and food for wildlife.
Before diving into the details of planting and caring for arborvitae trees, it is essential to understand the different varieties available. There are several arborvitae cultivars to choose from, each with its unique characteristics and growth habit. Whether you prefer compact varieties for small gardens or taller varieties for a striking focal point, there is an arborvitae tree that suits your needs.
When it comes to arborvitae care, selecting the right planting location is crucial. Arborvitae trees thrive in areas with full sun to partial shade and well-draining soil. They have a moderate tolerance for a wide range of soil pH levels, making them adaptable to various garden conditions. However, they prefer slightly acidic to mildly alkaline soil.
With the right planting location chosen, it is time to prepare the planting site. Clear any debris, rocks, or weeds and ensure the area is well-graded. This will provide a clean canvas for your arborvitae trees to flourish. Proper preparation of the planting site sets the stage for healthy root development and overall growth.
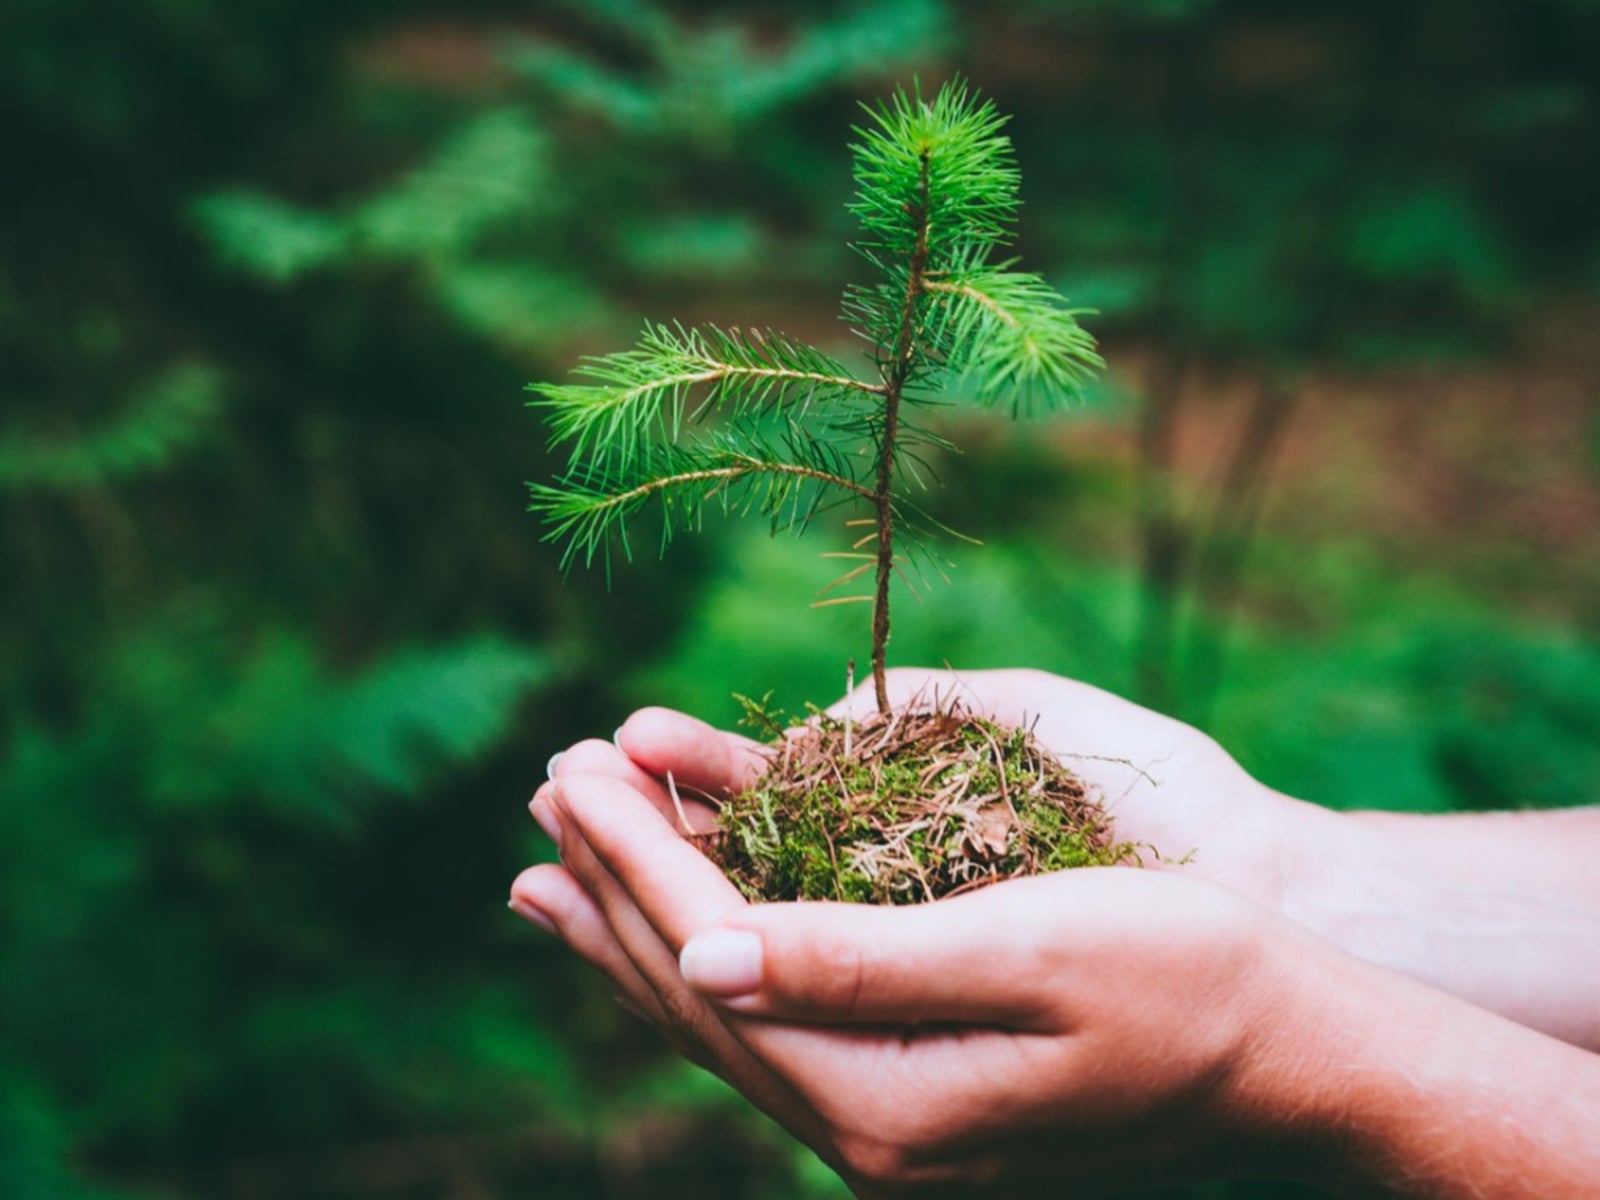
Now that we have laid the foundation, let’s dig into the exciting process of planting arborvitae trees. From digging the planting hole to the actual planting techniques, we will cover each step in detail to ensure optimal health and survival for your new additions. We will also explore mulching, watering, fertilizing, pruning, and common pests and diseases that can impact arborvitae trees.
So, strap on your gardening gloves and let’s embark on this journey of planting and caring for arborvitae trees. With a little bit of knowledge and a whole lot of passion, you’ll be rewarded with vibrant and flourishing trees that will bring beauty, privacy, and joy to your outdoor space.
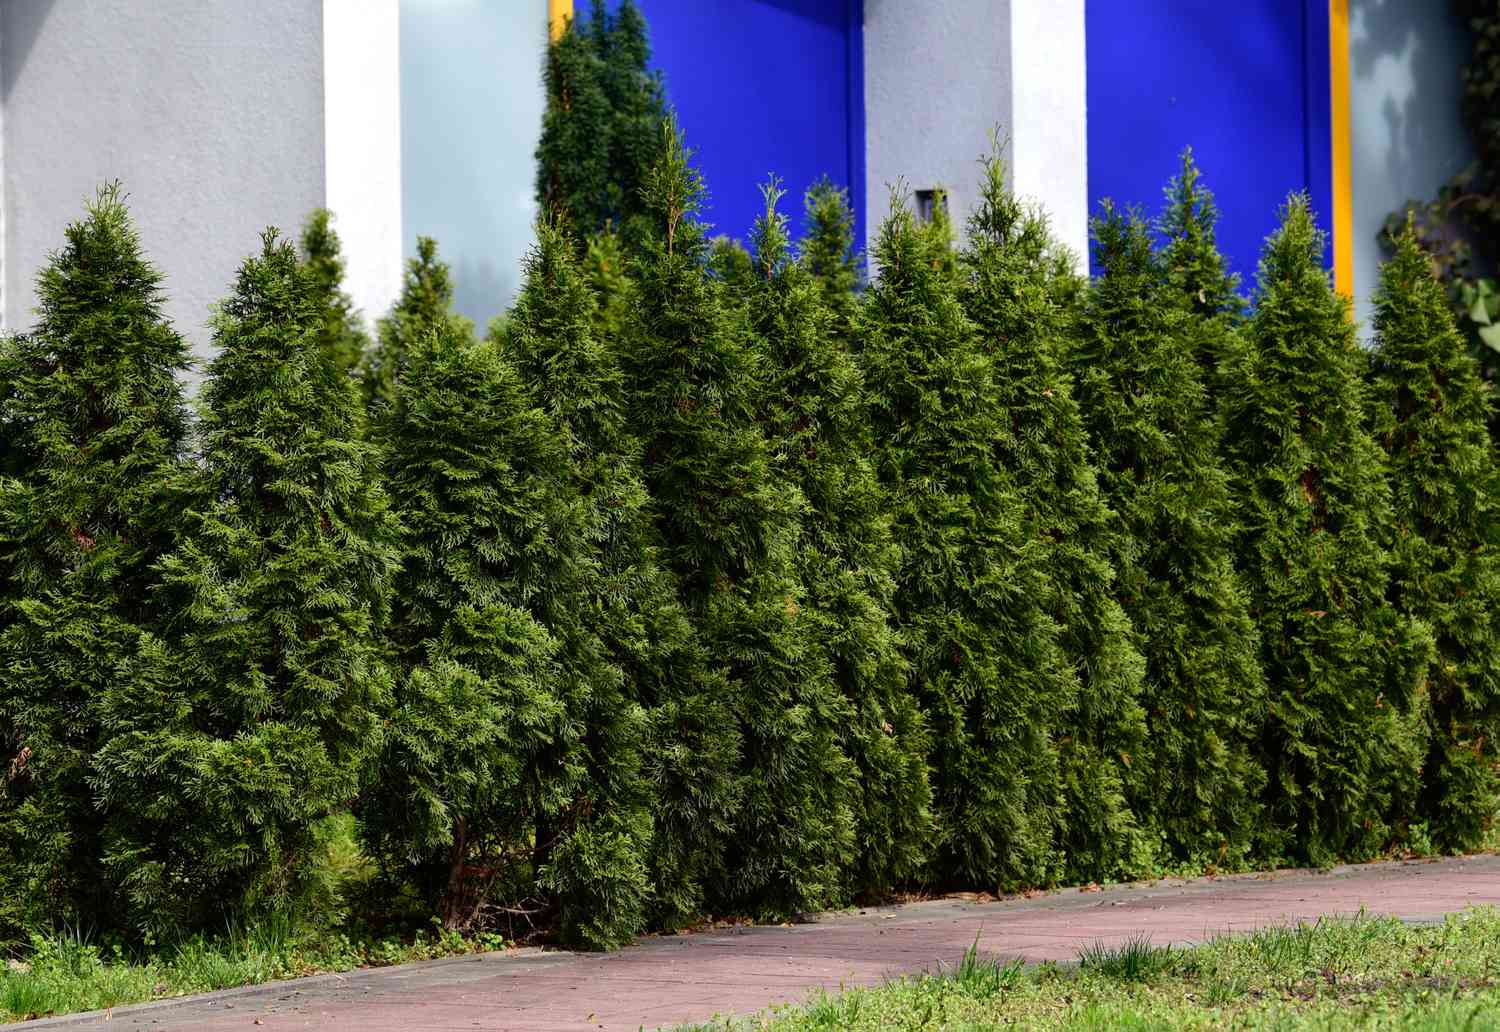
Choosing the Right Arborvitae Varieties
When it comes to selecting arborvitae trees for your landscape, there is a wide array of varieties to choose from. Each variety has its unique characteristics, growth habit, and visual appeal. Understanding these differences will allow you to choose the right arborvitae for your specific needs.
One important factor to consider when selecting arborvitae varieties is the desired height and width of the tree. Some varieties, such as the American arborvitae (Thuja occidentalis), can grow up to 60 feet tall, making them ideal for creating privacy screens or windbreaks. On the other hand, compact varieties like the Emerald Green arborvitae (Thuja occidentalis ‘Emerald Green’) stay more manageable, reaching heights of around 10 to 15 feet.
In addition to height, arborvitae trees also differ in their growth habit. Some varieties have a more pyramidal shape, while others have a columnar or globe-like form. Consider the overall aesthetics you want to achieve in your landscape and choose a variety that complements your existing plants and structures.
Another aspect to consider is the foliage color of the arborvitae variety. Most arborvitae trees have vibrant green foliage, but some varieties offer unique foliage colors that can add visual interest to your garden. For example, the Fire Chief arborvitae (Thuja occidentalis ‘Fire Chief’) has stunning golden foliage that turns to a beautiful bronze in winter, adding a pop of color to your landscape.
Furthermore, it is crucial to assess the hardiness zone of your region and choose arborvitae varieties that can thrive in your specific climate. Different varieties have varying levels of cold and heat tolerance, so make sure to select ones that are well-adapted to your local conditions. Researching the specific hardiness zones of different arborvitae varieties will ensure that your trees can withstand temperature extremes and continue to thrive for years to come.
Lastly, consider the maintenance requirements of the arborvitae variety you choose. Some varieties require more frequent pruning to maintain their desired shape, while others have a more compact and self-maintaining form. Understanding the maintenance needs of different varieties will help you plan for the time and effort required to care for your arborvitae trees.
When selecting arborvitae varieties, take the time to assess your specific needs, preferences, and the unique conditions of your landscape. Consulting with local nurseries or horticultural professionals can also provide valuable insights and recommendations based on your specific location.
By choosing the right arborvitae varieties, you can create a visually appealing and functional landscape that suits your taste, provides privacy, and enhances the overall beauty of your outdoor space.
Selecting a Suitable Planting Location
Choosing the right planting location is crucial for the success and long-term health of your arborvitae trees. The ideal location will provide the necessary conditions for optimal growth, allowing your trees to thrive and flourish. Here are some factors to consider when selecting a suitable planting location for your arborvitae trees.
Sunlight: Arborvitae trees generally prefer full sun to partial shade. Adequate sunlight is essential for their photosynthesis and overall growth. Observe your landscape throughout the day to determine the areas that receive the recommended amount of sunlight for your chosen arborvitae species.
Soil Conditions: Arborvitae trees grow best in well-draining soil. They can tolerate a wide range of soil pH levels, but they generally prefer slightly acidic to mildly alkaline soil. Conduct a soil test to determine the pH level and make any necessary amendments to ensure the soil is within the optimal range for arborvitae growth.
Drainage: Good drainage is essential for the health of your arborvitae trees. Avoid planting them in areas prone to standing water or poor drainage, as this can lead to root rot and other moisture-related issues. If you have heavy clay soil or a location with poor drainage, consider improving the drainage by amending the soil or creating raised beds.
Wind Protection: Arborvitae trees can be susceptible to wind damage, especially when they are young and establishing their root systems. Choose a planting location that offers some natural wind protection, such as near existing structures, other trees, or windbreaks. This will help reduce the risk of wind stress and damage to your arborvitae trees.
Space Considerations: Consider the mature size of your arborvitae trees and allow enough space for them to grow without overcrowding other plants or structures. Planting them too close together can lead to competition for resources and hinder their overall growth and health. Consult the specific spacing recommendations for your chosen arborvitae variety to ensure proper placement.
Privacy and Aesthetics: If one of your main objectives for planting arborvitae trees is to create privacy or add visual interest to your landscape, consider placing them strategically along property lines or in areas where they can serve as a natural screen or backdrop. This will not only provide the desired privacy but also enhance the overall beauty of your outdoor space.
By carefully considering these factors and selecting a suitable planting location, you will provide the optimal conditions for your arborvitae trees to thrive. Remember to assess the specific needs of your chosen arborvitae species and consult with local nurseries or horticultural professionals for additional guidance based on your specific region and climate.
Preparing the Planting Site
Proper preparation of the planting site is crucial for the successful establishment and growth of your arborvitae trees. Taking the time to prepare the site will create an optimal environment for the roots to spread and access necessary nutrients and water. Here are the steps to follow when preparing the planting site for your arborvitae trees.
Clear the Area: Before you start preparing the site, remove any debris, rocks, weeds, or grass from the planting area. Clearing the area will provide a clean and open space for your arborvitae trees to thrive. It will also prevent competition from weeds, which can hinder the growth of your trees.
Assess Drainage: Check the drainage in the planting area to ensure it is sufficient for your arborvitae trees. If you have clay or poorly drained soil, consider improving the drainage by amending the soil with organic matter, such as compost or well-rotted manure. This will help create a looser and more well-draining soil structure.
Soil Preparation: Assess the quality of the soil in the planting area. If it is compacted or nutrient-poor, consider loosening it by tilling or digging. Incorporate organic matter into the soil, such as compost or peat moss, to improve its fertility and structure. This will provide a nutrient-rich and loose soil environment for your arborvitae trees to thrive.
Test Soil pH: Conduct a soil test to determine the pH level of the soil. Arborvitae trees generally prefer slightly acidic to mildly alkaline soil. If the pH level is too high or too low, you may need to amend the soil to adjust the pH. Consult with your local agricultural extension office or a horticultural professional for guidance on adjusting soil pH.
Soil Amendments: Based on the results of your soil test, you may need to add additional amendments to enhance the soil quality. This may include adding nutrients, such as nitrogen, phosphorus, and potassium, or adjusting the soil’s organic matter content. Follow the recommendations provided by the soil test to ensure your arborvitae trees have access to the necessary nutrients.
Consider Site Protection: Depending on the location of your planting site, you may need to consider providing some form of protection for your newly planted arborvitae trees. For example, if the planting area is exposed to strong winds or potential deer damage, you may need to install windbreaks or fencing to ensure the initial establishment and survival of your trees.
By following these steps and properly preparing the planting site, you will create an ideal environment for your arborvitae trees to thrive. This will set them up for success and ensure their healthy growth and establishment in your landscape. Remember to consider the specific needs of your arborvitae variety and consult with local nurseries or horticultural professionals for additional guidance based on your specific region and climate.
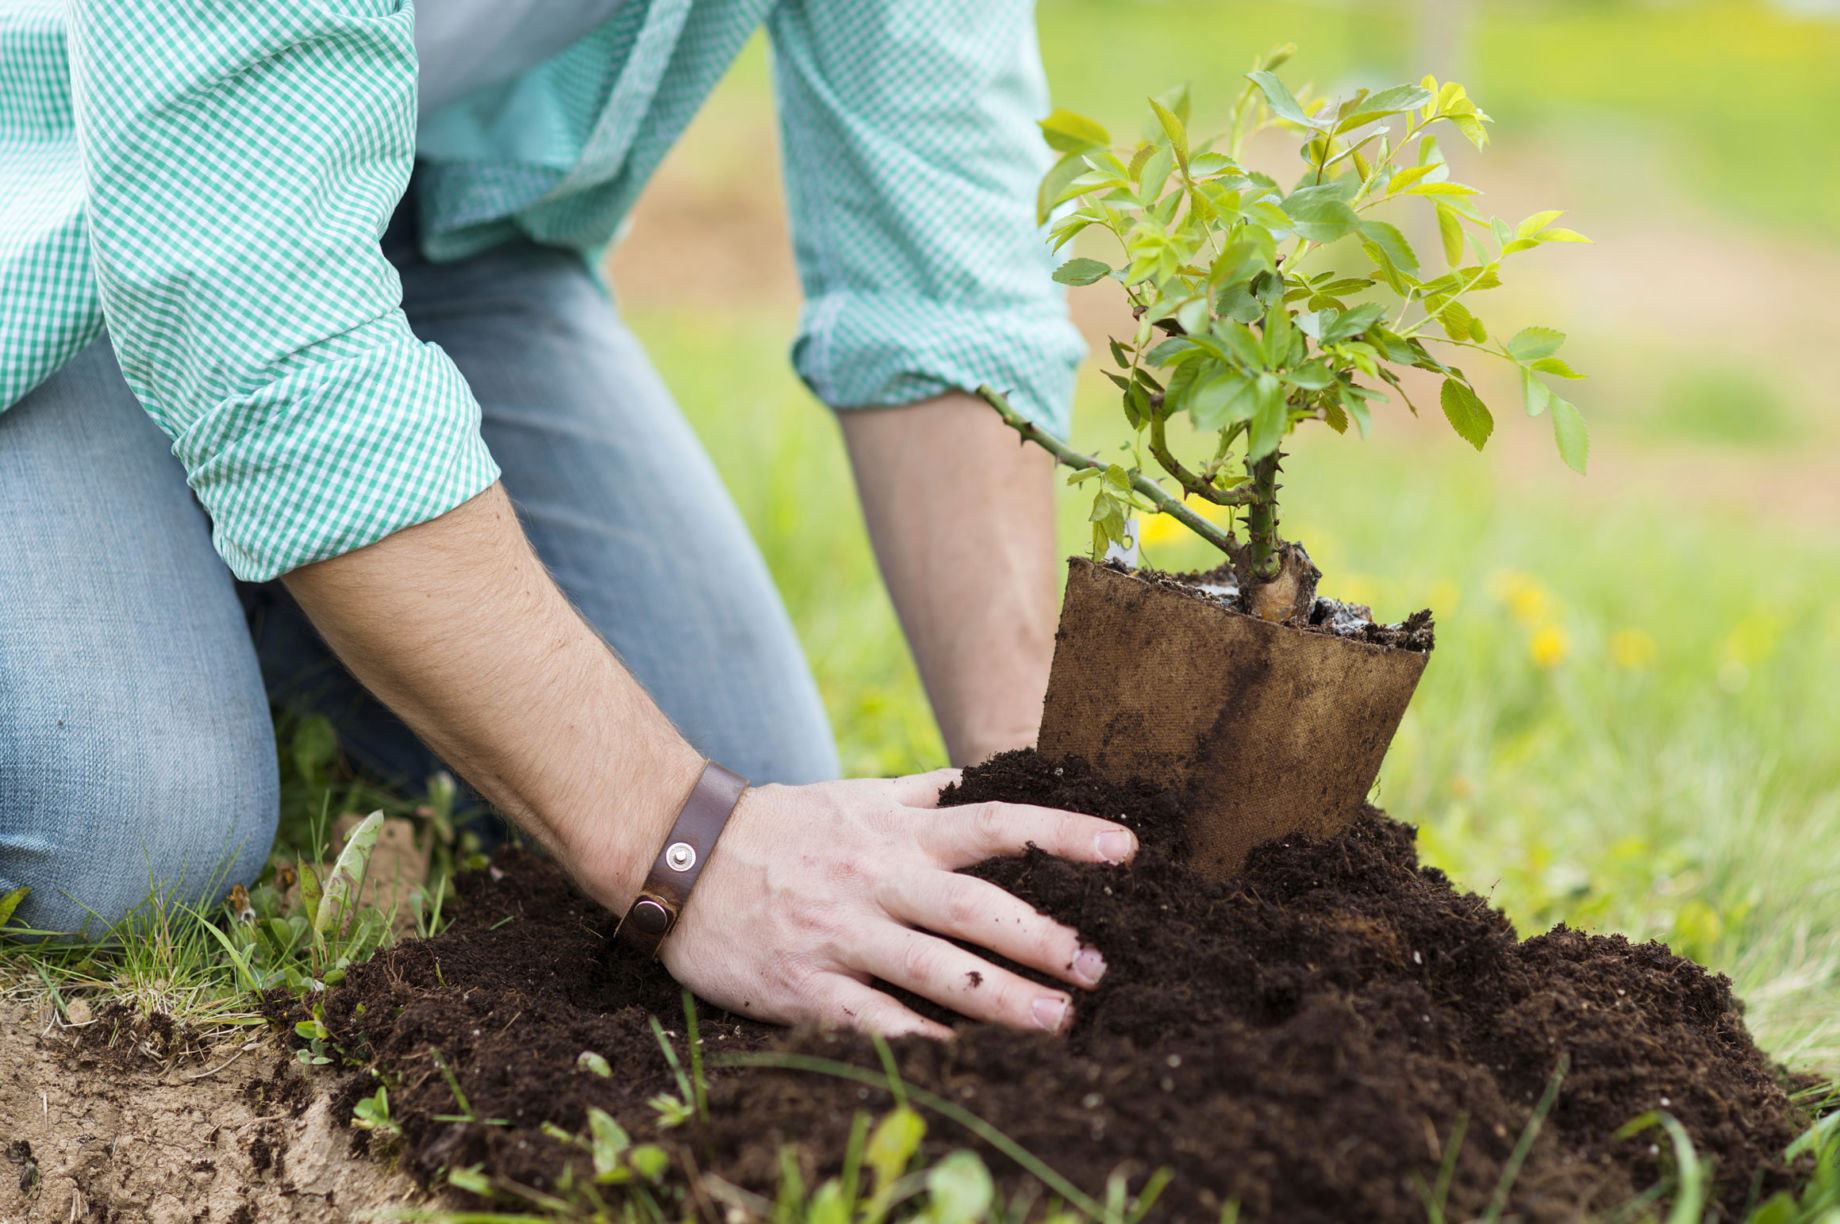
Digging the Planting Hole
Properly digging the planting hole is a crucial step in the process of planting your arborvitae trees. The size, depth, and preparation of the planting hole will directly impact the root development and overall health of your trees. Here are the steps to follow when digging the planting hole for your arborvitae trees.
Choose the Right Size: The size of the planting hole is important to provide enough space for the roots to spread and establish. As a general rule of thumb, the planting hole should be two to three times the width of the root ball or container and slightly shallower than the height of the root ball. This will allow the roots to spread outwards and downwards.
Mark the Area: Use a garden hose or spray paint to mark the outline of the planting hole. This will help guide you as you start digging and ensure that you maintain the correct size and shape.
Start Digging: Use a shovel or a spade to start digging the planting hole. Begin at the marked outline and work your way inward. As you dig, remove any large rocks, roots, or debris that may hinder root growth.
Check Depth: As you dig, periodically check the depth of the hole to ensure it is slightly shallower than the height of the root ball. Adjust the depth as needed to achieve the proper planting depth.
Loosen Soil: Once you have reached the desired depth, use a garden fork or your shovel to loosen the soil at the bottom and sides of the hole. This will create a loose soil environment for the roots to penetrate and establish.
Backfill with Soil: Before placing the arborvitae tree into the hole, backfill with some of the removed soil. This will help stabilize the tree and prevent air gaps around the roots. Gently firm the soil as you backfill to eliminate any pockets of air.
Center the Tree and Position Straight: Carefully place the arborvitae tree into the hole, ensuring that it is centered and positioned straight. Take the time to adjust the tree’s position if needed before proceeding.
Backfill Completely: Once the tree is centered and positioned correctly, continue backfilling the hole with the rest of the soil. Firm the soil gently as you go, but avoid compacting it excessively, as this can hinder root growth.
Water Thoroughly: After backfilling, thoroughly water the planted area to settle the soil and provide moisture for the roots. This will help eliminate any air pockets and provide the necessary hydration for your newly planted arborvitae tree.
By following these steps and ensuring that the planting hole is dug properly, you will provide a solid foundation for your arborvitae tree. This will promote healthy root development, establishment, and overall growth. Remember to consider the specific needs of your arborvitae variety and consult with local nurseries or horticultural professionals for additional guidance based on your specific region and climate.
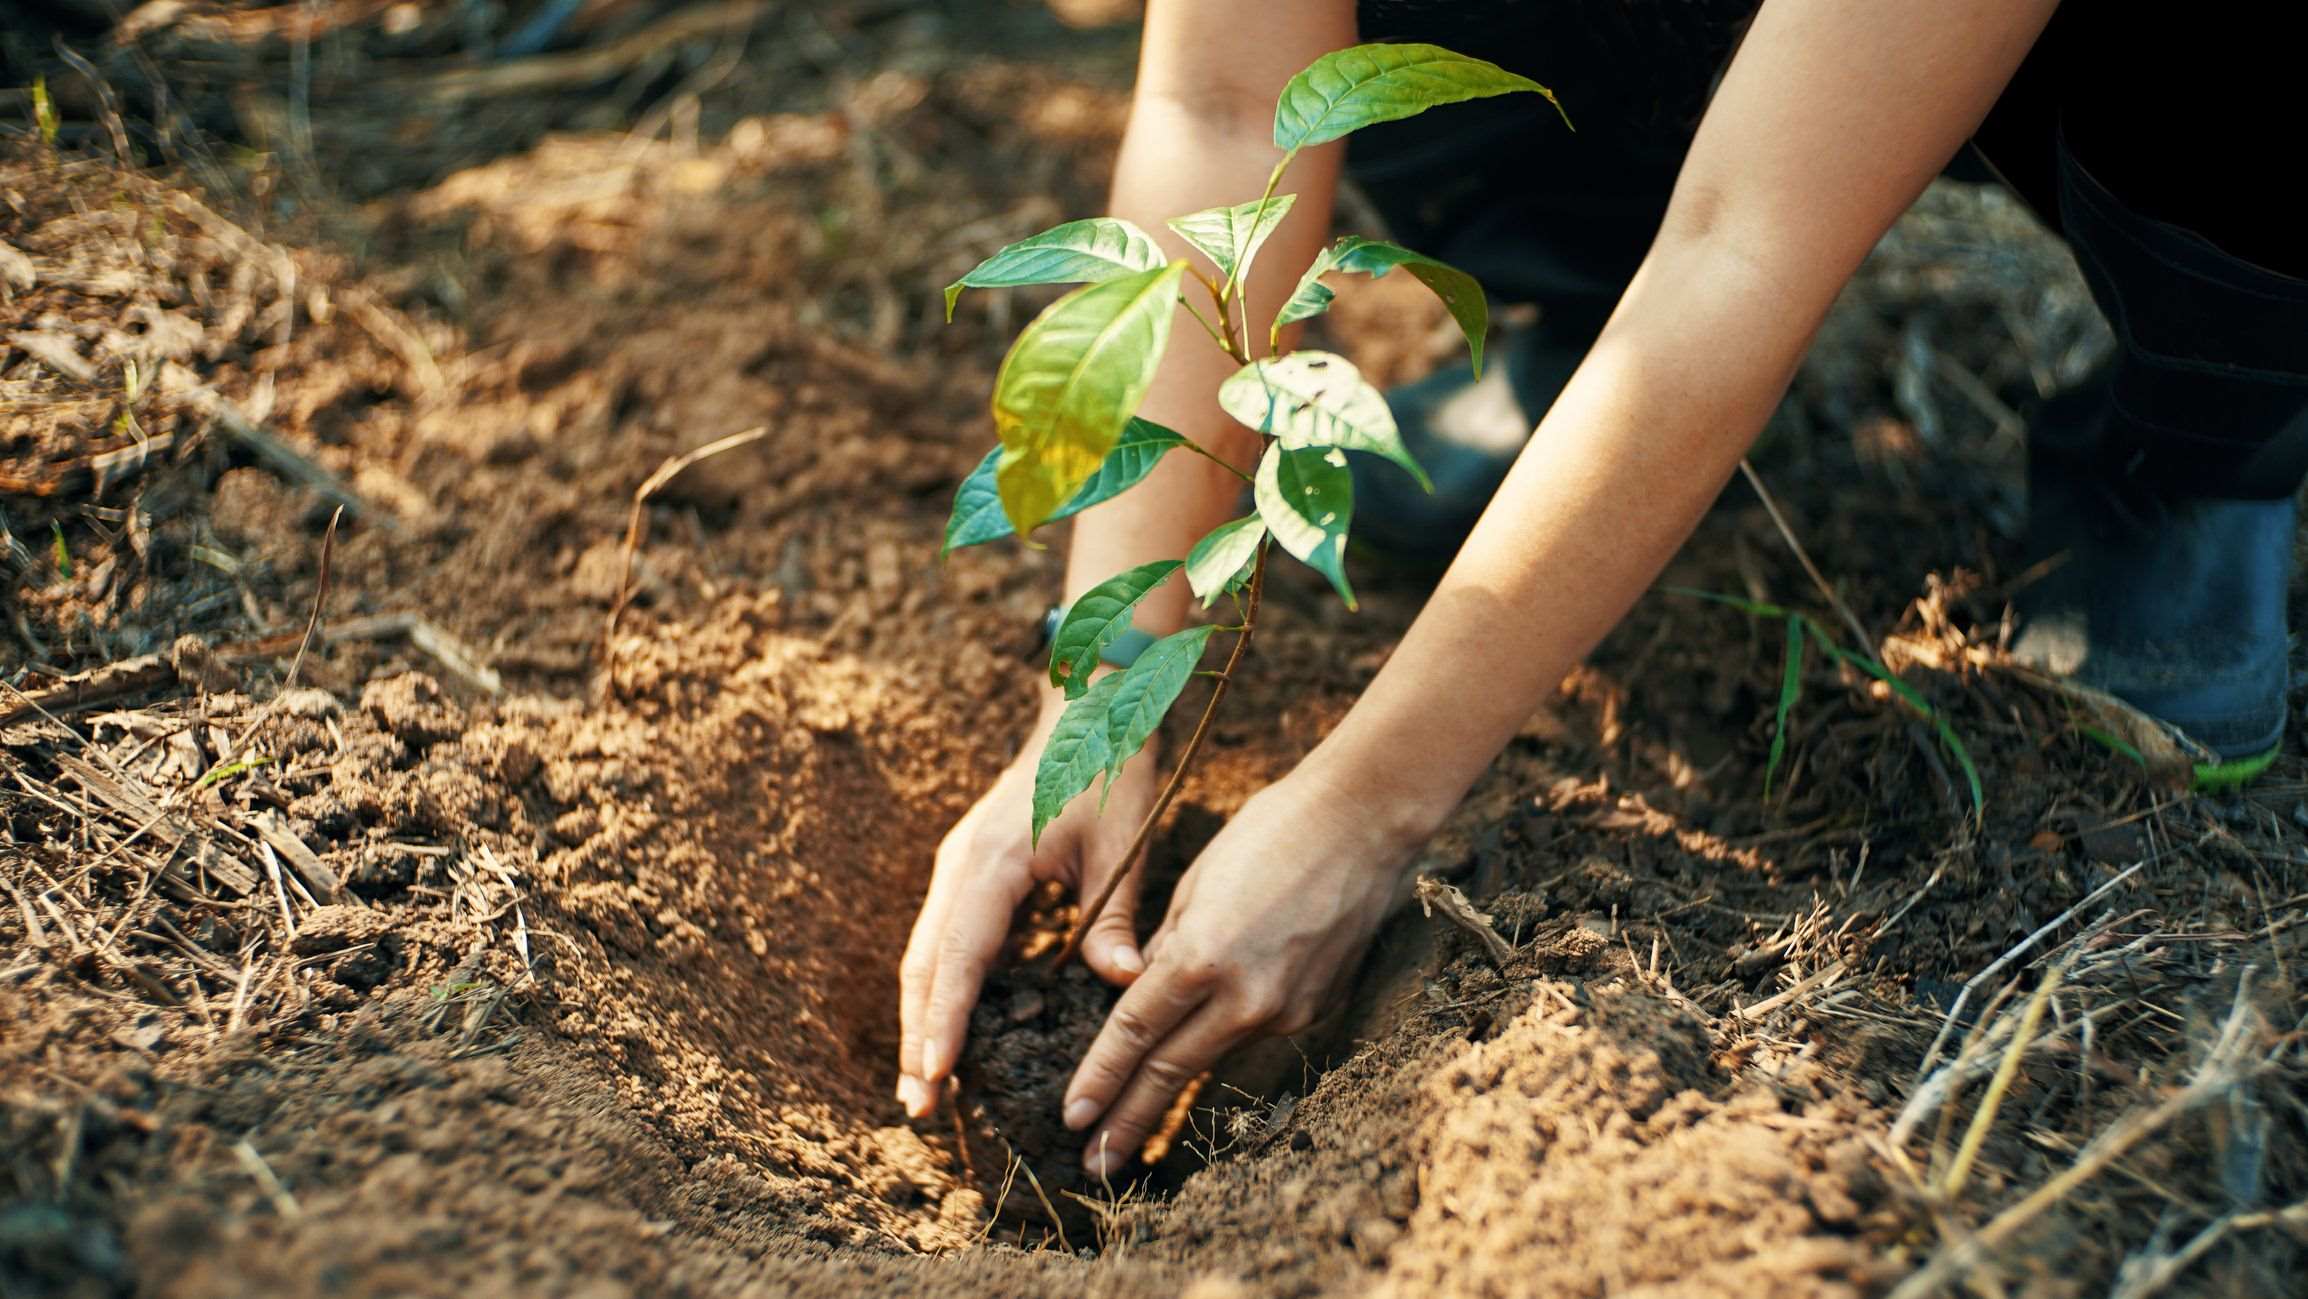
Planting Arborvitae Trees
Now that the planting hole is prepared, it is time to plant your arborvitae trees. The planting process is crucial for ensuring proper root-to-soil contact and promoting the healthy establishment of your trees. Follow these steps to successfully plant your arborvitae trees:
Remove the Tree from its Container: If your arborvitae tree comes in a container, gently remove it from the container by carefully holding the base of the tree and tapping on the bottom of the container. If the tree is root-bound, loosen the roots slightly to encourage outward growth.
Center the Tree in the Hole: Place the arborvitae tree into the planting hole, ensuring that it is positioned at the proper depth. The top of the root ball should be just slightly above ground level. Adjust the tree’s position if necessary to ensure it is centered in the hole.
Backfill the Hole: Begin backfilling the hole with the soil mixture you removed earlier. Gently pack the soil around the tree’s root ball, being careful not to compact it too tightly. Continue to add soil until the hole is completely filled. Give the tree a gentle shake to help settle the soil.
Water the Tree: After planting, thoroughly water the tree to settle the soil and remove any air pockets. Ensure that the entire root ball and surrounding area receive a deep soaking. This will provide the necessary moisture for the tree’s roots to establish in their new environment.
Add Mulch: Apply a layer of organic mulch around the base of the tree, leaving a small space around the trunk to prevent moisture buildup and potential rot. Mulch helps retain moisture, regulate soil temperature, and suppress weed growth. Maintain a depth of 2-4 inches and replenish the mulch as needed.
Stake the Tree (if necessary): If your arborvitae tree is tall or located in a windy area, it may benefit from staking for additional support. Use two or three stakes placed around the tree, and secure them with soft ties or tree straps. Make sure the ties are not too tight to allow for some movement.
Monitor and Maintain: Regularly check on your newly planted arborvitae trees to ensure they are adjusting well and thriving. Water regularly, especially during dry periods, to keep the soil evenly moist but not waterlogged. Monitor for any signs of pests, diseases, or stress, and address them promptly.
By following these steps, you will give your arborvitae trees the best start in their new home. Proper planting techniques will help establish healthy and robust root systems, providing a strong foundation for their growth and longevity. Remember to consider the specific needs and requirements of your arborvitae variety and consult with local nurseries or horticultural professionals for additional guidance based on your specific region and climate.
Mulching Around the Trees
Mulching is an essential step in the care and maintenance of your arborvitae trees. Proper mulching provides numerous benefits, such as conserving soil moisture, regulating soil temperature, suppressing weed growth, and improving soil fertility. Follow these guidelines to effectively mulch around your arborvitae trees:
Choose the Right Mulch: Select high-quality organic mulch, such as shredded bark, wood chips, or compost. Avoid using plastic or rubber mulch, as they can retain heat and moisture, potentially causing harm to the tree’s roots.
Prepare the Area: Before mulching, remove any weeds, grass, or debris around the base of the trees. This ensures the mulch will have direct contact with the soil and provide its full benefits.
Apply the Mulch: Spread a layer of mulch around the base of the tree, starting a few inches away from the trunk. The layer should have a depth of 2 to 4 inches. Keep the mulch a few inches away from the trunk to avoid moisture buildup and potential rot. Ensure the mulch extends to the drip line, which is the outer edge of the tree’s canopy.
Avoid Volcano Mulching: Do not pile the mulch against the trunk of the tree, creating a “volcano” shape. This practice can lead to excess moisture retention and bark rot. Maintain a slight depression around the base of the tree to allow for proper water drainage.
Leave Breathing Room: Make sure there is space between the mulch and the tree’s trunk. This allows for proper airflow and prevents pests, diseases, and rot from affecting the tree’s base.
Replenish Mulch Annually: Mulch breaks down over time, so it is important to replenish it annually. Before adding new mulch, rake back the old mulch to prevent excessive buildup. Add a fresh layer to maintain the desired depth and reap the benefits of mulching throughout the year.
Mulching Dos and Don’ts: Do monitor the moisture levels regularly and water the trees as needed. Do inspect the mulch regularly for signs of mold, fungus, or pest activity. Don’t use excessive amounts of mulch, as it can create moisture and root suffocation issues. Don’t pile the mulch against the trunk or create mulch volcanoes, as it can lead to tree damage.
Mulching is an effective and efficient way to support the health and growth of your arborvitae trees. It provides insulation, conserves moisture, and suppresses weed growth, all of which contribute to the overall vitality and longevity of your trees. With proper mulching, you’ll create an optimal environment for your arborvitae trees to thrive.
Watering and Fertilizing
Proper watering and fertilizing are essential components of arborvitae tree care. These practices provide the necessary nutrients and moisture for growth and a robust root system. Follow these guidelines to ensure your arborvitae trees receive optimal hydration and nutrition:
Watering:
Establishment Period: During the first year after planting, arborvitae trees require regular watering to help their roots establish. Water deeply at least once a week, ensuring the water penetrates the entire root ball and surrounding soil. Adjust the frequency based on weather conditions, aiming to keep the soil evenly moist but not waterlogged.
Mature Trees: Once the trees are established, their watering needs decrease. However, it is still important to monitor soil moisture levels during dry periods. Water deeply when the top few inches of soil become dry, ensuring the water reaches the entire root zone. Avoid excessive watering, as it can lead to root rot or shallow root growth.
Watering Methods: Use a soaker hose or drip irrigation system to water arborvitae trees deeply and evenly. These methods allow for slow, deep watering, which encourages deep root growth. Avoid overhead watering, as it can disrupt the shape of the trees and promote foliar diseases.
Fertilizing:
Soil Test: Conduct a soil test to determine the nutrient deficiencies or imbalances in the soil. The results will guide you in choosing the appropriate fertilizer and application rates to meet the specific needs of your arborvitae trees.
Timing: Fertilize arborvitae trees in early spring before new growth starts. Avoid fertilizing during drought or extreme heat conditions, as this can stress the trees. Regular fertilization is not typically necessary for established arborvitae trees if the soil is naturally fertile. However, if deficiencies are identified through a soil test, targeted fertilization may be required.
Slow-Release Fertilizer: Use a slow-release granular fertilizer specifically formulated for evergreen trees or shrubs. Applying a slow-release fertilizer allows nutrients to be released gradually over an extended period, providing consistent and controlled nutrition.
Application: Follow the manufacturer’s instructions for the recommended amount and method of fertilizer application. Typically, sprinkle the granules evenly around the drip line of the tree, avoiding direct contact with the trunk. Water the area thoroughly after fertilization to help distribute the nutrients into the soil.
Organic Options: If you prefer organic methods, consider using compost or well-rotted manure as a natural fertilizer. These organic amendments provide slow-release nutrients and improve soil fertility over time.
Monitor Nutrient Levels: Regularly inspect your arborvitae trees for signs of nutrient deficiencies, such as yellowing or stunted growth. Adjust your fertilization practices based on these observations and the results of soil tests. Remember, over-fertilization can be detrimental to the health of the trees.
By following these watering and fertilizing guidelines, you will provide the essential moisture and nutrients your arborvitae trees need to thrive. Consistent and proper care will lead to healthy growth, vibrant foliage, and overall longevity for your trees.
Pruning and Maintenance
Pruning and proper maintenance play a crucial role in maintaining the health, shape, and longevity of your arborvitae trees. Regular pruning helps promote airflow, control size, and remove any damaged or diseased branches. Follow these guidelines to ensure effective pruning and overall maintenance of your arborvitae trees:
Timing:
Prune arborvitae trees in late winter or early spring while they are still dormant. This timing allows the tree to heal quickly and minimizes the risk of pest or disease infestation. Avoid pruning in late summer or fall, as new growth may not have enough time to harden off before winter.
Tools:
Use clean, sharp pruning shears or loppers to make precise cuts. Cleaning the tools with a disinfectant before and after pruning helps prevent the spread of disease between trees.
Pruning Techniques:
Thin Out the Canopy: Remove congested or crossing branches to improve airflow and sunlight penetration. Thin out the canopy by selectively removing branches, focusing on those that are growing inward or rubbing against each other. This helps reduce the risk of disease and promotes healthy growth.
Shape the Tree: Arborvitae trees have a natural pyramidal shape, but you may need to shape them to maintain a desirable form. Make pruning cuts just above a bud or lateral branch, ensuring a clean and smooth cut. Avoid cutting into the main trunk as this can weaken the overall structure of the tree.
Size Control: Arborvitae trees can grow quite tall, but they can be pruned to control their size. To maintain their height, prune the top leader or terminal bud. However, avoid cutting too drastically, as this may compromise the overall shape and health of the tree.
Dead or Diseased Branches: Regularly inspect your arborvitae trees for dead, damaged, or diseased branches. Prune these branches back to healthy wood, making clean cuts just outside the branch collar. Removing these branches will improve the overall appearance and health of the tree.
Maintenance:
Watering: Water your arborvitae trees deeply during dry periods, especially during the establishment phase and hot summer months. Check the soil moisture regularly to ensure it remains evenly moist but not waterlogged.
Weed Control: Regularly remove weeds and grass around the base of your arborvitae trees to minimize competition for nutrients and water. Apply a layer of mulch to suppress weed growth and conserve soil moisture.
Monitor Pest and Disease: Keep an eye out for common pests, such as aphids or spider mites, or signs of diseases, such as discoloration or lesions. Promptly address any issues with appropriate treatments to prevent further damage to the trees.
Seasonal Inspections: Conduct regular inspections of your arborvitae trees throughout the growing season. Look for any signs of stress, pest infestation, or structural issues. Address any concerns as soon as possible to maintain the health and vitality of the trees.
By practicing regular pruning and maintenance techniques, you can enhance the overall aesthetics, health, and longevity of your arborvitae trees. Remember to assess the specific needs of your arborvitae variety and consult with local nurseries or horticultural professionals for additional guidance based on your specific region and climate.
Common Pests and Diseases of Arborvitae Trees
Arborvitae trees, like any other plant, are susceptible to certain pests and diseases. Being aware of these common issues can help you identify and address them promptly, ensuring the health and vitality of your arborvitae trees. Here are some of the most common pests and diseases that may affect arborvitae trees:
Arborvitae Leafminer (Argyresthia thuiella): The arborvitae leafminer is a tiny moth whose larvae feed on the foliage, causing significant damage. Look for brown, damaged foliage, thinning of branches, and small, silvery larvae feeding within the leaves. Regularly inspect your trees and consider applying insecticidal sprays or releasing beneficial parasitic wasps to control this pest.
Bagworms (Thyridopteryx ephemeraeformis): Bagworms are caterpillars that construct bag-like structures from silk and plant material, which they hang from tree branches. They feed on the foliage, leading to defoliation if left untreated. Look for cone-shaped bags hanging from the branches and remove them by hand or apply insecticidal sprays early in the season to control the infestation.
Spider Mites (Tetranychus urticae): Spider mites are tiny pests that thrive in hot, dry conditions and can cause discoloration and webbing on the foliage. Inspect the underside of the leaves for small, red or yellow pests and treat with insecticidal soap or horticultural oil as necessary. Regularly watering your trees and maintaining proper humidity levels can help deter spider mite infestations.
Canker Diseases: Cankers are areas of dead tissue on the trunk or branches of arborvitae trees. They are typically caused by fungal infections or environmental stress. Symptoms include sunken, discolored bark and dieback of branches. Remove affected branches, cutting at least 6 inches below the visible signs of infection. Maintain tree health through proper watering and fertilization to prevent canker diseases.
Root Rot: Root rot is a fungal disease that affects the roots of arborvitae trees. It is caused by poor drainage, overwatering, or planting in compacted soil. Signs include yellowing or wilting foliage, stunted growth, and root decay. Improve drainage, adjust watering practices, and avoid over-irrigation to prevent root rot. Fungicide treatments may be necessary in severe cases.
Tip Blight (Diplodia spp.): Tip blight is a fungal disease that affects the branch tips of arborvitae trees, causing them to turn brown or die back. Prune affected branches at least 6 inches below the visible signs of infection and dispose of the debris. Avoid overhead watering and improve air circulation to minimize humidity and prevent the spread of the disease.
Scale Insects: Scale insects are small, immobile pests that attach themselves to the branches and needles of arborvitae trees, sucking sap and weakening the plant. Look for small, round bumps on the branches and treat with horticultural oil or insecticidal soap as necessary. Encouraging natural predators, such as ladybugs, can also help control scale populations.
Regular monitoring, proper cultural practices, and timely intervention are essential for preventing and controlling common pests and diseases. Maintaining optimal tree health, proper watering, and providing proper spacing between trees can help reduce the risk of infestation and disease. Consult with local nurseries or horticultural professionals for specific guidance on identifying, preventing, and treating pests and diseases in your area.
Conclusion
Congratulations! You have now learned the essential steps for planting and caring for your arborvitae trees. With the right knowledge and techniques, your arborvitae trees will thrive, providing beauty, privacy, and a vibrant addition to your landscape. Here are some key takeaways to remember:
Choose the Right Arborvitae Varieties: Consider the height, growth habit, foliage color, and maintenance requirements of different arborvitae varieties to find the perfect fit for your landscape.
Select a Suitable Planting Location: Ensure your chosen location offers adequate sunlight, well-draining soil, wind protection, and sufficient space for the tree to grow and flourish.
Prepare the Planting Site: Clear the area, assess drainage, improve soil quality, and make any necessary amendments to create an optimal environment for root development.
Dig the Planting Hole: Dig a hole that is wide enough to accommodate the root ball, slightly shallower than its height, and ensure good soil-to-root contact.
Plant Arborvitae Trees: Remove the tree from its container, center it in the hole, backfill with soil, water thoroughly, and apply mulch around the base to retain moisture and suppress weed growth.
Water and Fertilize: Provide regular deep watering during the establishment phase and monitor soil moisture levels thereafter. Fertilize based on soil test results and the specific needs of your arborvitae trees.
Prune and Maintain: Prune selectively to shape the tree, remove dead or diseased branches, and ensure proper airflow. Regularly monitor and address pests, diseases, and maintenance needs for optimal tree health.
By following these guidelines and considering the specific needs of your arborvitae trees, you will create a nurturing environment for their growth and success. Remember to consult with local experts, nurseries, or horticultural professionals for additional guidance tailored to your specific region and climate.
With patience, care, and attention to detail, your arborvitae trees will reward you with lush foliage, vertical interest, and privacy for years to come. Enjoy the beauty and benefits that these magnificent trees bring to your outdoor space!