Home>Types of Gardening>Edible Gardening>How To Plant Okra Seedlings
Edible Gardening
How To Plant Okra Seedlings
Modified: February 7, 2024
Learn how to plant okra seedlings in your edible garden and enjoy a bountiful harvest. Discover expert tips and techniques for successful cultivation.
(Many of the links in this article redirect to a specific reviewed product. Your purchase of these products through affiliate links helps to generate commission for Chicagolandgardening.com, at no extra cost. Learn more)
Table of Contents
Introduction
Welcome to the world of edible gardening, where you can cultivate delicious, nutritious crops right in your own backyard. One plant that excels in edible gardens is okra. Known for its unique taste, versatility, and stunning flowers, okra is a fantastic addition to any vegetable patch. Whether you’re an experienced gardener or a novice looking to try your hand at something new, planting okra seedlings is a rewarding and relatively simple endeavor.
Okra, also referred to as Abelmoschus esculentus, thrives in warm climates and is a popular choice for gardeners in tropical and subtropical regions. This fast-growing plant not only offers a bountiful harvest but also adds visual interest to your garden with its tall, erect stem and vibrant green leaves. By following a few easy steps, you can enjoy a plentiful supply of okra pods throughout the growing season.
Before we dive into the nitty-gritty of planting okra seedlings, it’s important to note that the success of your edible garden depends on various factors, including soil quality, sunlight exposure, and proper care. By understanding and implementing these foundational elements, you can ensure the health and productivity of your okra plants. So, let’s roll up our sleeves and dig into the process of planting and growing okra seedlings.
Step 1: Choosing the Right Location
When it comes to growing okra, selecting the right location is crucial for the plant’s overall health and productivity. Okra thrives in full sun, so opt for a spot in your garden that receives at least 6 to 8 hours of direct sunlight daily. This will ensure that your okra plants receive ample light for photosynthesis and optimal growth. Additionally, make sure the location is sheltered from strong winds, as they can damage the tender okra stems.
Furthermore, consider the soil quality in the chosen area. Okra prefers well-draining soil with a pH level between 6.0 and 7.0. Sandy loam or loamy soil works best for okra cultivation, as it provides adequate drainage and moisture retention. If your soil is compacted or heavy clay, you can improve its texture and drainage by adding organic matter such as compost or well-rotted manure.
Another factor to consider is the proximity to other plants in your garden. Okra has a tall and erect growth habit, so be mindful of planting it in a location that won’t shade or overcrowd other nearby plants. Adequate spacing allows for proper air circulation and reduces the risk of fungal diseases.
Lastly, accessibility is key. Choose a location that is easily accessible for watering, weeding, and harvesting. This will make maintenance tasks more convenient and enjoyable, ensuring you can tend to your okra plants regularly.
Step 2: Preparing the Soil
Preparing the soil is a crucial step in setting up your okra seedlings for success. By creating a nutrient-rich and well-draining environment, you are providing the optimal conditions for healthy growth and development.
Start by removing any weeds or debris from the area where you plan to plant your okra. Weeds compete for nutrients and can hinder the growth of your seedlings. Once the area is clear, loosen the soil using a garden fork or tiller. This will help improve the soil’s texture and drainage, allowing the roots to penetrate more easily.
Next, add organic matter such as compost, well-rotted manure, or peat moss to enrich the soil. Organic matter improves the soil structure, adds essential nutrients, and enhances its water-holding capacity. Spread a 2 to 3-inch layer of organic matter over the planting area and work it into the top 6 to 8 inches of soil.
After incorporating the organic matter, consider conducting a soil test to determine the pH level and nutrient composition. This will provide valuable insights into any deficiencies or imbalances in the soil. Adjust the pH level if necessary by adding lime to raise it or sulfur to lower it, following the recommendations from your soil test results.
Lastly, ensure that the soil is well-draining. Okra does not thrive in waterlogged conditions and can develop root rot if the soil is too saturated. If your soil tends to retain too much moisture, you can improve drainage by adding perlite or coarse sand to the planting area.
By properly preparing the soil, you are creating a fertile foundation for your okra seedlings to grow and flourish. The nutrient-rich soil will provide the necessary resources for healthy root development and robust plant growth.
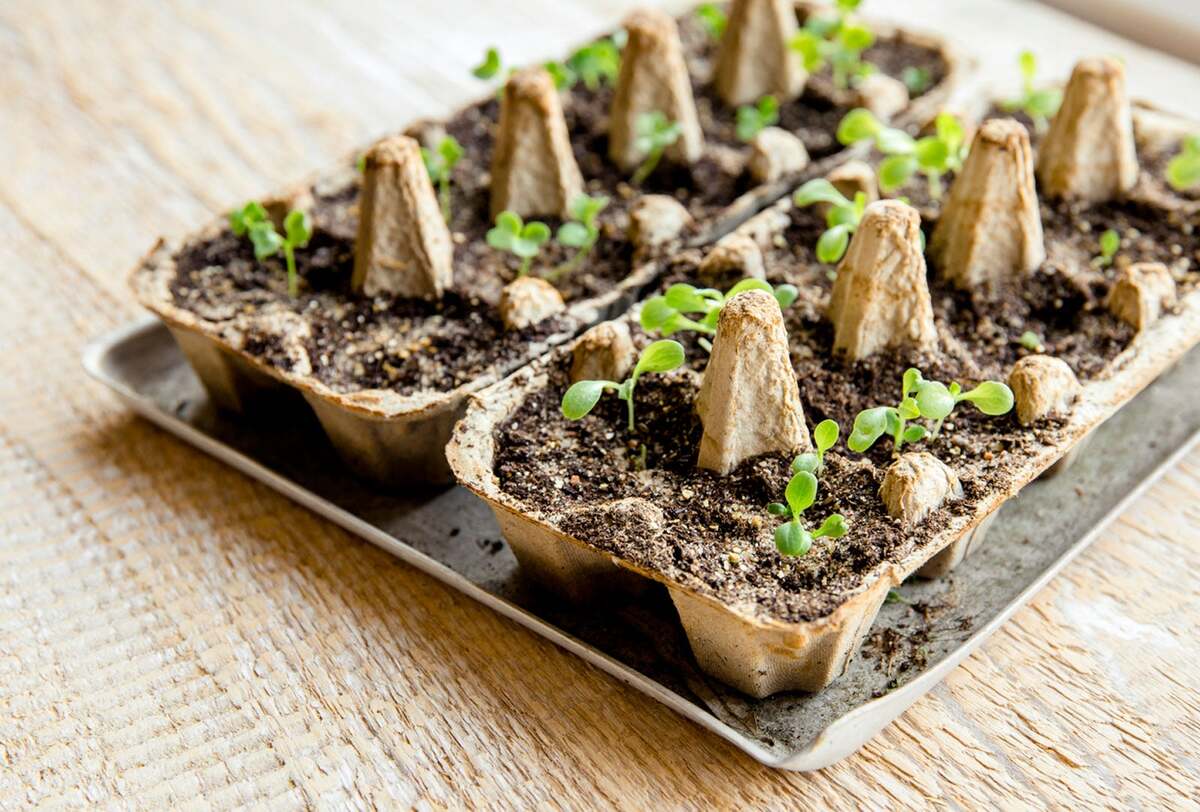
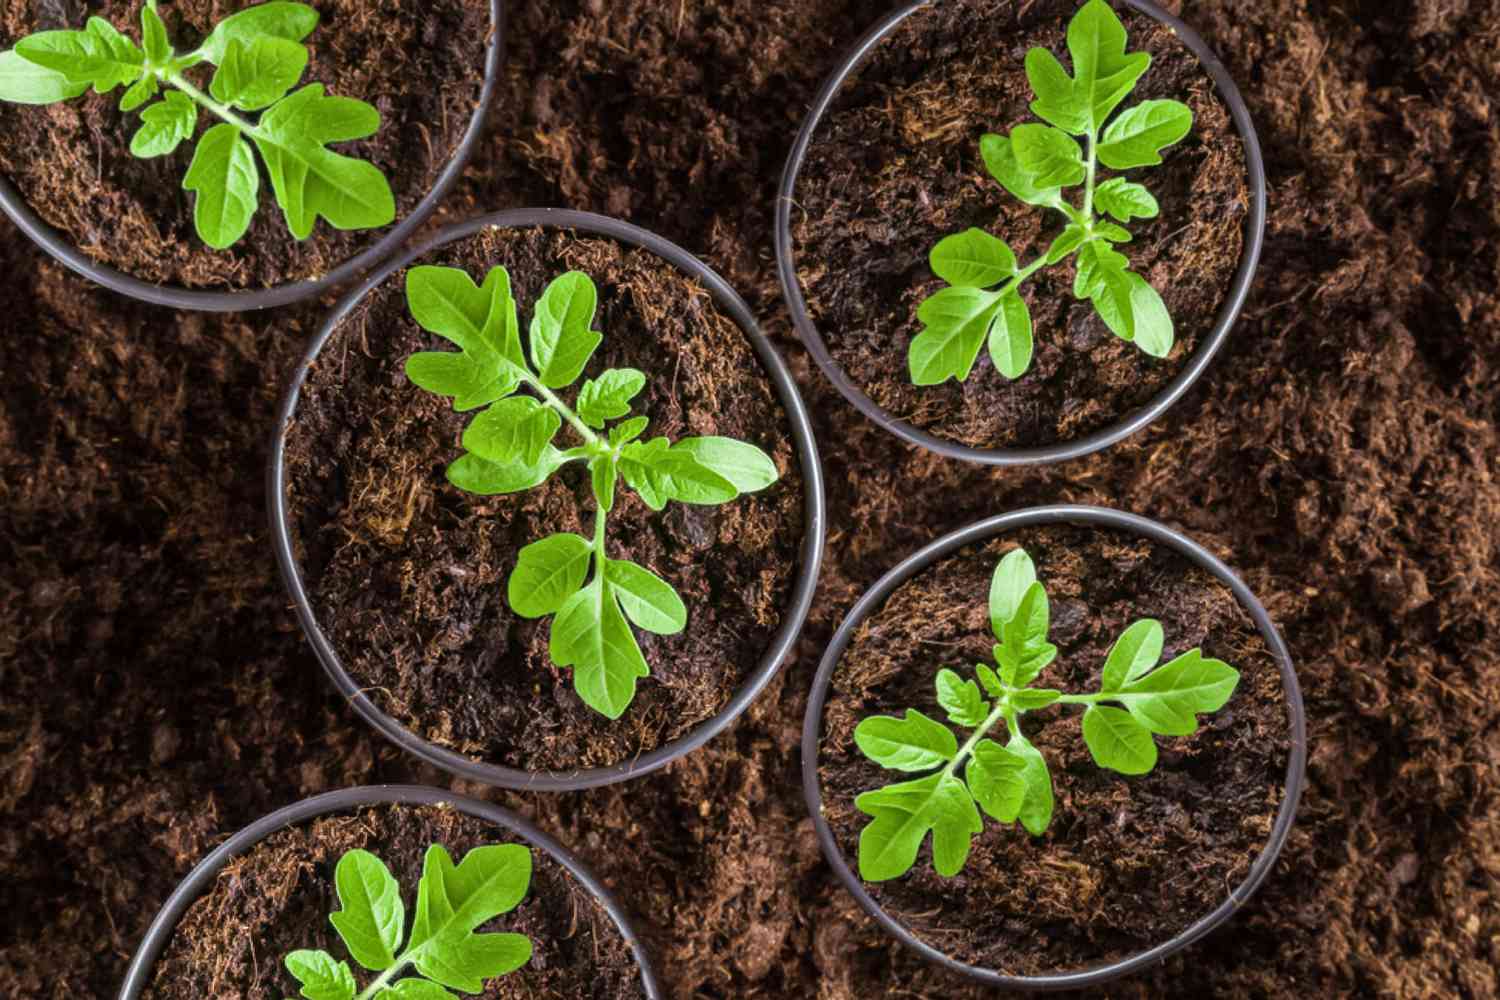
Step 3: Starting Okra Seedlings Indoors
If you live in a region with a short growing season or want to get a head start on your okra planting, starting the seedlings indoors is a great option. By giving your okra seeds a head start indoors, you can ensure stronger and more vigorous plants when it’s time to transplant them outdoors.
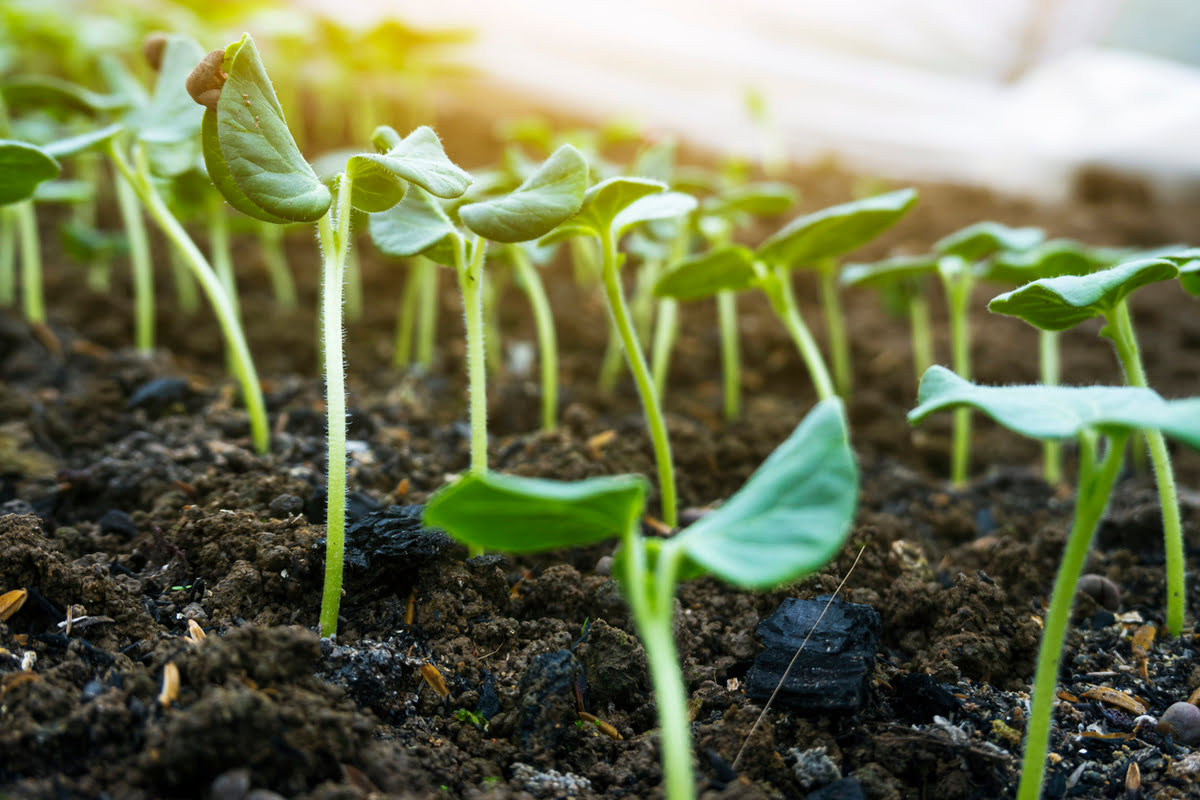
Begin by selecting high-quality okra seeds from a reputable source. Look for varieties that are well-suited to your climate and growing conditions. Fill containers or trays with a well-draining seed-starting mix, leaving about half an inch of space at the top.
Plant the okra seeds about half an inch deep and spaced out according to the recommended spacing for the variety you are growing. Gently cover the seeds with the seed-starting mix and lightly press down to ensure good seed-to-soil contact.
Keep the containers in a warm area, ideally around 70-80°F (21-27°C). You can use a seedling heat mat to provide consistent warmth if needed. Ensure that the soil remains moist but not waterlogged by misting it with water or using a spray bottle.
Okra seeds usually take around 7-14 days to germinate. Once the seedlings emerge, place them in a location that receives bright, indirect sunlight or under grow lights. Make sure to rotate the containers regularly to promote even growth and prevent plants from leaning towards the light.
As the seedlings grow, maintain a consistent watering schedule, ensuring that the soil remains moist but not overly saturated. Once they develop their first true leaves, you can begin fertilizing the seedlings with a diluted balanced liquid fertilizer, following the instructions on the package.
Allow the okra seedlings to grow indoors for 6-8 weeks or until they have reached a height of around 4-6 inches and have a good root system. At this stage, they are ready to be transplanted outdoors, provided that all frost and cold weather has passed and the soil has warmed up.
Starting okra seedlings indoors gives you a jump-start on the growing season and ensures healthier and stronger plants. It also allows you to extend your harvest and maximize your yield when it’s time to transplant them into your garden.
Step 4: Transplanting Okra Seedlings
Once your okra seedlings have grown to a suitable size and all risk of frost has passed, it’s time to transplant them into your garden. Transplanting okra seedlings is a critical step in their journey towards becoming mature, productive plants.
Start by preparing the planting holes in the garden bed. The holes should be spaced about 12-18 inches apart, allowing enough room for the okra plants to grow and spread. The depth of the hole should accommodate the length of the seedling’s root system.
Before transplanting, make sure to water the seedlings well to ensure the soil around the roots is moist and cohesive. Gently remove the seedlings from their containers, being careful not to disturb the delicate roots. If the roots are tightly bound, gently loosen them before planting.
Place each seedling in a prepared hole and backfill with soil, ensuring that the soil is firmly packed around the roots to eliminate air pockets. Be careful not to bury the stem of the seedling too deep, as this can lead to rotting or stunted growth.
After transplanting, water the newly planted seedlings thoroughly to help them establish in their new environment. Keep the soil consistently moist in the weeks following transplantation, as this will aid in root development and minimize transplant shock.
It’s also important to provide support for the okra plants, as they can grow quite tall. Installing stakes or trellises near the plants can help provide support and prevent them from bending or breaking under their own weight as they mature. This is especially important if you live in an area prone to strong winds.
Once the okra seedlings have been transplanted, monitor them closely for any signs of stress or disease. Keep an eye out for wilting, yellowing leaves, or any other indicators of nutrient deficiencies or pests. Address any issues promptly to ensure the health and vitality of your okra plants.
Transplanting okra seedlings is an exciting step that brings your garden one step closer to a bountiful harvest. By following proper transplanting techniques and providing the necessary care, you are setting the stage for robust growth and a successful okra crop.
Step 5: Caring for Okra Plants
Once your okra plants are established in the garden, it’s important to provide them with the necessary care to ensure healthy growth and a bountiful harvest. Caring for okra plants involves ongoing maintenance and attention to their specific needs.
One essential aspect of caring for okra plants is proper watering. Okra requires consistent moisture to thrive, so provide them with a deep watering once or twice a week, depending on rainfall and soil conditions. Avoid overwatering, as it can lead to root rot and other diseases.
Mulching around the base of the plants can help conserve moisture, suppress weeds, and regulate soil temperature. Apply a layer of organic mulch, such as straw or compost, to retain moisture and keep the roots cool during hot summer months.
Fertilization is also important for optimal okra plant growth. Before planting, incorporate a balanced organic fertilizer into the soil. As the plants grow, continue to feed them with an organic fertilizer high in phosphorus and potassium, which promotes flower and fruit development.
Regularly monitor your okra plants for pests and diseases. Common pests that affect okra include aphids, flea beetles, and caterpillars. Use organic insecticidal soaps or natural insecticides to control infestations. Additionally, be on the lookout for signs of diseases such as powdery mildew or fungal infections, and take appropriate measures to prevent their spread.
Providing support for your okra plants is essential as they grow taller. Install stakes or trellises early in the growing season to ensure the plants have proper support and prevent them from falling over or bending under the weight of the fruits.
Regular pruning can also help maintain the health and productivity of your okra plants. Removing any dead or yellowing leaves and trimming back excessive growth can improve air circulation and reduce the risk of diseases.
Finally, stay vigilant for signs of maturity. Harvest okra pods when they reach a length of 3-4 inches, as larger pods can be tough and fibrous. Harvest regularly to encourage continued pod production.
By providing adequate watering, fertilization, pest control, and support, you can ensure that your okra plants remain healthy and productive throughout the growing season. With proper care, you’ll be enjoying a plentiful harvest of delicious okra pods in no time.
Step 6: Harvesting Okra
Harvesting okra at the right time is crucial to ensure optimal taste and texture. With the right approach, you can enjoy a consistent supply of tender and flavorful okra pods throughout the growing season.
The ideal time to harvest okra is when the pods are young and tender, typically around 3-4 inches in length. Harvesting at this stage ensures that the pods are still succulent and have not become tough or fibrous. It’s best to check the plants regularly, as okra pods can grow quickly and become too large for consumption within a matter of days.
When harvesting okra, use a pair of garden shears or a sharp knife to cut the stem above the cap. Avoid pulling or twisting the pods, as this can damage the plants. Harvesting from above the cap helps retain the pod’s freshness and reduces the risk of exposing the plant to diseases.
It’s important to note that okra plants produce new pods continuously, so it’s essential to harvest pods regularly. This encourages the plants to continue producing more pods and extends the overall harvest period. Aim to harvest okra every two to three days during peak production.
Once you’ve harvested your okra pods, handle them with care to prevent bruising. Place the harvested pods in a basket or container, making sure not to overcrowd them. This allows air circulation and helps to maintain their quality and freshness.
If you encounter any oversized or tough okra pods, it’s best to remove them from the plant. They can drain energy from the plant and inhibit the growth of new pods. Regular harvesting ensures that your okra plants stay productive and continue to yield a bountiful harvest.
Remember to wash the harvested okra pods thoroughly before consuming or storing them. Gently rinse them under cool water to remove any dirt or debris. Once cleaned, the okra can be stored in the refrigerator for up to a week.
Harvesting okra is an enjoyable and rewarding process. By maintaining a consistent harvesting schedule and selecting the right-sized pods, you’ll savor the best flavors and textures that this popular vegetable has to offer.
Conclusion
Congratulations! You have now learned the essential steps to successfully plant, care for, and harvest okra in your own edible garden. By following these steps, you can enjoy a bountiful harvest of this versatile and delicious vegetable.
Starting with the right location, ensuring adequate sunlight, and preparing the soil with organic matter, you have created an ideal environment for your okra plants to thrive. Starting seedlings indoors gives you a head start and stronger plants, while transplanting them into the garden allows for proper growth and development.
Caring for your okra plants involves providing consistent watering, proper fertilization, and vigilant pest and disease control. Providing support for the tall plants and regular pruning ensures their health and productivity. And when the time comes, harvesting the young, tender pods at the right stage ensures the best flavors and textures.
Now that you are equipped with the knowledge and understanding of the entire process, it’s time to put it into action. Enjoy the experience of observing your okra plants grow, the satisfaction of harvesting your homegrown produce, and the pleasure of incorporating fresh okra into your favorite recipes.
Remember, gardening is an ongoing learning experience, so don’t be afraid to experiment and adapt your techniques as you go. By fine-tuning your skills and gaining more experience, you’ll continue to improve and enjoy even greater success in your edible gardening endeavors.
So, get out there, embrace the joy of edible gardening, and indulge in the delights of growing your own okra. Happy gardening!