Home>Types of Gardening>Edible Gardening>How To Plant Corn Seedlings

Edible Gardening
How To Plant Corn Seedlings
Modified: January 22, 2024
Learn how to plant corn seedlings in your edible garden. Get step-by-step instructions and expert tips for successful cultivation.
(Many of the links in this article redirect to a specific reviewed product. Your purchase of these products through affiliate links helps to generate commission for Chicagolandgardening.com, at no extra cost. Learn more)
Table of Contents
- Introduction
- Step 1: Prepare the planting area
- Step 2: Purchase or prepare corn seedlings
- Step 3: Transplant the corn seedlings
- Step 4: Water the seedlings
- Step 5: Provide adequate sunlight
- Step 6: Apply fertilizer
- Step 7: Weed control
- Step 8: Monitor and protect from pests
- Step 9: Harvesting the corn
- Conclusion
Introduction
Welcome to the wonderful world of edible gardening! Growing your own food is not only a rewarding and sustainable practice, but it also allows you to enjoy the freshest produce possible. One vegetable that can be a delightful addition to your garden is corn. Whether you have a sprawling backyard or a small balcony, you can successfully grow corn seedlings and enjoy the sweet and tender ears right at your doorstep.
Corn, known scientifically as Zea mays, is a warm-season annual that belongs to the grass family. It is renowned for its tall stalks and juicy kernels that burst with flavor when cooked. While some may assume that growing corn requires vast fields and lots of space, it is actually possible to cultivate this delicious crop in a more compact garden or even in containers.
In this step-by-step guide, we will walk you through the process of planting corn seedlings in your garden or container. From preparing the planting area to harvesting the corn, we will provide you with all the necessary information to achieve a successful harvest.
So, roll up your sleeves, get your gardening tools ready, and let’s dive into the world of corn cultivation!
Step 1: Prepare the planting area
The first step in growing healthy corn seedlings is to prepare the planting area. Corn plants require well-drained soil, plenty of sunlight, and ample space to reach their full potential. Here’s how you can get started:
- Select the right location: Choose a sunny spot in your garden that receives at least 6-8 hours of direct sunlight per day. Corn plants thrive in full sun, which helps in the growth and maturation of the ears. Additionally, make sure the area is sheltered from strong winds, as they can easily topple the tall corn stalks.
- Prepare the soil: Corn plants prefer loose, fertile soil that is rich in organic matter. Begin by removing any weeds or debris from the planting area. Use a garden fork or tiller to loosen the soil, ensuring that it is fluffy and well-aerated. Incorporate compost, well-rotted manure, or a balanced fertilizer into the soil to provide essential nutrients for the corn seedlings to thrive.
- Optimize soil pH: Corn plants prefer slightly acidic to neutral soil, with a pH range of 6.0 to 7.0. Test the soil pH using a soil testing kit, and if necessary, adjust it by adding amendments. Garden centers often carry products specifically formulated to raise or lower soil pH levels.
- Consider spacing: Adequate spacing is essential for proper growth and development of corn plants. Since corn is a wind-pollinated crop, planting in blocks or square patches instead of rows can help facilitate pollination. Space the corn plants around 12-18 inches apart in all directions, allowing enough room for the stalks to grow tall and produce multiple ears per plant.
- Create supportive structures: As corn plants grow tall, they may require support to prevent them from toppling over in strong winds. Consider installing stakes or a trellis system to provide stability to the plants. Drive stakes into the ground at regular intervals and loosely tie the corn stalks to the stakes using twine or soft plant ties.
By following these steps, you will create an ideal planting area for your corn seedlings. The well-prepared soil, optimal sunlight, and proper spacing will provide the perfect conditions for your corn plants to thrive and produce a bountiful harvest.
Step 2: Purchase or prepare corn seedlings
Once you have prepared the planting area, the next step is to acquire corn seedlings for transplanting. You have two options: purchasing pre-grown seedlings from a reputable nursery or starting your own from seeds. Here’s what you need to know:
- Purchasing seedlings: If you’re short on time or prefer the convenience, you can purchase corn seedlings from a local nursery or garden center. Look for healthy seedlings that have well-developed roots, sturdy stems, and vibrant green leaves. Check the label or ask the nursery staff for specific corn varieties suitable for your growing region and preferences.
- Growing from seeds: Growing corn from seeds allows you to have more control over the varieties you want to cultivate. Start the seeds indoors 4-6 weeks before the last frost date in your area or directly sow them in the garden once the soil has warmed up. Sow the corn seeds about 1-2 inches deep and 4-6 inches apart in rows or blocks, ensuring that you follow the recommended spacing for the specific variety you are growing. Keep the soil consistently moist until the seedlings emerge.
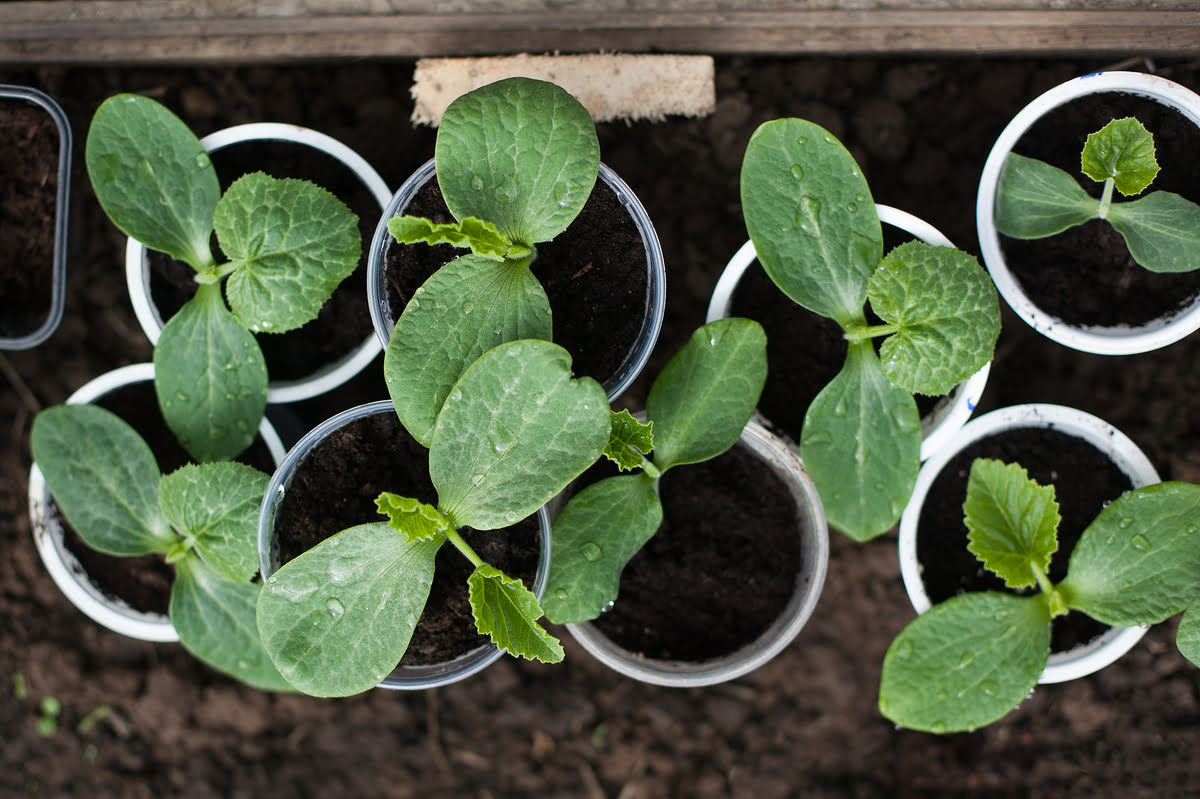
- Transplanting seedlings: If you purchased pre-grown seedlings, carefully remove them from their containers, taking care not to damage the roots. If starting from seeds, thin out the seedlings, keeping only the healthiest ones that are spaced according to the recommendations. Dig a hole in the prepared planting area and gently place the seedlings, making sure the roots are well-covered with soil. Firmly press down the soil around each seedling to provide stability.
- Watering: After transplanting the seedlings, give them a thorough watering to help them establish in their new environment. Provide enough water to saturate the root zone but avoid overwatering, which can lead to rot or fungal diseases. As the seedlings grow, monitor the soil moisture levels regularly and water when needed, aiming for around 1-1.5 inches of water per week.
- Protecting seedlings: To protect the newly transplanted seedlings from extreme weather conditions, consider using row covers or cloches until they become more established. These covers can also offer some protection against pests and help create a microclimate that promotes healthy growth. Remove the covers once the seedlings have acclimatized and are growing vigorously.
By either purchasing or preparing your corn seedlings, you are taking the crucial first step in the growth process. These young plants will develop into robust corn stalks that will eventually bear delicious ears of corn for you to enjoy!
Step 3: Transplant the corn seedlings
Once you have your corn seedlings ready, it’s time to transplant them into the prepared planting area. Transplanting ensures that the seedlings have enough space and resources to grow into healthy and productive corn plants. Follow these steps to transplant your corn seedlings:
- Choose the right time: Corn seedlings are best transplanted when they are 4-6 inches tall and have developed a sufficient root system. This usually occurs 2-3 weeks after the seedlings have emerged.
- Prepare the holes: Dig holes in the prepared planting area that are approximately 6 inches deep and spaced according to the recommended spacing for your particular corn variety. The spacing will vary depending on the size of the mature corn plant.
- Transplant the seedlings: Carefully remove the corn seedlings from their containers, gently teasing apart any tangled roots. Place each seedling in a prepared hole, ensuring that the roots are spread out and covered with soil. Be careful not to plant the seedlings too deeply as this can hinder their growth.
- Fill and firm the soil: Fill the hole with soil, gently pressing it down around the base of the seedling to provide support. Ensure that the soil is in firm contact with the roots to avoid air pockets. A firm planting will help the seedlings establish quickly.
- Water thoroughly: After transplanting, give the seedlings a thorough watering to settle the soil and help the roots adjust to their new environment. Water at the base of the plants to avoid wetting the foliage excessively. This will also encourage the roots to grow deeper in search of water.
- Provide support: As the corn plants grow, they may need support to prevent them from bending or breaking in strong winds. Install stakes or a trellis system around the planting area, and tie the corn stalks to the support structure as they grow taller.
By transplanting your corn seedlings properly, you are giving them the best chance at thriving in their new home. Ensure that they are well-watered and protected, and watch as they grow into magnificent corn plants, ready to produce a bountiful harvest!
Step 4: Water the seedlings
Proper watering is crucial for the healthy growth and development of your corn seedlings. Adequate moisture ensures that the plants receive the necessary nutrients and stay hydrated, enabling them to produce robust stalks and ears of corn. Follow these guidelines to water your corn seedlings effectively:
- Monitor soil moisture: Check the moisture level of the soil regularly to determine when to water. Stick your finger about an inch into the soil near the base of the seedlings. If it feels dry, it’s time to water. Avoid letting the soil become too dry or waterlogged, as both conditions can negatively impact plant health.
- Deep watering: When you water your corn seedlings, it’s important to provide deep watering to encourage strong root growth. Rather than surface watering, which only wets the top layer of soil, aim to moisten the soil to a depth of about 6 inches. This will encourage the roots to grow deeper, making the plants more resilient to drought conditions.
- Water at the base: When watering, direct the water at the base of the plants. Avoid wetting the foliage excessively, as this can promote the growth of fungal diseases. Watering at the base also ensures that the water reaches the roots directly, allowing for efficient absorption.
- Consistent watering: Corn plants require consistent moisture, especially during periods of active growth. Aim to provide around 1-1.5 inches of water per week, either through rainfall or irrigation. If rainfall is insufficient, you can supplement with manual watering using a garden hose or a drip irrigation system.
- Mulch the soil: Applying a layer of organic mulch around the base of the corn plants can help retain soil moisture and prevent weed growth. Spread a 2-3 inch layer of mulch, such as straw or shredded leaves, around the plants, being careful not to pile it against the stalks. The mulch will also help regulate soil temperature and reduce evaporation.
- Timing matters: Water your corn seedlings early in the day to allow any excess moisture to evaporate before nightfall. This helps prevent damp conditions, which can attract pests and encourage disease development. Morning watering also ensures that the plants have enough moisture to withstand the heat of the day.
By following these watering tips, you will provide your corn seedlings with the essential moisture they need to thrive. Consistent and appropriate watering will help the plants establish a strong root system, resulting in healthy growth and eventually, a bountiful harvest of delicious ears of corn.
Step 5: Provide adequate sunlight
Sunlight is a vital factor for the successful growth of corn seedlings. Corn plants require ample sunlight to photosynthesize and produce energy for growth. By providing the proper amount of sunlight, you can ensure that your corn plants develop robust stalks and yield flavorful ears of corn. Follow these guidelines to provide adequate sunlight for your corn seedlings:
- Choose a sunny location: Select a planting area that receives full sun, which is at least 6-8 hours of direct sunlight per day. Corn is a warm-season crop that thrives in bright sunlight and warm temperatures.
- Optimize planting orientation: If possible, orient your corn rows in a north-south direction. This maximizes the exposure of the plants to sunlight throughout the day, ensuring that all sides of the stalks receive adequate light.
- Minimize shading: Avoid planting your corn seedlings in areas where they will be shaded by large trees, buildings, or tall structures. These obstructions can block sunlight and reduce the amount of light the plants receive, hindering their growth.
- Thin out overcrowded seedlings: If you have planted multiple corn seedlings close together, thin them out according to the recommended spacing for your variety. Overcrowding can create shade and competition for sunlight, leading to weakened plants and reduced yield.
- Monitor potential shade sources: As the corn plants grow, be mindful of any nearby plants or structures that may cast shade on them. Trim back overhanging branches or relocate objects that obstruct sunlight to ensure that your corn seedlings receive the necessary light.
- Consider reflective surfaces: To enhance sunlight exposure, consider placing reflective surfaces, such as white or aluminum foil, around the planting area. These surfaces can help redirect and amplify the available sunlight, ensuring that it reaches all parts of the corn plants.
- Adjust for microclimates: If you are gardening in an area with microclimates, such as a warm or cool spot, be aware of the sunlight variations. Monitor how the sun moves throughout the day and adjust your planting locations accordingly to optimize light exposure.
By providing adequate sunlight, you are giving your corn seedlings the energy they need to grow strong and produce delicious ears of corn. Paying attention to their sun requirements and optimizing their exposure will contribute to a successful and fruitful corn harvest.
Step 6: Apply fertilizer
To ensure optimal growth and productivity, corn plants require a steady supply of essential nutrients. While fertile soil and organic matter can provide some nutrients, applying fertilizer is often necessary to meet the high nutrient demands of corn seedlings. Follow these guidelines to effectively fertilize your corn plants:
- Soil testing: Before applying fertilizer, it is beneficial to conduct a soil test to determine the specific nutrient needs of your soil. A soil test will provide information about the pH level, nutrient deficiencies, and recommendations for appropriate fertilizer application.
- Timing: It’s best to apply fertilizer before planting or during the early stages of growth. Incorporate the fertilizer into the soil during soil preparation or when transplanting the seedlings to ensure that the nutrients are readily available to the plants.
- Choosing the right fertilizer: Look for a balanced fertilizer, such as a 10-10-10 or 14-14-14 composition, that provides equal amounts of nitrogen (N), phosphorus (P), and potassium (K). These macronutrients are essential for healthy growth, root development, and overall plant vigor.
- Applying the fertilizer: Follow the instructions on the fertilizer package for the recommended application rates. Typically, you would apply the fertilizer in a band or trench about 2-3 inches away from the base of the corn seedlings or along the rows if direct sowing. Avoid placing the fertilizer directly in contact with plant stems to prevent burning.
- Watering after fertilizing: After applying the fertilizer, water the plants thoroughly. This helps dissolve the nutrients and allows them to reach the root system of the corn seedlings. Adequate moisture is necessary for nutrient uptake.
- Side-dressing: As the corn seedlings grow, consider side-dressing with nitrogen-rich fertilizer to support their ongoing nutrient needs. Side-dressing involves applying additional fertilizer alongside the rows or around the base of the plants when they are about knee-high or when they begin to show signs of yellowing.
- Organic alternatives: If you prefer organic gardening methods, you can utilize natural fertilizers, such as compost or well-rotted manure, to provide nutrients to your corn seedlings. These organic materials enrich the soil, improve its fertility, and promote long-term soil health.
By applying fertilizer appropriately, you are supplying your corn plants with the necessary nutrients to support their growth and development. Regular fertilization, whether with synthetic or organic options, will contribute to healthy plants and a successful corn harvest.
Step 7: Weed control
Keeping weeds under control is essential for the optimal growth and productivity of your corn plants. Weeds compete with corn seedlings for nutrients, water, and sunlight, and can hinder their growth and development. Implementing effective weed control measures will help your corn plants thrive. Follow these guidelines to manage weeds in your corn patch:
- Early prevention: Start weed control early to prevent weeds from establishing and spreading in your corn patch. Clear the planting area of weeds and remove any weed seeds or plant residues before planting or transplanting your corn seedlings.
- Mulching: Applying a layer of organic mulch around the base of your corn plants can suppress weed growth. Mulch helps smother weeds by blocking sunlight and preventing them from germinating. Use organic materials like straw, wood chips, or shredded leaves to create a weed barrier.
- Hand pulling: Regularly inspect your corn patch and manually remove weeds that emerge. Be careful when hand pulling to avoid damaging the corn seedlings. Pull weeds when they are small and easy to remove, before they have a chance to establish strong root systems.
- Mechanical cultivation: Using a hoe or cultivating tool, gently cultivate the soil around the corn plants to disrupt weed growth. Be cautious not to damage the roots or stems of the corn seedlings while removing the weeds. Regular shallow cultivation can help control weeds without harming your corn plants.
- Chemical weed control: If manual and mechanical methods are insufficient, you may consider using herbicides labeled for use in corn crops. Ensure that you read and follow the product instructions carefully, taking precautions to avoid contact with the corn plants. It’s essential to select herbicides that effectively target the specific types of weeds you are dealing with.
- Regular maintenance: Stay vigilant throughout the growing season and continue to monitor your corn patch for any new weed growth. Promptly remove any weeds that emerge to prevent them from competing with your corn plants for vital resources.
- Preventing weed spread: To prevent the spread of weed seeds, ensure that any weeds you remove are properly disposed of, especially if they have already produced seeds. Avoid composting weed-infested plants to prevent the weed seeds from germinating elsewhere.
By implementing effective weed control practices, you will create a healthier environment for your corn plants. Minimizing weed competition allows your corn seedlings to grow vigorously, maximize nutrient uptake, and produce a more abundant harvest of tasty corn ears.
Step 8: Monitor and protect from pests
Monitoring and protecting your corn plants from pests are crucial steps in ensuring a healthy and productive harvest. Corn can attract a variety of pests, including insects and small animals, that may damage the leaves, stems, and ears of the plants. By diligently monitoring and implementing pest control measures, you can safeguard your corn plants. Follow these guidelines to effectively monitor and protect your corn plants from pests:
- Regular inspection: Regularly inspect your corn plants for any signs of pest infestation. Look out for chewed foliage, irregular holes or patterns on leaves, discoloration, and wilting. Early detection allows for prompt action, minimizing potential damage.
- Beneficial insects: Encourage beneficial insects, such as ladybugs, lacewings, and parasitic wasps, that prey on common corn pests like aphids and caterpillars. Planting companion flowers and herbs, such as marigolds and dill, can attract these helpful insects to your garden.
- Physical barriers: Protect your corn plants from larger pests, such as birds and rodents, by using physical barriers. Install bird netting or mesh around the plants to prevent birds from pecking at the ears, and use fences or wire mesh to deter rodents.
- Organic pest control: Utilize organic pest control methods to minimize chemical use and protect the environment. Neem oil or insecticidal soaps can be applied to control common pests like aphids and spider mites. Ensure that you follow the instructions carefully and apply treatments during the recommended times.
- Integrated Pest Management (IPM): Implement an Integrated Pest Management approach, which combines multiple pest control strategies. This includes combining cultural practices, such as crop rotation and proper sanitation, with biological controls and targeted use of pesticides when necessary.
- Companion planting: Implement companion planting techniques to help deter pests. For example, planting mint or onions near corn can repel pests like aphids and other insects. Research suitable companion plants that can help deter specific pests common to your area.
- Trap cropping: Utilize trap crops, such as sunflowers or zinnias, that attract pests away from your corn plants. Pests will be drawn to the trap crops, minimizing damage to your corn plants. Regularly inspect and remove any pests from the trap crops to prevent them from spreading.
- Monitor pest populations: Regularly monitor the population levels of common corn pests in your garden. This can be done through visual inspection, sticky traps, or pheromone traps. By monitoring pest populations, you can take timely action if the numbers exceed a threshold that may lead to significant damage.
By being proactive in monitoring and protecting your corn plants from pests, you can ensure their health and productivity. Implement pest control measures in a timely manner, considering both organic and integrated approaches to minimize damage and promote a successful corn harvest.
Step 9: Harvesting the corn
After months of nurturing your corn plants, it’s time to reap the rewards of your hard work and enjoy the sweet and delicious ears of corn. Harvesting corn at the right time ensures that you enjoy the maximum flavor and tenderness. Follow these guidelines for a successful corn harvest:
- Monitor maturity: Keep an eye on the ears of corn as the plants approach maturity. You can determine ripeness by observing the color of the silks, which should turn brown and dry, and by gently squeezing a kernel to check for a milky, not watery, consistency.
- Timing: Harvest corn when the ears are fully mature but not overripe. Aim to harvest within 14-20 days after the silks appear. If you’re unsure, you can make a test harvest by picking one ear and checking its taste and texture to gauge the readiness of the remaining ears.
- Harvesting techniques: To harvest, firmly hold the stalk with one hand and twist the ear downward with a quick, snapping motion. Alternatively, you can use a sharp knife or garden shears to cut the ear from the stalk at the base. Avoid damaging the stalk or nearby ears during the process.
- Field corn vs. sweet corn: If you’re growing field corn (grown for drying or grinding) rather than sweet corn, allow the ears to stay on the stalks until the husks turn brown and dry. Harvest the ears and dry them further in a well-ventilated area before grinding or using for other purposes.
- Post-harvest handling: After harvesting, remove the husks and silk from the ears. To retain maximum flavor and tenderness, immediately cook or refrigerate the corn. The sugar content in the kernels begins to convert to starch once it’s picked, affecting the taste and texture.
- Eating and preserving: Freshly harvested corn can be enjoyed by boiling, grilling, or steaming the ears until the kernels are tender. Leftover corn can be frozen by blanching the ears briefly in boiling water, cooling them quickly in ice water, and then storing them in airtight freezer bags or containers.
- Seed saving: If you would like to save seeds for the next planting season, allow a few ears of sweet corn to fully mature on the stalk. Once dried, remove the kernels from the ears, ensure they are completely dry, and store them in a cool, dry place until ready for planting.
Harvesting corn is a satisfying and enjoyable part of the edible gardening journey. By following these guidelines, you can ensure that you pluck your corn at its peak ripeness for a flavorful and memorable harvest.
Conclusion
Growing corn seedlings and tending to them until harvest can be a fun and rewarding experience. By following the steps outlined in this guide, you can successfully cultivate healthy corn plants and enjoy a bountiful harvest of delicious ears. From preparing the planting area and transplanting the seedlings to ensuring adequate sunlight, water, and nutrients, each step plays a crucial role in the growth and development of your corn crop.
Remember to monitor your corn plants regularly for signs of pests, diseases, or nutrient deficiencies. By promptly addressing any issues that arise, you can protect your plants and ensure their continued health and productivity. Harvest your corn at the right time, when the ears are mature but not overripe, and savor the sweet and tender kernels fresh from the garden or preserved for future enjoyment.
Edible gardening is a journey of learning and discovery, and growing corn seedlings is a delightful part of that adventure. As you gain experience, you can experiment with different corn varieties, planting techniques, and pest control methods to refine your approach and improve your harvest year after year.
So, whether you have a large backyard or a small balcony, don’t hesitate to embark on the journey of growing your own corn. With dedication, knowledge, and a little bit of patience, you can experience the joy of harvesting and enjoying the flavors of freshly grown corn right at home.
