Home>Garden Design>Landscape Design>How To Layer Plants In Landscaping
Landscape Design
How To Layer Plants In Landscaping
Modified: January 22, 2024
Learn how to layer plants in your landscape design for a stunning and dynamic outdoor space. Transform your garden with expert tips and techniques.
(Many of the links in this article redirect to a specific reviewed product. Your purchase of these products through affiliate links helps to generate commission for Chicagolandgardening.com, at no extra cost. Learn more)
Table of Contents
Introduction
Welcome to the wonderful world of landscaping! Transforming your outdoor space into a beautiful oasis requires careful planning and strategic design. One technique that can elevate your landscaping to the next level is layering plants. This artful approach involves creating depth and dimension by arranging plants of various heights, textures, and colors to create a visually stunning landscape.
Layering plants not only enhances the aesthetic appeal of your garden, but it also has functional benefits. It allows you to maximize space, add visual interest, create focal points, and improve overall plant health. Whether you have a small cozy backyard or a sprawling garden, incorporating layering techniques can add depth and complexity to your outdoor space.
As with any landscaping endeavor, successful plant layering requires careful consideration and planning. You’ll need to choose the right plants that complement each other in terms of height, foliage, and blooming season. Additionally, you’ll need to ensure that the plants have adequate sunlight, water, and nutrient requirements to thrive in their respective layers.
In this article, we will explore the benefits of layering plants in landscaping, discuss how to choose the right plants for layering, provide guidance on planning the layout, share tips on preparing the soil, and offer a step-by-step guide on how to layer plants effectively.
So, grab your gardening gloves and let’s dive into the exciting world of plant layering to create a captivating and vibrant landscape for your outdoor space!
Benefits of Layering Plants in Landscaping
Layering plants in landscaping offers numerous benefits that can enhance the beauty and functionality of your outdoor space. Here are some key advantages of incorporating plant layering techniques:
- Visual Appeal: One of the primary benefits of plant layering is the visual interest it adds to your garden. By combining plants of different heights, textures, and colors, you create a dynamic and aesthetically pleasing landscape. The layers provide depth and dimension, making your garden more visually appealing and inviting.
- Maximized Space: Layering plants allows you to maximize the use of limited space. By utilizing vertical and horizontal space effectively, you can create an illusion of a larger garden. Taller plants can be placed towards the back, while shorter ones can be positioned towards the front. This technique helps create a sense of depth and makes your garden appear more spacious.
- Focal Points: Plant layering facilitates the creation of focal points in your garden. By strategically positioning taller or more unique plants, you can draw attention to specific areas and create visual anchors. A bold tree or a vibrant flowering shrub can serve as a focal point, adding interest and capturing the eye.
- Seasonal Interest: Layering plants ensures year-round visual interest by incorporating plants with varying blooming seasons and foliage color. With careful selection, you can have plants that bloom in different seasons, providing colorful displays throughout the year. This creates a dynamic and ever-changing landscape that keeps your garden looking beautiful in any season.
- Improved Plant Health: When plants are layered, they create a microclimate that can benefit their growth and health. Taller plants provide shade and protection for shorter plants, reducing evaporation and preserving soil moisture. This microclimate also helps to buffer against extreme temperatures and winds, creating more favorable conditions for plant growth.
The benefits of layering plants in landscaping go beyond visual appeal. It allows you to maximize your space, create focal points, provide year-round interest, and improve overall plant health. These advantages make plant layering an essential technique in creating a stunning and thriving outdoor space.
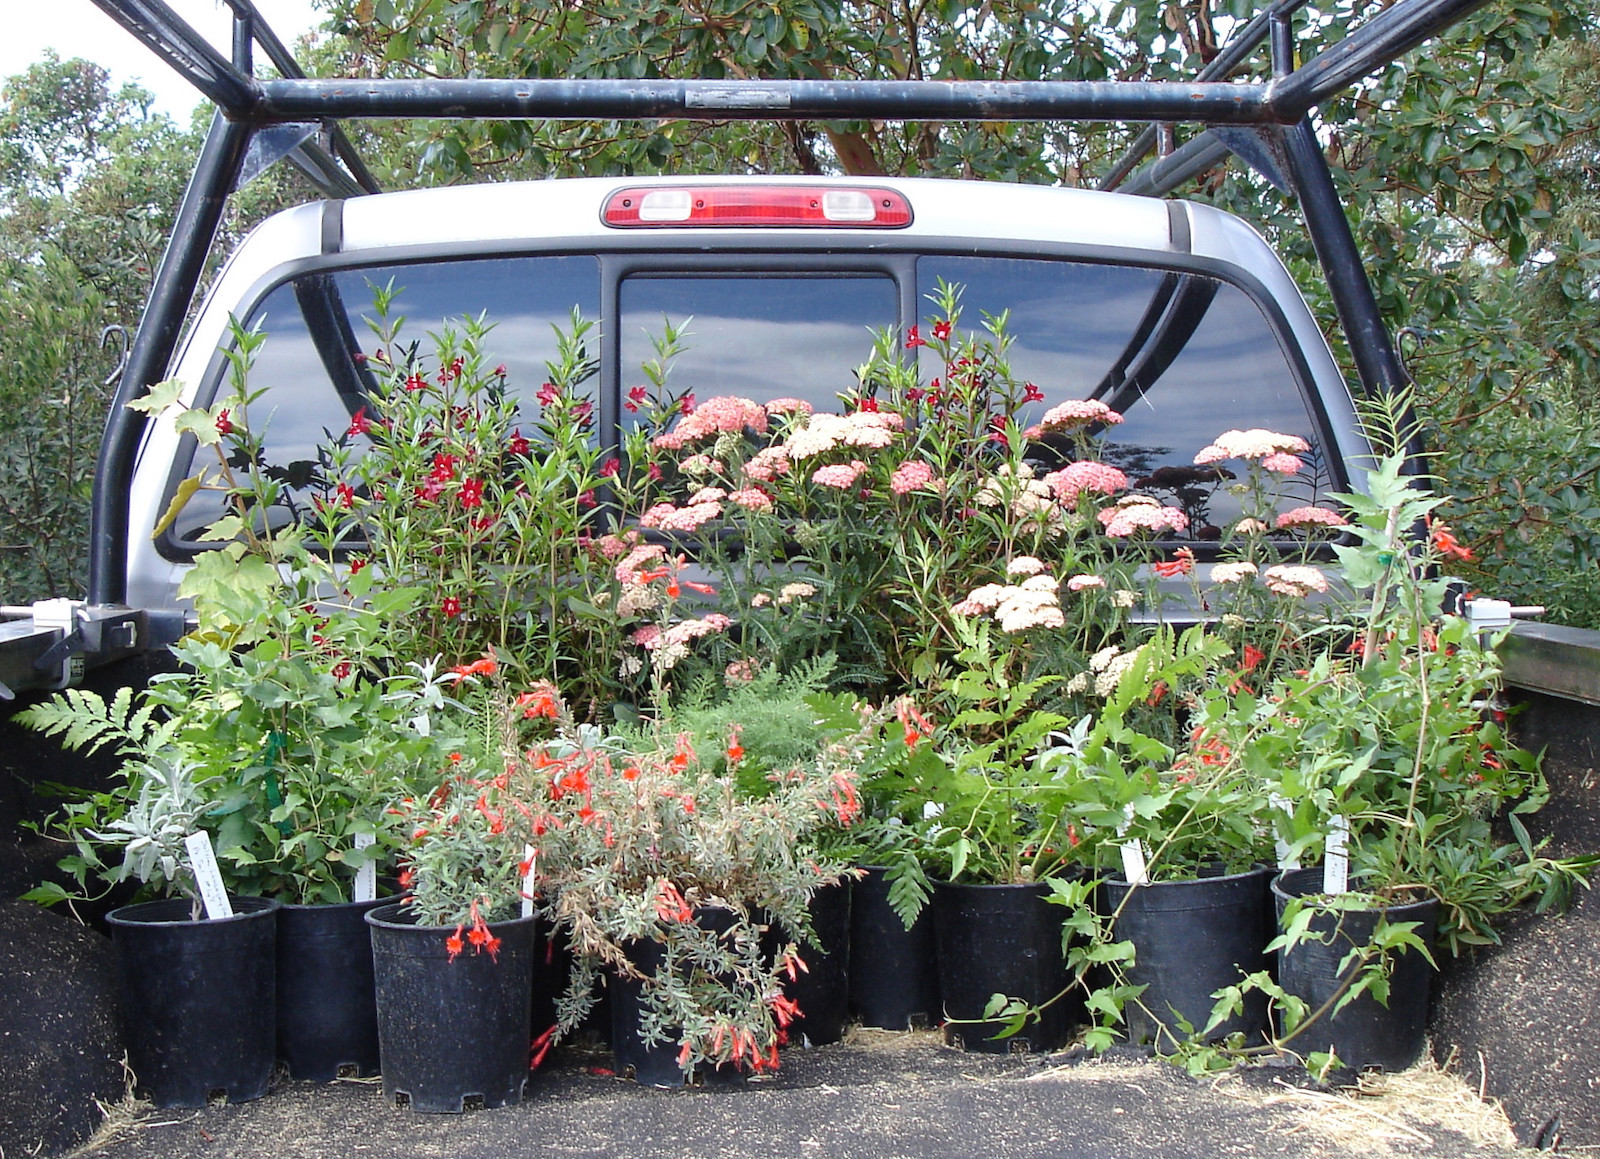
Choosing the Right Plants for Layering
Choosing the right plants for layering is crucial to create a harmonious and visually appealing landscape. Here are some factors to consider when selecting plants for layering:
- Plant Height: Opt for plants of varying heights to create a visually dynamic effect. Choose taller plants for the back or center of the layered garden, and shorter plants for the front or edges. This height variation adds depth and interest to the overall landscape.
- Foliage Texture: Incorporate plants with a mix of foliage textures. Combining plants with different leaf shapes and textures, such as broad leaves, feathery foliage, or fine-textured leaves, adds visual interest and contrast to the layered design.
- Blooming Season: Choose plants that bloom at different times of the year to ensure year-round color and interest. This allows your layered garden to have a continuous display of blooms, ensuring a vibrant and ever-changing landscape throughout the seasons.
- Color Palette: Consider the color scheme and choose plants that complement each other. Harmonize the colors in your layered garden by selecting plants with flowers or foliage that harmonize or contrast with one another. Use different shades and tones to create depth and visual harmony.
- Light and Water Requirements: Pay attention to the specific light and water requirements of each plant. Ensure that the plants in each layer have similar needs to ensure optimal growth and health. This will simplify maintenance and make it easier to provide the necessary conditions for each plant.
- Growth Habit: Take into account the growth habits of the plants. Some plants may spread and fill out a large space, while others may grow tall and upright. Choose plants that have compatible growth habits and will not overcrowd or overshadow one another in the layered garden.
Consider creating a plant list or sample layout to visualize how the chosen plants will work together in your layered design. Take into account their individual growth habits, colors, textures, and blooming seasons to create a cohesive and visually engaging composition.
By carefully selecting plants that vary in height, foliage texture, blooming season, color palette, and growth habits, you can create a layered garden that is visually cohesive, visually appealing, and harmonious. Remember to consider the specific requirements of each plant and plan accordingly to ensure their successful growth and development.
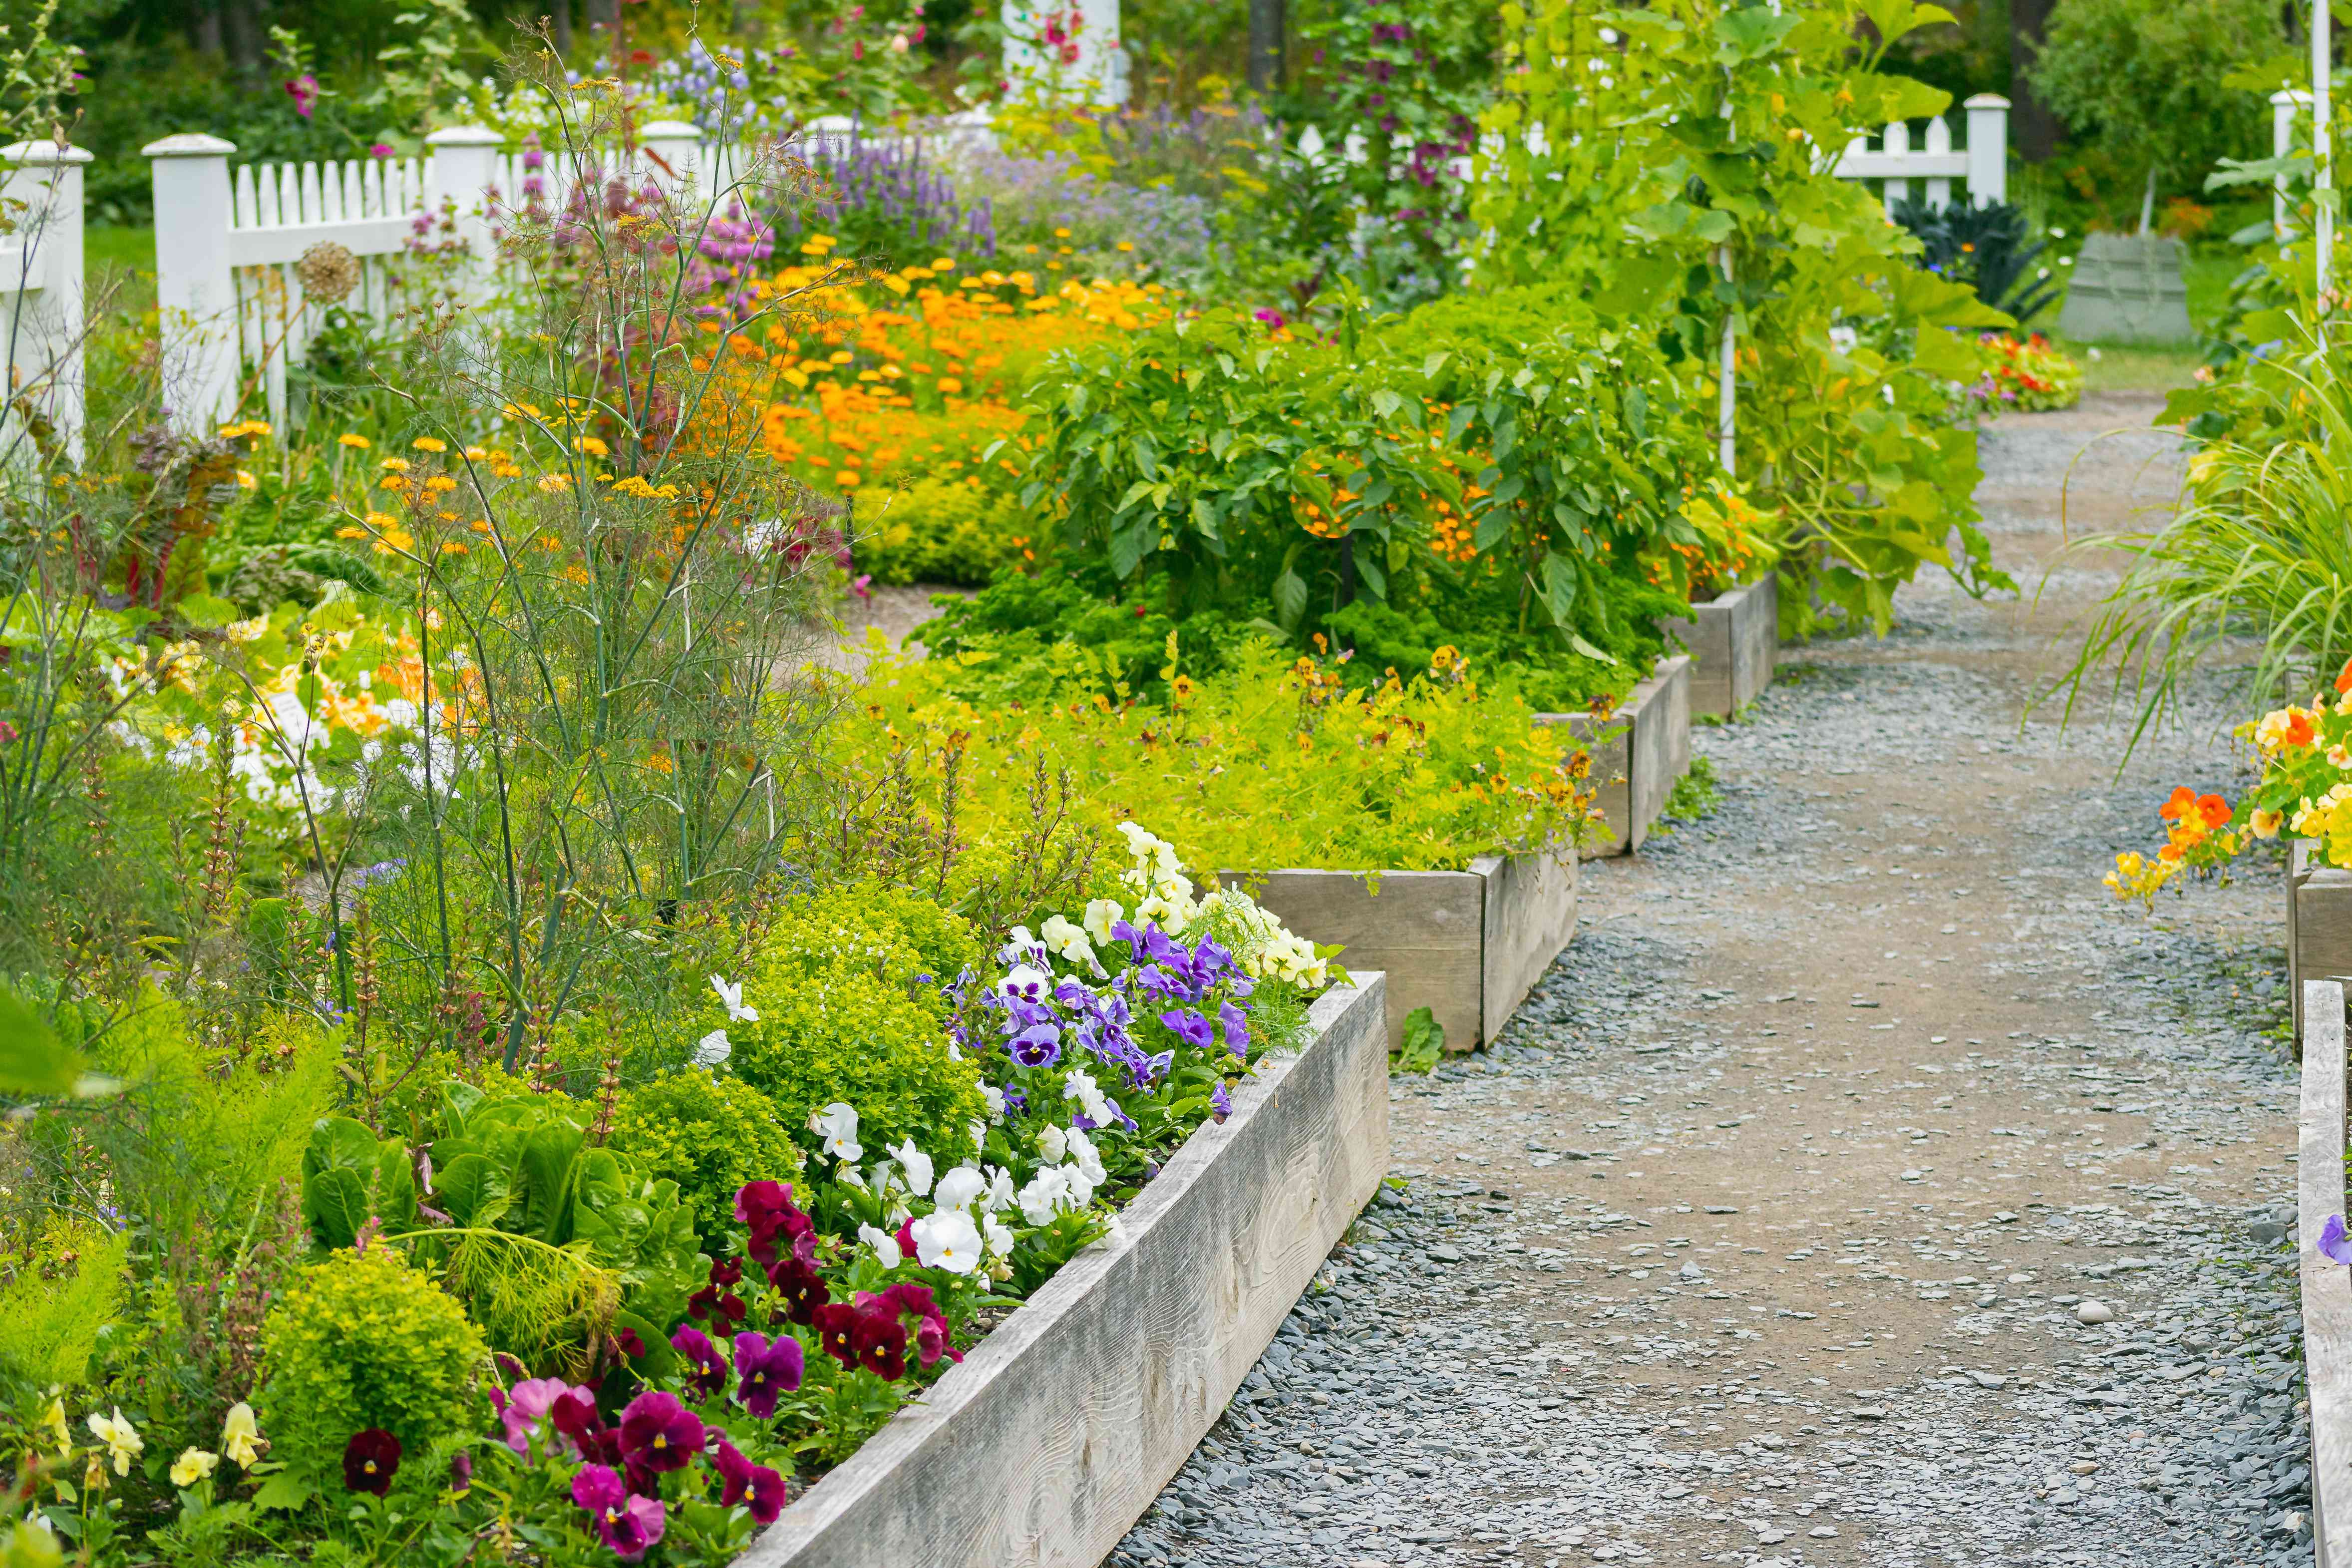
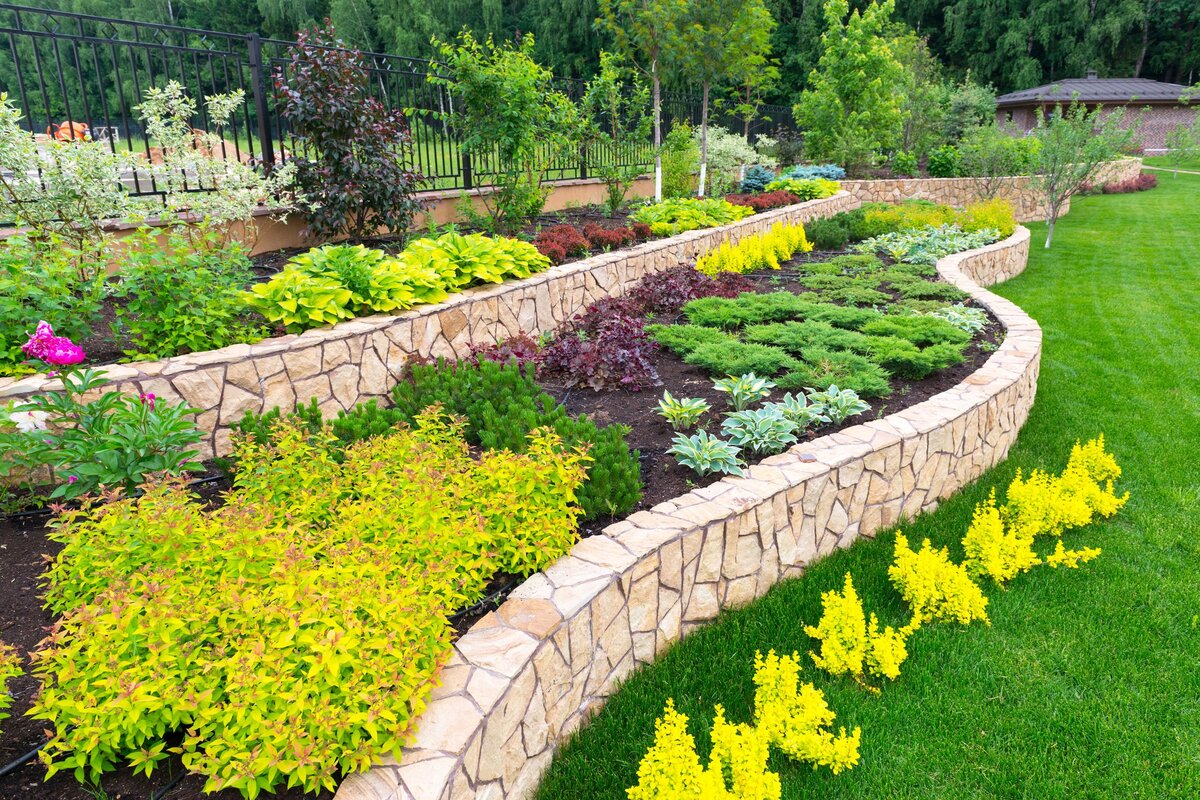
Planning the Layout of Layered Plants
Planning the layout of layered plants is a crucial step in creating a cohesive and visually pleasing landscape. Here are some tips to help you plan the layout of your layered garden:
- Consider the Site: Assess the site conditions of your garden, including the amount of sunlight, soil type, and drainage. Different plants have different needs, so it’s important to choose plants that are suited to the specific conditions of your site.
- Zoning: Divide your garden into different zones based on the plants’ height and growth habit. This will help you determine where to place taller plants, shrubs, and groundcovers. Create layers by positioning the taller plants towards the back or center and gradually decrease the height towards the front or edges.
- Focal Points: Identify areas in your garden where you would like to create focal points. These can be areas that naturally draw attention or areas that you want to highlight. Place taller or more unique plants in these areas to create focal points and add visual interest.
- Proportions: Pay attention to the proportions of the plants in your design. Avoid overcrowding or sparse spacing by choosing plants that will fill out the respective layers appropriately. Consider the mature size of each plant and allow enough space for them to grow and thrive.
- Repetition and Balance: Incorporate repetition and balance in your layered garden design. Repeat certain plants or plant combinations throughout the layers to create a sense of unity and cohesion. Balance the placement of plants and ensure an even distribution of visual weight throughout the different layers.
- Transition and Flow: Create a smooth transition and flow between the layers. Avoid abrupt changes in plant height or texture that may cause visual disruptions. Use transitional plants or gradual changes to ensure a seamless and natural flow from one layer to another.
- Seasonal Interest: Consider how the layers will change throughout the seasons. Plan for plants that will provide color, texture, or interest during specific times of the year. This will ensure that your layered garden remains visually appealing and engaging throughout all seasons.
Visualize your design using sketches or garden design software to get a better idea of how the layers will interact and complement each other. Revise and adjust the layout as needed to achieve the desired balance, harmony, and aesthetic appeal.
By carefully planning the layout of your layered plants, taking into account site conditions, zoning, focal points, proportions, repetition, balance, transition, and seasonal interest, you can create a visually stunning and well-balanced garden that will bring joy and beauty to your outdoor space.
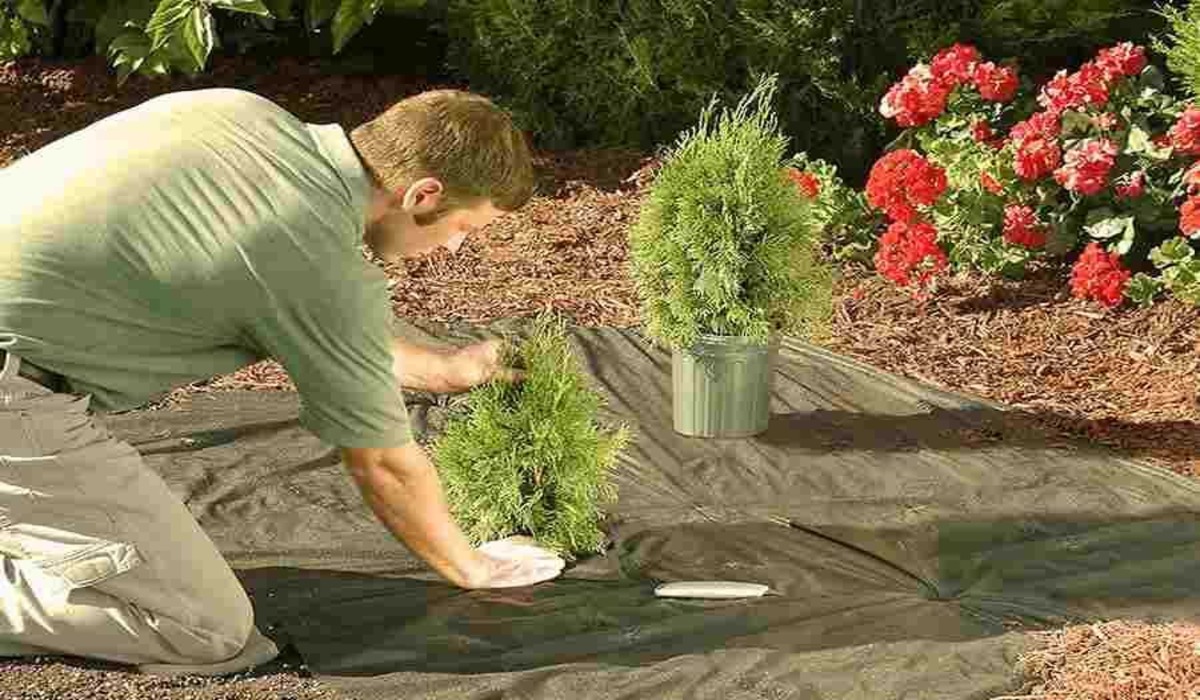
Preparing the Soil for Layering
Preparing the soil is a critical step in creating a healthy and thriving layered garden. Proper soil preparation provides a solid foundation for plant growth and ensures optimal nutrient availability. Here are some steps to prepare the soil for layering:
- Clear the Area: Begin by removing any existing weeds, rocks, or debris from the planting area. Clearing the area allows you to work with a clean canvas and prevents competition between weeds and the layered plants for vital resources.
- Test the Soil: Test the soil to determine its pH level and nutrient composition. You can do this using a home soil testing kit or by sending a sample to a local agricultural extension office for analysis. Understanding the soil’s characteristics will help you determine if any amendments are needed.
- Amend the Soil: Based on the results of the soil test, amend the soil as necessary. Adding organic matter, such as compost, well-rotted manure, or leaf mold, can improve the soil structure and provide essential nutrients. Incorporate the amendments into the top few inches of soil using a garden fork or tiller.
- Improve Drainage: If the soil has poor drainage, consider incorporating organic matter like compost or sand to improve its structure. This helps prevent waterlogging and ensures that the plants’ roots will not become saturated, which can lead to root rot.
- Enhance Nutrient Levels: If the soil is deficient in certain nutrients, consider adding organic fertilizer or slow-release granules with the appropriate nutrient balance. Follow the instructions on the fertilizer package for the correct application rates and timing.
- Loosen the Soil: Use a garden fork or tiller to loosen the soil in the planting area. This will break up any compacted soil and create a loose, well-aerated environment for the plants’ roots to penetrate and access nutrients more easily.
- Apply Mulch: After planting the layered plants, apply a layer of organic mulch around the plants’ base. Mulching helps conserve moisture, suppresses weed growth, and regulates soil temperature. Use a 2-3 inch layer of mulch, making sure to keep it a few inches away from the base of the plants to prevent moisture-related issues.
- Regular Soil Maintenance: Ongoing soil maintenance is essential for the health of your layered garden. Regularly monitor soil moisture levels, ensuring it is consistently moist but not waterlogged. Avoid overwatering or allowing the soil to dry out completely. Regularly check for weeds and remove them promptly to prevent competition for resources.
By following these steps to prepare the soil for layering, you establish an optimal growing environment for your plants. The well-prepared soil provides the necessary nutrients, good drainage, and aeration that will support the healthy growth and development of your layered garden.
Step-by-Step Guide to Layering Plants
Creating a layered garden involves careful planning and execution. Here is a step-by-step guide to help you successfully layer plants:
- Plan and Design: Begin by visualizing and planning the layout of your layered garden. Take into consideration the height, texture, and color of the plants you want to include. Create a rough sketch or use garden design software to map out the different layers and their arrangement.
- Prepare the Soil: Before planting, ensure that the soil is properly prepared as mentioned in the previous section. Clear the area, test the soil, amend it if necessary, and ensure good drainage to provide a healthy foundation for your plants.
- Start with the Tallest Plants: Begin by planting the tallest plants in the back or center of the layered area. These can be trees, large shrubs, or tall ornamental grasses. Dig a hole large enough to accommodate the plant’s root ball and position it at the desired height in the layered design.
- Add Mid-sized Plants: After planting the tallest plants, move on to the mid-sized plants. These can be medium-sized shrubs or perennials. Place them in front of the taller plants, ensuring they complement each other in terms of height, foliage texture, and color. Adjust their positioning to create a harmonious transition between the different layers.
- Include Groundcovers: Next, add groundcovers or low-growing plants to the front or edges of the layered area. These plants provide a finishing touch and help create a cohesive look. Select groundcovers that spread and fill out the space, adding texture and visual interest to the lower layer.
- Water Thoroughly: After planting each layer, water the plants thoroughly to settle the soil and ensure proper root establishment. Apply water at the base of the plants, allowing it to soak into the root zone. Use a gentle stream of water to avoid disturbing the newly planted layers.
- Maintain Proper Care: To help the layered plants thrive, provide regular care and maintenance. This includes watering as needed, fertilizing according to plant requirements, pruning to maintain desired shape and size, and removing any weeds or pests that may occur.
- Monitor and Adjust: Keep an eye on the growth and development of the layered plants. Monitor their health and make adjustments if necessary. Over time, some plants may require pruning or repositioning to maintain the desired layering effect.
Remember to consider the specific requirements of each plant, such as sunlight, water, and nutrient needs, and provide the necessary conditions for their optimal growth and development.
By following these step-by-step guidelines, you can successfully create a stunning and well-layered garden that will provide visual interest, depth, and beauty to your outdoor space.
Maintaining and Caring for Layered Plants
Proper maintenance and care are essential to keep your layered plants healthy and thriving. Here are some important tips for maintaining and caring for your layered garden:
- Watering: Regularly water your layered plants to ensure they receive the right amount of moisture. Monitor the soil moisture levels and water deeply, providing enough water to reach the root zone. Avoid overwatering, as it can lead to root rot, and underwatering, which can cause stress and stunted growth.
- Fertilization: Feed your layered plants with appropriate fertilizers to provide essential nutrients. Use a slow-release granular fertilizer or organic fertilizers that are suited to the specific needs of your plants. Follow the instructions on the package to determine the correct amount and frequency of application.
- Pruning: Regularly prune your layered plants to maintain their shape, remove dead or damaged branches, and promote healthy growth. Pruning also helps manage the size of the plants and prevents overcrowding within the layers. Ensure you use clean and sharp pruning tools to minimize damage to the plants.
- Weeding: Keep an eye out for weeds and promptly remove them to prevent competition for nutrients and space. Regularly inspect the layered area for any unwanted vegetation and pull them out by hand or use appropriate weeding tools while being careful not to disturb the roots of your plants.
- Pest and Disease Control: Monitor your layered plants for signs of pests or diseases. Take immediate action if you notice any infestations or symptoms. Use organic or chemical pest control methods as necessary, following the instructions carefully. Proper plant spacing and good airflow can also discourage pest and disease development.
- Seasonal Care: Adjust your care routine to accommodate seasonal changes. Provide extra protection, such as mulching, during colder months to insulate the roots and prevent winter damage. During periods of extreme heat, ensure adequate watering to prevent drought stress. Adjust fertilization schedules based on the specific needs of your plants during different seasons.
- Regular Observation: Regularly observe and monitor your layered garden for any changes or issues. Look for signs of nutrient deficiencies, pests, diseases, or any signs of stress. Early detection allows for timely intervention and helps maintain the health and vitality of your plants.
- Adjustments and Maintenance: As your layered plants grow, some adjustments may be necessary. Prune or relocate plants that have outgrown their designated layer. Maintain the desired balance and aesthetics by trimming as needed and ensuring that each layer is visually appealing and harmonious.
Maintaining and caring for your layered plants is an ongoing process. Regular monitoring, proper watering, fertilization, pruning, and pest control are crucial for their health and longevity. By providing the necessary attention and care, you can enjoy a thriving and visually captivating layered garden for years to come.
Troubleshooting Common Issues with Layered Plants
While layering plants can create a stunning and vibrant garden, there may be some challenges that arise along the way. Here are some common issues that you may encounter with layered plants and how to troubleshoot them:
- Overcrowding: Over time, plants in your layered garden may become overcrowded, leading to competition for resources and stunted growth. Regular pruning and thinning of the plants can help alleviate this issue. Remove any excessive growth or plants that have outgrown their allocated space to maintain a balanced and visually pleasing composition.
- Unbalanced Layers: Sometimes, the layers in your garden may become unbalanced, with some plants growing taller or more vigorously than others. To address this, consider pruning the taller plants to maintain the desired layering effect. You can also add plants of appropriate size and growth habit to fill gaps and restore balance to the layers.
- Pest Infestations: Insects and pests can pose a threat to the health and well-being of your layered plants. Regularly inspect your garden for signs of infestation, such as chewed leaves or wilting plants. Identify the pests and use appropriate pest control methods, including organic alternatives whenever possible, to manage the infestation and protect your plants.
- Disease Outbreaks: Plants in a layered garden can sometimes be susceptible to diseases, such as fungal infections or bacterial diseases. Ensure proper spacing between plants and promote good airflow to minimize the risk of disease. If a disease outbreak occurs, identify the specific issue and take appropriate action, such as removing infected plants or applying targeted treatments.
- Improper Watering: Improper watering practices can lead to plant stress, root rot, or dehydration. Be mindful of the water needs of each layer and provide adequate moisture accordingly. Avoid overwatering by allowing the top few inches of soil to dry out between watering sessions. Adjust your watering routine based on seasonal changes and the specific requirements of your plants.
- Nutrient Deficiencies: Lack of essential nutrients can affect the health and growth of your layered plants. Monitor the foliage for signs of nutrient deficiencies, such as yellowing leaves or poor growth. Use a balanced fertilizer or organic amendments to address the specific nutrient needs of your plants and promote healthy growth.
- Environmental Stress: Extreme weather conditions, such as heatwaves or frost, can cause stress to your layered plants. Provide adequate protection during harsh weather by using shade cloth, frost blankets, or protective coverings. Mulching can also help regulate soil temperature and conserve moisture, reducing stress on the plants.
- Improper Plant Selection: Incorrectly selecting plants that are not suited to your climate, sunlight conditions, or soil type can lead to poor growth or plant failure. Research and choose plants that are well adapted to your specific region and meet the requirements of your garden conditions. This will help ensure the success of your layered garden.
By being proactive and addressing these common issues as they arise, you can maintain the health and beauty of your layered garden. Regular monitoring, prompt action, and adjusting care practices as needed will help you troubleshoot and overcome any challenges that may arise along the way.
Conclusion
Creating a stunning and visually captivating garden is possible with the artful technique of layering plants. By incorporating plants of varying heights, textures, and colors, you can transform your outdoor space into a multi-dimensional landscape that is both visually appealing and functional.
Throughout this article, we explored the benefits of layering plants in landscaping, including enhanced visual appeal, maximized space utilization, the creation of focal points, year-round interest, and improved plant health. We learned how to choose the right plants for layering based on factors such as height, foliage texture, blooming season, color palette, and growth habit.
Additionally, we discussed the importance of planning the layout, preparing the soil, and provided a step-by-step guide to successfully layering plants. We emphasized the significance of maintaining and caring for layered plants, addressing common issues such as overcrowding, unbalanced layers, pest infestations, disease outbreaks, improper watering, nutrient deficiencies, environmental stress, and improper plant selection.
Remember, the key to a successful layered garden lies in regular maintenance, monitoring, and providing the right care for your plants. With proper watering, fertilization, pruning, pest control, and attention to seasonal changes, you can enjoy a flourishing and vibrant layered garden year-round.
So, whether you have a small backyard or a large garden, why not unleash your creativity and implement plant layering techniques to elevate your outdoor space? With careful planning and thoughtful consideration of plant selection, you can transform your garden into a captivating oasis that will bring joy, beauty, and relaxation for years to come.