Home>Gardening News and Trends>Latest News>Which End Is Up When You Plant Elephant Ears
Latest News
Which End Is Up When You Plant Elephant Ears
Modified: February 10, 2024
Discover the Latest News and Tips for Planting Elephant Ears, Including Which End Should Be Facing Up
(Many of the links in this article redirect to a specific reviewed product. Your purchase of these products through affiliate links helps to generate commission for Chicagolandgardening.com, at no extra cost. Learn more)
Table of Contents
Introduction
Elephant ears, also known as colocasia or taro plants, are a stunning addition to any garden or landscape. These tropical plants are known for their large, heart-shaped leaves that resemble the ears of an elephant, hence the name. With their bold foliage and impressive size, elephant ears can create a dramatic focal point in your outdoor space.
Aside from their aesthetic appeal, elephant ears are relatively easy to grow and care for, making them a popular choice among gardeners of all skill levels. Whether you’re a seasoned gardener looking to add some exotic flair to your space or a beginner eager to try your hand at growing unique plants, elephant ears are sure to impress.
In this article, we will explore the steps to successfully plant and cultivate elephant ears. From selecting the right location to caring for these plants throughout the year, we will cover everything you need to know to ensure their health and longevity. So let’s dive in and discover the captivating world of elephant ears!
What are Elephant Ears?
Elephant ears, scientifically known as colocasia or taro plants, are herbaceous perennial plants native to Southeast Asia and the tropical regions of the Americas. They belong to the family Araceae and are characterized by their large, heart-shaped leaves that can grow up to 3 feet long.
These plants are renowned for their impressive foliage, which comes in various shades of green, ranging from light and vibrant to deep and dark. Some varieties even feature variegated or patterned leaves, adding a captivating element to their visual appeal.
Aside from their striking leaves, elephant ears also produce unique flowers known as spathes. The spathes are typically surrounded by a modified leaf called a spathe that forms a hood-like structure. The flowers themselves are small and inconspicuous, usually hidden within the spathe.
While elephant ears are primarily grown for their ornamental foliage, they have also been cultivated for their edible tubers. In certain cultures, the tubers of the taro plant are harvested and used as starchy vegetables in various culinary dishes.
It’s important to note that while elephant ears are visually similar to another plant called “calla lilies,” they are not related. Calla lilies belong to the family Araceae as well, but they are a separate genus and have different growth patterns and characteristics.
Overall, elephant ears are revered for their unique and eye-catching foliage, making them a popular choice among gardeners and plant enthusiasts alike.
Selecting the Right Location
When it comes to planting elephant ears, choosing the right location is crucial for their overall growth and development. Here are a few factors to consider when selecting the perfect spot for your elephant ears:
- Sunlight: Elephant ears thrive in areas with partial to full sun. While they can tolerate some shade, they generally require at least 4-6 hours of direct sunlight each day to flourish. Ensure that the chosen location receives adequate sunlight to promote healthy leaf growth.
- Soil Conditions: Elephant ears prefer well-draining soil that is rich in organic matter. They thrive in soil that is moist but not waterlogged. Avoid planting them in soil that is too compact or heavy, as it can lead to root rot and hinder growth. Consider amending the soil with compost or well-rotted manure to improve its moisture retention and fertility.
- Climate: Elephant ears are tropical plants and thrive in humid climates. They prefer temperatures between 65-85°F (18-29°C) and high humidity levels. If you live in a region with colder winters, it’s important to choose a location that offers protection from frost and cold winds.
- Space: Elephant ears can grow quite large, both in height and width. Take into account the mature size of the specific variety you’re planting and ensure that there is enough space for it to spread without overcrowding other plants. This will allow the foliage to develop to its full potential.
Consider these factors when choosing the perfect spot for your elephant ears. Providing them with the right conditions will contribute to their overall health and ensure that they thrive in your garden.
Preparing the Soil
Before planting elephant ears, it’s essential to prepare the soil to create an optimal growing environment for these tropical beauties. Here are some steps to follow when preparing the soil:
- Clear the area: Start by clearing the area of any weeds, rocks, or debris. You want to provide a clean and clutter-free space for your elephant ear plants to grow.
- Loosen the soil: Use a garden fork or tiller to loosen the soil to a depth of 8-10 inches. This will help improve drainage and make it easier for the roots to establish and grow.
- Amend the soil: Enhance the soil’s fertility by adding organic matter such as compost, well-rotted manure, or peat moss. These amendments will help improve the soil’s structure, nutrient content, and water retention capabilities.
- Test the pH: Elephant ears prefer a slightly acidic to neutral soil pH ranging from 6.0 to 7.0. Test the soil pH using a testing kit and make any necessary adjustments with the addition of lime to raise the pH or elemental sulfur to lower it.
- Add nutrients: To give your elephant ears a nutrient boost, incorporate a slow-release fertilizer into the soil during the preparation stage. Choose a balanced fertilizer with equal ratios of nitrogen, phosphorus, and potassium for overall plant health.
- Mulch: Once the soil is prepared, apply a layer of organic mulch around the plants. Mulching helps regulate soil temperature, conserve moisture, and suppress weed growth. Use a layer of mulch that is 2-3 inches thick, leaving space around the base of the plants.
By following these steps and taking the time to prepare the soil adequately, you will create an ideal environment for your elephant ears to thrive. Good soil preparation sets the foundation for healthy growth and ensures that your plants receive the necessary nutrients and moisture they need to flourish.
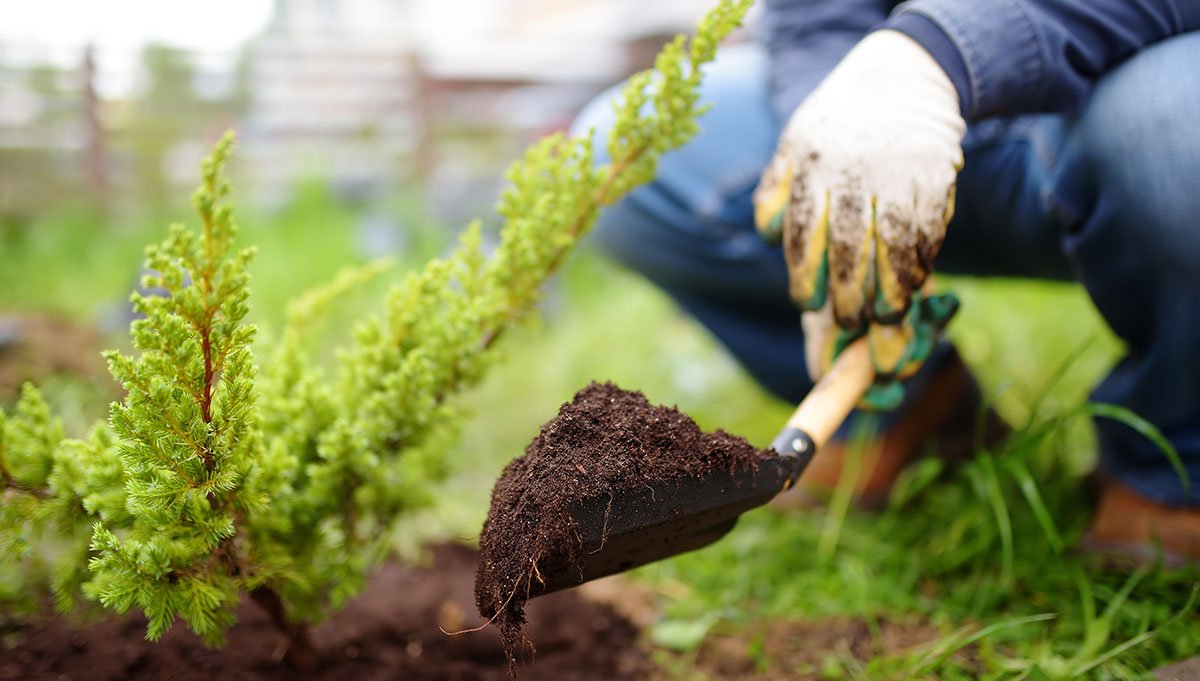
Planting Elephant Ears
Now that you have prepared the soil, it’s time to plant your elephant ears. Follow these steps to ensure proper planting:
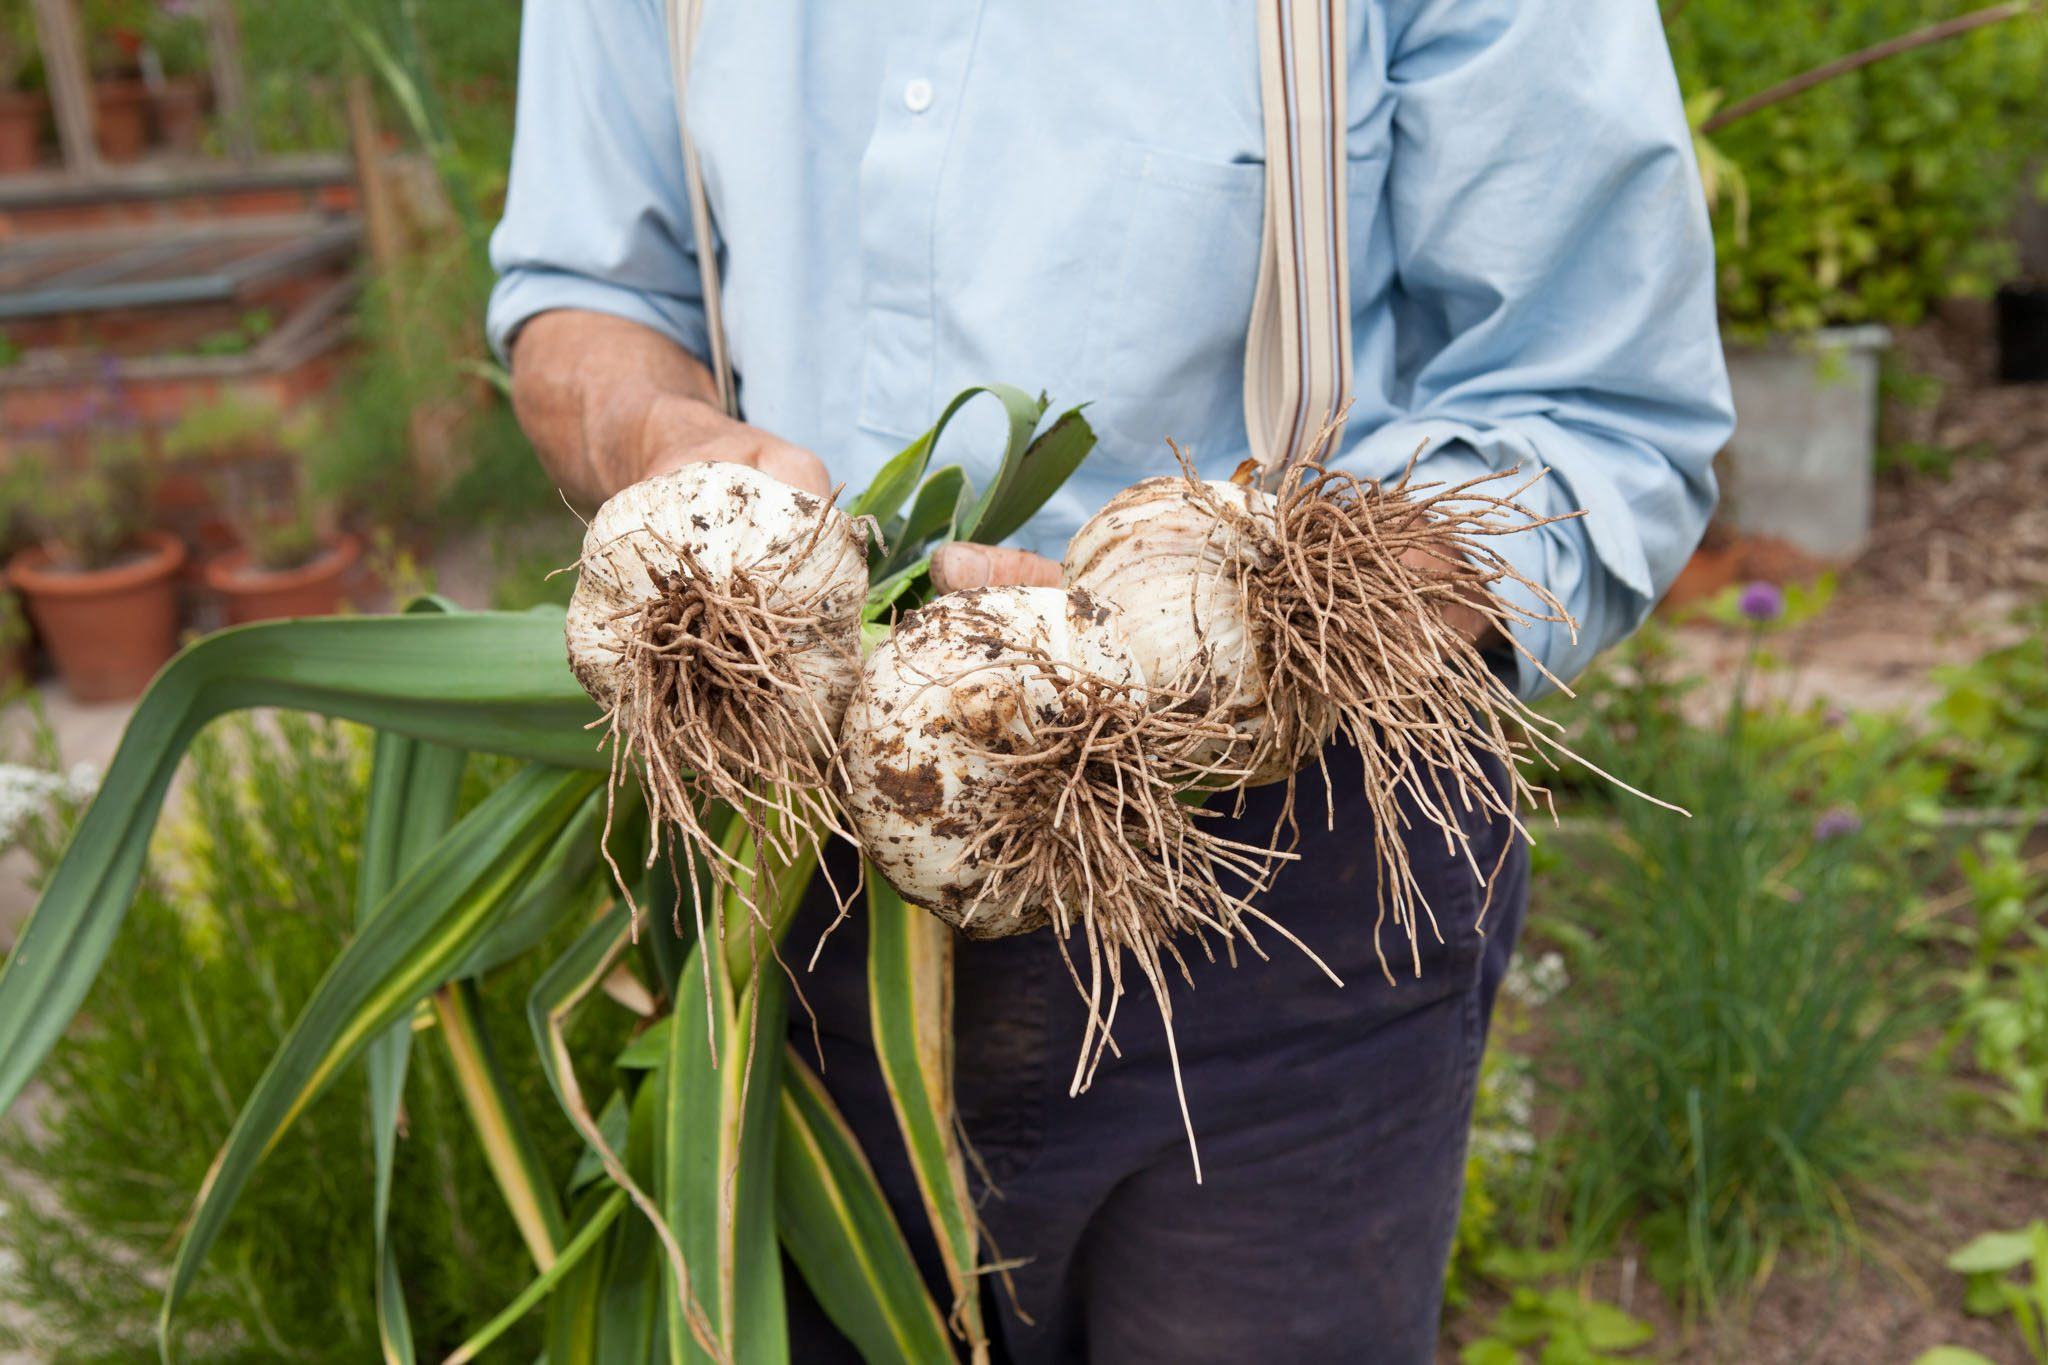
- Select healthy rhizomes: Choose healthy, firm rhizomes with several growing points or “eyes.” Avoid ones that are soft, mushy, or damaged.
- Dig the planting holes: Dig holes in the prepared soil that are slightly larger than the size of the rhizomes. Space the holes at least 2-3 feet apart to allow the plants to spread.
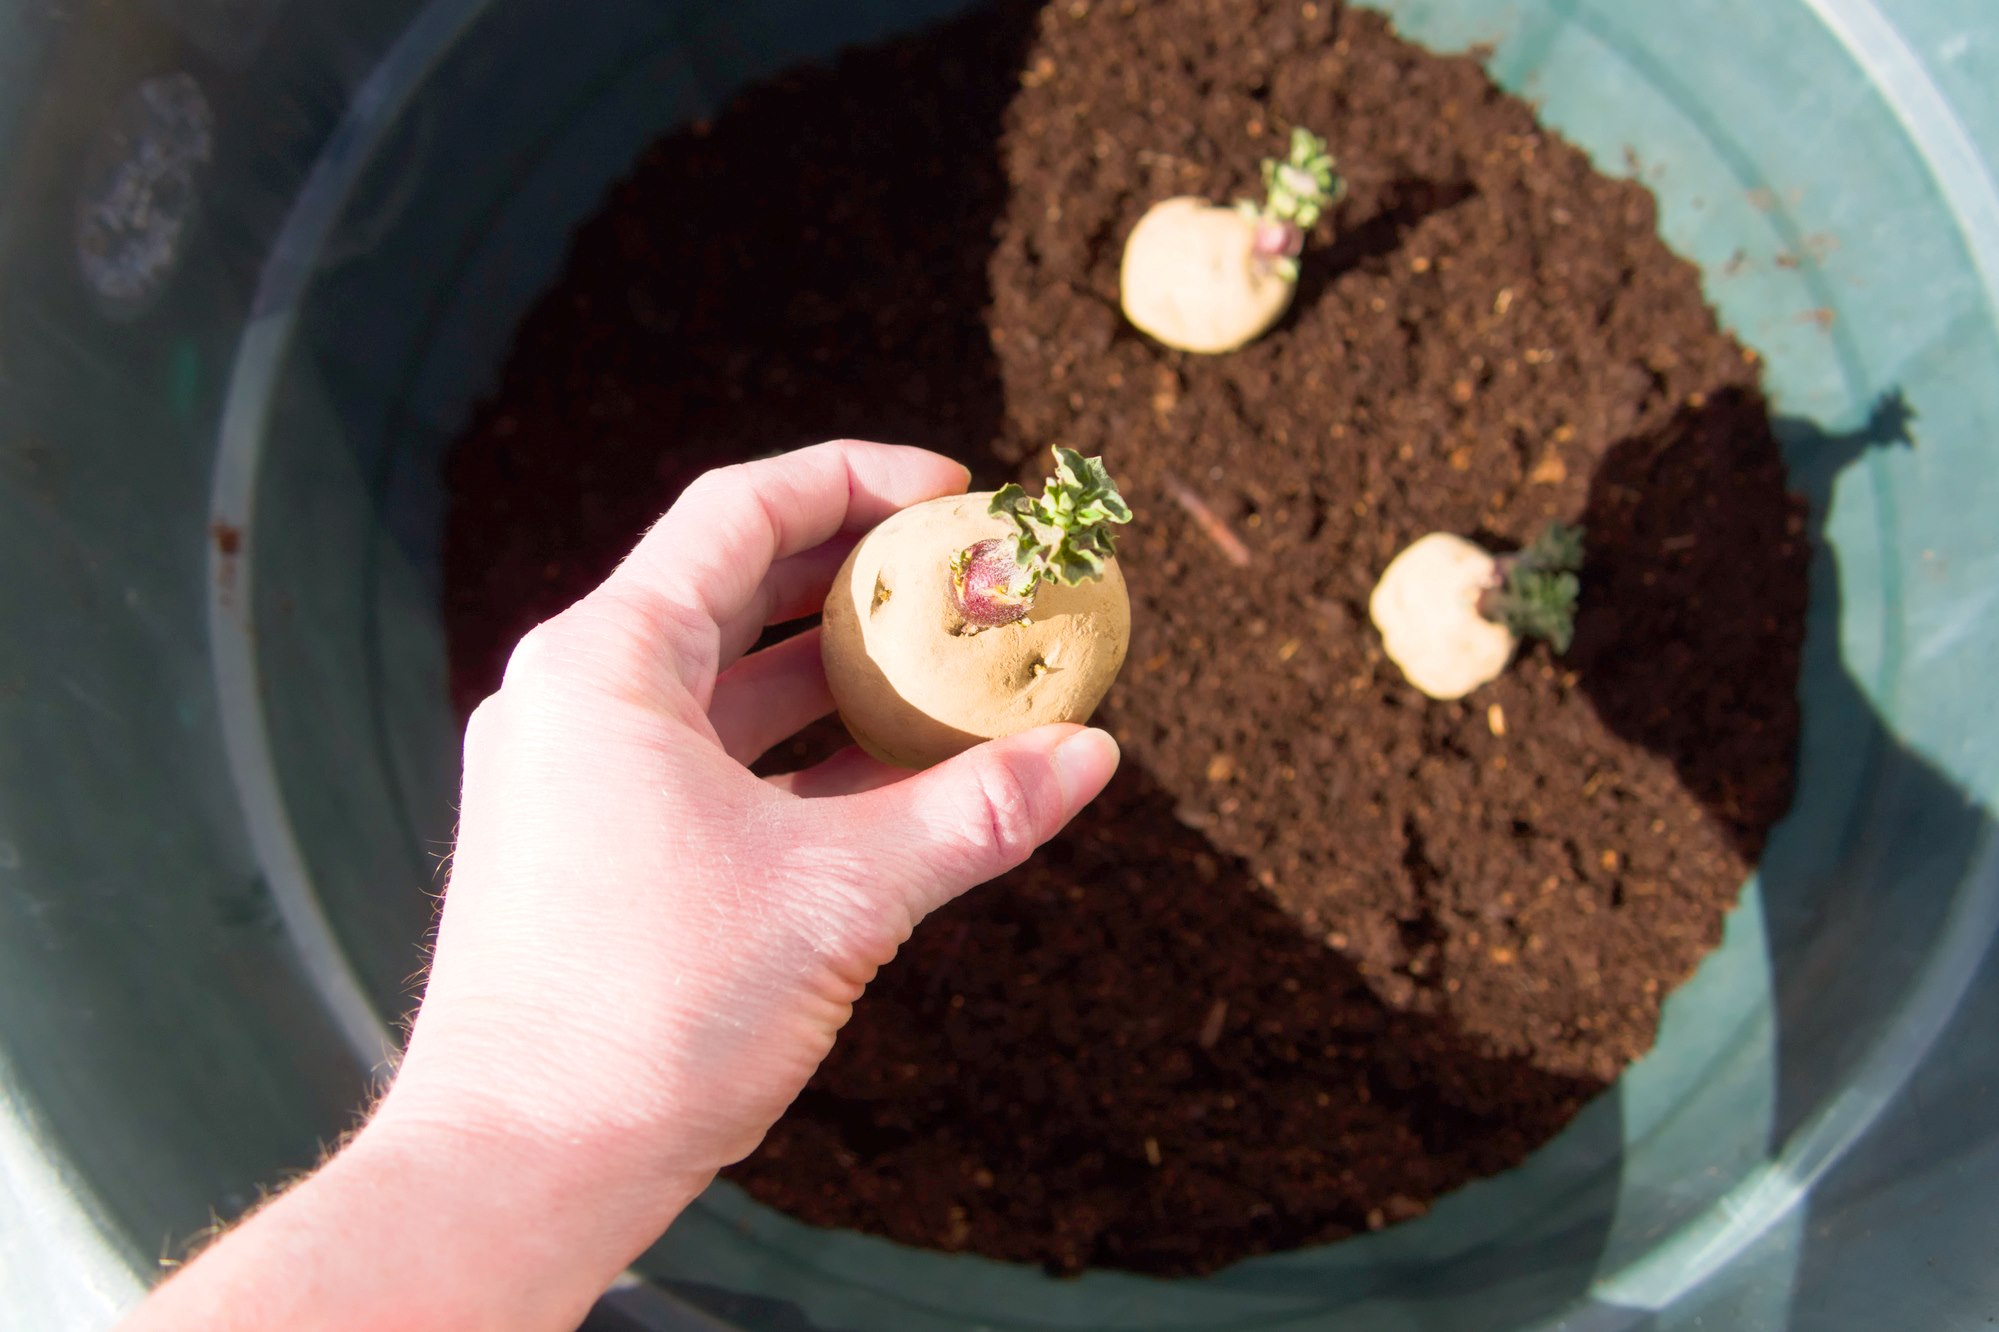
- Planting depth: Place each rhizome in the holes with the growing points facing upwards. The top of the rhizome should be just below the soil surface, around 1-2 inches deep.
- Backfill and firm the soil: Gently backfill the holes with soil, ensuring that the rhizomes are securely planted. Lightly firm the soil around the rhizomes, but avoid compacting it too much.
- Water thoroughly: After planting, water the newly planted elephant ears thoroughly. This will help settle the soil and provide moisture for the roots to start growing.
- Mulch: Apply another layer of mulch around the base of the plants, extending it to the edges of the planting holes. This will help conserve moisture and suppress weed growth.
Remember to consider the mature size of the specific variety you’re planting and provide adequate spacing to allow for growth. As your elephant ears mature, their impressive foliage will create a stunning display in your garden.
Now that you have successfully planted your elephant ears, it’s time to move on to the next step: providing proper care and maintenance to ensure healthy growth and abundant foliage.
Watering and Fertilizing
Proper watering and fertilizing are crucial for the health and vitality of your elephant ears. Here are some guidelines to follow:
- Watering: Elephant ears prefer consistently moist soil, but they don’t like to sit in waterlogged conditions. Water the plants deeply whenever the top few inches of soil start to feel dry. Aim for a slow and steady water application to ensure thorough penetration into the root zone. Avoid overwatering, as it can lead to root rot and other moisture-related issues.
- Monitor moisture levels: Check the soil moisture frequently, especially during hot and dry weather. If the soil feels excessively dry, increase the frequency of watering. Adding a layer of mulch around the base of the plants can help retain soil moisture and reduce evaporation.
- Fertilizing: Elephant ears are heavy feeders and benefit from regular fertilization. Apply a balanced, slow-release fertilizer in early spring when new growth emerges. Follow the manufacturer’s instructions for application rates and frequency. Additionally, you can supplement with liquid fertilizers every 4-6 weeks during the growing season to promote lush foliage.
- Micronutrients: Elephant ears may benefit from micronutrient supplementation, especially if you notice signs of nutrient deficiencies such as yellowing leaves. Opt for a fertilizer specifically formulated for foliage plants or use a foliar spray of micronutrients to provide the necessary nutrients.
It’s important to strike a balance with both watering and fertilizing. Monitor the plant’s response to your watering and feeding schedule, adjusting as needed. Pay attention to any signs of overwatering or underwatering, such as wilting or yellowing leaves, and make appropriate adjustments.
By providing consistent moisture and essential nutrients, you will encourage vigorous growth and vibrant foliage in your elephant ears.
Managing Pests and Diseases
Like any plant, elephant ears are susceptible to certain pests and diseases. However, with proper care and vigilant monitoring, you can effectively manage these issues. Here are some common pests and diseases to watch out for and how to control them:
- Aphids: These small, sap-sucking insects can cluster on the undersides of leaves and cause damage. Remove them by spraying a strong stream of water or use insecticidal soap if the infestation is severe.
- Spider mites: These tiny pests can create fine webbing on the leaves and cause yellowing or browning. Regularly misting the foliage and keeping humidity levels high can help deter spider mites. If an infestation occurs, use insecticidal soap or a miticide specifically designed for spider mites.
- Slugs and snails: These slimy creatures can feed on the leaves and leave behind holes and damage. Hand-pick them off the plants, especially during damp periods, or use organic slug and snail baits to control their population.
- Mildew and leaf spot: Fungal diseases like powdery mildew and leaf spot can affect the foliage of elephant ears. To prevent these diseases, avoid overhead watering, promote good air circulation, and remove any infected leaves. Fungicidal sprays may be required in severe cases.
- Root rot: Overwatering or poorly draining soil can lead to root rot, which can cause yellowing leaves and stunted growth. Ensure that the soil is well-draining and water properly to prevent this issue. If root rot occurs, remove and discard affected plants and improve the soil drainage for future plantings.
Regularly inspect your elephant ears for any signs of pests or diseases. Early detection is key in managing these issues effectively. Maintain good cultural practices such as proper watering, adequate spacing, and regular cleaning to minimize the risk of pest and disease problems.
If the infestation or disease is severe and difficult to control, you may need to consult a local horticulturist or extension service for further guidance and treatment options.
Winter Care
As tropical plants, elephant ears are not frost-tolerant and require special care during the winter months in colder climates. Here are some winter care tips to ensure the survival of your elephant ears:
- Monitor the temperature: Keep an eye on the weather forecast and be prepared to protect your elephant ears when temperatures drop below their tolerance level.
- Bring indoors: If you’re growing your elephant ears in containers, it’s best to bring them indoors before the first frost. Place them in a cool and well-lit area, such as a sunny window or a greenhouse.
- Mulch: For in-ground plants, apply a thick layer of mulch around the base of the plants before the first frost. This will insulate the soil and protect the rhizomes from freezing temperatures.
- Cut back foliage: Once the foliage has been damaged by frost, cut it back to a few inches above the soil level. This will help redirect the plant’s energy to the rhizomes and promote new growth in the spring.
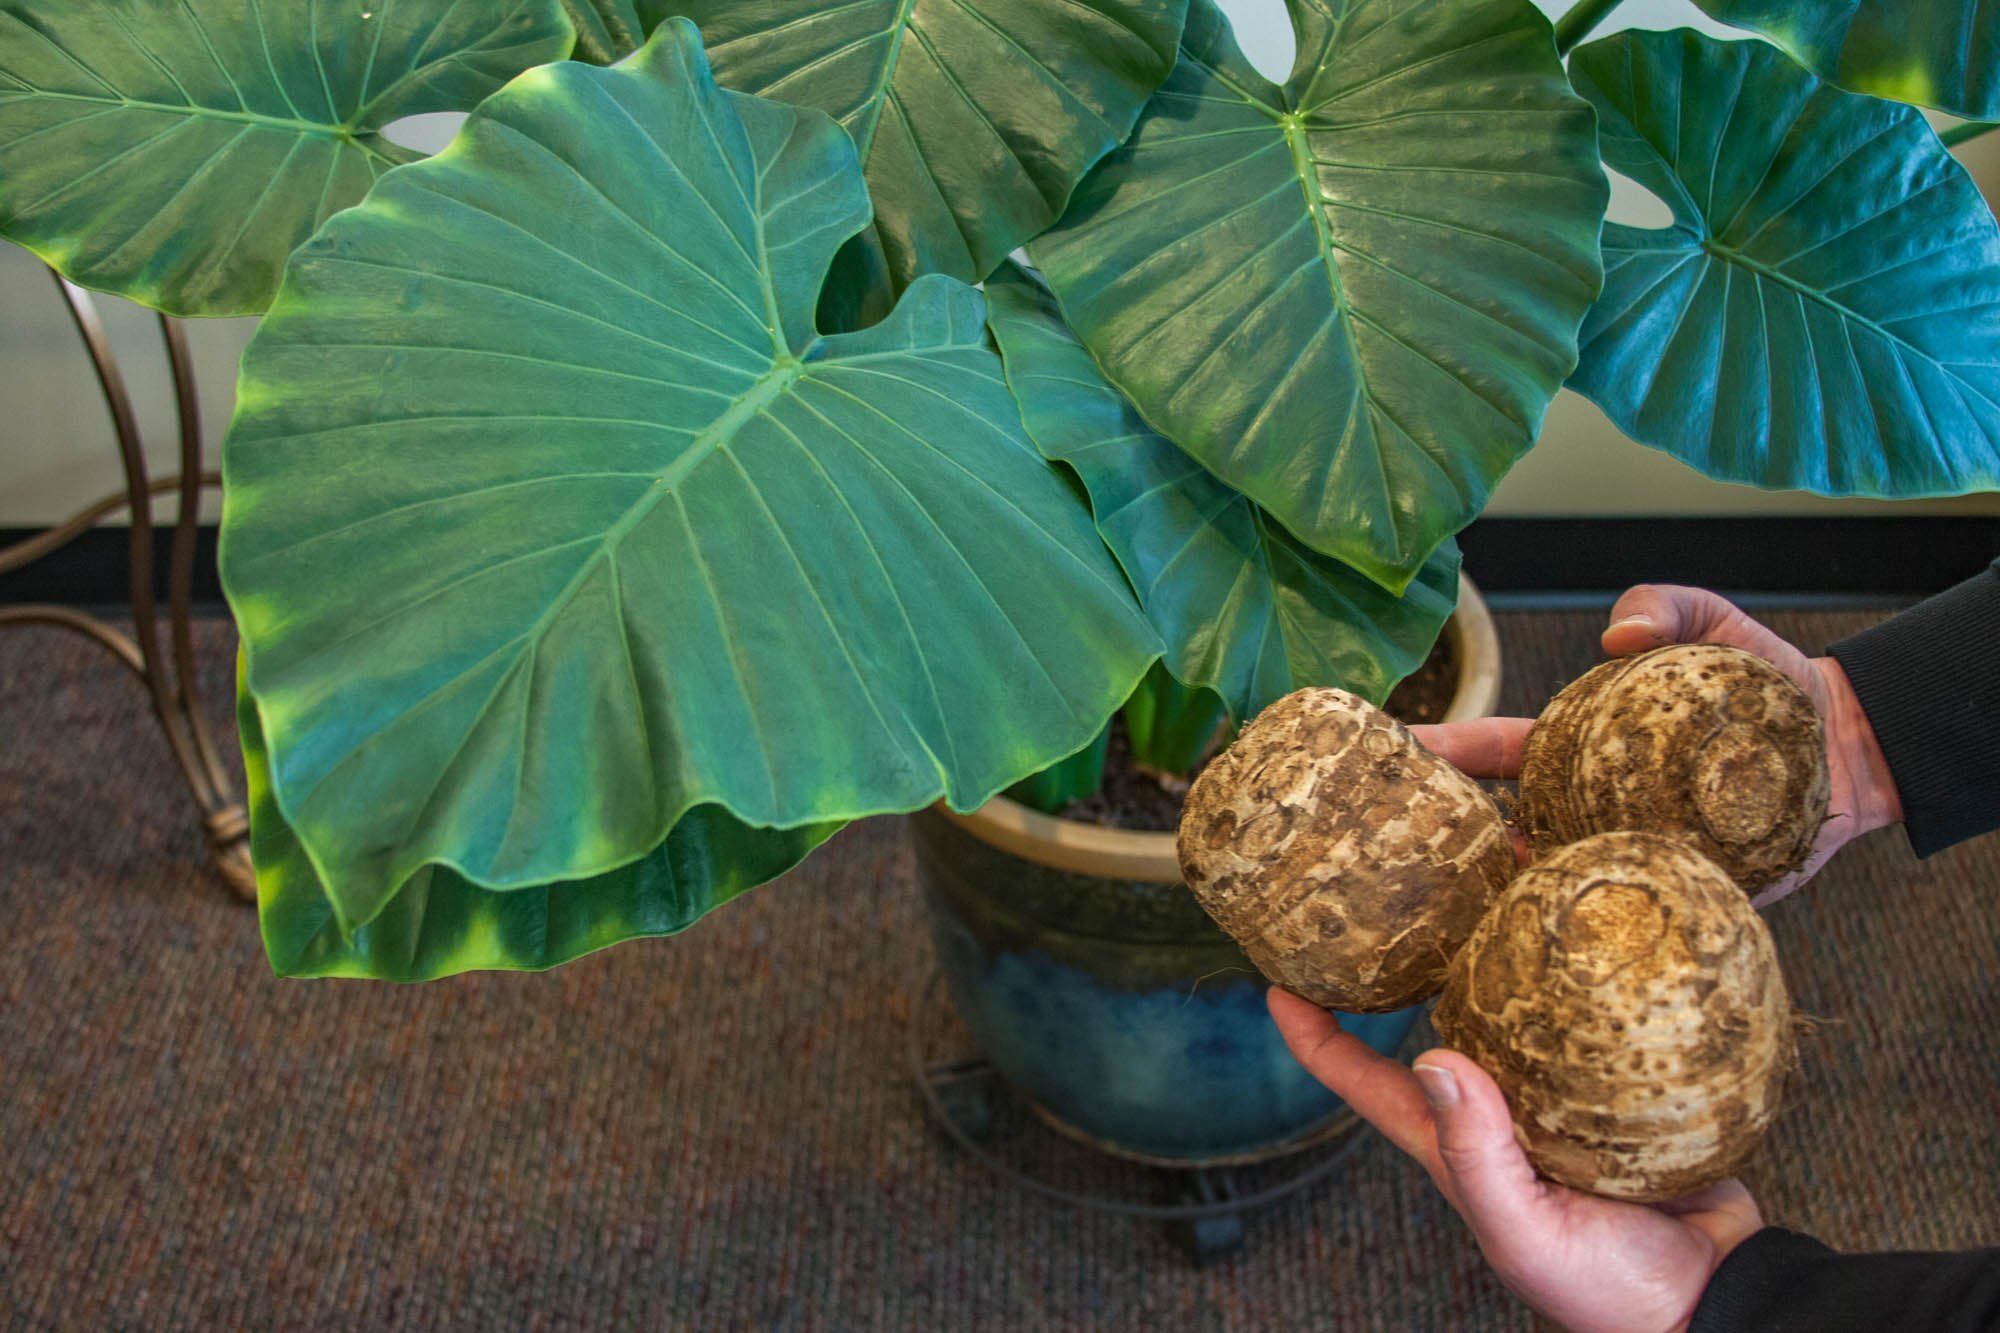
- Divide and store rhizomes: In areas with extremely cold winters, it may be necessary to dig up the rhizomes and store them indoors for the winter. Allow the rhizomes to dry for a few days, then remove any excess soil and store them in a cool, dark, and dry place until the following spring.
- Monitor moisture: During the winter months, be cautious not to overwater your plants. While they still require some moisture, the reduced light and cooler temperatures will slow their growth and reduce their water requirements.
By following these winter care tips, you can help your elephant ears survive the cold season and ensure their healthy return in the spring. Remember to monitor them regularly and provide the necessary protection and care based on your specific climate and growing conditions.
Harvesting and Storage
While elephant ears are primarily grown for their stunning foliage, some varieties also produce edible tubers that can be harvested and enjoyed. Here’s how to harvest and store elephant ear tubers:
- Wait for dormancy: Harvest elephant ear tubers after the foliage has died back naturally and entered dormancy. This usually occurs in late fall or early winter.
- Dig up the tubers: Using a garden fork or shovel, carefully dig around the base of the plant to loosen the soil. Gently lift the tubers out of the ground, taking care not to damage them.
- Clean and dry: Remove any excess soil from the tubers and gently rinse them with water. Allow them to air dry for a few days in a cool and well-ventilated area to prevent rotting during storage.
- Cure the tubers: After drying, cure the tubers by placing them in a dry and dark location with temperatures around 70-80°F (21-27°C) and humidity levels around 70%. This process helps the tubers develop a protective layer and prepare them for storage.
- Store in a cool and dry place: Once cured, store the tubers in a cool and dry location. A temperature of around 45-55°F (7-13°C) with low humidity is ideal for long-term storage. You can use paper bags, mesh bags, or cardboard boxes lined with peat moss or sawdust to provide insulation and maintain proper moisture levels.
- Check periodically: Throughout the storage period, check the tubers regularly for any signs of rot or disease. Remove any affected tubers immediately to prevent further spread.
- Replant in spring: When the danger of frost has passed and temperatures begin to warm up in spring, you can replant the stored tubers in the garden to grow a new crop of elephant ears.
Remember that not all elephant ear varieties produce edible tubers, so if you’re specifically interested in harvesting and storing the tubers, ensure you choose a variety known for this purpose.
By following these steps, you can enjoy the beauty of your elephant ears in the garden and savor the flavorful tubers when it’s time to harvest.
Conclusion
Growing and caring for elephant ears can be a rewarding experience that adds a touch of tropical beauty to your garden. With their large, show-stopping foliage and easy maintenance, these plants are a popular choice for both seasoned gardeners and beginners alike.
In this article, we explored the various aspects of planting and nurturing elephant ears. From selecting the right location and preparing the soil to properly watering, fertilizing, and managing pests and diseases, each step is crucial for their overall health and vitality.
We also discussed the importance of winter care and how to protect these tropical plants from frosty temperatures. By following the recommended steps for winterizing, you can ensure the survival of your elephant ears and enjoy their beauty for years to come.
Whether you choose to grow elephant ears for their striking foliage, ornamental beauty, or even their edible tubers, these plants are sure to bring a touch of exotic charm to your outdoor space.
So go ahead, plant some elephant ears and revel in the lush and vibrant foliage they provide. With the right care, these fascinating plants will captivate your senses and become a treasured addition to your garden.