Home>Types of Gardening>Ornamental Gardening>How to Plant Allium Bulbs: Which Way Is Up?
Ornamental Gardening
How to Plant Allium Bulbs: Which Way Is Up?
Modified: January 22, 2024
Discover the proper way to plant Allium bulbs for stunning ornamental gardening displays. Learn which way is up for these beautiful flowers.
(Many of the links in this article redirect to a specific reviewed product. Your purchase of these products through affiliate links helps to generate commission for Chicagolandgardening.com, at no extra cost. Learn more)
Table of Contents
Introduction
Welcome to the world of ornamental gardening! If you’re looking to add beauty and charm to your garden, planting allium bulbs is a fantastic choice. Alliums are perennial bulbs that produce stunning, globe-shaped flowers in various colors and sizes. These unique plants are not only visually appealing but also attract pollinators like bees and butterflies, making them a wonderful addition to any garden.
When it comes to planting allium bulbs, one common question that gardeners have is: “Which way is up?” It’s essential to understand the correct orientation of the bulb to ensure successful growth and blooming. In this article, we will delve into the fascinating world of allium bulbs, discuss how to identify the top and bottom of these bulbs, and provide guidance on planting and caring for them.
Whether you’re an experienced gardener or a beginner, we will walk you through the process step by step, equipping you with all the knowledge you need to create a thriving allium display in your garden. So, let’s dive in and uncover the secrets of planting allium bulbs!
Understanding Allium Bulbs
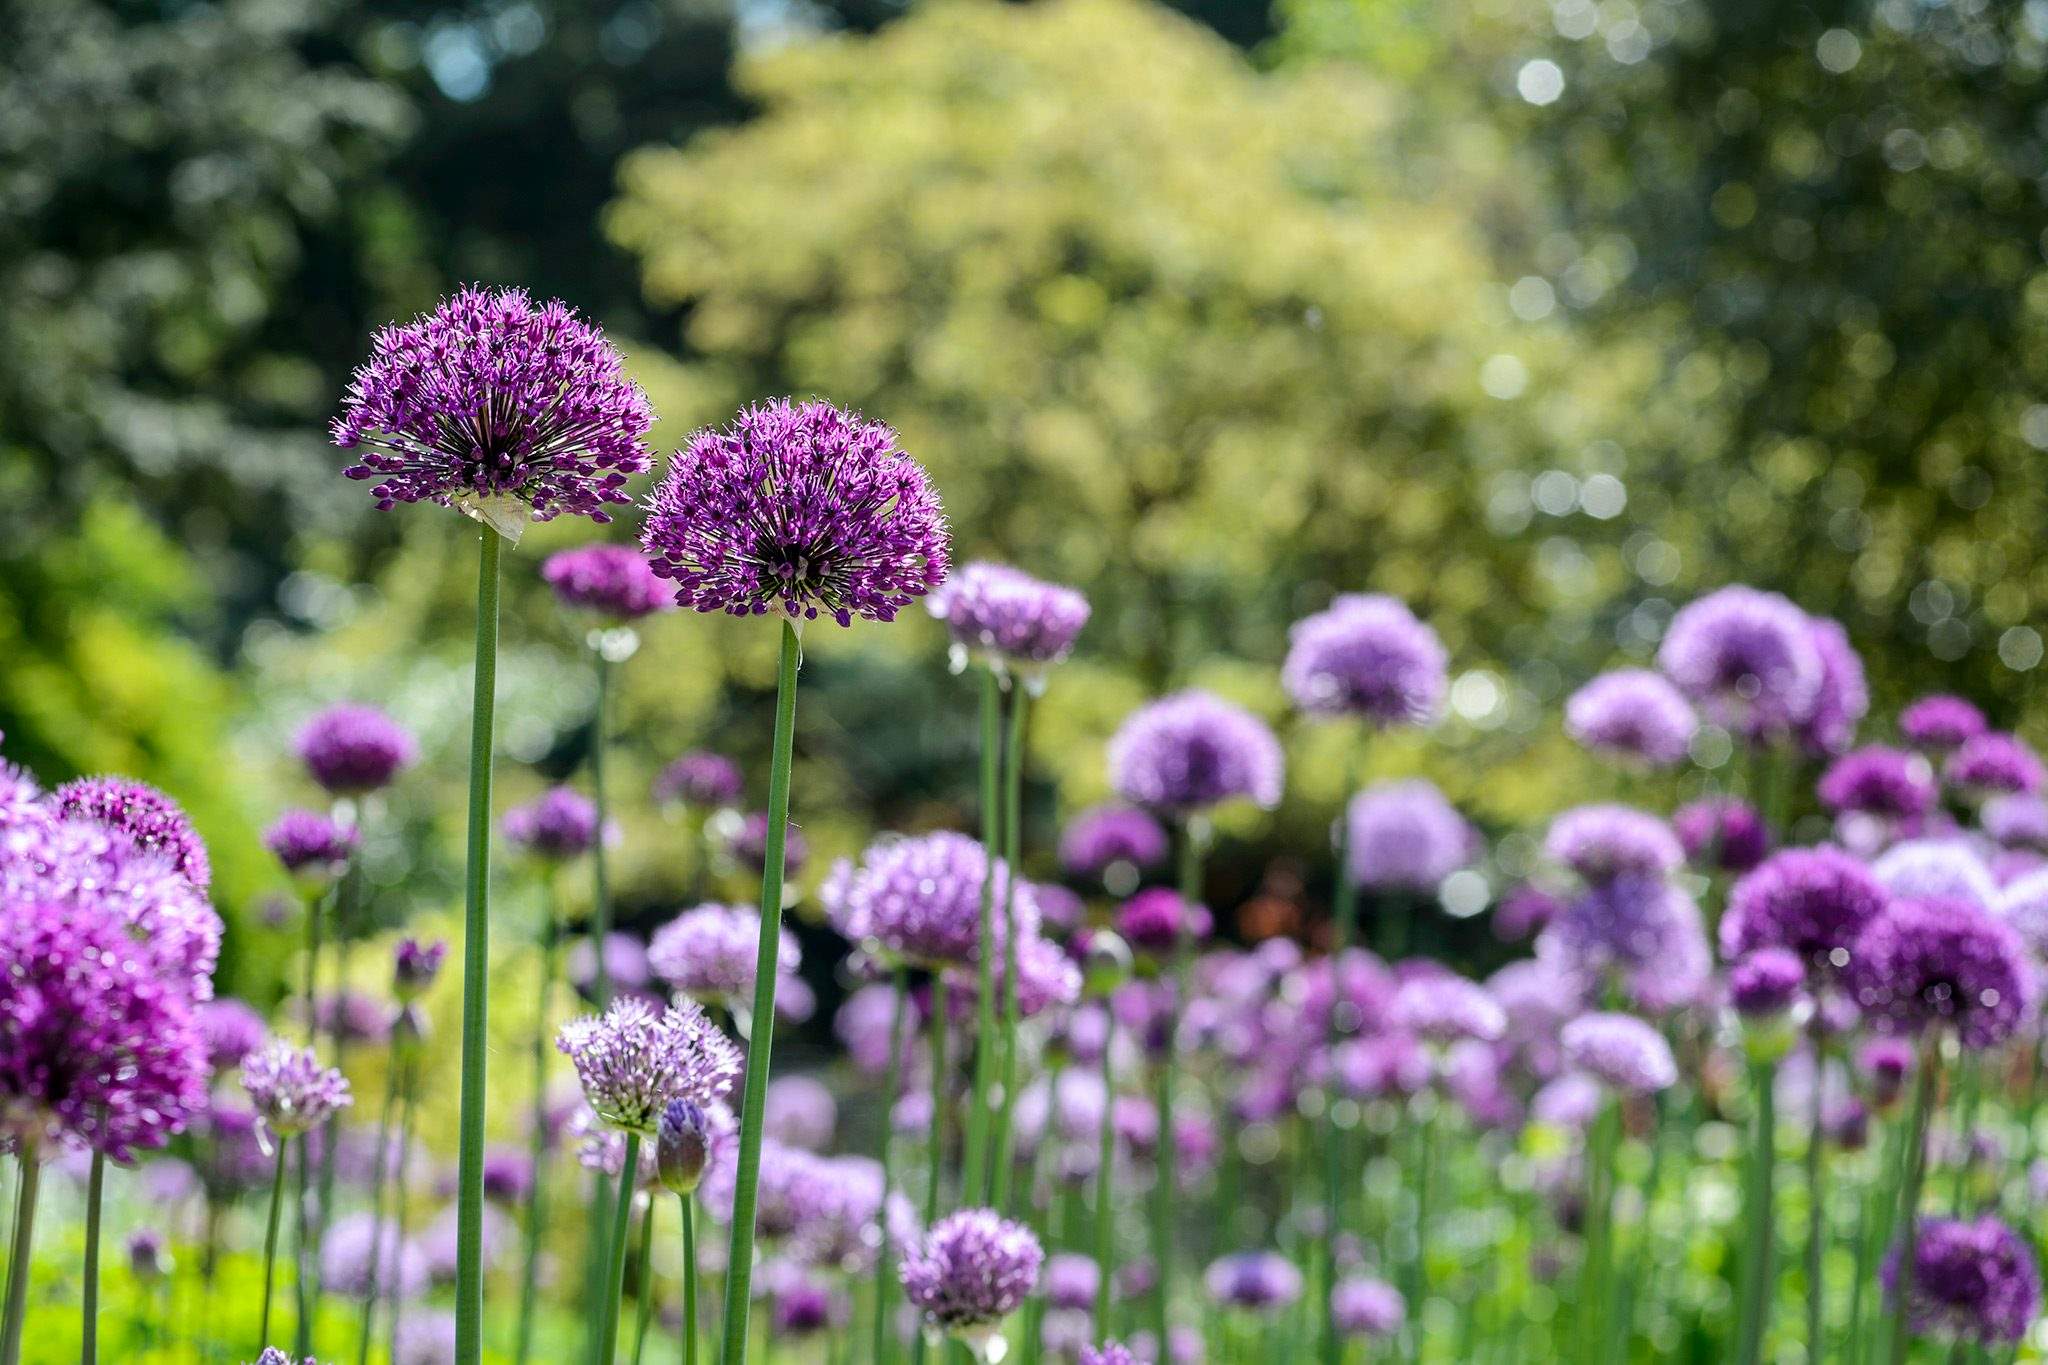
Allium bulbs belong to the Allium genus, which includes a wide variety of flowering plants. These bulbs are known for their long, slender stems topped with spherical flower clusters. They come in a range of colors, including purple, white, yellow, and pink, and can vary in size from small golf-ball-like blooms to large, show-stopping spheres.
One fascinating feature of allium bulbs is their ornamental value. Their unique shape and vibrant hues make them standout additions to any garden. Additionally, alliums are deer-resistant, which is a great advantage for gardeners dealing with wildlife browsing on their plants.
These bulbs are also highly versatile and can be used in different garden styles and planting schemes. They work well in formal gardens, cottage gardens, or even naturalistic meadows. Depending on the species or variety, alliums can bloom in early spring, late spring, or even early summer, extending the flowering season of your garden.
Moreover, alliums are relatively low-maintenance plants. They are not prone to diseases or pests, and once established, they require minimal care. Allium bulbs are also known for their ability to naturalize, meaning they can multiply and spread over time, creating a breathtaking display.
However, it is important to note that allium bulbs are toxic to pets, particularly dogs and cats, so it is crucial to keep this in mind if you have furry friends in your household.
Now that we have a better understanding of allium bulbs let’s move on to the next important aspect – identifying the top and bottom of these bulbs. This knowledge is essential for proper planting and ensuring the bulbs grow and flourish.
Identifying the Top and Bottom of Allium Bulbs
When it comes to planting allium bulbs, correctly identifying the top and bottom is crucial for ensuring successful growth. The top of the bulb is where the stem and leaves emerge, while the bottom is where the roots develop. Knowing the proper orientation of the bulb will help you position it correctly in the soil, allowing it to establish itself and grow into a beautiful flowering plant.
Identifying the top and bottom of allium bulbs is relatively simple. The top of the bulb is usually pointed or slightly rounded, while the bottom is flatter and often has small root remnants. Additionally, you may notice dry, papery scales on the top, which may be remnants of the previous year’s growth. These scales help protect the bulb from moisture loss and damage.
If you find it challenging to differentiate between the top and bottom visually, gently squeeze the bulb – the side that feels firmer is typically the bottom, where the roots will emerge. The softer side indicates the top, where the stem and leaves will grow.
It is important to note that planting the bulbs upside down can hinder their growth and blooming. The roots may struggle to develop, and the stem and leaves may have difficulty emerging from the soil. Therefore, taking the time to properly identify the top and bottom of allium bulbs can significantly impact their overall health and vigor.
Now that we know how to determine the top and bottom of the bulbs, let’s move on to the next step – planting allium bulbs in your garden.
Planting Allium Bulbs
Planting allium bulbs is an exciting and rewarding process that allows you to witness the transformation of these bulbs into stunning flowering plants. Here are the steps to help you successfully plant your allium bulbs:
- Choose the right location: Alliums thrive in full sun to partial shade, so select a spot in your garden that receives at least 6-8 hours of direct sunlight. Ensure the soil is well-drained to prevent waterlogged conditions, which can cause rotting of the bulbs.
- Prepare the soil: Before planting, prepare the soil by removing any weeds, rocks, or debris. Loosen the soil with a garden fork or tiller to improve drainage and create a favorable environment for the bulbs to establish.
- Spacing: Consider the mature size of the allium variety you are planting when determining the spacing between bulbs. On average, space the bulbs 6-8 inches apart to allow room for the plants to grow and develop.
- Planting depth: Dig a hole that is two to three times deeper than the height of the bulb. The general rule of thumb is to plant the bulb with the pointed end facing up, and the flat bottom facing down where the roots will grow. Place the bulb in the hole, ensuring it is positioned upright and at the correct depth.
- Backfilling: Gently backfill the hole with soil, ensuring the bulb is securely nestled in place. Lightly firm the soil around the bulb, being careful not to compact it too much as this can hinder root growth.
- Watering: After planting, give the bulbs a thorough watering to settle the soil and provide essential moisture. However, be cautious not to overwater, as excessive moisture can cause the bulbs to rot.
- Mulching: Applying a layer of organic mulch around the planted bulbs can help regulate soil moisture and temperature, suppress weed growth, and enhance the overall appearance of the garden bed. Just ensure the mulch is not touching the bulbs directly to prevent excess moisture retention.
Remember to follow any specific planting instructions given for the particular allium variety you are working with, as different species may have slightly different requirements.
Now that we have covered the planting process, let’s move on to discussing the proper depth for planting allium bulbs to ensure their optimal growth.
Proper Depth for Planting Allium Bulbs
The proper depth for planting allium bulbs plays a crucial role in their growth and development. Planting bulbs at the correct depth provides them with the necessary support, protection, and resources to establish a strong root system and produce healthy foliage and flowers. Here are some guidelines to help you determine the proper depth for planting allium bulbs:
General depth: As a rule of thumb, place allium bulbs at a depth that is two to three times their own height. For larger allium varieties, such as Allium giganteum, plant them approximately 6-8 inches deep. Smaller varieties, like Allium karataviense, can be planted at a shallower depth of around 4-6 inches.
Soil and drainage considerations: The planting depth may vary depending on the composition and drainage of your soil. In heavy clay soils or areas prone to waterlogging, it is advisable to plant the bulbs slightly shallower to avoid excess moisture around the bulbs, which can lead to rotting. On the other hand, in sandy or loose soils, planting the bulbs slightly deeper can help provide stability and prevent the bulbs from being exposed.
Overwintering: Another factor to consider is the climate and the winter temperatures in your region. In colder areas, where the soil freezes deeply, it is recommended to plant the bulbs slightly deeper to protect them from freezing temperatures. The presence of a layer of insulating mulch can also help protect the bulbs during the winter months.
It’s important to note that allium bulbs have a pointed tip, which indicates the top of the bulb. Ensure that the pointed tip is facing upwards when planting, as this is where the stem and leaves will emerge. Planting the bulbs upside down can hinder their growth and reduce their chances of blooming successfully.
By following these guidelines and considering the specific needs of the allium variety you are planting, you can ensure that your bulbs are placed at the appropriate depth for optimal growth.
Now that we have covered the proper depth for planting allium bulbs, let’s move on to discussing essential care tips to help your alliums thrive.
Caring for Allium Bulbs
Caring for allium bulbs is relatively simple, as these plants are generally low-maintenance once established. Here are some essential care tips to ensure the health and vitality of your alliums:
Watering: Allium bulbs prefer well-drained soil, so it’s important not to overwater them. Allow the soil to dry out slightly between waterings, ensuring that the bulbs receive adequate moisture during their active growing season. However, be cautious not to let the soil become excessively dry, as this can hinder their growth and blooming.
Fertilizing: Allium bulbs do not require heavy fertilization. Before planting, amend the soil with organic matter, such as compost, to provide a nutrient-rich environment for the bulbs. During the growing season, you can lightly top-dress the soil with a balanced, slow-release granular fertilizer. Avoid excessive nitrogen fertilizers, as this can promote excessive leaf growth at the expense of flower production.
Removing spent flowers: After the allium blooms have faded, you can remove the spent flower heads. This practice not only keeps the garden looking tidy but also prevents the plant from redirecting energy towards producing seeds. Allowing the foliage to wither and die naturally helps the bulbs store energy for the next growing season.
Protecting from pests: Alliums are generally resistant to pests and diseases. However, some garden pests, such as slugs and snails, may occasionally nibble on the foliage. If you notice damage, you can take measures to deter these pests, such as using organic slug repellents or creating physical barriers around the plants.
Division and propagation: Allium bulbs can naturalize and multiply over time. To prevent overcrowding and encourage healthy growth, you can divide the bulbs every few years. Dig up the clusters of bulbs, separate them, and replant them at the appropriate depth in a new location or back in the same spot with adequate spacing.
Protection from extreme weather conditions: In areas with harsh winters, providing a layer of mulch over the planted bulbs can help protect them from extreme temperature fluctuations and freezing. This layer of mulch also helps retain moisture and suppresses weed growth.
By following these care tips, you can ensure that your allium bulbs thrive and continue to grace your garden with their stunning blooms year after year.
Conclusion
Planting allium bulbs can add a touch of beauty and elegance to your garden. These fascinating plants, with their unique globe-shaped flowers in various colors, are sure to captivate the attention of both visitors and pollinators alike. Whether you’re an experienced gardener or just starting your journey, alliums are a fantastic choice for creating stunning displays.
In this article, we explored the key aspects of planting allium bulbs, from understanding their characteristics to properly identifying the top and bottom of the bulbs. We discussed the importance of choosing the right planting location, preparing the soil, and ensuring the bulbs are planted at the correct depth. Additionally, we provided essential care tips, including watering, fertilizing, removing spent flowers, protecting against pests, and handling division and propagation.
Remember, allium bulbs are resilient and relatively low-maintenance, making them a great addition to any garden. With adequate care and attention, your alliums will reward you with stunning blooms year after year.
So, why not embark on your allium gardening adventure? Select your favorite allium varieties, get your hands dirty, and witness the magic as these bulbs transform into magnificent flowering plants in your very own garden. Enjoy the beauty, fragrance, and joy that alliums bring to your outdoor space and create a haven that will leave a lasting impression on all who enter.
Happy gardening!