Home>Types of Gardening>Ornamental Gardening>How To Plant Fern Bulbs

Ornamental Gardening
How To Plant Fern Bulbs
Published: January 20, 2024
Learn how to plant fern bulbs for your ornamental gardening needs. Find step-by-step instructions and expert tips to ensure a successful growth of ferns in your garden.
(Many of the links in this article redirect to a specific reviewed product. Your purchase of these products through affiliate links helps to generate commission for Chicagolandgardening.com, at no extra cost. Learn more)
Table of Contents
Introduction
Welcome to the world of ornamental gardening! If you have a green thumb and a love for beautiful foliage, you’re in the right place. In this comprehensive guide, we will explore the fascinating world of fern bulbs – an essential addition to any garden lover’s collection.
Ferns have been captivating garden enthusiasts for centuries. These versatile plants come in a wide variety of shapes, sizes, and colors, making them an excellent choice for adding texture and visual interest to your landscape. While many people associate ferns with their delicate leaves, few are aware that they can also be grown from bulbs.
Planting fern bulbs not only allows you to expand your garden, but it also presents a unique opportunity to witness the growth and development of these spectacular plants from their earliest stages. Whether you’re a seasoned gardener or just starting your horticultural journey, learning how to plant fern bulbs will undoubtedly add a new level of excitement and accomplishment to your gardening endeavors.
In this article, we will delve into the world of fern bulbs, starting with an understanding of what they are and how they differ from traditional fern plants. We will then guide you through the process of selecting the right bulbs, choosing the perfect planting location, preparing the soil, planting the bulbs, and providing them with the necessary care for optimal growth. Additionally, we will explore how to protect your fern bulbs from pests and diseases, as well as when and how to harvest and divide them.
So, grab your gardening gloves and let’s embark on this thrilling journey of planting and nurturing fern bulbs. By the end of this guide, you will have the knowledge and confidence to create a stunning display of ferns in your garden, transforming it into a haven of natural beauty.
Understanding Fern Bulbs
Before we dive into the specifics of planting fern bulbs, it’s essential to have a clear understanding of what they are and how they differ from traditional fern plants. While most ferns reproduce through spores, certain fern species also produce bulbs as a means of propagation.
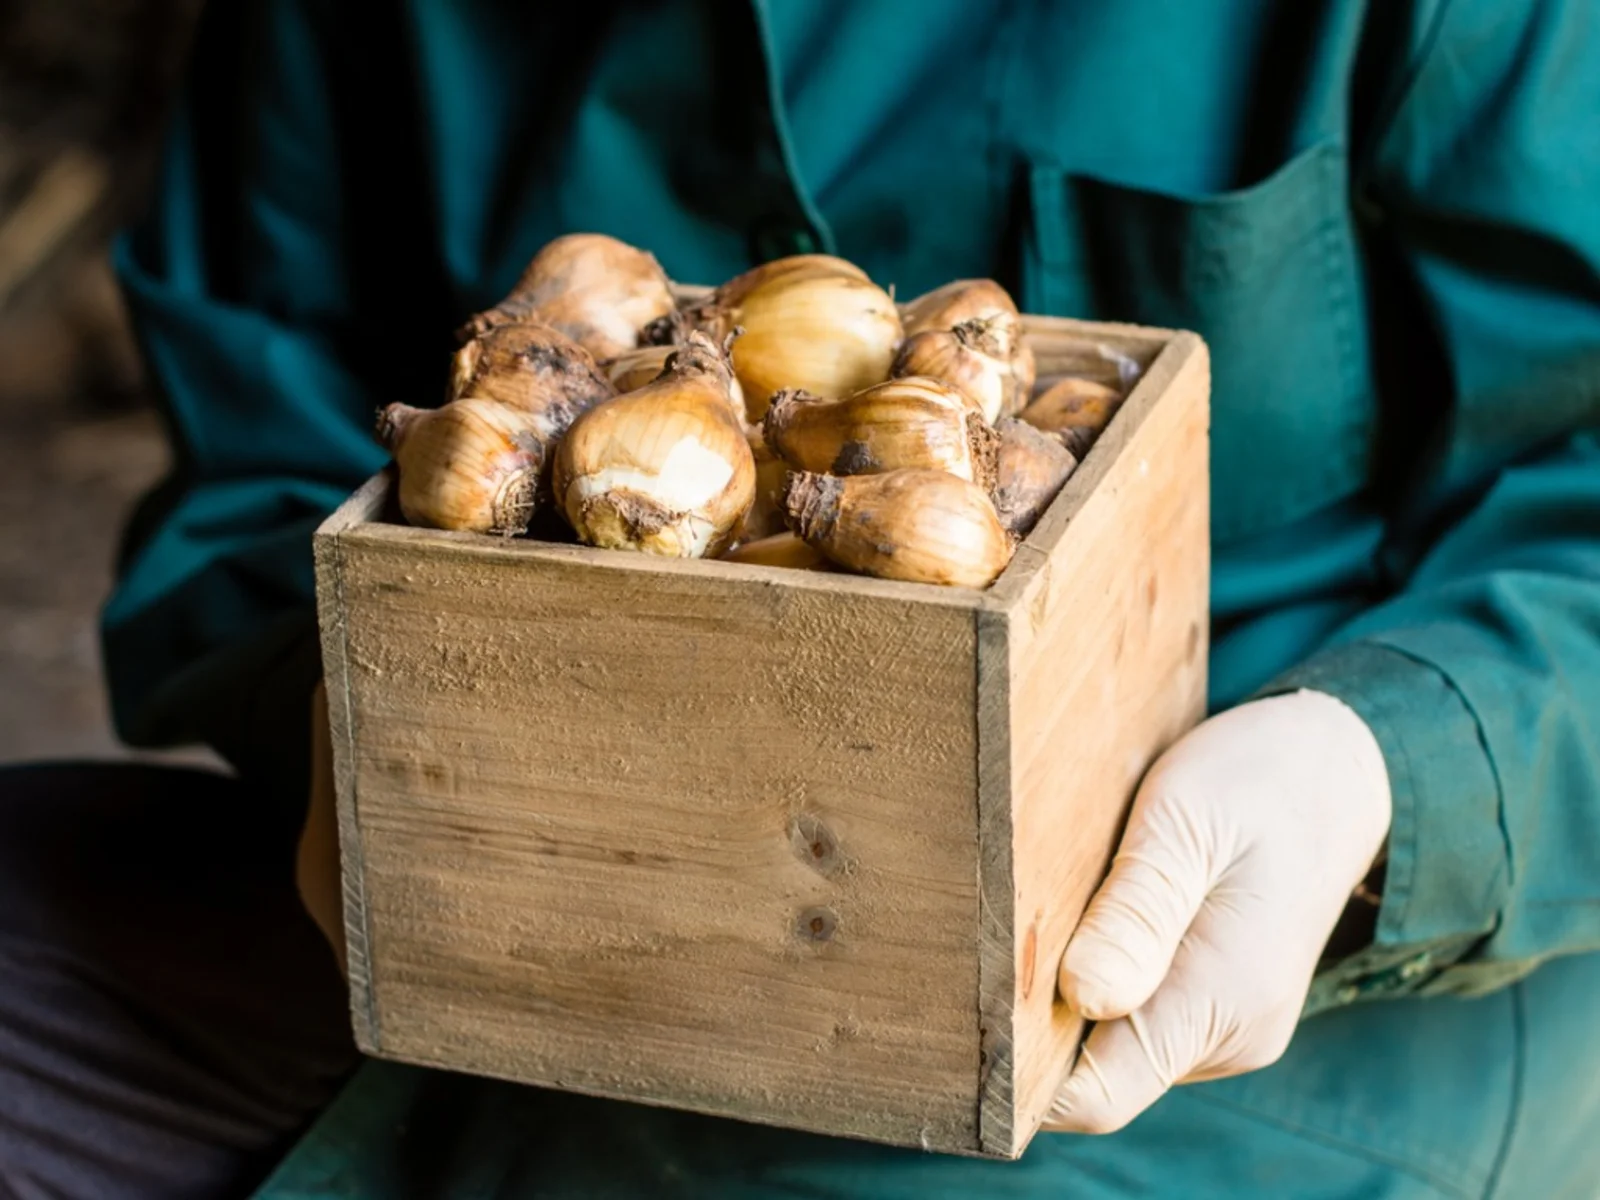
A fern bulb is a compact underground structure that contains the essential nutrients and energy needed for a fern plant to grow and develop. It serves a similar purpose to a seed or bulb in other garden plants, acting as a storage organ for the plant’s life cycle.
The bulb itself consists of a dormant bud surrounded by layers of modified leaves, known as scales, which protect and nourish the bud until it’s ready to emerge. These scales may vary in color and texture, depending on the fern species.
One key distinction between fern bulbs and traditional fern plants is the speed at which they grow. While the growth of spore-based ferns can be slow and unpredictable, fern bulbs tend to sprout and establish themselves more quickly, allowing for a more controlled and accelerated growth process.
Another advantage of fern bulbs is their adaptability to different environments. They tend to be hardier and more resilient than spore-based ferns, making them an ideal choice for gardeners looking to introduce ferns into their landscape or expand their existing fern collection.
Fern bulbs come in a variety of species, each with its unique set of characteristics and requirements. Some popular fern bulb varieties include the Osmunda regalis, Matteuccia struthiopteris, and Dryopteris species. These fern bulbs can add a range of textures and colors to your garden, creating a captivating display.
Now that you have a better understanding of what fern bulbs are, it’s time to explore how to select the right bulbs for your garden and create an optimal environment for their growth and development.
Selecting the Right Fern Bulbs
When it comes to selecting fern bulbs for your garden, it’s important to choose the right species and consider factors such as climate, soil conditions, and available space. Here are some key considerations to keep in mind:
- Climate: Different fern species have specific climate requirements. Some fern bulbs thrive in cooler climates, while others prefer warmer environments. Research the preferred climate conditions for the fern species you’re interested in and ensure they align with your local climate.
- Hardiness: The hardiness of fern bulbs is an important factor to consider, especially if you live in an area with extreme temperatures. Check the hardiness zone recommendations for the fern species you’re considering to ensure they can withstand the winter temperatures in your region.
- Size: Fern bulbs come in various sizes, ranging from small to large. Consider the available space in your garden and choose bulbs that fit well within the designated area without overcrowding other plants.
- Soil Requirements: Fern bulbs have specific soil requirements for optimal growth. Some prefer well-draining soil, while others thrive in moist or acidic conditions. Assess the soil composition in your garden and select fern bulbs that are compatible with it. If needed, you can amend the soil to create a suitable environment.
- Light Exposure: Like all plants, ferns require varying levels of light exposure. Some species prefer full shade, while others can tolerate partial sunlight. Take note of the lighting conditions in your garden and choose fern bulbs that are well-suited for those conditions.
- Availability: Determine the availability of fern bulbs in your local nurseries or online plant stores. Some rare or exotic fern species may be harder to find, so be prepared to explore different sources or consider alternative options if necessary.
Take the time to research and familiarize yourself with different fern species and their specific requirements. This will help ensure that you select the right fern bulbs that will thrive in your garden and provide you with years of beauty and enjoyment.
Choosing the Perfect Planting Location
The success of your fern bulbs largely depends on selecting the perfect planting location. Consider these key factors when choosing where to plant your fern bulbs:
- Shade or Partial Sun: Most fern species prefer shade or partial sun, as direct sunlight can scorch their delicate fronds. Look for an area in your garden that receives filtered sunlight or is shaded for a significant part of the day. This could be under trees, near a north-facing wall, or in the shadow of taller plants.
- Moisture Level: Ferns enjoy moist soil, so select a location that naturally retains water or where you can provide frequent watering. Avoid areas that are prone to drying out quickly, such as sandy soils or locations that receive a lot of wind.
- Protection from Harsh Elements: Ferns are sensitive to harsh weather conditions, including strong winds and heavy rain. Choose a planting location that offers some protection, such as being shielded by buildings, fences, or taller plants. This will help prevent damage to their delicate fronds.
- Soil Quality: Ferns prefer well-draining soil that is rich in organic matter. Before planting, assess the soil quality in your selected location. If the soil is heavy or clay-like, consider amending it with compost or well-rotted organic matter to improve drainage and nutrient content.
- Adequate Space: Consider the mature size of the fern species you have chosen and ensure that the planting location provides enough space for them to grow without being crowded by other plants. Crowding can lead to reduced airflow and increased risk of pests and diseases.
- Aesthetics: While the practical considerations are important, don’t forget to consider the aesthetic appeal of the planting location. Choose an area where the ferns will complement the overall design of your garden and create a visually pleasing display.
By carefully selecting the perfect planting location, you will create an environment that promotes healthy growth and long-term success for your fern bulbs. Take the time to assess your garden and find the ideal spot that meets the specific needs of the fern species you have selected.
Preparing the Soil
Preparing the soil is a crucial step in ensuring the success and longevity of your fern bulbs. By providing a nutrient-rich and well-draining soil, you create an ideal environment for the ferns to establish and thrive. Follow these steps to prepare the soil:
- Clear the Area: Start by removing any weeds, rocks, or debris from the planting area. This allows the fern bulbs to have ample space and reduces competition for nutrients.
- Loosen the Soil: Use a garden fork or tiller to loosen the soil to a depth of about 10-12 inches. This improves drainage and allows the fern roots to penetrate easily.
- Amend the Soil: If the soil is heavy or contains a high clay content, it may benefit from amendments to improve drainage and fertility. Add organic matter such as compost, well-rotted manure, or leaf mold to the soil and mix it thoroughly. This will help improve soil structure and provide essential nutrients for the fern bulbs.
- Check Soil pH: Most fern species prefer slightly acidic to neutral soil pH. Use a soil testing kit to determine the pH level of your soil. If necessary, adjust the pH by incorporating lime to increase alkalinity or sulfur to increase acidity.
- Improve Drainage: If the soil in your chosen location tends to retain water, it’s important to improve drainage. Incorporate organic matter and coarse sand into the soil to increase its porosity and drainage ability.
- Level and Smooth: Once the soil has been amended, level the area and smooth out any uneven surfaces. This provides an even and stable base for planting the fern bulbs.
By taking the time to properly prepare the soil, you create an optimal growing environment for your fern bulbs. The amended soil will provide the necessary nutrients, moisture retention, and drainage for the ferns to establish a strong root system and flourish in your garden.
Planting Fern Bulbs
Now that you have selected the perfect location and prepared the soil, it’s time to plant your fern bulbs. Follow these steps to ensure successful planting:
- Dig the Planting Holes: Dig holes in the prepared soil that are slightly wider and deeper than the size of the fern bulbs. Space the holes according to the recommended spacing for the specific fern species you are planting.
- Place the Fern Bulbs: Gently place the fern bulbs into the holes, ensuring that the bud or growing point is facing upwards. The top of the bulb should be level with or slightly above the soil surface.
- Backfill the Holes: Fill the holes with the amended soil, gently pressing it around the bulbs to remove any air pockets. Avoid compacting the soil too tightly as this can hinder root growth and drainage.
- Water the Newly Planted Bulbs: After planting, thoroughly water the area to settle the soil and provide moisture for the bulbs. Aim to keep the soil consistently moist but not waterlogged in the following weeks.
- Mulch the Area: Apply a layer of organic mulch, such as shredded bark or straw, around the base of the fern bulbs. This helps to conserve moisture, suppress weed growth, and provide insulation for the bulbs during extreme temperatures.
- Label the Ferns: It’s a good idea to label the ferns with their respective species or variety, especially if you have planted multiple types. This will help you keep track of their progress and provide specific care if needed.
Remember to adjust the depth and spacing of the planting holes based on the specific recommendations for your fern species. Some fern bulbs may require shallow planting, while others may need to be planted deeper in the soil. Refer to reliable sources or consult with local gardening experts for species-specific guidelines.
By following these steps, you will ensure that your fern bulbs are properly positioned in the soil, allowing them to establish strong roots and begin their growth journey in your garden.
Providing Adequate Watering
Watering is a critical aspect of caring for fern bulbs and ensuring their healthy growth. Proper watering techniques will help maintain optimal moisture levels and prevent the plants from becoming too dry or waterlogged. Here are some guidelines to provide adequate watering for your fern bulbs:
- Monitor Soil Moisture: Regularly check the moisture level of the soil around the fern bulbs. Insert your finger about an inch into the soil. If it feels dry, it’s time to water; if it feels moist, wait a day or two before checking again. Avoid overwatering as it can lead to root rot and other fungal diseases.
- Watering Frequency: Fern bulbs generally prefer consistently moist soil. Depending on your climate, you may need to water them every two to three days, especially during dry periods. Adjust the frequency of watering based on the weather and the moisture needs of the specific fern species you’re growing.
- Watering Technique: Water fern bulbs thoroughly, allowing the water to penetrate deeply into the soil. Use a gentle and slow watering technique to avoid washing away the soil or causing erosion around the bulbs. Water at the base of the plant rather than wetting the foliage as damp leaves can promote disease development.
- Consider Drip Irrigation or a Soaker Hose: If you have a larger fern bed or multiple fern bulbs, consider using drip irrigation or a soaker hose system. These methods deliver water directly to the soil, ensuring efficient and even distribution while minimizing water loss through evaporation.
- Avoid Waterlogging: While ferns enjoy moist soil, they are susceptible to root rot if the area becomes waterlogged. Ensure that the soil has proper drainage and does not retain excess water. If you notice the soil staying consistently saturated, adjust your watering schedule or amend the soil with organic matter to improve drainage.
- Observe Signs of Under or Overwatering: Regularly observe the fern plants for signs of under or overwatering. Wilting, yellowing leaves may indicate insufficient moisture, while yellowing or browning leaves may suggest excessive water or poor drainage. Adjust your watering practices accordingly to provide the right balance.
Remember that proper watering is especially crucial during the fern bulbs’ establishment phase. As they develop a strong root system, they will become more resilient and require less frequent watering. However, always be mindful of their moisture needs and adjust watering practices as necessary throughout the growing season.
By following these watering guidelines, you will provide your fern bulbs with the necessary moisture for healthy growth and ensure their long-term viability in your garden.
Taking Care of Fern Bulbs
Providing proper care for your fern bulbs is essential to promote their overall health and longevity. By following a few key practices, you can ensure that your fern bulbs thrive and continue to beautify your garden. Here are some essential care tips:
- Maintain Consistent Moisture: As mentioned earlier, fern bulbs prefer consistently moist soil. Monitor soil moisture levels and water as needed to keep the soil moist but not waterlogged. Avoid allowing the soil to dry out completely between watering.
- Mulch to Conserve Moisture: Apply a layer of organic mulch, such as shredded bark or straw, around the base of the fern bulbs. The mulch helps to conserve soil moisture, suppress weed growth, and provide insulation for the bulbs during extreme temperatures.
- Provide Adequate Shade: Most fern species thrive in shaded or partially shaded areas. Ensure that the fern bulbs are protected from direct sunlight, particularly during the hottest part of the day. Use shade cloth or strategically position them under trees or taller plants to create the optimal growing conditions.
- Prune and Remove Dead Fronds: Regularly inspect your fern bulbs for any dead or yellowing fronds. Gently remove these using pruning shears or scissors, as they can attract pests or diseases and impede the overall health of the plant. Pruning also helps maintain an aesthetically pleasing appearance.
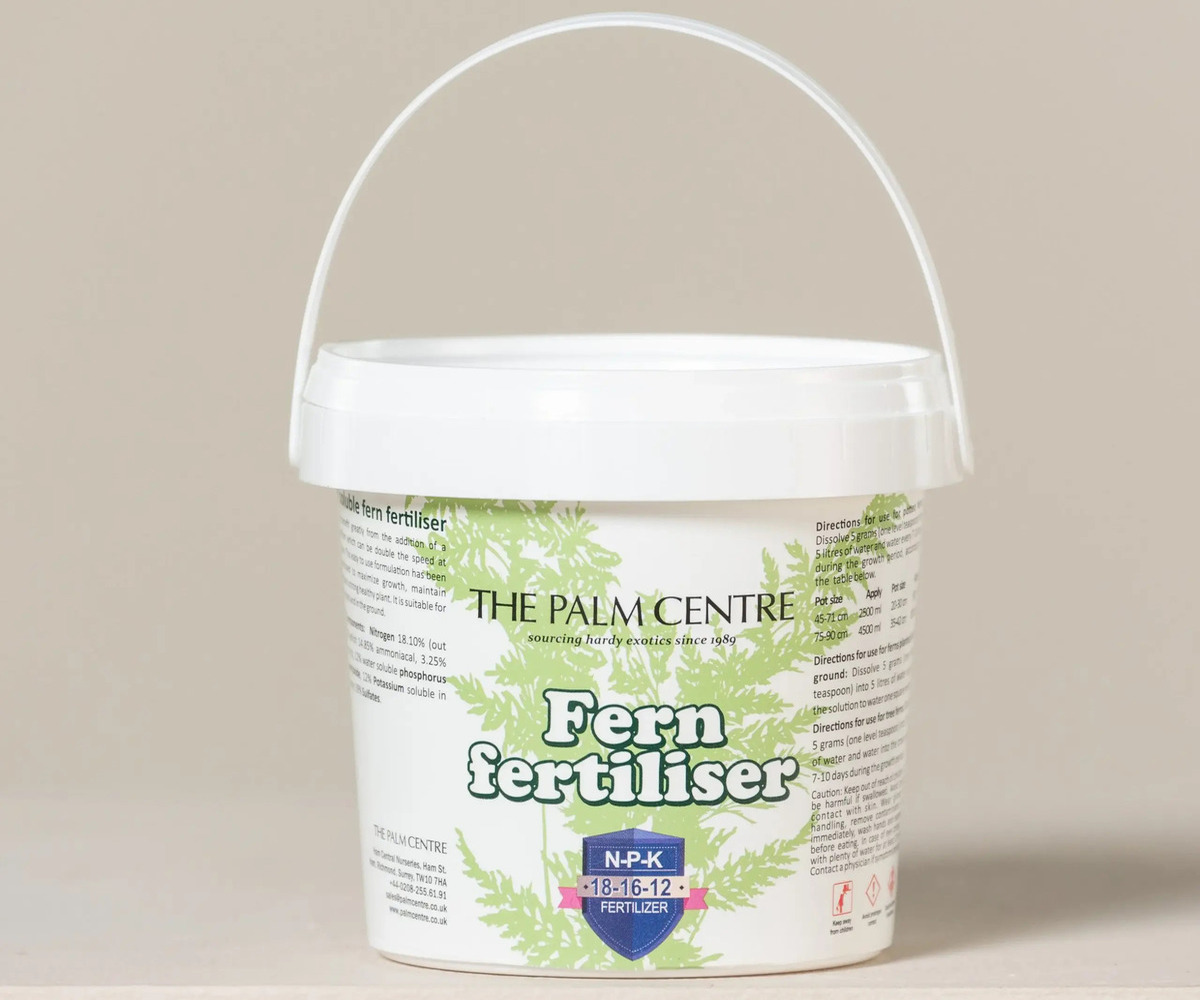
- Fertilize Regularly: Fern bulbs benefit from regular fertilization to provide the necessary nutrients for growth. Use a balanced, slow-release fertilizer specifically formulated for ferns. Apply the fertilizer according to the package instructions, typically once every couple of months during the growing season.
- Monitor for Pests and Diseases: Keep a lookout for common fern pests such as aphids, scale insects, and slugs. Regularly inspect the plants and take appropriate measures if pests are present. Additionally, watch for signs of diseases such as leaf spot or powdery mildew, and promptly address any issues to prevent spreading.
- Protect from Extreme Temperatures: Fern bulbs can be sensitive to extreme heat or cold. Provide protection during heatwaves by ensuring adequate shade and providing additional watering. In colder climates, consider mulching the plants heavily before the onset of winter to provide insulation and protect the bulbs from freezing temperatures.
- Divide and Transplant as Needed: Over time, fern bulbs may become crowded, leading to reduced growth and vigor. If necessary, divide the bulbs every few years to rejuvenate the plants. Transplanting can also help create more space and ensure optimal growth conditions for your fern bulbs.
By following these care tips, you will ensure that your fern bulbs remain healthy, vibrant, and a beautiful addition to your garden. Regular maintenance, including watering, pruning, and monitoring for pests or diseases, will help support their growth and ensure their long-term success.
Protecting Fern Bulbs from Pests and Diseases
Like any other plants, fern bulbs are susceptible to pests and diseases that can affect their health and vitality. Taking proactive measures to protect your fern bulbs will help ensure their continued growth and beauty. Here are some tips for preventing and managing pests and diseases:
- Regular Inspection: Regularly inspect your fern bulbs for any signs of pests or diseases. Look for unusual spots, discoloration, wilting, or damage to the fronds. Early detection allows for prompt action and minimizes the risk of further infestation or infection.
- Remove Diseased or Infested Fronds: If you notice any fronds that are infected or infested, remove them immediately. This will help contain the spread of pests and diseases to other parts of the plant.
- Natural Predators and Beneficial Insects: Encourage the presence of natural predators and beneficial insects in your garden. Ladybugs, lacewings, and parasitic wasps are among the many insects that can help keep pest populations in check. Avoid using broad-spectrum pesticides that may harm beneficial insects.
- Handpicking: For larger pests such as slugs or caterpillars, handpicking can be an effective method of control. Regularly check the surrounding area and physically remove any pests that you come across. Dispose of them away from your fern bulbs.
- Organic Pest Control: If chemical intervention becomes necessary, opt for organic and eco-friendly pest control methods. Neem oil, insecticidal soaps, or horticultural oils can be used to target specific pests while minimizing harm to beneficial organisms and the environment.
- Proper Hygiene: Maintain good garden hygiene by cleaning up fallen debris and removing dead foliage around your fern bulbs. This will help eliminate hiding places for pests and reduce the risk of diseases taking hold in decaying plant material.
- Quarantine New Additions: If you add new fern bulbs to your garden, it is wise to quarantine them for a period of time away from your existing plants. This allows you to monitor them for any signs of pests or diseases before introducing them to your main garden bed.
- Cultural Practices: Creating optimal growing conditions for your fern bulbs can also help reduce the risk of pest and disease problems. Ensure proper spacing between plants, adequate air circulation, and appropriate watering and fertilization practices to promote robust plant health.
Keep in mind that prevention is key when it comes to protecting your fern bulbs from pests and diseases. Regular monitoring, maintaining good garden hygiene, and implementing appropriate pest control measures will help safeguard the health and beauty of your fern bulbs for years to come.
Harvesting and Dividing Fern Bulbs
As fern bulbs grow and mature, they may need to be harvested and divided to maintain their health and vigor. Dividing fern bulbs not only helps prevent overcrowding but also allows you to propagate new plants for expanding your fern collection. Here’s a step-by-step guide on how to harvest and divide fern bulbs:
- Timing: The ideal time to harvest and divide fern bulbs is during their dormant period, usually in early spring or late fall. This is when the bulbs are less actively growing and the risk of transplant shock is minimal.
- Prepare the Area: Clear the surrounding area and have containers or prepared planting holes ready to accommodate the divided bulbs. Ensure that the location where you will be working is clean and well-organized.
- Dig up the Bulbs: Carefully dig up the entire clump of fern bulbs using a garden fork or shovel. Take care not to damage the bulbs or their roots. Gently shake off excess soil to reveal the bulb clusters.
- Separate the Bulbs: Examine the bulb clump and identify natural divisions or areas where the bulbs can be separated. Use your hands or a sharp, sterile knife to carefully separate the bulbs, ensuring that each division has sufficient roots attached.
- Trim and Clean: Trim any damaged or decaying portions of the bulbs using clean pruning shears or scissors. Remove any dead or yellowing fronds as well. Rinse the divided bulbs and roots under running water to remove excess soil.
- Replant or Store: Replant the divided fern bulbs immediately in prepared planting holes or containers filled with well-draining soil. Ensure that the bulbs are positioned at the appropriate depth and water them thoroughly after replanting. Alternatively, if you are not ready to replant the bulbs, store them in a cool, dry place until you are ready to do so.
- Provide Care: After dividing and replanting the fern bulbs, provide them with proper care and maintenance. Keep the soil consistently moist and provide shade during hot periods. Monitor their growth and adjust watering and fertilization as needed to support their establishment.
Dividing fern bulbs every few years not only prevents overcrowding but also rejuvenates the plants, leading to healthier growth and more robust fronds. Additionally, the divided bulbs can be shared or planted in different areas of your garden, allowing you to expand your fern collection and create stunning displays.
By following these steps and providing appropriate care, you can successfully harvest and divide your fern bulbs, promoting their overall health and ensuring their continuous beauty in your garden.
Conclusion
Congratulations! You have now gained comprehensive knowledge about planting and caring for fern bulbs. By understanding the unique qualities of fern bulbs, selecting the right ones for your garden, and providing them with the optimal growing conditions, you can enjoy the beauty and elegance that these plants bring to your landscape.
Remember, proper soil preparation, choosing the right planting location, and providing adequate watering are essential for the successful growth of fern bulbs. Take the time to monitor their progress, prune as needed, and protect them from pests and diseases to ensure their long-term health.
Harvesting and dividing fern bulbs will not only maintain their vitality but also give you the opportunity to expand your fern collection and share the beauty with others. Replant the divided bulbs or store them properly until you are ready to replant, and make sure to provide them with the care and maintenance they need to thrive.
Ornamental gardening with fern bulbs can be a truly rewarding experience. These versatile plants bring texture, color, and a touch of serenity to your garden, transforming it into a tranquil oasis. Whether you are a seasoned gardener or just starting your horticultural journey, the addition of fern bulbs will undoubtedly elevate your gardening skills and provide years of enjoyment.
So, put on your gardening gloves, grab your trowel, and start embracing the world of fern bulbs. With your newfound knowledge and passion, you are well-equipped to create a stunning display of these enchanting plants in your garden. Happy gardening!