Home>Types of Gardening>Ornamental Gardening>How To Plant Amaryllis Bulbs

Ornamental Gardening
How To Plant Amaryllis Bulbs
Published: January 25, 2024
Learn how to properly plant amaryllis bulbs in your garden and enhance your ornamental gardening skills. Discover step-by-step instructions and care tips.
(Many of the links in this article redirect to a specific reviewed product. Your purchase of these products through affiliate links helps to generate commission for Chicagolandgardening.com, at no extra cost. Learn more)
Table of Contents
- Introduction
- Step 1: Choosing the Right Bulbs
- Step 2: Preparing the Soil
- Step 3: Planting the Bulbs
- Step 4: Watering and Care
- Step 5: Ensuring Proper Lighting
- Step 6: Supporting the Stems
- Step 7: Fertilizing the Plants
- Step 8: Dealing with Pests and Diseases
- Step 9: Monitoring Growth and Development
- Conclusion
Introduction
Welcome to the wonderful world of ornamental gardening! If you have a passion for beautiful blooms and want to add a touch of elegance to your garden, then planting amaryllis bulbs is a perfect choice. Amaryllis is a stunning flowering plant that produces gorgeous trumpet-shaped flowers in various shades of red, pink, white, and even striped patterns.
Whether you are a seasoned gardener or just starting out, planting amaryllis bulbs is a rewarding and straightforward process. These bulbs are known for their ability to produce show-stopping blooms, making them a popular choice among garden enthusiasts. By following a few simple steps, you’ll be able to enjoy the vibrant colors and striking beauty of amaryllis flowers.
In this guide, we will take you through the entire process of planting and caring for amaryllis bulbs. From selecting the right bulbs to ensuring proper lighting and support, we will cover everything you need to know to grow healthy and stunning amaryllis plants. So, let’s roll up our sleeves and get ready to embark on an ornamental gardening adventure!
Step 1: Choosing the Right Bulbs
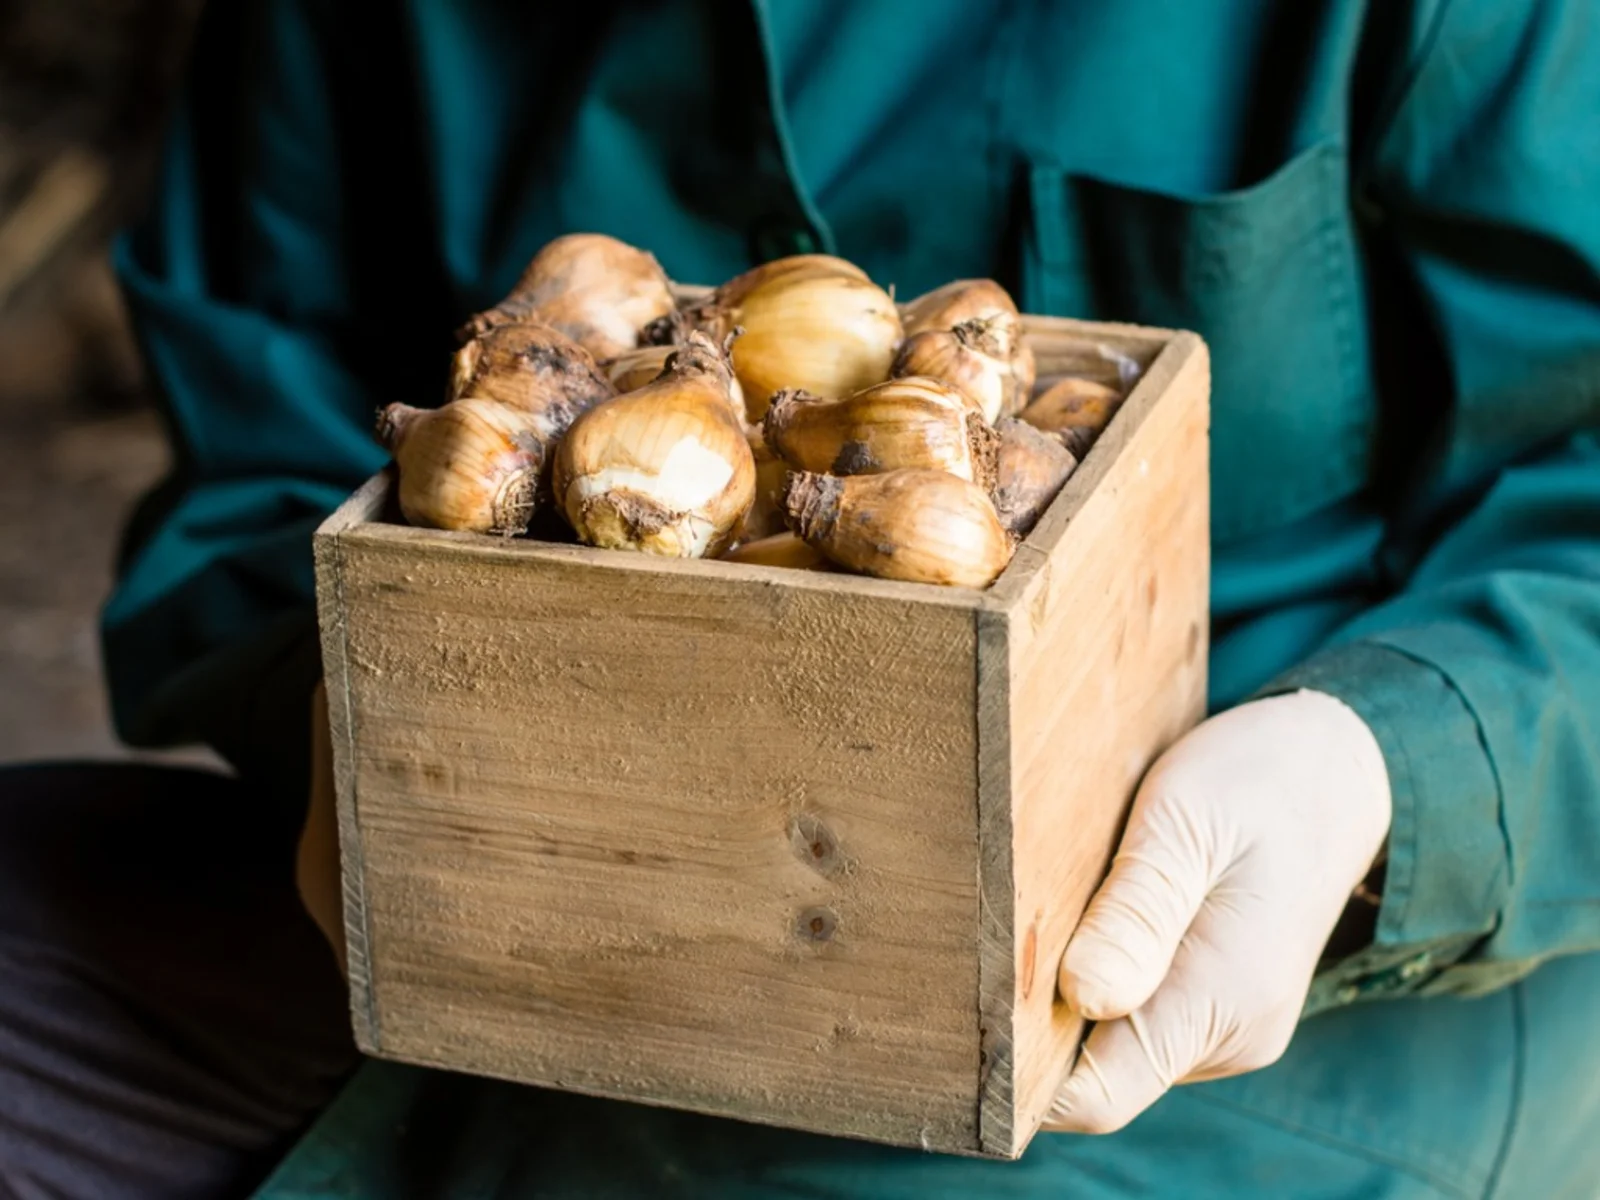
The first and crucial step in planting amaryllis bulbs is selecting high-quality bulbs. Choosing the right bulbs will ensure healthy growth and vibrant blooms. Here are some key factors to consider when selecting amaryllis bulbs:
- Size: Look for bulbs that are large and firm. Bigger bulbs tend to produce more flowers and have a higher chance of successful growth.
- Condition: Inspect the bulbs for any signs of damage or decay. Avoid bulbs with mold, soft spots, or visible signs of disease.
- Variety: Amaryllis bulbs come in various colors and patterns. Select bulbs with the specific color and pattern you desire to add a touch of beauty to your garden.
- Growth Stage: Some bulbs may already show signs of sprouting, while others may be in a dormant state. Both options are viable, but dormant bulbs may require a longer time to bloom.
It’s also worth considering purchasing bulbs from reputable garden centers or nurseries to ensure their quality and authenticity. Online shopping can be convenient, but it’s important to research and choose a reliable source.
Once you have chosen your bulbs, it’s time to move on to the next step: preparing the soil. Proper soil preparation is essential for providing the ideal growing conditions for your amaryllis bulbs.
Step 2: Preparing the Soil
Creating the right foundation for your amaryllis bulbs to thrive is crucial for their growth and development. Here are some essential steps to prepare the soil:
1. Choose the right location: Amaryllis bulbs thrive in well-draining soil and prefer a spot with full sun or partial shade. Select a location in your garden where the soil is loose, fertile, and receives at least 6 hours of direct sunlight.
2. Assess the soil: Test the pH level of the soil using a soil testing kit. Amaryllis bulbs prefer a slightly acidic to neutral pH level (around 6.0 to 7.0). If the soil is too acidic or alkaline, amendments may be required to adjust the pH level.
3. Improve drainage: Amaryllis bulbs dislike soggy or waterlogged soil, as it can lead to rotting. If your soil retains too much water, consider adding organic matter, such as compost or well-rotted manure, to improve drainage.
4. Loosen the soil: Use a garden fork or a tiller to loosen the soil to a depth of about 12 inches (30 cm). This will allow the amaryllis bulbs’ roots to penetrate easily and establish a strong foundation.
5. Remove obstacles: Clear the planting area of any weeds, rocks, or debris that could hinder the growth of your amaryllis bulbs.
By following these steps, you will create an ideal environment for your amaryllis bulbs to flourish. Now it’s time to move on to the next step: planting the bulbs!
Step 3: Planting the Bulbs
Now that you have prepared the soil, it’s time to plant your amaryllis bulbs. Follow these steps to ensure proper planting:
1. Dig the hole: Dig a hole in the prepared soil that is approximately 6 to 8 inches (15 to 20 cm) deep. The hole should be wide enough to accommodate the entire bulb.
2. Position the bulb: Place the amaryllis bulb in the hole, with the pointed end facing up. The top one-third of the bulb should be above the soil line.
3. Backfill the hole: Gently fill the hole with soil, ensuring that the bulb is securely held in place. Be careful not to damage the bulb or its roots during this process.
4. Firm the soil: Lightly press down on the soil around the bulb to eliminate any air pockets and provide stability.
5. Space the bulbs: If you are planting multiple amaryllis bulbs, make sure to space them at least 8 to 12 inches (20 to 30 cm) apart to allow proper growth and prevent overcrowding.
6. Water thoroughly: After planting, water the bulbs thoroughly to help them settle in and encourage root development.
7. Mulch the area: Apply a layer of organic mulch, such as straw or wood chips, around the planted bulbs to help retain moisture and suppress weed growth. Keep the mulch about an inch away from the base of the bulbs to avoid rotting.
Follow these steps when planting your amaryllis bulbs, and you will set them up for successful growth and flowering. The next step is to provide proper watering and care to ensure their well-being.
Step 4: Watering and Care
Proper watering and care are essential for the health and vitality of your amaryllis plants. Follow these guidelines to ensure they receive the right amount of water and attention:
1. Watering: Amaryllis bulbs should be watered thoroughly but not excessively. Allow the top inch of soil to dry out slightly between waterings. When watering, aim to moisten the soil evenly, but avoid waterlogging, as it can lead to bulb rot. Adjust the frequency of watering based on the weather conditions and soil moisture levels.
2. Fertilizing: Feed your amaryllis bulbs with a balanced, water-soluble fertilizer once every two to four weeks during the active growth period. Choose a fertilizer with a formulation of equal or similar proportions of nitrogen (N), phosphorus (P), and potassium (K). Follow the packaging instructions for proper dilution and application.
3. Deadheading: After your amaryllis flowers have finished blooming, remove the faded flowers to prevent the plant from expending energy on seed production. Cut the flower stalk near the base, but leave the foliage intact to continue nourishing the bulb for future growth.
4. Support: As the amaryllis stems grow taller, they may require support to prevent them from bending or breaking. Place a stake or ring support near the base of the stem and gently tie it with soft plant ties to provide stability.
5. Protect from extreme temperatures: Amaryllis plants are sensitive to extremely cold or hot temperatures. If the weather becomes too cold, consider bringing your potted amaryllis indoors, or provide a protective cover for in-ground plants. Similarly, if the temperature becomes scorching, provide some shade during the hottest part of the day.
6. Monitor pests and diseases: Keep an eye out for common pests like aphids, mealybugs, and spider mites. If infestations occur, treat them with organic pest control solutions or insecticidal soap. Also, watch for signs of diseases like bulb rot or fungal infections. Remove affected plant parts promptly to prevent the spread of disease.
By following these watering and care practices, your amaryllis plants will thrive and reward you with stunning blooms. The next step is to ensure proper lighting for optimal growth.
Step 5: Ensuring Proper Lighting
Proper lighting is a crucial factor for the healthy growth and blooming of your amaryllis plants. Follow these guidelines to ensure they receive the right amount and quality of light:
1. Sunlight requirements: Amaryllis plants thrive in bright, indirect sunlight. They require at least 6 to 8 hours of sunlight each day to promote optimal growth and flower production. Place them near a south or west-facing window where they can receive ample sunlight throughout the day.
2. Outdoor placement: If you are growing amaryllis bulbs outdoors, choose a location that offers partial shade during the hottest parts of the day. This will protect the plants from potential sunburn and heat stress.
3. Indoor placement: When growing amaryllis bulbs indoors, avoid placing them near drafty windows or in direct contact with cold windowsills during the winter months. Cold temperatures can hinder their growth and delay flowering.
4. Rotate the pot: If you notice your amaryllis plant leaning towards the light, rotate the pot every few days to ensure even exposure to sunlight. This will help promote straight stem growth and prevent leaning.
5. Supplemental lighting: In areas with limited natural light, you can provide supplemental artificial lighting. Use grow lights designed specifically for plants and position them 6 to 12 inches above the foliage. Keep the lights on for 12 to 14 hours a day to mimic the natural day-night cycle.
6. Light-sensitive varieties: Some amaryllis varieties are light-sensitive and require specific lighting conditions to bloom properly. These varieties may need a period of darkness (12 to 14 hours) each day for several weeks before they can develop flower buds. Research the specific requirements of your amaryllis variety and adjust your lighting accordingly.
By ensuring proper lighting conditions, you will encourage healthy growth, sturdy stems, and vibrant blooms in your amaryllis plants. The next step is to provide support to the stems as they grow taller.
Step 6: Supporting the Stems
As your amaryllis plants grow, their tall and heavy flower stalks may need support to prevent them from bending or breaking. Follow these steps to provide the necessary support:
1. Assess stem growth: Monitor the growth of your amaryllis stems and anticipate when they will need support. Typically, stems will start to elongate and become top-heavy as the flowers develop.
2. Stake selection: Choose a sturdy stake or support that is at least 1 to 2 feet taller than the anticipated height of the fully grown stems. Bamboo stakes or metal rods are commonly used for this purpose.
3. Placement: Position the stake near the base of the stem, being careful not to disturb the roots. Insert it into the soil, ensuring it is firmly in place but not too close to the bulb.
4. Attachment: Use soft plant ties or twine to gently tie the stem to the stake. Avoid tying too tightly to allow room for growth and movement, but secure it enough to provide stability.
5. Check for stability: Ensure that the stem is secure and upright after attaching it to the stake. Adjust the ties if needed to provide proper support.
6. Regular maintenance: As the stem continues to grow, periodically check the ties and readjust them if necessary. Make sure they are not too tight, as this can cause damage to the stem.
7. Remove support after flowering: Once the flowering period is over and the stem starts to wither, you can remove the support. Cut the stem close to the base, and carefully remove the stake from the soil.
By providing support to the growing stems of your amaryllis plants, you will help maintain their upright position and prevent any damage that can occur due to heavy blossoms. The next step is to ensure proper fertilization to promote healthy growth and vibrant blooms.
Step 7: Fertilizing the Plants
Fertilizing your amaryllis plants is an important step to provide them with the necessary nutrients for healthy growth and vibrant blooms. Follow these guidelines to ensure proper fertilization:
1. Timing: Start fertilizing your amaryllis bulbs after they have finished blooming and are actively growing. This typically occurs during spring and summer. Avoid fertilizing when the plant is dormant or not actively growing.
2. Choose the right fertilizer: Select a balanced, water-soluble fertilizer with a formulation ratio of equal or similar proportions of nitrogen (N), phosphorus (P), and potassium (K). Look for a fertilizer specifically formulated for flowering plants or bulbs.
3. Dilution and application: Follow the instructions on the fertilizer packaging for proper dilution ratios and application methods. Generally, you will need to dilute the fertilizer in water according to the recommended dosage and apply it to the soil around the base of the amaryllis plant.
4. Frequency: Fertilize your amaryllis plants every two to four weeks during the active growth period. Be careful not to over-fertilize, as it can lead to salt buildup in the soil, which can be harmful to the plant.
5. Watering after fertilization: After applying fertilizer, water your amaryllis plants thoroughly. This helps to distribute the nutrients evenly in the soil and prevents any potential damage from concentrated fertilizer.
6. Monitor plant response: Observe your amaryllis plants for any signs of deficiency or excess fertilization. Symptoms like yellowing leaves, stunted growth, or nutrient burn indicate the need for adjustment in fertilizer dosage or type.
7. Stop fertilizing before dormancy: As your amaryllis plants approach their dormant period, usually in late summer or early fall, gradually reduce and eventually stop fertilizing. This allows the plant to prepare for its resting phase.
By following these fertilizing guidelines, you can provide your amaryllis plants with the nutrients they need for robust growth and stunning blooms. The next step is to be proactive in preventing and managing pests and diseases.
Step 8: Dealing with Pests and Diseases
Pests and diseases can pose a threat to the health and vitality of your amaryllis plants. It’s important to be proactive in preventing and managing these issues. Follow these guidelines to deal with common pests and diseases:
1. Identifying pests: Keep an eye out for common pests that can affect amaryllis plants, such as aphids, mealybugs, and spider mites. Look for signs of damage, like discolored leaves, distorted growth, or sticky residue on the leaves.
2. Natural pest control: For mild infestations, you can try gentle pest control methods like spraying with a mixture of water and mild liquid detergent or using neem oil. These solutions help suffocate pests and deter their feeding activity.
3. Organic pesticides: For more severe pest infestations, consider using organic insecticides specifically formulated for the pests affecting amaryllis plants. Follow the instructions carefully and apply them sparingly to minimize any potential harm to beneficial insects and the environment.
4. Monitoring and prevention: Regularly inspect your plants for signs of pests or diseases. Catching the problem early makes it easier to manage and prevent further damage. Avoid overwatering or allowing water to sit on the foliage, as this can create an environment conducive to fungal diseases.
5. Treating diseases: Amaryllis plants can be susceptible to diseases like bulb rot or fungal infections. If you notice any signs of disease, such as soft or discolored spots on the bulbs or leaves, take immediate action. Remove affected plant parts, improve air circulation, and avoid overwatering to discourage disease development.
6. Sterilizing tools: When pruning or removing infected plant parts, make sure to clean and sterilize your tools to prevent the spread of diseases. Use a solution of rubbing alcohol or bleach diluted in water to disinfect your tools between each use.
7. Proper plant hygiene: Maintain good plant hygiene by removing fallen leaves or debris from the soil surface. This reduces the risk of pests and diseases finding a breeding ground near your amaryllis plants.
By staying vigilant and taking prompt action, you can effectively deal with pests and diseases and help ensure the health and longevity of your amaryllis plants. The final step is to monitor the growth and development of your plants.
Step 9: Monitoring Growth and Development
Monitoring the growth and development of your amaryllis plants is crucial for their overall health and success. By keeping a close eye on their progress, you can make necessary adjustments and ensure optimal growth. Follow these guidelines for effectively monitoring your amaryllis plants:
1. Growth rate: Observe how quickly your amaryllis stems and foliage are growing. A healthy plant will exhibit steady and vigorous growth. If you notice slow or stunted growth, it may indicate an issue that needs attention, such as inadequate light or nutrient deficiency.
2. Leaf color and condition: Monitor the color and condition of the leaves. They should be a deep green color and have a glossy appearance. Yellowing leaves can be a sign of nutrient deficiencies or excessive watering, while brown spots or wilting may indicate disease or pest infestation.
3. Flower bud development: Keep track of the emergence and development of flower buds. It’s an exciting stage that indicates the upcoming bloom. Note the number of bud clusters and the size of the buds, as this can vary depending on the amaryllis variety.
4. Blooming period: Pay attention to the duration and timing of the flowering period. Amaryllis plants typically bloom for several weeks, but the exact duration can vary. Monitor changes in the intensity and color of the flowers, as well as the overall health and longevity of the blooms.
5. Foliage after blooming: After the flowers have faded, the foliage will continue to grow. Observe the foliage and ensure it remains green and healthy. The leaves play a vital role in storing energy for the next blooming cycle.
6. Bulb division: Over time, amaryllis bulbs can multiply and form clumps. Monitor the bulbs and consider dividing them every few years to maintain their health and vigor. Dividing bulbs can also enable you to propagate new plants.
7. Adjustments and care: Based on your observations, make any necessary adjustments to the care routine for your amaryllis plants. This could include adjusting watering frequency, fertilizing schedule, or changing their placement to optimize their growth environment.
By regularly monitoring the growth and development of your amaryllis plants, you can ensure they receive the proper care and attention they need to thrive. Enjoy the journey of witnessing the transformation of your plants from bulbs to beautiful blooming flowers!
Conclusion
Congratulations on successfully planting and caring for your amaryllis bulbs! By following the steps outlined in this guide, you have set yourself up for a rewarding and vibrant ornamental gardening experience.
From selecting the right bulbs to ensuring proper soil preparation, planting, watering, and care, you have gained valuable knowledge on how to nurture amaryllis plants to their full potential. By providing them with the ideal growing conditions, including proper lighting, support, fertilization, and monitoring of their growth, you have maximized their chances of healthy growth and stunning blooms.
Remember to regularly observe your amaryllis plants for any signs of pests, diseases, or nutrient deficiencies. By addressing these issues promptly, you can minimize damage and ensure the continued well-being of your plants.
Through your dedication and passion for ornamental gardening, you have unlocked the beauty and joy of growing these spectacular flowers. Enjoy the sight of their elegant and vibrant trumpet-shaped blooms, which will undoubtedly bring color and charm to your garden and indoor spaces.
Continue to care for your amaryllis plants with love and attention, and they will reward you with years of stunning floral displays. Don’t hesitate to experiment with different varieties and techniques to expand your knowledge and create a diverse and enchanting garden.
Thank you for embarking on this amaryllis-growing journey with us. Happy gardening!