Home>Types of Gardening>Ornamental Gardening>How To Plant Astilbe Bulbs

Ornamental Gardening
How To Plant Astilbe Bulbs
Published: January 25, 2024
Learn the steps for planting Astilbe bulbs in your ornamental garden and create a stunning display of vibrant colors and lush foliage.
(Many of the links in this article redirect to a specific reviewed product. Your purchase of these products through affiliate links helps to generate commission for Chicagolandgardening.com, at no extra cost. Learn more)
Table of Contents
Introduction
Welcome to the world of ornamental gardening! If you’re looking to add a touch of elegance and beauty to your garden, then planting astilbe bulbs is the perfect choice. Astilbe, also known as false spirea, is a popular flowering plant that adds vibrant colors and unique textures to any landscape. Whether you’re a seasoned gardener or a beginner, growing astilbe bulbs is a rewarding and relatively easy task.
In this article, we will guide you through the step-by-step process of planting astilbe bulbs, from selecting the right location to providing proper care and maintenance. By following these instructions, you’ll be able to create a stunning garden filled with lush astilbe blooms.
Astilbe is native to Asia and North America and thrives in partially shaded areas with moist, well-draining soil. With its feather-like foliage and tall, plume-like flowers, astilbe is a standout addition to any garden bed, border, or woodland garden. Its blooms come in a range of colors, including white, pink, red, and purple, allowing you to create a visually striking display.
So, grab your gardening tools and let’s get started on this exciting journey of planting and growing astilbe bulbs. With a little time and effort, you’ll soon be rewarded with a garden that is the envy of your neighbors.
Step 1: Selecting the Right Location
The first step in successfully planting astilbe bulbs is selecting the right location in your garden. Astilbe thrives in partially shaded areas, so it’s important to choose a spot that receives dappled sunlight or a few hours of morning sun. Avoid planting astilbe in full sun, as this can lead to scorched leaves and decreased blooming.
When choosing a location, consider the soil conditions as well. Astilbe prefers moist, well-draining soil that is rich in organic matter. If your soil tends to be heavy and clay-like, consider adding compost or well-rotted manure to improve drainage and fertility. This will create the ideal growing conditions for astilbe.
Additionally, consider the overall aesthetics of your garden when selecting the location. Astilbe plants can range in height from 6 inches to 5 feet, depending on the variety. Taller varieties make excellent backdrops or focal points in a garden bed, while shorter varieties are perfect for edging or container gardening. Take into account the plant height and spacing recommendations when planning the layout.
Remember to also consider the proximity to other plants. Astilbe is a versatile companion plant that pairs well with other shade-loving perennials such as hostas, ferns, and heucheras. The contrasting textures and colors create a visually appealing garden bed. Planting astilbe near water features or in woodland garden settings can also accentuate their natural beauty.
To sum up, selecting the right location for your astilbe bulbs is crucial for their overall health and vigor. Choose a partially shaded spot with well-draining soil that has been enriched with organic matter. Consider the height and spacing requirements, as well as the aesthetics and complementary plantings, to maximize the impact of your astilbe garden. With the right location, your astilbe bulbs are off to a great start!
Step 2: Preparing the Soil
Preparing the soil is an essential step in ensuring the healthy growth of your astilbe bulbs. By providing them with the right conditions from the start, you can help them establish strong root systems and thrive in your garden.
Start by testing the pH level of your soil. Astilbe prefers slightly acidic soil with a pH range of 5.5 to 6.5. If your soil is too alkaline, you can lower the pH by adding organic matter such as peat moss or compost. On the other hand, if your soil is too acidic, you can raise the pH by incorporating limestone or dolomite lime.
Next, loosen the soil to allow for better drainage and root penetration. Use a garden fork or tiller to break up any compacted soil. Remove any rocks, weeds, or debris that may hinder the growth of your astilbe bulbs.
Before planting, it’s a good idea to enrich the soil with organic matter. This will help improve the soil’s fertility, structure, and moisture-holding capacity. Work in compost, well-rotted manure, or leaf mold to ensure a nutrient-rich base for your astilbe bulbs.
Lastly, consider adding a layer of organic mulch to the soil surface. Mulch helps retain moisture, suppresses weed growth, and insulates the roots from temperature fluctuations. Apply a 2- to 3-inch layer of mulch, such as shredded bark or straw, around the base of your astilbe plants, making sure to leave a small space around the stem to prevent rot.
By preparing the soil properly, you are setting the stage for healthy plant growth and vibrant astilbe blooms. Remember to test the pH level, improve drainage, incorporate organic matter, and apply mulch. Your astilbe bulbs will thank you by thriving in their new home!
Step 3: Choosing and Planting Astilbe Bulbs
Choosing the right astilbe bulbs and planting them correctly will greatly contribute to the success of your garden. Follow these steps to ensure optimal growth and abundant blooms.
When selecting astilbe bulbs, look for healthy, firm bulbs that are free from any signs of rot or damage. The bulbs should feel heavy for their size, indicating good moisture content. Choose bulbs that are of a size appropriate for the variety you have chosen.
Before planting, soak the astilbe bulbs in water for a few hours. This helps rehydrate the bulbs and promotes faster root development. While they soak, prepare the planting holes in your garden bed or containers.
The planting depth and spacing requirements vary depending on the astilbe variety. As a general rule, plant the bulbs at a depth that is two to three times their diameter. This means that larger bulbs will be planted deeper than smaller bulbs. Space the bulbs according to the recommended distance, typically 12 to 18 inches apart.
Place the soaked bulbs in the prepared holes with the pointed ends facing upwards. Gently firm the soil around the bulbs, ensuring they are secure but not overly compacted. Water the newly planted bulbs thoroughly to settle the soil and provide moisture for root establishment.
Astilbe bulbs prefer consistently moist soil, so monitor the moisture levels regularly. Water deeply when the top inch of the soil feels dry to the touch. However, be cautious not to overwater, as excessive moisture can lead to crown rot.
As astilbe plants grow, they may require additional support to prevent the tall flower stalks from drooping or breaking. Install stakes or provide a framework to support the plants as needed.
By carefully selecting and planting your astilbe bulbs, you are giving them the best chance to thrive. Soak the bulbs, plant them at the appropriate depth and spacing, and provide support and proper watering. Soon enough, you’ll witness the beauty of astilbe blooms brightening up your garden.
Step 4: Watering and Mulching
Proper watering and mulching are essential for maintaining the health and vitality of your astilbe plants. Follow these guidelines to ensure they receive adequate moisture and protection.
Astilbe plants require consistent moisture to thrive, especially during the hot summer months. Water deeply and evenly, ensuring that the soil is moist but not waterlogged. Aim to keep the soil consistently moist, but avoid standing water, as this can lead to root rot.
When watering astilbe, it’s important to focus on the root zone. Direct the water at the base of the plant rather than overhead to prevent wet foliage, which can increase the risk of fungal diseases. Consider using a drip irrigation system or soaker hose to ensure efficient water delivery.
Mulching is another important step in the care of astilbe plants. Apply a layer of organic mulch, such as shredded bark or straw, around the base of the plants. Mulch helps conserve moisture, suppress weeds, and regulate soil temperature. Keep the mulch layer at a depth of 2 to 3 inches, taking care to leave a small space around the stems to prevent rot.
During the growing season, inspect the mulch periodically to ensure it remains in place and hasn’t become compacted. If necessary, replenish the mulch to maintain the desired thickness and coverage.
Additionally, consider adding organic matter, such as compost, to the soil each year. This helps improve the soil structure, fertility, and moisture-holding capacity, providing an optimal growing environment for your astilbe plants.
By providing consistent moisture through proper watering techniques and using organic mulch, you are setting your astilbe plants up for success. Monitor soil moisture levels, water deeply and evenly at the base of the plants, and apply a layer of mulch to conserve moisture and suppress weeds. With these watering and mulching practices, your astilbe garden will flourish with vibrant blooms.
Step 5: Providing Proper Care and Maintenance
Providing proper care and maintenance is essential in ensuring the long-term health and vitality of your astilbe plants. Follow these steps to keep your astilbe thriving year after year.
One key aspect of caring for astilbe is regular fertilization. Apply a balanced, slow-release fertilizer in early spring, as new shoots emerge from the ground. This will provide the necessary nutrients to support healthy growth and abundant blooms. Follow the package instructions for the recommended application rate and frequency.
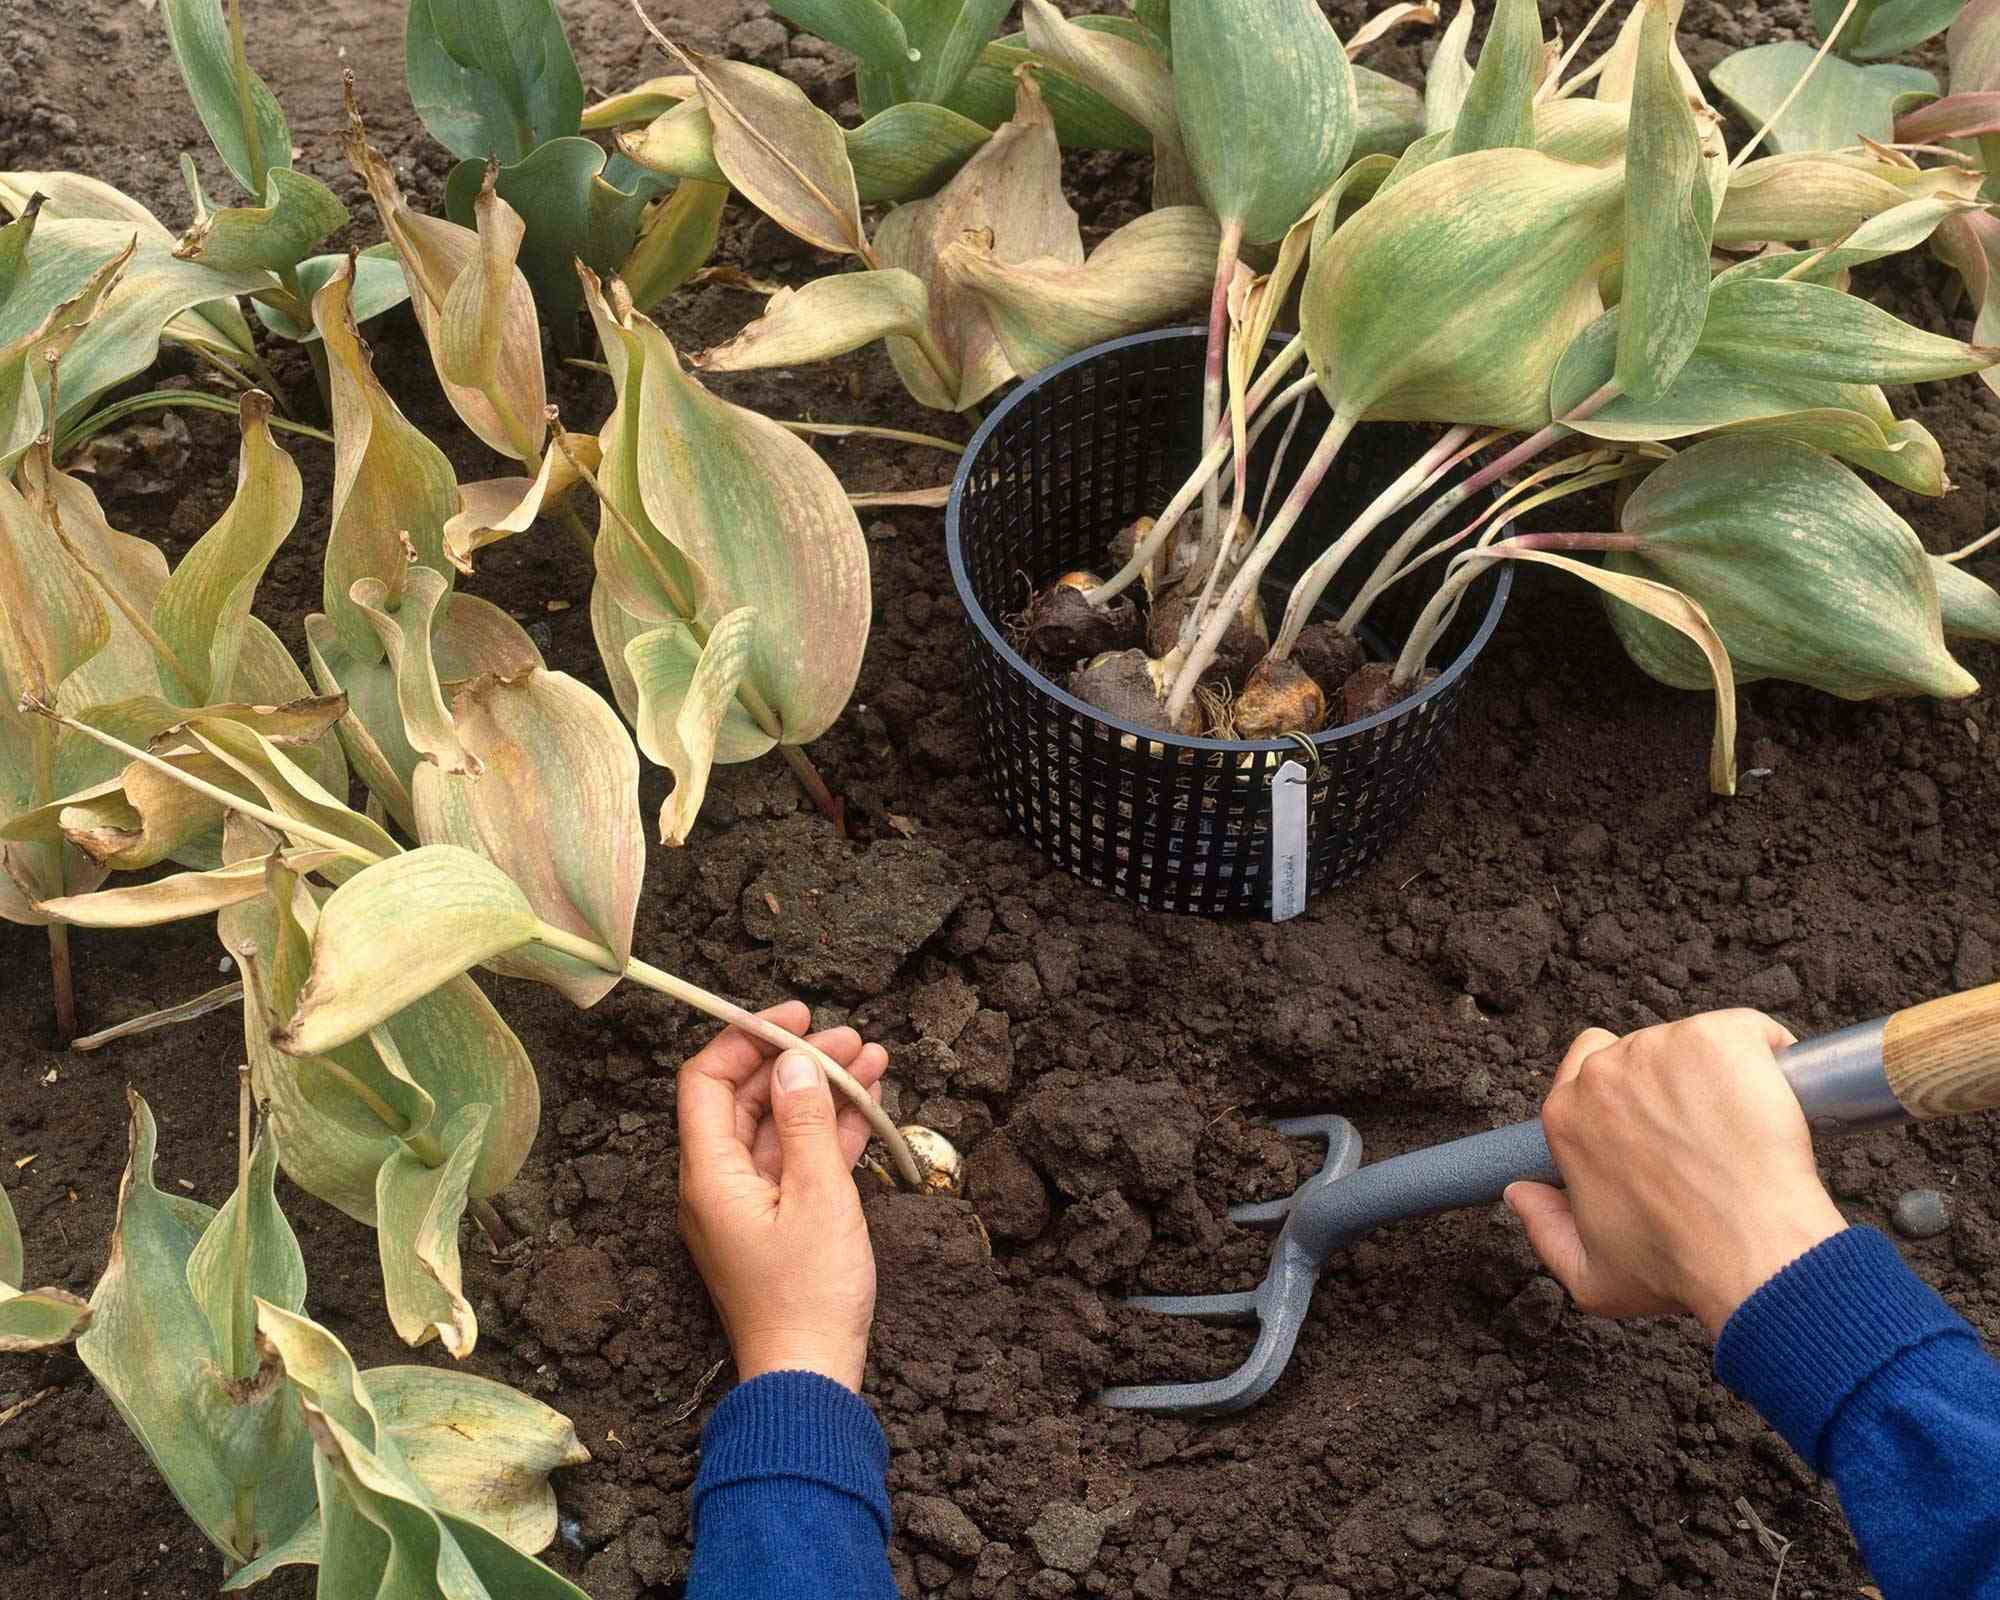
In addition to fertilization, astilbe plants benefit from regular division. Over time, clumps of astilbe can become crowded and may produce fewer flowers. Divide the plants every three to four years in the early spring or late fall when they are dormant. Dig up the clumps and carefully separate them into smaller sections, ensuring that each division has viable roots and shoots. Replant the divisions in well-prepared soil and provide adequate watering until they become established.
To maintain a tidy appearance and prevent the spread of diseases, remove any dead or damaged foliage throughout the growing season. This will also improve air circulation around the plants, reducing the risk of fungal infections. After the first hard frost in the fall, cut back the spent flower stalks and foliage to ground level.
While astilbe is relatively low-maintenance, it is still susceptible to pests and diseases. Keep an eye out for common pests like aphids, slugs, and snails. If necessary, use organic pest control methods or appropriate insecticides to keep these pests at bay. Additionally, practicing good garden hygiene, such as removing debris and maintaining adequate spacing between plants, can help prevent the spread of diseases.
Lastly, pay attention to the specific needs of different astilbe varieties. Some may require more shade and moisture, while others tolerate more sunlight and drier conditions. Take note of the specific care recommendations for the astilbe varieties you have planted and adjust your practices accordingly.
By providing proper care and maintenance, you are ensuring the long-term health and beauty of your astilbe plants. Fertilize regularly, divide as needed, remove dead foliage, monitor for pests and diseases, and cater to the specific needs of your astilbe varieties. With these care practices in place, your astilbe garden will continue to dazzle with its exquisite blooms.
Conclusion
Congratulations! You now have the knowledge and know-how to successfully plant and grow astilbe bulbs in your garden. By following the steps outlined in this guide, you can create a stunning display of astilbe blooms that will add beauty and elegance to your outdoor space.
From selecting the right location and preparing the soil to choosing and planting the bulbs, watering and mulching, and providing proper care and maintenance, each step plays a vital role in the overall success of your astilbe garden.
Remember to choose a partially shaded spot with well-draining, slightly acidic soil enriched with organic matter. Soak the astilbe bulbs before planting them at the appropriate depth and spacing. Water deeply and regularly, focusing on the root zone, and apply a layer of mulch to conserve moisture and suppress weeds.
Proper care and maintenance, including regular fertilization, division every few years, removal of dead foliage, pest and disease management, and catering to the specific needs of different astilbe varieties, will help keep your plants healthy and thriving.
So, roll up your sleeves, put on your gardening gloves, and start creating the astilbe garden of your dreams. With your dedication and the helpful information provided in this guide, your garden will be adorned with the vibrant and elegant blooms of astilbe.
Enjoy the beauty and tranquility that astilbe brings to your outdoor sanctuary. Happy gardening!