Home>Types of Gardening>Ornamental Gardening>How To Keep Iris Bulbs Until Planting
Ornamental Gardening
How To Keep Iris Bulbs Until Planting
Modified: January 22, 2024
Learn the best ways to store iris bulbs until planting season for your ornamental gardening projects. Ensure their health and vitality for beautiful blooms with these expert tips.
(Many of the links in this article redirect to a specific reviewed product. Your purchase of these products through affiliate links helps to generate commission for Chicagolandgardening.com, at no extra cost. Learn more)
Table of Contents
- Introduction
- Selecting and Buying Iris Bulbs
- Preparing the Storage Space
- Cleaning and Drying the Bulbs
- Inspecting and Sorting the Bulbs
- Dusting the Bulbs
- Packing the Bulbs for Storage
- Choosing the Right Storage Containers
- Storing Bulbs in a Cool and Dry Location
- Monitoring the Temperature and Humidity
- Checking the Bulbs Regularly
- Preparing Bulbs for Planting
- Conclusion
Introduction
Welcome to the world of ornamental gardening! If you have a passion for beautiful flowers and a desire to create a stunning garden, then you’re in the right place. Ornamental gardening involves cultivating plants primarily for their aesthetic appeal, and one of the most popular and enchanting plants in this realm is the iris.
The iris is renowned for its elegant blooms and varied colors, making it a favorite among gardeners. Whether you’re a novice or a seasoned gardener, understanding how to keep iris bulbs until planting is crucial for achieving successful growth and vibrant blooms. This article will guide you through the process of selecting, storing, and preparing iris bulbs for planting, ensuring that you can enjoy these stunning flowers to their fullest.
Properly handling iris bulbs before planting is essential because they are sensitive to environmental conditions and require specific care to maintain their vitality. By following the steps outlined in this article, you can ensure that your iris bulbs stay healthy and thriving until planting season.
So, if you’re eager to learn how to keep iris bulbs in optimal condition for planting, let’s dive into the details of selecting and buying high-quality bulbs, preparing the storage space, cleaning and drying the bulbs, and everything else you need to know to take care of these magnificent plants.
Selecting and Buying Iris Bulbs
Choosing the right iris bulbs is the first step towards a successful garden. When purchasing iris bulbs, there are a few important factors to consider.
1. Variety: Iris bulbs come in a wide range of varieties, each with its own unique characteristics. Consider factors such as color, size, and bloom time to select the varieties that best suit your garden design and personal preferences.
2. Size and Quality: Look for bulbs that are firm and plump, indicating good health and vitality. Avoid bulbs that are soft, shriveled, or have any signs of fungal or insect damage.
3. Disease resistance: Inspect the bulbs for any signs of diseases or pests. Look for blemishes, discoloration, or spots that could indicate the presence of rot or other issues.
4. Reliable Sources: Purchase iris bulbs from reputable nurseries or online suppliers that specialize in ornamental plants. This ensures that you are getting high-quality bulbs that have been properly stored and handled.
It’s worth noting that some gardeners prefer to purchase iris rhizomes instead of bulbs. Rhizomes are thick, fleshy roots that propagate and grow new plants. Rhizomes can be a great option if you’re looking for a more cost-effective way to expand your iris collection, as they can be divided into multiple plants.
When buying iris bulbs, it’s important to consider the planting season. Iris bulbs are typically available for purchase in late summer or early fall for autumn planting, or in early spring for spring planting. Be sure to check the specific planting recommendations for the iris variety you have chosen.
By selecting high-quality bulbs from reliable sources and considering factors such as variety, size, quality, and disease resistance, you’re setting the stage for a successful and visually stunning iris display in your garden.
Preparing the Storage Space
Before storing iris bulbs, it’s important to create an ideal storage environment that promotes their longevity and keeps them in optimal condition. Follow these steps to prepare the perfect storage space for your iris bulbs.
1. Clean and Dry: Start by cleaning the storage area to remove any dust, dirt, or debris that may harbor pests or pathogens. Ensure that the storage space is dry and free from excess moisture, as dampness can lead to bulb rot.
2. Well-Ventilated: Choose a storage area that is well-ventilated to prevent the buildup of excess humidity, which can also contribute to bulb rot. Good air circulation helps to maintain the bulbs’ freshness and prevent the growth of mold or fungi.
3. Temperature Control: Iris bulbs require a cool storage environment. Aim for a temperature between 35°F (2°C) and 45°F (7°C). Avoid extreme temperature fluctuations, as this can negatively impact the bulbs’ viability.
4. Dark and Protected: Keep the storage space away from direct sunlight, as exposure to light can cause the bulbs to sprout prematurely. Additionally, ensure that the bulbs are protected from rodents and other pests that may be attracted to them.
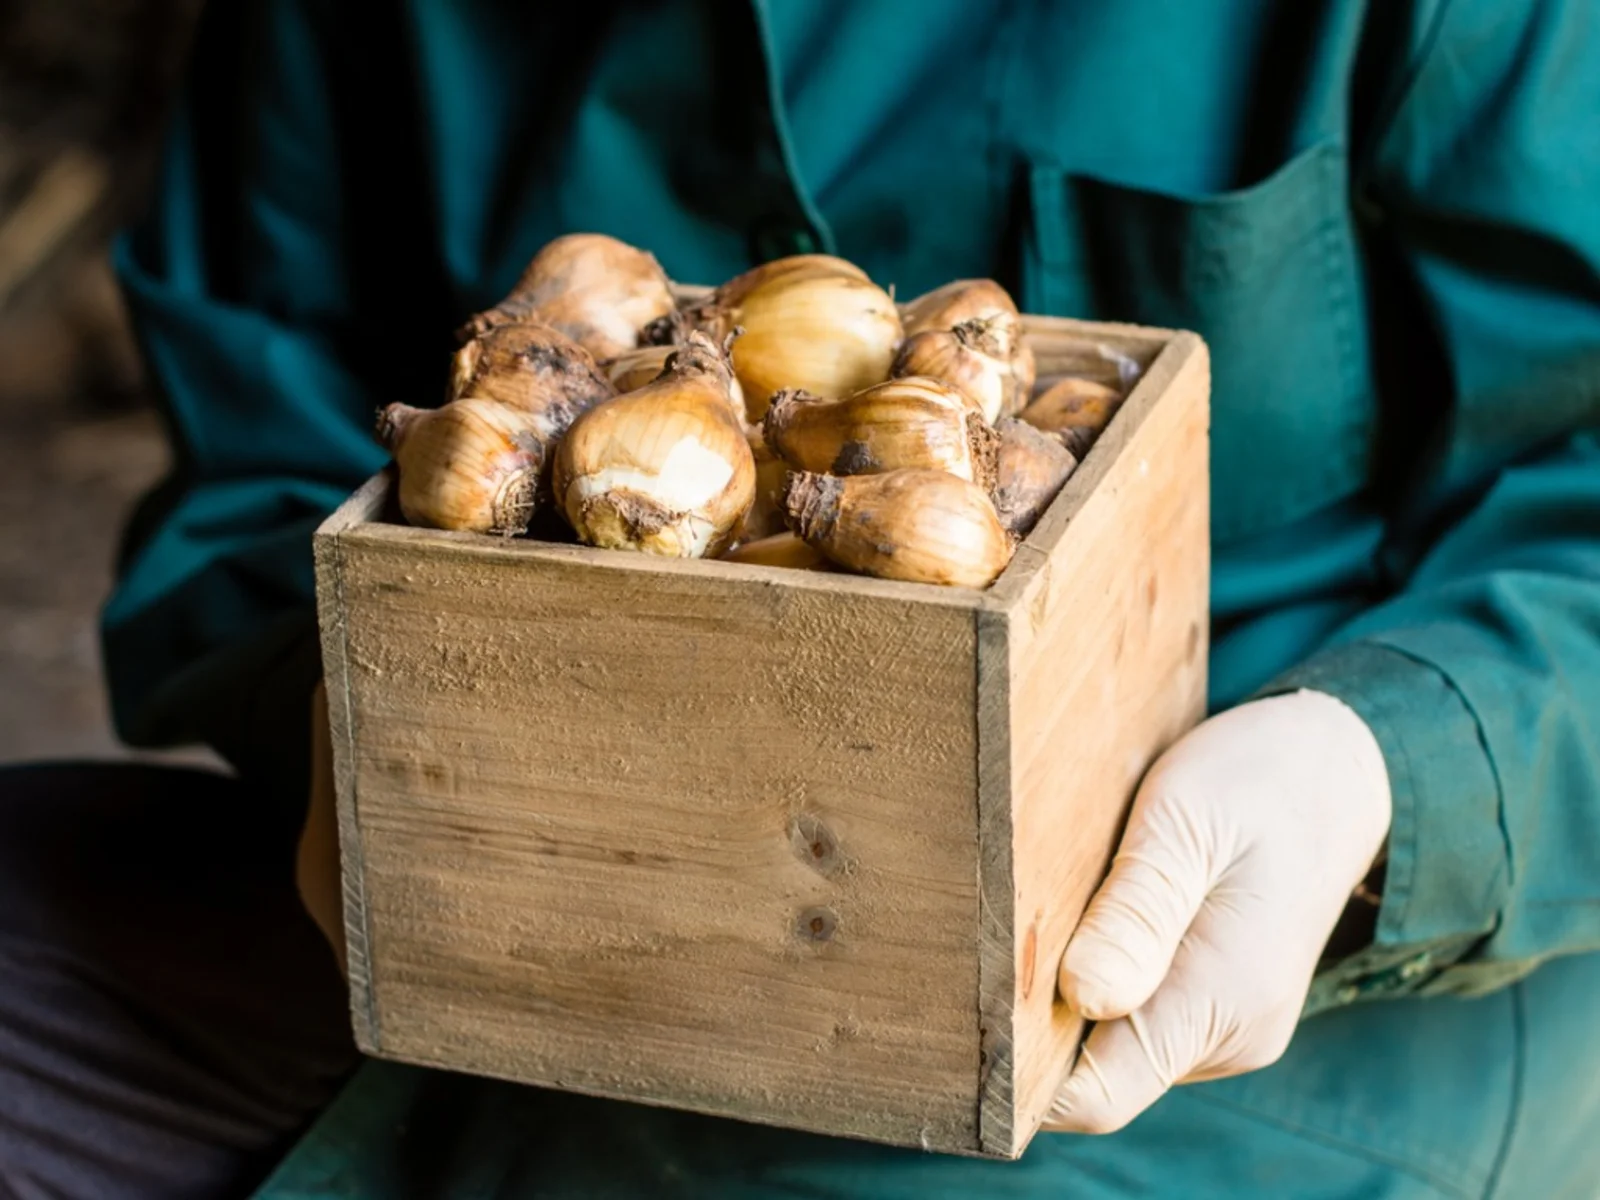
5. Organized Storage: Prepare a designated area or containers specifically for storing your iris bulbs. This helps to keep them organized and prevents damage or mix-ups during storage. Consider using mesh bags, cardboard boxes, or wooden crates to provide adequate airflow.
6. Labeling: Label each storage container with the iris variety name or any other relevant information. This makes it easier to retrieve and identify the bulbs when it’s time for planting.
7. Safety Considerations: If you have pets or small children, choose a storage area that is out of their reach. Some bulbs can be toxic if ingested, so it’s important to keep them away from curious hands and paws.
By following these steps, you can ensure that the storage space is well-prepared to keep your iris bulbs safe and healthy until the planting season arrives.
Cleaning and Drying the Bulbs
Before storing iris bulbs, it’s essential to clean and dry them properly. Cleaning the bulbs helps remove any soil or debris that may harbor pests or diseases, while drying them prevents excess moisture and reduces the risk of bulb rot. Follow these steps to clean and dry iris bulbs effectively:
1. Gently Remove Soil: Carefully dig up the iris bulbs, taking care not to damage or bruise them. Use your hands or a soft brush to remove excess soil from the bulbs. Avoid rinsing the bulbs with water, as this can introduce moisture.
2. Inspect for Damage: Once the soil is removed, examine each bulb closely for any signs of damage or disease. Look for soft spots, mold, or discoloration. Discard any bulbs that appear damaged or infected to prevent the spread of disease to other bulbs.
3. Trim Excess Foliage: If your iris bulbs still have foliage attached, trim it down to around 5 cm (2 inches) above the bulb. This helps minimize moisture loss and redirects the bulb’s energy towards growth and bloom development.
4. Air Dry: Place the cleaned bulbs in a single layer on a dry surface, such as a wire rack or newspaper. Allow them to air dry in a cool, well-ventilated area for about two to three weeks. This allows any remaining moisture to evaporate and reduces the risk of bulb rot.
5. Rotate the Bulbs: During the drying period, periodically rotate the bulbs to ensure even drying. This helps prevent moisture buildup and promotes uniform drying.
6. Avoid Direct Sunlight: While drying the bulbs, keep them away from direct sunlight. Excessive exposure to sunlight can cause the bulbs to dry out too quickly and become damaged. A shaded area with good airflow is ideal for the drying process.
7. Check for Complete Drying: After the drying period, check that the bulbs are completely dry to the touch. They should feel firm and show no signs of moisture or softness. If there is any doubt, continue the drying process for a few more days.
By carefully cleaning and drying your iris bulbs, you are taking important steps to ensure their longevity and reduce the risk of disease. Once dried, these bulbs are ready for the next stage: inspection and sorting.
Inspecting and Sorting the Bulbs
After the iris bulbs have been cleaned and dried, it’s time to inspect and sort them to ensure that only healthy, viable bulbs are stored and planted. This step is crucial for maintaining a thriving iris garden. Follow these guidelines to effectively inspect and sort your iris bulbs:
1. Visual Inspection: Examine each bulb closely for any signs of damage or disease. Look for blemishes, soft spots, discoloration, or any other irregularities. Remove any bulbs that exhibit these signs, as they may compromise the health of the other bulbs.
2. Check for Firmness: Gently squeeze each bulb to check for firmness. Healthy bulbs should feel firm and have a solid texture. Discard any bulbs that feel soft or mushy, as this indicates decay or rot.
3. Look for Healthy Roots: Inspect the roots of the bulbs. They should be white and firm, indicating a healthy root system. Bulbs with dark, mushy, or rotten roots should be discarded.
4. Separate Bulbs by Size: Sort the bulbs into groups based on their size. This helps in organizing and planning their placement when it comes time to plant them. Larger bulbs tend to produce larger flowers, while smaller bulbs may take longer to establish and bloom.
5. Label the Bulbs: As you sort the bulbs, label each group with the iris variety name or any other relevant information. This will make it easier for you to identify them when it’s time for planting.
6. Remove Bulb Offset: Bulb offsets are smaller bulbs that can form attached to the parent bulb. If any offsets are present, carefully separate them from the main bulb, ensuring that each offset has its own roots. This encourages individual growth and prevents overcrowding.
7. Dispose of Unhealthy Bulbs: Properly dispose of any bulbs that show signs of disease, rot, or other issues. This helps prevent the spread of disease and ensures that only healthy bulbs are stored and planted.
By inspecting and sorting your iris bulbs, you are taking proactive measures to ensure the health and success of your garden. Remember to handle the bulbs with care and to store them properly until planting season arrives.
Dusting the Bulbs
Dusting the iris bulbs is an important step in preparing them for storage. Dusting helps protect the bulbs from pests and fungal infections, ensuring their health and vitality during the storage period. Here’s how you can effectively dust the bulbs:
1. Choose a Suitable Dusting Agent: There are various dusting agents available that can help protect the bulbs. Some common choices include sulfur, powdered fungicides, or commercially available bulb dust. These agents help control fungal diseases and discourage pests.
2. Wear Protective Gear: When applying the dusting agent, it’s important to protect yourself and follow the instructions on the product labels. Wear gloves and a dust mask to prevent any potential harm from the dust or chemicals.
3. Prepare the Dusting Station: Set up a designated area for dusting the bulbs. Lay down a clean surface, such as a newspaper or a smooth, non-absorbent tray, to minimize the mess. Ensure good ventilation to avoid inhaling the dust.
4. Dust Bulbs Lightly: Take each bulb and lightly dust it with the chosen dusting agent. Use a small brush or a puff to evenly distribute the dust on the surface of the bulbs. Be careful not to apply an excessive amount as it can clog the pores of the bulbs.
5. Cover all Bulb Surfaces: Make sure to cover all parts of the bulb surfaces, including the sides, top, and bottom. Pay special attention to the areas where pests or diseases are more likely to occur, such as the basal plate and any wounds or scars.
6. Allow the Dust to Settle: Once the bulbs are dusted, leave them undisturbed for a short time to allow the dust to settle on the surface. This helps create a protective barrier against pests and diseases.
7. Dispose of Excess Dust: Dispose of any excess dust safely and properly. Follow the instructions on the dusting agent packaging for disposal guidelines. Avoid shaking off the excess dust, as this can lead to inhaling or spreading it unintentionally.
8. Store the Dusted Bulbs: Place the dusted bulbs in the designated storage containers, ensuring that they are adequately labeled and separated by variety. Store them in a cool, dry, and well-ventilated area as recommended in the previous section.
Dusting the bulbs is a preventive measure that helps protect them during the storage period. By taking the time to dust your iris bulbs, you can contribute to their overall health and increase the likelihood of vibrant and thriving blooms when they are eventually planted.
Packing the Bulbs for Storage
Proper packing of iris bulbs is crucial to ensure their protection and longevity during the storage period. By using the right storage containers and taking appropriate precautions, you can keep your bulbs safe and ready for planting when the time comes. Follow these steps to effectively pack your iris bulbs for storage:
1. Choose the Right Storage Containers: Opt for breathable containers that provide good airflow. Mesh bags, paper bags, or wooden crates are suitable options. Avoid using plastic bags or airtight containers, as these can trap moisture and lead to bulb rot.
2. Prepare the Containers: Clean and dry the chosen storage containers thoroughly before packing the bulbs. Remove any moisture or debris that could potentially harm the bulbs.
3. Arrange the Bulbs: Place the bulbs in the containers in a single layer, ensuring they are not touching each other. This prevents the spread of disease and damage due to pressure or rubbing.
4. Add a Bulb Label: As you pack the bulbs, attach a label indicating the variety name or any other relevant information. This will help you identify the bulbs easily when it’s time for planting.
5. Create Layers: If you have multiple layers of bulbs, separate them with a layer of dry material such as peat moss, sawdust, or newspaper. This helps maintain airflow between layers and prevents moisture buildup.
6. Fill Gaps: Fill any empty spaces within the containers with additional dry material, such as wood shavings or crumpled newspaper. This helps absorb excess moisture and provides stability to the bulbs during storage.
7. Seal the Containers: Close the containers securely but avoid sealing them completely. Leave a small opening or create holes in the containers to allow for airflow and prevent the bulbs from suffocating.
8. Store in a Cool and Dark Location: Place the packed containers in a cool, dark, and dry storage area, maintaining the recommended temperature and humidity levels. Keep them away from direct sunlight, extreme temperatures, and fluctuations that could harm the bulbs.
9. Avoid Stacking: If possible, avoid stacking the containers on top of each other. This prevents excessive pressure on the bulbs and helps maintain proper airflow.
10. Regularly Monitor: Periodically check on the stored bulbs to ensure they remain in good condition. Look out for signs of rot, mold, or pests. If any issues are detected, address them promptly to prevent further damage.
By packing your iris bulbs carefully and storing them in suitable containers and conditions, you can maintain their quality and ensure their readiness for planting in the future.
Choosing the Right Storage Containers
When it comes to storing iris bulbs, selecting the appropriate storage containers is essential. The right containers will provide proper airflow, protection, and the necessary environment to keep the bulbs healthy and viable. Consider the following factors when choosing the right storage containers for your iris bulbs:
1. Breathability: Opt for containers that allow for good airflow. Mesh bags, paper bags, or wooden crates are excellent choices as they prevent trapped moisture and promote ventilation around the bulbs. Avoid using airtight containers or plastic bags that can lead to bulb rot due to excessive moisture.
2. Size and Capacity: Ensure that the storage containers are spacious enough to accommodate the bulbs without crowding and damaging them. Bulbs need some room for air circulation within the container. However, avoid using containers that are too large, as excess space can create a humid microclimate.
3. Material: Opt for containers made from natural, breathable materials. Mesh bags allow for good airflow and are lightweight and easy to handle. Paper bags are sturdy and absorb any moisture, helping to maintain the bulbs’ dryness. Wooden crates provide insulation and protection against temperature fluctuations.
4. Durability: Choose containers that are sturdy and durable enough to withstand the storage period. They should be able to support the weight of the bulbs and resist any potential damage or accidental impacts.
5. Labeling: Consider containers that allow for easy labeling. Attach labels to the containers indicating the iris variety name or any relevant information. This makes it easier to identify the bulbs when it’s time for planting.
6. Stackability: If space is limited, choose containers that can be stacked securely without causing damage to the bulbs. However, avoid stacking too many containers on top of each other, as excessive pressure can be detrimental to the bulbs.
7. Pest Prevention: Select containers that provide some level of protection against pests. Mesh bags or paper bags with a tight weave can deter insects and rodents from accessing the bulbs. Wooden crates may offer additional protection against pests due to their solid construction.
8. Easy Access and Monitoring: Consider containers that allow for easy access and monitoring of the bulbs. With transparent containers, you can visually inspect the bulbs without opening them, reducing disturbance and maintaining storage conditions.
By carefully selecting the right storage containers for your iris bulbs, you can provide an optimal environment for their storage, promoting their health and ensuring they are in prime condition for planting.
Storing Bulbs in a Cool and Dry Location
Creating the right storage conditions is crucial to preserving the health and viability of iris bulbs. Storing the bulbs in a cool and dry location is essential to prevent rot, decay, and other storage-related issues. Follow these guidelines to ensure the bulbs remain in optimal condition:
1. Ideal Temperature: Aim for a storage temperature between 35°F (2°C) and 45°F (7°C). Cool temperatures help slow down the bulbs’ metabolic processes, preserving their energy and preventing premature sprouting. Avoid storing the bulbs in areas prone to extreme temperature fluctuations.
2. Humidity Control: Maintain proper humidity levels by storing the bulbs in a dry location. Excess moisture can lead to bulb rot and fungal diseases. Avoid storing the bulbs in high humidity areas, such as basements or areas prone to water leaks.
3. Ventilation: Ensure proper airflow around the bulbs to prevent the buildup of excessive humidity and the growth of mold or fungi. Avoid tightly sealed containers that restrict ventilation. Choose breathable storage containers, as mentioned in the previous section, to promote adequate airflow.
4. Darkness: Store the bulbs in a location away from direct sunlight. Exposure to light can trigger premature sprouting, depleting the bulbs’ stored energy before planting. Opt for a dark storage space or use opaque containers to shield the bulbs from any light sources.
5. Protection from Frost: Avoid storing the bulbs in areas prone to freezing temperatures. Freezing can damage the bulbs and render them unusable. If storing in a garage or shed, ensure proper insulation or consider moving the bulbs indoors to a frost-free location.
6. Avoid Ethylene Exposure: Keep the bulbs away from fruits, vegetables, or other ethylene-producing items. Ethylene gas can promote premature sprouting and damage the bulbs. Store the bulbs in a separate area to prevent exposure to ethylene.
7. Stable Storage Area: Choose a stable storage area where the temperature and humidity levels remain relatively consistent. Fluctuations in these conditions can negatively impact the bulbs’ health and viability. Avoid storing the bulbs near heating or cooling vents.
8. Safe from Pests: Take precautions to keep the bulbs safe from rodents, insects, or other pests. Use pest-resistant containers or consider placing a layer of mesh or wire mesh beneath the bulbs in storage containers to prevent pests from accessing them.
By storing your iris bulbs in a cool and dry location, you are creating an environment that promotes their longevity and maintains their dormancy until planting season. Proper storage conditions are vital for ensuring healthy growth and vibrant blooms in your garden.
Monitoring the Temperature and Humidity
Proper monitoring of the temperature and humidity levels is essential when storing iris bulbs. Regularly checking these factors helps ensure the bulbs remain in optimal condition and reduces the risk of storage-related issues. Follow these guidelines to effectively monitor the temperature and humidity:
1. Use a Thermometer: Place a thermometer in the storage area to monitor the temperature regularly. Check it daily or weekly, depending on your preference, and ensure that the storage temperature remains within the recommended range of 35°F (2°C) to 45°F (7°C).
2. Invest in a Hygrometer: A hygrometer is a device used to measure humidity levels. Place a hygrometer in the storage area to monitor the relative humidity. Keep the humidity between 40% and 60% for optimum bulb storage conditions.
3. Check for Temperature Fluctuations: Monitor the storage area for any noticeable temperature fluctuations. Extreme temperature changes can damage the bulbs or trigger untimely sprouting. Take measures to insulate and regulate the storage area if needed.
4. Use Dehumidifiers or Fans: If the storage area tends to have high humidity, consider using dehumidifiers or fans. These devices help control and reduce moisture levels, preventing bulb rot or fungal growth.
5. Regularly Ventilate the Storage Area: Open the storage area periodically to allow fresh air circulation. This helps prevent the accumulation of stagnant air and humidity. Be cautious not to leave the storage area open for too long, as this may expose the bulbs to extreme temperatures or pests.
6. Take Action for Improper Conditions: If you notice temperature or humidity levels outside the recommended range, take immediate action. Adjust the storage environment by ventilating, insulating, or using humidifiers or dehumidifiers as necessary to maintain suitable conditions.
7. Inspect Bulbs for Moisture or Signs of Decay: Regularly check the bulbs for any signs of moisture or decay. If you detect any, take immediate action to address the issue. Remove any moist or damaged bulbs and adjust the storage conditions accordingly.
8. Keep Records: Keep a log or record of the temperature and humidity readings. This allows you to track any variations or patterns over time, and it helps identify potential issues with the storage environment.
By diligently monitoring the temperature and humidity levels, you can ensure that your iris bulbs are stored in optimal conditions, promoting their health and viability until it’s time for planting.
Checking the Bulbs Regularly
Regularly checking the stored iris bulbs is an important part of their care and maintenance during the storage period. By staying vigilant and conducting routine inspections, you can identify and address any issues that may arise. Here are some key steps to follow when checking your bulbs:
1. Frequency of Inspections: Plan to check your bulbs at regular intervals throughout the storage period. Depending on the length of storage and other environmental factors, you may choose to inspect them on a weekly or monthly basis.
2. Visual Examination: Carefully examine each bulb for any signs of decay, rot, or mold. Look for changes in color, soft spots, or unusual growth. Discard any bulbs showing such signs to prevent the spread of disease.
3. Check for Sprouting: Keep an eye out for any early sprouting, especially if the bulbs are exposed to warm temperatures or fluctuating light conditions. If you spot sprouts, it may be an indication that the storage conditions are not ideal.
4. Inspect for Pests: Look for any signs of pests, such as insects or rodents, that may have found their way into the storage area. Check for chewed bulbs or the presence of droppings. Take necessary measures to address any pest infestations promptly.
5. Monitor Moisture Levels: Assess the moisture content of the storage area and inspect the bulbs for any signs of excessive moisture or condensation. Excess moisture can lead to rot or fungal growth. If needed, adjust the storage conditions to maintain an appropriate humidity level.
6. Record Observations: Keep a record of your observations during each inspection. Note any changes in the bulbs, such as sprouting or decay, as well as any modifications you make to the storage environment. This log will help you track the bulbs’ condition over time.
7. Address Issues Promptly: If you discover any problems during the inspections, take immediate action to rectify them. This could involve adjusting the storage conditions, applying treatments to prevent disease or pests, or removing any damaged bulbs that pose a risk to the healthy ones.
8. Monitor Temperature and Humidity: Continuously monitor the temperature and humidity levels in the storage area during your inspections. Ensure that they remain within the recommended ranges to maintain the bulbs’ dormancy and prevent premature sprouting.
Regularly checking your stored iris bulbs allows you to identify and resolve any issues before they escalate. By maintaining a keen eye on their condition, you can ensure that the bulbs remain healthy and ready for planting when the time comes.
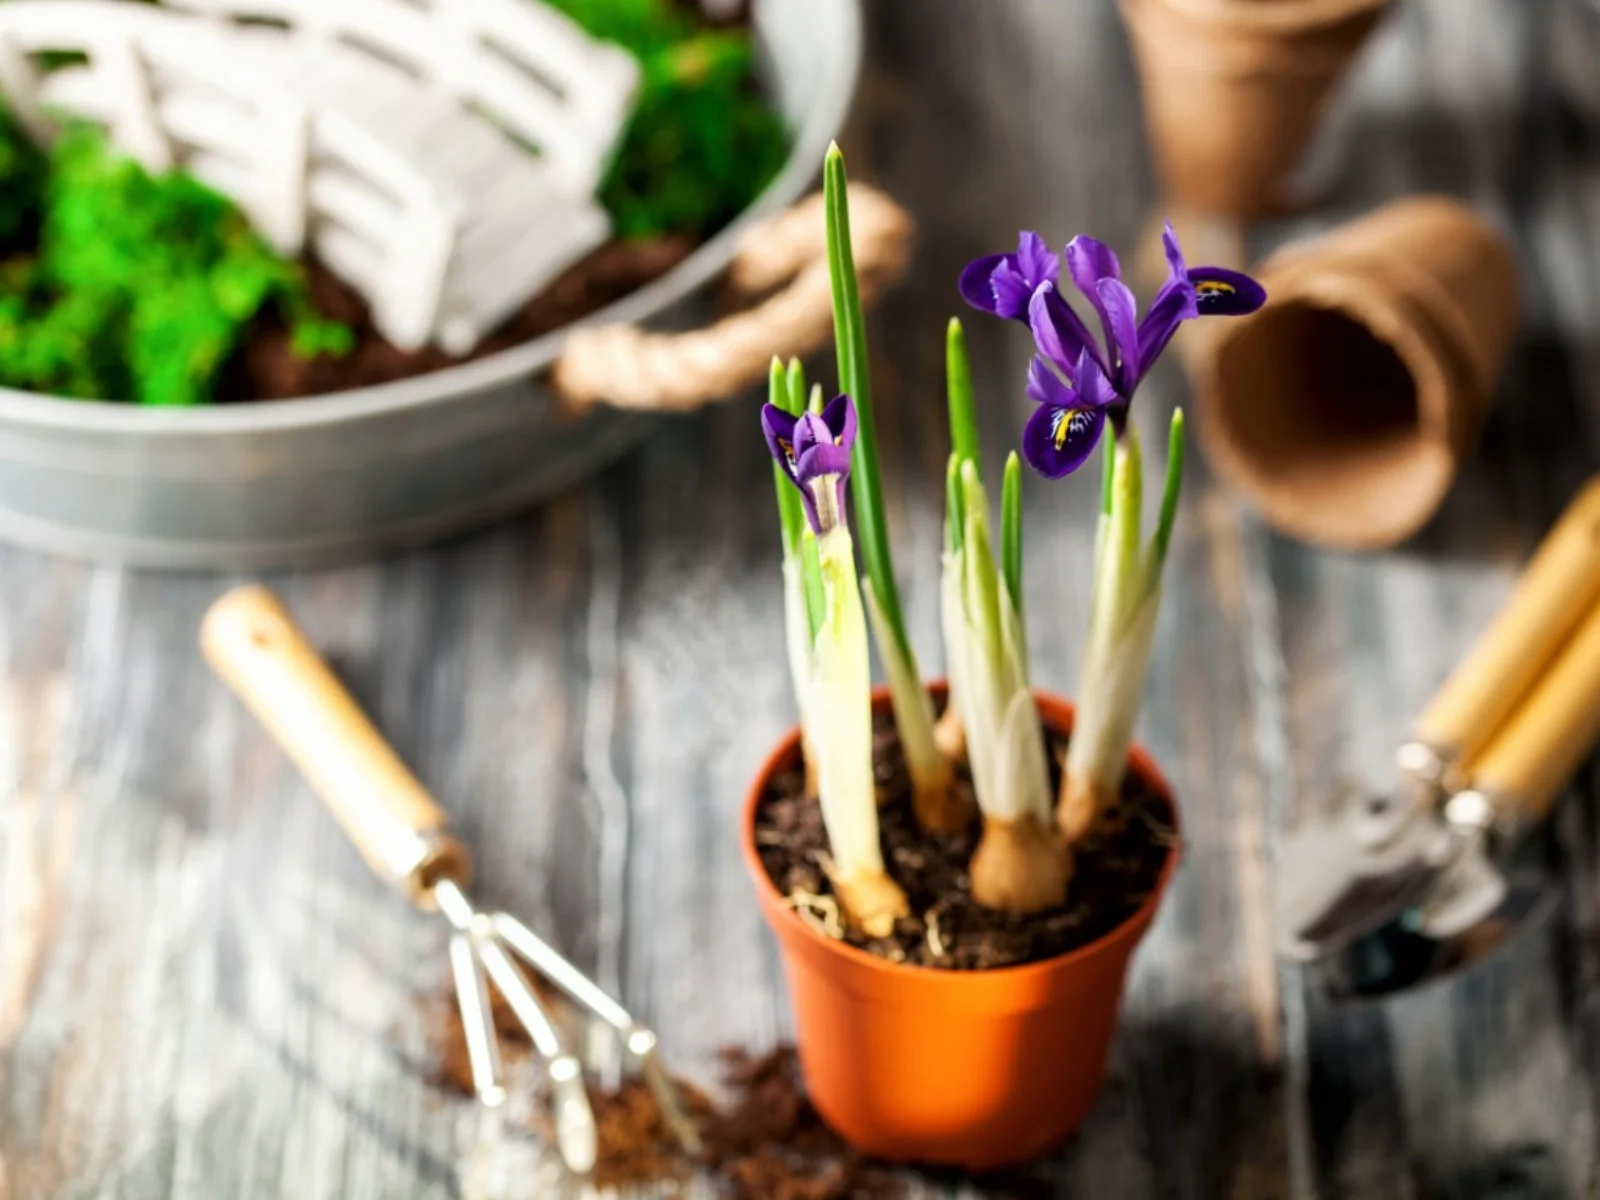
Preparing Bulbs for Planting
When the planting season arrives, it’s time to prepare your stored iris bulbs for their journey into the ground. Proper preparation ensures that the bulbs are in the best condition for growth and development. Follow these steps to effectively prepare your bulbs for planting:
1. Remove from Storage: Retrieve the stored bulbs from their storage containers, taking care not to damage or bruise them during the process. Handle them gently to avoid unnecessary stress.
2. Inspect for Changes: Examine each bulb closely for any signs of damage, decay, or disease since the last inspection during the storage period. Remove any bulbs showing signs of deterioration to prevent the spread of issues to healthy bulbs.
3. Soak in Water: Before planting, give the bulbs a rejuvenating soak in tepid water for one to two hours. This helps rehydrate them and awaken their dormant state. However, do not soak them for too long, as excessive moisture can lead to rot.
4. Trim Excess Roots: Inspect the roots of the bulbs and trim off any damaged or excessively long roots. This helps the bulbs establish themselves in the new planting location more easily.
5. Prepare the Planting Bed: Prior to planting, prepare the planting bed by removing any weeds, rocks, or debris. Loosen the soil to a depth of 8-10 inches (20-25 cm) and amend it with organic matter, such as compost or well-rotted manure, to improve drainage and provide nutrients.
6. Determine Planting Depth: Check the planting depth guidelines specific to the iris variety you are planting. Generally, iris bulbs should be planted with the top of the bulb exposed or just slightly covered with soil. Planting too deeply can hinder growth and blooming.
7. Spacing and Arrangement: Determine the desired spacing between each bulb and arrange them according to your preferred layout. Give them enough room to grow and spread without overcrowding, which can lead to poor air circulation and potential disease issues.
8. Planting the Bulbs: Gently place each bulb in the planting hole or furrow, positioning them with the pointed end facing upwards. Ensure the bulbs are at the correct planting depth and cover them with soil, lightly firming it around them to remove any air pockets.
9. Watering and Mulching: After planting, water the newly planted bulbs thoroughly to settle the soil around them. Apply a layer of organic mulch, such as straw or wood chips, to help retain soil moisture and suppress weed growth.
10. Post-Planting Care: Throughout the growing season, provide regular watering, adequate sunlight, and appropriate fertilization to support the growth of the iris bulbs. Monitor the plants for any signs of disease or pests and take necessary action if needed.
By following these steps to prepare your stored iris bulbs for planting, you are ensuring that they have the best start in your garden. With proper care and attention, your iris bulbs will bloom beautifully, adding color and elegance to your outdoor space.
Conclusion
Congratulations! You have learned the essential steps for keeping iris bulbs until planting. By carefully selecting and buying high-quality bulbs, preparing the storage space, cleaning and drying the bulbs, inspecting and sorting them, dusting the bulbs to protect them from pests and diseases, and packing them properly, you have ensured that the bulbs are in optimal condition for storage. You also learned about the importance of choosing the right storage containers, storing the bulbs in a cool and dry location, monitoring the temperature and humidity, checking the bulbs regularly, and preparing them for planting when the time comes.
With your attention to detail and proper care, your stored iris bulbs are primed for successful growth and vibrant blooming. Remember to provide a suitable planting bed, soak the bulbs before planting, trim any excess roots, and give them the right planting depth. Continuously monitor and care for the bulbs during the growing season, providing appropriate watering, sunlight, and fertilization.
By following these steps, you can enjoy a stunning iris garden filled with a delightful array of colors and elegant blooms. Embrace the art of ornamental gardening, and let your creativity flourish as you design and cultivate your iris paradise.
Now, it’s time to roll up your sleeves, get your hands dirty, and witness the transformation of your stored iris bulbs into enchanting floral wonders. Happy gardening!