Home>Types of Gardening>Ornamental Gardening>How To Plant Bulbs In Pots

Ornamental Gardening
How To Plant Bulbs In Pots
Modified: February 9, 2024
Learn how to plant bulbs in pots for stunning ornamental gardening displays. Step-by-step guide and tips for successful container gardening.
(Many of the links in this article redirect to a specific reviewed product. Your purchase of these products through affiliate links helps to generate commission for Chicagolandgardening.com, at no extra cost. Learn more)
Table of Contents
Introduction
Welcome to the world of ornamental gardening! If you’re longing to add a burst of color and charm to your outdoor space, planting bulbs in pots is a fantastic way to achieve stunning results. Whether you have limited space, want to create a focal point on your patio, or simply enjoy the flexibility of container gardening, bulbs in pots offer a delightful solution.
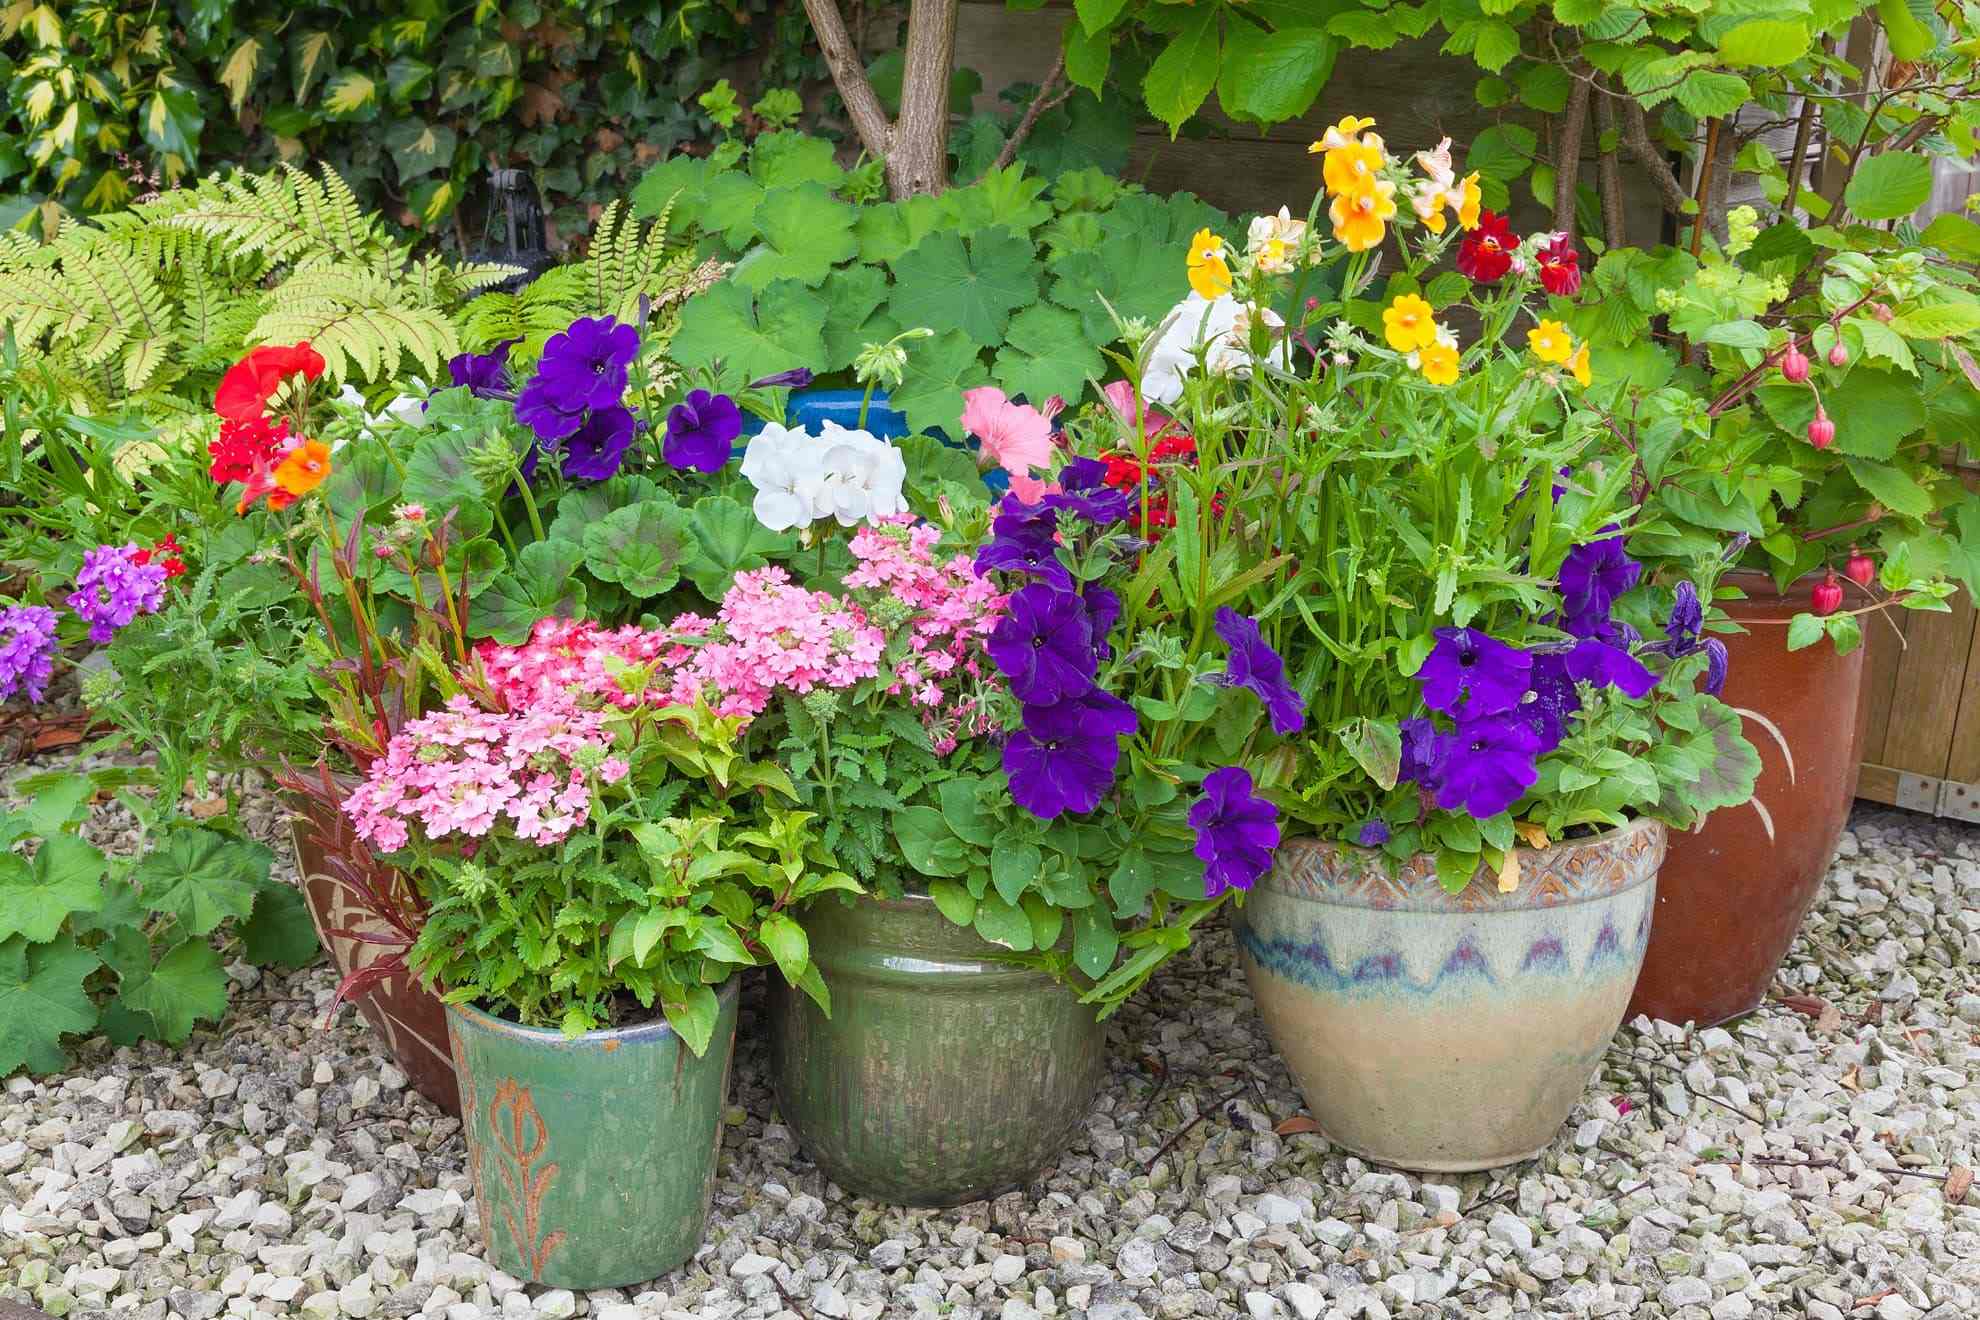
Planting bulbs in pots allows you to enjoy a wide variety of flowers throughout the year. From daffodils and tulips in spring to lilies and gladiolus in summer, and even crocuses and hyacinths in winter, there’s a bulb for every season. Plus, the portability of potted bulbs means you can easily move them around to suit your design preferences or take them indoors during harsh weather.
Not only does planting bulbs in pots provide aesthetic appeal, but it also offers practical benefits. It allows you to control the soil composition, drainage, and sunlight exposure, which is particularly beneficial if you have poor soil quality in your garden. Additionally, potted bulbs can be a great solution for urban gardeners or those with limited mobility, as they require less bending and digging than traditional garden beds.
In this article, we will guide you through the process of planting bulbs in pots, from choosing the right bulbs and selecting the appropriate container to ensuring proper care and protecting them during winter. Whether you’re a seasoned gardener or a complete beginner, you’ll find valuable tips and techniques to help you create vibrant and thriving displays.
So, let’s dive in and discover the joy of planting bulbs in pots!
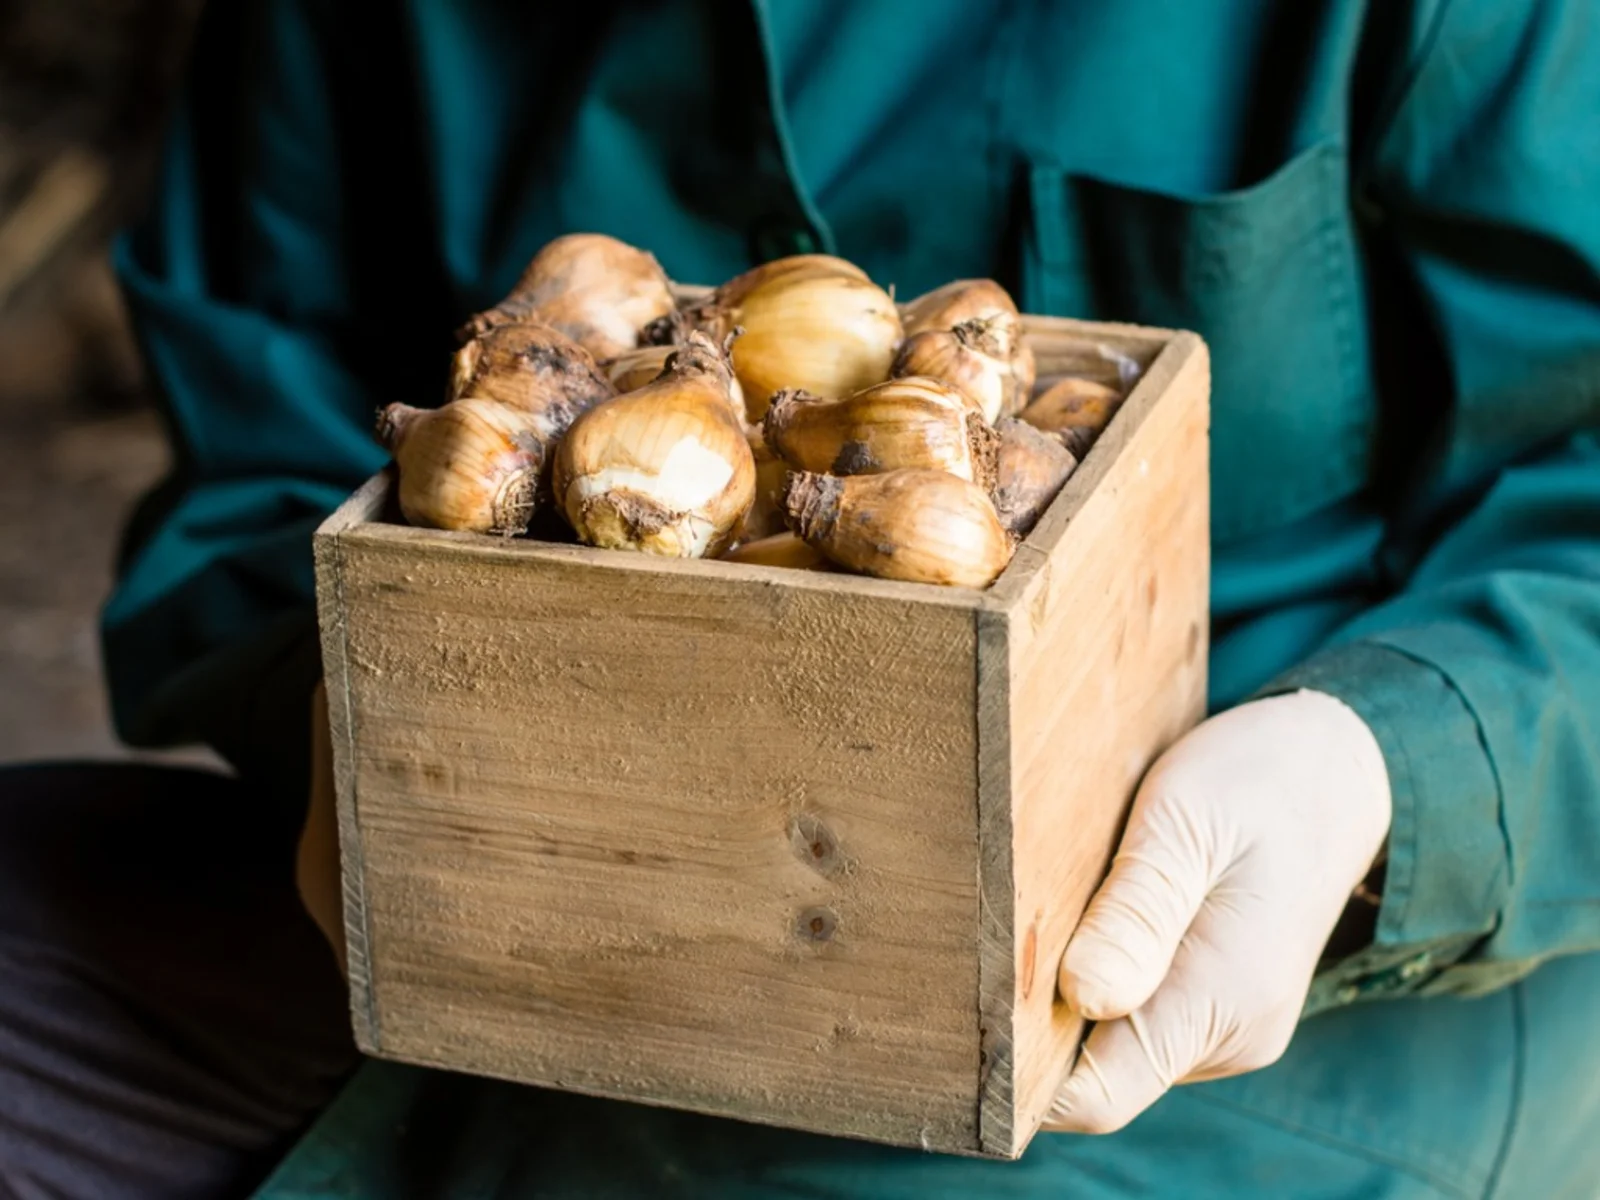
Choosing the Right Bulbs
When it comes to planting bulbs in pots, selecting the right bulbs is crucial for a successful and blooming display. Here are some factors to consider when choosing your bulbs:
- Climate: Consider the climate in your region and choose bulbs that are suitable for your specific zone. Some bulbs thrive in colder climates, while others prefer warmer conditions. Check the hardiness zones indicated on the bulb packaging to ensure a good match.
- Flowering Season: Decide which seasons you want your pot to be in full bloom. Different bulbs bloom at different times of the year. If you want a springtime display, go for bulbs like daffodils, tulips, and crocuses. For summer flowers, consider lilies, dahlias, or gladiolus. If you want to add color to your winter garden, opt for winter-flowering bulbs like snowdrops or hyacinths.
- Size and Height: Consider the space you have available for your potted bulbs and choose bulbs that are proportional to the container. Some bulbs can grow quite tall, so be mindful of their height when selecting bulbs for smaller pots. Additionally, make sure to choose bulbs that won’t overcrowd the pot, allowing enough growing space for each plant.
- Colors and Varieties: Think about the color palette and the overall aesthetic you want to achieve with your potted bulbs. There is a wide range of colors and varieties available, from vibrant and bold hues to soft pastels. Consider mixing different varieties and colors to create a visually appealing and diverse display.
Remember to purchase bulbs from reputable sources to ensure their quality and viability. Avoid bulbs that are soft, moldy, or blemished, as these may not grow properly. It’s also a good idea to research specific bulb requirements to ensure they align with your gardening skills and preferences.
By carefully selecting the right bulbs for your pots, you’ll set a solid foundation for a beautiful and thriving container garden. Now let’s move on to the next step: selecting the right pot for your bulbs!
Selecting the Right Pot
Choosing the right pot for your bulbs is essential for their growth and overall health. Here are some factors to consider when selecting the perfect pot:
- Size: The size of the pot is crucial. It should provide enough space for the bulbs to grow and develop a root system. If the pot is too small, the bulbs may become root-bound and fail to thrive. On the other hand, if the pot is too large, it can lead to excessive moisture retention, which may cause bulbs to rot. As a general rule, choose a pot that is at least 3 times the height of the bulbs.
- Drainage: Proper drainage is essential to prevent waterlogged soil, which can lead to root rot. Look for pots with drainage holes at the bottom. If your chosen pot doesn’t have holes, you can create them yourself using a drill or adding a layer of gravel at the bottom to improve drainage.
- Material: Pots come in various materials, including terracotta, ceramic, plastic, and metal. Each material has its advantages and disadvantages. Terracotta pots are porous and allow for better airflow and water drainage but can dry out quickly. Plastic pots are lightweight and retain moisture well but may not be as aesthetically pleasing. Choose a material that suits your needs and preferences.
- Style and Aesthetics: Consider the overall style and aesthetics of your outdoor space when choosing a pot. Whether you prefer a classic terracotta pot or a modern and sleek design, selecting a pot that complements your garden’s style will enhance the visual appeal of your potted bulbs.
- Mobility: If you want the flexibility to move your potted bulbs around, consider pots with built-in wheels or lightweight materials. This will allow you to adjust the positioning of your pots based on the sunlight requirements and design preferences.
Once you have chosen the right pot, make sure to clean it thoroughly before planting. Rinse it with water and mild soap, and rinse it again to remove any residue. This will ensure a clean and healthy environment for your bulbs to grow.
Now that you have selected the perfect pot, it’s time to prepare the potting mix for your bulbs. Let’s move on to the next step!
Preparing the Potting Mix
The potting mix you use plays a vital role in the success of your potted bulbs. It provides essential nutrients, proper drainage, and a suitable growing medium for the roots. Here’s how to prepare the perfect potting mix:
- Choose a Well-Draining Mix: Bulbs thrive in well-draining soil that doesn’t retain excess moisture. Opt for a potting mix specifically formulated for container gardening or make your own by combining equal parts of high-quality compost, garden soil, and coarse sand or perlite. This mixture allows for adequate drainage while retaining enough moisture for the bulbs to grow.
- Add Organic Matter: Incorporating organic matter into the potting mix can improve its texture, fertility, and water-holding capacity. Mix in some well-rotted compost, leaf mold, or aged manure to enrich the soil and provide essential nutrients for the bulbs.
- Avoid Heavy Soils: Heavy soils, such as clay, can compact and cause drainage issues. It’s best to avoid using them in pots. If you have heavy soil in your garden, it’s better to purchase a pre-made potting mix that is specifically formulated to provide proper drainage.
- Moisture Retention: To help the potting mix retain moisture, you can add water-retaining crystals or moisture-control granules. These additives absorb water and slowly release it to the roots, keeping the soil evenly moist without becoming waterlogged.
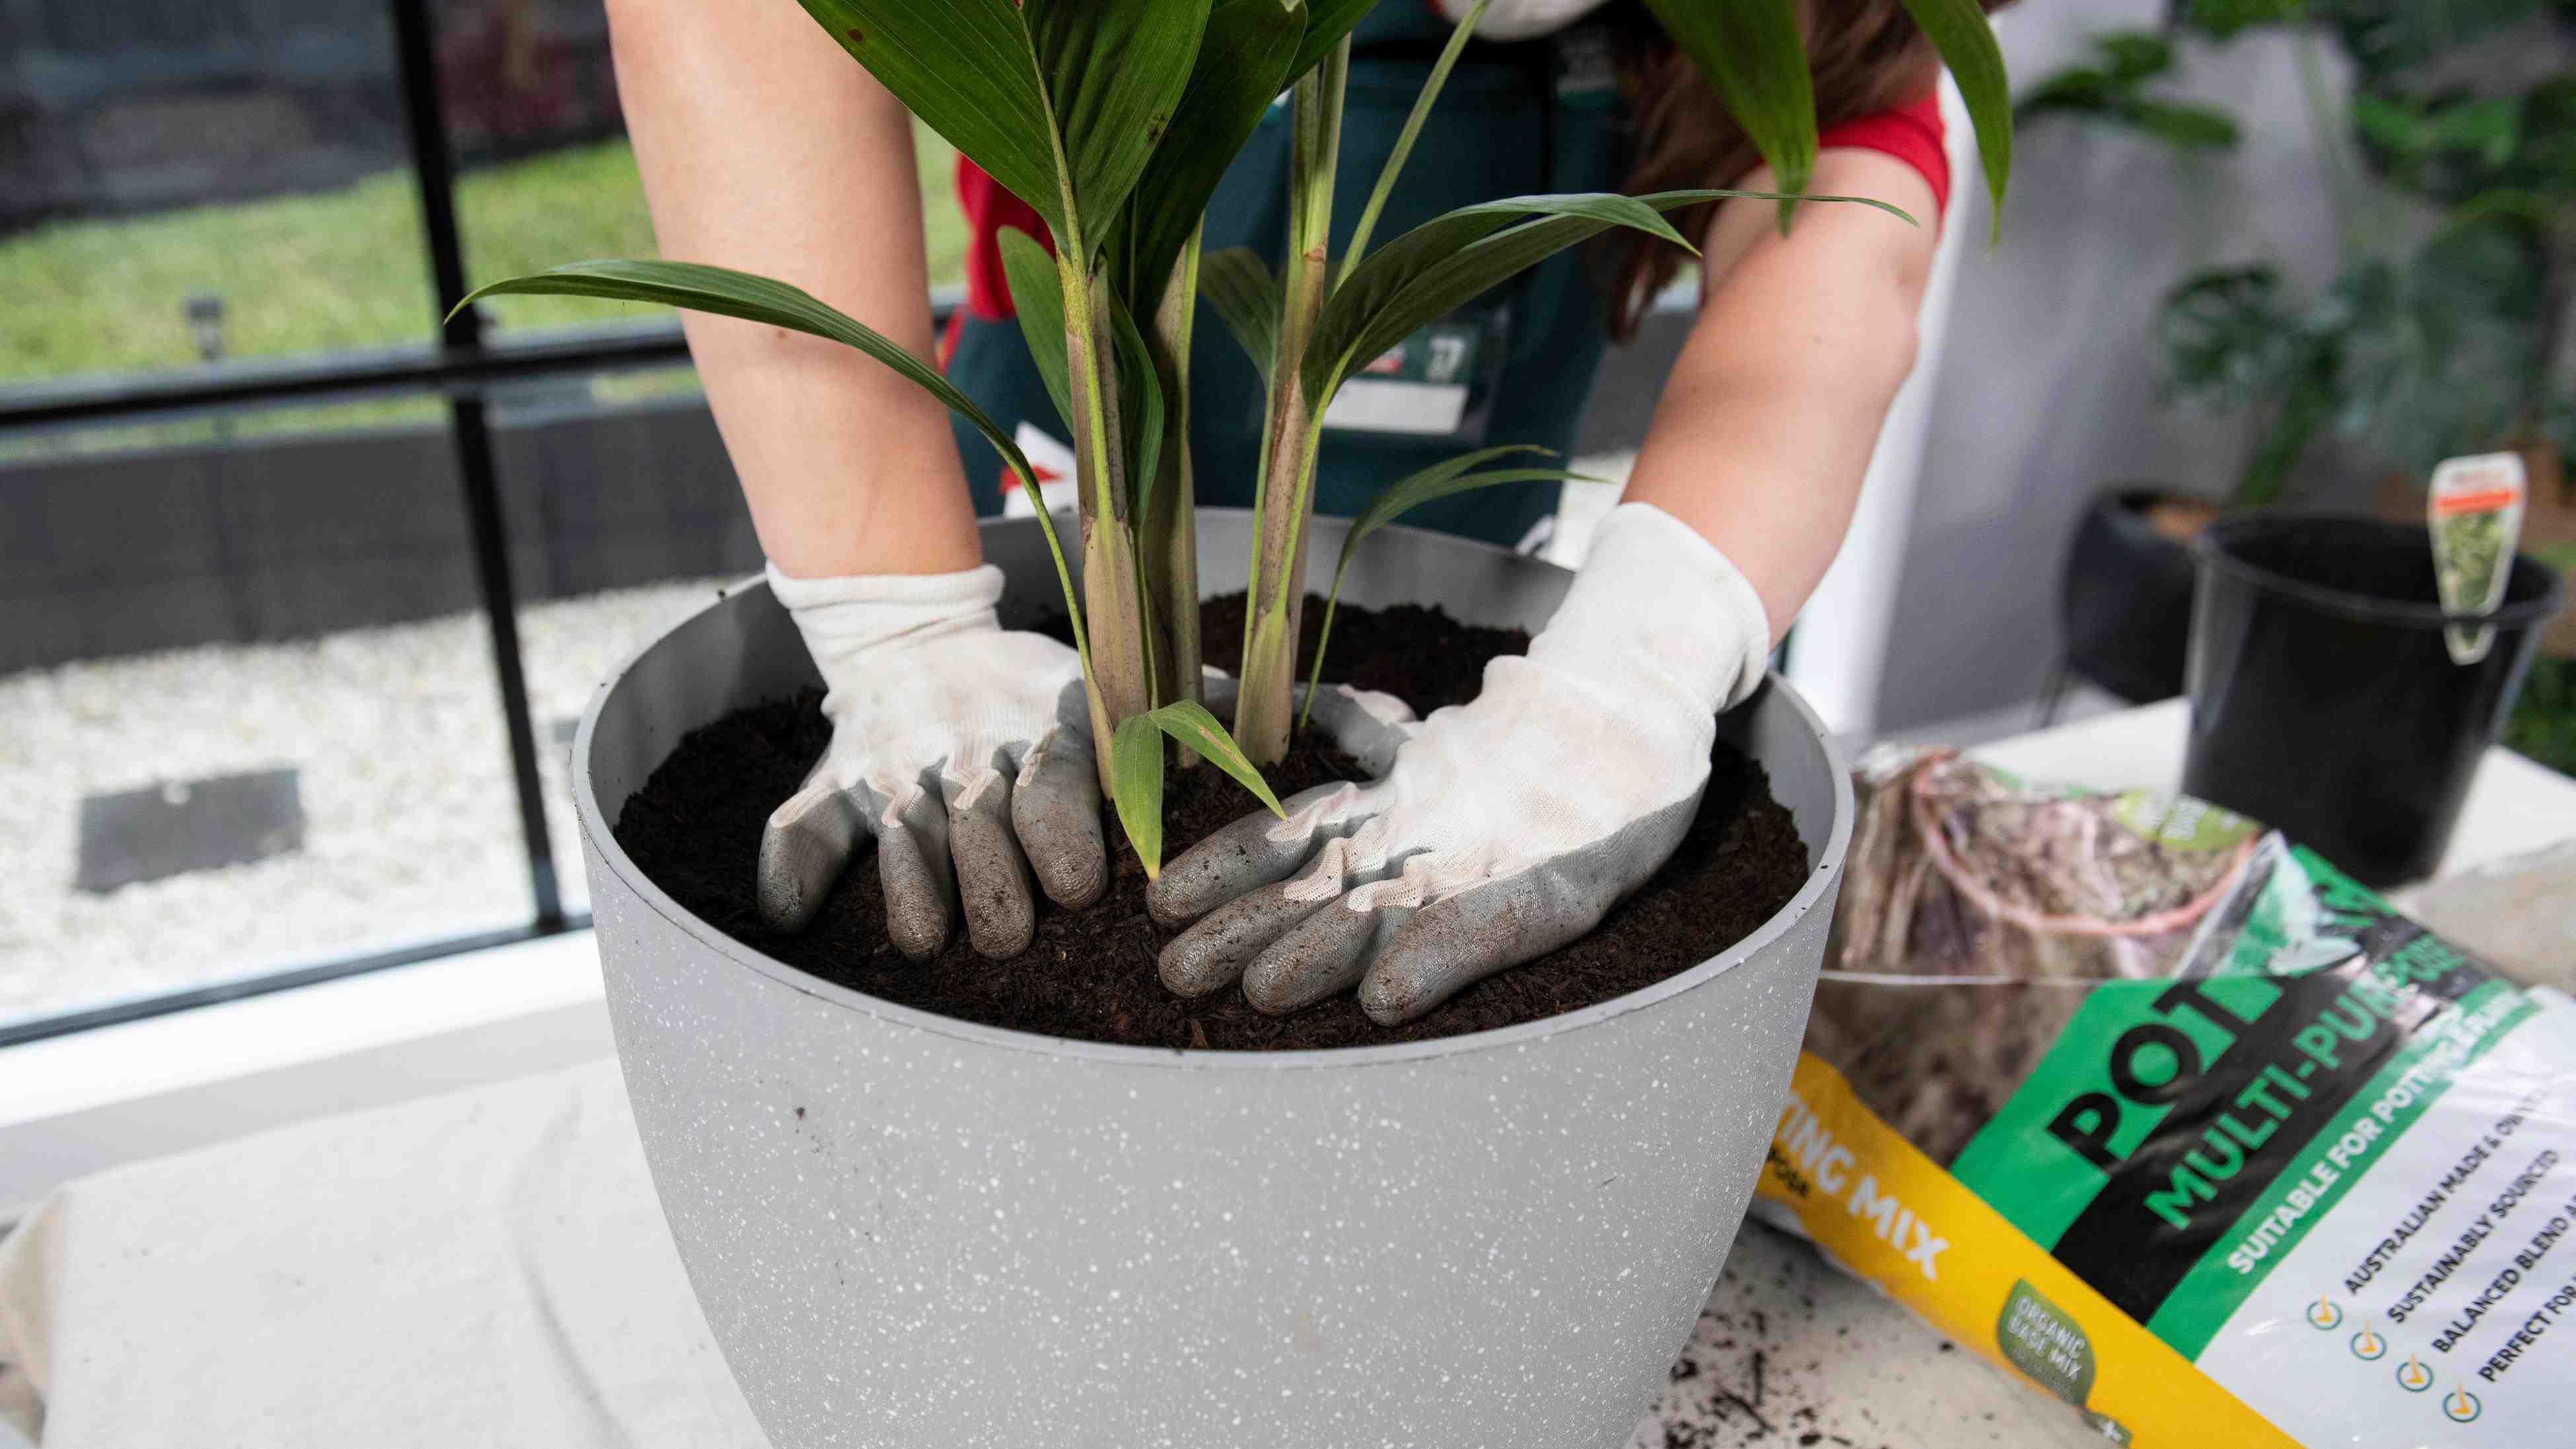
After preparing the potting mix, fill the chosen pot with the mixture, leaving enough space for your bulbs to be planted at the appropriate depth. Level the surface of the potting mix and pat it gently to remove any air pockets.
With the potting mix ready, it’s time to move on to the exciting part: planting the bulbs in your pots. Let’s explore the next step!
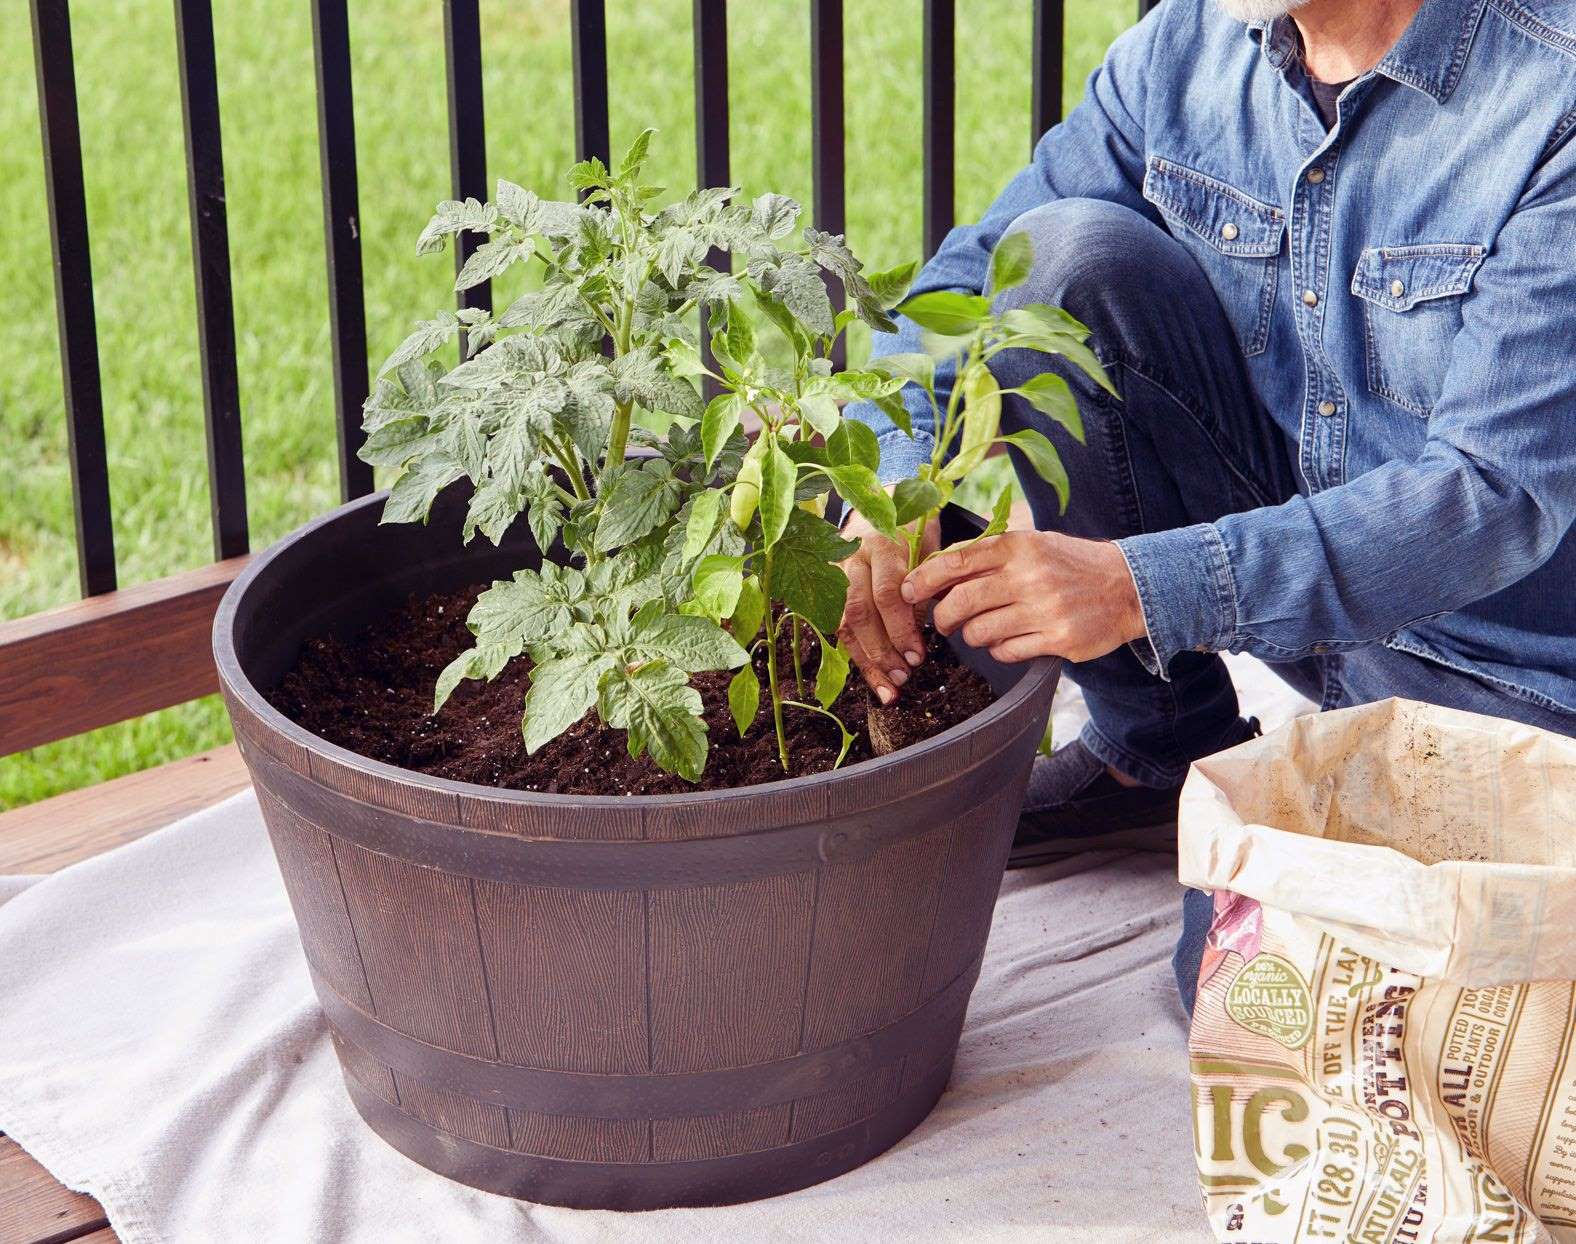
Planting the Bulbs in Pots
Planting bulbs in pots is a straightforward process that requires a few simple steps. Follow these guidelines to ensure successful planting:
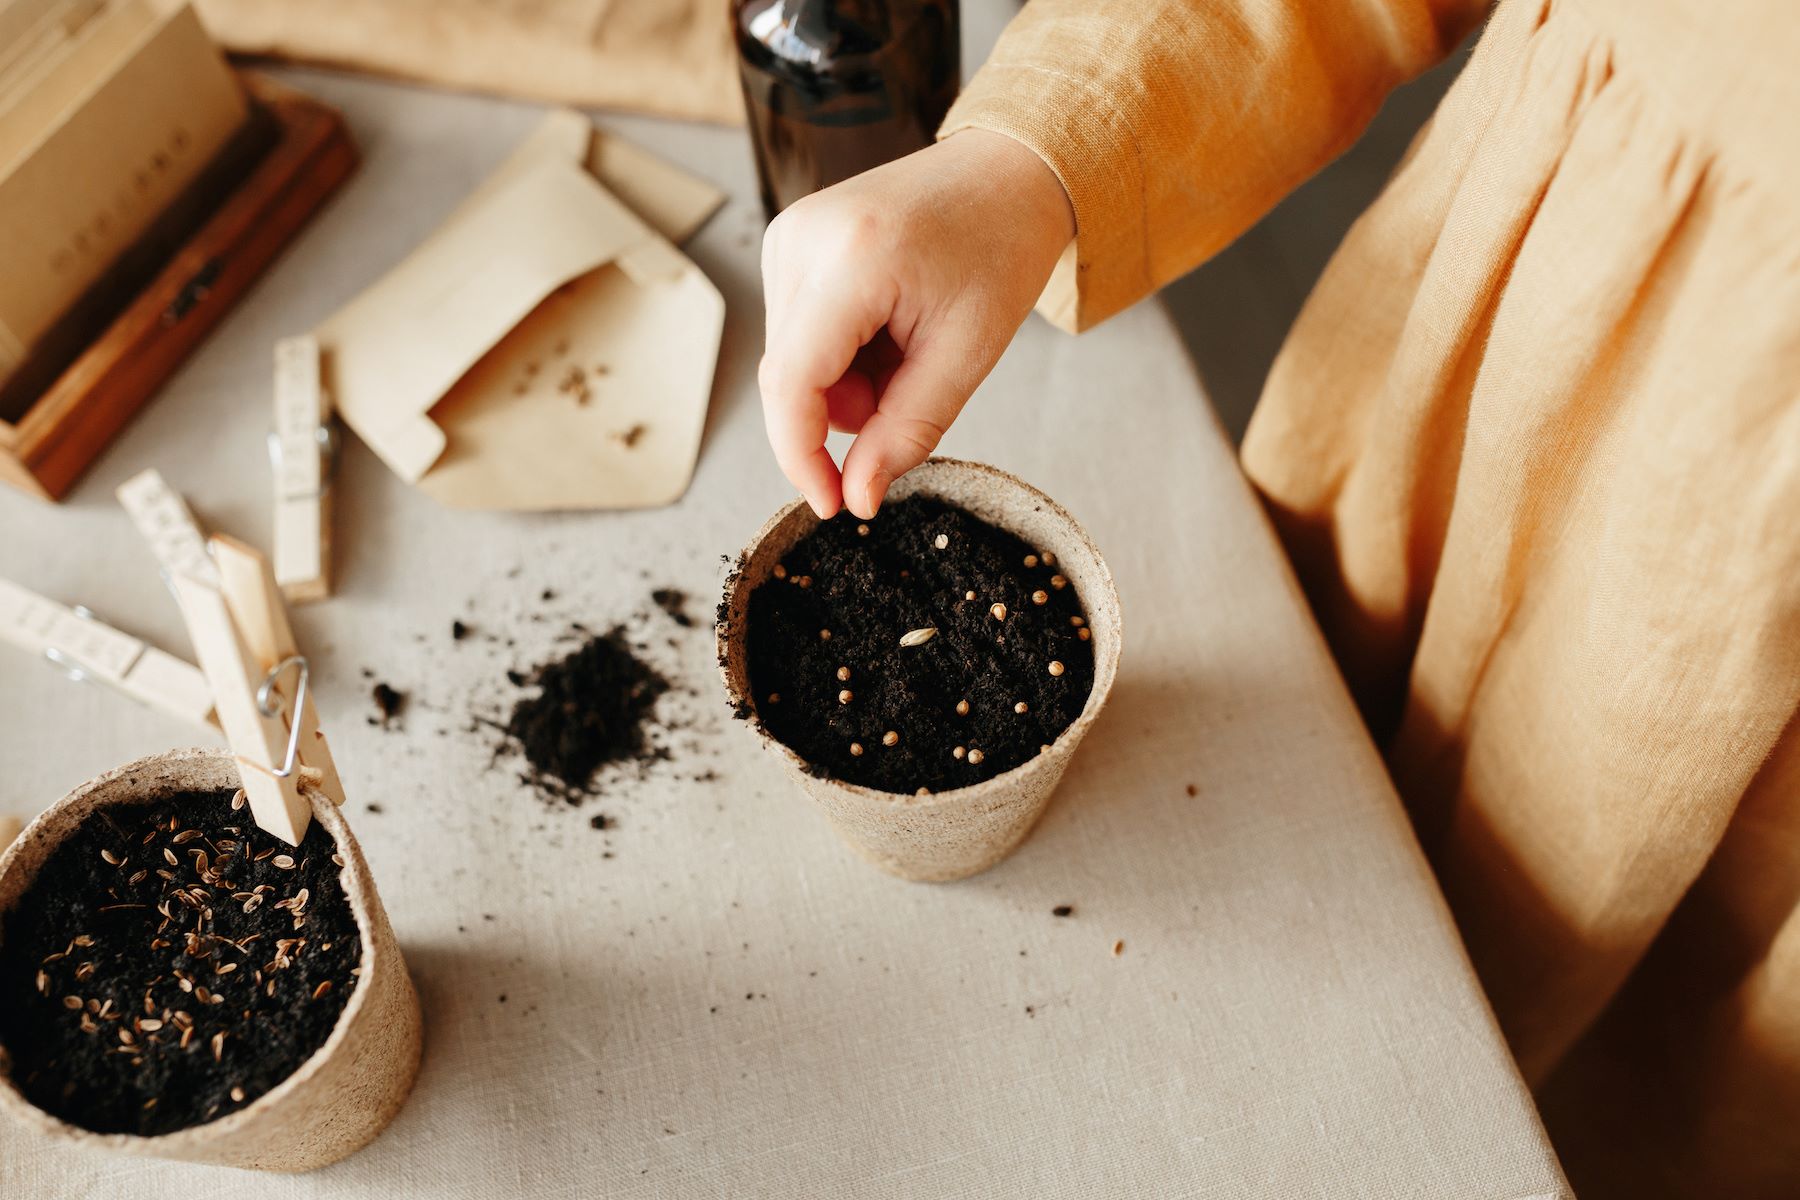
- Select the Right Depth: Each type of bulb has a specific planting depth. As a general rule, bulbs should be planted at a depth that is two to three times their own height. Check the packaging or research the specific requirements for the bulbs you are planting.
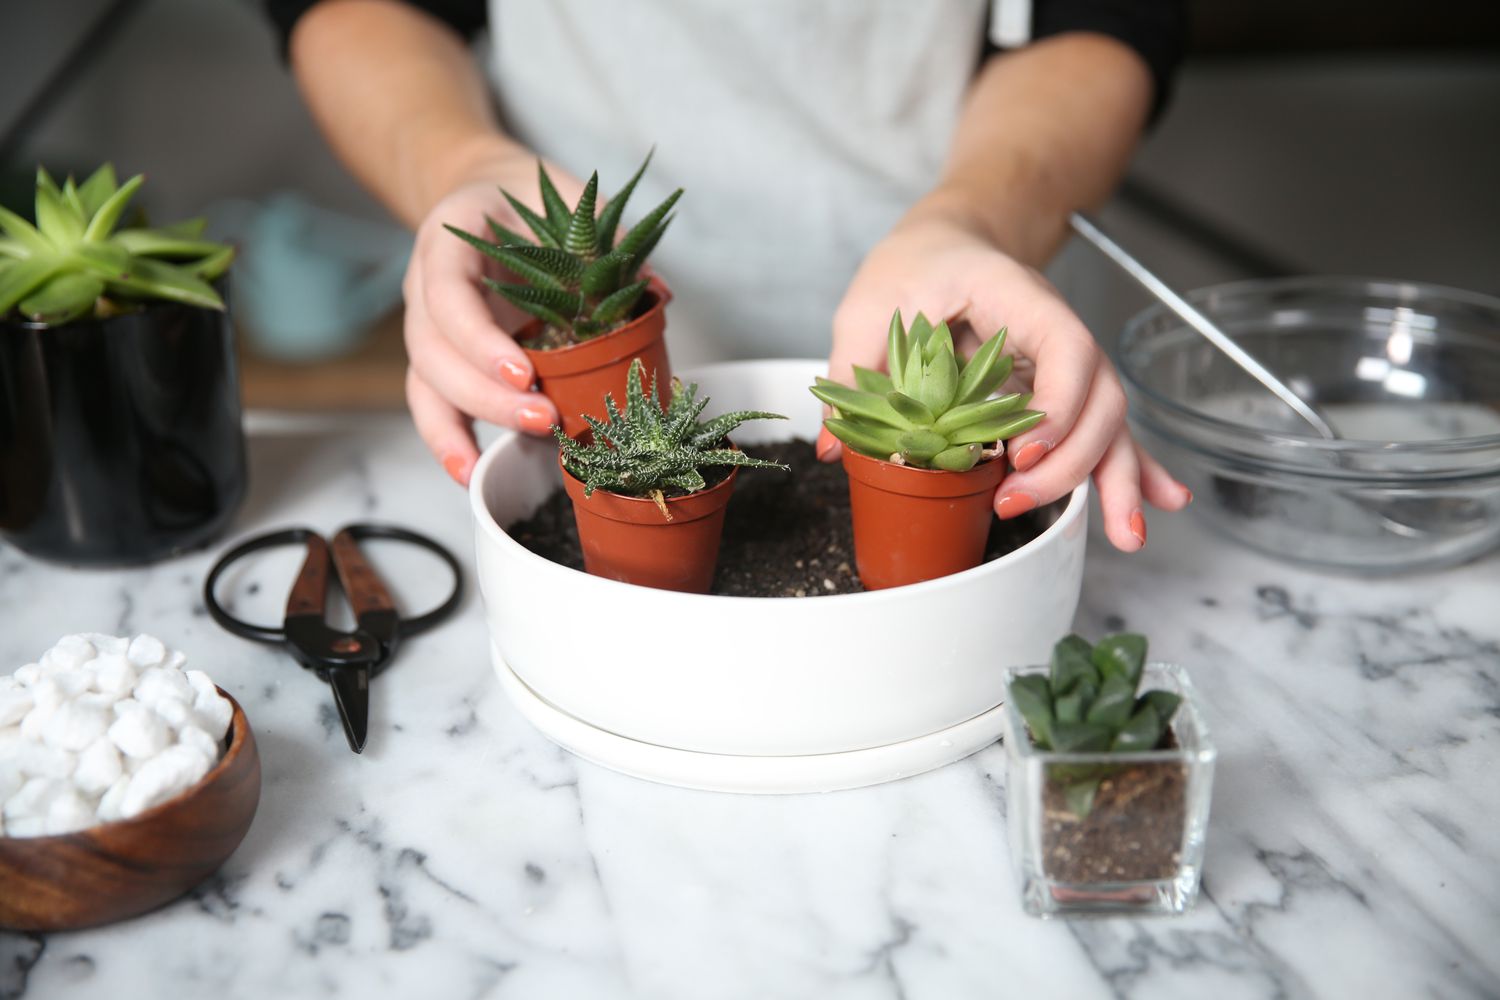
- Position the Bulbs: Place the bulbs in the pot, ensuring they are spaced apart and not touching each other or the sides of the pot. This will allow them to grow and develop without overcrowding or competition for nutrients.
- Root-Side Down: When placing the bulbs in the pot, make sure the root side faces down, and the pointed end faces upward. This ensures that the bulbs will grow in the correct direction.
- Cover with Potting Mix: Once the bulbs are in position, cover them with potting mix, gently filling the spaces around and on top of the bulbs. Leave a small gap between the top of the potting mix and the rim of the pot to allow for watering and prevent soil runoff.
- Water Thoroughly: After planting, thoroughly water the pot to settle the soil and ensure proper hydration of the bulbs. The water should penetrate the potting mix, providing moisture for the bulbs to begin the growing process.
It’s important to note that some bulbs require a period of cold stratification before they can begin to sprout. This imitates the natural winter conditions they would experience in the ground. Consult the packaging or do some research to determine if your bulbs require this treatment.
After planting your bulbs, place the pot in a suitable location based on the sunlight requirements of the specific bulbs you have chosen. Most bulbs prefer a sunny area, but some may thrive in partial shade. Place the pot where it will receive the appropriate amount of sunlight for the type of bulbs you are growing.
Now that your bulbs are planted and in position, it’s time to learn how to care for them and ensure their healthy growth. Let’s move on to the next step: watering and caring for your bulbs!
Watering and Caring for the Bulbs
Proper watering and care are essential for the successful growth and development of your potted bulbs. Here are some guidelines to keep in mind:
- Watering: Bulbs in pots require consistent moisture, but it’s crucial to avoid overwatering, which can lead to bulb rot. The general rule of thumb is to keep the potting mix evenly moist, but not overly saturated. Feel the top inch of the soil, and if it feels dry, it’s time to water. Water thoroughly until you see water draining out of the bottom holes, ensuring that the entire root ball is moistened. Avoid letting the pot sit in standing water, as this can also cause root rot.
- Fertilizing: While bulbs contain all the nutrients they need to bloom, you can give them a boost of fertilizer to promote strong growth and abundant flowers. Use a balanced, slow-release fertilizer, following the instructions on the packaging. Apply the fertilizer when the shoots begin to emerge, and lightly work it into the top inch of the potting mix.
- Deadheading: To encourage continuous blooming and maintain the appearance of your potted bulbs, it’s a good practice to remove faded flowers regularly. Deadheading redirects the plant’s energy from producing seeds to developing stronger bulbs and more flowers.
- Protecting from Pests: Keep an eye out for common pests like snails, slugs, and aphids, as they can damage your bulbs. Regularly inspect the plants and take appropriate measures to control and prevent infestations. Organic pest control methods, such as handpicking or using natural repellents, are often effective and safer for the environment.
- Supporting Growing Stems: As your potted bulbs grow, some varieties may require support to prevent the stems from bending or flopping over. Use stakes or plant supports to gently prop up the stems, ensuring they grow upright and present a tidy appearance.
It’s important to note that after the flowering season, most bulbs will enter a dormant phase. During this time, reduce watering and allow the foliage to die back naturally. This allows the bulbs to store energy for the next growing season.
With proper watering and care, your potted bulbs will reward you with beautiful blooms and healthy growth. However, it’s important to protect them during the cold winter months. Let’s explore how to ensure the winter survival of your potted bulbs in the next section.
Protecting the Bulbs in Winter
As winter approaches, it’s important to take measures to protect your potted bulbs from the harsh conditions that can damage or kill them. Here are some tips to ensure their survival during the winter months:
- Move Indoors: If your potted bulbs are not cold-hardy for your region or the winter temperatures are extremely harsh, consider moving the pots indoors. Find a cool, dark location such as a garage, basement, or root cellar where the temperature remains consistently above freezing but below 50°F (10°C). Check on the bulbs occasionally and water sparingly to prevent them from drying out.
- Insulate the Pot: If moving the pots indoors is not possible, you can insulate the pots to protect the roots from freezing temperatures. Wrap the pot with bubble wrap or burlap to provide an extra layer of insulation. This can help prevent the potting mix from freezing and damaging the bulbs.
- Group and Mulch: If you have several potted bulbs, grouping them together can provide additional insulation. Place the pots close to each other and surround them with a layer of mulch, such as straw or wood chips. This helps to retain heat and regulate temperature fluctuations, protecting the bulbs from freezing.
- Use Frost Protection Covers: Frost protection covers, such as frost blankets or cloths, can be draped over the pots to shield them from extreme cold and frost. These covers create a barrier that traps heat and prevents direct contact between the bulbs and freezing temperatures.
- Monitor Moisture Levels: While the bulbs need less water during their dormant period, it’s important to monitor the moisture levels in the pots. If the winter is particularly dry, provide occasional watering to prevent the potting mix from completely drying out. Be careful not to overwater, as too much moisture coupled with cold temperatures can lead to rot.
- Check for Pests: During winter, pests may seek shelter in your potted bulbs. Regularly inspect the pots and bulbs for any signs of infestation. If pests are present, take appropriate measures to eliminate them before they cause significant damage.
By taking these precautions, you can ensure the survival of your potted bulbs and set them up for a healthy and vibrant growth in the following spring. Now that you have learned how to protect your bulbs in winter, let’s explore some additional tips for success in the next section.
Tips for Success
To achieve the best results when planting bulbs in pots, consider the following tips:
- Choose Bulbs of High Quality: Opt for bulbs that are firm, plump, and free from mold or signs of damage. High-quality bulbs have a better chance of producing healthy and vibrant flowers.
- Plant Bulbs in Groups: Planting bulbs in groups or clusters can create a more impactful and visually appealing display. Consider planting bulbs of the same variety or mix different varieties for a diverse and stunning arrangement.
- Rotate Bulbs: If you have limited space or want to ensure continuous blooms, consider rotating the bulbs in and out of pots. Once a variety has finished flowering, replace it with another variety that is ready to bloom, extending the display and maximizing the use of your pots.
- Monitor Sunlight: Different bulbs have varying sunlight requirements. Pay attention to the recommended sunlight levels for the specific bulbs you are planting and ensure they receive the appropriate amount of sunlight each day.
- Prevent Overcrowding: Avoid planting too many bulbs in a single pot, as this can lead to overcrowding and competition for nutrients. Give each bulb enough space to grow and thrive.
- Consider Companion Plants: Pairing bulbs with companion plants can enhance the visual appeal and create a more varied and harmonious display. Choose companion plants that have similar growing requirements to ensure they coexist well in the same pot.
- Regularly Inspect and Maintain: Regularly check your potted bulbs for signs of disease, pest infestation, or water needs. Remove any faded flowers, inspect leaves for discoloration or damage, and address issues promptly to maintain the health of your bulbs.
- Adjust Watering as Needed: Pay attention to the moisture needs of your bulbs and adjust your watering routine accordingly. Factors such as temperature, sunlight, and pot size can influence the watering requirements, so be attentive and responsive to the needs of your plants.
Remember, gardening is a learning process, and each season presents an opportunity to improve and refine your skills. Be patient, experiment with different techniques, and don’t be afraid to embrace the joy of gardening. With these tips in mind, you can enjoy the beauty and rewards of planting bulbs in pots.
Conclusion
Planting bulbs in pots is a wonderful way to add color, beauty, and versatility to your ornamental gardening endeavors. With the right bulbs, pots, potting mix, and care, you can create stunning displays that brighten up any outdoor space. Whether you have a small balcony, a patio, or a spacious garden, potted bulbs offer a flexible and rewarding gardening experience.
By carefully choosing the right bulbs for your climate and desired flowering season, selecting suitable pots, preparing a well-draining potting mix, and following proper planting techniques, you can set the stage for your bulbs to flourish. Adequate watering, fertilizing, and providing protection during winter ensure the continuing health and growth of your potted bulbs.
Remember to stay vigilant and monitor your potted bulbs regularly for signs of pests, diseases, or moisture levels. With proper care, your potted bulbs can provide years of stunning blooms and vibrant displays.
So, whether you’re a seasoned gardener or embarking on your first gardening adventure, planting bulbs in pots offers a rewarding and creative way to express your passion for ornamental gardening. Get ready to watch your potted bulbs come to life, and delight in the beauty they bring to your outdoor space!