Home>Types of Gardening>Ornamental Gardening>Which Way To Plant Bulbs

Ornamental Gardening
Which Way To Plant Bulbs
Modified: February 7, 2024
Discover the best way to plant bulbs for stunning ornamental gardening. Follow our expert tips and tricks to ensure beautiful blooms in your garden.
(Many of the links in this article redirect to a specific reviewed product. Your purchase of these products through affiliate links helps to generate commission for Chicagolandgardening.com, at no extra cost. Learn more)
Table of Contents
Introduction
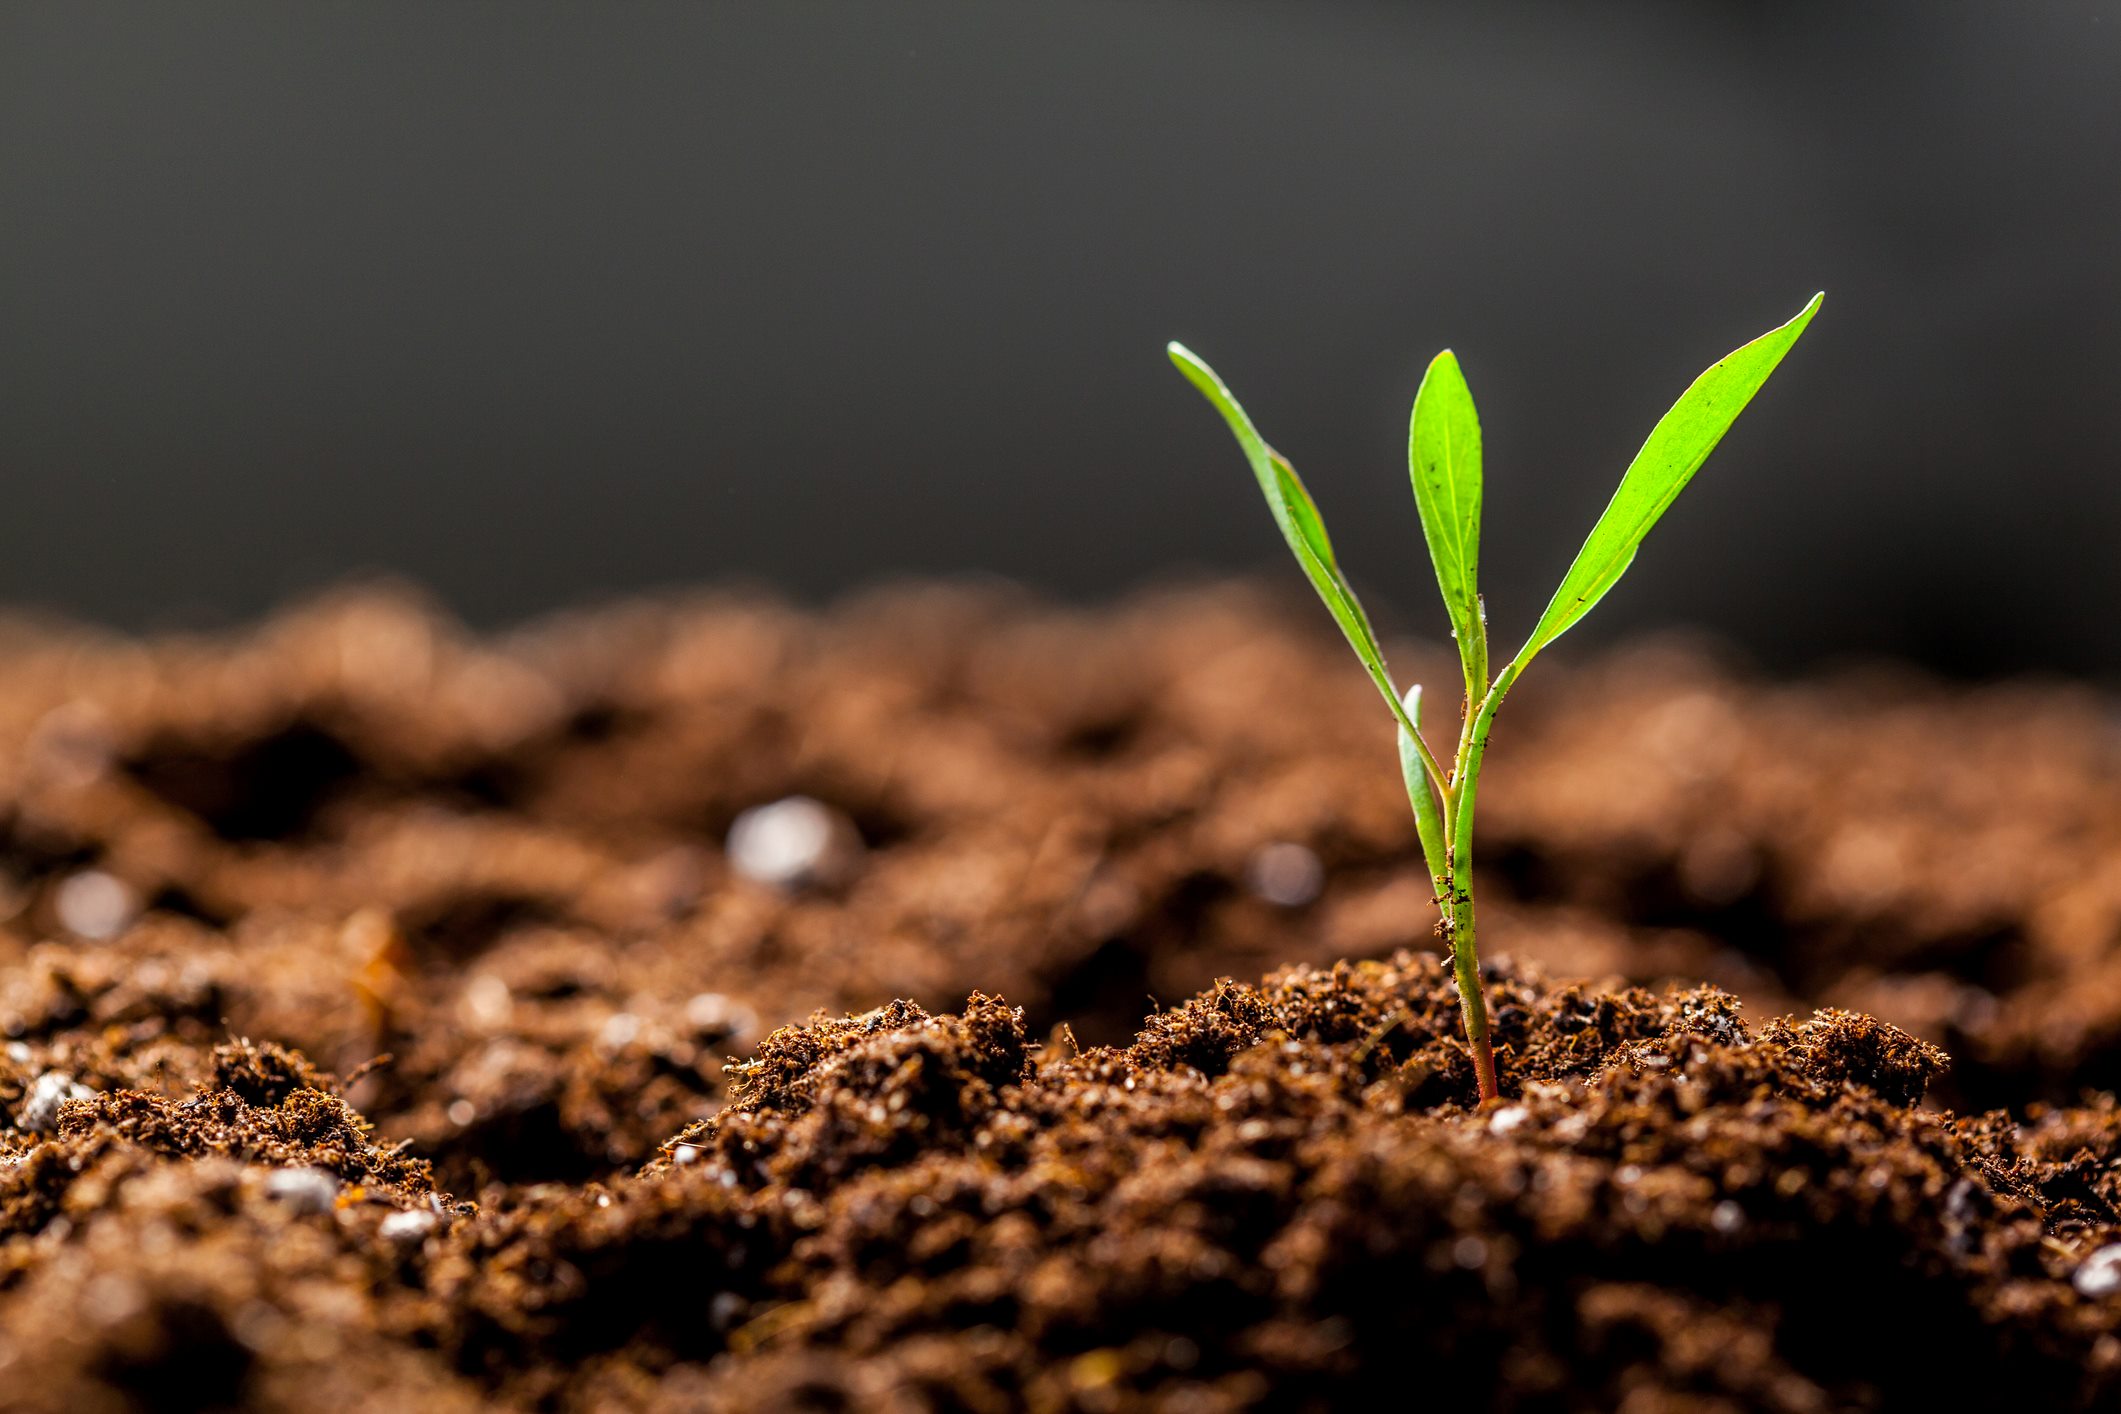
Welcome to the wonderful world of ornamental gardening! Whether you’re a seasoned green thumb or a novice enthusiast, planting bulbs is an essential part of creating a vibrant and stunning garden. However, figuring out which way to plant bulbs can be a bit confusing for many gardeners. Should they go in pointed end up, on their sides, or even pointed end down? The answer to this question depends on various factors, including soil type, sunlight exposure, planting depth, watering requirements, and bloom time.
By understanding these factors and implementing the correct planting method, you can ensure the success of your bulb garden and enjoy a breathtaking display of colorful blooms. In this article, we will delve into the intricacies of planting bulbs and explore the various methods to help you make an informed decision based on your specific gardening needs.
Before we dive into the different planting methods, it’s important to note that there is no one-size-fits-all approach. The best way to plant bulbs may vary depending on the specific type of bulb you’re working with. Some bulbs, such as daffodils or tulips, have a clear “top” and “bottom” side, while others, like lilies or hyacinths, may not have a distinct orientation.
So, let’s roll up our sleeves, grab our gardening tools, and embark on a fascinating journey to discover the secrets of planting bulbs and creating a flourishing ornamental garden. By the end of this article, you’ll be equipped with the knowledge and confidence to take on any bulb-planting project!
Factors to Consider
When deciding which way to plant your bulbs, there are several important factors to consider. By taking these factors into account, you can ensure that your bulbs thrive and produce beautiful blooms.
- Soil Type: The type of soil in your garden can influence the way you plant your bulbs. Well-draining soil is crucial for preventing bulb rot. If you have heavy clay soil, it’s best to plant your bulbs on their sides to prevent water from pooling around the pointed end.
- Sunlight Exposure: Different bulb species have varying sunlight requirements. Some bulbs thrive in full sun, while others prefer partial shade. When choosing which way to plant your bulbs, consider their specific sunlight needs and position them accordingly. Bulbs should be oriented with the pointed end up if they require more sunlight, while bulbs that prefer shade can be planted on their sides.
- Planting Depth: The depth at which you plant your bulbs plays a crucial role in their growth and development. As a general rule of thumb, smaller bulbs should be planted at shallower depths, while larger bulbs require deeper planting. Follow the instructions provided with the bulbs to determine the correct planting depth, and orient them accordingly.
- Watering Requirements: The watering needs of bulbs can vary. While some bulbs require moderate moisture, others prefer drier conditions. Take into account the watering requirements of your bulbs and adjust your planting orientation accordingly. Bulbs that need less moisture can be planted on their sides to prevent excess water accumulation.
- Bloom Time: The timing of the bloom is another important factor to consider. If you want your bulbs to bloom early in the season, plant them with the pointed end up. For bulbs that bloom later, plant them on their sides or pointed end down. This orientation can help regulate the emergence of the shoots and flowers.
By evaluating these factors and tailoring your planting technique accordingly, you can optimize the growing conditions for your bulbs and ensure a bountiful display of colorful blooms. So, let’s explore the different methods of planting bulbs to better understand how to implement these considerations in your gardening endeavors.
Soil Type
The type of soil in your garden has a significant impact on the success and health of your bulbs. Different soil types have different drainage capacities, affecting how water moves around the bulbs. When considering which way to plant your bulbs, soil type is an important factor to take into account.
For well-draining soils, such as sandy or loamy soil, it is generally recommended to plant bulbs with their pointed end up. This helps prevent excess moisture from accumulating around the base of the bulb, reducing the risk of rot. Planting them upright also ensures that the shoots emerge in the correct direction, leading to more successful growth and flowering.
On the other hand, if your garden has heavy clay soil that retains water, it is advisable to plant bulbs on their sides. This sideways orientation helps prevent water from pooling around the pointed end of the bulb, which can lead to rot. Planting bulbs horizontally also allows the shoots to grow upward more easily, even if the soil is heavy and compact.
Additionally, if you have a mixture of soil types in your garden, you can consider adjusting the planting depth to accommodate the varying soil conditions. Plant bulbs with their pointed end up in soil that drains well, and plant them on their sides or even pointed end down in heavier soil areas.
It’s worth noting that if your soil tends to be consistently wet or poorly draining, it may be beneficial to amend it by adding organic matter such as compost or well-rotted manure. This can help improve soil structure and drainage, creating a more favorable environment for your bulbs.
Understanding your soil type and how it affects moisture retention and drainage is key to making informed decisions about planting your bulbs. By adapting the orientation of your bulb planting to suit your specific soil conditions, you can provide your bulbs with the best chance of thriving and producing stunning blooms.
Sunlight Exposure
The amount of sunlight your garden receives is another important factor to consider when determining how to plant your bulbs. Different bulb species have varying sunlight requirements, and orienting them correctly can optimize their ability to photosynthesize and thrive.
If you have bulbs that require full sun, it is advisable to plant them with their pointed end up. This orientation ensures that the shoots emerge towards the sunlight, allowing for maximum exposure to sunlight throughout the day. By placing the bulbs upright, you are positioning them in a way that allows them to receive the most direct sunlight to fuel their growth and blooming process.
On the other hand, if you have bulbs that prefer partial shade, you can plant them on their sides. This horizontal orientation prevents the shoots from growing too quickly towards the sun, as these bulbs require less intense sunlight. By planting them sideways, you can help to moderate the amount of light they receive, preventing them from becoming leggy and providing a more balanced environment for growth.
It’s important to note that the specific sunlight requirements can vary between different bulb species. Some bulbs may thrive in part sun, while others may prefer dappled shade. Be sure to research the sunlight preferences of the specific bulbs you are planting and position them accordingly.
Observing your garden throughout the day and taking note of the areas that receive different levels of sunlight is crucial. This will help you determine the optimal planting orientation based on the available sunlight in different areas of your garden. Consider the location of nearby trees or buildings that may cast shade and adjust your planting technique accordingly.
By aligning the planting orientation of your bulbs with their sunlight requirements, you can provide them with the ideal conditions to harness the sun’s energy and produce vibrant, healthy blooms.
Planting Depth
The depth at which you plant your bulbs plays a crucial role in their growth and development. Each bulb species has its own specific planting depth requirements, which are essential to follow for optimal results.
The general rule of thumb is to plant smaller bulbs at shallower depths and larger bulbs at deeper depths. Planting bulbs at the correct depth ensures that they establish a strong root system and allows for proper nutrient uptake from the soil.
When determining the planting depth, refer to the instructions provided with the bulbs or do some research beforehand. This will give you an idea of how deep each variety should be planted to thrive. It’s important to note that different bulbs have different preferences, so it’s essential to treat each variety individually rather than using a one-size-fits-all approach.
Generally, bulbs should be planted with the pointed end facing up. This orientation ensures that the new shoots will be able to emerge from the correct end of the bulb. If you’re unsure about the orientation, look for any visible roots or growing buds, as this can help guide the planting process.
When it comes to depth, a good guideline is to plant bulbs at a depth approximately three times their own height. This depth provides enough soil coverage to protect the bulb while allowing the shoots to successfully emerge. However, for some bulbs that have a more elongated shape, such as lilies, planting them a bit deeper can be beneficial to provide additional stability.
Remember to consider the soil conditions when determining planting depth. If you have heavy clay soil, it’s advisable to plant the bulbs slightly shallower to prevent excess moisture accumulation. Conversely, if you have sandy or loamy soil, you may need to plant the bulbs slightly deeper to ensure proper root establishment.
By planting your bulbs at the correct depth, you will provide them with the ideal growing conditions to develop strong roots, healthy foliage, and vibrant blooms. Take the time to understand the specific planting depth requirements for each bulb variety in your garden, and adjust your planting technique accordingly.
Watering Requirements
Understanding the watering needs of bulbs is essential for their successful growth and blooming. Different bulbs have varying moisture requirements, and adapting your watering practices can help ensure their overall health and vitality.
When considering which way to plant your bulbs, it’s important to take into account their watering needs. Some bulbs prefer moderate moisture levels, while others thrive in drier conditions.
If you have bulbs that require less moisture, planting them on their sides can help prevent excess water accumulation around the pointed end. This planting angle allows water to drain away more easily, reducing the risk of rot or fungal diseases caused by prolonged dampness. By providing a slightly drier environment, you can promote healthier bulb growth and prevent potential issues caused by overwatering.
Conversely, if you have bulbs that require more moisture, you can plant them with their pointed end up. This orientation helps to retain moisture around the bulb and encourages the roots to grow towards the water source. Providing adequate moisture is crucial for the proper development of these bulbs and can contribute to larger, more robust blooms.
It’s important to note that while water is essential for bulb growth, overwatering can be detrimental. Before watering, check the moisture levels in the soil. Bulbs generally prefer well-drained soil that is slightly moist but not waterlogged. Ensuring proper drainage is crucial for preventing bulb rot and other related issues.
Observing the weather conditions and adjusting your watering routine accordingly is also important. During periods of heavy rainfall, it may be necessary to reduce watering frequency to avoid waterlogged soil. In drier spells, you may need to supplement rainfall with additional watering to maintain adequate moisture levels.
Lastly, consider the specific watering needs of other plants in your garden when determining the planting orientation of your bulbs. Grouping bulbs with similar moisture requirements together can help streamline your watering practices and ensure all your plants receive the appropriate amount of water.
By carefully assessing the watering requirements of your bulbs and adjusting your planting technique accordingly, you can promote healthy growth, prevent water-related issues, and enjoy a stunning display of blooms in your garden.
Bloom Time
Considering the bloom time of your bulbs is crucial when determining the ideal planting orientation. Different bulbs bloom at different times throughout the growing season, and aligning their planting method with their bloom time can help create a well-sequenced and visually appealing garden.
If you want your bulbs to bloom early in the season, it is generally recommended to plant them with the pointed end up. This planting orientation allows the shoots to emerge more quickly and efficiently, helping the bulbs to take advantage of early spring sunlight and warmth. By placing them upright, you are encouraging faster growth and ensuring that their colorful flowers appear at the desired time.
On the other hand, if you prefer your bulbs to bloom later in the season, you can consider planting them on their sides or even pointed end down. This planting method helps to slow down the emergence of shoots and prolongs the flowering period. By controlling the orientation, you can manipulate the growth rate and ensure a more staggered bloom time for your bulbs.
It’s important to note that not all bulbs have a specific orientation requirement based on bloom time. Some bulbs, such as daffodils or tulips, have a clear top and bottom, while others, such as lilies or hyacinths, may not have a distinct orientation. For bulbs without a specific orientation, you can simply plant them as directed by the instructions provided or based on general planting guidelines.
When planning your garden, consider the bloom times of different bulb varieties and envision how they will interact with other flowers and plants in the landscape. By strategically choosing the planting orientation based on bloom time, you can create stunning displays that showcase a succession of blooms from early spring to late summer or even into fall.
Understanding the bloom time of your bulbs and utilizing appropriate planting methods will help you achieve a well-coordinated and visually captivating garden throughout the growing season. Take the time to research the flowering periods of your bulbs and plan your planting orientations accordingly for the most enjoyable and vibrant display.
Methods of Planting
When it comes to planting bulbs, there are various methods you can employ depending on the specific bulb and your gardening preferences. Each method offers its own advantages and considerations, allowing you to choose the most suitable approach for your ornamental gardening endeavors.
- 1. Planting Bulbs Pointed End Up: This is the most common and recommended method for planting bulbs. Simply position the bulb in the planting hole with the pointed end facing up. This ensures that the shoots will emerge in the correct direction, leading to more successful growth and flowering. This method is suitable for bulbs such as daffodils, tulips, and crocuses, which have a clear top and bottom.
- 2. Planting Bulbs on Their Sides: Planting bulbs on their sides can be beneficial in certain situations. This method is particularly useful for bulbs that prefer partial or dappled shade. Planting bulbs horizontally helps to moderate the amount of sunlight they receive, preventing them from becoming leggy. It also works well for bulbs in heavy clay soil, as it prevents water from pooling around the pointed end and causing rot. Bulbs without a distinct orientation, such as lilies or hyacinths, can also be planted on their sides.
- 3. Planting Bulbs Pointed End Down: Planting bulbs with the pointed end facing down is a less common method but can be employed for bulbs that have a more rounded shape or lack a clear orientation. While this method is not suitable for all bulb species, it can work well for certain varieties such as anemones or ranunculus. Planting them upside down helps prevent excess moisture from accumulating at the basal plate and reduces the risk of rot.
Regardless of the method you choose, it’s important to ensure that the bulbs are planted at the appropriate depth. Following the planting instructions provided with the bulbs or doing prior research is essential to determine the correct planting depth for each specific variety.
Additionally, incorporating organic matter, such as compost or well-rotted manure, into the planting hole can help improve soil fertility and drainage. This can further enhance the success and health of your bulbs.
Experimentation and observation will help you determine which planting method works best for your specific bulb varieties and gardening conditions. Don’t be afraid to try different approaches and adapt them to suit your needs and the needs of your bulbs.
By understanding the various methods of planting bulbs and incorporating the most suitable approach, you can maximize the chances of success and ensure a stunning display of blooms in your ornamental garden.
Planting Bulbs Pointed End Up
One of the most common and widely recommended methods of planting bulbs is to position them with the pointed end facing up. This planting orientation ensures that the shoots and leaves emerge in the correct direction, leading to more successful growth and blooming. It is suitable for bulbs such as daffodils, tulips, crocuses, and many others that have a clear top and bottom.
Planting bulbs with the pointed end up allows them to take full advantage of the sunlight. By orienting them correctly, you are ensuring that the leaves and shoots grow towards the light source, maximizing their ability to photosynthesize and produce energy for the bulb. This, in turn, promotes healthier foliage and vibrant blooms.
When preparing the planting hole, ensure that it is deep enough to accommodate the bulb and provide ample soil coverage. Place the bulb in the hole with the pointed end facing upward and gently press it into the soil. The bulb should be covered with soil to the recommended planting depth, allowing for proper root growth and stability.
Planting bulbs with the pointed end up is particularly important for bulbs that have a distinct basal plate, from which the roots emerge. Placing the bulb upside down can hinder root development and affect the overall health of the plant. It can also cause the shoots to grow in the wrong direction, resulting in stunted growth or abnormal flowering.
Following the correct planting technique not only ensures the proper orientation of the bulb but also helps prevent diseases and rot. Placing the bulb upright allows excess moisture to drain away from the base, reducing the risk of water pooling around the bulb and causing rot.
Remember to consider other factors such as soil type, watering requirements, and sunlight exposure when planting bulbs with the pointed end up. Adapt your planting technique to suit the specific needs of each bulb species, taking into account their individual preferences for soil moisture and light conditions.
By diligently planting bulbs with the pointed end up, you are providing them with the best chance for successful growth and beautiful blooms. This method ensures that the bulbs are positioned optimally to receive sunlight, develop strong roots, and produce the stunning floral display you envision for your ornamental garden.
Planting Bulbs on Their Sides
Planting bulbs on their sides is an alternative method that can be particularly beneficial in certain gardening scenarios. This planting technique is useful for bulbs that prefer partial or dappled shade, as well as in heavy clay soil where water drainage can be a concern.
When using this method, position the bulb horizontally in the planting hole, ensuring that it is in direct contact with the soil. By planting bulbs on their sides, you can moderate the amount of direct sunlight they receive. This is especially important for bulbs that thrive in partial shade or areas with dappled sunlight, as excessive exposure to direct sunlight can lead to scorching or stunted growth.
In areas with heavy clay soil that tends to retain moisture, planting bulbs horizontally can help prevent water from pooling around the pointed end. This reduces the risk of rot or fungal diseases caused by excessive dampness. Planting on the side also allows the shoots to grow upward more easily, even in dense soil conditions.
It’s worth noting that not all bulbs have a distinct orientation requirement and can be planted on their sides without issue. Bulbs with a more rounded shape, such as lilies or hyacinths, or bulbs that lack a clear top and bottom can be planted horizontally with success.
When planting bulbs on their sides, ensure that the planting hole is deep enough to accommodate the bulb and provide adequate soil coverage. Gently press the bulb into the soil so it remains in place. Remember to follow the recommended planting depth for each specific bulb variety.
Consider the specific needs of each bulb species when deciding whether to plant them on their sides. Research their preferred light conditions and adjust your planting technique accordingly. By providing the right amount of shade and moisture control, you can create an environment conducive to the healthy growth and development of these bulbs.
Experiment with planting bulbs on their sides in different areas of your garden to determine where this method works best. Monitor and adjust watering practices as needed to ensure the soil remains moist but well-drained. Adapting this planting technique to suit the specific needs of your bulbs will help you create a thriving and visually stunning ornamental garden.
Planting Bulbs Pointed End Down
Planting bulbs with the pointed end down is a less common method but can be suitable for certain bulb varieties that have a more rounded shape or lack a distinct orientation. While not applicable to all bulb species, this planting technique can be employed for bulbs like anemones or ranunculus, which do not have a clear top and bottom.
When using this method, place the bulb in the planting hole with the pointed end facing downward. While it may seem counterintuitive, planting the bulb upside down can have its benefits. It helps prevent excess moisture from accumulating at the basal plate, reducing the risk of rot or fungal diseases that can occur in overly damp conditions. Additionally, planting bulbs with the pointed end down can stimulate stronger and more reliable root growth.
Before planting, inspect the bulb for any visible roots or growing buds that can help indicate the proper orientation. If you’re unsure, planting the bulb on its side is a safe alternative that can still provide successful growth and flowering.
While this planting method can be effective for certain bulbs, it’s important to emphasize that it is not suitable for all bulb species. Bulbs with a clear top and bottom, such as daffodils or tulips, should always be planted with the pointed end facing up to ensure proper growth and development.
When preparing the planting hole, ensure that it is deep enough to accommodate the bulb and provide adequate soil coverage. Gently press the bulb into the soil to secure it in place. Be sure to follow the recommended planting depth for each specific bulb variety to ensure optimal growth.
While planting bulbs with the pointed end down may go against conventional wisdom, it can be a successful technique for certain bulb species. By understanding the specific needs and preferences of the bulbs you are planting, you can make informed decisions and experiment with different planting methods to optimize their growth and overall health.
Take note of how bulbs planted in this manner perform in your garden, and make adjustments to planting techniques or soil conditions as needed. By adapting your approach, you can create the ideal environment for your bulbs and enjoy flourishing displays of blooms.
Conclusion
Planting bulbs in your ornamental garden allows you to create an enchanting and vibrant floral display. When determining which way to plant bulbs, considerations such as soil type, sunlight exposure, planting depth, watering requirements, and bloom time are crucial. By taking these factors into account, you can ensure the success of your bulbs and enjoy a stunning garden year after year.
While the most common method is to plant bulbs with the pointed end facing up, there are alternative techniques depending on the specific needs of the bulbs and your gardening conditions. Planting bulbs on their sides is beneficial for bulbs that prefer partial shade or in heavy clay soil, as it promotes optimal growth and prevents excessive water accumulation. Planting bulbs with the pointed end down can be used for certain bulb varieties without a clear orientation, aiding in root development and minimizing the risk of rot.
Remember to follow the recommended planting depths for each bulb species and adjust your planting method accordingly. Consider the individual requirements of the bulbs, such as their preferred sunlight exposure and watering needs, to create the best environment for their growth and blooming potential.
By incorporating these techniques and guidelines, you can create a stunning floral symphony in your garden. Whether your goal is early spring blooms or a succession of color throughout the season, understanding how to plant bulbs can make a significant difference in the overall success and beauty of your ornamental garden.
So, armed with your newfound knowledge, don’t be afraid to get your hands dirty and experiment with different planting methods. Explore the incredible variety of bulbs available, select the ones that suit your garden’s needs, and watch as they transform your outdoor space into a kaleidoscope of colors and fragrances.
Remember, gardening is a creative endeavor, and each garden is a unique expression of its gardener. Have fun, embrace the process, and enjoy the beauty that unfolds as you plant and care for your bulbs. Happy gardening!
Additional Tips and Recommendations
As you embark on your journey of planting bulbs, here are some additional tips and recommendations to ensure the success and longevity of your ornamental garden:
- Choose high-quality bulbs: Select bulbs that are firm, plump, and free from blemishes or signs of damage. The quality of the bulb can greatly impact its ability to establish and produce healthy blooms.
- Prepare the soil: Before planting, prepare the soil by removing any weeds or debris and incorporating organic matter, such as compost or well-rotted manure, to improve soil fertility and drainage.
- Take note of companion plants: Consider the neighboring plants when choosing your bulb varieties. Group bulbs with similar growth requirements and complementary colors to create harmonious plant combinations.
- Consider bloom succession: To extend the blooming period, choose bulbs with varying bloom times. By planting a combination of early, mid, and late-season bloomers, you can enjoy a continuous display of color throughout the growing season.
- Maintain appropriate spacing: Avoid overcrowding bulbs, as this can lead to competition for resources and hinder their growth. Follow the spacing recommendations provided with the bulbs to allow for proper airflow and root development.
- Protect bulbs from pests: Install barriers or use organic pest control methods to prevent damage from pests such as rodents or diggers. Consider planting bulbs that are less attractive to certain pests or utilizing repellents to deter them.
- Monitor and adjust watering: Regularly check the moisture levels in the soil, especially during periods of drought or excessive rainfall. Adjust watering accordingly to maintain the appropriate level of moisture for your bulbs.
- Remove spent blooms: Deadhead flowers as they fade to promote additional blooming and divert the plant’s energy into bulb development. This can also help maintain a neat and tidy appearance.
- Divide and replant bulbs: Some bulb species benefit from occasional division to prevent overcrowding and promote better flowering. Follow the recommended division intervals for each specific bulb variety to maintain their vigor.
- Continue bulb care after blooming: Even after the blooms have faded, continue to care for the leaves until they naturally wither and die. This allows the bulbs to replenish their energy reserves for future growth and flowering.
Remember, gardening is a journey of learning and experimentation. Every garden is unique, and it may take some time to find what works best for your specific conditions. Embrace the process, learn from both successes and setbacks, and enjoy the beauty that unfolds as you tend to your bulbs. Happy gardening!