Home>Gardening Techniques>Plant Care>How To Thin Out Carrot Seedlings
Plant Care
How To Thin Out Carrot Seedlings
Published: January 2, 2024
Learn how to thin out your carrot seedlings for optimal plant care. Follow our step-by-step guide to ensure healthy growth and a bountiful harvest.
(Many of the links in this article redirect to a specific reviewed product. Your purchase of these products through affiliate links helps to generate commission for Chicagolandgardening.com, at no extra cost. Learn more)
Table of Contents
- Introduction
- Reasons for Thinning out Carrot Seedlings
- When to Thin out Carrot Seedlings
- Tools and Materials Needed
- Step-by-step Guide on How to Thin out Carrot Seedlings
- Tips for Successful Thinning
- Common Mistakes to Avoid
- Benefits of Thinning out Carrot Seedlings
- Frequently Asked Questions (FAQs)
- Conclusion
Introduction
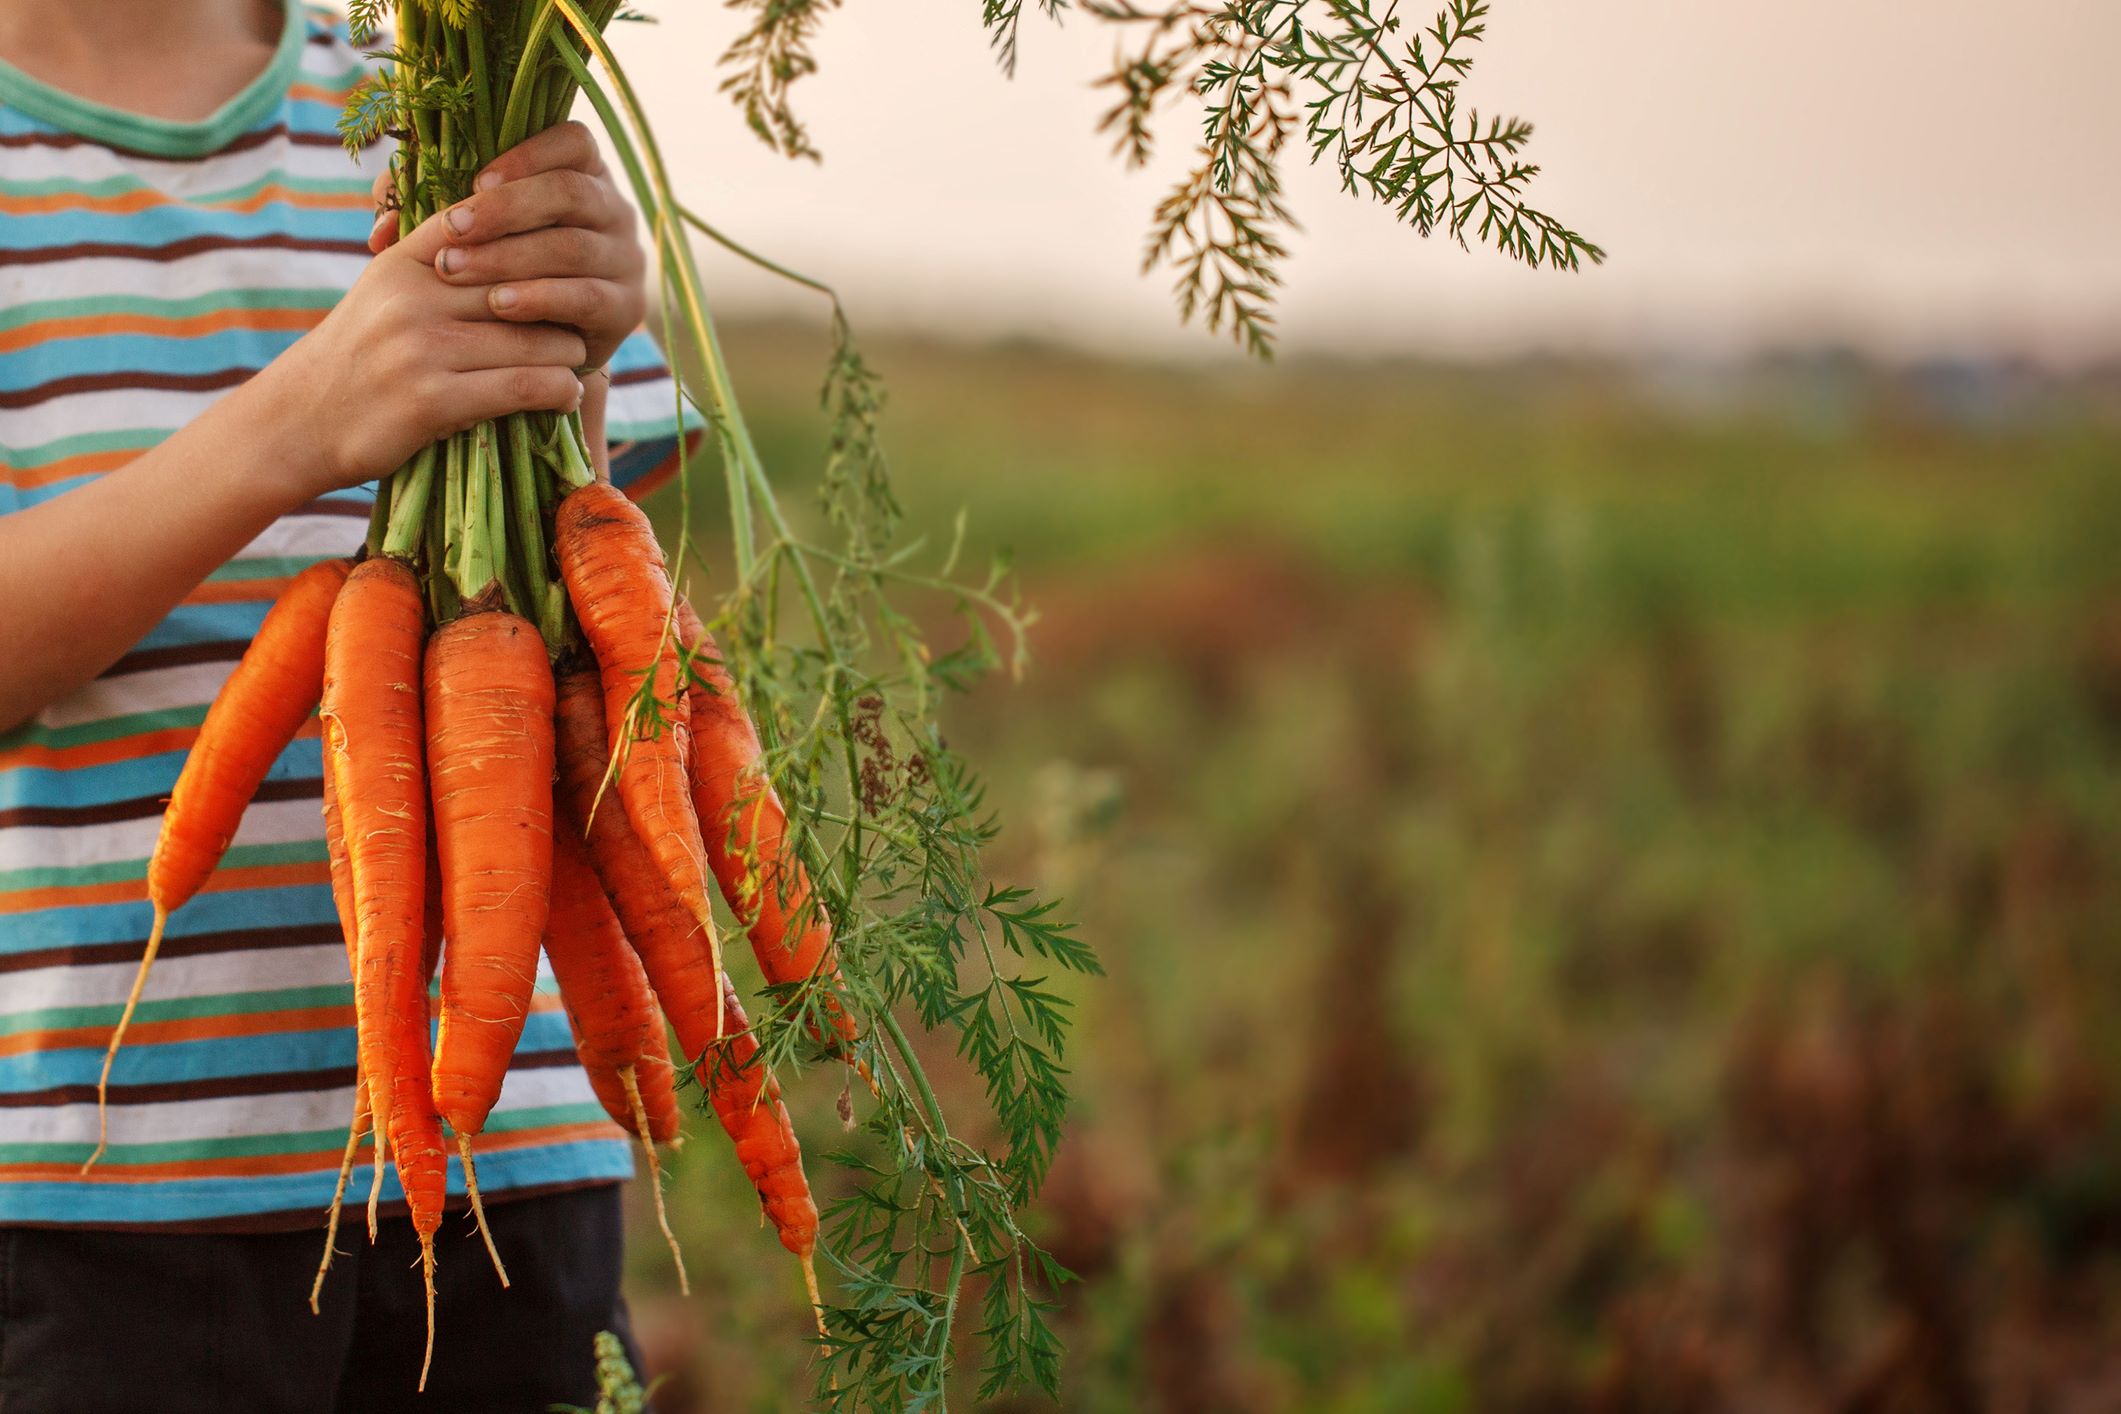
Carrots are one of the most popular and rewarding vegetables to grow in your garden. Not only are they delicious and nutritious, but they also add a vibrant pop of color to your plate. However, growing carrots can sometimes present challenges, especially when it comes to managing overcrowded seedlings. Thinning out carrot seedlings is an essential step in growing healthy and robust carrots.
Thinning out refers to the process of selectively removing excess seedlings to create optimal spacing between each plant. By thinning out your carrot seedlings, you allow room for the remaining plants to receive adequate sunlight, nutrients, and water. This simple practice can significantly improve the overall quality and yield of your carrot harvest.
In this article, we will explore the reasons for thinning out carrot seedlings, the ideal time to perform this task, and the tools and materials you will need. Additionally, we will provide a step-by-step guide on how to thin out carrot seedlings properly. We will also share some helpful tips for successful thinning and discuss common mistakes to avoid. Lastly, we will highlight the benefits of thinning out carrot seedlings and address some frequently asked questions.
Whether you are a seasoned gardener or a beginner, this comprehensive guide will equip you with the knowledge and skills necessary to thin out your carrot seedlings like a pro. So, let’s roll up our sleeves and get ready to give your carrot plants the space they need to thrive!
Reasons for Thinning out Carrot Seedlings
Thinning out carrot seedlings may seem like an extra step in the gardening process, but it is crucial for the optimal growth and development of your carrots. Here are the key reasons why thinning out carrot seedlings is essential:
- Promotes proper spacing: Carrots need ample space to grow and develop a strong root system. When you thin out the seedlings, you create enough room for each plant to spread its roots and access essential nutrients and water in the soil. Proper spacing also reduces competition among the carrots, ensuring they have enough resources to thrive.
- Prevents overcrowding: Carrot seedlings tend to sprout closely together, leading to overcrowding if left unthinned. Overcrowded seedlings can result in stunted growth, as they compete for limited resources. Thinning them out eliminates the competition and allows the remaining plants to grow to their full potential.
- Increases airflow and sunlight: Dense carrot foliage can restrict airflow and block sunlight from reaching the lower leaves. Thinning out the seedlings promotes better air circulation and light penetration, reducing the risk of fungal diseases and ensuring even growth throughout the plant.
- Enhances root development: Carrots store their energy in the taproot, which develops underground. Thinning out the seedlings helps each plant develop a robust and well-formed taproot. With enough space and resources, the carrots can grow straight and long, resulting in a higher-quality harvest.
- Reduces the risk of pest and disease infestation: Overcrowded carrot plants provide a conducive environment for pests and diseases. By thinning out the seedlings, you minimize the chances of pests and diseases easily spreading from one plant to another. Additionally, the increased airflow helps in keeping the foliage dry, making it less susceptible to fungal infections.
Thinning out carrot seedlings may require a bit of effort, but the benefits far outweigh the extra work. By providing your carrots with sufficient space to grow, you are setting them up for success and ensuring a bountiful harvest.
When to Thin out Carrot Seedlings
Timing is crucial when it comes to thinning out carrot seedlings. It is important to wait until the seedlings have reached a certain size before thinning them out. Here are some guidelines to help you determine the right time for thinning:
The ideal time to thin out carrot seedlings is when they are around 2-3 inches tall. At this stage, the seedlings have developed enough leaves to facilitate photosynthesis and are sturdy enough to handle the thinning process. Thinning too early can disturb the delicate roots, while thinning too late can result in stunted growth and overcrowding.
Another indicator to look for is the appearance of the first true leaves. The first leaves that emerge from carrot seedlings are not the true leaves but rather the cotyledons, which serve as temporary food storage. True leaves, on the other hand, are the characteristic feathery carrot leaves. Once the true leaves have fully formed, it is a good indication that the seedlings are ready to be thinned out.
In terms of timing, thinning out carrot seedlings is typically done about 2-3 weeks after germination. This allows enough time for the seedlings to establish a strong root system. However, it is important to monitor the growth of your seedlings closely, as the timing may vary depending on the specific variety and growing conditions.
It is also worth noting that thinning out carrot seedlings is a gradual process rather than a one-time event. You may start by thinning out the seedlings to achieve a rough spacing of about 2 inches between each plant. Then, as the seedlings continue to grow, you can thin them further to achieve the recommended spacing of 3-4 inches between each carrot.
Remember, the goal is to provide enough space for each carrot plant to develop a strong root system and receive adequate sunlight and nutrients. By thinning out your carrot seedlings at the right time, you are setting the stage for healthy and thriving plants.
Tools and Materials Needed
Thinning out carrot seedlings requires a few essential tools and materials to ensure a smooth and successful process. Here are the items you will need:
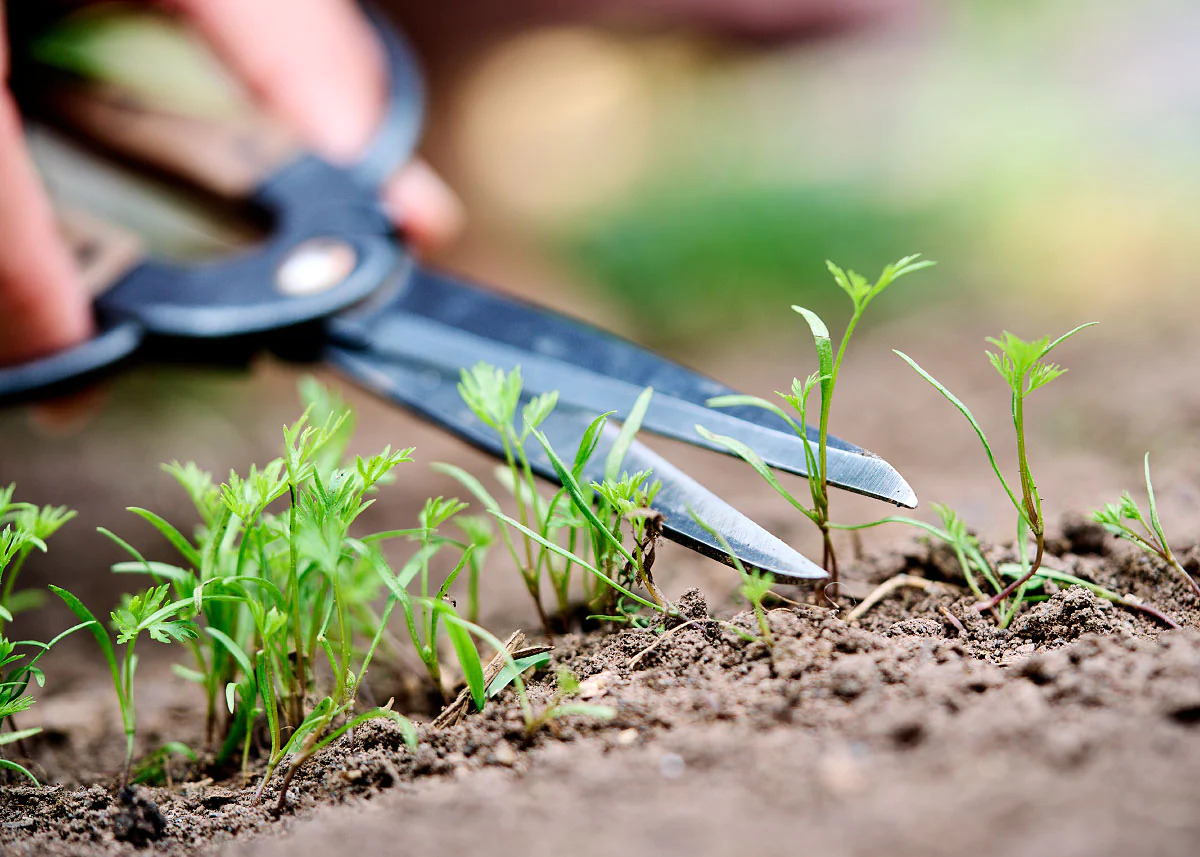
- Garden shears or scissors: These will be used to carefully snip off the unwanted seedlings at the base. Opt for clean, sharp shears to minimize damage to the surrounding plants.
- Gloves: It’s always a good idea to wear gardening gloves to protect your hands from any potential thorns or irritants. Plus, gloves provide a better grip when handling the seedlings.
- Marker or plant tags: To mark the selected seedlings that will remain after thinning, it is helpful to have a marker or plant tags on hand. This ensures that you do not accidentally remove the wrong plants.
- Watering can or hose: It’s important to water the area before and after thinning out the seedlings. This helps soften the soil and minimizes root disturbance during the thinning process.
- Fertilizer or compost: After thinning out the seedlings, it is beneficial to provide an extra boost of nutrients to the remaining plants. Consider incorporating a slow-release fertilizer or compost into the soil to promote healthy growth.
- Rake or hand shovel: Depending on the size of your carrot bed, you may need a rake or hand shovel to gently loosen the soil around the seedlings and assist in their removal.
- Planting guide or ruler: To ensure proper spacing when thinning out the seedlings, it can be helpful to have a planting guide or ruler to measure the distance between each plant accurately.
Having these tools and materials ready before you start thinning out your carrot seedlings will make the process more efficient and enjoyable. Remember to keep your tools clean and in good condition to avoid introducing any potential pathogens or damaging the remaining plants.
Now that you have gathered all the necessary tools, let’s move on to the step-by-step guide on how to properly thin out your carrot seedlings.
Step-by-step Guide on How to Thin out Carrot Seedlings
Thinning out carrot seedlings may seem like a daunting task, but with the right approach, it can be a simple and rewarding process. Here is a step-by-step guide to help you thin out your carrot seedlings:
- Prepare the area: Start by watering the carrot bed thoroughly to moisten the soil. This will make it easier to remove the unwanted seedlings without disturbing the roots of the remaining plants. If the soil is hard or compacted, use a rake or hand shovel to loosen it gently.
- Select the seedlings to remove: Carefully examine the carrot seedlings and identify the ones that are growing too close together or appear weak. These are the seedlings that need to be removed during the thinning process. Using your marker or plant tags, mark the seedlings that will stay to avoid confusion.
- Snip off unwanted seedlings: Using garden shears or scissors, snip off the unwanted seedlings at the base, as close to the soil surface as possible. Be sure not to disturb the roots of the neighboring plants. Dispose of the removed seedlings in a compost pile or discard them properly.
- Adjust spacing: Once you have removed the excess seedlings, take a moment to assess the spacing between the remaining plants. Ideally, there should be around 3-4 inches of space between each carrot plant. If needed, gently reposition the remaining seedlings to achieve the desired spacing.
- Water and fertilize: After thinning out the seedlings, water the carrot bed again to settle the remaining plants and ensure they receive adequate moisture. If desired, you can also incorporate a slow-release fertilizer or compost into the soil to provide extra nutrients for healthy growth.
- Maintain regular care: Once the thinning process is complete, continue to care for your carrot plants by watering them regularly, monitoring for pests or diseases, and providing any necessary support as they grow.
Following these steps will help you successfully thin out your carrot seedlings and create the ideal spacing for optimal growth. Remember to take your time and be gentle when handling the seedlings to avoid any unnecessary damage.
Now that you know how to thin out your carrot seedlings, let’s explore some tips for ensuring a successful thinning process.
Tips for Successful Thinning
Thinning out carrot seedlings can be a delicate process, but with the right approach, you can ensure a successful outcome. Here are some tips to help you achieve optimal results:
- Start thinning gradually: Instead of thinning all the seedlings at once, start by removing the obvious overcrowded ones. This allows the remaining seedlings to spread out and gives you a better visual of the spacing required for thinning.
- Thinning during cloudy or cooler days: Choose a day with overcast skies or during the cooler parts of the day to thin out your carrot seedlings. This reduces stress on the plants and minimizes evaporation from direct sunlight, helping the seedlings recover more quickly.
- Handle seedlings with care: When removing the unwanted seedlings, be gentle to avoid disturbing the roots of the remaining plants. Hold the seedlings by the leaves and carefully snip them off at the base. Avoid pulling or yanking the seedlings, as this can damage the nearby plants.
- Thin to the recommended spacing: Aim for a final spacing of 3-4 inches between each carrot plant. This provides enough room for the carrots to grow without crowding each other. It may require thinning multiple times as the remaining seedlings grow to achieve the desired spacing.
- Stay consistent with thinning: Regularly monitor the growth of your carrot seedlings and thin them as needed. This ensures that the remaining plants continue to have ample space and resources for healthy development.
- Use the removed seedlings: Don’t let the removed seedlings go to waste! If the removed seedlings are still in good condition, you can transplant them to another area of your garden or share them with fellow gardeners. Alternatively, you can compost them to enrich your soil.
- Maintain proper hygiene: Clean your tools before and after thinning to prevent the spread of diseases. This is particularly important if you encounter any diseased seedlings during the thinning process.
By following these tips, you can ensure a successful thinning process and set your carrot seedlings up for healthy growth and a bountiful harvest. Now that you are armed with these helpful tips, it’s time to address some common mistakes to avoid during thinning.
Common Mistakes to Avoid
Thinning out carrot seedlings is a critical step in their growth, but it’s important to avoid some common mistakes that could hinder their development. Here are some common errors to steer clear of:
- Thinning too late or too early: Timing is crucial when it comes to thinning out carrot seedlings. Thinning too late can result in stunted growth and overcrowding, while thinning too early can disturb the delicate root system. Make sure to wait until the seedlings are around 2-3 inches tall and have their true leaves before thinning.
- Removing too many seedlings: It’s easy to get carried away during thinning and remove more seedlings than necessary. Removing too many seedlings can leave gaps and result in uneven growth. Be mindful and thin gradually, ensuring the desired spacing between the remaining seedlings.
- Not marking the selected seedlings: Forgetting to mark the seedlings that will remain after thinning can create confusion and lead to accidentally removing the wrong plants. Take the time to mark the selected seedlings with a marker or plant tags to avoid any mix-ups.
- Insufficient spacing: It is crucial to thin the seedlings to the recommended spacing of 3-4 inches between each carrot plant. Thinning too conservatively or not achieving the proper spacing can result in overcrowding, limiting the growth and development of the carrots.
- Disturbing the surrounding seedlings: When removing the unwanted seedlings, be careful not to disturb or damage the roots of the remaining plants. Handle the seedlings with care and use sharp garden shears or scissors to snip them off at the base.
- Underwatering after thinning: After thinning out the seedlings, ensure that you water the carrot bed thoroughly. Adequate watering helps the remaining seedlings recover and promotes proper root development. Monitor the moisture levels and water consistently to keep the soil evenly moist.
- Ignoring regular care: Thinning out carrot seedlings is just one step in the overall care of your carrot plants. Don’t neglect regular watering, pest control, and providing necessary support as they grow. Consistency in care will contribute to the overall success of your carrot crop.
By avoiding these common mistakes, you can enhance the effectiveness of thinning and maximize the growth potential of your carrot seedlings. Now that we have covered the mistakes to avoid, let’s explore the benefits of thinning out carrot seedlings.
Benefits of Thinning out Carrot Seedlings
Thinning out carrot seedlings is a crucial step in cultivating healthy and robust carrot plants. Here are some key benefits of thinning out carrot seedlings:
- Promotes healthy growth: Thinning out carrot seedlings allows each plant to have sufficient space to grow and develop a strong root system. With less competition for nutrients and sunlight, the remaining seedlings can grow larger, healthier, and produce better yields.
- Enhances root development: Adequate spacing between carrot plants ensures that each plant has room to develop a well-formed taproot. Thinning out the seedlings facilitates the growth of long and straight carrots with fewer deformities or branching roots.
- Reduces competition for resources: Overcrowded carrot seedlings compete for limited resources like water, nutrients, and sunlight. Thinning them out eliminates this competition, allowing the remaining plants to access the necessary resources more efficiently and thrive.
- Prevents disease and pest problems: Overcrowded foliage can trap moisture and create a humid environment, making it more susceptible to diseases and pests. Thinning out the seedlings improves air circulation and reduces the risk of fungal infections and pest infestations.
- Improves overall quality: Thinning out carrot seedlings ensures consistent growth, preventing irregular sizes and shapes. The optimal spacing allows carrots to develop evenly, resulting in higher-quality roots that are easier to harvest and prepare for culinary use.
- Facilitates easier cultivation and maintenance: With proper spacing, it becomes easier to navigate through the carrot bed for watering, weeding, and other routine maintenance tasks. Thinning out the seedlings simplifies these tasks and helps keep your carrot bed tidy and organized.
- Maximizes space utilization: By thinning out carrot seedlings, you are making efficient use of the available garden space. Removing excess seedlings allows the remaining plants to fill the allotted space and utilize resources more effectively, resulting in a higher yield per square foot of the garden.
Thinning out carrot seedlings is not just about creating space; it is about setting the stage for healthy growth, optimum yields, and easier plant care. By following the proper thinning techniques and reaping the benefits, you are well on your way to a successful and rewarding carrot harvest.
Frequently Asked Questions (FAQs)
Here are some commonly asked questions about thinning out carrot seedlings:
- 1. Can I skip thinning and let the carrot seedlings grow densely?
- 2. Can I transplant the thinned-out seedlings to another location?
- 3. How close should I thin carrot seedlings?
- 4. Can I thin carrot seedlings when they are wet after rain or watering?
- 5. Can I thin carrot seedlings in containers or only in garden beds?
- 6. Can I thin carrot seedlings in hot weather?
- 7. How often should I thin carrot seedlings?
While it is possible to let the carrot seedlings grow densely without thinning, it is not recommended. Overcrowding can hinder the growth and development of the carrots, resulting in smaller, misshapen roots. Thinning out the seedlings allows each plant to have enough space and resources to thrive.
Transplanting carrot seedlings can be challenging due to their delicate roots. It’s best to avoid transplanting them, as it can cause significant stress and damage. Instead, consider composting the removed seedlings or sharing them with other gardeners.
For optimal growth, thin carrot seedlings to a spacing of 3-4 inches between plants. This provides ample room for each carrot to develop a healthy root system and receive sufficient sunlight and nutrients.
It is best to wait for the carrot foliage and soil to dry before thinning out the seedlings. Wet conditions can make the leaves and soil clump together, making it difficult to distinguish individual seedlings and potentially causing damage to the surrounding plants.
Thinning out carrot seedlings is necessary whether they are in containers or garden beds. The same principles apply to both growing environments, ensuring that each plant has adequate space to grow and develop.
Thinning carrot seedlings in hot weather can be more challenging, as the heat can stress the plants. If possible, choose a cooler time of day or wait for a slightly overcast day to thin out the seedlings to minimize stress and promote better recovery.
Thin carrot seedlings as needed, depending on their growth rate and the desired spacing. It is common to thin them once to achieve an initial spacing and then thin them further as they continue to grow to maintain the recommended 3-4 inch spacing between plants.
These frequently asked questions cover some of the common concerns and doubts regarding thinning out carrot seedlings. By understanding these aspects, you can successfully navigate the thinning process and promote the healthy growth of your carrot plants.
Conclusion
Thinning out carrot seedlings is an essential step in maximizing the potential of your carrot harvest. By providing adequate spacing and removing excess seedlings, you allow each plant to develop a strong root system, access essential resources, and receive optimal sunlight and airflow. The benefits of thinning out carrot seedlings extend beyond just space management, as it also promotes healthy growth, enhances root development, reduces competition for resources, and helps prevent diseases and pest problems.
To successfully thin out carrot seedlings, remember to choose the right time, have the necessary tools and materials, and follow a step-by-step guide. Gradually thin out the seedlings, handle them with care, and adjust the spacing to achieve the recommended 3-4 inch distance between plants. Avoid common mistakes such as thinning too early or late, removing too many seedlings, and neglecting regular care.
With proper thinning techniques and consistent care, you are setting the stage for a bountiful and high-quality carrot harvest. Enjoy the process of thinning out your carrot seedlings, and watch as your plants flourish and produce delicious, vibrant roots that will bring joy to your garden and kitchen.
So, roll up your sleeves, grab your tools, and embark on the journey of thinning out your carrot seedlings. Your efforts will be rewarded with healthy, robust carrots that are sure to impress!