Home>Types of Gardening>Edible Gardening>How Long From Planting To Harvest Carrots
Edible Gardening
How Long From Planting To Harvest Carrots
Published: September 7, 2023
Learn how long it takes for carrots to go from planting to harvest in your edible gardening journey and get ready to enjoy the fruits of your labor!
(Many of the links in this article redirect to a specific reviewed product. Your purchase of these products through affiliate links helps to generate commission for Chicagolandgardening.com, at no extra cost. Learn more)
Table of Contents
Introduction
Welcome to the world of edible gardening! If you’re passionate about growing your own food and enjoy the satisfaction of culinary creations made from scratch, then you’re in for a treat. One popular vegetable that is not only delicious but also easy to grow is the humble carrot. Whether you have a spacious backyard or a small balcony, you can cultivate this versatile root vegetable and enjoy the fruits of your labor.
Carrots, scientifically known as Daucus carota, are not only packed with vitamins and nutrients but also add vibrant colors and flavors to various dishes. From soups and stews to salads and stir-fries, carrots can be used in countless recipes to enhance both taste and nutritional value. And what’s more, growing carrots in your own edible garden allows you to have full control over their quality and ensures a fresh supply throughout the growing season.
In this comprehensive guide, we’ll explore everything you need to know about growing carrots successfully. We’ll discuss the factors that affect carrot growth, including soil conditions, watering, and sunlight requirements. We’ll delve into the planting process, from seed selection to germination and the vegetative growth stage. We’ll also provide insights into creating optimal growing conditions, meeting nutrient requirements, and controlling pests and diseases.
Additionally, we’ll guide you in determining when your carrots are ready for harvesting and share effective techniques for harvesting them without causing damage. Finally, we’ll cover essential post-harvest care, ensuring that your carrots remain fresh and flavorful for as long as possible.
So, whether you’re a novice gardener or already have some experience under your belt, this article is designed to equip you with the knowledge and confidence to grow your own carrots successfully. Grab your gardening tools, and let’s embark on the journey of cultivating delicious and nutritious carrots together!
Factors Affecting Carrot Growth
Several factors play a crucial role in determining the growth and development of carrots. Understanding these factors will help you create the best possible conditions for your carrot plants to thrive. Let’s explore some of the key factors that influence carrot growth:
- Soil: Carrots prefer loose, well-drained soil that is rich in organic matter. Heavy or compacted soils can hinder root development and cause misshapen carrots. Prior to planting, ensure that the soil is loose and crumbly. Removing any rocks, clumps, or debris will create an ideal environment for healthy root growth.
- Watering: Carrots require consistent moisture for proper growth, but overwatering can lead to rot or disease issues. It’s essential to strike a balance when watering your carrots. Aim to keep the soil evenly moist, but not overly saturated. Deep, infrequent watering is preferable to shallow, frequent watering as it encourages the roots to grow deeper.
- Sunlight: Carrots are a sun-loving vegetable and require at least 6-8 hours of direct sunlight per day. Plant them in a location where they can receive ample sunlight to ensure optimal growth and sweet flavor. In areas with intense summer heat, providing some shade during the hottest parts of the day can help protect the carrot plants.
- Temperature: Carrots are cool-season vegetables that thrive in temperatures between 60°F and 70°F (15°C and 21°C). They can tolerate light frosts, making them an excellent choice for early spring or fall planting. Extreme heat can cause the carrots to become woody and have a bitter taste. Consider planting carrot varieties that are suited to your specific climate.
- Spacing: Proper spacing is crucial for carrot plants to grow and develop fully. Crowded plants can result in stunted growth and misshapen roots. Thin the seedlings to maintain a distance of 2-3 inches (5-7.5 cm) between each plant. This will give the carrots enough space to expand and form their roots without competition.
- Weed Control: Weeds can rob carrots of nutrients, light, and moisture. Keeping the area around your carrot plants free from weeds is essential. Regularly remove any weeds that appear, taking care not to disturb the fragile carrot roots. Applying a layer of organic mulch around the plants can also help suppress weed growth.
- Companion Planting: Certain plants make excellent companions for carrots. For example, planting onions, garlic, or chives alongside carrots can help deter pests like carrot flies. On the other hand, avoid planting carrots near crops like dill or fennel, as they can negatively affect each other’s growth and flavor.
By considering and optimizing these factors, you can create an ideal environment for your carrot plants to flourish. Providing them with the right soil conditions, proper watering, adequate sunlight, and suitable temperatures will help ensure healthy growth and a bountiful harvest.
Planting Carrots
Planting carrots is an exciting and rewarding process. With a little preparation and care, you can enjoy a bumper crop of crunchy and delicious carrots. Here are the key steps to follow when planting carrots:
- Seed Selection: Start by selecting high-quality carrot seeds from a reputable source. Choose varieties that are best suited to your climate and growing conditions. Consider factors such as size, color, and flavor preferences when making your selection.
- Preparing the Soil: Before planting, prepare the soil by removing any weeds, rocks, or clumps. Carrots prefer loose, well-drained soil, so work in organic matter like compost or well-rotted manure to improve the soil structure and fertility. Use a garden fork or tiller to loosen the soil to a depth of about 8-10 inches (20-25 cm).
- Sowing the Seeds: Carrot seeds are small and can be challenging to handle. Mix the seeds with a small amount of sand or fine soil to improve their distribution. Create furrows in the prepared soil about 1/4 inch (0.6 cm) deep and sow the seeds thinly along the rows. Space the rows at least 12-18 inches (30-45 cm) apart to allow for future growth.
- Covering and Watering: After sowing the seeds, gently cover them with a thin layer of soil or vermiculite. Lightly press down the soil to ensure good seed-to-soil contact. Water the area thoroughly but gently to avoid disturbing the seeds. Keep the soil consistently moist until germination occurs, which usually takes around 7-14 days.
- Thinning the Seedlings: Once the carrot seedlings have emerged and developed their first true leaves, it’s time to thin them. Aim for a spacing of 2-3 inches (5-7.5 cm) between each plant. This will give the carrots enough space to grow and develop properly. Use scissors or garden shears to carefully remove the excess seedlings, taking care not to disturb the remaining plants.
- Mulching and Weed Control: Applying a layer of organic mulch around the carrot plants can help conserve moisture, suppress weed growth, and regulate soil temperatures. Use straw, shredded leaves, or grass clippings as mulch. Regularly inspect the area for weeds and promptly remove them, being careful not to damage the delicate carrot roots.
- Watering and Care: Carrots require consistent moisture for optimal growth. Water the plants regularly, keeping the soil evenly moist but not waterlogged. Avoid overhead watering, as it can promote fungal diseases. Instead, use a drip irrigation system or water at the base of the plants to minimize leaf wetness.
- Thin out more if necessary: If the carrots are still overcrowded after the initial thinning, you may need to thin them again. This step is crucial for ensuring that the remaining carrots have enough space to reach their full potential.
By following these steps, you’ll be well on your way to successfully planting carrots in your edible garden. With proper soil preparation, careful seed sowing, and timely thinning, you’ll create an ideal environment for your carrot plants to thrive. Now, let’s move on to understanding the germination period and the vegetative growth stage of carrots.
Germination Period
The germination period is a critical stage in the growth of carrots. It marks the point when the seeds start to sprout and develop into seedlings. Understanding the germination process and providing the right conditions will set the foundation for successful carrot cultivation. Here’s what you need to know about the germination period:
Carrot seeds typically take about 7-14 days to germinate, but this can vary depending on various factors, such as the carrot variety, soil temperature, and moisture levels. Carrots prefer cooler soil temperatures for germination, ideally between 50°F and 85°F (10°C and 29°C).
During the germination process, the carrot seeds absorb water and begin to break dormancy. The outer seed coat softens, allowing the embryonic plant to emerge and develop its first set of leaves. It’s important to keep the soil consistently moist during this period to support germination. A lack of moisture can result in poor seed viability and hinder the germination success rate.
To ensure successful germination, follow these guidelines:
- Moisture: Keep the soil evenly moist during the germination period. Water gently and avoid creating standing water, which can lead to rotting. Consider covering the area with a thin layer of plastic or a damp burlap sack to help retain moisture. Remove the cover once the seedlings emerge to allow for proper air circulation.
- Temperature: Carrot seeds germinate best in cooler soil temperatures. If the soil temperature is too high, it can inhibit or delay germination. If necessary, consider using shade cloth or light mulch to help regulate the soil temperature. On the other hand, if temperatures are too cold, the germination process may be slow. In such cases, covering the garden bed with a row cover can help create a warmer microclimate.
- Thinning: As the carrot seedlings emerge and develop their first set of true leaves, it’s important to thin them. Aim for a spacing of 2-3 inches (5-7.5 cm) between each plant to allow sufficient room for growth. Thinning helps ensure that the remaining seedlings have enough resources (light, nutrients, and moisture) to thrive.
- Pest Protection: Be vigilant against pests that may target the tender seedlings. Carrot flies and other insects can lay their eggs near the seedlings, leading to potential damage. To protect your seedlings, you can cover the bed with horticultural mesh or floating row covers, which create a physical barrier against pests while allowing light and air to reach the plants.
By providing the right moisture levels, temperature, and spacing, you can enhance the success rate of carrot seed germination. Monitoring the progress of the seedlings and taking appropriate action to address any issues will help ensure a healthy start to your carrot plants. Now, let’s move on to understanding the vegetative growth stage of carrots and the factors that contribute to it.
Vegetative Growth Stage
Once the carrot seedlings have successfully sprouted and established themselves, they enter the vegetative growth stage. During this phase, the focus is on the development of foliage, stems, and an extensive root system. Understanding the vegetative growth stage and providing optimal conditions will contribute to the overall health and productivity of your carrot plants. Let’s explore this stage in more detail:
During the vegetative growth stage, the carrot plants devote their energy to leaf production and root development. The leaves, which are comprised of compound, feathery, and green fronds, play a vital role in photosynthesis. They absorb sunlight and convert it into energy, which is used to fuel growth and ensure the production of healthy roots.
To support the vegetative growth stage of your carrot plants, consider the following factors:
- Watering: Carrots require consistent moisture to thrive during the vegetative growth stage. Water regularly to keep the soil evenly moist, but avoid overwatering, as it can lead to rotting or disease. Monitor the moisture levels by checking the soil’s top inch, and adjust your watering schedule accordingly.
- Sunlight: Carrots are sun-loving plants and require a minimum of 6-8 hours of direct sunlight each day for optimal growth. Make sure to position your carrot bed in a location that receives abundant sunlight. If your garden experiences intense heat during the summer, providing some shade during the hottest parts of the day can help protect the plants and prevent wilting or heat stress.
- Nutrients: During the vegetative growth stage, it’s important to provide your carrot plants with a balanced supply of nutrients. Incorporating organic matter, such as compost or well-rotted manure, into the soil prior to planting will help nourish the plants. If you notice any nutrient deficiencies, such as yellowing leaves or stunted growth, consider applying a balanced organic fertilizer specifically formulated for vegetables.
- Weed Control: Weeds compete with carrots for nutrients, water, and sunlight, which can hinder their growth. Regularly inspect the carrot bed for any weeds and promptly remove them, being careful not to disturb the delicate roots of the carrot plants. Applying a layer of organic mulch can also help suppress weed growth and conserve moisture.
- Pest and Disease Management: Monitor your carrot plants regularly for signs of pests or diseases. Carrot flies, aphids, and slugs are common pests that can wreak havoc on carrot foliage and roots. Implement preventive measures, such as covering the plants with horticultural mesh or using organic pest control methods. Additionally, practice good garden hygiene, including proper plant spacing, to minimize the risk of diseases.
By providing adequate water, sunlight, nutrients, and effective pest management, you can promote optimal vegetative growth in your carrot plants. Remember to monitor their progress regularly and take prompt action to address any issues that may arise. Now, let’s continue by exploring the environmental considerations that are important for growing healthy and robust carrots.
Environmental Considerations
When it comes to growing carrots, paying attention to environmental factors is crucial for their overall health and productivity. Carrots are sensitive to certain conditions and require a favorable environment for optimal growth. Let’s explore the key environmental considerations for growing healthy and robust carrots:
- Temperature: Carrots are cool-season vegetables that prefer moderate temperatures for growth. Ideally, the daytime temperature should range between 60°F and 70°F (15°C and 21°C). Carrots can tolerate light frosts but are not fond of extreme heat. High temperatures can lead to poor root development and make the carrots woody or bitter in taste. Consider planting carrots in the spring or fall when temperatures are more favorable.
- Day Length: Carrots are not sensitive to day length in the same way as some other plants. However, they tend to grow more slowly when daylight hours are shorter. Therefore, planting carrots in the spring allows for longer daylight hours and potentially faster growth.
- Air Circulation: Good air circulation is essential for preventing diseases and promoting healthy growth. Plant carrots in an area with adequate spacing between plants, allowing for proper air movement. Avoid overcrowding, as this can promote moisture retention and increase the risk of fungal diseases.
- Soil pH: Carrots prefer slightly acidic to neutral soil with a pH range of 6.0 to 7.0. Conduct a soil test to determine the pH of your garden bed. If the soil is too acidic, you can raise the pH by incorporating lime. Conversely, if the soil is too alkaline, you can lower the pH by adding organic matter like compost or peat moss.
- Wind Protection: Strong winds can cause damage to carrot foliage and affect their growth. Consider planting carrots in a location that offers some wind protection, such as near a fence or hedgerow. Alternatively, you can use windbreaks, such as temporary wind barriers made from fabric or other materials, to shield the plants from strong gusts.
- Microclimate: Take advantage of microclimates in your garden to optimize carrot growth. Some areas may receive more sun, while others may be more shaded. For example, planting carrots on a south-facing slope can provide them with more sunlight and warmth, aiding in their growth and development.
- Pollination: Carrots are primarily grown for their roots rather than their flowers. However, if you allow some carrot plants to bolt and produce flowers, they can attract beneficial insects for pollination. This can support the growth of companion plants or future seasons’ crops.
By considering these environmental factors and making appropriate adjustments, you can create an optimal growing environment for your carrot plants. From temperature and air circulation to soil pH and wind protection, each factor plays a role in the overall health and success of your carrots. Now, let’s move on to understanding the optimal growing conditions and care requirements for carrots.
Optimal Growing Conditions
To ensure the best possible growth and yield, providing carrots with optimal growing conditions is essential. These conditions include factors such as soil composition, sunlight exposure, and water management. By meeting the following requirements, you can maximize the success of your carrot crop:
- Soil: Carrots prefer loose, well-drained soil that is rich in organic matter. The ideal soil composition for carrots is sandy or loamy, allowing for easy root penetration and preventing the risk of rotting. If your soil tends to be heavy or clayey, you can improve its texture by adding sand, compost, or well-rotted manure.
- Sunlight: Carrots thrive in full sun conditions, which means they need a minimum of 6-8 hours of direct sunlight each day. Ensure that your carrot bed is located in an area that receives ample sunlight. If your garden has partial shade, make sure that the carrot plants still receive enough sunlight to promote proper growth and development.
- Watering: Consistent moisture is crucial for carrot growth, particularly during the early stages. Water your carrot plants regularly to keep the soil evenly moist, but be careful not to overwater, as it can lead to disease issues. Aim for a consistent supply of moisture throughout the growing season, paying close attention to periods of drought.
- Fertilization: Carrots are relatively light feeders, but providing them with proper nutrients can enhance their growth and flavor. Prior to planting, incorporate compost or well-balanced organic fertilizer into the soil to enrich its nutrient content. Avoid using excessive amounts of nitrogen, as it can result in excessive foliage growth at the expense of root development.
- Thinning: Proper spacing is crucial for successful carrot growth. Thin the carrot seedlings to ensure that each plant has enough space to develop its roots. Aim for a spacing of 2-3 inches (5-7.5 cm) between each plant. Thinning helps prevent overcrowding and allows for better air circulation, reducing the risk of disease.
- Pest Control: Implement pest control measures to protect your carrot plants from common pests such as carrot flies and aphids. Covering the plants with horticultural mesh or using organic pest control methods can help minimize pest damage. Additionally, practicing crop rotation and keeping the garden area clean and weed-free can help prevent pest infestations.
- Harvesting on Time: Timing is crucial when it comes to harvesting carrots. Check the recommended maturity period for the specific carrot variety you are growing. Harvest the carrots when they have reached their desired size and color. Delaying the harvest can result in oversized or woody roots, while harvesting too early can lead to underdeveloped carrots.
By providing carrots with optimal growing conditions, you are giving them the best chance to thrive. From soil composition and sunlight exposure to proper watering and nutrient management, each aspect contributes to the overall health and yield of your carrot crop. Now that we have covered the optimal growing conditions, let’s delve into the nutrient requirements of carrots.
Nutrient Requirements
Providing carrots with the right balance of nutrients is essential for their growth, development, and overall health. While carrots are not heavy feeders, ensuring they receive adequate nutrients will result in robust plants and flavorful roots. Let’s explore the key nutrient requirements for growing healthy carrots:
Nitrogen: Nitrogen (N) is an essential nutrient for promoting leafy growth and overall plant vigor. However, excessive nitrogen can lead to excessive foliage growth at the expense of root development. Incorporating nitrogen-rich organic matter such as compost or well-rotted manure into the soil prior to planting is usually sufficient to meet the carrot’s nitrogen needs.
Phosphorus: Phosphorus (P) promotes root development, flowering, and fruit set. It is particularly important for carrots as they are primarily grown for their roots. It’s advisable to add a phosphorus-rich organic fertilizer or bone meal to the soil before planting. This will ensure that the carrot plants have the necessary phosphorus levels to support healthy root growth.
Potassium: Potassium (K) helps plants withstand stress, improves nutrient uptake, and contributes to disease resistance. Carrots benefit from a moderate supply of potassium, which can be provided through the application of potassium-rich organic fertilizers or wood ash. Potassium is important for root development and the overall health of the carrot plants.
Micronutrients: Micronutrients, such as iron, zinc, manganese, and boron, are essential for various physiological processes in plants. While most soils contain adequate amounts of micronutrients, deficiencies can occur, particularly in alkaline or sandy soils. To ensure that your carrots have access to these micronutrients, consider applying a balanced organic fertilizer or foliar spray that includes micronutrients.
In addition to providing the right nutrients, it’s important to maintain the soil pH within the optimal range of 6.0 to 7.0. This range ensures that nutrients are available for uptake by the carrot plants. Conduct a soil test to determine the pH of your soil and make the necessary adjustments using organic soil amendments if required.
It’s worth noting that carrots are relatively self-sufficient when it comes to nutrient uptake. However, providing them with a fertile soil enriched with organic matter and ensuring the proper balance of essential nutrients will support their growth and flavor. Remember to monitor the health of your plants throughout the growing season and adjust fertilizer applications as needed.
By meeting the nutrient requirements of your carrot plants, you’ll cultivate healthy and productive crops. Providing the right levels of nitrogen, phosphorus, potassium, and essential micronutrients will promote vigorous vegetative growth, robust root development, and ultimately, delicious carrots. Now that we understand the nutrient requirements, let’s explore pest and disease control methods for maintaining healthy carrot plants.
Pest and Disease Control
Protecting your carrot plants from pests and diseases is crucial for maintaining their health and maximizing yield. While carrots are generally resilient, they can still fall victim to certain pests and diseases. Understanding common issues and implementing appropriate control measures will help ensure the success of your carrot crop. Let’s explore some effective pest and disease control methods:
Pest Control:
- Carrot Flies: Carrot flies are a common pest that lay their eggs near carrot plants. The larvae then burrow into the roots, causing damage. To prevent the flies from laying eggs, cover your carrot bed with horticultural mesh or floating row covers. These physical barriers will help protect the plants while still allowing air and sunlight to reach them.
- Aphids: Aphids are another common pest that can cause damage to carrot foliage. Regularly inspect your plants for signs of aphid infestation, such as curled leaves or a sticky residue called honeydew. Use a strong jet of water to knock them off the plants or apply an organic insecticidal soap if necessary.
- Slugs and Snails: Slugs and snails can chew on the leaves of young carrot plants, causing significant damage. Reduce their population by clearing away debris and places where they can hide. You can also use organic slug bait traps or create barriers, such as copper tape or crushed eggshells, around your carrot bed to deter them.
Disease Control:
- Fungal Diseases: Fungal diseases, such as powdery mildew and leaf blight, can affect carrot foliage. Ensure proper air circulation around the plants by thinning them and removing any unnecessary foliage. Water the plants at the base to prevent excessive moisture on the leaves. If necessary, apply organic fungicides or sprays to control and prevent fungal diseases.
- Root Diseases: Carrots can be susceptible to root diseases, such as carrot rot caused by fungal pathogens. To prevent root diseases, avoid overwatering and ensure good drainage. Practice crop rotation by avoiding planting carrots in the same area for consecutive years. Removing and disposing of any infected plants can also help prevent the spread of disease.
- Viral Diseases: Viral diseases can stunt the growth of carrot plants and affect root development. Unfortunately, there are no effective treatments for viral diseases. Prevent their spread by removing and disposing of infected plants immediately. Additionally, practice good garden hygiene and control the populations of aphids, which can transmit viral diseases.
Regularly monitor your carrot plants for signs of pests or diseases. Early detection and prompt action are key to preventing and managing issues. By implementing preventive measures and practicing good garden hygiene, you can minimize the risk of pest and disease infestations. Remember to choose organic control methods to avoid the use of harmful chemicals in your edible garden.
By taking proper care of your carrot plants and promptly addressing any pest or disease concerns, you’ll greatly increase the chances of having healthy and productive carrots. Now, let’s move on to the exciting part: harvesting your homegrown carrots!
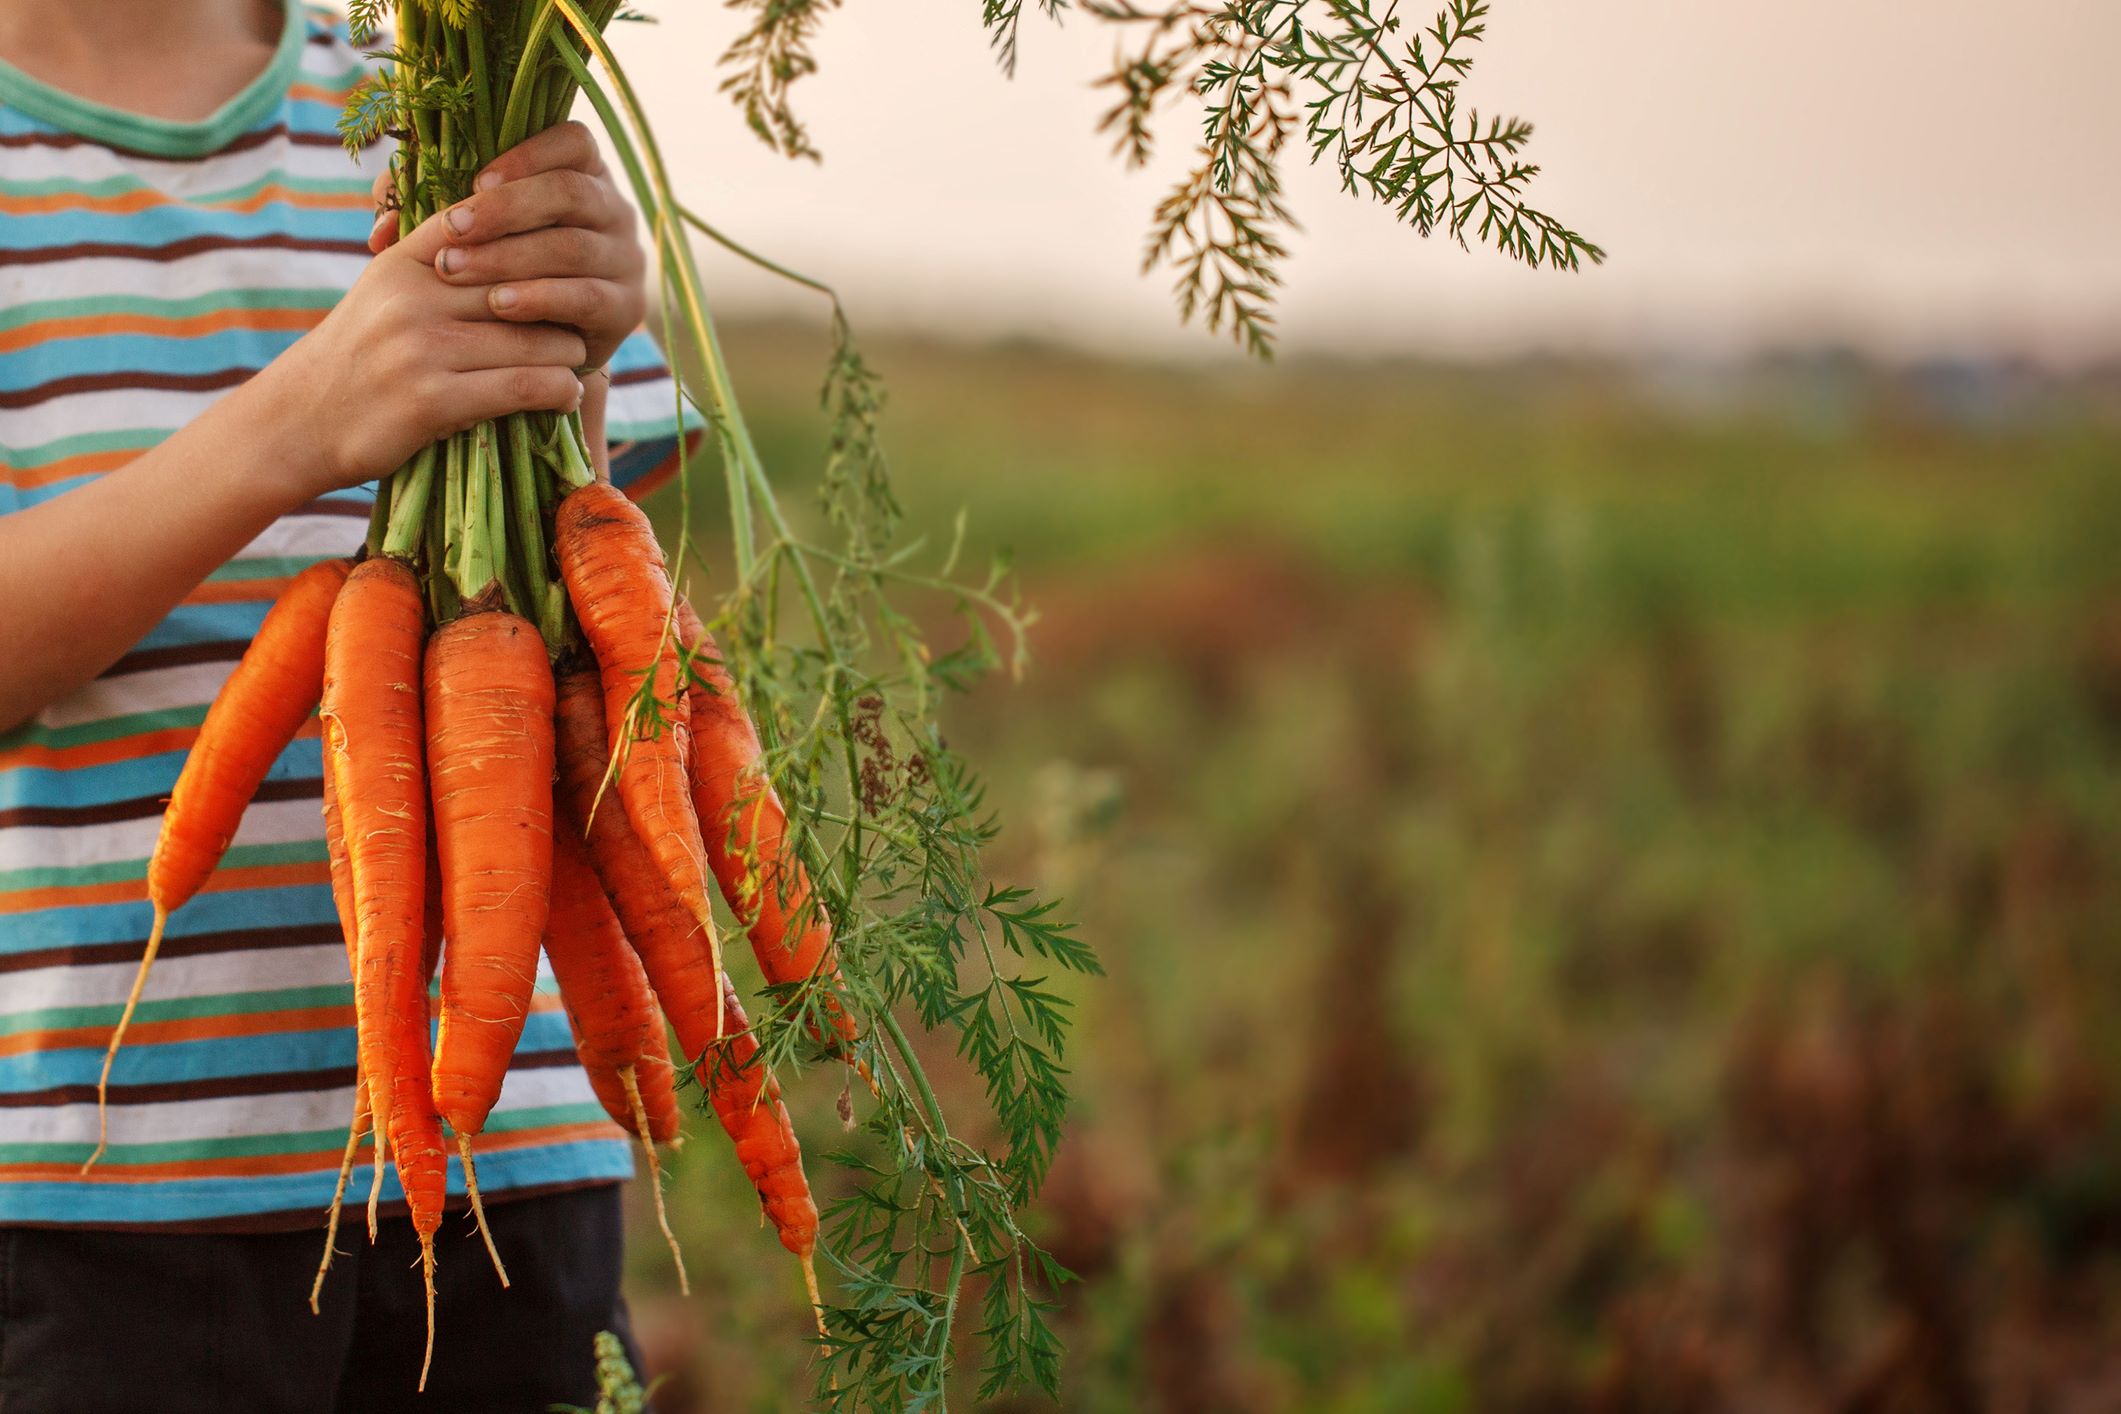
Harvesting Carrots
Harvesting carrots is an exciting moment for any gardener, as it marks the culmination of your hard work and patience. Carrots are usually ready to harvest when they have reached their desired size and color. Proper timing and harvesting techniques can ensure that you enjoy flavorful and crispy roots. Here’s what you need to know about harvesting carrots:
Signs of Maturity:
Carrots come in various shapes, sizes, and colors, depending on the variety you’re growing. Generally, mature carrots are around 1/2 to 1 inch (1.3 to 2.5 cm) in diameter and have a well-developed, vibrant color. However, the specific signs of maturity can vary from one variety to another. Refer to the seed packet or catalog description for guidance on the expected size and color of your chosen carrot variety.
Harvesting Techniques:
To harvest your carrots, follow these steps:
- Loosen the soil: Before harvesting, gently loosen the soil around the base of the carrot plants using a garden fork or trowel. This will help facilitate the removal of the roots without causing damage.
- Gently pull the carrot: Grasp the foliage near the carrot’s crown (where the foliage meets the root) and gently pull straight up. If the soil is dry and compacted, you may need to use a garden fork or trowel to carefully lift the carrots out of the ground.
- Inspect the roots: Examine the harvested carrots for any signs of damage or disease. Remove any damaged or diseased carrots from the batch to prevent the spread of issues to the healthy ones.
- Trim and store: Trim off the greens, leaving a small stub or about an inch (2.5 cm) of foliage attached to the roots. This helps prolong the storage life of the carrots. If you plan to store them, brush off excess soil and place the carrots in a cool, dark, and well-ventilated area, such as a root cellar or refrigerator.
It’s important to note that carrots can be harvested at any stage of their growth, depending on your preference. Younger carrots are generally more tender and sweet, while larger carrots may have a more pronounced flavor. Experiment with harvesting carrots at different stages to discover the flavor and texture that you prefer.
Remember, freshly harvested carrots can be eaten raw or cooked in a variety of delicious dishes. Enjoy the fruits of your labor and savor the flavors of your homegrown carrots!
With proper timing and gentle harvesting techniques, you’ll be rewarded with a bountiful harvest of vibrant and delicious carrots. Now all that’s left to do is to enjoy the fruits of your labor and start planning your next edible gardening adventure!
Signs of Maturity
Identifying the signs of maturity is crucial when it comes to harvesting carrots. Proper timing ensures that you harvest the carrots at their peak flavor, texture, and nutritional value. Although specific maturity signs may vary depending on the carrot variety, there are some general indicators to look for when determining if your carrots are ready to be harvested:
Size:
Carrots come in various sizes, ranging from baby carrots to large storage varieties. The size of the mature carrots will depend on the specific variety you are growing. Refer to the seed packet or catalog description for the expected size of your chosen carrot variety. Typically, mature carrots tend to be around 1/2 to 1 inch (1.3 to 2.5 cm) in diameter.
Color:
Color is another important indicator of carrot maturity. Mature carrots usually exhibit a rich, vibrant color. This can vary depending on the variety, ranging from traditional orange to purple, yellow, or white. Some carrots may even have bi-color or multi-color combinations. Monitor the color development of your carrot crops and harvest them when the color intensifies and appears at its most vibrant.
Texture:
Carrots should have a firm texture when they reach maturity. Gently squeeze the top of the carrot near the foliage. Mature carrots will feel firm and solid, with no soft spots or sponginess. Avoid harvesting carrots that feel excessively hard or woody, as they may be overmature and lacking in flavor.
Root Appearance:
Examine the shape and appearance of the carrot roots. Mature carrots should have a well-formed, smooth root shape without any significant deformities or splits. However, keep in mind that some carrot varieties naturally have unique shapes or irregularities. Harvest carrots that exhibit healthy root development and avoid those that appear misshapen or have extensive damage.
While these indicators are helpful guidelines for determining carrot maturity, personal preference also plays a role. Different stages of maturity can offer varying flavors and textures. If you prefer sweeter and more tender carrots, consider harvesting them when they are smaller and younger. On the other hand, if you prefer a stronger and more robust flavor, allow the carrots to mature further.
Regular checking and monitoring of your carrot plants will help you identify the ideal time for harvesting. It’s recommended to begin checking carrots for signs of maturity as they approach their estimated maturity date, which can typically range from 60 to 80 days after sowing, depending on the variety.
By paying close attention to the size, color, texture, and root appearance, you’ll be able to harvest your carrots at the peak of their flavor and quality. So keep a close eye on your carrots and get ready to enjoy the delicious results of your patient gardening efforts!
Harvesting Techniques
Proper harvesting techniques play a vital role in ensuring the quality and flavor of your carrots. By following the correct methods, you can safely and efficiently harvest your carrots without causing damage. Here are some essential techniques to consider:
- Loosening the Soil: Before harvesting, gently loosen the soil around the carrots to facilitate their removal. Use a garden fork or a trowel to carefully loosen the soil around the base of each carrot plant. This helps prevent the roots from breaking or snapping during the harvesting process.
- Gentle Pulling: Grasp the top of the carrot foliage near the crown (where the foliage meets the root) and gently pull the carrot straight up. If the soil is dry and compacted, you may need to use a garden fork or trowel to lift the carrots out of the ground slowly and carefully. Avoid jerking or yanking the carrot, as it may cause the root to break.
- Inspecting the Roots: As you harvest each carrot, inspect the root for any signs of damage or disease. Remove any carrots that appear damaged, misshapen, or affected by pests or diseases. Removing affected carrots helps prevent the spread of issues to the healthy ones and ensures a higher-quality harvest.
- Trimming the Foliage: After harvesting, trim off the foliage from the carrot roots. Leave about an inch (2.5 cm) of foliage attached to the root. Trimming the foliage helps prolong the storage life of the carrots by reducing moisture loss. It also makes it easier to handle and store the harvested carrots.
- Brushing off Excess Soil: Gently brush off excess soil from the harvested carrots. Avoid washing them at this stage, as moisture can promote decay during storage. Instead, removing loose soil with a soft brush or cloth is sufficient to clean the carrots before storing or using them.
- Storage: If you plan to store your harvested carrots, it’s important to store them properly to maintain their freshness. Place the trimmed carrots in a cool, dark, and well-ventilated location, such as a root cellar or refrigerator. Store them in a container with damp sand or loose soil to help retain moisture and prevent drying out.
Remember that freshly harvested carrots can also be enjoyed immediately. Wash them thoroughly before using them in salads, soups, stir-fries, or other culinary creations. The crisp texture and sweet taste of homegrown carrots are best savored when fresh from the garden.
Incorporating these harvesting techniques into your routine will help you harvest your carrots efficiently and preserve their quality. Remember to handle the carrots gently, inspect them for any issues, and provide proper storage conditions for long-term enjoyment. Now that you’ve successfully harvested your carrots, it’s time to reap the rewards of your hard work and savor the delicious flavors that only homegrown carrots can offer!
Post-Harvest Care
Proper post-harvest care is essential for maintaining the quality, flavor, and longevity of your harvested carrots. By following the right practices, you can ensure that your carrots remain fresh and delicious for an extended period. Here are some important post-harvest care tips to consider:
- Cleaning: After harvesting, gently brush off excess soil from the carrots. Avoid washing them at this stage, as moisture can promote decay during storage. Cleaning the carrots helps remove any lingering debris and prepares them for storage or immediate use.
- Trimming: Trim off the leafy green tops of the carrots, leaving about an inch (2.5 cm) of foliage attached to the roots. Trimming the foliage helps prevent moisture loss from the roots and prolongs the storage life of the carrots. However, if you plan to use the carrots within a day or two, you can leave the foliage attached to retain their freshness.
- Storage: Proper storage conditions are crucial for preserving the quality and flavor of your carrots. Place the trimmed carrots in a cool, dark, and well-ventilated area, such as a root cellar, basement, or refrigerator. If storing in the refrigerator, place the carrots in a plastic bag or airtight container to prevent them from drying out.
- Moisture Content: Carrots have a high water content, and maintaining optimal moisture levels is essential to prevent them from drying out. If storing the carrots for an extended period, you can place a damp cloth or a layer of damp sand in the storage container or bag to help retain their moisture.
- Monitoring: Periodically check on the stored carrots to ensure their quality. Remove any carrots that show signs of decay, mold, or softness, as they can spoil the others if left near them. Regularly inspecting and removing compromised carrots helps maintain the overall freshness of the stored batch.
- Usage: Use your homegrown carrots in a variety of dishes to enjoy their fresh flavor. From salads and soups to stir-fries and roasted vegetable medleys, there are endless culinary possibilities. Remember that the fresher the carrots, the better they taste, so incorporate them into your meals as soon as possible after harvesting.
- Seed Saving: If you wish to save seeds for future planting, select fully mature and healthy carrots from your harvest. Allow them to develop flower umbels and let them go to seed. Harvest the seeds once they have fully ripened and dried on the plants. Store the seeds in a cool, dry place in labeled envelopes for future use.
By following these post-harvest care practices, you can prolong the shelf life and maintain the premium quality of your homegrown carrots. Proper cleaning, trimming, and storage techniques ensure that the carrots retain their freshness, flavor, and nutritional value. Whether using them immediately or saving them for later, your homegrown carrots will add a vibrant touch to your culinary creations.
Now that you have harvested and properly cared for your carrots, it’s time to enjoy the fruits of your labor and share the joys of homegrown goodness with family and friends. Bon appétit!
Conclusion
Congratulations on your journey into the world of edible gardening and specifically, on growing your own carrots! As you have learned throughout this comprehensive guide, successfully cultivating carrots involves various factors, from the initial planting stage to the harvesting and post-harvest care. By understanding the factors that affect carrot growth and providing optimal conditions, you can enjoy a bountiful harvest of delicious and nutritious carrots.
Remember to select high-quality carrot seeds, prepare the soil properly, and provide adequate water, sunlight, and nutrients throughout the growth stages. Thinning the seedlings and practicing effective pest and disease control measures contribute to the overall health and productivity of your carrot plants. When the time comes for harvesting, pay attention to the signs of maturity and use gentle techniques to maintain the quality of the carrots.
After harvesting, proper post-harvest care ensures that your carrots remain fresh and flavorful. Cleaning, trimming, and storing them in the right conditions will help preserve their quality and prolong their shelf life. Whether you enjoy them immediately or save them for later use, your homegrown carrots will provide a delightful addition to your meals and a sense of satisfaction that comes from growing your own food.
Continue to explore the joys of edible gardening, and feel free to experiment with different carrot varieties and growing techniques. Remember to learn from each season’s successes and challenges, as gardening is a continuous learning experience.
So, roll up your sleeves, put your gardening skills to work, and enjoy the rewards of growing your own delicious and nutritious carrots. Happy gardening!