Home>Types of Gardening>Edible Gardening>How Long To Harvest Sweet Potatoes After Planting
Edible Gardening
How Long To Harvest Sweet Potatoes After Planting
Published: September 7, 2023
Learn when to harvest sweet potatoes after planting and maximize your edible gardening success. Discover the perfect timing for harvesting sweet potatoes to enjoy fresh and delicious homegrown produce.
(Many of the links in this article redirect to a specific reviewed product. Your purchase of these products through affiliate links helps to generate commission for Chicagolandgardening.com, at no extra cost. Learn more)
Table of Contents
Introduction
Welcome to the world of edible gardening, where you can grow your own delicious and nutritious sweet potatoes! There’s something incredibly satisfying about cultivating your own food, and sweet potatoes are no exception. Not only are they rich in vitamins, antioxidants, and fiber, but they also add a burst of flavor to your culinary creations.
Whether you’re an experienced gardener or a beginner with a green thumb, understanding the optimal time to harvest sweet potatoes is crucial. After all the hard work and care you’ve put into growing your sweet potato plants, you want to ensure that you harvest them at the right stage of maturity to get the best flavor and texture.
In this article, we’ll explore the factors that influence the harvest time of sweet potatoes, along with the proper techniques for planting, growing, and finally harvesting them. We’ll also discuss how to cure and store sweet potatoes to extend their shelf life and enjoy the bountiful harvest for months to come.
So, whether you’re dreaming of mouthwatering sweet potato fries, creamy mashed sweet potatoes, or a delectable sweet potato pie, let’s dive into the world of edible gardening and discover how long to harvest sweet potatoes after planting.
Factors Affecting Sweet Potato Harvest Time
Several key factors influence the timing of sweet potato harvest. Understanding these variables will allow you to determine the optimal moment to harvest your sweet potatoes and enjoy the best flavor and texture. Let’s explore the factors affecting sweet potato harvest time:
- Variety: Different sweet potato varieties have varying maturation times. Some varieties mature in as little as 90 days, while others may take up to 150 days to fully develop. Knowing the specific variety you’re growing will help you estimate the approximate harvest time.
- Climate: Sweet potatoes thrive in warm climates, with temperatures between 75 to 95 degrees Fahrenheit (24 to 35 degrees Celsius). The length of the growing season plays a significant role in determining the maturity of sweet potatoes. In regions with shorter growing seasons, sweet potatoes may take longer to mature.
- Soil Temperature: Sweet potatoes prefer a soil temperature of around 75 degrees Fahrenheit (24 degrees Celsius) for proper tuber development. If the soil temperature drops below this range, it can slow down the growth of sweet potatoes and delay the harvest time.
- Fertilization: Proper fertilization is crucial for healthy sweet potato growth. Providing the necessary nutrients at the right time can promote better development and faster maturation. However, excessive fertilization or unbalanced nutrient levels can lead to oversized or stunted tubers.
- Watering: Consistent and adequate watering is essential throughout the sweet potato growing season. However, excessive moisture during the final weeks before harvest can lead to waterlogging and rotting of the tubers. Conversely, drought stress can result in smaller sweet potatoes.
- Pest and Disease Control: Protecting your sweet potato plants from pests and diseases is crucial for a successful harvest. Pests like sweet potato weevils and diseases like black rot can damage the tubers and impact the harvest time. Timely prevention and control measures are necessary to ensure healthy plants and a bountiful harvest.
By understanding and monitoring these factors, you can determine the optimal harvest time for your sweet potatoes. Now that we’ve explored the important considerations, let’s dive into the process of planting and growing sweet potatoes in the next section.
Planting and Growing Sweet Potatoes
Planting and growing sweet potatoes is a rewarding journey that starts with careful preparation and continues with nurturing care throughout the growing season. Let’s explore the steps involved in successfully cultivating sweet potatoes:
- Choosing the Right Location: Select a sunny location in your garden that receives at least six to eight hours of direct sunlight daily. Sweet potatoes thrive in well-drained soil, so ensure that the planting area has good drainage.
- Preparing the Soil: Sweet potatoes prefer loose, fertile soil. Before planting, work the soil and remove any weeds, rocks, or debris. To improve soil fertility, incorporate organic matter like compost or aged manure to enhance nutrient content and drainage.
- Starting Slips or Transplants: Sweet potatoes are typically started from slips, which are small rooted shoots that sprout from mature sweet potatoes. Purchase certified disease-free sweet potato slips from a reputable source or start your slips by submerging sweet potatoes halfway in water until roots and shoots develop.
- Planting the Slips: Plant the slips in the prepared soil, leaving about 12 inches of space between each plant and setting them about 3 inches deep. Ensure that the soil covers the roots and the base of the slips while leaving the top foliage exposed.
- Watering and Mulching: After planting, water the slips thoroughly to provide moisture for good root establishment. Once the plants are established, it’s crucial to maintain consistent soil moisture. Apply a layer of organic mulch, such as straw or shredded leaves, around the plants to help conserve moisture and suppress weed growth.
- Fertilizing: Sweet potatoes benefit from regular feeding. Apply a balanced organic fertilizer low in nitrogen but higher in phosphorus and potassium, as too much nitrogen can result in excessive foliage growth. Follow the recommended application rates on the fertilizer package and avoid over-fertilization.
- Managing Pests and Diseases: Monitor your sweet potato plants regularly for signs of pest infestation or disease. Common pests include sweet potato weevils, wireworms, and slugs. Implement appropriate organic pest control methods and practice good crop rotation to minimize the risk of diseases.
By following these planting and care guidelines, you’ll set the foundation for healthy sweet potato growth. Now let’s move on to identifying the signs that indicate your sweet potatoes are ready for harvest.
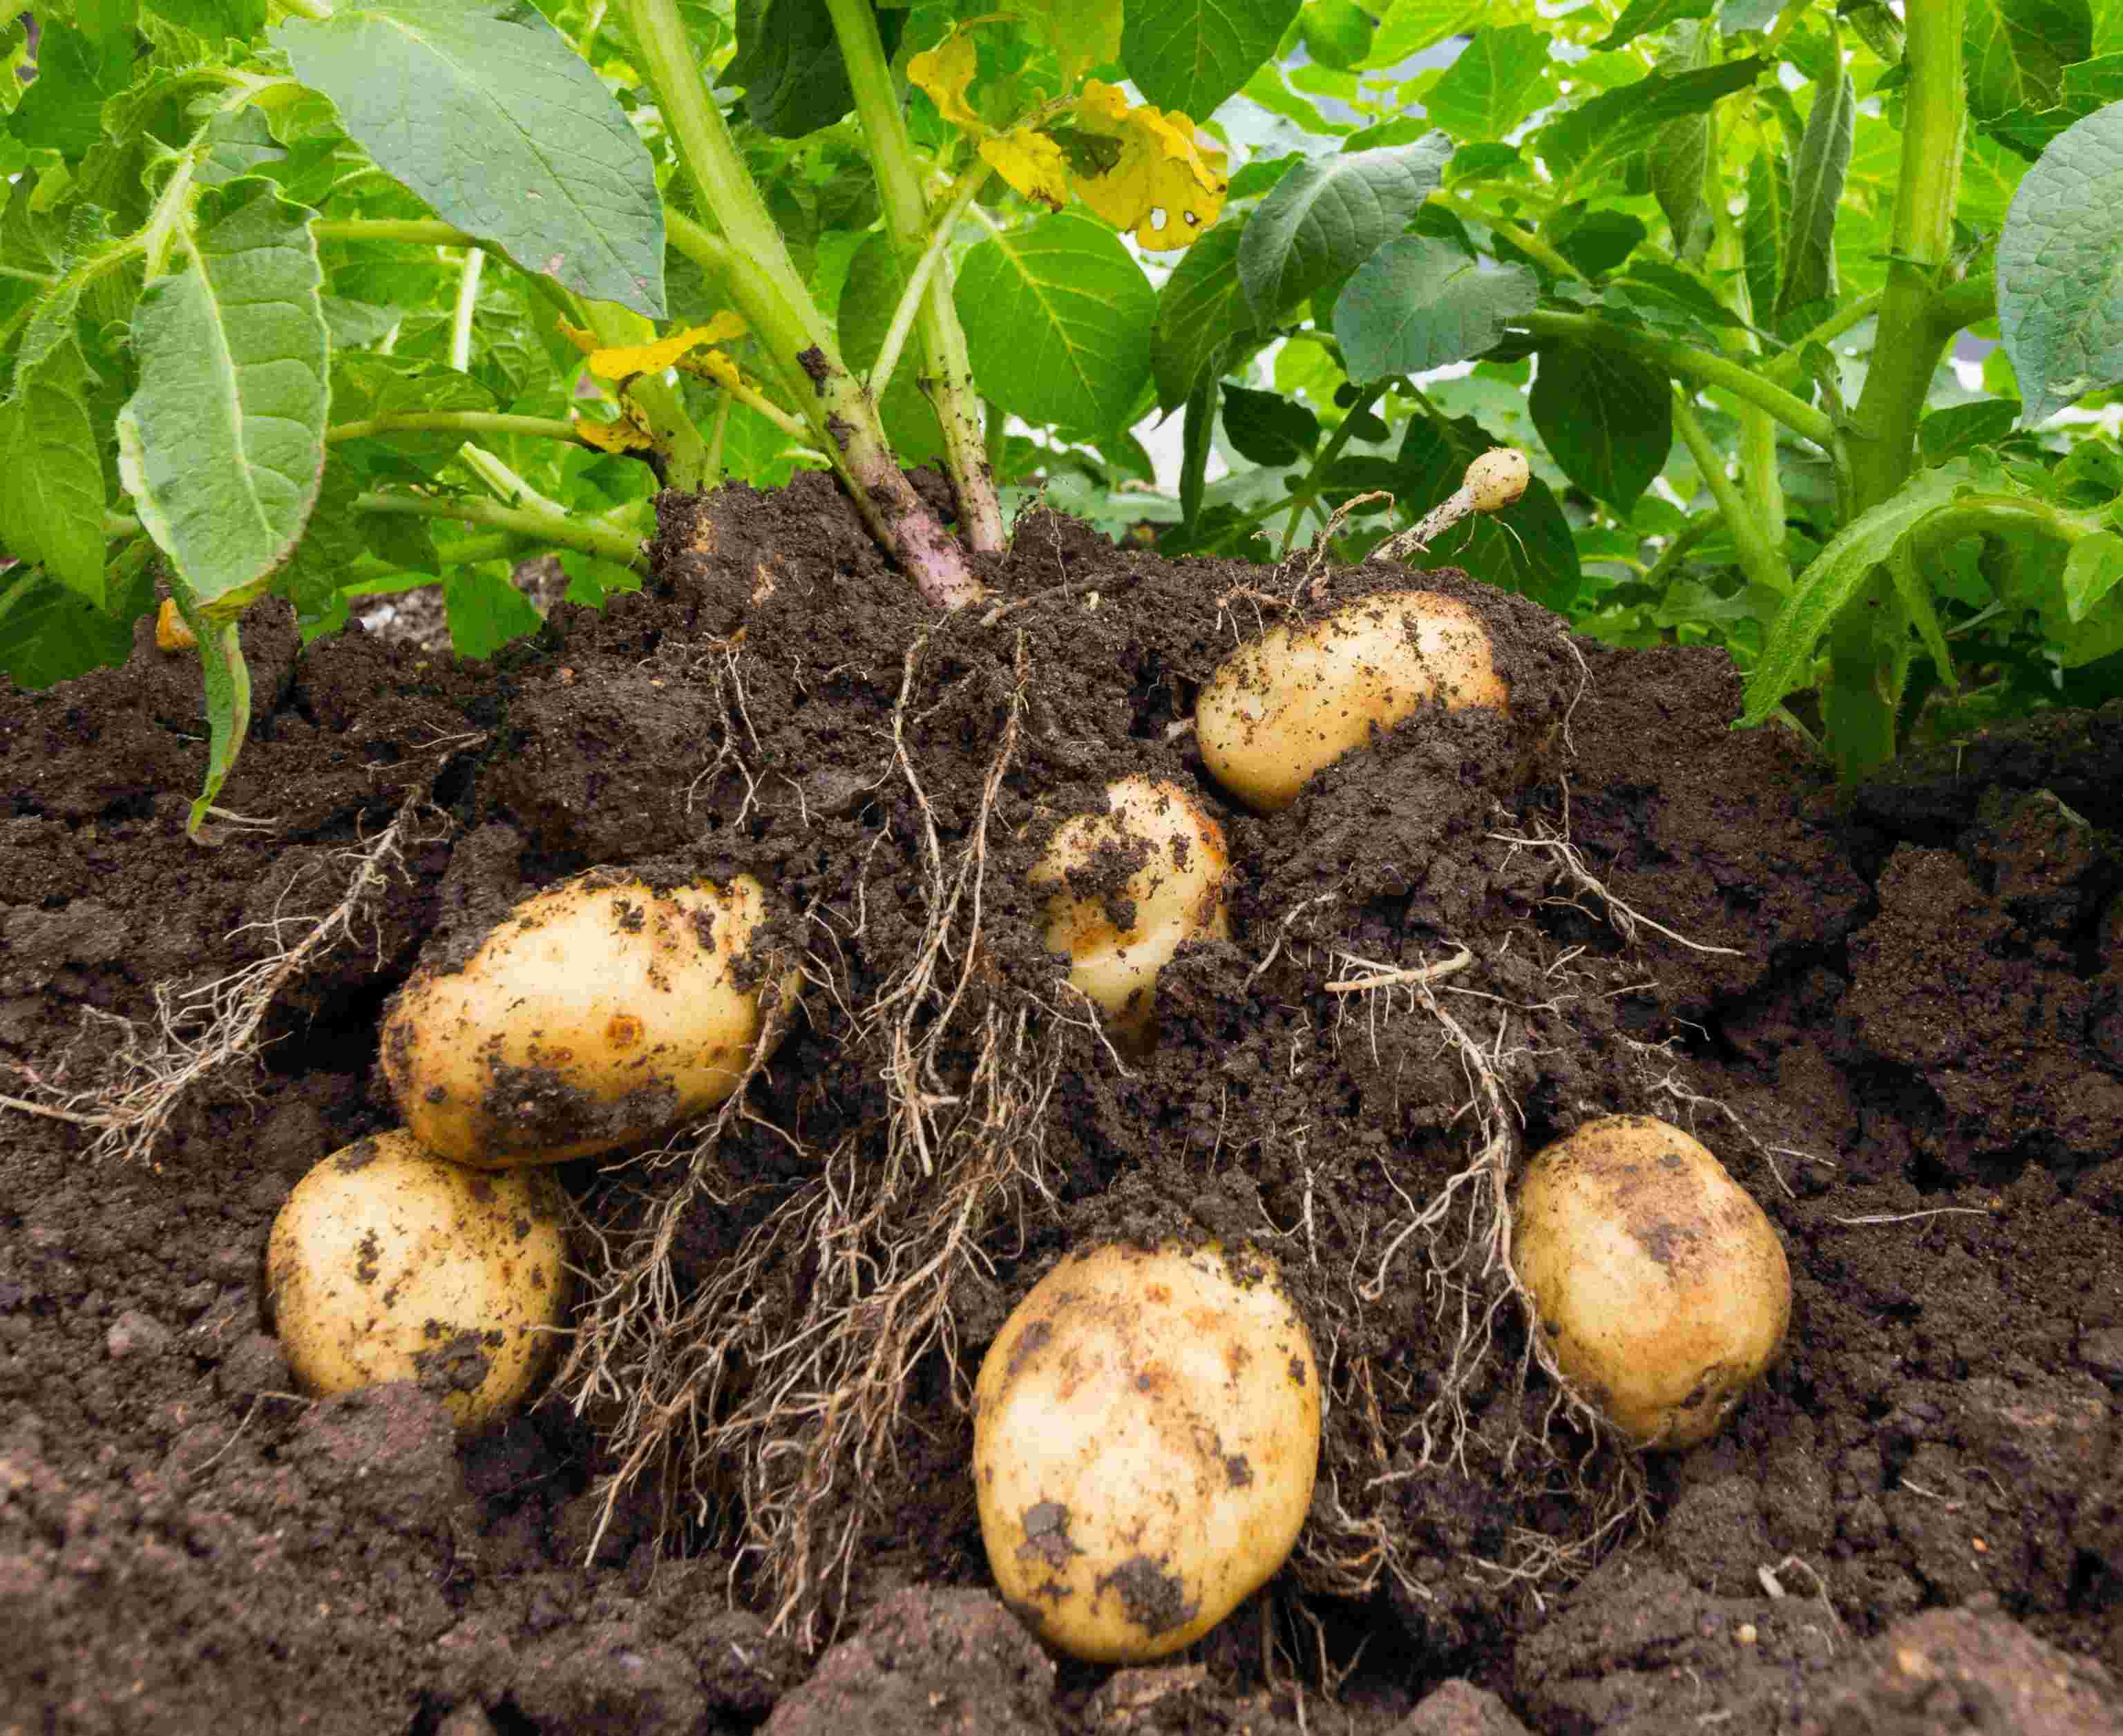
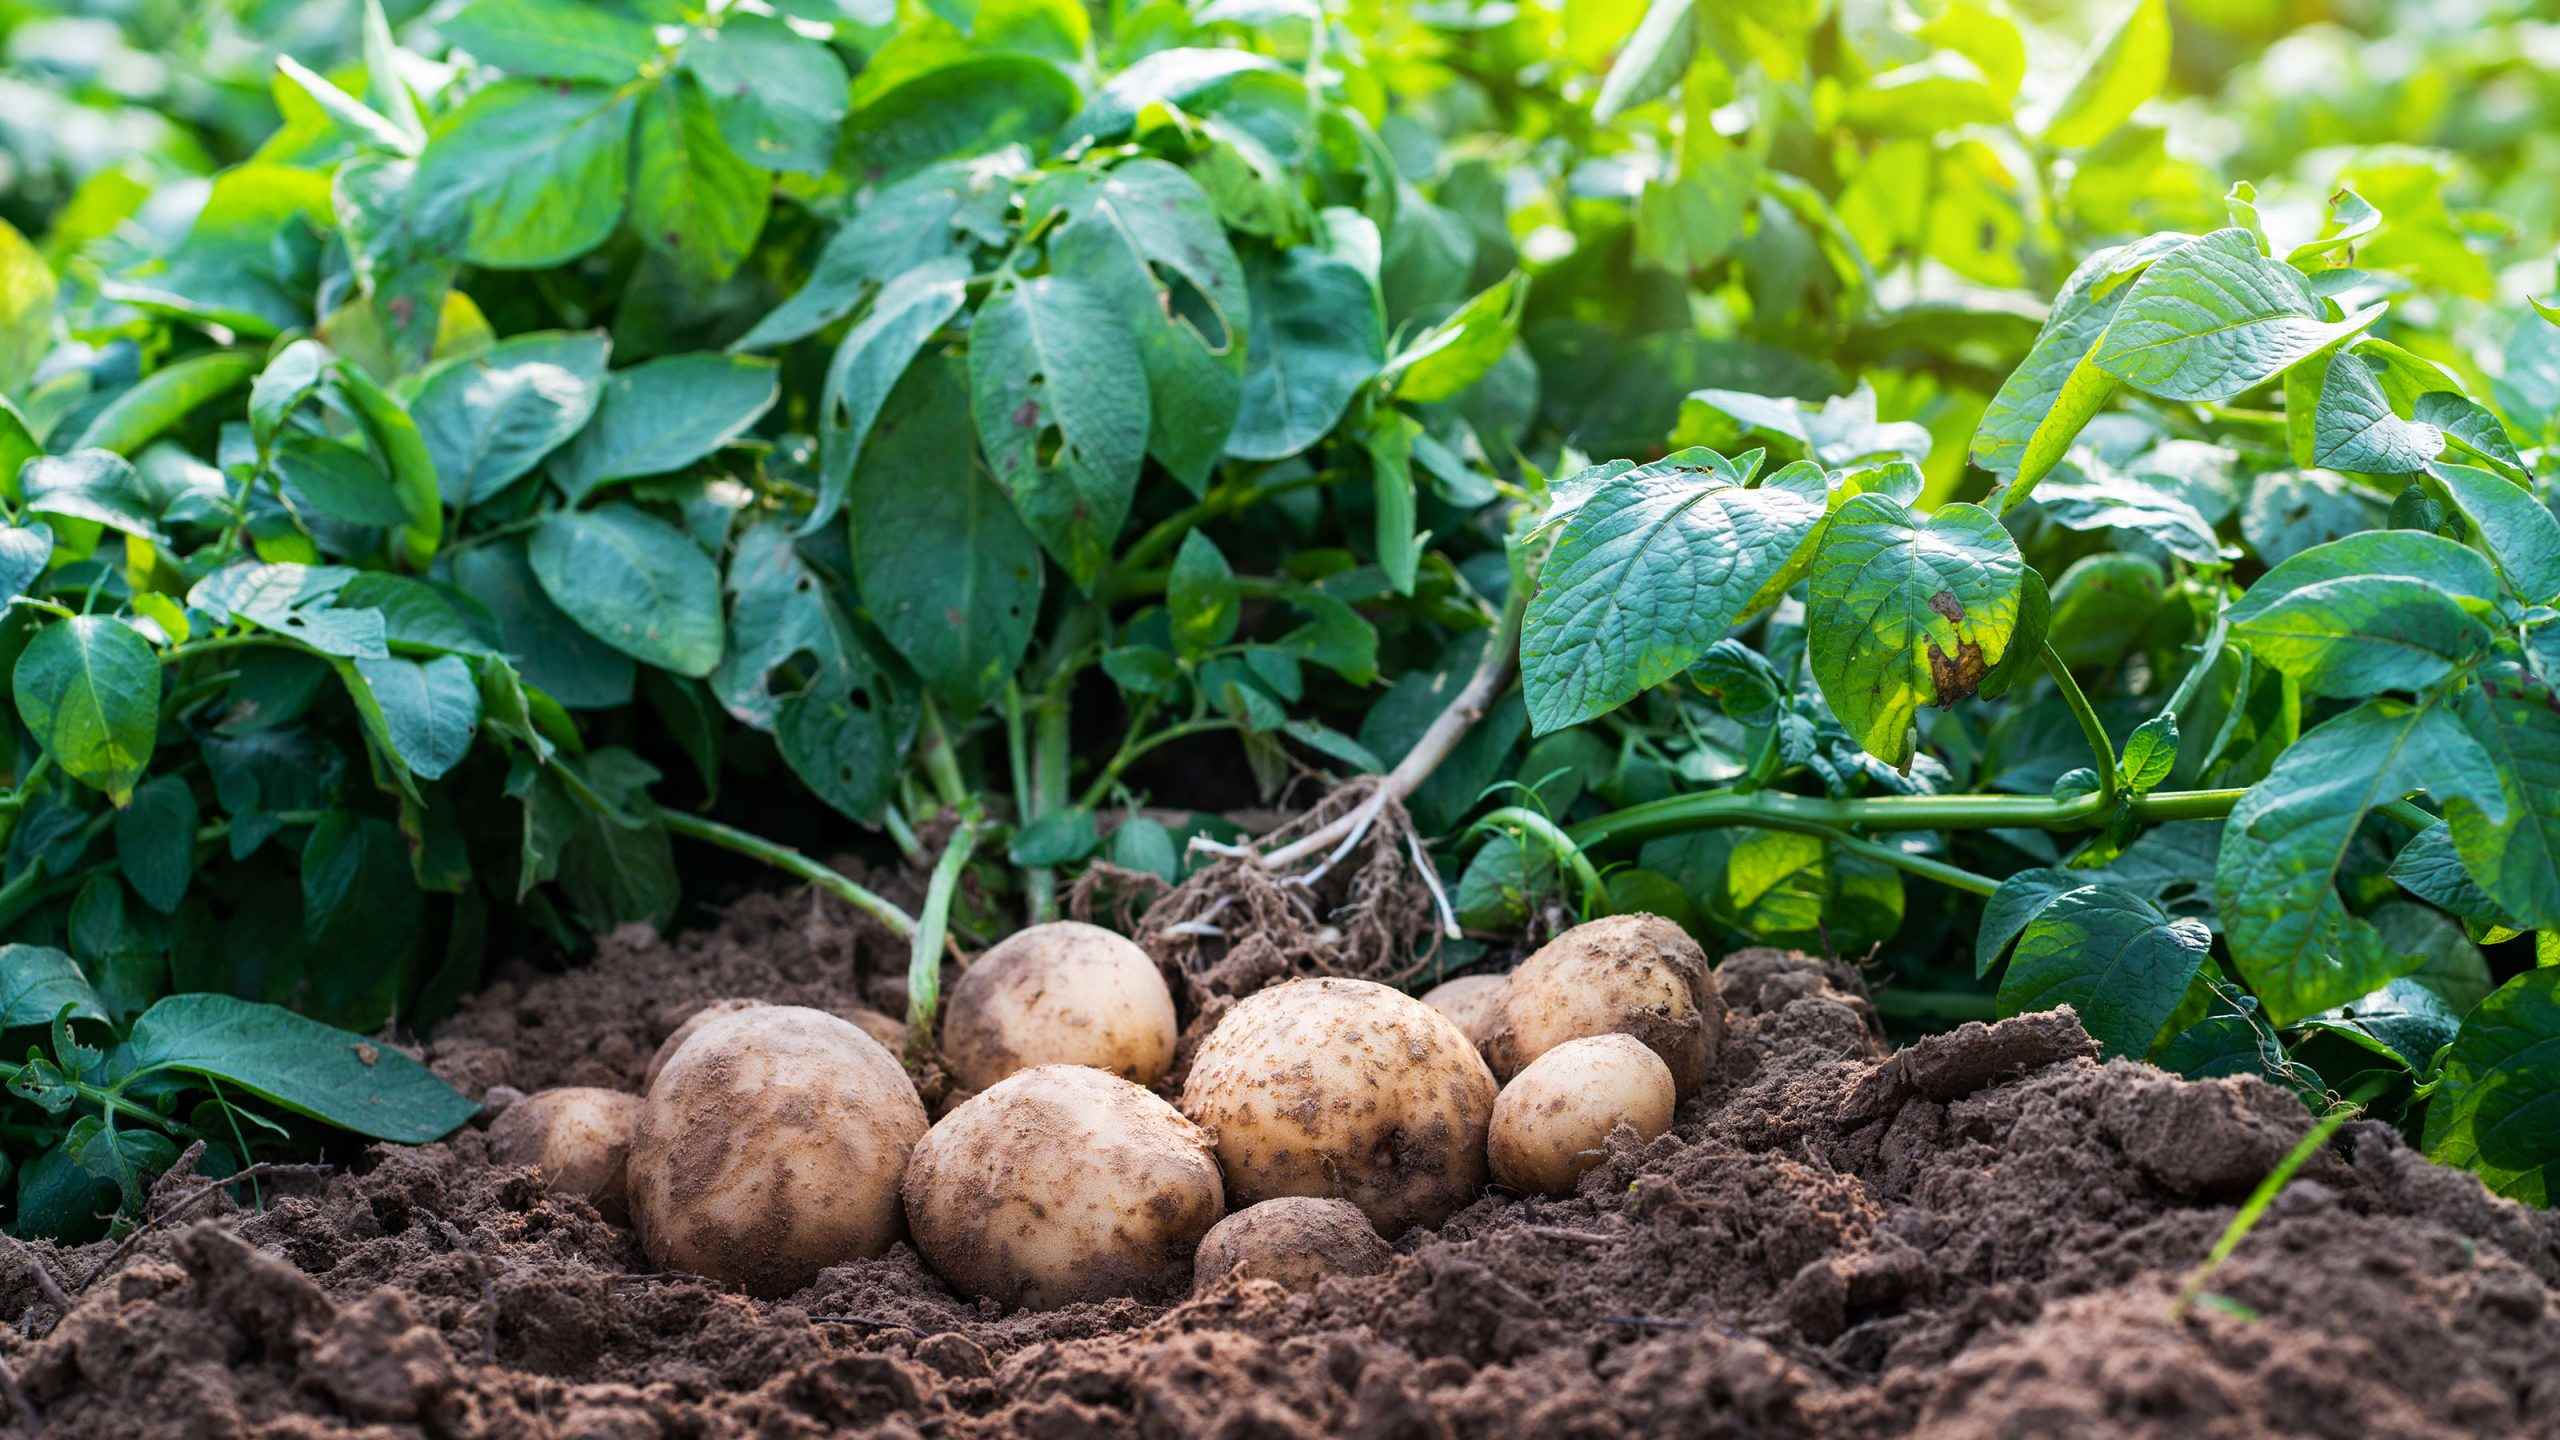
Signs of Sweet Potatoes Ready for Harvesting
The anticipation of harvest time is exciting for any gardener. To ensure that your sweet potatoes are at their peak of flavor and texture, it’s essential to recognize the signs that indicate they are ready for harvesting. Here are some key indicators to look out for:
- Time: Sweet potatoes typically require around 90 to 150 days from planting to reach maturity, depending on the variety. Consult the information provided by the seed supplier or plant breeder to estimate the approximate harvest time.
- Vine Condition: Observe the condition of the sweet potato vines. When the vines start to turn yellow and wither, it is a sign that the tubers are approaching maturity. The yellowing leaves indicate that the sweet potatoes have stopped growing and are ready for harvest.
- Tuber Size: While sweet potatoes can be harvested at any size, they are typically left in the ground until they reach a desirable size. Mature sweet potatoes are typically 2-3 inches in diameter, depending on the variety. Gently dig around the base of the plant to check the size of the tubers without damaging them.
- Skin Color: The skin color of sweet potatoes can provide clues about their readiness for harvest. Harvest sweet potatoes when the skin has turned from green to a more mature color. Depending on the variety, this could be a tan, orange, or reddish-brown hue.
- Firmness: When checking the tubers for harvest readiness, gently press your finger against the skin. Mature sweet potatoes will feel firm and should not have any soft spots or mushy areas. Avoid harvesting if the tubers are still too soft, as they may not have fully developed their flavor and starch content.
It’s important to note that sweet potatoes do not continue to ripen after they are harvested. Unlike some fruits, they will not get sweeter with time. Therefore, it’s crucial to harvest them when they are at their prime. If in doubt, it’s better to wait a little longer rather than harvesting too early.
Now that you know how to determine the readiness of your sweet potatoes, let’s move on to the next exciting step: harvesting!
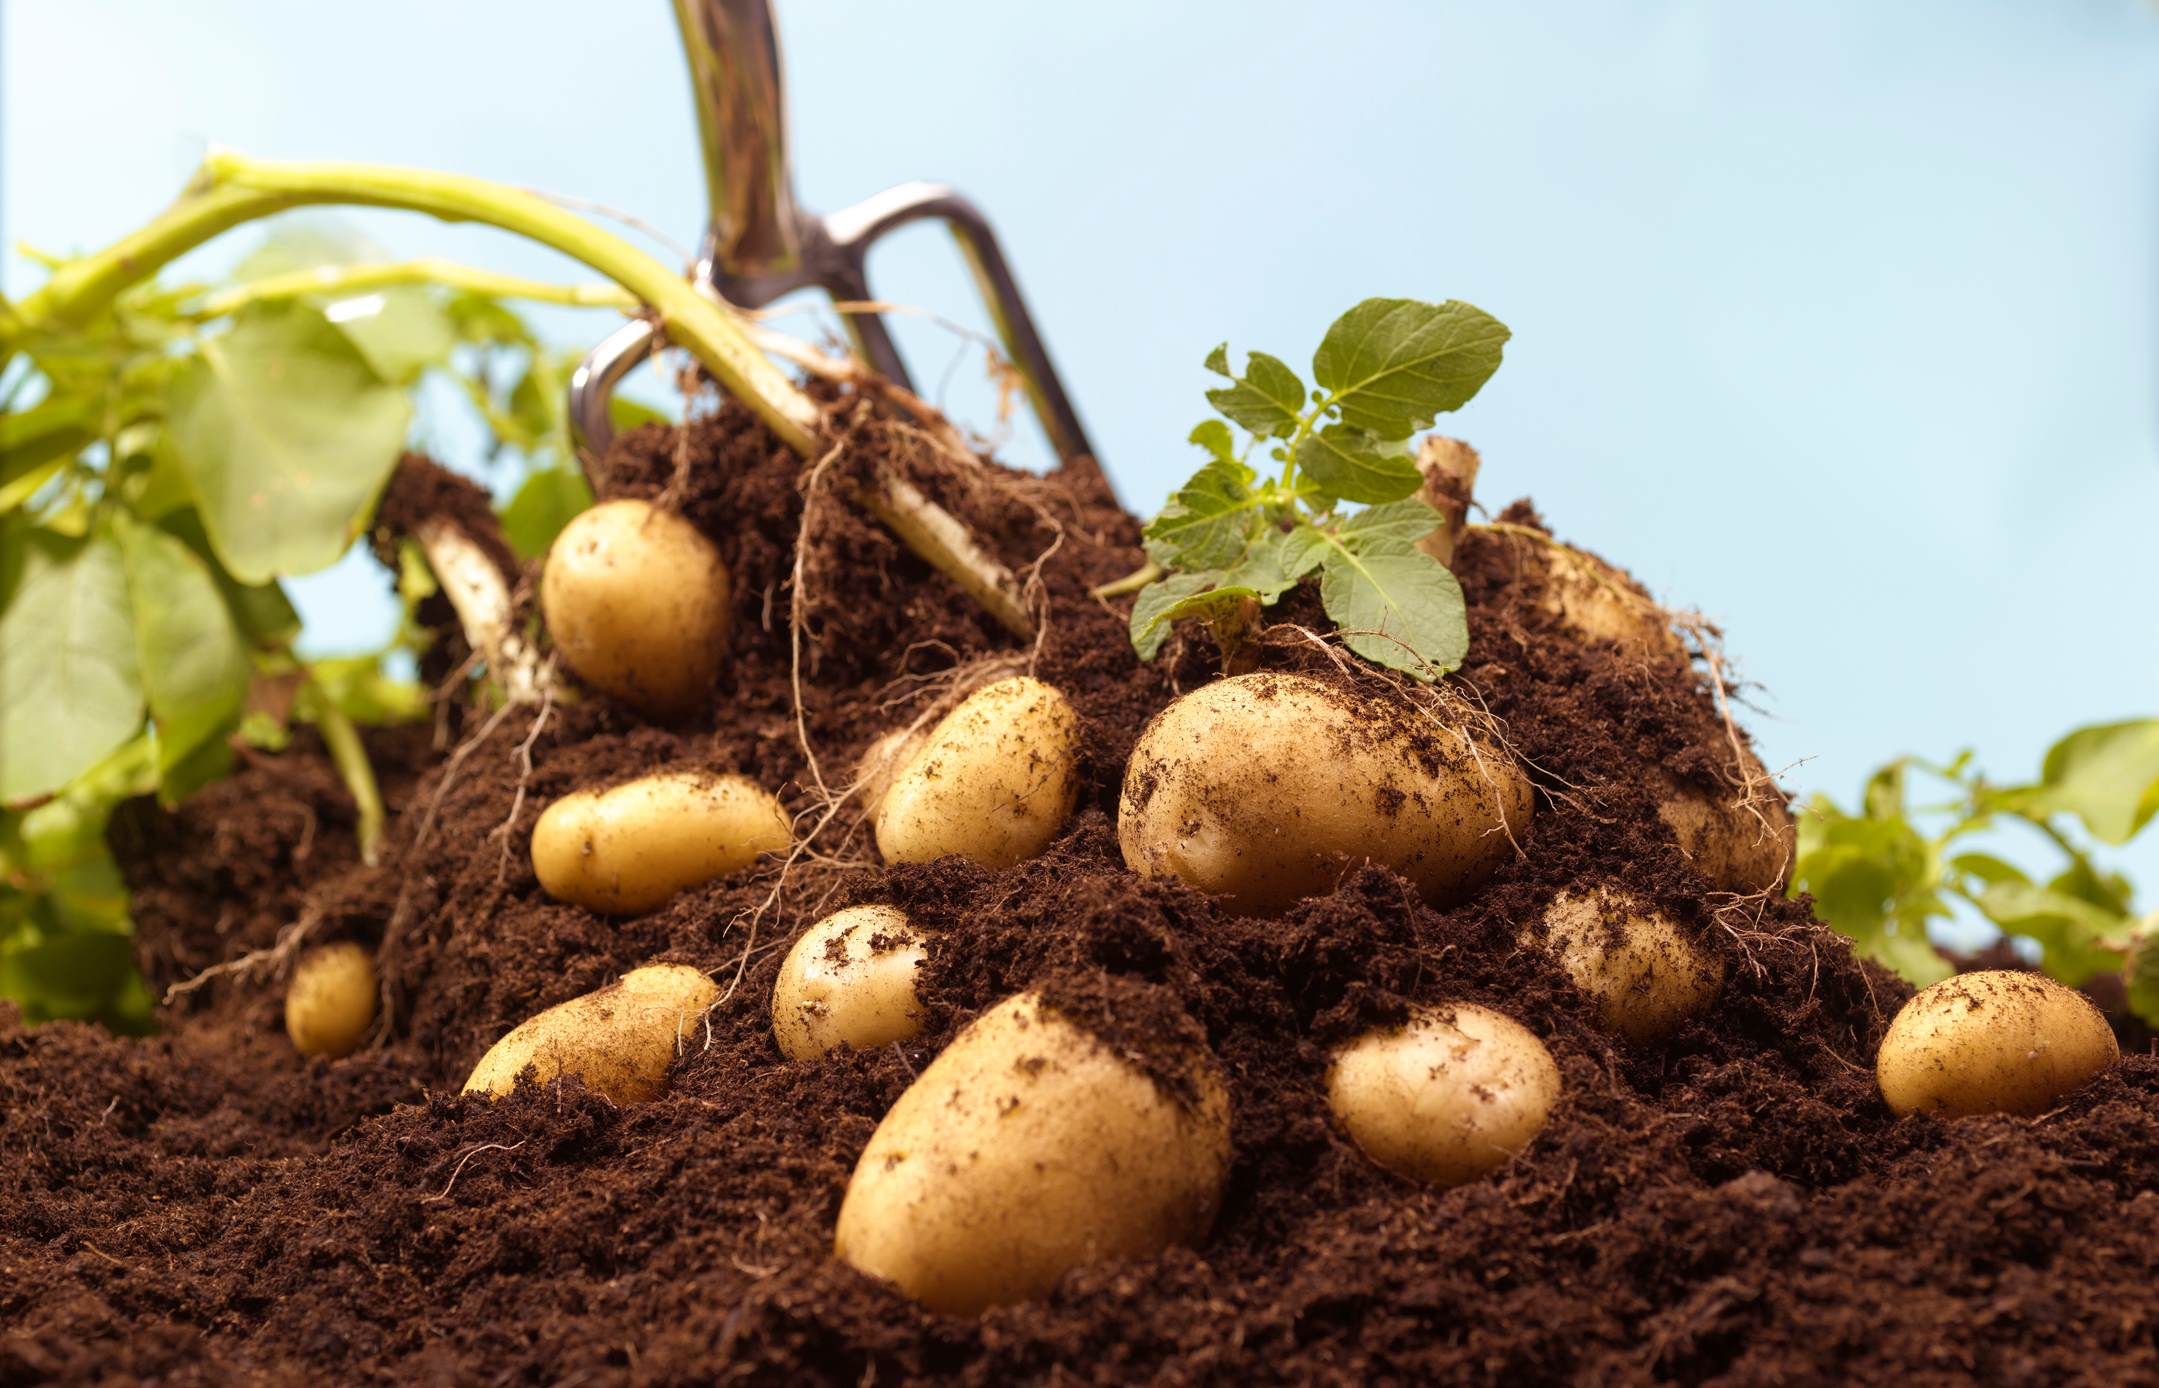
Harvesting Sweet Potatoes
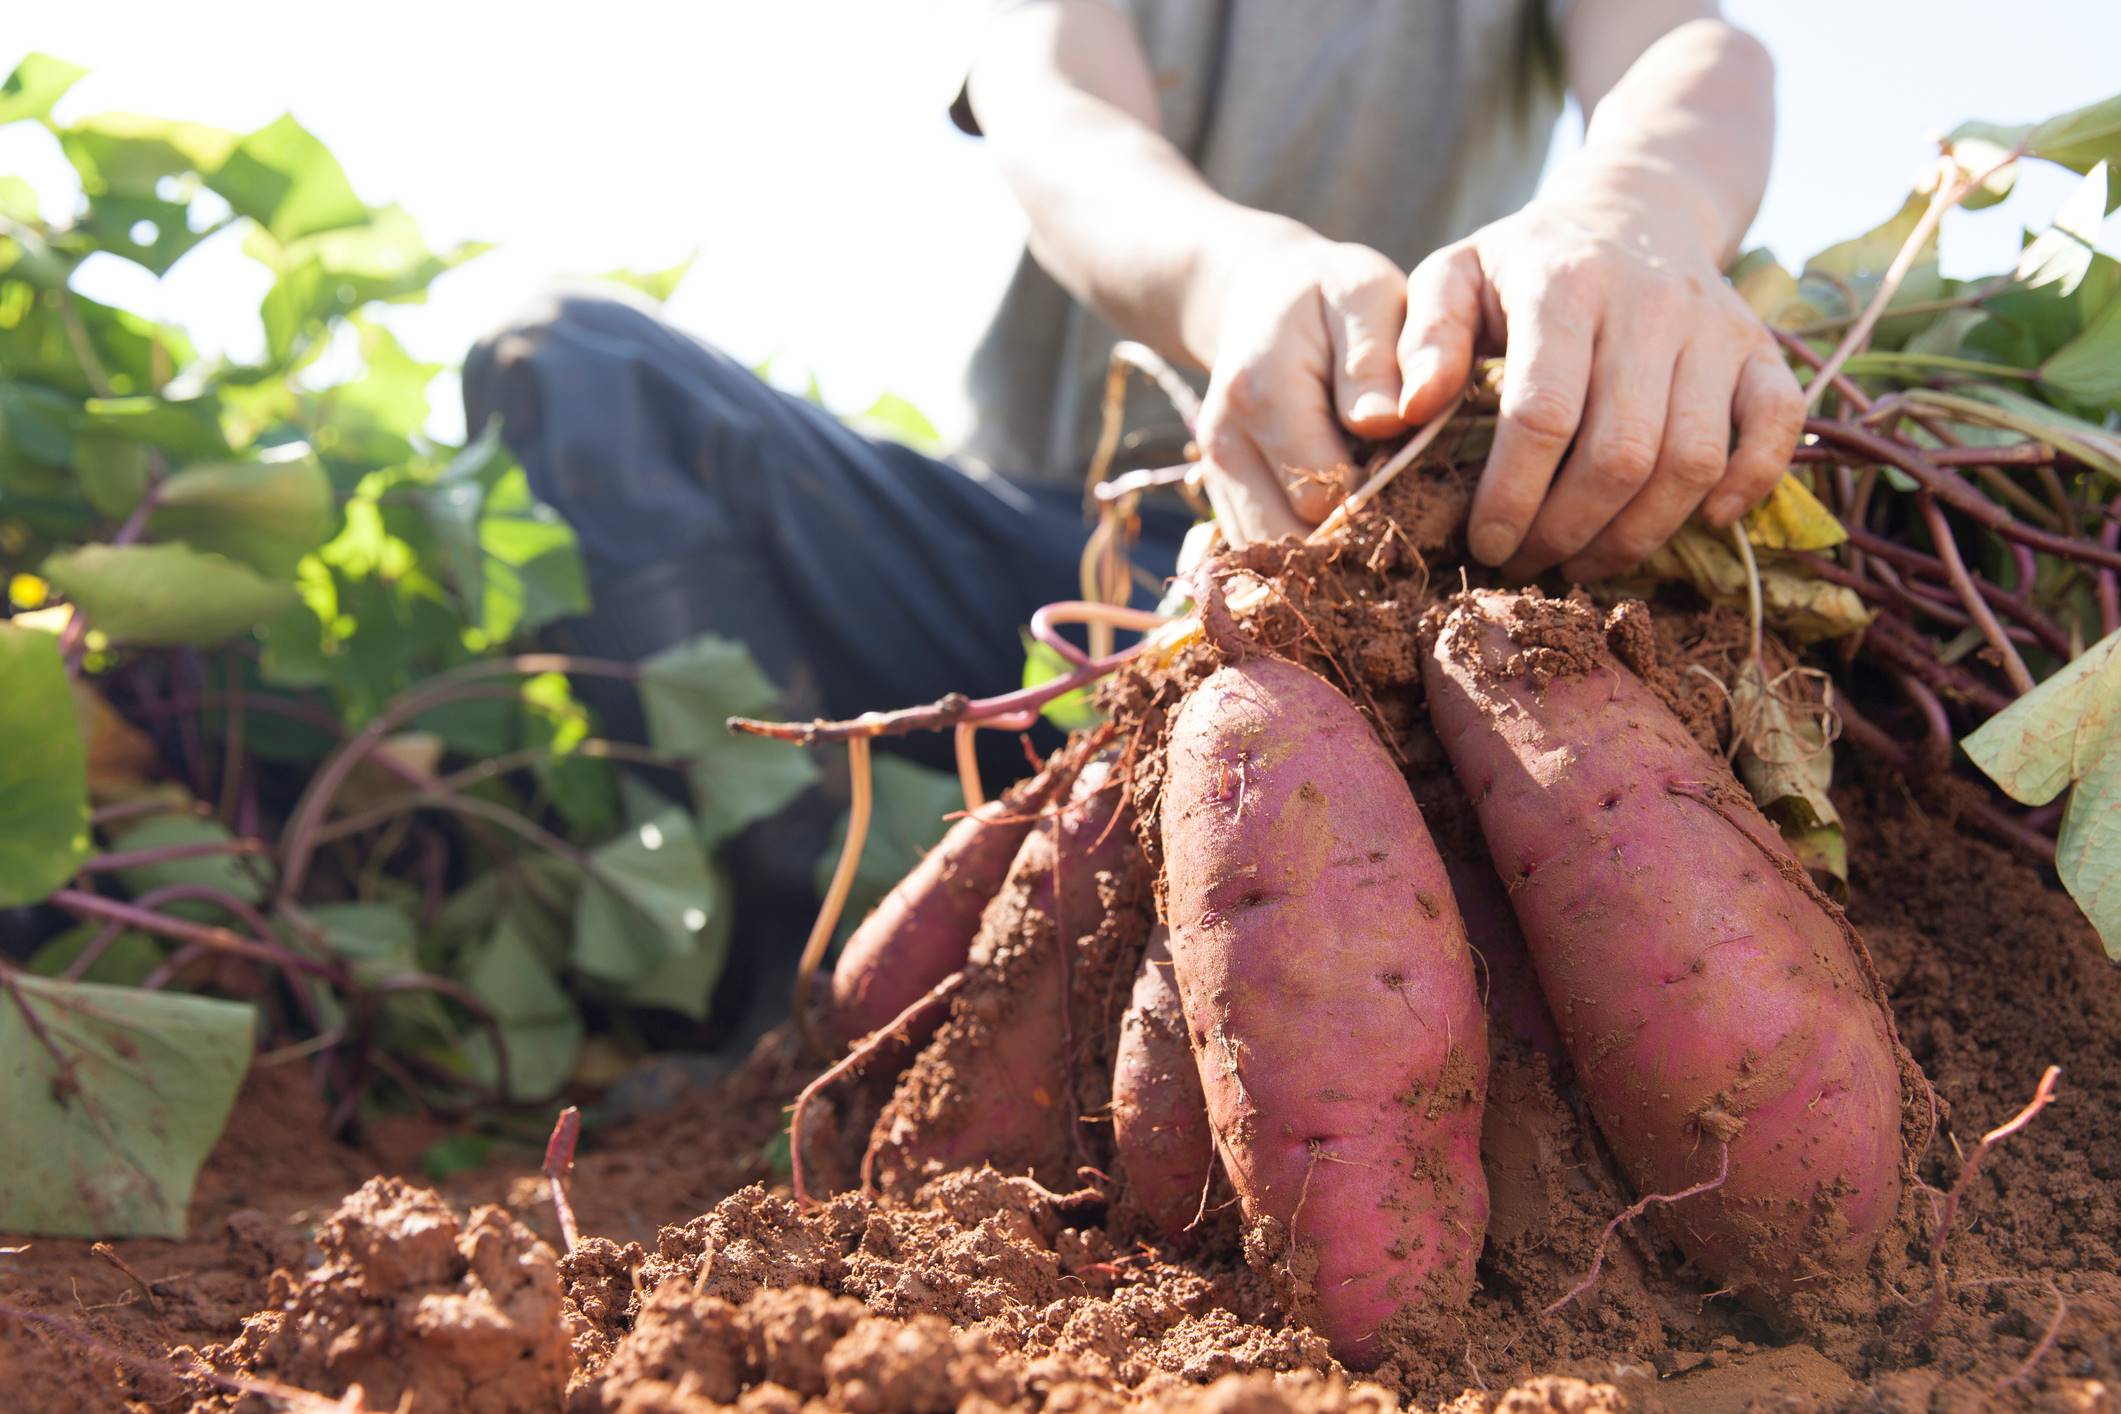
Harvesting sweet potatoes is a rewarding experience that allows you to reap the delicious fruits of your labor. When the time is right, it’s important to harvest sweet potatoes correctly to ensure their quality and longevity. Here are the steps to follow when harvesting your sweet potatoes:
- Timing: Choose a dry, sunny day to harvest your sweet potatoes. This will help prevent excess moisture from damaging the tubers during the harvesting process.
- Loosening the Soil: Use a garden fork or shovel to carefully loosen the soil around the base of the sweet potato plants. Start digging at least 6 inches away from the plant to avoid accidental damage to the tubers.
- Gently Lift: Lift the sweet potato plants out of the loosened soil, taking care not to break or bruise the tubers. Avoid pulling or yanking on the plants, as this can cause unnecessary damage.
- Inspecting the Tubers: Carefully examine each sweet potato, brushing off any excess soil. Inspect the skin for any signs of damage or disease. Remove any damaged or diseased tubers and set them aside for immediate consumption or discard them.
- Cutting the Vines: After harvesting the sweet potatoes, cut the vines back to about 1-2 inches above the soil level. This helps signal the plant to go into dormancy and prepares it for storage.
- Curing: Curing is an essential step in the post-harvest process for sweet potatoes. Place the harvested sweet potatoes in a warm and humid environment, such as an airy, dark room or a greenhouse, at a temperature of around 80-85 degrees Fahrenheit (27-29 degrees Celsius) and a humidity level of 85-90%. Allow them to cure for 7-14 days, which helps enhance their sweetness and flavor while promoting healing of any minor cuts or bruises.
- Storing: Once the sweet potatoes have cured, it’s time to store them properly. Choose a cool, dry, and well-ventilated storage area with temperatures between 55-60 degrees Fahrenheit (13-15 degrees Celsius) and a relative humidity of 75-80%. Store the sweet potatoes in a single layer or loosely packed in well-ventilated containers or crates. Avoid storing them near fruits that produce ethylene, such as apples, as this can cause them to spoil.
Proper harvesting techniques ensure that your sweet potatoes remain in excellent condition for an extended period. Whether you plan to enjoy them immediately or store them for future use, following these steps will help you make the most of your sweet potato harvest.
Now that you’ve successfully harvested and cured your sweet potatoes, you can look forward to savoring their delightful flavors in a variety of culinary creations.
Curing and Storing Sweet Potatoes
Curing and proper storage are essential steps in preserving the quality and flavor of harvested sweet potatoes. Curing allows the sweet potatoes to develop their characteristic sweetness, while correct storage conditions help to maintain their freshness. Let’s explore the process of curing and storing sweet potatoes:
- Curing: After harvesting, the sweet potato skins are delicate and can be easily damaged. Curing helps toughen the skin, heal minor cuts or scratches, and enhance the sweetness. Place the harvested sweet potatoes in a warm and humid environment, such as an airy, dark room or a greenhouse.
- Temperature and Humidity: During the curing process, maintain a temperature of around 80-85 degrees Fahrenheit (27-29 degrees Celsius) and a humidity level of 85-90%. This combination will promote healing and the conversion of starches to sugars in the tubers, resulting in a sweeter flavor.
- Curing Duration: Cure the sweet potatoes for a period of 7-14 days. The longer curing duration allows for more sugar development and better flavor. However, avoid exceeding the recommended curing period, as overly long curing can lead to sprouting and decay.
- Checking for Readiness: To check if the sweet potatoes are adequately cured, gently press the skin with your thumb. If the skin feels firm and resists indentation, they are ready for storage. If the skin is still soft or pliable, continue the curing process for a few more days.
- Storage Temperature: Once the sweet potatoes are cured, it’s time to store them. Choose a cool and dry storage area with temperatures between 55-60 degrees Fahrenheit (13-15 degrees Celsius). Avoid storing them in areas that experience drastic temperature fluctuations or are prone to moisture buildup.
- Storage Containers: Store the cured sweet potatoes in a single layer or loosely packed in well-ventilated containers or crates. Avoid stacking or piling them on top of each other, as this can lead to bruising and premature spoilage.
- Storage Environment: Maintain a relative humidity of 75-80% in the storage area. Too much humidity can cause mold or rot, while insufficient humidity can result in shriveled or dried-out sweet potatoes. Regularly check the stored potatoes for any signs of decay or damage, removing any affected ones to prevent spoilage.
- Periodic Inspection: Periodically inspect the stored sweet potatoes, discarding any that show signs of rotting, sprouting, or damage. This will help maintain the quality of the remaining potatoes and prevent the spread of decay.
By following these curing and storage guidelines, you can enjoy your homegrown sweet potatoes for several months. Remember to consume any damaged or sprouting sweet potatoes first, as they tend to have a shorter shelf life.
Now that you’re fully equipped with the knowledge of curing and storing sweet potatoes, you can savor the fruits of your labor throughout the year and incorporate their delightful flavors into your favorite recipes.
Conclusion
Growing sweet potatoes in your own edible garden can be a gratifying experience. From planting the slips to nurturing the vines, and finally, harvesting the tubers, each step is filled with anticipation and rewards. By understanding the factors that affect sweet potato harvest time, planting and caring for the plants, identifying signs of readiness, and properly curing and storing the harvested tubers, you can ensure a successful and flavorful harvest.
Remember that each sweet potato variety has its own maturation period, influenced by factors such as climate, soil temperature, fertilization, watering, and pest control. By considering these factors and monitoring the signs of readiness, you can determine the optimal time to harvest your sweet potatoes and enjoy their delicious flavor.
Proper planting and care, including choosing the right location, preparing the soil, starting slips, and managing pests and diseases, provide the foundation for healthy sweet potato growth. The careful process of harvesting, including loosening the soil, gently lifting the plants, inspecting the tubers, and curing the harvested sweet potatoes, ensures their quality and flavor.
Storing the cured sweet potatoes in cool and dry conditions helps prolong their freshness. Regularly inspecting the stored tubers and consuming any damaged or sprouting potatoes first will help maintain the quality of the remaining harvest.
So, whether you’re craving the sweetness of roasted sweet potatoes, the creaminess of a sweet potato mash, or the warmth of a comforting sweet potato soup, your homegrown harvest will provide the key ingredient for these culinary delights.
Now that you’re armed with the knowledge and techniques for successfully growing, harvesting, and storing sweet potatoes, it’s time to embark on your edible gardening journey and enjoy the bountiful rewards that come with cultivating this versatile and delicious crop.