Home>Types of Gardening>Edible Gardening>How To Prepare Potatoes For Planting
Edible Gardening
How To Prepare Potatoes For Planting
Modified: February 10, 2024
Learn the best techniques for preparing potatoes for planting, including tips for soil preparation and choosing the right variety. Start your edible gardening journey today.
(Many of the links in this article redirect to a specific reviewed product. Your purchase of these products through affiliate links helps to generate commission for Chicagolandgardening.com, at no extra cost. Learn more)
Table of Contents
Introduction
Welcome to the wonderful world of edible gardening! There is something truly satisfying about growing your own food, and one of the most versatile and beloved crops to grow in your backyard is potatoes. Whether you’re a seasoned gardener or just starting out, learning how to prepare potatoes for planting is an essential step to ensure a successful harvest.
Potatoes are not only delicious and nutritious, but they are also relatively easy to grow. With a little bit of planning and preparation, you can be enjoying your very own homegrown potatoes in no time. In this article, we will guide you through the process of selecting potato varieties, preparing seed potatoes, choosing the right planting location, and providing the necessary care for your potato plants.
Before we dive into the details, let’s take a moment to appreciate the beauty and versatility of potatoes. These underground tubers come in a wide range of colors, shapes, and sizes, making them a delightful addition to any garden. From the classic Russet potatoes to the vibrant purple and fingerling varieties, there is a potato for every taste and culinary preference.
Not only are potatoes versatile in appearance, but they are also incredibly versatile in the kitchen. You can boil them, roast them, mash them, or even use them as the base for delicious soups and stews. And with their high carbohydrate content, potatoes are a great source of energy and nutrition.
Growing your own potatoes gives you the opportunity to experience the joy of harvesting your own food and having a direct connection to the earth. It also allows you to control the growing conditions, avoid harmful pesticides, and enjoy the superior taste of freshly harvested potatoes.
So, whether you have a spacious backyard or a humble balcony, get ready to embark on a potato-growing adventure. With a little bit of time, effort, and patience, you’ll soon be reaping the rewards of your own edible garden. Let’s get started on preparing your potatoes for planting!
Selecting Potato Varieties
When it comes to selecting potato varieties for your edible garden, you have a wide array of options to choose from. Each variety has its own unique flavor, texture, and suitability for different growing conditions. Consider the following factors when selecting potato varieties:
- Climate: Different potato varieties have varying temperature and environmental preferences. Some varieties thrive in cooler climates, while others are more tolerant of heat. Research and choose varieties that are well-suited to your specific climate.
- Usage: Determine how you plan to use your potatoes. Are you looking for potatoes that are great for mashing, roasting, or boiling? Some varieties are better suited for specific culinary purposes, so choose ones that align with your cooking preferences.
- Yield: Consider the yield of each variety. Some potatoes produce a higher number of tubers, while others may have larger individual tubers. Assess your space and needs to determine which yield is most appropriate for your garden.
- Resistance to pests and diseases: Some potato varieties have developed resistance to common pests and diseases. This can be a significant factor to consider if you want to minimize the use of pesticides and ensure a healthy crop.
Popular potato varieties include the Russet, Yukon Gold, Red Pontiac, and Purple Majesty, among others. Each variety has its own unique characteristics and flavor profiles. Talk to local gardeners or consult with your local agricultural extension service to find out which varieties perform best in your region.
Additionally, consider experimenting with heirloom or specialty potato varieties to add some novelty to your garden. These unique varieties often come in vibrant colors and offer a different taste experience.
Remember, selecting the right potato varieties is the first step toward a successful potato-growing journey. Take the time to research and choose varieties that align with your preferences, growing conditions, and desired end uses. With the right selection, you’ll be well on your way to enjoying a bountiful harvest of delicious, homegrown potatoes.
Preparing Seed Potatoes
Preparing seed potatoes is a crucial step in ensuring a healthy and productive potato crop. Seed potatoes are the small tubers that you will plant in the ground to grow your potato plants. Follow these steps to properly prepare your seed potatoes:
- Select healthy seed potatoes: Choose seed potatoes that are firm and free from any signs of disease or rot. Look for certified seed potatoes, as they have been inspected and tested to ensure quality.
- Cut and cure the seed potatoes: If your seed potatoes are on the larger side, you can cut them into smaller pieces, making sure each piece has at least two or three eyes (small indentations) from which the new plants will sprout. After cutting, allow the cut surfaces to dry and form a callus-like layer. This is called “curing” and helps prevent rot and disease when planted.
- Prevent disease: To further reduce the risk of diseases, you can dust the cut surfaces of the seed potatoes with powdered sulfur or a fungicide. This helps to protect the potatoes from soil-borne diseases.
- Pre-sprout (chit) the seed potatoes: Pre-sprouting, also known as chitting, is an optional step but can help speed up the initial growth of your potato plants. Place the cut seed potatoes in a cool, well-ventilated area with indirect light. Allow sprouts to grow to about 1-inch in length before planting.
By properly preparing your seed potatoes, you can increase the chances of a successful potato crop. Cutting and curing the seed potatoes help them develop a protective layer and promote healthy growth. Pre-sprouting can give your plants a head start and potentially lead to earlier and more vigorous growth.
It’s important to note that some gardeners prefer to plant whole, uncut seed potatoes to avoid any potential risk of disease or rot. If you decide to plant them whole, make sure to select small- to medium-sized seed potatoes and avoid any that show signs of damage or disease.
Remember, the quality of your seed potatoes plays a significant role in the overall success of your potato crop. Take the time to carefully select, prepare, and pre-sprout your seed potatoes to give your plants the best possible start. With proper preparation, you’ll be well on your way to growing a bountiful harvest of delicious potatoes in your edible garden.
Chitting Potatoes
Chitting, or pre-sprouting, is a technique used to encourage the growth of sprouts on your seed potatoes before planting them in the ground. While not a necessary step, chitting can give your potato plants a head start and potentially lead to earlier and more vigorous growth. Here’s how to chit your potatoes:
- Select the right potatoes: Choose seed potatoes that are clean, healthy, and have a good number of eyes (small indentations) from which the sprouts will emerge. Avoid using seed potatoes that are shriveled, damaged, or show signs of disease.
- Prepare a chitting space: Find a cool, well-ventilated area with indirect light to set up your chitting space. A bright windowsill or a cool room away from direct sunlight are ideal locations. Ensure that the area is clean and free from excess moisture.
- Position the potatoes: Place the seed potatoes in an upright position with the end that has the most eyes facing upward. You can use egg cartons, trays, or specialized chitting trays to keep the potatoes organized and prevent them from rolling around.
- Allow the sprouts to grow: In the chitting space, the potatoes will begin to develop sprouts. Keep an eye on their progress and choose the strongest sprouts to become the main shoots. Remove any weak or damaged sprouts to promote stronger growth.
- Protect the sprouts: Be careful not to expose the sprouts to direct sunlight, as this can cause them to become weak and prone to breaking. Maintain a cool and airy environment to prevent the sprouts from becoming too leggy and weak.
- Timing is important: The duration of chitting depends on various factors, including the potato variety and your growing zone. Typically, chitting takes around 4-6 weeks before the sprouts are ready for planting. Aim to start chitting 4-6 weeks before the last frost date in your region.
Chitting potatoes can be an exciting and rewarding process, especially for eager gardeners who can’t wait to get their hands dirty. By encouraging the growth of sprouts before planting, you give your potatoes a head start and increase the chances of a successful crop.
Remember to handle your chitted potatoes with care when it is time to plant them, as the sprouts can be delicate. Plant the potatoes when the sprouts are sturdy and about 1 inch in length. This will ensure that the sprouts have enough energy to push through the soil and continue growing.
Chitting is optional, but it can be a fun way to kick-start your potato-growing journey and potentially enjoy an earlier harvest. So set up your chitting space, select your best seed potatoes, and watch with anticipation as the sprouts emerge. Soon, you’ll be ready to plant your chitted potatoes and watch them flourish into healthy, productive plants in your edible garden.
Choosing the Planting Location
Choosing the right planting location is crucial for the success of your potato plants. Potatoes require specific conditions to thrive and produce a bountiful harvest. Consider the following factors when selecting a planting location for your potatoes:
- Sunlight: Choose a location that receives a minimum of 6 to 8 hours of direct sunlight each day. Potatoes thrive in full sun, which helps promote strong growth and increased tuber production.
- Soil drainage: Potatoes prefer well-draining soil to avoid waterlogged conditions, which can lead to root rot and other diseases. Avoid areas with heavy clay soil or locations prone to standing water. If your soil is heavy, consider improving drainage by adding organic matter or creating raised beds.
- Soil pH: Potatoes prefer a slightly acidic to neutral soil pH, ranging from 5.0 to 7.0. Test your soil’s pH level and amend the soil if necessary to create an optimal growing environment for your potatoes.
- Space availability: Potatoes are known for their sprawling growth habit, so choose a location that has enough space for the plants to spread out. This will allow good air circulation around the foliage and help prevent the development of fungal diseases.
- Companion plants: Consider planting potatoes near companion plants that can benefit them. For example, planting potatoes alongside beans can help provide nitrogen fixation, which is beneficial for potato growth. Conversely, avoid planting potatoes near crops such as tomatoes, peppers, or eggplants, as they belong to the same family (Solanaceae) and can be susceptible to similar pests and diseases.
- Convenience: Select a location that is convenient for maintenance tasks such as watering, fertilizing, and harvesting. Choosing a location that is easily accessible will make it easier for you to care for your potato plants throughout the growing season.
Once you have identified a suitable planting location, take the time to prepare the soil by removing any weeds, rocks, or debris, and incorporating organic matter such as compost or well-rotted manure. This will improve soil fertility and structure, providing a favorable environment for your potato plants.
By carefully choosing the planting location for your potatoes, you set the stage for their successful growth and development. Remember, a sunny location with well-draining soil and adequate space is essential for healthy and productive potato plants. Take these factors into consideration, and you’ll be well on your way to growing a thriving potato crop in your edible garden.
Soil Preparation
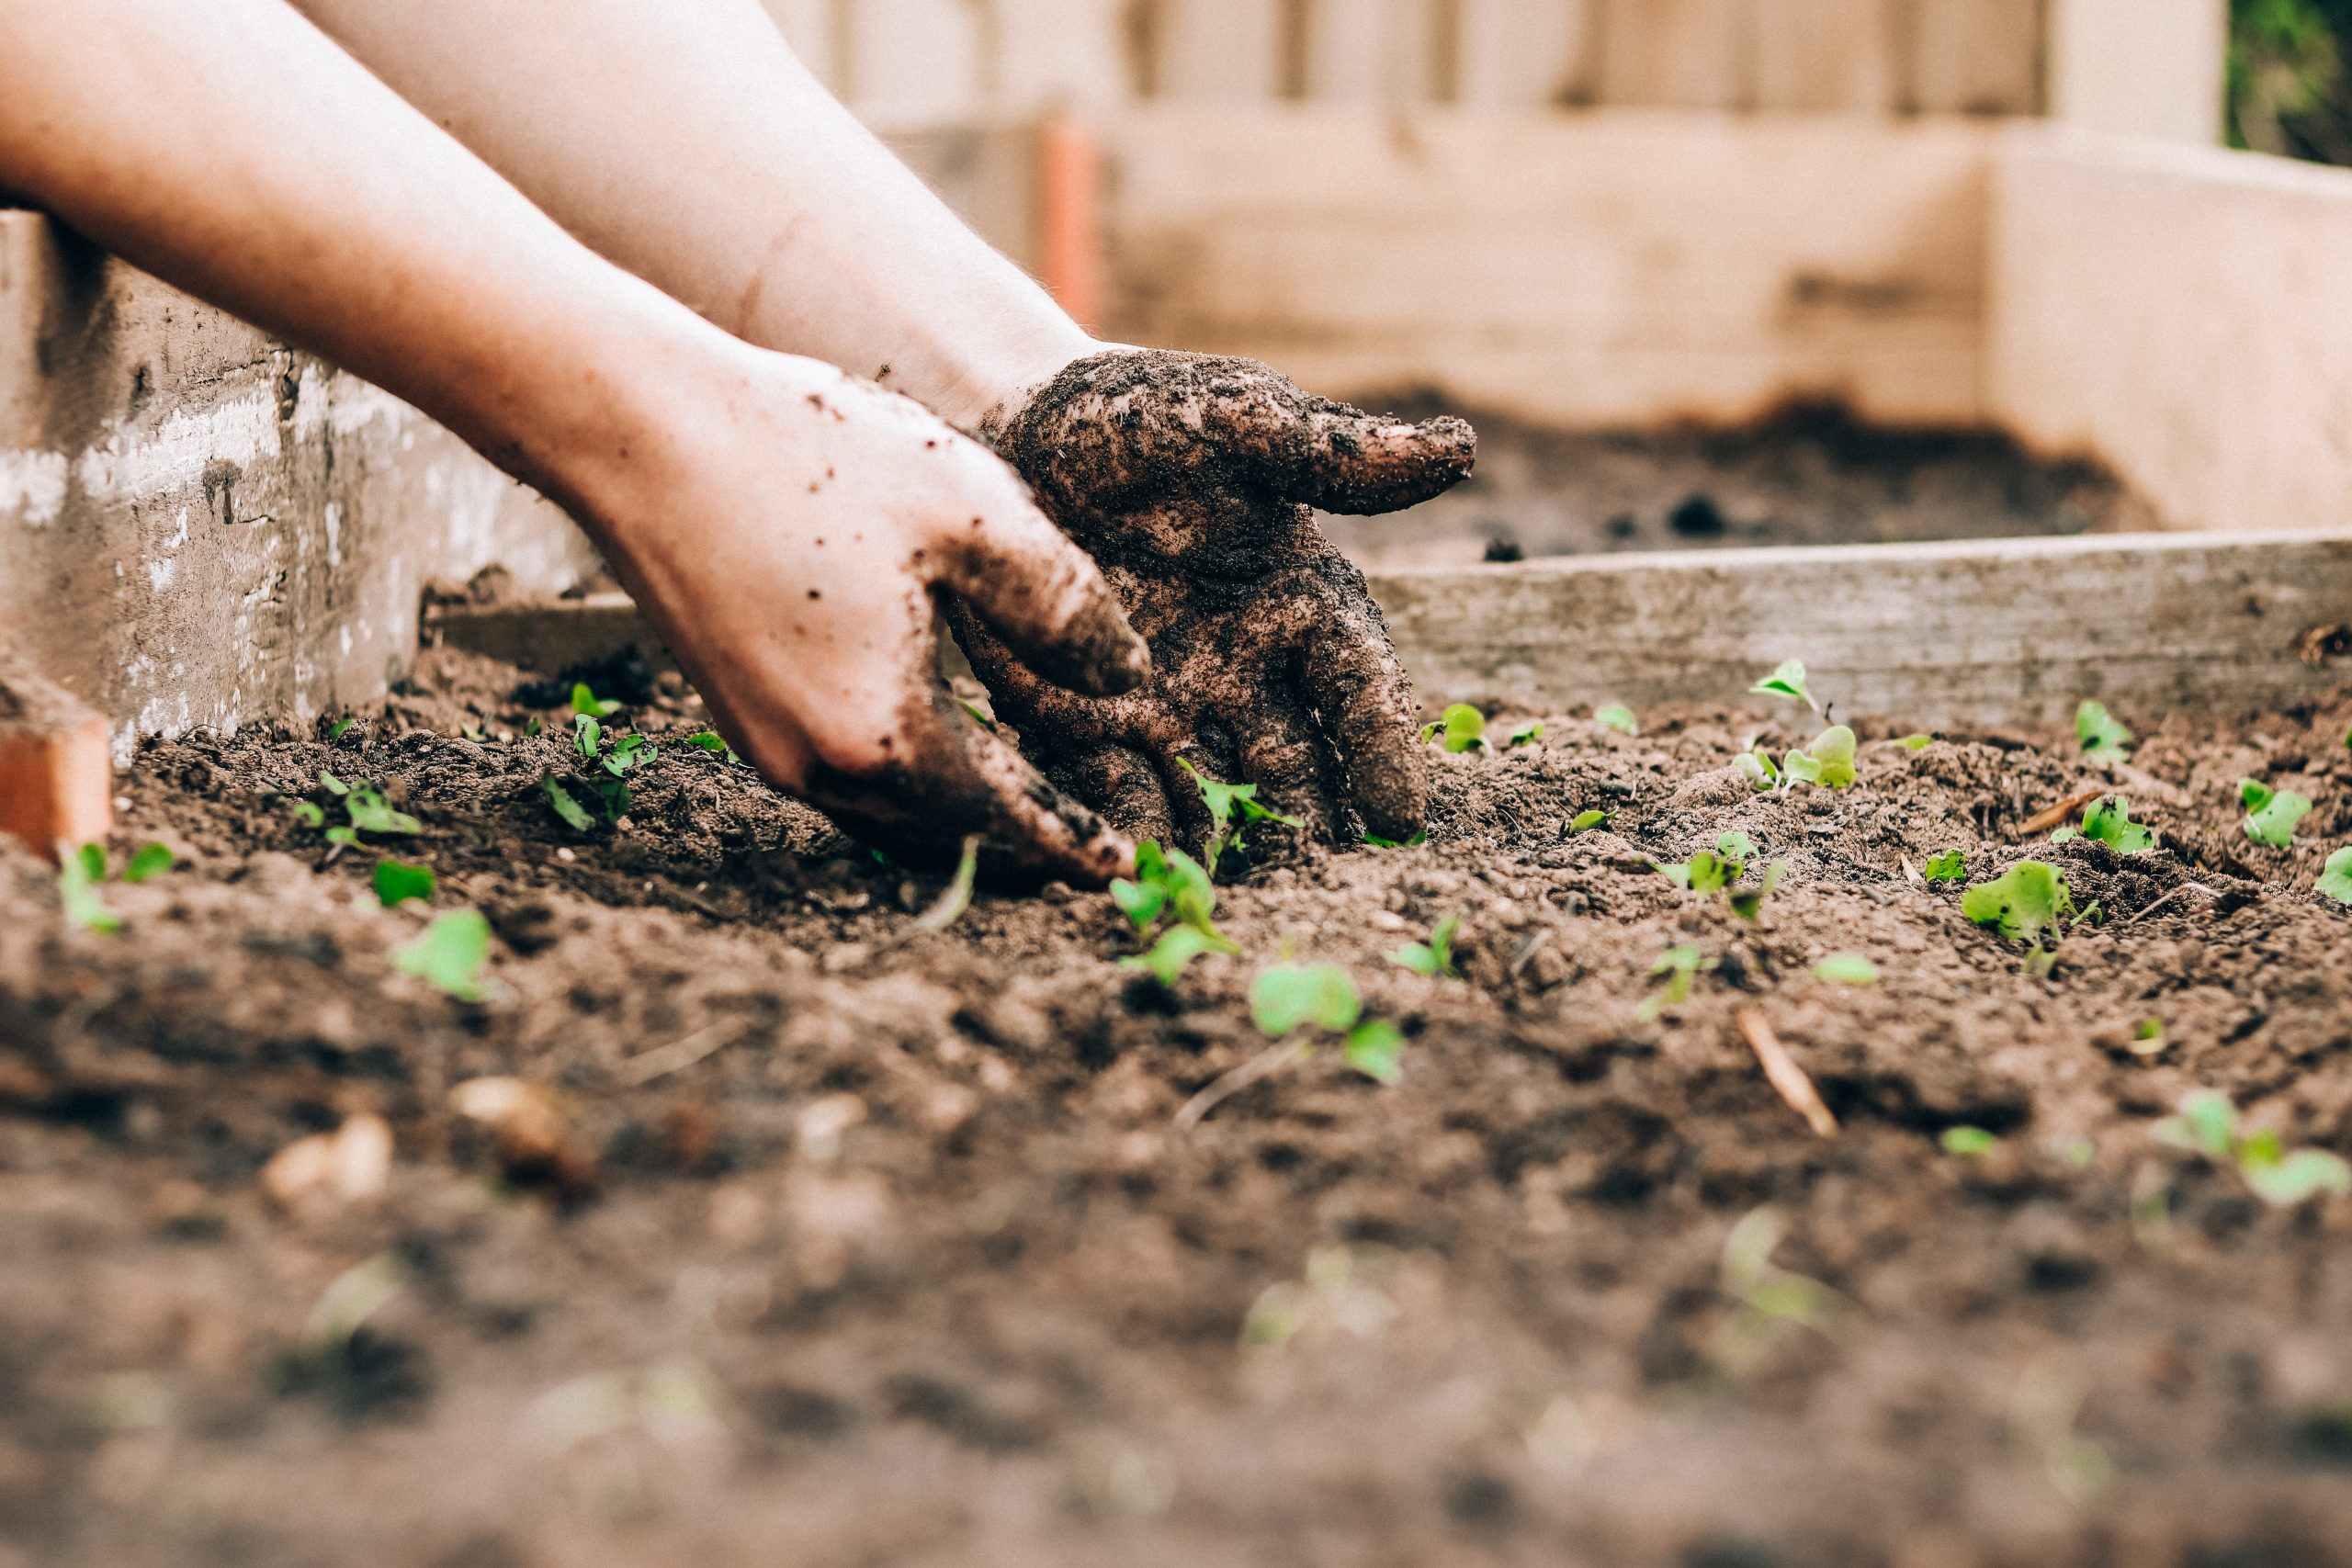
Proper soil preparation is essential for growing healthy and productive potato plants. Potatoes thrive in loose, well-draining soil that is rich in organic matter and nutrients. Follow these steps to prepare the soil for your potato garden:
- Clear the area: Begin by removing any weeds, rocks, or debris from the planting area. Clearing the area helps prevent competition for nutrients and allows your potato plants to grow without hindrance.
- Test the soil: Conduct a soil test to determine its pH level and nutrient composition. This will provide valuable information on any necessary amendments needed to optimize soil fertility and create ideal growing conditions for your potatoes.
- Amend the soil: Based on the results of your soil test, amend the soil as needed. If the pH is too low (acidic), add lime to raise it. Conversely, if the pH is too high (alkaline), add sulfur or other soil acidifiers to lower it. Incorporate well-rotted compost or organic matter into the soil to improve its structure, drainage, and nutrient content.
- Loosen the soil: Use a garden fork or tiller to loosen and aerate the soil. This improves drainage and allows the potato roots to penetrate easily. Avoid over-tilling, as excessive disturbance can damage the soil structure.
- Consider raised beds or containers: If you have heavy clay soil or poor drainage, consider creating raised beds or growing potatoes in containers. This allows for better control of soil moisture and reduces the risk of waterlogging.
- Apply organic fertilizers: Prior to planting, apply a balanced organic fertilizer, such as well-rotted manure or compost, to provide essential nutrients for your potato plants. Follow the manufacturer’s instructions for application rates.
Remember, potatoes are heavy feeders, and nutrient deficiencies can result in poor growth and reduced yields. By preparing the soil and ensuring it is nutrient-rich and well-draining, you set the foundation for your potato plants to thrive and produce a bountiful harvest.
Throughout the growing season, maintain good soil moisture by providing regular irrigation, especially during dry periods. Mulching the soil with organic matter can help retain moisture, suppress weed growth, and regulate soil temperature.
By dedicating time and effort to properly prepare your soil, you create an optimal growing environment for your potato plants. With nutrient-rich, well-draining soil, your potatoes will have the best chance to develop strong, healthy roots and produce a plentiful crop for your edible garden.
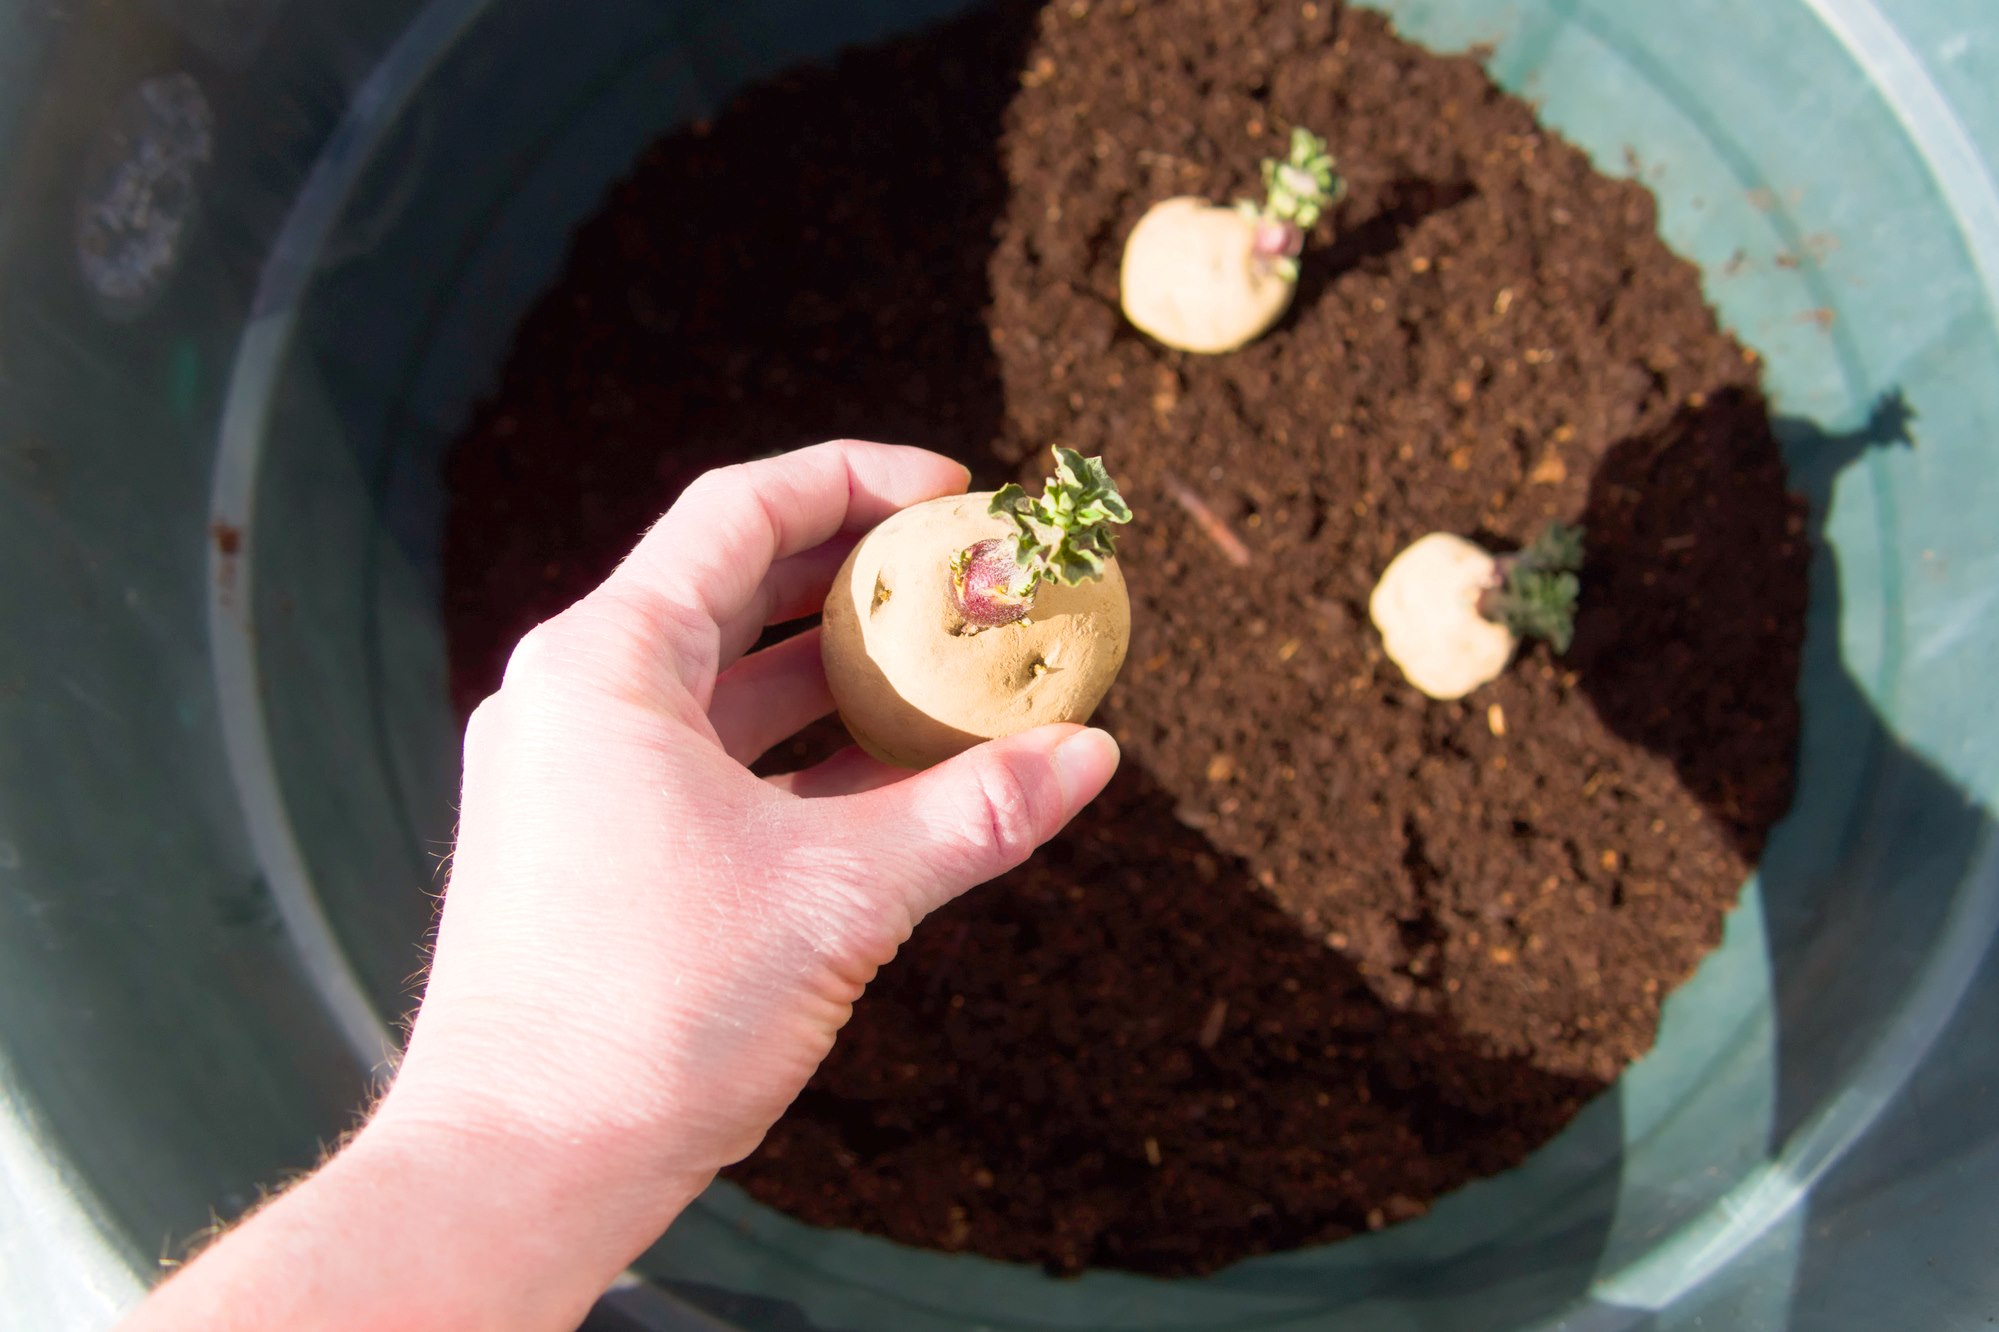
Planting Potatoes
Planting potatoes is an exciting step in the process of growing your own delicious tubers. Follow these guidelines to ensure optimal planting and give your potato plants a strong start:
- Timing: Plant your potatoes when the soil has warmed up and the threat of frost has passed. The ideal soil temperature for planting is around 45 to 55°F (7 to 13°C). Planting too early, when the soil is still cold, can delay sprouting and lead to poor growth.
- Spacing: Dig trenches or furrows that are 4 to 6 inches (10 to 15 cm) deep and about 2 to 3 feet (61 to 91 cm) apart. Space your potato seed pieces about 12 to 15 inches (30 to 38 cm) apart within the trench. This provides enough room for the plants to grow and spread out.
- Seed potato placement: Place the seed potatoes into the trench with the “eyes” or sprouted side facing upwards. Ensure that each piece is well-spaced and not touching each other or the sides of the trench.
- Cover the seed potatoes: Gently backfill the soil over the seed potatoes, covering them with about 2 to 3 inches (5 to 7 cm) of soil. Avoid compacting the soil too much, as this can restrict the growth of the plants.
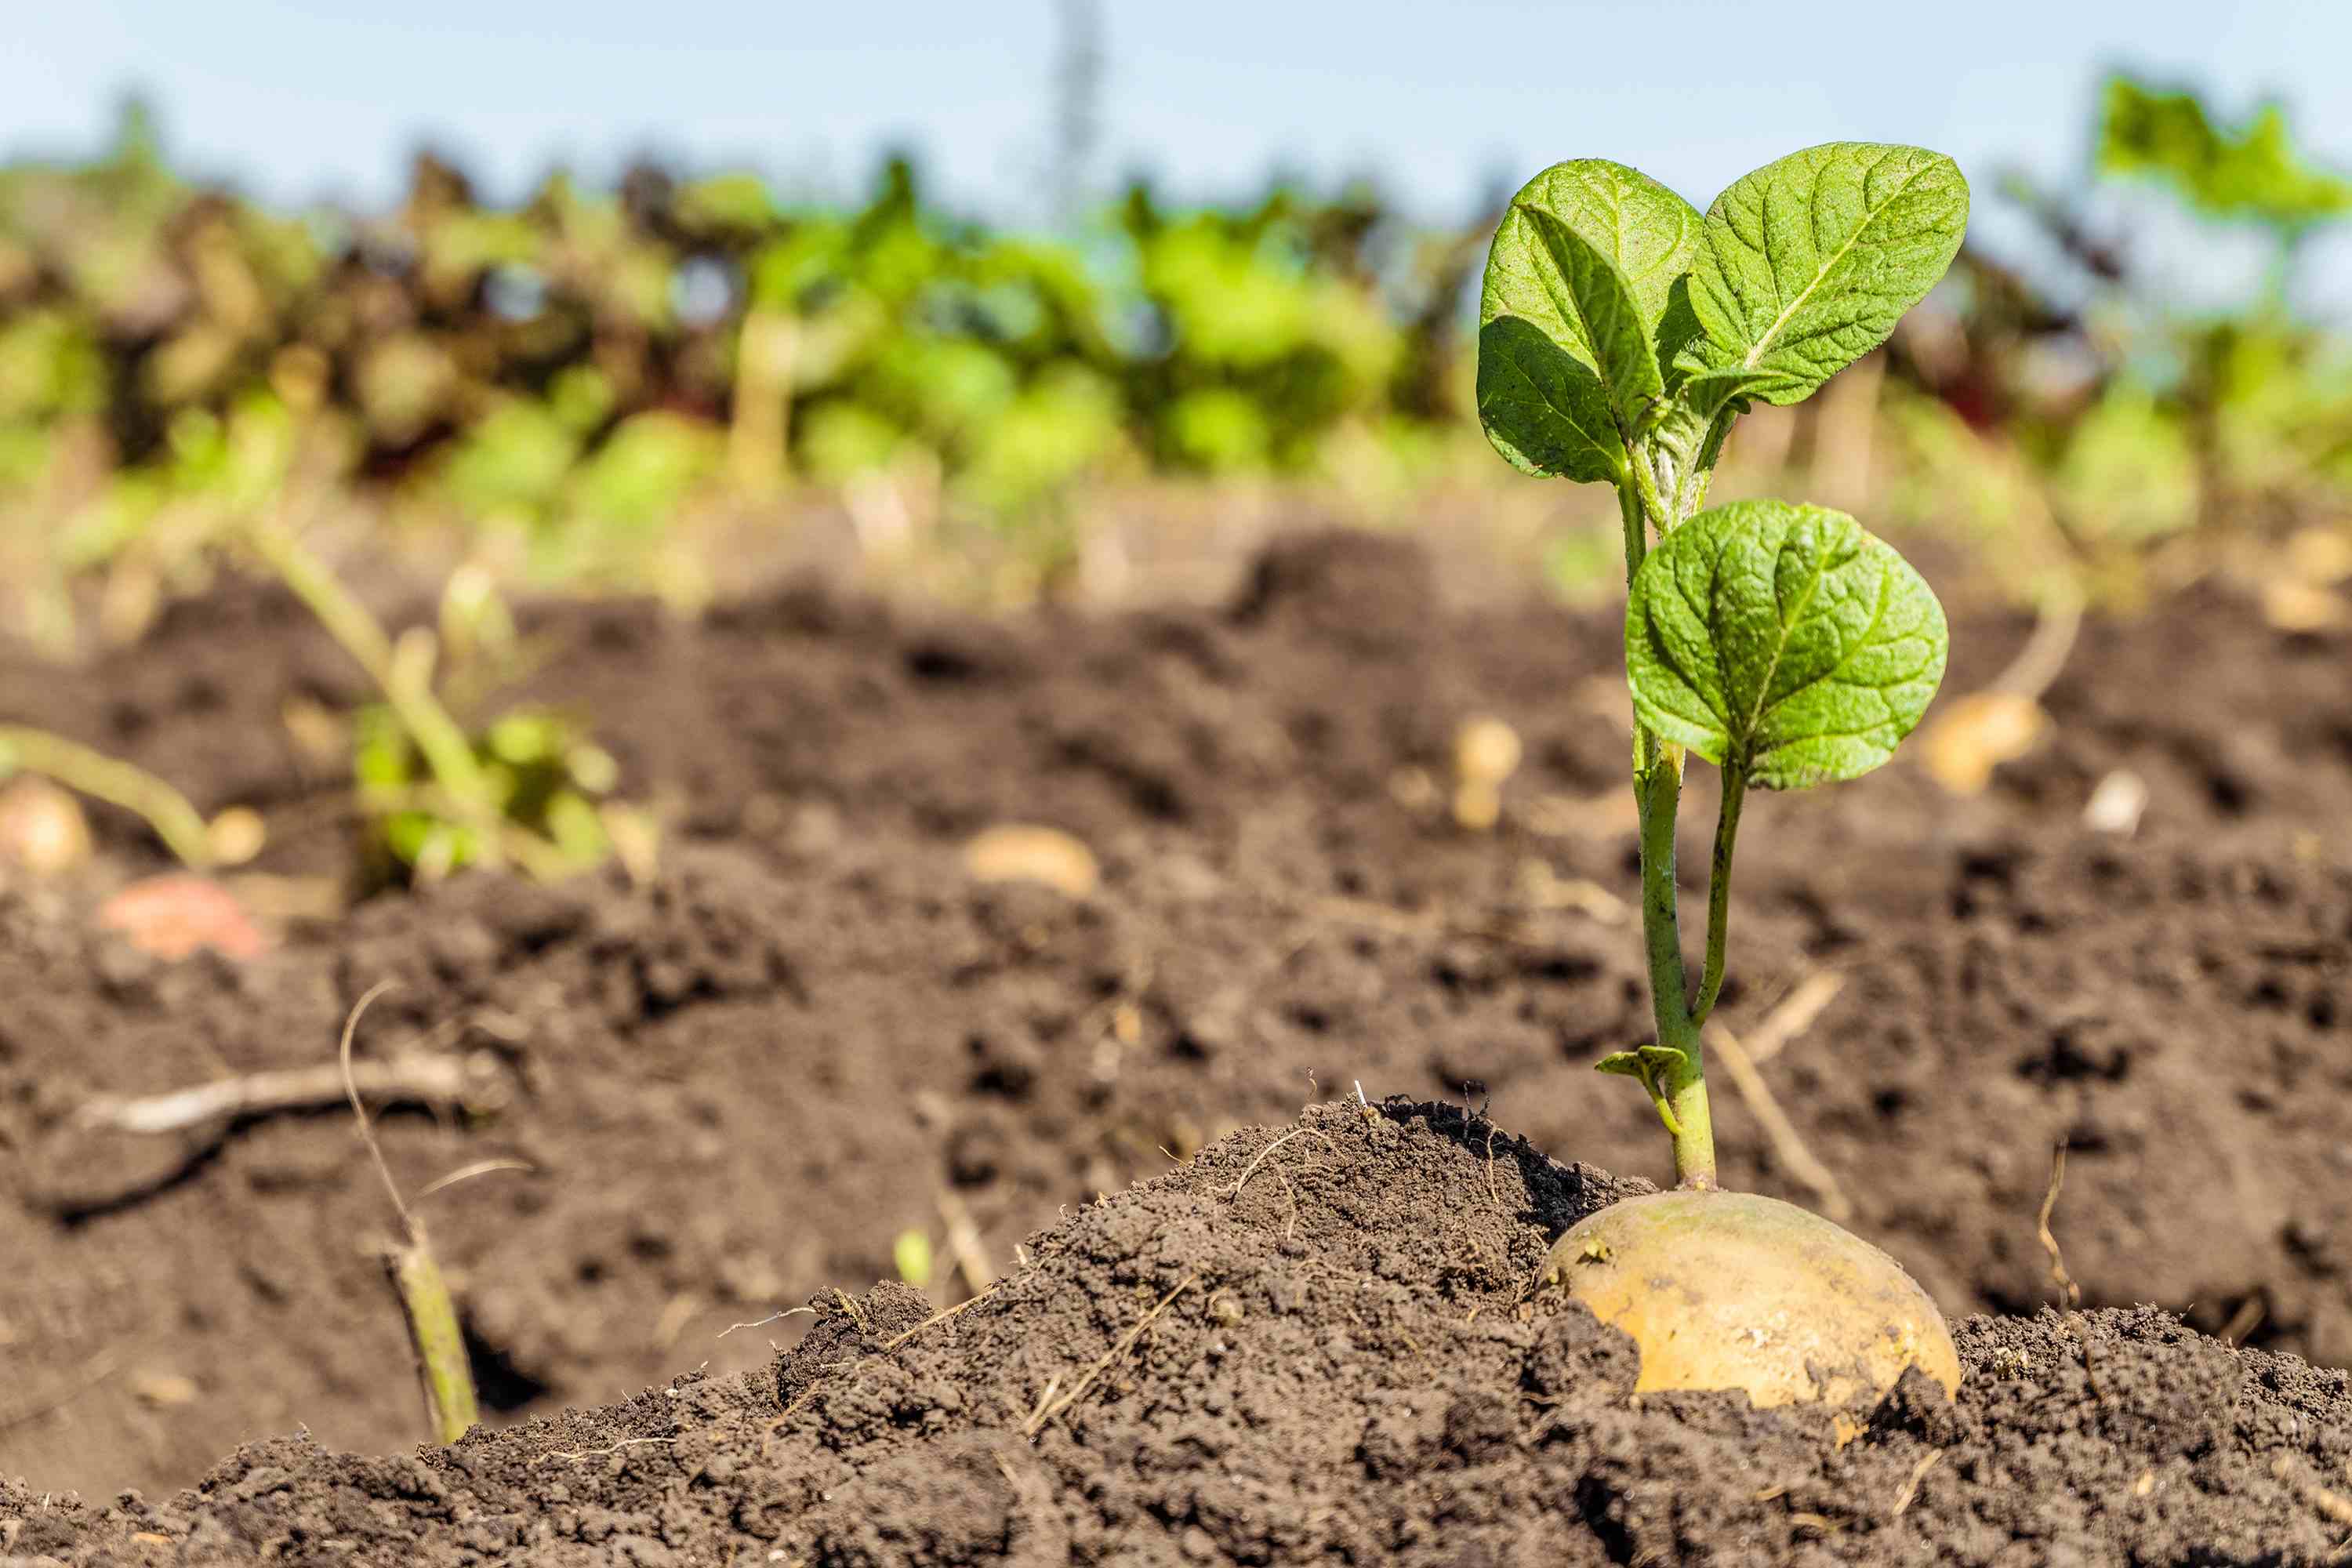
- Hilling: As the potato plants grow, continue to mound soil around the base of the plants to create raised hills. This helps to promote additional tuber growth and prevents sunlight from reaching the developing tubers, which can cause them to turn green and become toxic.
- Watering: After planting, give the soil a thorough watering to settle it around the seed potatoes. Throughout the growing season, keep the soil consistently moist, but not waterlogged. Avoid overwatering, as this can lead to rot and disease.
It’s important to note that some gardeners prefer to cut larger seed potatoes into smaller pieces before planting, ensuring that each piece has at least two or three eyes. However, planting whole, uncut seed potatoes is also a viable option.
Remember to label your rows or hills, so you can keep track of the potato varieties planted. This will come in handy when it’s time to harvest.
By following these steps, you’ll give your potato plants the best start. With the right timing, spacing, and proper care, your potato plants will grow vigorously, producing ample foliage and eventually yielding a satisfying harvest of homegrown, delicious potatoes.
Watering and Mulching
Watering and mulching are essential aspects of proper potato plant care. These practices help maintain soil moisture, regulate temperature, suppress weed growth, and promote healthy potato plant growth. Follow these tips for watering and mulching your potato plants:
- Watering: Potatoes need consistent moisture throughout the growing season. Water the plants deeply, ensuring that the soil is evenly moist. Aim to provide about 1 to 2 inches (2.5 to 5 cm) of water per week, either through rainfall or irrigation.
- Monitor soil moisture: Check the soil moisture level regularly by sticking your finger about an inch (2.5 cm) into the soil. If it feels dry, it’s time to water. Be mindful not to overwater, as this can lead to rot and disease. Avoid letting the soil dry out completely between waterings.
- Watering frequency: Rather than frequent shallow watering, focus on deep watering less often. This encourages the potato plant roots to grow deeper into the soil, making them more resilient and better able to access water during dry periods.
- Mulching: Applying a layer of organic mulch around the potato plants helps maintain soil moisture, prevent weeds, and regulate soil temperature. Use materials such as straw, shredded leaves, or grass clippings. Apply the mulch when the plants are about 6 inches (15 cm) tall, making sure to leave space around the stems to prevent rot.
- Regularly check for moisture: Lift a section of the mulch occasionally to check the soil moisture level. Adjust your watering schedule as needed based on the moisture content of the soil.
- Avoid excessive moisture: While potatoes require consistent moisture, it’s crucial to strike a balance and avoid waterlogged conditions. Excessive moisture can lead to root rot and other diseases. Ensure the soil has good drainage and avoid overwatering your plants.
- Watering during hot weather: During hot summer months, pay extra attention to watering as the soil can dry out more quickly. Consider watering in the early morning or evening to minimize water loss to evaporation.
Watering and mulching are integral to maintaining healthy and productive potato plants. By providing adequate moisture and using organic mulch as a protective layer, you can create an optimal growing environment and help your plants thrive throughout the growing season.
Remember to monitor soil moisture regularly and adjust your watering schedule accordingly. With proper watering techniques and the benefits of mulching, you’ll ensure your potato plants have the moisture they need for robust growth and a successful harvest.
Fertilizing Potatoes
Fertilizing is an important aspect of potato plant care, as it ensures that the plants receive the necessary nutrients for healthy growth and bountiful yields. By providing the right balance of nutrients, you can enhance the overall health and productivity of your potato plants. Consider the following tips for fertilizing your potatoes:
- Soil testing: Before applying any fertilizer, test your soil to determine its nutrient composition. This will help you understand the specific needs of your soil and avoid over- or under-fertilization. Based on the results, you can choose the appropriate fertilizer or make targeted amendments.
- Timing: Potatoes have specific nutrient requirements at different stages of growth. Apply fertilizer based on the plant’s development. Generally, it’s beneficial to apply fertilizer before planting and again during early growth stages.
- Pre-planting fertilizer: Prior to planting, incorporate well-rotted compost or a balanced organic fertilizer into the soil. This helps provide a good foundation of nutrients for the growing potato plants.
- Side-dressing: Once your potato plants reach a height of about 6 inches (15 cm), side-dress them with additional fertilizer. Use a balanced organic fertilizer, following the recommended application rates. Avoid directly contacting the foliage with the fertilizer to prevent leaf burn.
- Organic options: Organic fertilizers, such as compost, well-rotted manure, and fish emulsion, are excellent choices for feeding your potato plants. These organic options release nutrients slowly and improve soil health over time.
- Avoid excessive nitrogen: While potatoes require nitrogen for vigorous foliage growth, excessive nitrogen can lead to lush foliage but poor tuber development. Ensure the fertilizer you choose has a balanced blend of nitrogen, phosphorus, and potassium.
- Consider foliar feeding: In addition to soil fertilizing, you can supplement your potato plants’ nutrient intake by occasionally spraying them with a diluted liquid fertilizer. This foliar feeding method provides a direct supply of nutrients to the leaves and can enhance plant health.
- Monitor plant response: Keep an eye on your potato plants’ overall health and growth. If you notice signs of nutrient deficiencies, such as yellowing leaves or stunted growth, adjust your fertilization practices accordingly.
Remember, it’s important to strike a balance when fertilizing potatoes. Over-fertilization can result in excessive foliage growth at the expense of tuber production, while under-fertilization can lead to poor plant health and diminished yields. Follow the fertilizer manufacturer’s guidelines and be mindful of the specific needs of your soil and plants.
Fertilizing your potatoes appropriately can maximize the nutrient availability for healthy growth, vibrant foliage, and a plentiful harvest of delicious tubers. With the right nutrients and a well-balanced approach, your potato plants will thrive and reward you with a bountiful crop.
Controlling Weeds and Pests
Effective weed and pest control is crucial for the health and productivity of your potato plants. Weeds compete for nutrients, water, and sunlight, while pests can damage the foliage and tubers. By implementing preventive measures and using appropriate control methods, you can minimize the impact of weeds and pests on your potato crop. Consider the following tips for controlling weeds and pests:
- Mulching: Apply a layer of organic mulch, such as straw or shredded leaves, around your potato plants. Mulching helps suppress weed growth by blocking sunlight and preventing weed seeds from germinating. Additionally, it helps maintain soil moisture and regulate soil temperature.
- Hand weeding: Regularly inspect your potato plants and remove any weeds manually. Be careful not to disturb the shallow potato roots when weeding. Hand weeding is especially important during the early stages of potato growth, when the plants are most vulnerable to competition from weeds.
- Cultivation: Use a shallow hoe or cultivator to lightly cultivate the soil around your potato plants. This can help disrupt weed growth and loosen the soil, making it easier to pull out any emerging weeds. Take care not to cultivate too deeply, as this can damage the potato roots.
- Organic weed control: Consider using organic weed control methods, such as vinegar or boiling water, to spot-treat stubborn weeds. These natural alternatives can be effective in controlling weeds without the use of synthetic herbicides.
- Monitor for pests: Regularly inspect your potato plants for signs of pests. Common potato pests include Colorado potato beetles, aphids, and potato tuber moths. Look for chewed leaves, yellowing foliage, or damage to the tubers. Early detection allows for prompt intervention.
- Natural pest control: Encourage natural predators, such as ladybugs and lacewings, which feed on pests like aphids. Additionally, companion planting with pest-repellent plants, such as marigolds or basil, can help deter some pests.
- Organic pest control: If pest populations become a concern, consider using organic pest control methods, such as neem oil or insecticidal soap. These options are less harmful to beneficial insects and can effectively control pests when used according to the product instructions.
It’s important to strike a balance between controlling weeds and pests while minimizing harm to the environment and beneficial organisms. Integrated Pest Management (IPM) practices emphasize prevention, monitoring, and the use of least-toxic control methods. By implementing a holistic approach to weed and pest control, you can maintain a healthy potato crop while respecting the ecosystem.
Remember to practice good garden hygiene by removing any diseased plant materials and properly disposing of them. This helps reduce the risk of pests and diseases spreading to your potato plants and other garden crops.
By implementing a proactive approach to weed and pest control, you can create an environment that promotes healthy potato plant growth and minimizes the impact of weeds and pests on your crop.
Monitoring Potato Growth
Monitoring the growth of your potato plants is essential for optimizing their health and productivity. By keeping a close eye on their progress, you can identify any issues early on and take appropriate action. Here are some key aspects to monitor as your potatoes grow:
- Growth rate: Observe how quickly your potato plants are growing. They should show steady growth and develop lush foliage as they mature. Slow or stunted growth may indicate nutrient deficiencies, improper watering, or other environmental factors that need attention.
- Foliage health: Inspect the health of your potato plant’s foliage. Look for signs of yellowing, spotting, or wilting leaves, which may indicate nutrient deficiencies, disease, or pest infestation. Healthy foliage is a good indication of overall plant health.
- Flowering: Potato plants produce small white or purple flowers, which can signal that tuber formation is occurring. Flowering is a positive sign, but keep in mind that not all potato varieties produce flowers.
- Potato tuber development: As your potato plants grow, monitor the development of the tubers beneath the soil. Generally, tuber growth occurs about 8-10 weeks after planting, depending on the potato variety. Gently dig around the base of the plants to check the size and number of tubers forming.
- Pest and disease presence: Regularly inspect your potato plants for signs of pests or diseases. Look for chewed leaves, eggs or larvae on the foliage, or any unusual discoloration or lesions. Early detection and intervention can help prevent pests or diseases from causing significant damage to your crop.
- Environmental conditions: Pay attention to the environmental factors that may impact your potato plants, such as temperature, rainfall, and humidity. Extreme weather conditions, such as excessive heat or prolonged periods of rain, can affect plant growth and may require adjustments to your care routine.
Keeping a gardening journal or taking photos of your potato plants at different stages can help track their growth and identify trends or changes over time. This information can be valuable for future reference or troubleshooting any issues that may arise.
As you monitor your potato plants, remember that every variety has its own growth characteristics and timeline. Understanding the specific requirements and behavior of the potato variety you’re growing can help you accurately assess their progress and respond accordingly.
Regular monitoring allows you to address any problems promptly, whether it’s adjusting watering routines, fertilizing, or implementing pest control measures. By staying vigilant and actively involved in the growth of your potato plants, you can maximize their potential and enjoy a successful harvest.
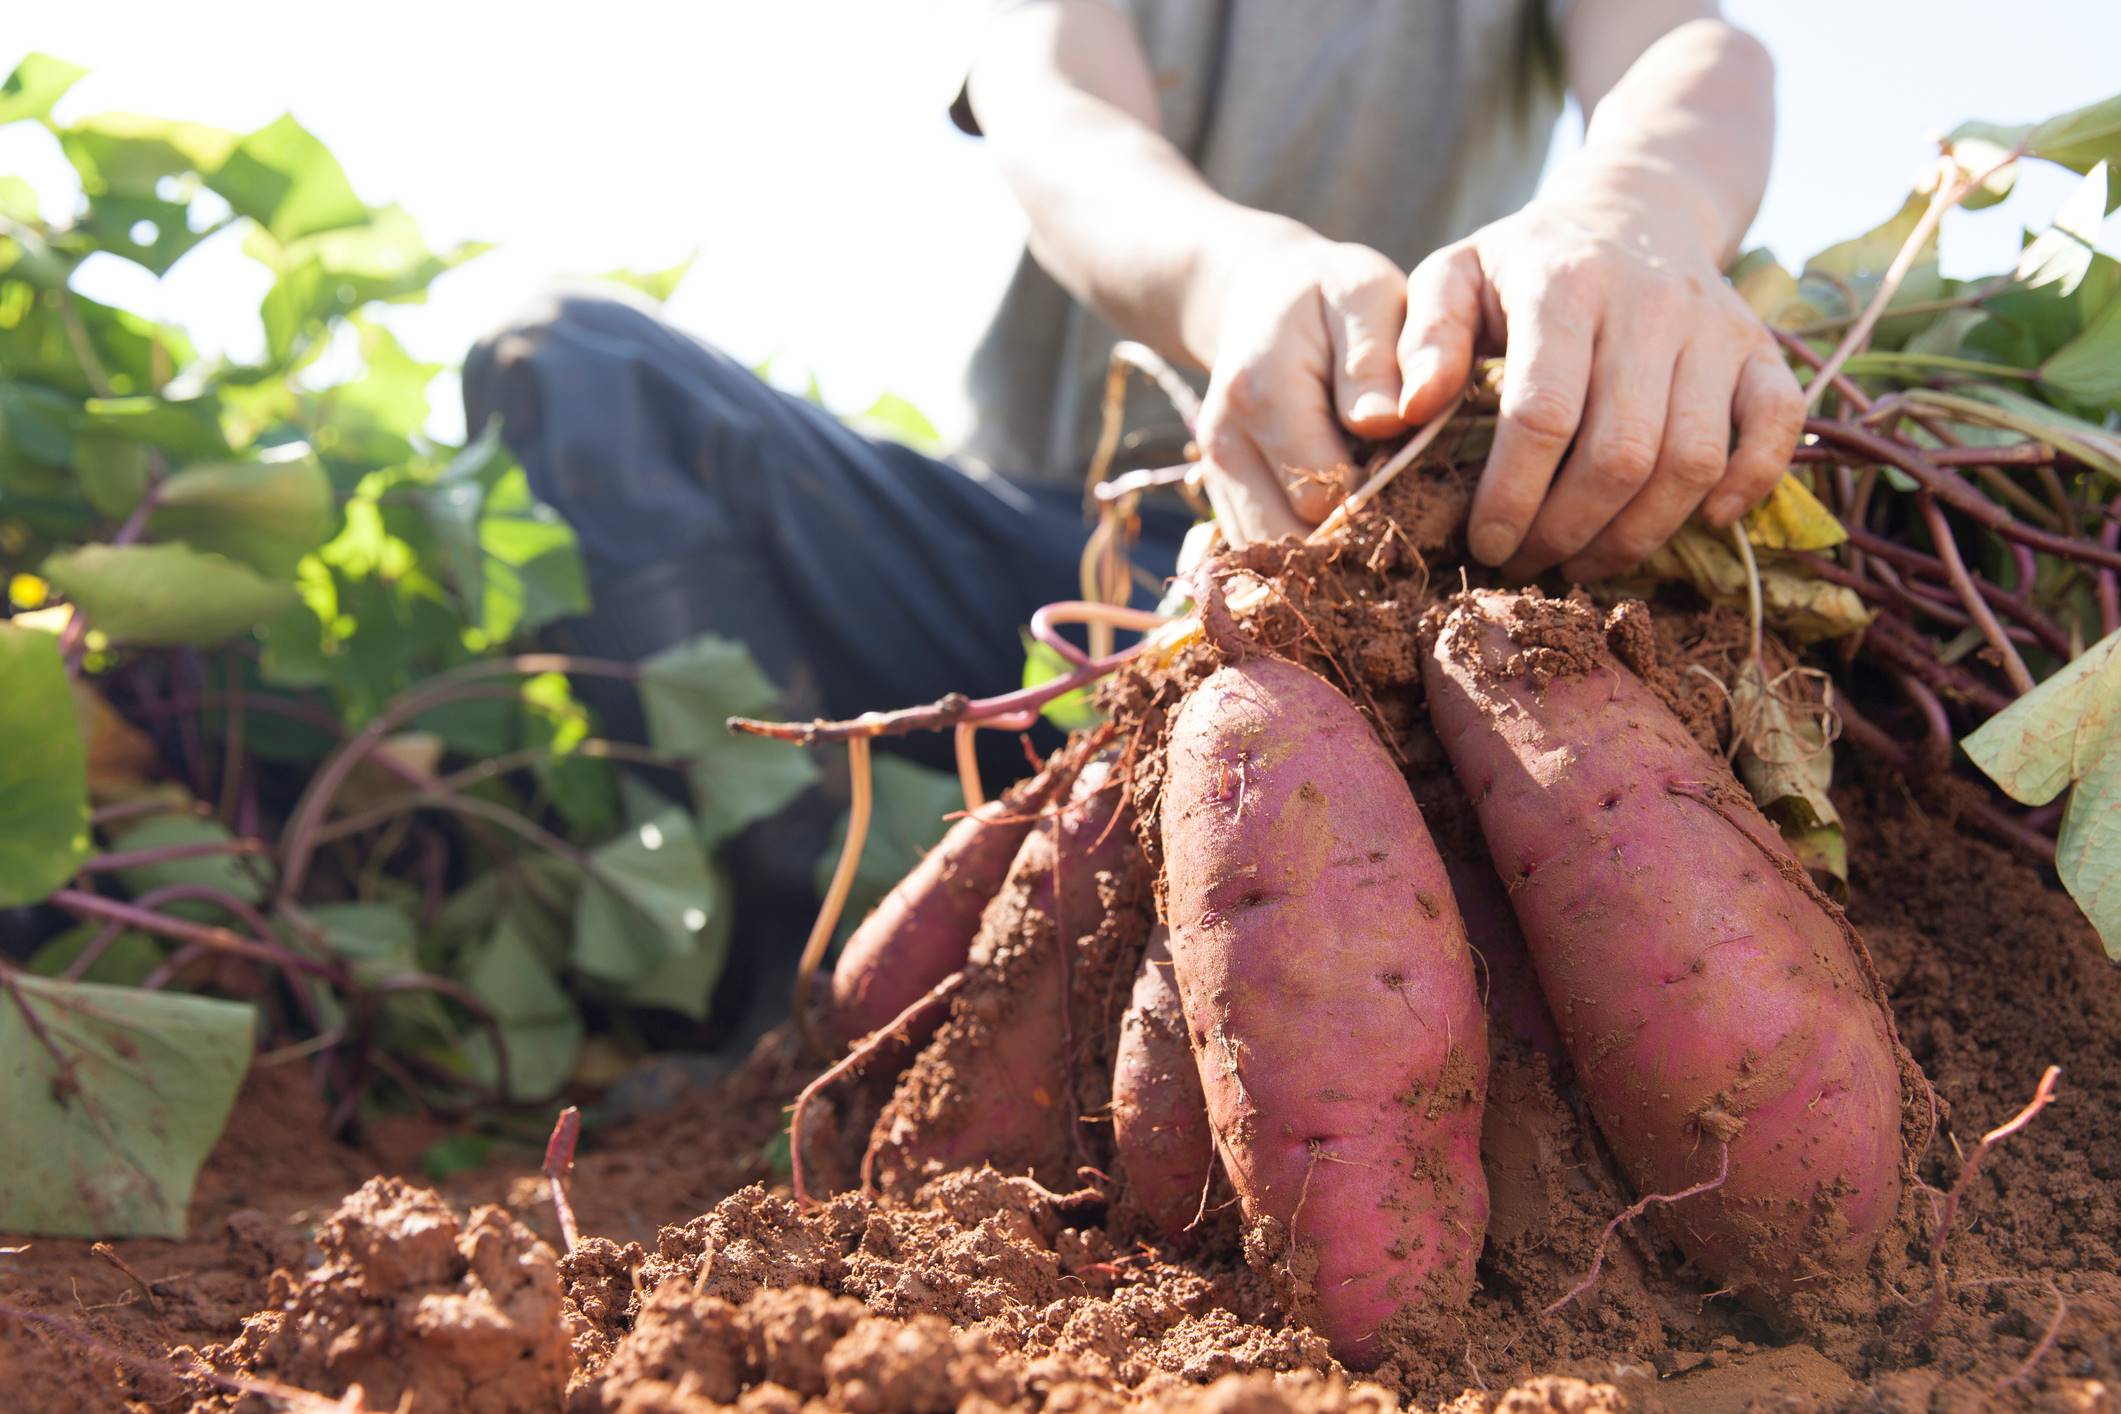
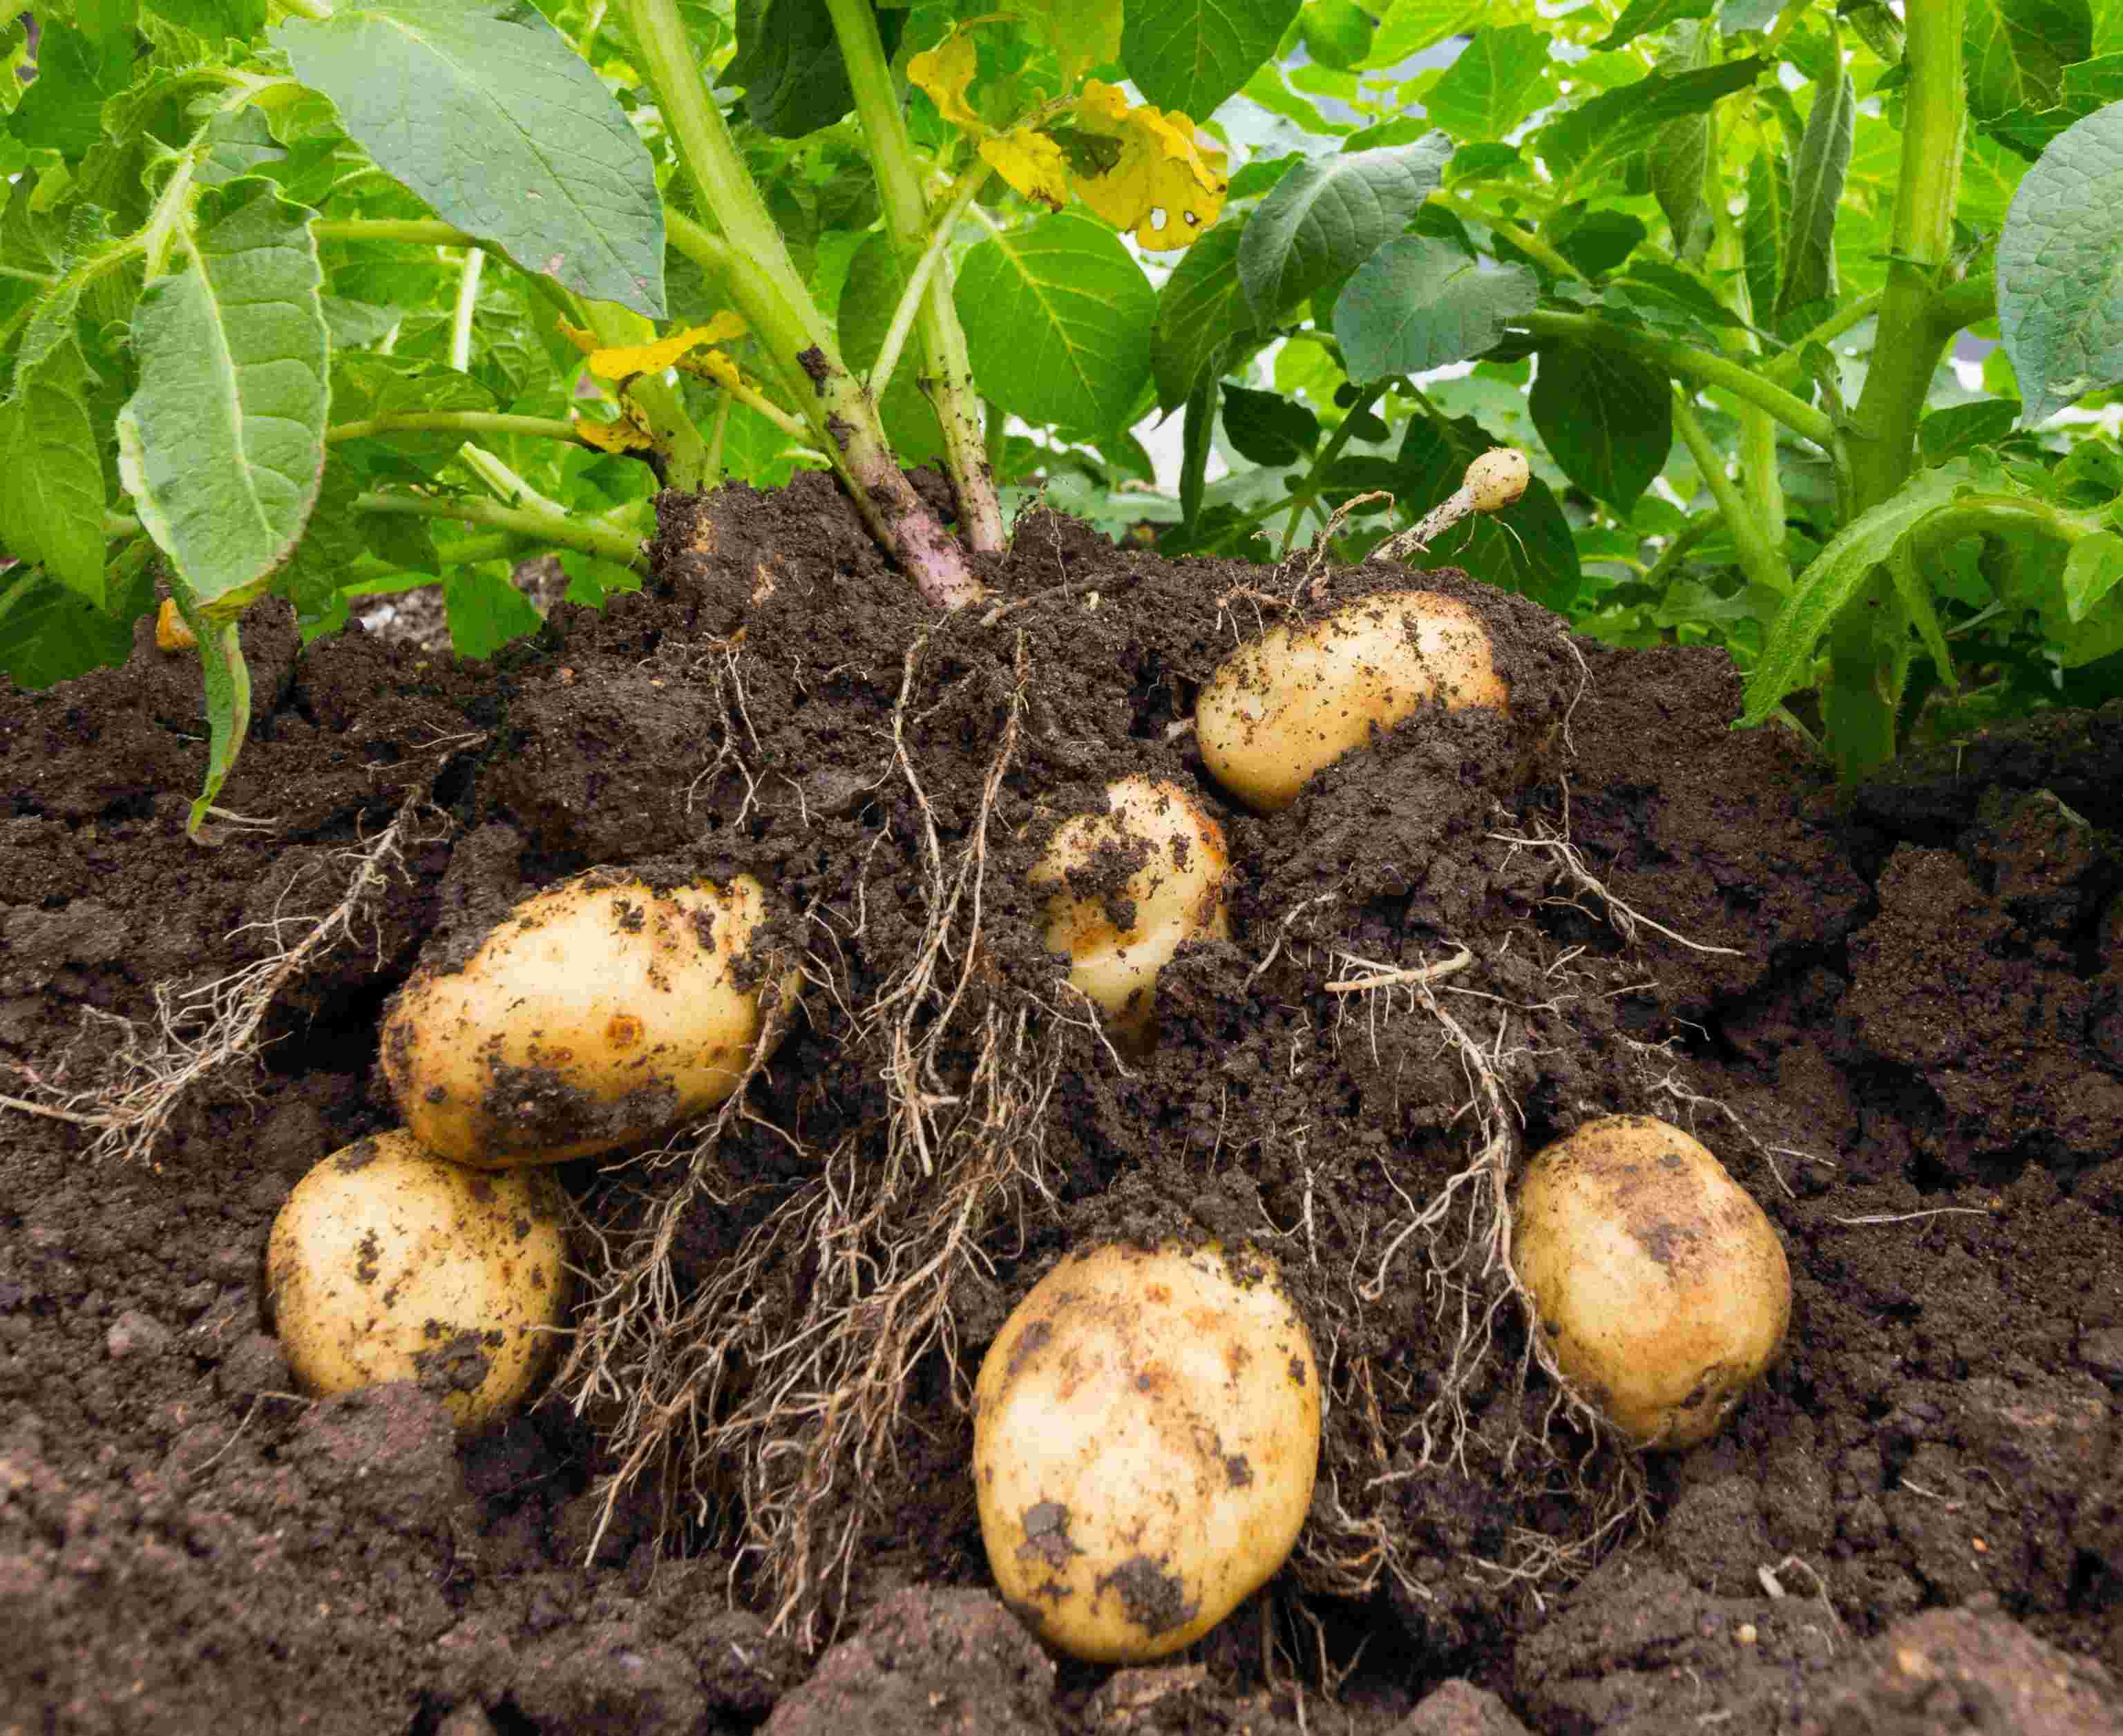
Harvesting Potatoes
Harvesting potatoes is an exciting milestone in the journey of growing your own food. The timing of the harvest is crucial to ensure that the potatoes have reached their peak ripeness and are ready to be enjoyed. Here are some key steps to follow when harvesting your potatoes:
- Observation: Start by observing the potato plants. Look for signs that the plants are reaching maturity, such as yellowing and dying foliage. Most potato varieties will take anywhere from 70 to 120 days from planting to harvest, depending on the specific cultivar.
- Soil moisture: Ensure that the soil is slightly moist but not overly wet when harvesting. Digging in excessively wet soil can lead to damage and rotting of the tubers.
- Prepare tools and gloves: Gather a garden fork or shovel, gloves, and a container to collect your harvested potatoes. Gloves can protect your hands from cuts, and a container will prevent damage to the tubers during the harvest process.
- Loosen the soil: Gently loosen the soil around the base of the potato plants using the garden fork or shovel. Start several inches away from the plant to avoid accidentally damaging the tubers.
- Harvesting: Carefully lift the plants out of the ground, using the fork or shovel to expose the tubers. Avoid stabbing or cutting the potatoes during this process. If some of the tubers remain buried, gently hand dig around them to retrieve them without causing damage.
- Curing: After harvesting, allow the potatoes to cure for a brief period to toughen their skins. Spread them out on a dry, well-ventilated surface, out of direct sunlight, for 1-2 weeks. This process helps the skin to thicken and improves the storage potential of the potatoes.
- Inspect and sort: While curing the potatoes, inspect each tuber for any signs of damage or disease. Discard any potatoes that appear spoiled or damaged. Sort the potatoes by size, keeping the smaller tubers separate from the larger ones.
- Storage: After curing, store your potatoes in a cool, dry, and dark location with good airflow. Ideal storage conditions include temperatures between 45-55°F (7-13°C) and humidity levels of 80-90%. Potatoes should be stored in breathable containers, such as burlap sacks or wooden crates, to prevent moisture buildup and extend their shelf life.
It’s important to note that you can also enjoy some freshly harvested “new” potatoes by gently digging around the plants before they reach maturity. These will have a thinner skin and a more delicate flavor.
Remember to save some of the best potatoes from your harvest to serve as seed potatoes for next year’s planting. Choose the healthiest, unblemished tubers for this purpose to ensure a strong start for your next potato crop.
By following these steps, you can ensure a successful potato harvest. The joy of harvesting your own potatoes and savoring their fresh, homegrown flavor is a rewarding experience for any edible gardener.
Storing Potatoes
Proper storage is crucial to maximize the shelf life and maintain the quality of your harvested potatoes. With the right storage conditions and handling techniques, you can enjoy your homegrown potatoes for an extended period. Follow these guidelines for storing potatoes:
- Curing: After harvesting, allow the potatoes to cure for 1-2 weeks in a cool, dry, and well-ventilated area. This helps toughen the skins and heal any minor wounds, reducing the risk of rot.
- Inspect and sort: Before storing, carefully inspect each potato for any signs of damage or disease. Remove any potatoes that are spoiled, bruised, or have soft spots. Sort the potatoes by size and remove any that show signs of decay to prevent them from spoiling others.
- Choose a storage location: Find a storage location that is cool, dark, and well-ventilated. Ideal temperatures for storing potatoes range from 45-55°F (7-13°C). Avoid storing potatoes near fruits such as apples, as ethylene gas emitted by fruits can cause potatoes to sprout prematurely.
- Use breathable containers: Store potatoes in breathable containers, such as burlap sacks or wooden crates. Avoid using plastic bags or airtight containers, as these can trap moisture and lead to rot. The breathable containers allow for proper airflow and help prevent moisture buildup.
- Avoid light exposure: Potatoes should be stored in darkness to prevent them from turning green. Exposure to light can cause the development of solanine, a naturally occurring toxin that forms in green or sun-exposed potatoes. Store potatoes in a dark location or cover the containers with a cloth or paper to block out light.
- Keep humidity in check: Maintain humidity levels between 80-90% to prevent the potatoes from shriveling. However, excessive humidity can encourage mold or rot. Regularly check the storage area for any signs of excess moisture and adjust ventilation if necessary.
- Regularly inspect and remove spoiled potatoes: Periodically check your stored potatoes for signs of decay or sprouting. Remove any spoiled potatoes promptly to prevent them from spoiling the rest. This regular inspection helps maintain the quality of your stored potatoes.
- Avoid washing potatoes: To prolong their shelf life, do not wash the potatoes before storing them. The natural dirt and protective skin help preserve their freshness and prevent moisture loss.
By following these storing guidelines, you can extend the shelf life of your potatoes and enjoy their flavor and nutritional benefits for several months. Remember that different potato varieties have varying storability, so it’s always a good idea to consume the more perishable varieties earlier.
Throughout the storage period, it’s essential to monitor your potatoes regularly for any signs of spoilage or sprouting. Properly stored potatoes will provide you with delicious tubers to enjoy in various culinary preparations for an extended period.
Conclusion
Growing your own potatoes can be a rewarding and satisfying experience, allowing you to enjoy the taste of freshly harvested tubers while connecting with the natural world. By following the steps outlined in this guide, you can successfully prepare, plant, and care for your potato plants, ultimately reaping a bountiful harvest.
From selecting the right potato varieties and preparing seed potatoes to choosing the ideal planting location, soil preparation, and proper watering and mulching techniques, each step plays a vital role in cultivating healthy and productive potato plants. Monitoring the growth of your plants, controlling weeds and pests, and harvesting and storing your potatoes correctly are equally essential aspects of the potato cultivation journey.
Remember to approach potato gardening with enthusiasm, curiosity, and a willingness to learn from both successes and challenges. Each growing season offers new opportunities to refine your techniques and techniques and deepen your understanding of the potato’s needs.
Whether you have a small backyard plot, a raised bed, or even containers on a balcony, potatoes can be grown in various spaces. Embrace this versatile crop and experiment with different potato varieties to explore their unique flavors and attributes.
By growing your own potatoes, you have the satisfaction of knowing exactly where your food comes from and the joy of sharing it with family and friends. The rewards of tending to your potato plants, watching them thrive, and harvesting your own homegrown potatoes are unparalleled.
So, roll up your sleeves, get your hands dirty, and embark on the journey of growing your own potatoes. With the knowledge and tips provided in this guide, you’re well-equipped to start your edible gardening adventure and savor the delicious taste of homegrown potatoes.