Home>Gardening Basics>Understanding Soil>How To Prepare A Field For Planting
Understanding Soil
How To Prepare A Field For Planting
Modified: January 22, 2024
Learn the importance of understanding soil in preparing a field for planting. Discover tips and techniques for optimizing soil conditions to maximize plant growth and yield.
(Many of the links in this article redirect to a specific reviewed product. Your purchase of these products through affiliate links helps to generate commission for Chicagolandgardening.com, at no extra cost. Learn more)
Table of Contents
Introduction
Preparing a field for planting is an essential step in ensuring a successful crop yield. Whether you’re a seasoned farmer or a novice gardener, understanding the importance of soil preparation is key to nurturing healthy plants and maximizing their growth potential.
Before embarking on the process of field preparation, it’s important to assess the condition of the land and identify any existing challenges or limitations. By thoroughly evaluating the soil quality and addressing any deficiencies, you can create an environment that promotes optimal plant growth.
Clearing the field is the first step in preparing a planting site. Removing any unwanted vegetation, rocks, or debris not only ensures a clean slate for planting but also minimizes competition for resources and reduces the risk of crop diseases.
Soil preparation plays a crucial role in establishing a nutrient-rich environment for plant roots to flourish. Testing and adjusting the soil pH is important, as different plants thrive in varying pH levels. By knowing the pH of your soil, you can make necessary adjustments to create the best possible growing conditions.
Amending the soil involves adding organic matter such as compost or well-rotted manure to improve soil structure, fertility, and water-holding capacity. This process helps balance nutrient levels and promotes beneficial microbial activity in the soil.
Tilling or plowing the field helps break up compacted soil, improves aeration, and allows for proper root penetration. However, it’s important not to over-till, as excessive disturbance can lead to erosion and nutrient loss.
Leveling the field is essential for even water distribution and preventing waterlogging or runoff issues. Creating planting beds helps facilitate drainage and makes it easier to manage the crops.
Adding organic matter to the soil further boosts its fertility and enhances moisture retention. Mulching the beds with straw or other organic materials can help suppress weeds and regulate soil temperature.
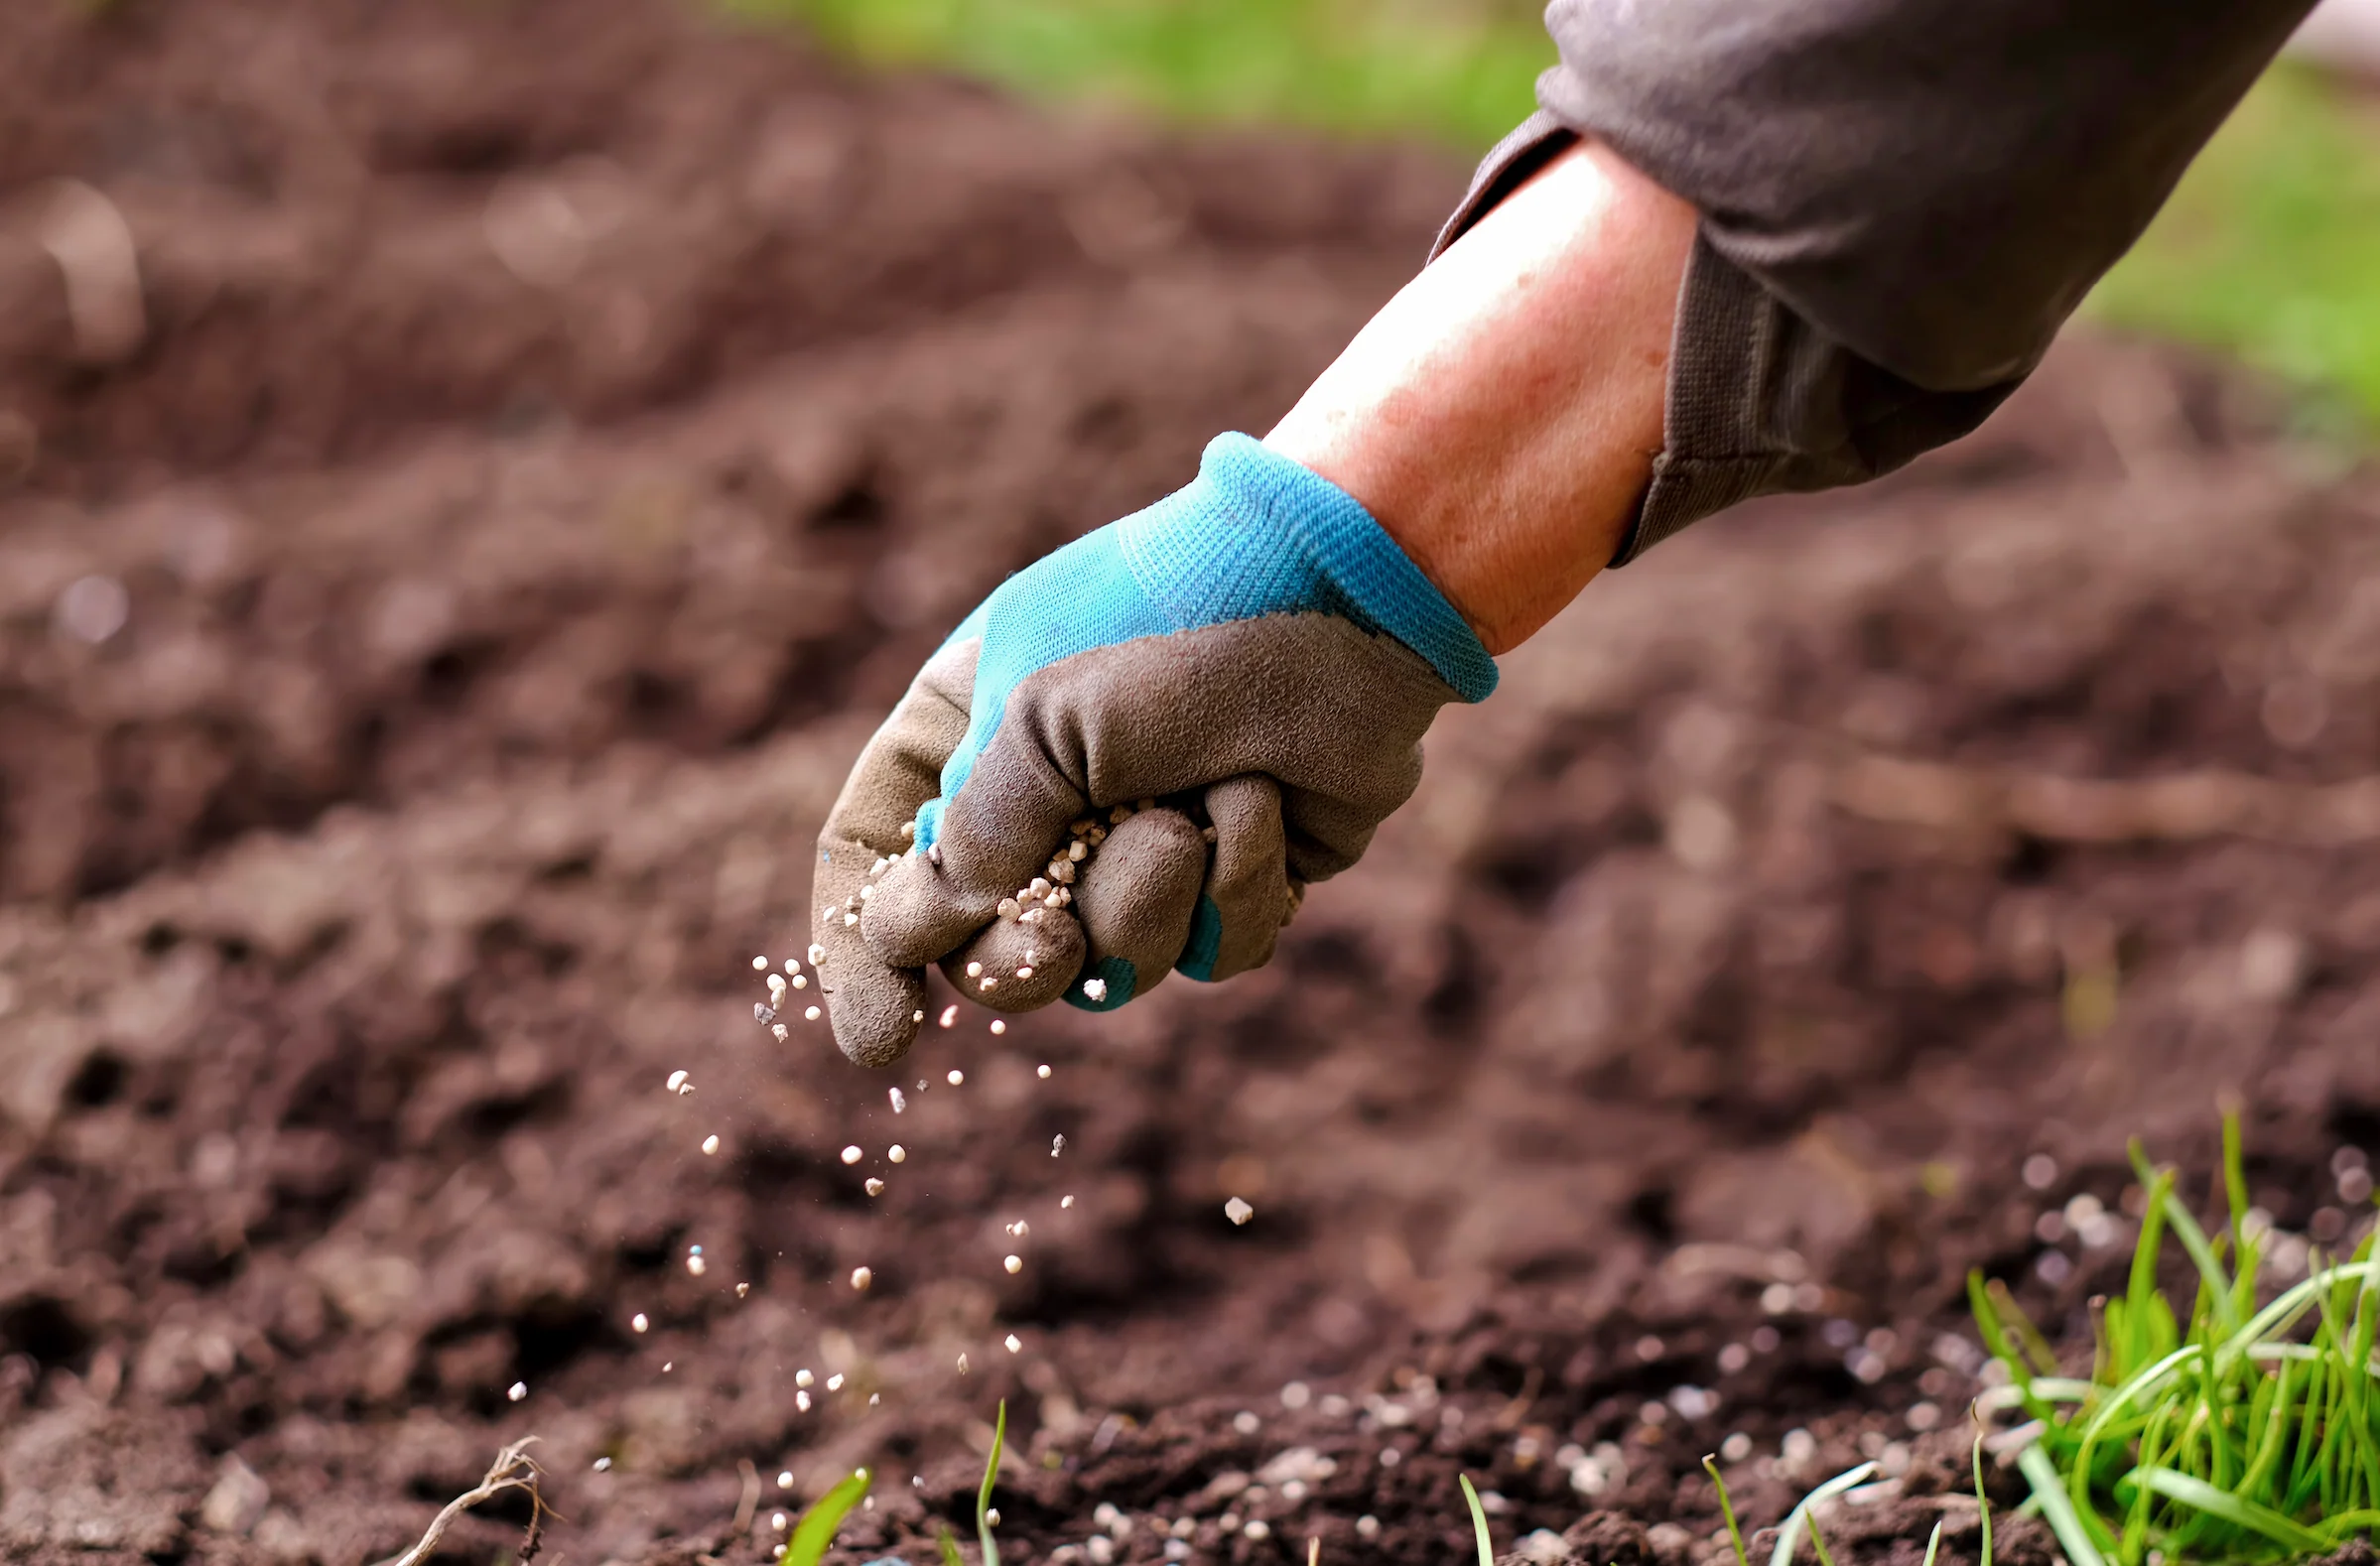
Fertilizing the soil is crucial for providing essential nutrients to the plants. Understanding the nutrient requirements of the specific crop you intend to grow will help you choose the right type and amount of fertilizer.
Setting up an irrigation system is vital to ensure adequate water supply throughout the growing season. Installing overhead sprinklers or drip systems helps minimize water waste and provides targeted hydration to the plants.
Protecting the field from weeds is a constant battle. Implementing effective weed control measures, such as mulching, hand weeding, or using herbicides, will help prevent weed competition and maintain crop health.
By following these steps and incorporating best practices, you can prepare your field for planting in a way that sets the stage for a successful growing season. From assessing the field to fertilizing the soil, each step plays a crucial role in providing the optimal conditions for your plants to thrive.
Assessing the Field
Before preparing a field for planting, it is crucial to assess the condition of the land to identify any potential challenges or limitations. This step will help you understand the current state of the soil and guide you in making the necessary adjustments to create an optimal growing environment for your crops.
One of the first aspects to consider is the topography of the field. Assess the slope and drainage patterns to determine if there are any areas prone to erosion or waterlogging. Proper drainage is essential to prevent water from accumulating and suffocating plant roots. If necessary, consider installing drainage systems or adjusting the field’s contours to improve water flow.
Next, evaluate the soil type and texture. Different soil types have different water-holding capacities and nutrient levels. Sandy soils, for example, drain quickly and may require more frequent irrigation and nutrient supplementation. Clay soils, on the other hand, retain more moisture but may need additional amendments to improve their structure and drainage. Assessing the soil type will help you choose appropriate techniques and amendments for field preparation.
Conducting a soil test is an integral part of field assessment. Soil testing provides valuable information about the nutrient content, pH levels, and organic matter content of the soil. It allows you to determine the soil’s fertility status and identify any deficiencies or imbalances that need to be addressed. Contact your local agricultural extension office or use a reputable soil testing service to obtain accurate results.
Another important factor to consider is the history of the field. If it has previously been used for intensive agriculture, there might be residual chemical buildup or nutrient imbalances in the soil. Understanding the field’s history will help you take appropriate steps in soil preparation and ensure the long-term health of your crops.
Assessing the presence of pests, diseases, and weeds in the field is also crucial. Inspect the area for signs of pest damage, such as chewed leaves or tunnels in the soil. Identifying potential pest threats in advance allows you to implement preventive measures, such as crop rotation or the use of beneficial insects, to mitigate the risk.
Lastly, consider the availability of sunlight and shade in the field. Different crops have varying light requirements, and planting in the wrong location can result in diminished yield or poor growth. Observe the field throughout the day to gauge the amount of sunlight it receives and plan your planting accordingly.
By thoroughly assessing the field, you can make informed decisions and take appropriate steps in preparing the soil for planting. Understanding the topography, soil type, nutrient content, and potential pest risks will help you create a favorable environment for your crops to flourish.
Clearing the Field
Clearing the field is an essential step in preparing a planting site. It involves removing any unwanted vegetation, rocks, debris, or other obstacles that may hinder plant growth or impede farming operations. Clearing the field not only provides a clean and organized space for planting but also minimizes competition for resources and reduces the risk of crop diseases.
Begin by surveying the field and identifying any existing vegetation or weeds. Take note of the types of plants present, as some may be beneficial or serve as indicators of soil conditions. Remove any invasive or undesirable plants that could potentially compete with your intended crop. This may involve pulling weeds by hand, using a hoe or rake to uproot them, or applying herbicides in accordance with safe and environmentally friendly practices.
In addition to weeds, be sure to remove any brush, shrubs, or trees that may obstruct the planting area or interfere with irrigation and farming equipment. Depending on the size of the trees or shrubs, you may require specialized equipment or professional assistance to safely remove them.
Clear the field of rocks, stones, and large debris that could impede the planting process or damage farming equipment. These objects can also cause injury to workers or hinder proper irrigation and drainage. Collect and dispose of rocks and debris responsibly, considering recycling or repurposing options where applicable.
It is important to clear the field thoroughly to minimize the presence of potential disease vectors. Some pathogens and pests can survive in crop residues or overwinter in vegetation. Removing crop remains, such as corn stalks or tomato vines, from the previous growing season can help reduce the risk of disease carryover and pest infestations. Dispose of crop residues properly, following recommended disposal practices to prevent the spread of pests and diseases.
By clearing the field effectively, you create a clean and fertile canvas for planting. Removing undesired vegetation, rocks, and debris minimizes competition for resources, reduces the risk of disease, and facilitates a more efficient farming operation. With a cleared field, you can now move on to the next steps of soil preparation, ensuring the optimal conditions for your crops to thrive.
Soil Preparation
Soil preparation is a critical step in creating an optimal growing environment for your plants. Properly preparing the soil helps improve its structure, nutrient content, water-holding capacity, and overall fertility. By investing time and effort in soil preparation, you can set the stage for healthy plant growth and maximize your crop yield.
The first step in soil preparation is to test and adjust the soil pH. Different plants thrive in different pH ranges, so it’s essential to know the pH level of your soil. A pH test will determine if your soil is acidic, neutral, or alkaline. By adjusting the pH to suit the needs of your desired crops, you create conditions that allow for optimal nutrient uptake. pH adjustment can be done by adding soil amendments such as lime to raise pH or sulfur to lower pH.
Amending the soil with organic matter is crucial in improving soil structure and fertility. Organic matter, such as compost, well-rotted manure, or leaf mold, adds essential nutrients, increases the water-holding capacity of sandy soils, and improves drainage in clay soils. Incorporate organic matter into the soil using a garden fork or tiller. Aim to add a layer of organic matter about 2-3 inches deep across the entire planting area.
Tilling or plowing the soil is a common practice to break up compacted soil, enhance aeration, and facilitate root penetration. However, it’s important not to over-till, as excessive disturbance can lead to erosion and nutrient loss. Follow recommended tillage depth guidelines based on your soil type and consider using less invasive methods, such as shallow cultivation or strip-tilling, to minimize soil disruption.
Leveling the soil surface is essential to ensure even water distribution and prevent waterlogging or runoff issues. Use a rake or leveling tool to smooth out any uneven areas and create a flat surface. This helps prevent water from pooling and promotes uniform plant growth.
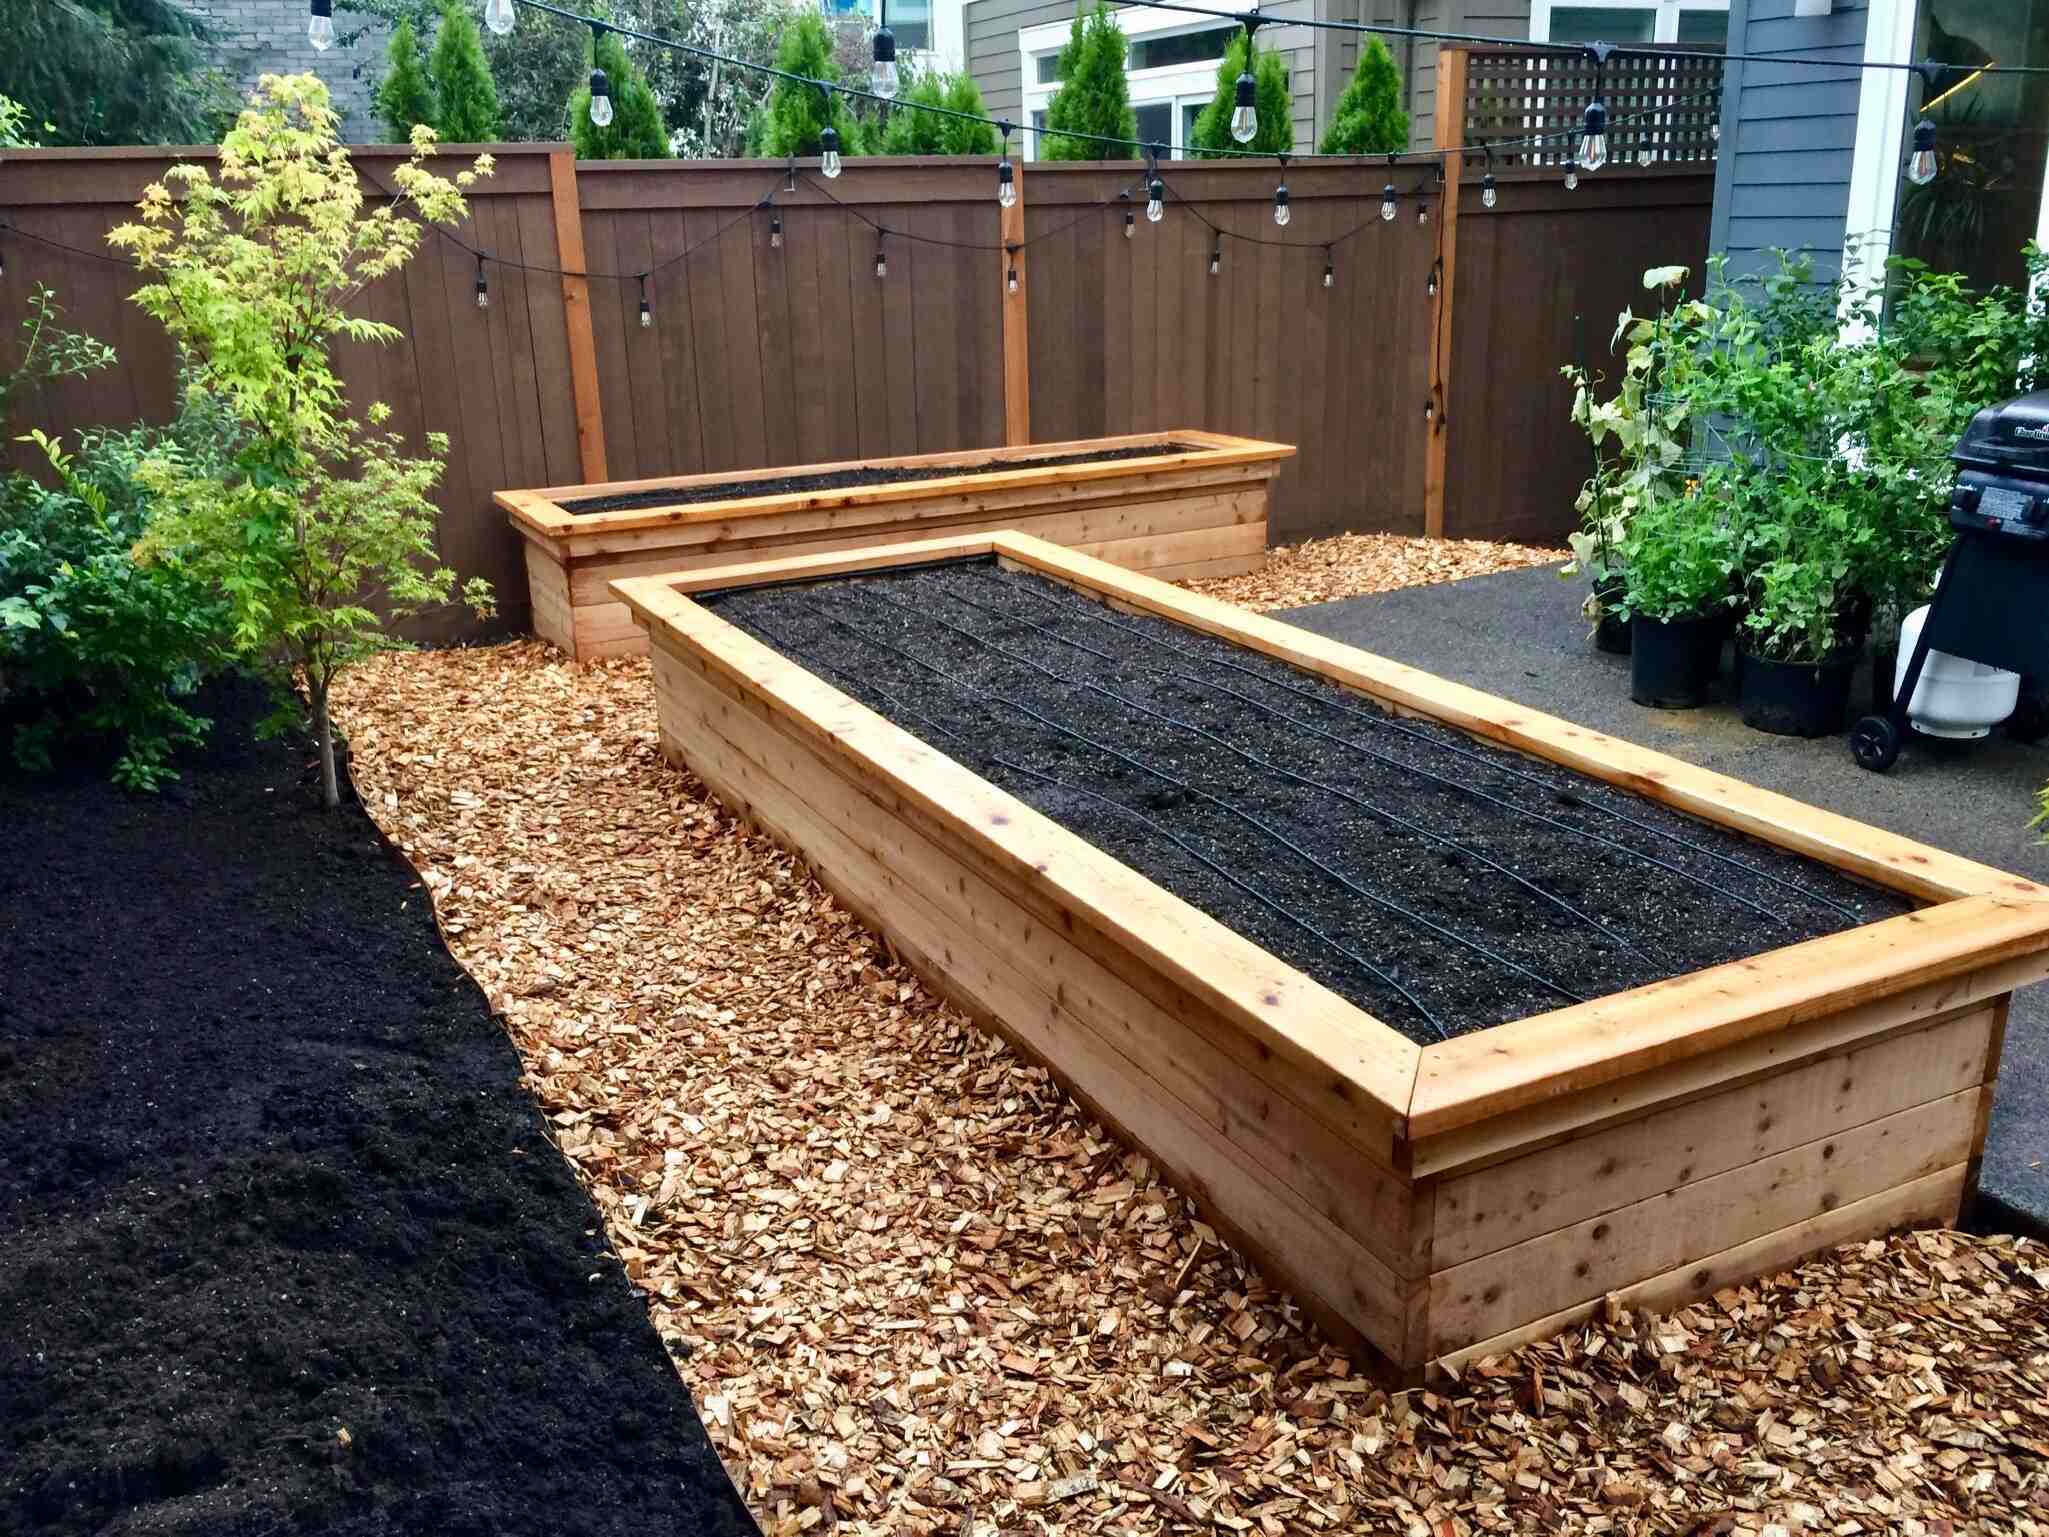
Creating planting beds is another aspect of soil preparation that facilitates efficient crop management. Raised beds or planting rows help improve drainage, increase root access to oxygen, and minimize soil compaction. Use a shovel or garden hoe to shape raised beds, ensuring adequate spacing between each bed for easy access and maintenance.
Adding organic matter to the soil further enhances its fertility and moisture retention capabilities. Incorporate compost or well-rotted manure into the planting beds or rows to enrich the soil and provide long-lasting nutrients for your plants. Mulching the beds with straw or other organic materials can also help regulate soil temperature, conserve moisture, and suppress weed growth.
Lastly, consider fertilizing the soil to provide essential nutrients for plant growth. Conduct a soil test to determine nutrient deficiencies and select a balanced fertilizer that suits the needs of your specific crops. Follow recommended application rates and timings to avoid over or under-fertilization, which can lead to imbalances or damage to the plants.
By taking the time to prepare the soil properly, you create an ideal foundation for successful plant growth. Testing and adjusting soil pH, incorporating organic matter, tilling or plowing, leveling the surface, creating planting beds, adding organic matter, and fertilizing the soil are all important aspects of soil preparation that contribute to optimal plant health and abundant crop yields.
Testing and Adjusting Soil pH
Soil pH is a critical factor that influences plant growth and nutrient availability. Testing and adjusting the soil pH ensures that you provide the ideal conditions for your plants to thrive. Most plants have specific pH requirements, and by understanding and adjusting the pH of your soil, you can create an optimal environment for their growth.
The first step in testing soil pH is to collect soil samples from different areas of the planting site. Use a soil probe or a garden trowel to take samples from several spots within the field, ensuring that you obtain a representative sample of the soil. Take samples from a depth of about 6-8 inches, as this is where most plant roots will be located.
Once you have collected the soil samples, send them to a reputable soil testing laboratory or consult your local agricultural extension office for testing services. The lab will analyze the samples and provide you with a detailed report that includes the soil pH level.
A soil pH of 7 is considered neutral. pH levels below 7 indicate acidity, with lower numbers indicating higher acidity, while pH levels above 7 indicate alkalinity, with higher numbers indicating higher alkalinity. Different plants have specific pH preferences, so it’s essential to understand the pH requirements of the crops you wish to grow.
If the soil pH is outside the optimal range for your desired crops, you may need to adjust it. Lowering the pH can be done by adding substances such as elemental sulfur, aluminum sulfate, or peat moss. These substances increase the acidity of the soil over time. It’s important to note that adjusting soil pH takes time, and gradual changes are recommended to avoid sudden shifts that can shock plants.
Increasing the pH can be done by adding substances like lime or wood ashes. These materials raise the soil’s alkalinity and should be carefully applied based on the recommendations provided by the soil test report. It’s important to follow guidelines for proper application rates and timing to avoid over-application, which can have negative effects on plant growth.
When applying pH-adjusting substances to the soil, it’s crucial to mix them thoroughly to ensure even distribution. Incorporate the amendments into the soil to a depth of about 6-8 inches using a garden fork or tiller. After application, retest the soil pH periodically to monitor the progress and make any necessary adjustments.
Regularly testing and adjusting soil pH is essential for maintaining healthy plants and maximizing their growth potential. By providing the optimal pH conditions, you ensure that essential nutrients are readily available to the plants and avoid nutrient deficiencies or toxicities that can occur in imbalanced pH environments. Take the time to test and adjust your soil pH to create the best possible growing conditions for your crops.
Amending the Soil
Amending the soil is a crucial step in soil preparation that involves adding organic matter and other beneficial substances to improve its structure, fertility, and overall health. The process of amending the soil helps provide a nutrient-rich environment for plant roots to thrive and promotes optimal plant growth.
One of the most common methods of amending the soil is by incorporating organic matter. Organic matter, such as compost, well-rotted manure, leaf mold, or peat moss, is rich in nutrients and helps improve soil structure. It enhances the soil’s ability to retain moisture, improves its drainage capacity, and promotes beneficial microbial activity.
To amend the soil with organic matter, spread a layer of compost or well-rotted manure over the planting area. Aim for a thickness of about 2-3 inches and incorporate it into the soil using a garden fork or tiller. This ensures that the organic matter is evenly mixed throughout the soil, providing a consistent nutrient supply for your plants.
In addition to organic matter, other amendments can be used to address specific soil deficiencies. For example, if your soil lacks essential nutrients like nitrogen, phosphorus, or potassium, you can apply a balanced fertilizer to replenish these elements. It’s important to follow the recommended application rates provided by a soil test or fertilizer manufacturer to avoid over-fertilization and environmental damage.
In some cases, soil amendments may be necessary to adjust the pH level of the soil. For example, adding lime can help raise the pH of acidic soil, while elemental sulfur or aluminum sulfate can lower the pH of alkaline soil. Again, it is important to follow recommended application rates based on a soil test to avoid drastic pH fluctuations that can harm plants.
Amending the soil is not a one-time process. It’s advisable to continue incorporating organic matter into the soil on an annual basis to sustain its fertility and health. Regular addition of compost or well-rotted manure helps replenish the nutrients that plants utilize and maintain a balanced soil ecosystem.
When amending the soil, it’s important to consider the specific needs of the crops you plan to grow. Different plants have varying nutrient requirements and thrive in different soil conditions. Research the nutrient needs and preferred soil conditions of your chosen plants and make amendments accordingly to provide them with the best possible growing environment.
By amending the soil, you create a nurturing environment that supports healthy plant growth and maximizes crop productivity. Incorporating organic matter, addressing nutrient deficiencies, and adjusting the soil pH as needed will improve the overall fertility and structure of the soil. Remember to regularly test your soil and make amendments accordingly to ensure continued success in your gardening or farming endeavors.
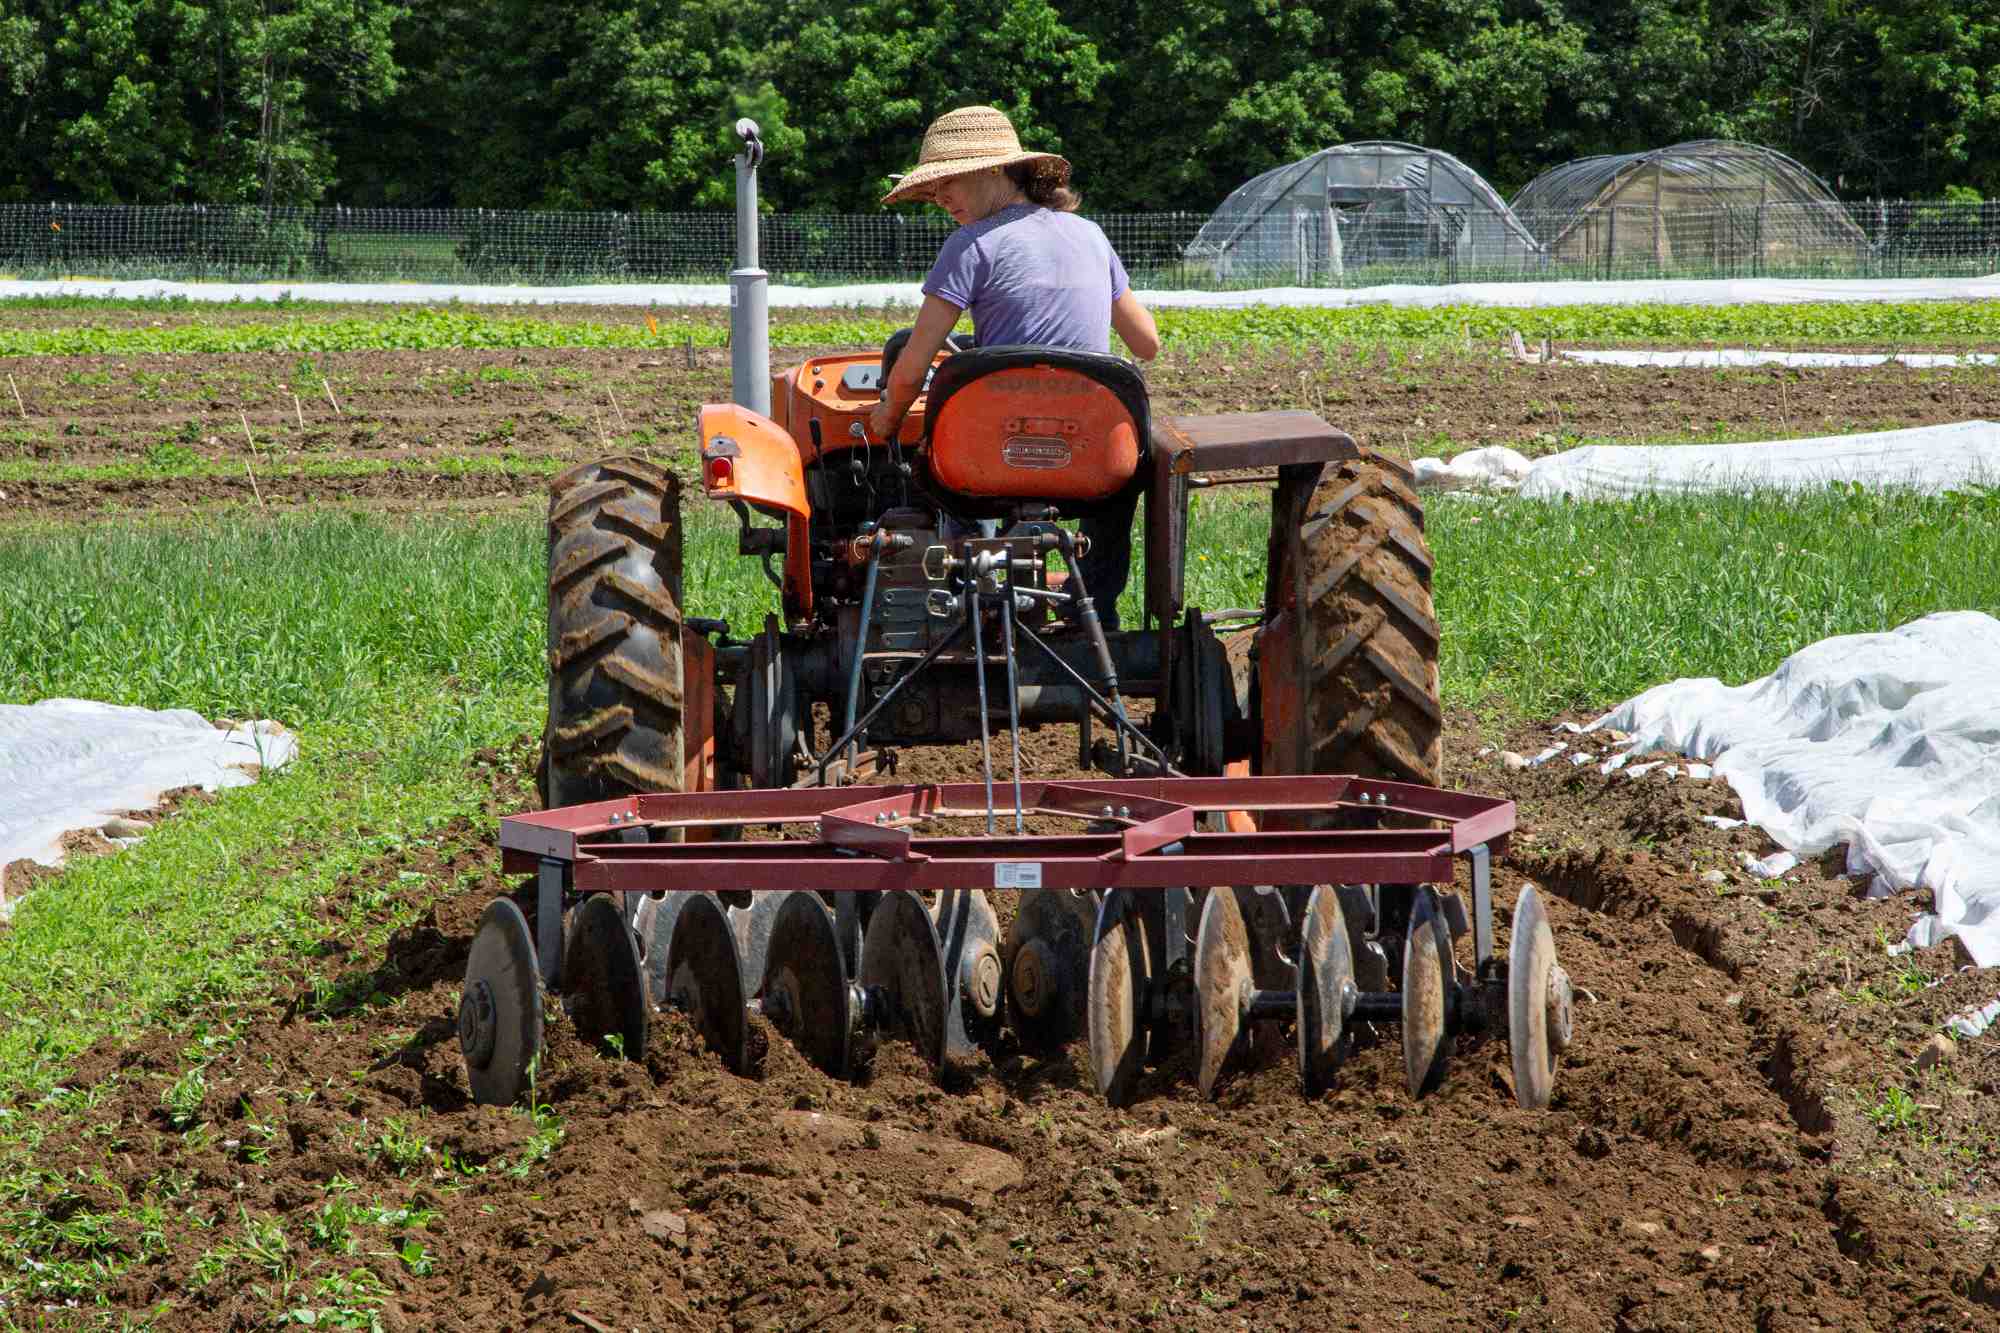
Tilling or Plowing the Field
Tilling or plowing the field is a crucial step in soil preparation that helps break up compacted soil, improve aeration, and create an optimal environment for plant growth. By loosening the soil, tilling or plowing facilitates root penetration and promotes the circulation of air and water within the soil.
The primary objective of tilling or plowing is to break up compacted soil. Over time, soil can become compacted due to factors such as heavy machinery, foot traffic, or natural settling. Compacted soil restricts the movement of air, water, and roots, inhibiting plant growth and nutrient absorption. Tilling or plowing helps alleviate compaction, allowing roots to penetrate more easily and facilitating the exchange of gases between the soil and the atmosphere.
Before engaging in tilling or plowing, it’s crucial to assess the condition of the soil. Check for signs of compaction, such as hard, clumpy soil or poor drainage. Avoid tilling or plowing when the soil is excessively wet to prevent compaction and damage to the soil structure.
Choose the right tillage equipment based on the size of your field and the type of soil you are working with. Common tools for tilling or plowing include rototillers, garden forks, or tractor-drawn plows. These tools help break up the soil, chop up and mix organic matter, and prepare a suitable seedbed for planting.
When tilling or plowing, it’s important not to overdo it. Excessive tilling can lead to soil erosion, nutrient loss, and disruption of the soil ecosystem. Generally, aim for a depth of 6-8 inches, as this allows for proper root development without excessive disturbance. Shallow tilling can be sufficient for lighter soils or smaller-scale gardening, while deeper tilling may be necessary for compacted or heavy clay soils.
Consider alternative tillage practices, such as strip-tilling or minimum tillage, if you want to minimize soil disturbance. These practices involve only tilling the planting rows or specific areas, while leaving the rest of the soil undisturbed. Strip-tilling helps focus soil preparation where it is most needed, leaving the soil structure intact and maximizing moisture retention.
After tilling or plowing, it’s important to level the field. Use a rake or leveling tool to smooth out any uneven surfaces and create a flat seedbed. Leveling ensures even water distribution, prevents water pooling, and promotes uniform plant growth.
It’s worth noting that not all fields or situations require tilling or plowing. In some cases, no-till or reduced tillage practices may be more appropriate, especially in conservation agriculture or sustainable farming systems. No-till practices help maintain soil structure, increase organic matter content, and reduce erosion and nutrient leaching. These practices can be implemented by using cover crops, crop rotation, or specialized no-till equipment.
Tilling or plowing the field is an important step in soil preparation that promotes optimal soil health and plant growth. By breaking up compacted soil, improving aeration, and leveling the field, you create a favorable environment for roots to penetrate, nutrients to be absorbed, and crops to flourish. Select the appropriate equipment, consider alternative tillage practices, and avoid excessive disturbance to ensure the long-term health and productivity of your field.
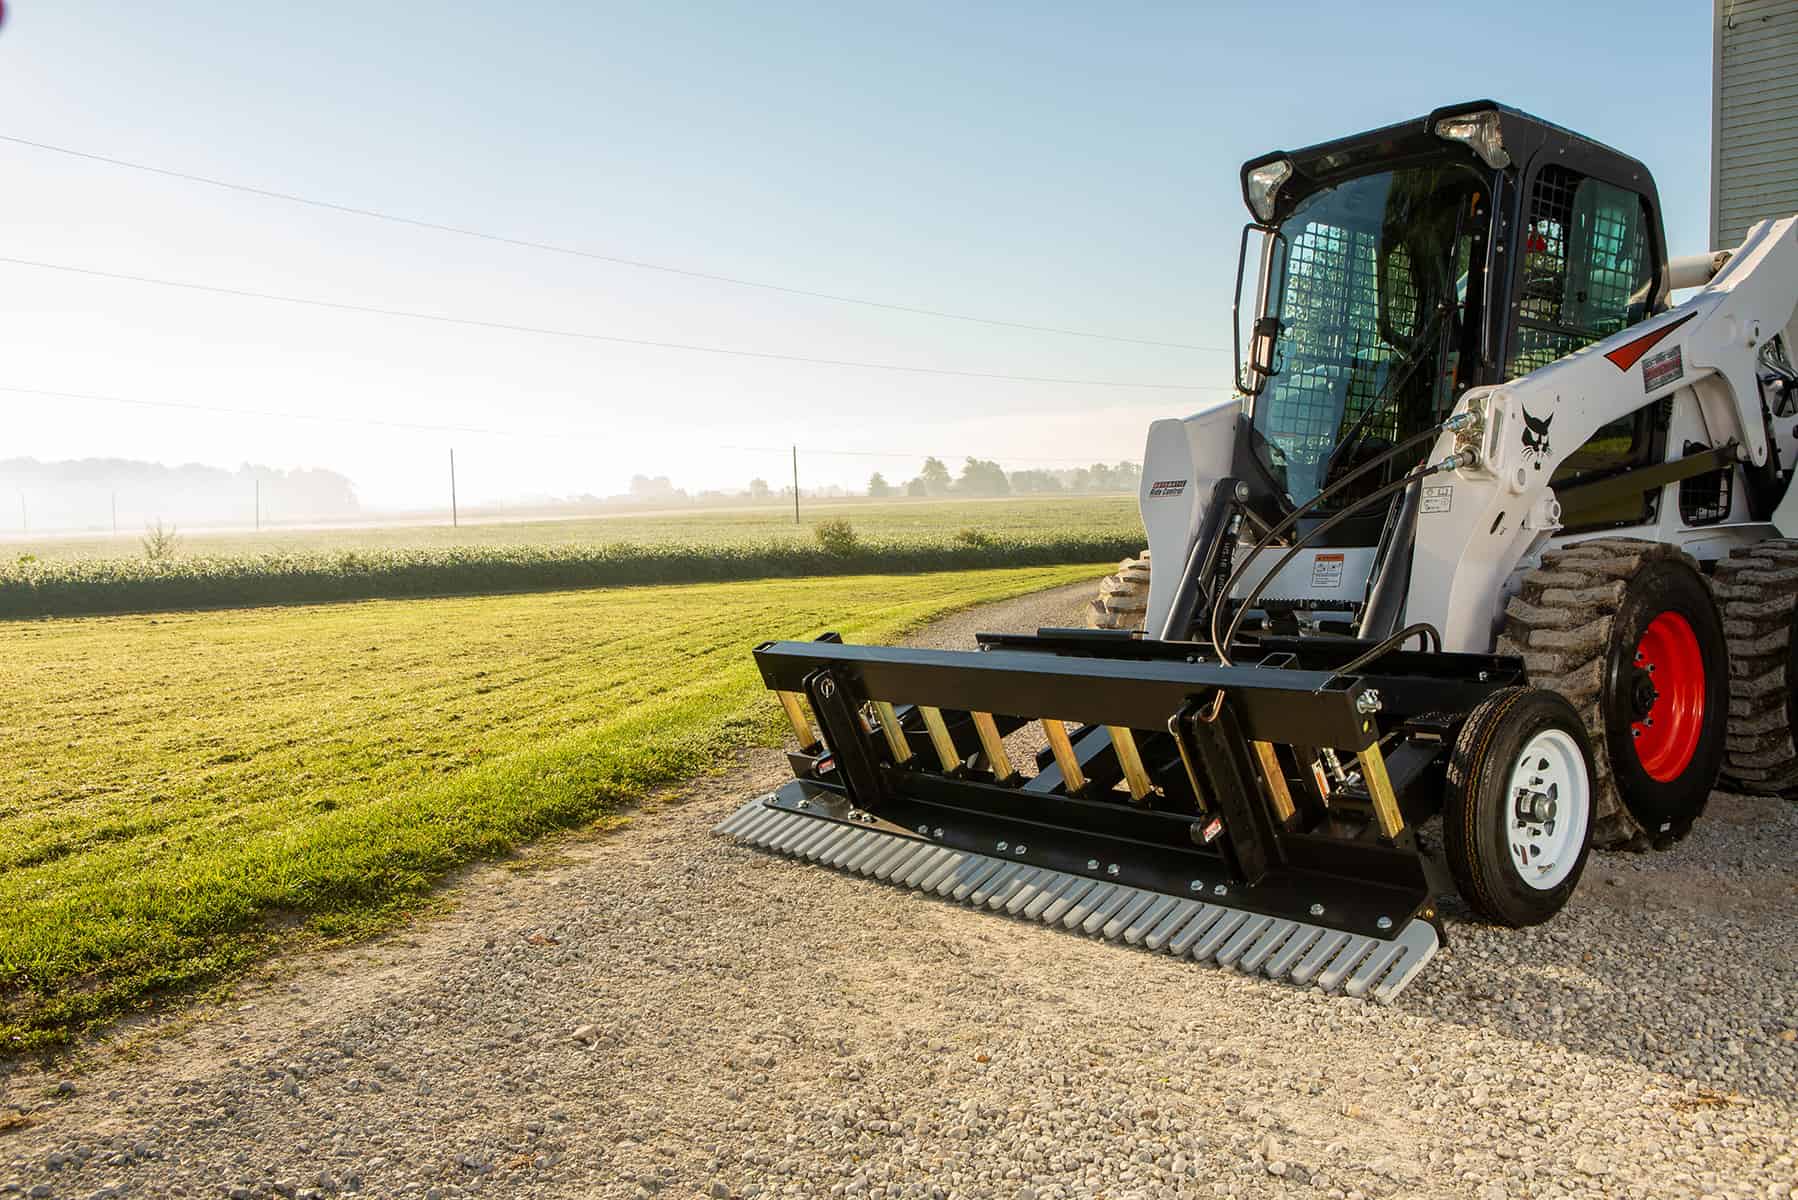
Leveling the Field
Leveling the field is an important step in soil preparation that ensures even water distribution, prevents waterlogging or runoff issues, and promotes uniform plant growth. Creating a flat and well-leveled surface allows for efficient water management and helps provide an optimal environment for your crops.
Uneven surfaces can cause water to accumulate in low-lying areas, leading to waterlogging and suffocating plant roots. Additionally, water runoff can occur on sloped fields if the land is not properly leveled, causing erosion and nutrient loss. By leveling the field, you create a uniform slope that facilitates proper drainage and reduces the risk of water-related issues.
The first step in leveling the field is to identify any high or low spots. Walk the field and visually inspect the surface, noting areas that are uneven or have noticeable variations in elevation. Additionally, consider using a laser level or other leveling tools to obtain more accurate measurements.
To level the field, start by filling in low spots and depressions. Use topsoil or well-decomposed compost to raise the surface level. Spread a layer of the chosen material evenly over the low areas and use a rake or leveling tool to distribute it evenly. Gradually build up the surface until it aligns with the surrounding area.
For high spots or ridges, remove excess soil to bring the area down to the desired level. Use a shovel or grading equipment to carefully scoop away the excess soil, ensuring a smooth transition between the high area and the rest of the field.
After filling in low spots and removing high areas, use a rake or leveling tool to smooth out the surface and create an even and uniform slope. Make sure the entire field is properly leveled and there are no noticeable bumps or depressions.
Leveling is particularly important when implementing irrigation systems. A properly leveled field ensures that water is evenly distributed and reaches all parts of the field. It prevents water from pooling in one area while leaving other areas dry.
In addition to facilitating water distribution, a level field also aids in efficient planting and maintenance. Level surfaces make it easier to maneuver farming equipment and perform tasks like seeding, cultivating, and harvesting.
It’s important to note that leveling the field is an ongoing process. Over time, the soil may settle, and new uneven areas may form. Regularly assess the field’s surface and make necessary adjustments to maintain a level and smooth surface.
By leveling the field, you create a foundation for successful crop growth. Proper water management, ease of farm operations, and uniform plant development are all benefits of a well-leveled field. Invest time and effort in leveling the field to create the ideal conditions for your crops to thrive.
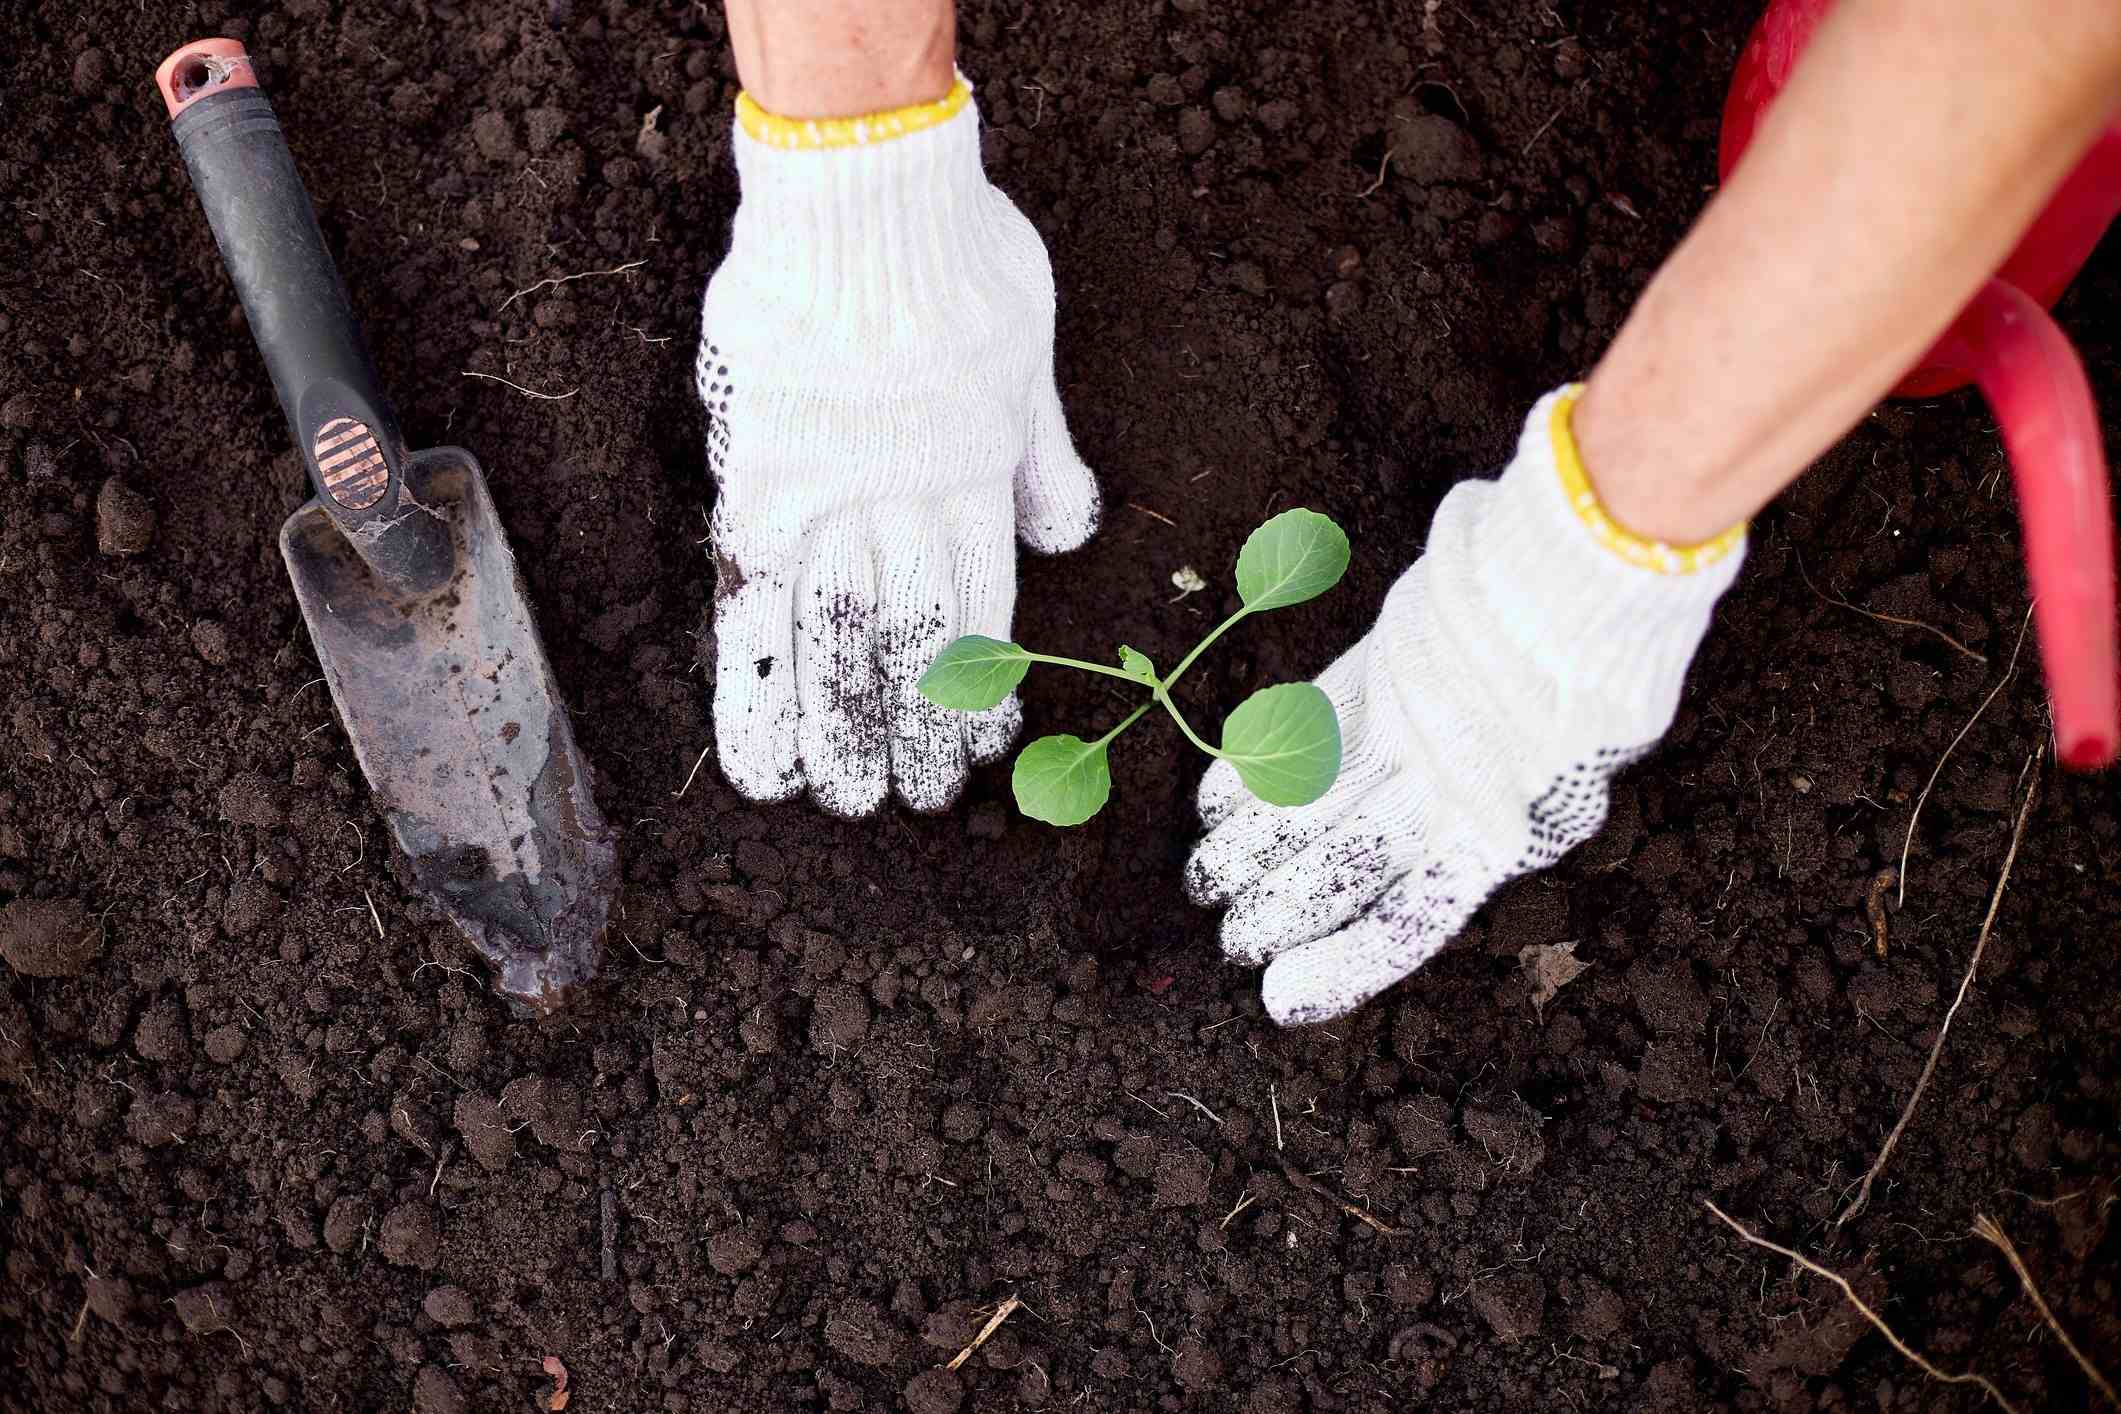
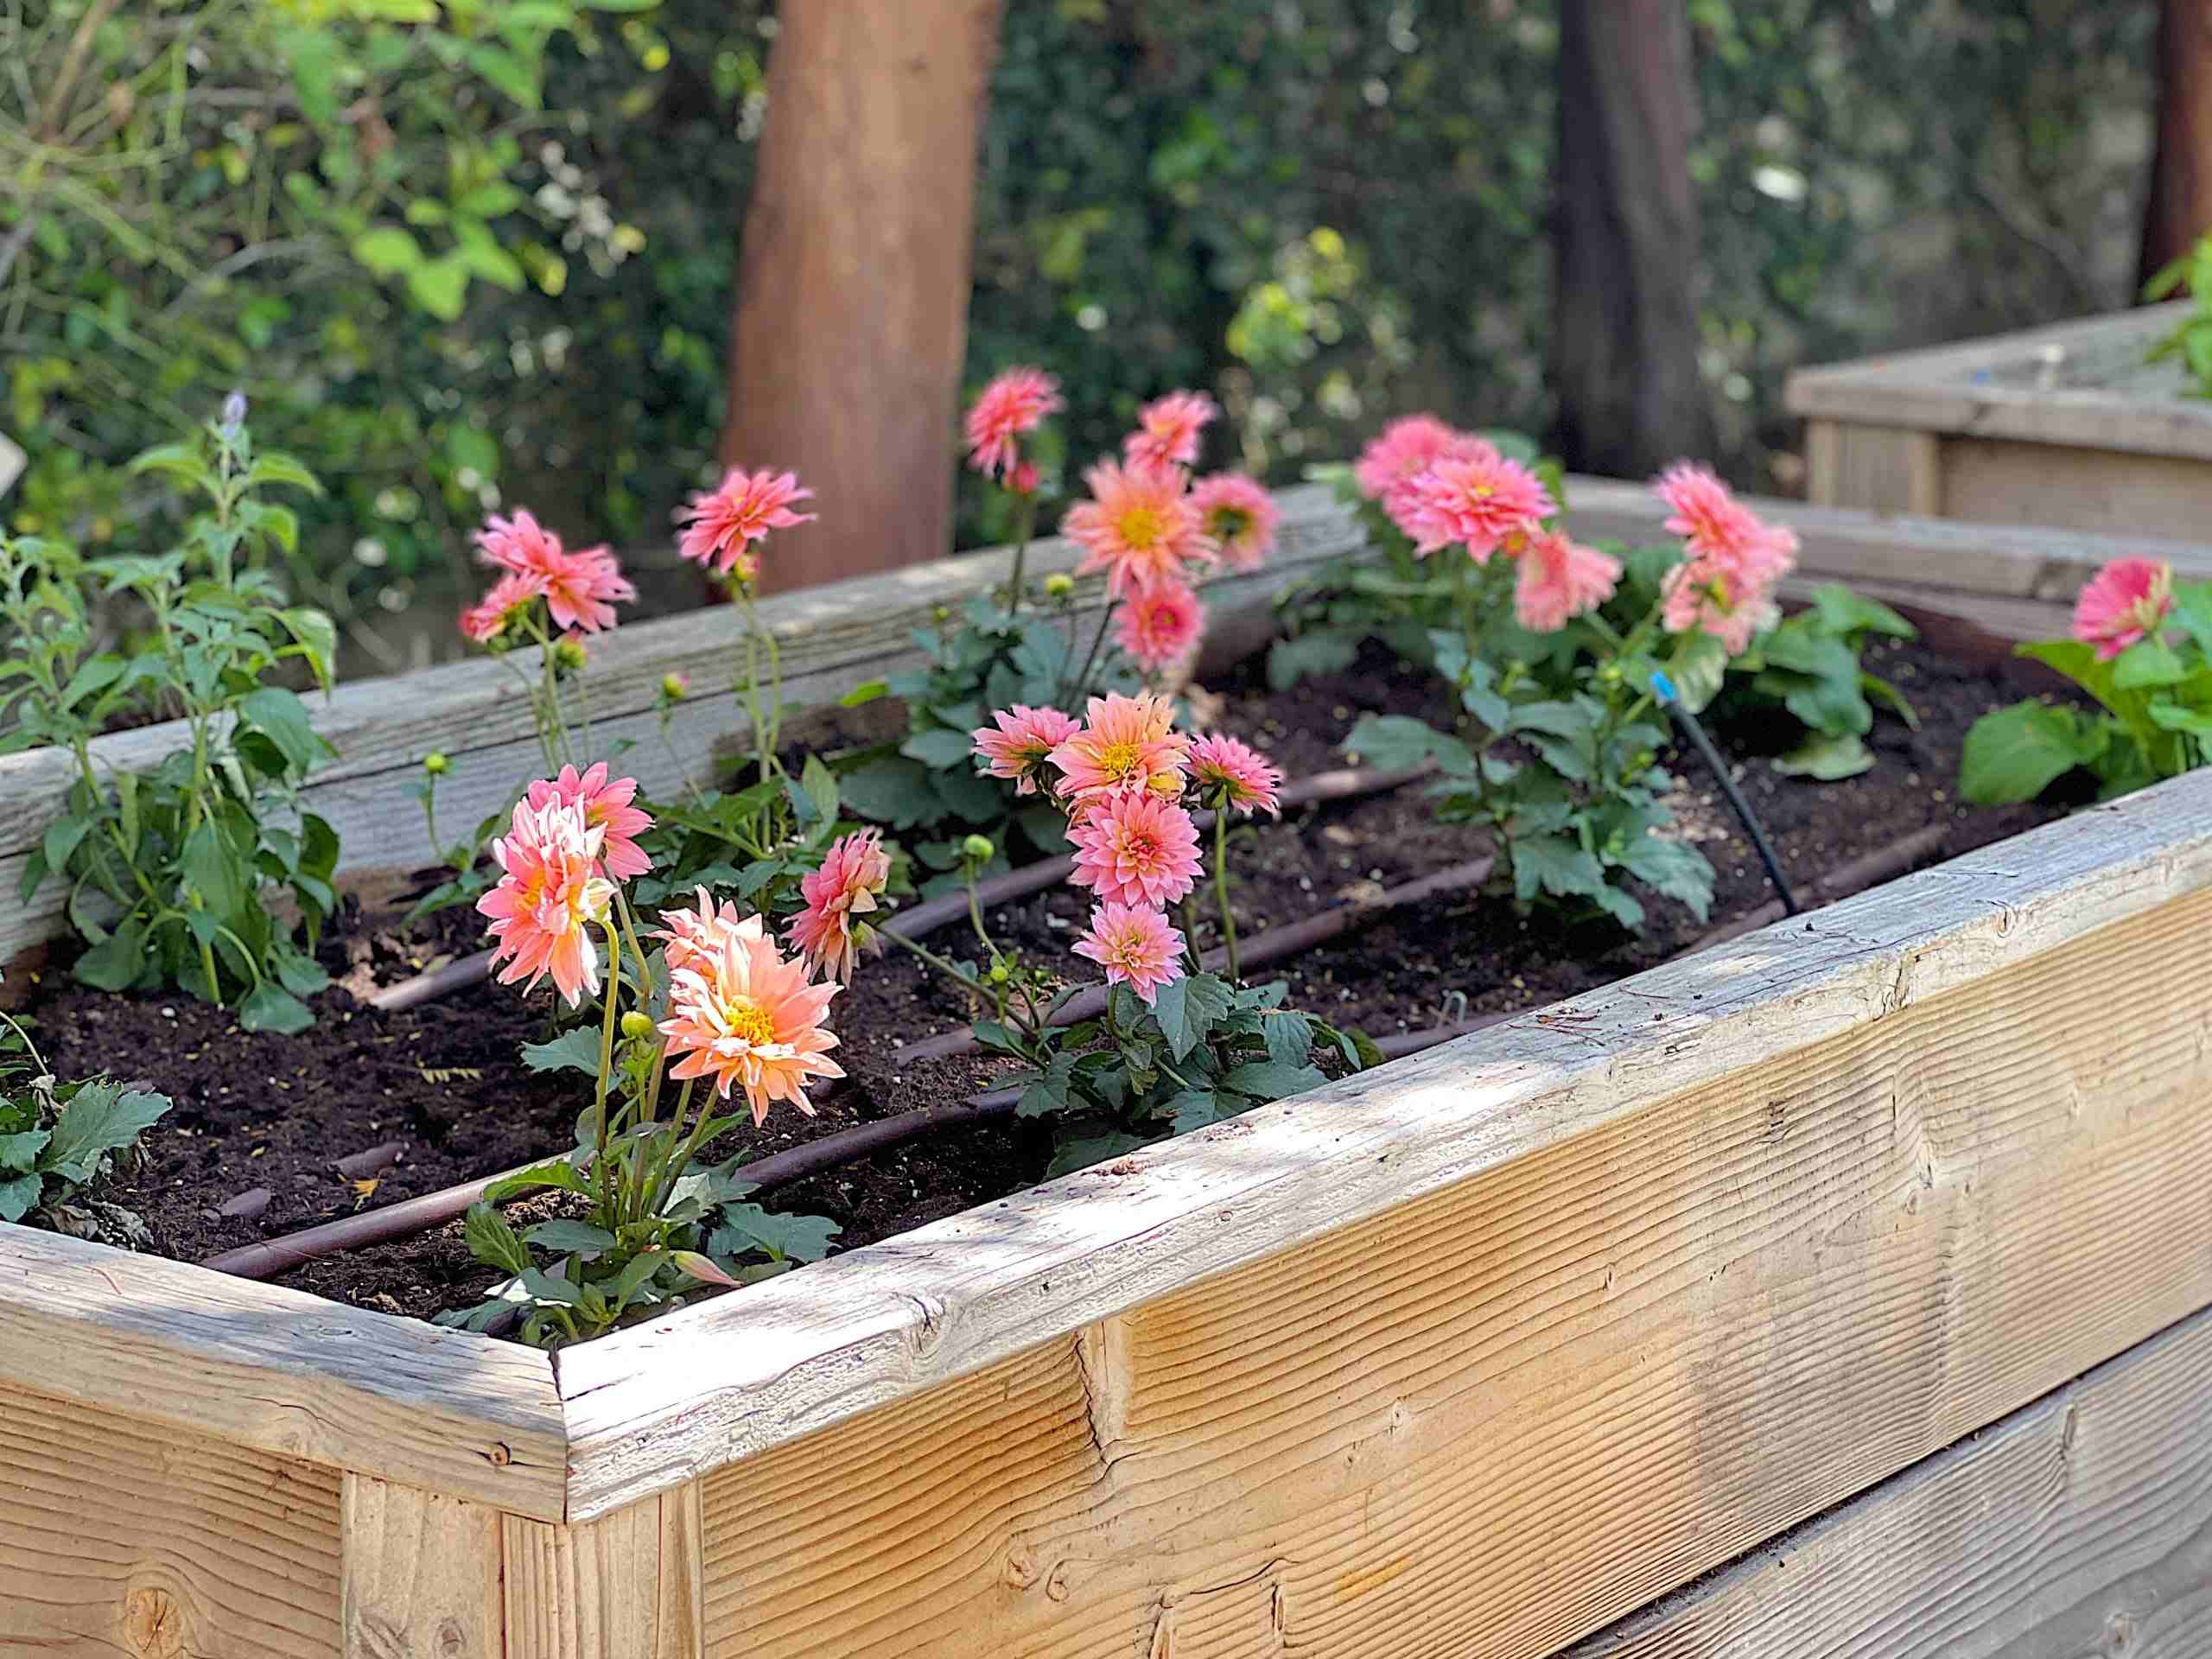
Creating Planting Beds
Creating planting beds is an effective technique in soil preparation that provides numerous benefits for plant growth and crop management. Planting beds not only improve drainage and aeration but also help optimize soil conditions, reduce weed competition, and make it easier to manage and maintain your crops.
The first step in creating planting beds is determining their dimensions and layout. Consider the space available, the type of crops you will be growing, and any specific requirements or considerations. Beds can be of varying widths, but a common width is around 3-4 feet to allow for easy access from both sides for planting, maintenance, and harvest.
Preparing the soil for planting beds involves removing any existing vegetation, rocks, or debris. Clear the area where the beds will be situated, ensuring a clean surface free of obstacles that could impede the growth of your crops.
Once the area is clear, use a rake or garden hoe to level the soil and create a smooth surface for the planting beds. This step is important to ensure even water distribution and prevent waterlogged or dry spots within the beds.
After leveling, mark the boundaries of the planting beds using stakes, string, or other markers. This will help guide you in creating even and straight planting rows.
Use a shovel or garden fork to dig into the soil along the marked lines and create the planting beds. The depth of the beds will depend on the depth of the roots of the crops you plan to grow. Generally, aim for a depth of about 6-8 inches to provide ample space for root development.
Once the beds are formed, it’s advisable to add a layer of organic matter to improve soil fertility and structure. Incorporate well-decomposed compost, manure, or other organic materials into the top few inches of the soil. This will help enrich the soil with nutrients and organic content, providing a nourishing environment for your plants.
Consider adding a layer of organic mulch on top of the beds. Mulching can help regulate soil temperature, retain moisture, and suppress weed growth. Apply a 2-3 inch layer of mulch, such as straw, wood chips, or shredded leaves, around the plants, avoiding direct contact with the stems. Regularly replenish the mulch as needed throughout the growing season.
Creating planting beds has several advantages for plant growth and cultivation. The raised beds improve soil drainage, preventing waterlogging and root rot. They also provide better aeration to the plant roots, promoting healthy growth and reducing the risk of diseases.
Planting beds also help in weed management. The defined boundaries make it easier to identify and remove weeds that may compete with your crops for nutrients, water, and sunlight. The narrower planting beds reduce the surface area available for weeds to grow, making it more manageable to control weed presence.
The distinct rows created within the planting beds facilitate crop planting, maintenance, and harvest. You can plant seeds or transplant seedlings in a straight line, allowing for efficient spacing and easier access for weeding, watering, and applying fertilizers or pesticides.
Overall, creating planting beds is a beneficial practice in soil preparation that enhances drainage, aeration, and weed control. The structured layout improves crop management and makes it easier to provide the care and attention your plants need. Invest time in creating well-planned and organized planting beds to set the stage for successful plant growth and bountiful harvests.
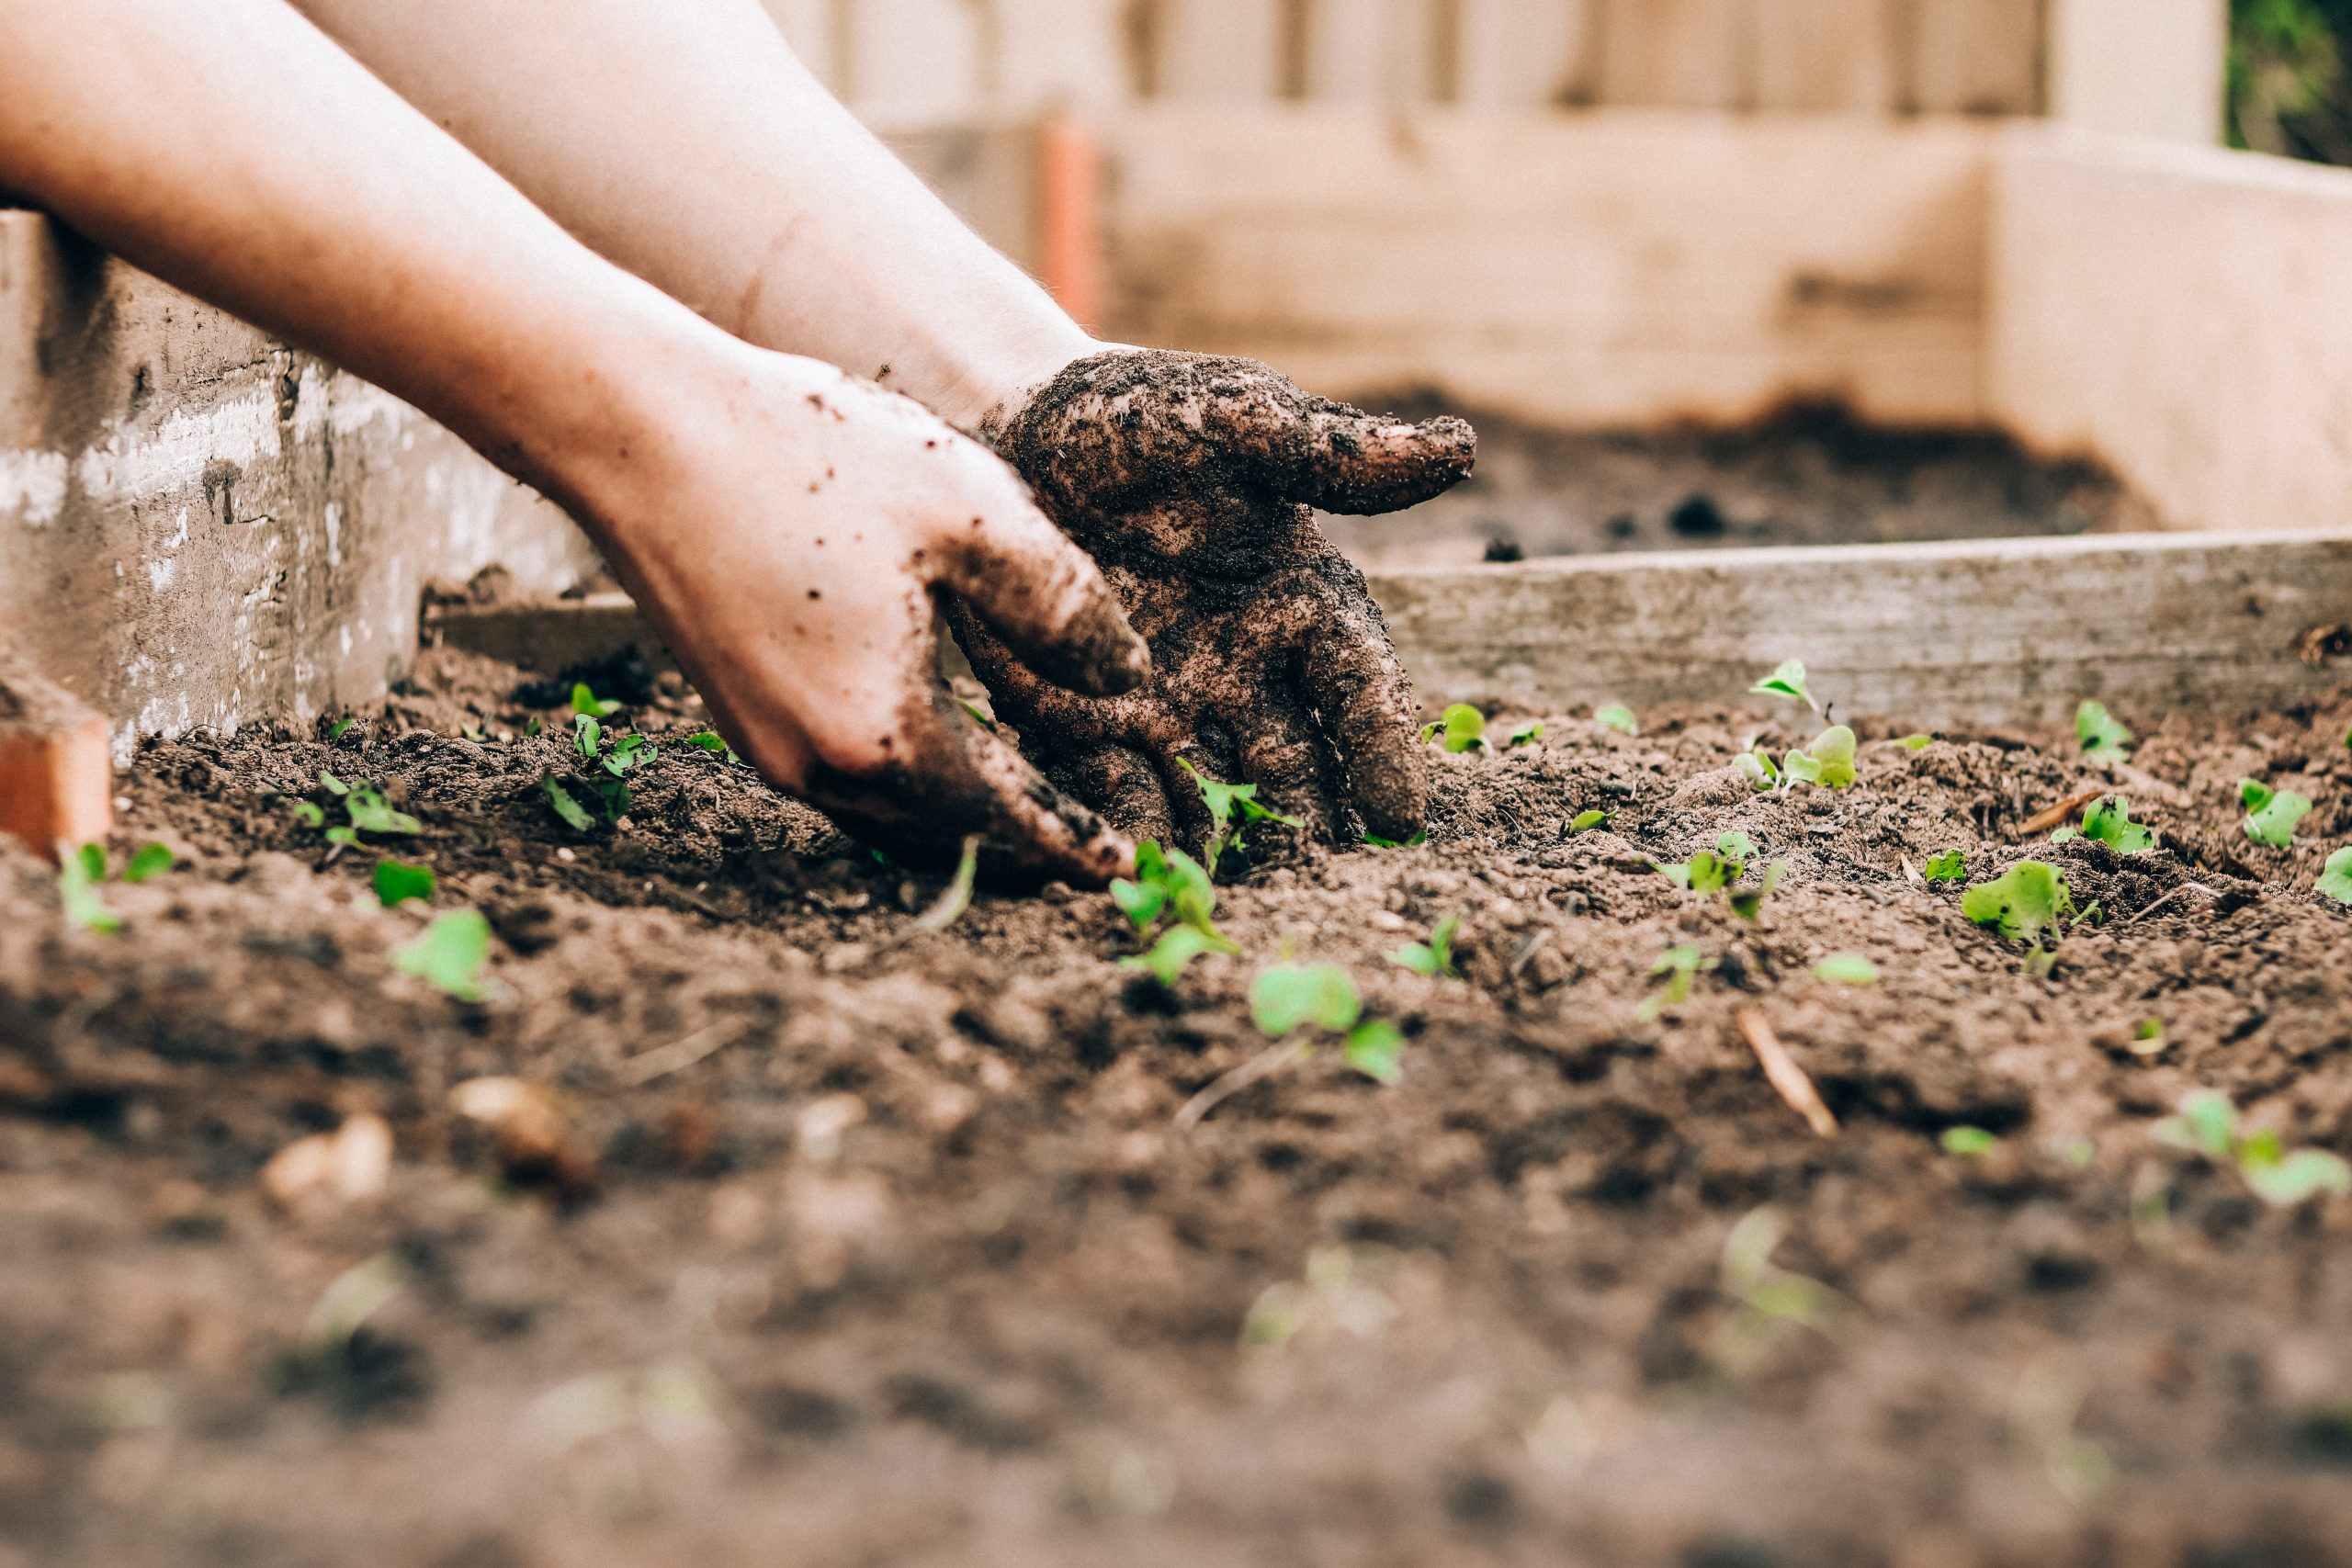
Adding Organic Matter
Adding organic matter to the soil is a crucial step in soil preparation that helps improve soil structure, increase nutrient content, and enhance overall fertility. Organic matter, such as compost, well-rotted manure, or leaf mold, provides numerous benefits for plant growth and soil health.
The first step in adding organic matter is selecting the right type and quality of material. Compost is a popular choice as it contains a diverse range of nutrients and beneficial microorganisms. Well-rotted manure, obtained from herbivores like cows or horses, is also a rich source of organic matter. Leaf mold, achieved by composting fallen leaves, is another option that can be easily produced at home.
Prior to adding organic matter, remove any existing vegetation or weeds from the intended planting area. Clearing the area allows for better incorporation of the organic matter into the soil without competition from unwanted plants.
Spread a layer of organic matter, typically 2-3 inches deep, over the soil surface. Organic matter can be applied to the entire planting area or concentrated in specific areas where you plan to grow your crops.
After spreading the organic matter, use a garden fork, tiller, or shovel to incorporate it into the top few inches of the soil. Work the organic matter thoroughly into the soil to ensure uniform distribution and maximized nutrient availability.
Incorporating organic matter into the soil improves soil structure by creating stable aggregates and enhancing the soil’s ability to hold water and nutrients. The organic matter acts as a sponge, allowing the soil to retain moisture while still providing adequate drainage.
Organic matter also stimulates beneficial microbial activity in the soil. Microorganisms, such as bacteria, fungi, and earthworms, break down the organic matter and release nutrients in a form that plants can readily absorb. These microorganisms also help improve soil structure, decompose organic residues, and suppress harmful pathogens.
In addition to improving soil fertility and structure, organic matter enriches the soil with essential nutrients. It acts as a slow-release fertilizer, providing a continuous supply of nutrients to the plants over time. The organic matter also aids in balancing soil pH levels and improves the cation exchange capacity, which ensures that nutrients remain available for plant uptake.
Adding organic matter contributes to long-term soil health and sustainability. It promotes beneficial soil organisms, enhances nutrient cycling, and reduces the need for synthetic fertilizers. Regularly incorporating organic matter into the soil builds organic content, improves soil structure, and supports a diverse soil ecosystem.
It’s important to note that not all organic matter is suitable for immediate application. Fresh manure or uncomposted materials may contain high levels of nitrogen and can burn plant roots or introduce weed seeds. Therefore, it is advisable to use well-rotted or composted organic matter, which has undergone decomposition and stabilization, ensuring that it is safe and beneficial for your plants.
By adding organic matter to the soil, you enhance soil fertility, nutrient availability, and overall soil health. Incorporating compost, well-rotted manure, or leaf mold improves soil structure, increases moisture retention, supports beneficial soil organisms, and reduces the need for synthetic fertilizers. Invest in the regular addition of organic matter to provide your plants with the best possible growing medium and create a thriving and sustainable garden or farm ecosystem.
Fertilizing the Soil
Fertilizing the soil is a crucial aspect of soil preparation that involves providing plants with essential nutrients to support their growth and development. Even with naturally fertile soil, crops can benefit from the additional nutrients that fertilizers provide. By understanding the nutrient requirements of your plants and applying fertilizers appropriately, you can help maximize their productivity and overall health.
The first step in fertilizing the soil is to determine the specific nutrient needs of your plants. Different crops require different amounts of nutrients like nitrogen, phosphorus, and potassium. Additionally, they may require varying levels of micronutrients such as iron, zinc, and manganese. Understanding the nutrient requirements of your specific crops guides you in choosing the right type and formulation of fertilizer.
Soil testing is a valuable tool in determining the nutrient content of your soil and identifying any deficiencies or imbalances. Soil testing provides you with information about the pH level, organic matter content, and nutrient levels in the soil. Use the results of the soil test to determine the appropriate type of fertilizer and the right application rates to meet the specific needs of your crops.
Fertilizers come in different forms, including granular, liquid, and slow-release formulations. Granular fertilizers are commonly used and can be incorporated into the soil during soil preparation or applied as a top dressing around established plants. Liquid fertilizers are dissolved in water and can be applied through foliar sprays or as part of an irrigation system. Slow-release fertilizers gradually release nutrients over an extended period, providing a steady supply to the plants.
When applying fertilizers, follow the manufacturer’s instructions and recommended rates to avoid over-fertilization, which can lead to nutrient imbalances or environmental pollution. It’s important to note that excess fertilization can be damaging to both plants and the surrounding environment.
Different stages of plant growth require different nutrient ratios. During the early stages, plants typically benefit from higher nitrogen levels to promote leaf and stem growth. As plants transition to the flowering and fruiting stages, a higher phosphorus and potassium content is usually more beneficial for flower and fruit development. Understanding the specific requirements of each crop and providing the appropriate nutrients at the right stage is essential for maximizing yield.
Keep in mind that organic sources of fertilizers, such as compost or well-rotted manure, are also viable options. Organic fertilizers provide a gradual release of nutrients and contribute to improving soil health and fertility over time. However, their nutrient content may be lower than synthetic fertilizers, so larger quantities may be required for equivalent nutrient supply.
In addition to providing the necessary nutrients, proper timing of fertilizer application is crucial. Applying fertilizers too early or too late in the growing season can affect nutrient uptake and plant performance. Generally, it’s recommended to apply fertilizers before planting or during active growth periods to ensure optimal nutrient availability.
Regular monitoring, including plant observation and leaf tissue analysis, can help determine if additional fertilization is necessary throughout the growing season. Adjustments in fertilizer applications may be required based on plant response or changes in soil nutrient levels.
By fertilizing the soil, you provide the essential nutrients that plants need for robust growth and high productivity. Understanding the nutrient requirements of your crops, conducting soil tests, choosing appropriate fertilizers, and applying them at the right time and rate are all important factors in cultivating healthy and thriving plants.
Irrigation Setup
Irrigation is a vital component of soil preparation that ensures adequate water supply to plants during the growing season. Setting up an effective irrigation system is crucial for optimizing water usage, maximizing plant growth, and sustaining crop productivity. By providing sufficient water at the right time and in the right amounts, you can create an environment that promotes healthy root development and overall plant vigor.
When designing an irrigation system, consider the specific watering needs of your crops, the size and layout of your field, and the availability of water resources. There are various irrigation methods to choose from, each with its advantages and limitations.
Overhead sprinkler systems are a popular choice for large-scale irrigation. These systems distribute water through sprinkler heads that spray water over the field. Overhead sprinklers provide good coverage and are suitable for a wide range of crops. However, they can be more water-intensive and may lead to water loss through evaporation or wind drift.
Drip irrigation is a more water-efficient option that delivers water directly to the root zone of the plants. The system consists of tubes or pipes with small emitters that release water slowly and evenly. Drip irrigation reduces water waste and allows for precise control over water application, making it ideal for rows or raised beds.
When setting up an irrigation system, consider factors such as the desired flow rate, the spacing between emitters or sprinkler heads, and the duration and frequency of watering. These factors will depend on the specific requirements of your crops, the soil type, and the climate conditions in your region.
Properly timing irrigation is crucial to avoid overwatering or underwatering your plants. Watering early in the morning or late in the evening reduces water loss due to evaporation and allows plants to absorb moisture more efficiently. Monitor soil moisture levels regularly and adjust your irrigation schedule as needed to prevent water stress or excessive saturation.
To promote even water distribution, ensure that your irrigation system is properly installed and maintained. Regularly check for leaks, clogs, or damaged components, and promptly address any issues. Proper maintenance helps optimize water usage and ensures that your crops receive adequate moisture without wasting resources.
In addition to the chosen irrigation method, consider incorporating water-conserving techniques such as mulching. Mulching helps reduce evaporation, regulate soil temperature, and suppress weed growth. Apply a layer of organic mulch around the base of plants, keeping it away from the stems to prevent rot and disease.
It’s important to note that irrigation needs may vary throughout the growing season. Young plants or newly germinated seeds may require more frequent watering to establish roots, while mature plants may need less frequent but deeper watering to encourage deeper root growth. Regularly monitor soil moisture levels and adjust your irrigation schedule accordingly.
Proper irrigation setup is essential for providing your plants with the necessary moisture for optimal growth. Understanding the water needs of your crops, selecting the appropriate irrigation method, scheduling water applications effectively, and maintaining your irrigation system will result in improved water usage efficiency and healthier, more productive plants.
Protecting the Field from Weeds
Weed control is an essential aspect of soil preparation to ensure the health and productivity of your crops. Weeds compete with your plants for essential resources like sunlight, water, and nutrients, potentially jeopardizing their growth and yield. Implementing effective weed control measures helps maintain the integrity of your field, minimize weed competition, and support the vigorous growth of your crops.
Several strategies can be employed to protect the field from weeds:
1. Mulching: Applying a layer of organic mulch, such as straw, wood chips, or shredded leaves, around the base of your plants helps suppress weed growth. Mulching serves as a physical barrier that prevents weed seeds from germinating, while also conserving moisture and regulating soil temperature.
2. Hand Weeding: Regularly inspect the field and manually remove any weeds that emerge. Hand weeding is especially effective for small-scale operations or when weeds are easily accessible. Be sure to remove the entire weed, including the roots, to prevent regrowth.
3. Mowing or Cutting: For larger areas with dense weed growth, mowing or cutting the weeds can help manage their proliferation. This method prevents the weeds from flowering and producing seeds, limiting their spread in the field.
4. Herbicides: When used judiciously and with proper safety precautions, herbicides can be an effective tool for controlling weeds. Selective herbicides target specific weed species while minimizing harm to desirable plants. It is crucial to carefully follow the instructions provided by the manufacturer and adhere to recommended dosage rates.
5. Crop Rotation: Rotating your crops can help disrupt the lifecycle of weeds. Different plant species have different growth patterns and nutrient requirements, which can be leveraged to suppress weed growth. By alternating crops, you can break the cycle of weed infestations and reduce the buildup of weed populations.
6. Cover Crops: Sowing cover crops during fallow periods or in between growing seasons can help suppress weed growth by outcompeting them for resources. Cover crops also improve soil structure, enhance nutrient cycling, and provide organic matter when they are eventually incorporated into the soil.
7. Integrated Weed Management: Adopting a holistic approach to weed control through integrated weed management is recommended. This combines multiple strategies, such as combining cultural practices, biological controls, and chemical methods, to create an effective and sustainable weed management plan.
Preventing weeds from taking hold in the field is always preferable to removing them later. Regular field monitoring, timely intervention, and implementing weed control measures will help minimize the impact of weeds on crop growth and yield.
It’s important to note that weed control is an ongoing process, as new weed seeds can be introduced into the field through various means. Maintaining a proactive approach and addressing weed growth promptly and consistently throughout the growing season will help keep your crops healthy, reduce competition for resources, and increase your chances of a successful harvest.
Conclusion
Soil preparation is a vital step in creating an optimal environment for plant growth and maximizing crop yield. By carefully assessing the field, clearing unwanted vegetation, testing and adjusting soil pH, amending the soil with organic matter, tilling or plowing, leveling the field, creating planting beds, fertilizing the soil, setting up an irrigation system, and protecting the field from weeds, you can establish the ideal conditions for your crops to thrive.
Assessing the field allows you to understand its topography, soil type, and potential challenges, enabling you to make informed decisions in soil preparation. Clearing the field removes obstacles and minimizes competition for resources, creating a clean and organized space for planting.
Testing and adjusting soil pH ensures that the pH levels are suitable for the specific crops you want to grow, allowing for optimal nutrient uptake and plant growth. Amending the soil with organic matter improves soil structure, fertility, and moisture retention, creating a nourishing environment for plant roots.
Tilling or plowing breaks up compacted soil, enhances aeration, and promotes root penetration. Leveling the field aids in proper water distribution, preventing waterlogging or runoff issues, and creating a level surface for planting.
Creating planting beds facilitates efficient crop management and helps regulate soil moisture. Fertilizing the soil provides necessary nutrients to support plant growth and development, ensuring optimal productivity. Setting up an irrigation system ensures adequate water supply for plants, promoting healthy growth and reducing water waste.
Protecting the field from weeds is crucial to minimize competition and optimize crop development. Incorporating various weed control measures, such as mulching, hand weeding, or using herbicides, helps maintain the integrity of the field and supports optimal plant growth.
By prioritizing these steps and implementing best practices, you lay the foundation for successful plant growth, abundant yields, and a thriving garden or farm. Regular maintenance and monitoring throughout the growing season will help ensure the continued health and productivity of your crops.
Remember, soil preparation is an ongoing process that requires attention and care. Each step plays a significant role in creating an optimal environment for your plants to flourish. As you nurture your soil, you contribute to the long-term health and sustainability of your agricultural endeavors.